Purpose
This supplemental addition to the Guide is here for more information about other vintage Mac activities and details that can be of use to almost any Mac user. We start by going over the comments on various System software versions, then this page moves on to other topics of interest.
Installing the System Software
Note that if any software has an Installer, use it -- otherwise there is an increased risk of bombs and crashes. For instance, if you just drop AppleShare WS 3.5 right into the Extensions folder and reboot, it'll bomb before it loads the control panels while booting. The reason is certain installers make additions or changes to the System file which are required for the software to work correctly.
System 6 and System 7 until Mac OS 9 cannot certain install system software upgrades (like NSI 1.5.1, AppleShare WS 3.5, et cetera) on to the startup volume where the install media is located in the same place as the destination, basically installing onto itself. Some exceptions do exist though. There are a couple of choices: use a RAM disk either as the boot volume or to store the installation content; copy the media onto a floppy disk, Zip disk or SCSI storage; use mounted disk images; or install it over the network by using the server computer as another installation source, which doesn't work all the time. Software doesn't necessarily require "genuine media" like floppy disks in the case of most the software mentioned here, so it can be freely installed from folders instead of disks, as long as the source names are the same as the Installer expects: for instance, AppleShare Workstation 3.5 expects a source directory name of AppleShare Workstation not untitled folder.
System 6 and earlier can hot-swap the boot volumes by Cmd + Option + double-clicking the Finder in the desired System Folder, which can be swapped to a newer System version but not an older one, and only extensions loaded at boot time will be functional. System 7 and later quit the Finder leaving the Installer the only running application. As for RAM disks, RAMDisk+ 2.01 works best with System 6 and earlier systems. It will work with System 1.1, Finder 1.1g and a 512K, but only about 339KiB of RAM is available to play with. It also requires MultiFinder in System 6 to be disabled, although it can be restarted afterwards by Cmd + Opt + double-clicking the MultiFinder system extension. System 7 and later can use the Memory control panel RAM disk on Quadras and PowerBooks, App Disk 1.6.1, RamBunctious, RAMDisk+ 3.24a, or the like.
A recommended practice is to backup the System Folders in case they get unexpectedly corrupted. Compact Pro is a very good tool for this since it offers high compression and does so speedily, and also offers segmenting, so that the whole System Folder can be split across multiple floppy disks, if need be. It does require System 4.2 or higher and a 512Ke or greater though.
The older Macs, like the Plus, can have issues with SCSI hard drives unless a certain change is implemented. What happens is the SCSI hard drive can push data to the Plus faster than the Plus can handle it. To circumvent this, an interleave is used. For instance, a 3:1 interleave means that it reads every third sector for each file. The easiest way to set the interleave with HD SC Setup 7.3.5 (patched) is to press Command + I when the program is open, and Lido 7.56 can also easily do it. 3:1 should be fine, while the SE might need 2:1 or may be just fine with 1:1 depending on the unit.
Pre-System 6
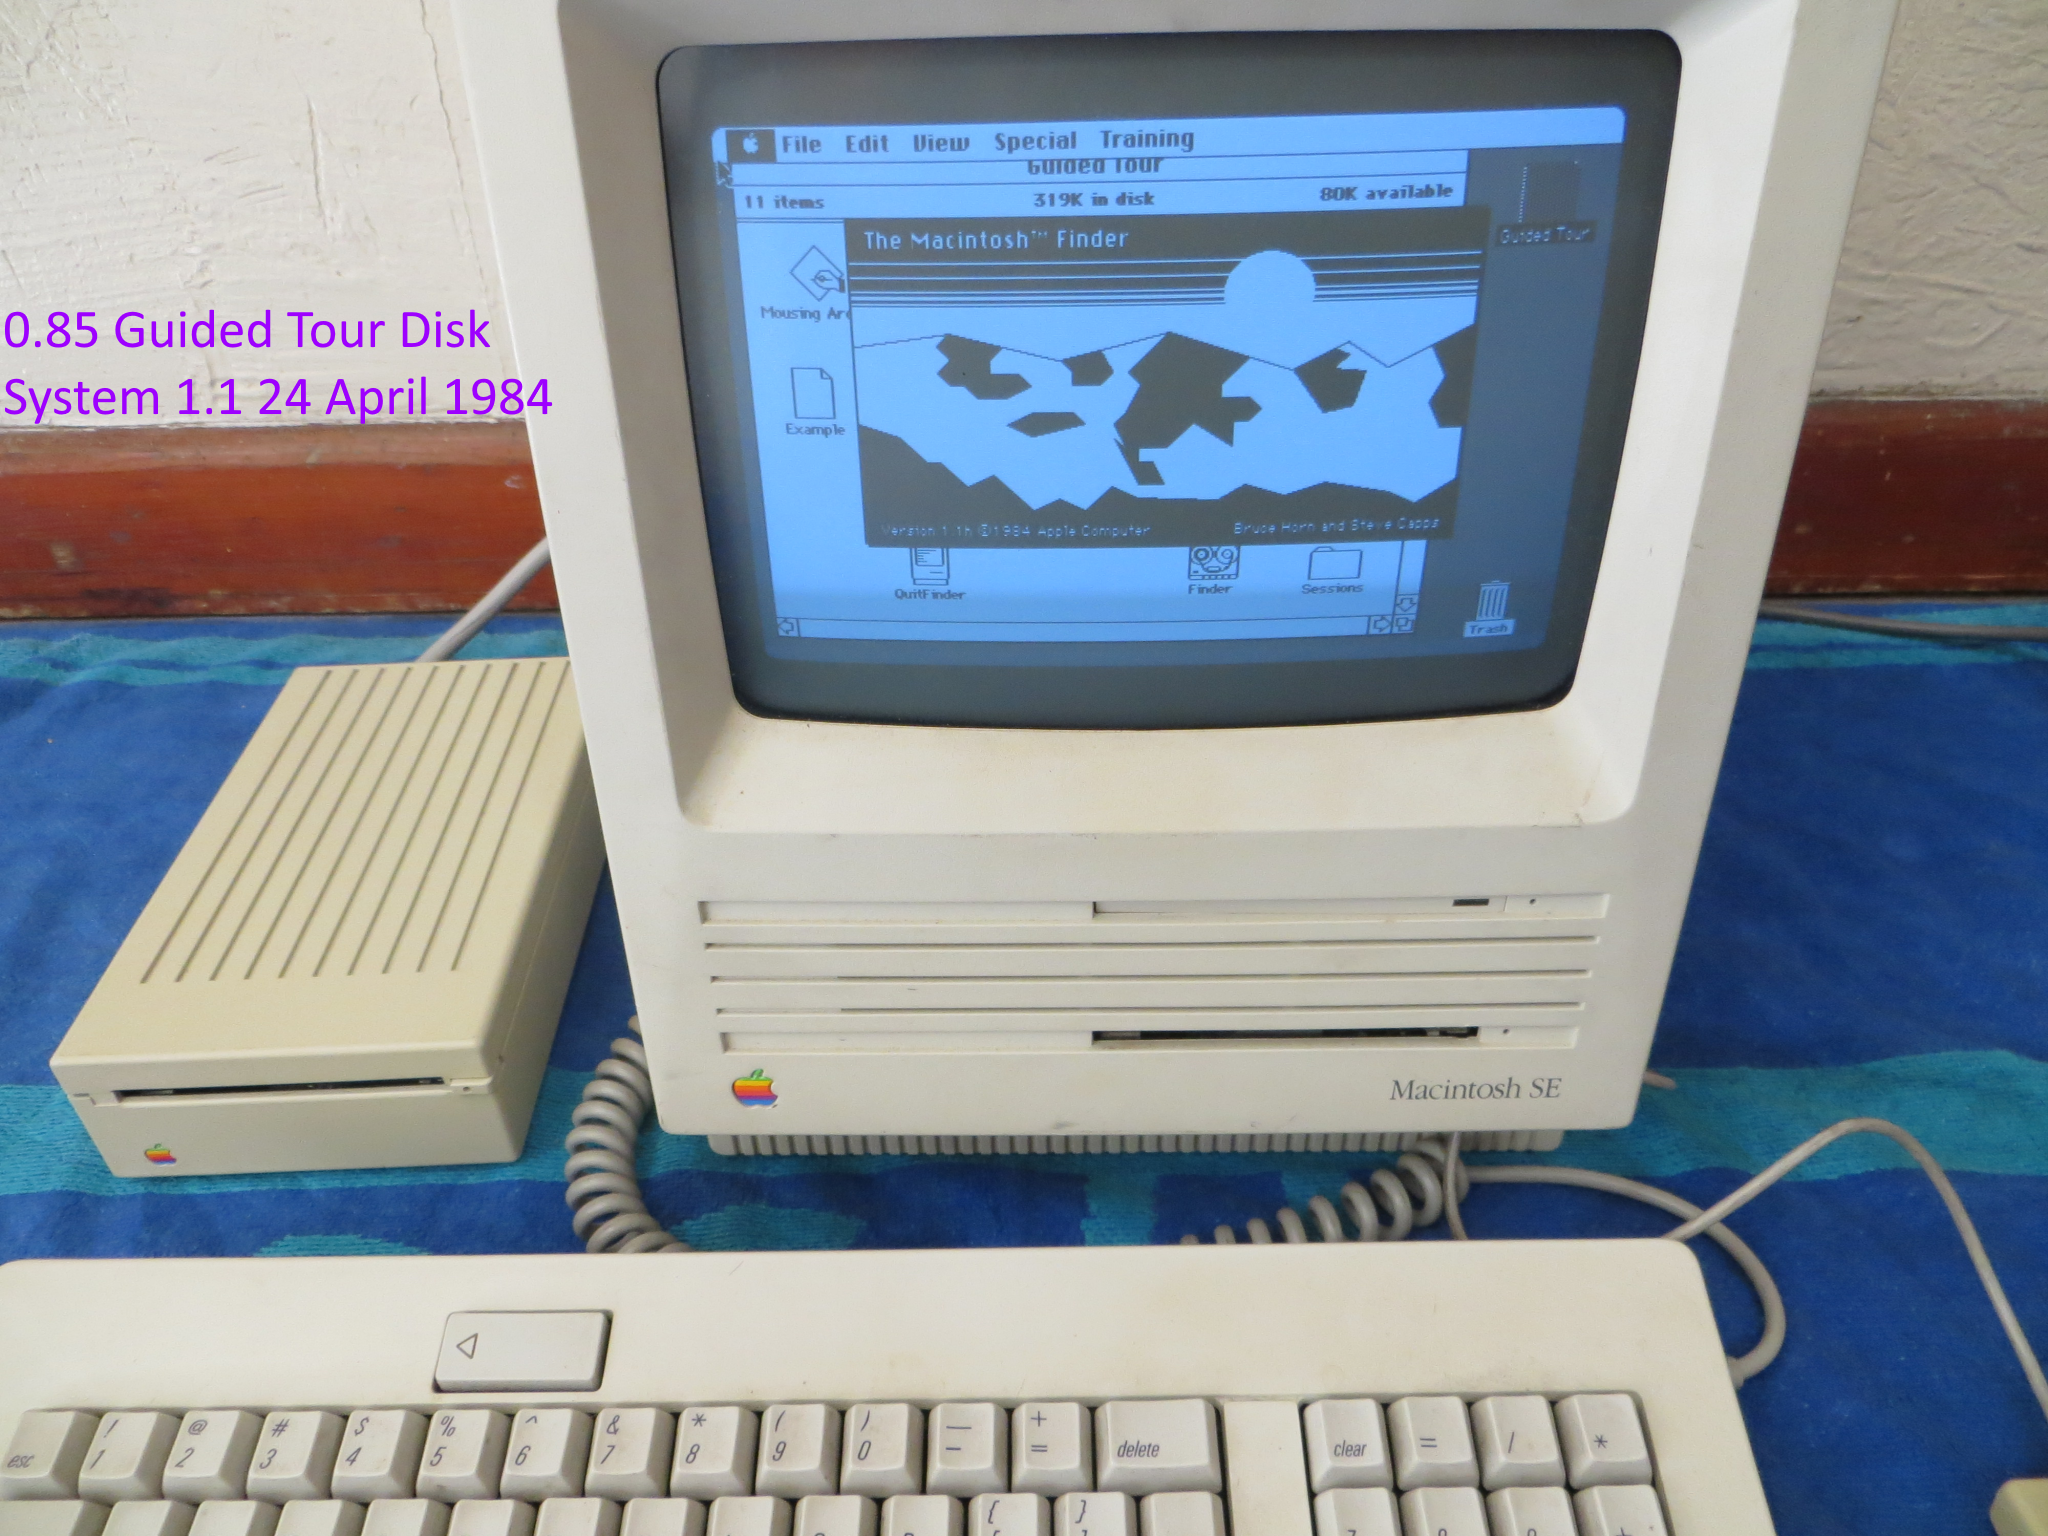
Older versions of Mac OS are the most spartan and limited systems available to these computers yet still some retain networking capabilities. Principally this section covers the 512K, 512Ke, Plus, SE, and the Macintosh II. All these computers can boot Mac OS system versions earlier than System 6. Installation on these systems is plainly simple. Obtain the disk images, which some may be 400KiB but most are 800KiB. This requires a Mac with an internal floppy drive, usually Old World ROM aka pre-G3 processors, that can write 800KiB disks. If the disk images are imaged via DART, then either DART or Disk Copy 6.3.3 can handle them; if they are Disk Copy 4.2 then they can be written with DC 4.2 or 6.3.3. | 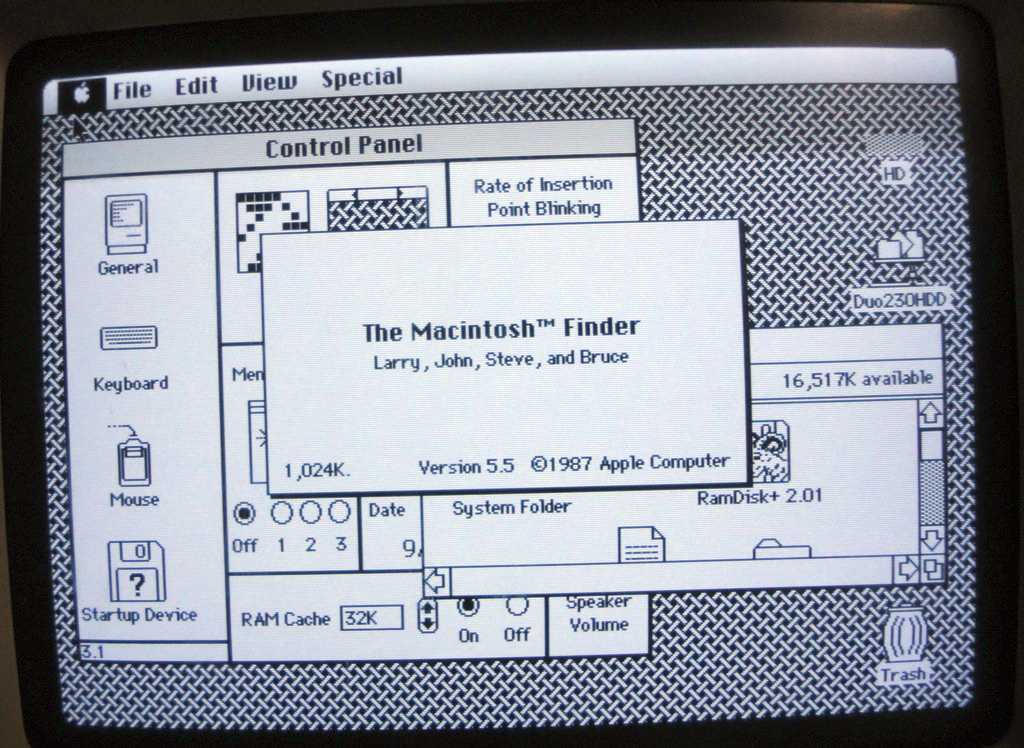 System 2.0 (S4.1, F5.5) on a SE FDHD with 1MiB RAM |
Once the disks are ready, boot into the floppy disk and install onto the target media; this can either be another floppy disk or a hard drive. A hard drive is recommended, but it is possible to run natively on one floppy disk. The Installer is so plain and basic it won't get much discussion other than to make sure that the software is built for the intended machine, otherwise it won't boot it.
The AppleShare Workstation disks allow the additional option of installing the AppleShare Workstation software. This can either be done alone or along with a fresh installation of the software. There is no other software to install in most cases, as LocalTalk is usually the only communication protocol available. However, if one has a SCSI to Ethernet converter or something else like a NuBus Ethernet card, then an upgrade to System 6 may be warranted because of its better support for Ethernet hardware.
One thing to note is that some of the older versions as here included the MiniFinder app -- it works with System 6. Copy it out of the System Folder into System 6 to use it, and set it as the startup application. Contrary to what Apple says, a plain SE (without the FDHD upgrade) will boot S1.1/F1.1g and should have no problem with System 0.97 or 0.85, depending interpretations of version numbers. Because it can handle two internal FDDs plus an internal HDD at the same time, assuming a special bracket is made for the HDD, can handle up to 4MiB of RAM, takes well to 68020 and 68030 accelerators, is the one of only two Macs that can handle three floppy drives (the Portable is the other) and has SCSI sorted, the SE is ideal for pre-System 6 experimentation. Some hard-to-find Macintosh SE accelerators have RAM SIMM expansion slots or daughter boards for putting more RAM onboard. |  Mac SE Singularity: Three FDDs attached (SE FDHD, 2/20) |
The Macintosh File System (MFS) 400KiB disks, traditionally used with systems earlier than System 3.0 do not use the later style of "blessing" to indicate that the disk is bootable. Instead, this kind of information is held in the boot blocks of the diskette. Sometimes, when custom installation disks are made in the 400KiB MFS format, these blocks are not updated correctly, or at all. An example of this is creating a System 4.1/Finder 5.4 bootable MFS disk for a 512K: the System has to be installed first on a 800KiB disk, stripped down as needed and then copied to a MFS disk. Use a program like BootConfigure or for Expert Grade users, Fedit to edit the boot blocks. Fedit will not run on a 128K. Use Open Volume from the File menu to select the MFS disk.
BootConfigure can have compatibility problems, returning garbled information in the text boxes, if that is observed then try using a different OS or computer. Selecting the right disk would be important. BootBlocks Writer is another option, but the file name suggests it only works in System 6. Check the Mac Giga-ROM 4.0 (1993) disc for these.
System 6
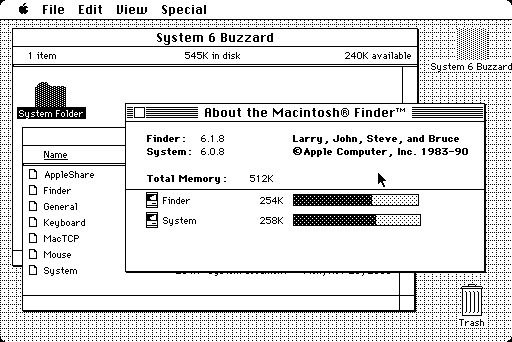
System 6 enjoys a special status among Mac enthusiasts for its plain spartan interface, and binaries compiled in assembly language which facilities a speedy interface. It also works the best on floppies, as System 7.0 takes up too much space and is too slow. For the 680x0 Macintoshes that can boot it, it is a good system to have in reserve, and it is blitzing fast on a Macintosh IIfx, being the last 68K to support it, even faster when it's ran entirely in RAM and will run at lightning speeds if a compatible 68040 accelerator is installed. Only 68000, 68020 and some 68030 processor equipped machines can boot System 6, practically the 512Ke is the lowest machine that can do so: in 2008-2010 a gaggle of 68kmla users were unable to get any version of System 6 to work on a 512K. But it still can be done. |
 System 6 Power: IIci with Radius Rocket 33MHz 68040 accelerator |
There are no 68040 Macs that can boot System 6: although a 68030 host with a hot-shot 68040 accelerator like a Daystar Turbo 040 (especially if it is the 40MHz version with a 128KiB cache) will be "wicked fast", especially with a RAM-based OS. System 6 is a good primary operating system for the older Macs like the Plus, with System 7.0.1 held in reserve for special cases; but 7.1 does offer additional benefits like a Scriptable Finder (v. 7.1.3, comes on the 7.1 Pro disks). For all other 68K Macs that can handle System 6, it is a good system to keep for special scenarios like handling 400KiB disks, and certain applications like Airborne! or Microsoft Works 2.0 which require System 6; otherwise, System 7.0.1 or 7.1 is a more useful primary operating system. Most of the later 68030s like the LC III and the Duo 230 require System 7.0.1 or 7.1. Early PPC 601s will take 7.1.2, but starting with the 603e and PCI bus interface they all wanted 7.5.3 at the lowest.
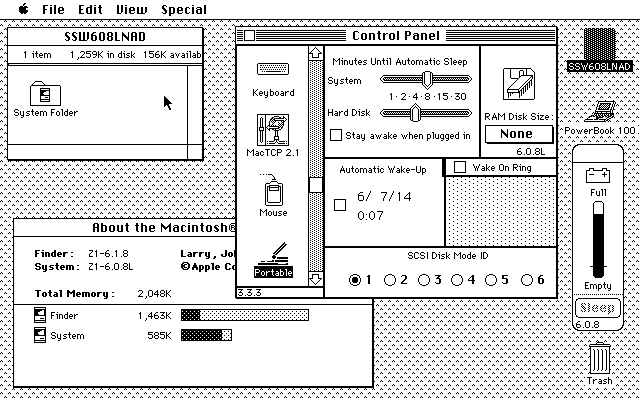
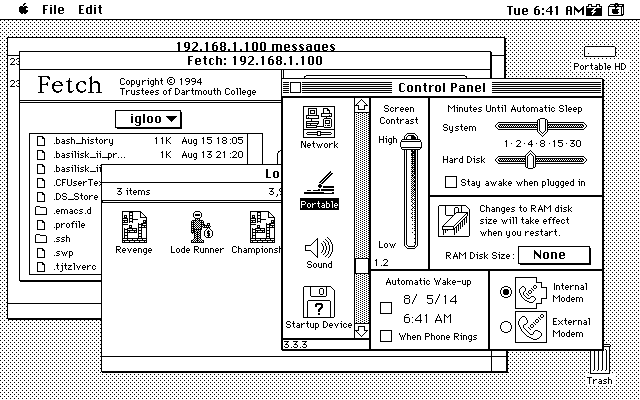
A special version of System 6, known as 6.0.8L, was intended for the Classic II and the PowerBook 100, but it also works on the LC, LC II and Classic. A "universal" 6.0.8L disk will not work with non-6.0.8L compatible Macs. The version allows for the additional binaries required for those systems with drivers and support for a maximum of 10MiB of RAM. Normally 6.0.8 can only address 8MiB by default, although Optima or Maxima could change that. Because of the hardware similarity of the PowerBook 100 and the Mac Portable, the Portable will also boot 6.0.8L, but there is no screen contrast adjustment in the Portable CDEV, and seems somewhat unstable. There's two versions of the Portable control panel: 1.2 and 1.3. 1.2 comes as default and works fine as usual, except the Macintosh Portable M5120 with the optional Backlight upgrade or the M5126 Backlit Portable needed a way to adjust the brightness. |
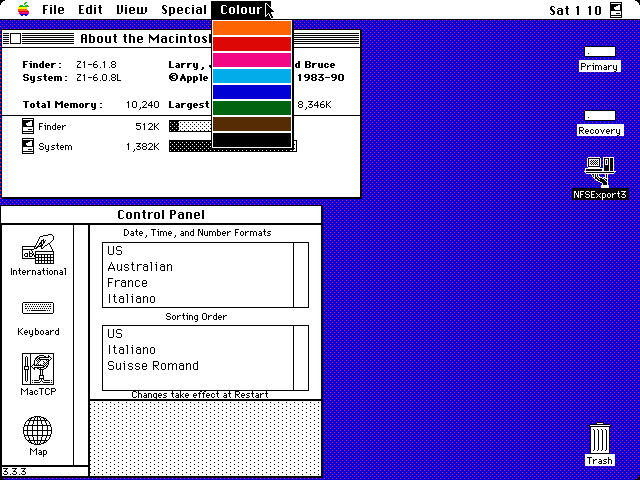 6.0.8L with 10MiB of memory; note International panel (LC II) |
Normally this is done in the Brightness control panel, but with the Portable 1.3 CDEV, it only can be done in the Portable CDEV alone, and the Contrast slider in version 1.2 doesn't work on a M5126: despite what Apple says, user experience (JDW of Tinker Different forums) reported that without the Portable 1.3 control panel, the backlight on the M5126 won't even work. It also adds a "Shortcut" button to allow the brightness to be adjusted with a key combination of modifier keys (like Control / Option / Shift and the arrow keys). Unlike the M5120 Portable, the M5126 does not appear to have a way to adjust the contrast of the display. Both versions can toggle the "Rest" function which is like a low power idle mode by Option-clicking the "Minutes Until Automatic Sleep" text. There's more: according to Androda of the Tinker Different forums, both Portables experience sleep and performance issues above 4MiB / 3MiB (M5120, M5126 respectively) of RAM expansion -- there's all kinds of oddities related to this platform. Because these CDEVs will probably never be seen by the common man and are difficult to find on the open internet, images are included here to showcase this unique element of the Portables. The Portable 1.3 image below and the "Rest" image are courtesy of dramirez of the Tinker Different forums.
 6.0.8 with a 512Ke |
 6.0.8L on a PowerBook 100 with laptop goodies |
 6.0.8 on a Macintosh Portable |
 Mac Portable with 6.0.8L (blanked area for SCSI Disk Mode ID) |
 Portable 1.3 CDEV on a Mac Portable M5126 |
Some time ago, some enterprising individuals ported System 6.0.7.1J in Japanese to work with the PowerBook 140 and 170 in (mostly) English, which is a treat when only 8MiB of RAM is available. More recently a user named David Cook on 68kmla ran a comb through the bootup code to try to patch 6.0.8L to run on more machines than was originally intended, but eventually the road ends at some point. As shown, 6.0.8 will run on a 512Ke (Minimal install for the Macintosh Plus), but memory is very limited. Some reports indicate that System 6.0.3 will run, but not earlier System 6 versions.
If a helper Mac is available that can boot OS 9, then Disk Copy 6.3.3 can write the disk images from Apple onto floppy disks, as Apple's download source and the Legacy Recovery CD's images are of the .smi or NDIF .img variety which requires System 7 or higher to mount them. Some disk images are Disk Copy 6.1.2+ Read-Only Compressed format, which can only be written out with DC 6.1.2 or later.
Once the install floppies are ready, they can be booted into and the software installed as desired. If a "universal" build is not required (takes up more space on disk) then a "System software for ..." can be selected for the target system, or a Minimal install, as appropriate. Rather than installing the software, if a Universal System build is acceptable, and removing unneeded CDEVs and INITs manually to save space as needed works fine, then you can just copy the System Folder right off the 1.44MB System Startup disk and use that, which is fine when if you have is one floppy drive.
Next, start installing Network Software Installer 1.4.5, which can also be found on the Legacy Recovery disc, if it is available. Follow up with any required Ethernet card drivers, such as the Asante drivers for Asante cards. The next step is to install AppleShare Workstation 3.5. Finally, MacTCP can be simply copied directly into the System Folder. Note that for the NSI 1.4.5 software and the Macintosh LC platform, the CommSlot Ethernet is not an exactly "valid" selection because all the Macs with CommSlot Ethernet slots required System 7 or higher, and NSI 1.5.1 is the latest version of NSI for System 7 and 7.1.
Regular switching back and forth between System 7 and System 6 can be a bit of a hassle with the constant desktop rebuilding process in System 7. To get around this, obtain a copy of AppleShare File Server 2, then fetch the Desktop Manager INIT out of the Administration disk. Drop it into the System 6 System Folder (not the System 7 folder) and reboot. The same INIT is a required extension to inhibit the Mac OS from trying to rebuild the desktop file on a CD, which isn't possible because CDs are read-only media.
System 6 is a 24-bit OS - but there are ways of enabling 32-bit memory access. System 7 can either be run in 24-bit or 32-bit mode. System 7.5.5 is the last to allow memory switching to 24-bit addressing, as 7.6 doesn't support 24-bit memory addressing. Certain Macs can't switch to 24-bit mode regardless, like the PB190cs and PowerPC Macs.
Extending System 6 to be more like System 7 is possible: the Now Utilities package can offer useful additions, like hierarchical menus (or the HierDA extension), desktop picture backgrounds with the DeskPicture control panel, and so on. Background image utilities exist elsewhere, such as Backdrop and BackSplash II. Later OSs with more powerful Mac hosts can use the Decor utility to do the same thing. There's all kinds of cool widgets for System 6 and 7/7.1 that were around back in the day, like Mac Lights which could flash the Num Lock, Caps Lock or Scroll Lock LEDs on an "Extended" keyboard according to disk activity; DiskInfo (sort of a file-browser DA); MockWrite (basic word processor) but a good portion of them, like MultiCache (a disk and floppy caching utility), cease to exist.
The presence of MultiFinder running changes the About the Macintosh dialog box to include the "Largest Unused Block" entry. Programs that run without MultiFinder quit the Finder as they load up. Because RAMDisk+ 2.01 can't create a RAM disk while MultiFinder is active, just start up with it off (Set Startup... from the Special menu changes the setting for the selected volume), create the RAM disk, then hold down Command + Option/alt and double-click the MultiFinder program in the System Folder. Also, the Easy Access ... INIT doesn't have a presence in the Control Panel like System 7 does. Use Command + Shift + Clear on the numeric keypad to enable Mouse Keys, in case your mouse is absent or inoperative; obviously a keyboard with a numpad is a requirement. Tip: Hold the Command key down while booting to temporarily load without MultiFinder.
Speaking of memory, two utilities that are good for System 6 are MemINIT 2.0.5 and MemoryThermometer, also known as MemroMeter. Memory Mapper will only work in System 7+, but it is dramatically better than the former two CDEVs. MemINIT can draw a 1 pixel high meter on the top of the display, so instead of 640x480, it becomes 640x481, counting the effect of the INIT. Using a bunch of INITs can cause issues with the System Heap size: use something like Bootman or HeapFix can tweak the system Heap size to something suitable which allows everything to load.
DiskTop was a popular Finder-in-a-DA back in the day, and works well systems not using MultiFinder. Version 1.2 (and the previously mentioned memory applets) were all on University of Michigan's Mac archive. A complete archive of the UMich archives is here. May take a while to find what you're looking for. DiskTop will show network volumes, at least version 4.0.2 does. A copy is included with the disks that come as part of the Macintosh SECRETS 2nd Edition book.
System 7
System 7.0.1 is a good default system for most practical vintage Mac uses. It will run a tad sluggish on a Plus or SE, but on a SE/30, IIx or similar it's just candy on the cake. System 7.1 is fairly similar to 7.0, although it can be considered "enhanced 7.0", as it can support additional extensions that can bring it up to a close spec to 7.5. Early versions of Open Transport are supported by 7.1, although MacTCP works just fine. Some Mac models list special 7.1 versions as minimum versions (i.e. Duo 230, Macintosh TV, et cetera). System 7 was not originally distributed on 800KiB disks (but the Legacy Recovery CD has 7.1 on 800KiBs). System 7 on a single 1.44MB disk is not recommended, although it can sometimes be the only practical option. 800KiB disks do not have sufficient room for System 7 to operate without some very exotic operations to make it all fit, and require a Mini Finder. |
 System 7.1 (DOS Compatible card) |
In addition, there will not be enough remaining disk space to make any reasonable applications fit, and ejecting the boot disk to insert another floppy means that the disks may have to be swapped quite a few times. Once again, a hard disk is a boon to the usability of System 7. As noted on
the Main Page, 68000 and 68020 Macs are not designed to run Open Transport and the Installer will refuse to perform the installation process. Installation of System 7 is usually facilitated by either NDIF images written to floppies or installation folders with the proper names of the "disks". For computers with only 800KiB disk drives, one method is to remove fat from the installation directory. The second is to use a hard drive and copy the contents over multiple 800KiB disks. Another is LocalTalk, as System 6 has sufficient support built-in to use this method. Finally, using a segmenting and compression utility like Compact Pro can create self-extracting archives. A capable bridge Mac with an internal floppy drive is a must for all these methods. See this section for more information about disk images. |
 IIci with 7.1 and Rocket 33 |
Certain Macs may require a System Enabler to start the operating system. Some Enablers are rather hard to find. Read the previous Apple KB article for clues, plus have a look at this page. The Disk Tools disks for System Software installation packages may have stripped down Enablers which may be beneficial for Emergency Network Access Disk purposes.
Once the base operating system has been installed, the next step is to install NSI 1.5.1 from Apple's directory. Next, install AppleShare Workstation 3.5 and follow up with MacTCP, which can be found on the Legacy Recovery Disk if you have it. Copy MacTCP into the Control Panels folder. Some individuals recommend installing 7.0 Tuneup 1.1.1, as it corrects some bugs. Add the File Sharing Extension from System 7.5.3 (version 7.6.2, about 190KiB) into the Extensions folder if you plan on using Panther as a client for AFP; otherwise, there is no need to upgrade it. FSE 7.6.2 can be either extracted from a 7.5.3 Installation Tome using TomeViewer 1.3D3, or from a regular plain install of 7.5.3.
Aside from curiosity's sake, System 7 Pro is not worth bothering with. Its only useful contribution is its Scriptable Finder, version 7.1.3, that can be yanked out of one of the installation disks. The rest of the system, like PowerTalk, was a failure, despite being rather far ahead as a concept went. Certain early PowerPC machines supported certain versions of 7.1, which can be handy to have around, but they won't have a lot of PowerPC native code. Since all the PowerPC machines emulate a 68020 with no FPU, they'll probably be running less efficiently than 7.5 with a optimization pass.
System 7.5
System 7.5.5 is an update to 7.5.3, which used to be on Apple's Older Software List. It isn't really that necessary for 68K machines as most of the updates were for PowerPC units. 7.5 should really only be used the older Macs when it is required, such as when Open Transport is desired because it is a thirsty consumer of RAM. 7.1 can open most of the applications that mandate OS 7 or higher, and occupies a smaller memory footprint. With various addons like SuperClock it is possible to bring 7.0.1 or 7.1 close to the feature set of 7.5 without the memory draw or the disk hungry folder size. The normal install for a SE/30 tallies up to about 30MiB, color Macs will demand a bit more; compared to 7.0.1, which adds up to about 6.5MiB. |
 System 7.5.5 (SE/30) |
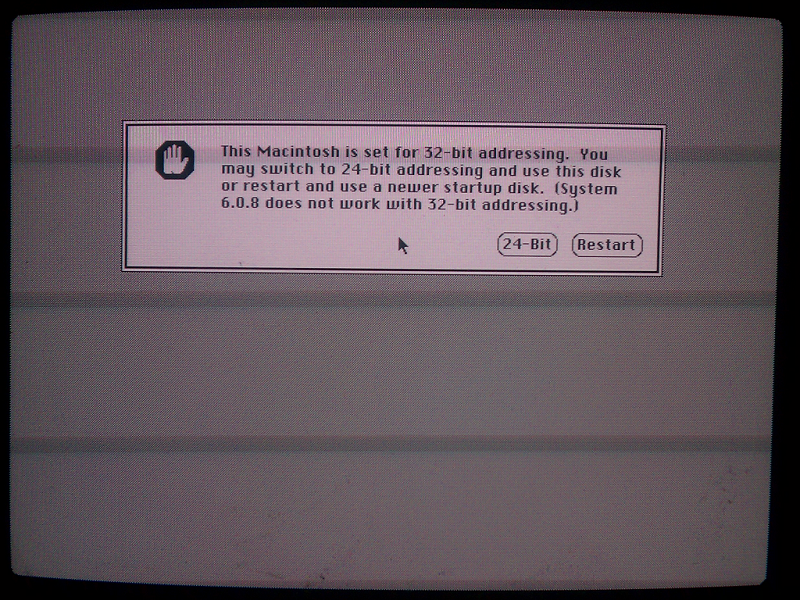
The Macintosh II, IIx, IIcx and the SE/30 use 24-bit memory addressing, which works fine up to 8MiB. Any memory installed in excess of this limit requires 32-bit addressing, which is activated with the MODE32 extension. MODE32 1.2 is for 7.0/7.1, and MODE32 7.5 is for 7.5 and above. (7.6 does not require this extension, as 7.6 requires 32-bit clean ROMs. These two links may be of further interest.) If MODE32 1.2 was installed over 7.5, then a reinstall of the System software is recommended by Apple. 32-bit System Enabler is depreciated for stability reasons: use MODE32 instead.
7.5.3 was available on floppy disks (16) of the 1.44MB size but back in the day CDs were more common; or as from Apple's download page, a self-mounting image. The image can be either copied over a network, shared over a network, the parts copied over floppy disks and recombined, or other methods. 7.5.3 requires System 7 as a base to "upgrade" for earlier computers, although the later computers that required 7.5.3 as a minimum (usually PPC 603e platforms) can work fine with a bootable CD. A minimal install of System 7 can work as a suitable base for 7.5.
If only a couple of floppy disks are used to install all 16 disk images (from the Legacy Recovery Disc) , then keep Install Disk 1 separate until the last step. The Installer will ask for that specific disk back and if it is not available or has been altered, the installation will not be completed. The other floppies can be freely erased or contents deleted and replaced with the next one in sequence, so the minimum for this method is two disks.
The 7.5.3 installer from Apple's download page deserves special mention. First it comes in a form of 17 parts which have to be individually decoded. Next, the all the parts have to combined to form a single .smi (Self Mounting Image). This is done by opening the .smi which will recreate the original full image. As the image is about 40MiB in size, it should probably be shuffled over the network or a suitable SneakerNet method. Note that .smi images cannot be opened in System 6. Use a minimal install of 7.0.1 or 7.1 and then use the network to access the image file, then open it and it will mount on the desktop. It does not need to be copied over the network, but it can be accessed over the network.
Try to install only elements that are required. An SE/30 has a 1 bit display, and unless a secondary monitor is available, Monitors and Color aren't required. A desktop cannot use PowerBook utilities, residents of the USA don't really need Numbers, Text, Keyboard, Easy Access, CloseView (only worthwhile on larger displays with 640x480 or larger resolution), Control Strip takes up too much screen space and isn't really beneficial, Energy Saver is only compatible with a certain range of Macs, and so on. Serial Switch is for certain Macs (IIfx, Quadra 900, 950) that can toggle the serial port between two modes because they have an Intelligent I/O Processor (IOP) serial chips, some of which can do direct memory access (DMA). Make sure to install all the Networking Software except A/ROSE (some one-off NuBus card is required, few people have such a setup) and TokenRing which perished in the hiatus back in the day.
Sometimes the Installer can fail to complete if all the desired elements are selected at once: thus, then install in portions. For example, start with the Base System, restart, then the Apple Menu Items, reboot and follow up with the Control Panels, and so on.
The last steps consist of the following: installing the 7.5.5 Update; any required Ethernet drivers; MacTCP for Classic Networking, if desired, alternatively install Open Transport 1.3 and AppleShare Client 3.7.4. Classic Networking with MacTCP cannot use AppleShare Client 3.7.4. 68030 and 68040 computers only need OT 1.3 Install Disk 1 and 2, using a Custom Install to only install the 68K libraries, however PPC machines require all four.
There has been some concern that Chooser 7.6.1 is required for this to work, it is installed along with OT 1.3; but Chooser 7.5.3 can work fine regardless. If your 7.5.5 installation acts unusual at any point, just re-update it with 7.5.5. Re-updating a system like this also works for all Mac OS versions 7.5.3 on up, including OS X. System Picker is a utility that can allows booting from multiple System Folders in the same root volume without partitioning. A lightweight, reliable, useful utility for Macs that need to boot from more than one version of System Software. It does not interfere with any one system version because of the way it works; by unblessing the current boot folder and blessing the target boot folder on the shutdown sequence. The use of descriptive System folder | 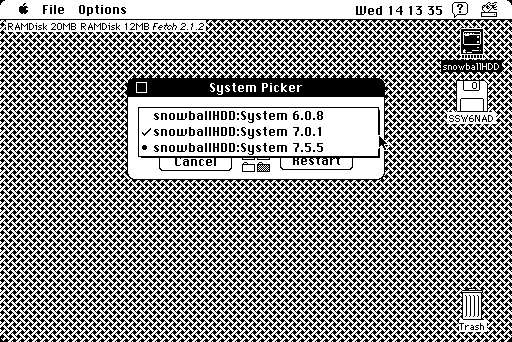 System Picker 1.0b10 |
names is a good idea because version 1.0b10 doesn't tell you what version is the target version. Limiting the search depth is a good idea. Version 1.0b10 will not work with Mac OS 8; use 1.1a3 instead. 1.1a3 also added an indicator of what System version the target folder contains.
System 7.6 and up
As the complexity and capabilities of Mac OS expanded beyond System 7, the distribution format also changed. While 7.6 could be obtained on floppies, the primary distribution media was via a CD-ROM, as most systems which came with 7.6 had built-in CD-ROM drives. All other versions of Mac OS used CDs until Tiger, which used DVDs for machine specific media and CDs for retail 10.4.0 distros; 10.5 and 10.6 are via dual layer DVDs and 10.7 is not sold on physical media, unless USB flash drives count. If a CD drive is not available, then the installation media will have to be shared over the network, installed over the network, or pulled off via FTP. Alternatively, install it on an emulator (most likely Basilisk II) with the same machine specs, or an install for any Mac, then copy it out of the emulator and push it over the network with AFP or FTP. |  7.6.1 on a PowerBook Duo 230/100 |
Another method that is supported by certain PowerBooks is Target Disk Mode over SCSI, called SCSI Disk Mode. (Macs with FireWire use Target Disk Mode over FireWire.) Apparently the PowerBook 140, 145B, 150 and 170 do not support SDM in ROM. Some PowerBook HDI-30 SCSI adapters have a little switch to toggle between TDM and regular SCSI mode, which is better than hunting down the HDI-30 HDM cable and a terminator. In certain circumstances a PowerBook can boot another Mac's System, if it is compatible and "share the HDD" with the host machine, but only if its own HDD is down. The FDD on the host computer will not be shared.
The default install of 7.6+ will usually update the current System Folder to the one presently being installed. A Clean Install can override this process, setting the old one aside and starting afresh with a new installation. Then, System Picker 1.1a3 can be used to switch between them without the need to partition the hard drive. Certain Macs like the PowerBook 1400 series had special versions of 7.5.3, some users will find the slight speed increase worthwhile. But because 7.5.3 doesn't have a Clean Install option like 7.6 does, just create a 60-70MiB disk image with DC 6.3.3 and install onto that, then copy the content back over again.
During the installation process, manually picking out what is desired rather than a default install can save hard disk space and speed up the boot time (see here and here). Once you have installed the System of choice, updating to any subversions (i.e. 7.6 upgrade to 7.6.1, 8.0 to 8.1...) should be the next step. Then install Open Transport 1.3 for all systems up to 8.1, then AppleShare 3.8.3; AppleShare 3.8.8 is for higher systems, head here to see what is the most suitable choice. Since Mac OS 8+ is more picky about invalid dates, set the date to avoid certain issues.
For platforms that dual-boot Mac OS X and Mac OS 9, the Desktop Folder in OS 9 is sometimes not accessible from within OS X. To get around this, open Terminal and type the following (Classic is the volume name for this example):
It could also be cd / && open /Desktop\ Folder, as 10.2 doesn't seem to list / within the /Volumes/ directory. Advanced users may want to create an AppleScript or a symbolic link within the Terminal app. This also works when Mac OS X and Mac OS 9 are installed on the same partition. OS 9 and OS X can get along on the same partition, but multiple OS X versions on the same partition is a no-no. In the Finder, the alias (symbolic link for *NIX people, or shortcut for Windows folks) named Desktop (Mac OS 9) is just a link to the same source folder that we opened manually.
A long time ago, the author discovered a rather obtuse trick for OS 9. The case was that the original install discs for OS 9 failed to install the operating system completely and would thus fail. The original 9.0.4 machine specific restore discs were for iMac G3; the discs were too heavily scratched to allow the process to complete. The solution was to boot into the restore discs into the Finder. Copy the whole System Folder of the CD onto the hard drive. It won't be bootable but that is not a concern. Next, run a Mac OS 9 Update on the newly copied System Folder on the hard drive -- i.e. run Mac OS 9.1 Update on a 9.0.4 System Folder copied from the CD's boot folder. By the time 9.2 Update is finished the end result will be the same as a regular install with all the extensions and control panels as usual.
This dates back to a time when OS 9 was not as ... available on "alternative sources" and back in the days of dialup when the maximum download speed was about 36KiB/sec, or about 250Kbps a 450MiB disc image could take all night. This is why magazines like MacUser had shareware CDs included from time to time because Internet time was metered by the minute and was quite slow.
Additional AppleTalk Discussion
This section contains extended details concerning AppleTalk topics that don't fit or align properly with the Main Page.
EtherTalk Phase 1 and 2
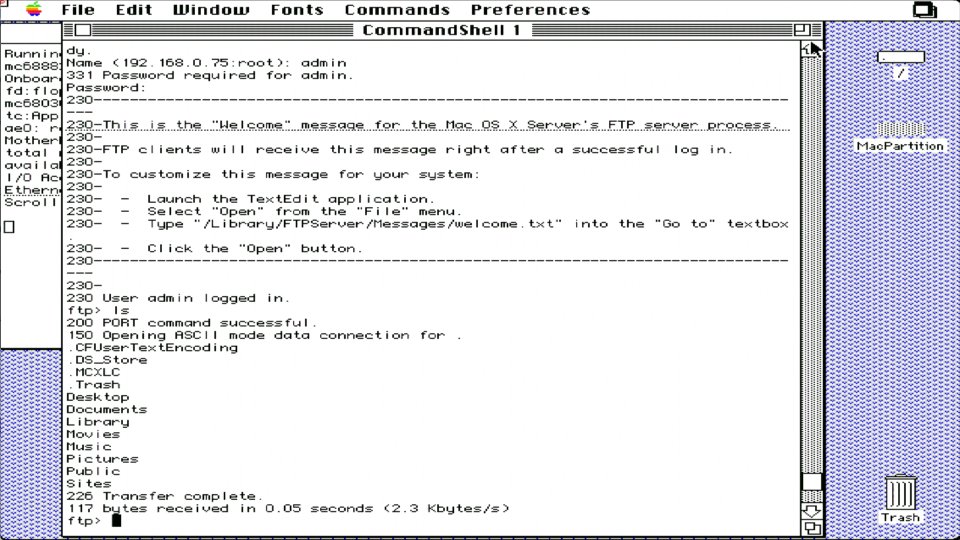
The first deployment of EtherTalk was simply called EtherTalk and then retroactively named EtherTalk Phase 1 when the AppleTalk Phase 2 update came up later in June of 1989. To help confuse matters further, recall that there's AppleTalk Phase 1 and Phase 2, plus AppleTalk version changes, i.e. version 54, 56.0, 58.1.4, and so on, and then there's AFP versions. ASFS 1.1 Server Installer has AppleTalk version 50 on it, which probably the first public release. Macs since the Mac Plus have certain versions of AppleTalk in ROM: for more, see the bottom of this document. Shown to the right is a list of the AFP versions, this was done by using Netatalk's internal logging function to capture the AFPVersion or version value of a client connecting, such as AFP3.2 for Tiger. An OS X 10.0 connection reports AFPX03; otherwise, this source was also consulted. It's probably safe to lump in the Server versions in that because they more or less came out at the same time, in that AS WS 1.1 came out with AppleShare Server 1.1, WS 2.0 was released with Server 2.0 and System 6, and so on. Apple says AFP 2.1 can technically do AFP over TCP but does not elaborate further beyond this quote: |
AFP version history:
|
For normal users AFP2.2 is the only one that actually does AFP over TCP through the Chooser without any special routers or software upgrades. The final specification for AFP 2.1 makes no mention of TCP, MacIP or KIP. Additional information is available with this Programming Guide, which gives a nice overview and reviews some of the version differences, and this Protocol Reference which reviews each AFP command call.
EtherTalk is simply AppleTalk over Ethernet 10BASE-2 (thin coaxial cable), 10BASE-5 (thick coaxial cable) or 10BASE-T twisted pair unshielded cabling. Searching for deeper technical information about EtherTalk Phase 1 is difficult. (TokenTalk is Phase 2 and uses a different network design.) Although not specifically focused on the EtherTalk Phase types, the Apple Service Guide: Networking and Communications (1992 publishing) book has quite of bit of network topology and somewhat-technical information concerning networks and network designs. Two other TIL articles worth a look include TA42703 and TA43332 which mostly have to do with LocalTalk matters.
For technical documentation, the only available source for any information about Phase 1 headers and packet information is Inside AppleTalk, 1st Edition. For reference, there's 3 general versions of Inside AppleTalk: a 1986 early developer release (which mostly just covers the serial port implementation, later called LocalTalk, with a bonus version that has some technical notes, which is also available separately), a 1989 "First Edition" (which has Phase 1 information consisting of one chapter with seven pages and two pages in an appendix), and a 1990 Second Edition, latter of which is what most people can find. The 2nd Edition does not talk about EtherTalk Phase 1 at all and is only concerned about EtherTalk Phase 2, and the most commonly found one floating around is missing images. There's also an Inside Macintosh book dedicated to networking. The document "AppleTalk Phase 2 Protocol Specifications" was an extra publication to the First Edition. It appears to have been removed from the APDA listing some time after the second edition of Inside AppleTalk came out. It was intended to be a document that would provide the relevant Phase 2 information without having to buy the Second Edition right after the First Edition was purchased, but it might contain some elements that did not make it to the Second Edition print but nothing game-breaking. A mention of it is here, talking about node assignments on startup, but no other official sources were available, but there were plenty of citations for it in 1989-era documents and RFC submissions. |
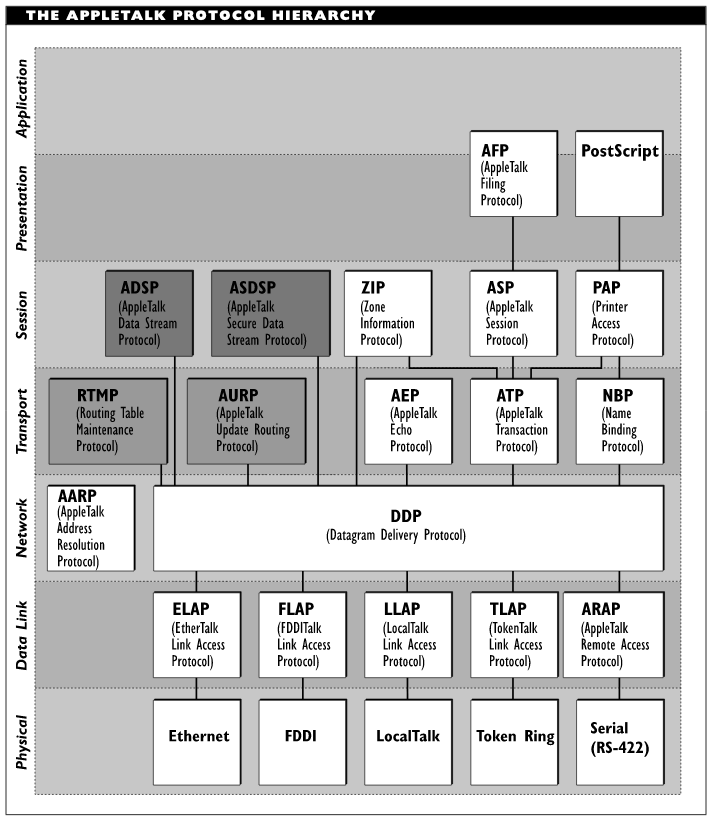 AppleTalk OSI model (via netfreak on wiki.peterhuman.net, unknown source) |
For over a decade no search query would return anything other than a forum sale post on the Vintage Computer Forums, which was posted in 2011 and no search results would return anything offering such a binder for sale or indicating possession of one. But in November of 2025 one popped up on eBay, which was promptly snapped up and scoured for technical information, courtesy of bitsavers.org.
Some interesting variations are: a description of how a provisional temporary DDP address is obtained (page 14) using PRAM, the Zone Information Protocol reply packet description is different (page 32 versus page 8-17 of the Second Edition), and some other minor changes, such as GetNetInfo was changed to GetZoneList. The basic review is in Chapter 2, with the included notes also reviewing the basic changes. For the most part it looks like short-term publication that was intended to help get developers and router manufacturers on board with Phase 2 as soon as practical, and it does offer some better descriptions of some technical considerations.
Compared to Phase 2, Phase 1 supports only one zone, 254 nodes (computers or devices), a maximum of 127 servers and the frame headers are different (Ethernet-II for Phase 1 and SNAP, or SubNetwork Access Protocol for Phase 2). It's basically LLAP, or LocalTalk Link Access Protocol over Ethernet instead of serial wires, and because of the frame headers, they can coexist on the same network, as long as only one zone is in use, but can't talk to each other without a Phase 1 - Phase 2 capable router. EtherTalk Phase 2 also allows the serial port and EtherTalk to be in use at the same time.
Drivers for Apple's first Ethernet cards were all Phase 1 drivers when they were released, as seen in this image. Note the single-headed (Phase 1) versus double-headed (Phase 2) arrows. The only cards that would even use the EtherTalk Phase 1 drivers are the "EtherTalk NB" or "EtherTalk Interface Card" which came out for the original Mac II and can be installed with the AppleShare File Server and Work Station 2.0 install, which is Phase 1. And then there's the Apple Ethernet NB card which used AAUI. Actual hardware besides those cards that specifically uses EtherTalk Phase 1 is pretty much limited to the very first hardware EtherTalk bridges like the Shiva FastPath 4. The Gatorbox can route Phase 1 traffic to a degree to, like the FastPaths and the old Cisco boxes, but the ship had sailed and most people were onboard with Phase 2 by the time that they got Ethernet, which wasn't really mainstream until the early 1990s, but also dialup access back then was not the same as Internet access today |
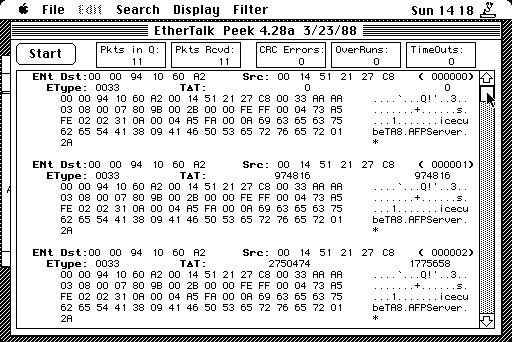 EtherTalk Peek packet info |
is until around 1995. In those days a modem would be hooked up to a serial port, it wasn't until PPPoE and the early 2000s that the dialup modem more or less disappeared, but this varied according to region. Ethernet was mostly used for businesses and more serious computer installations which required the bandwidth capability and cross-platform support that Ethernet could provide for networking together stuff like VAX mainframes and SUN workstations into a solution capable of distributing files and email between all of them.
It was possible to install EtherTalk Phase 1 drivers under System 7 but it wasn't a normal scenario that most people would deal with. Today it can be found on the System 7 Golden Master disk, which also includes Inter-Poll. Apple aggressively pushed Phase 1 out the door and offered a Phase 2 Upgrade kit, and deep dives through archives has turned up numerous FAQs and documents about the upgrade, so it's possible that Phase 1 was more common than we might think. AppleTalk Phase 2 was first introduced with AppleTalk version 53, and required at least a Macintosh Plus. For the most part, unless it was a special program or hardware device (like a Radius Rocket or TOPS/Macintosh) most programs weren't too picky about what AppleTalk version in use as long as it wasn't too old. Unless of course, they used specific properties of an AppleTalk stack that changed in a later version, or undocumented features of AppleTalk (like the Radius Rocket). |
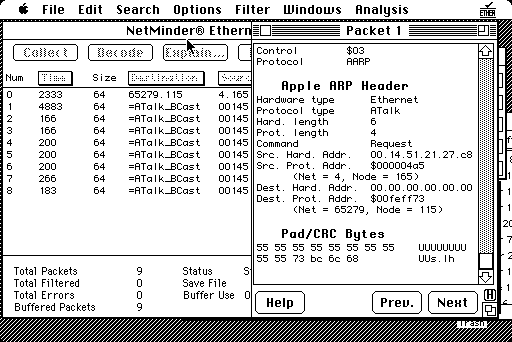 NetMinder packet analyzer |
By 1989, EtherTalk Phase 2 was already in the works, and by about 1990 or 1991 if people wanted Ethernet they had a lot of viable hardware choices to choose from with 10BASE-T being available for a less expensive installation. All of these options usually supplied Phase 2 drivers normally, with magazines like MacWorld and MacUser taking the pain to explain the difference, but as mentioned earlier, it wasn't something people normally had to deal with. Most people who could afford a computer at home didn't need Ethernet, that wasn't a popular thing until around the mid to late 1990s with the rise of LAN parties.
AppleTalk and EtherTalk history tidbits
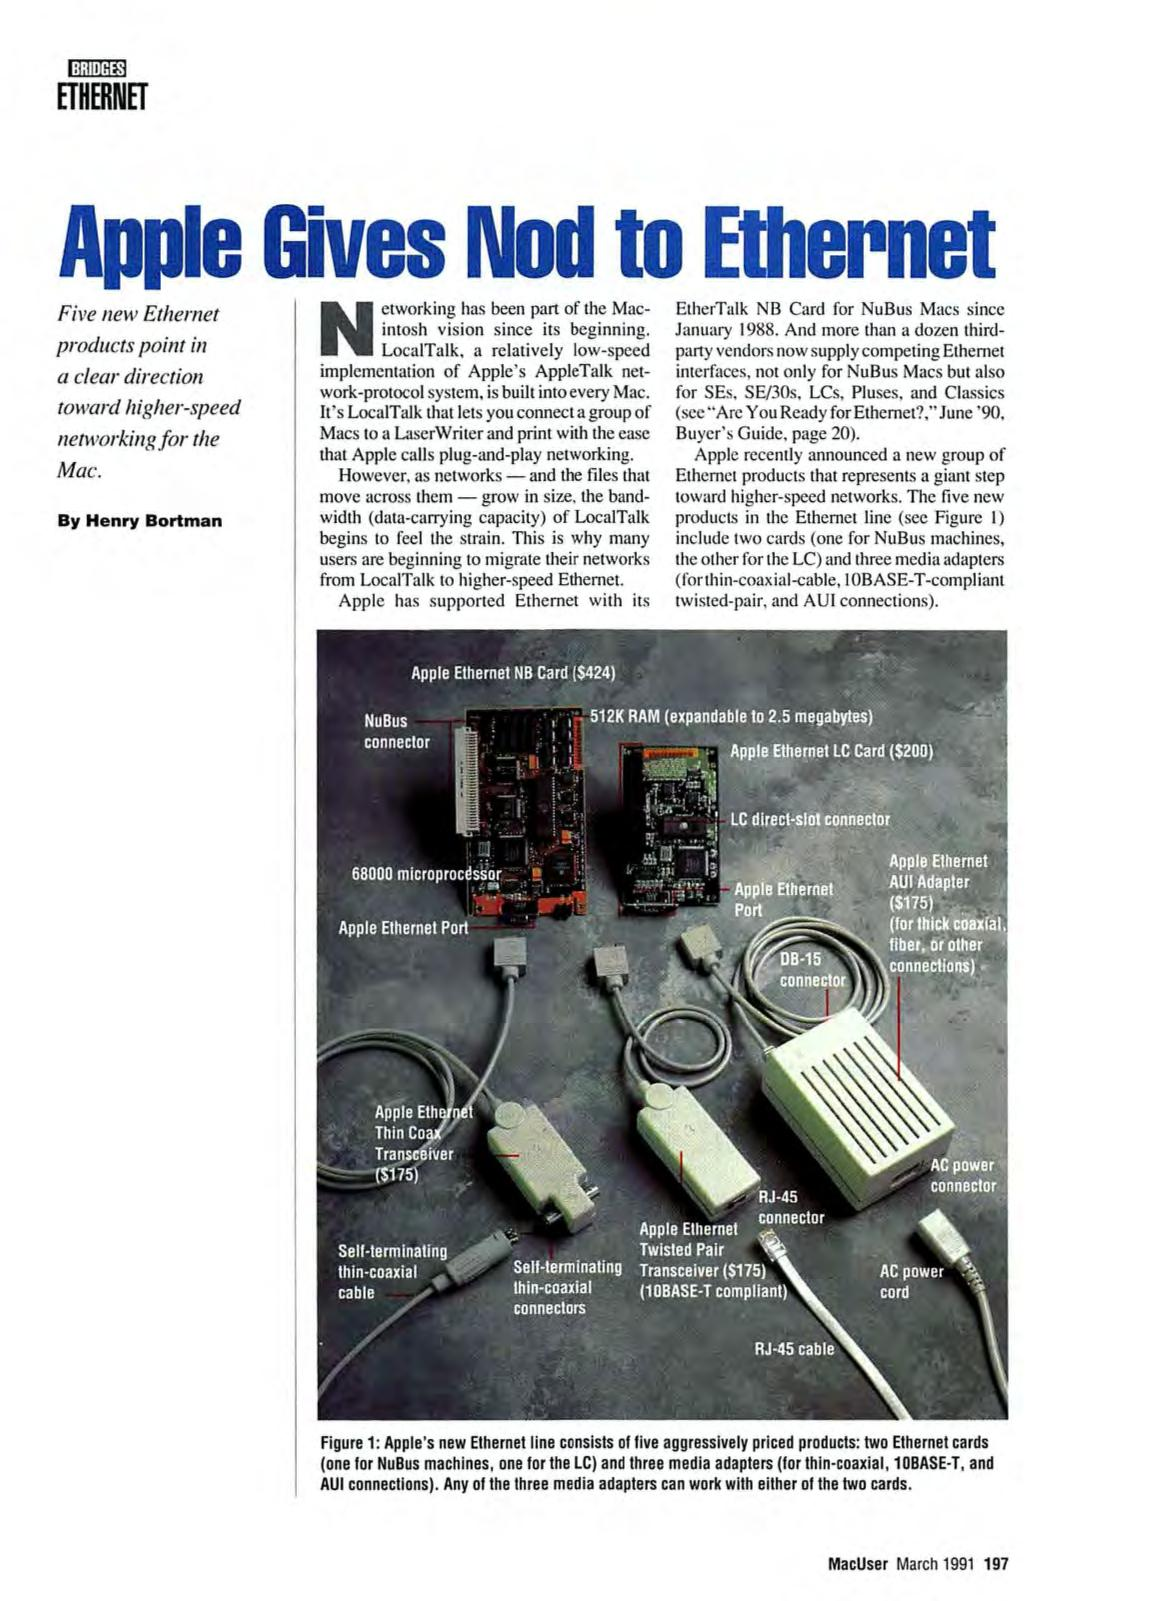
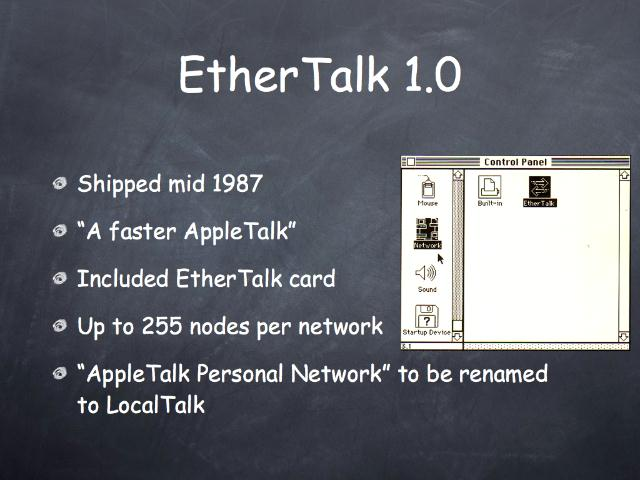
The history of EtherTalk is somewhat difficult to explain. The first Ethernet capable card made available by Apple was the EtherTalk NB card for the Macintosh II, according to MacUser, in January of 1988. But according to a slide from a Alan B. Oppenheimer presentation of Macintosh networking, EtherTalk 1.0 came out around mid-1987 with an Ethernet card, but no remnants appear to have survived, and no other reference could be found to back that up. MacWorld did mention EtherTalk in August and September 1987 issues, but those were just announcements of a product coming in the future. On the contrary, the EtherTalk Preliminary Note, the only technical documentation we have, is dated for October of 1987, so it's safe to say that at least a few prototype cards were produced by then, and it's most likely that cards began shipping around that time. It was a somewhat pricey card, at some 699$ US, and is most likely a rebadged 3Com model.
3Com were the primary developers of the 3C500 and 3C501 EtherLink 8-bit ISA cards, which date back to about 1982 or 1983 and are really old, probably the first Ethernet cards developed for personal computers. Earlier versions (3C200) were for minicomputers like the DEC PDP family and what not using Qbus, which was a set of 3 cards (memory board, control board, and serial board). This EtherTalk card also looks very similar to the 3Com EtherLink/MC (3C523) which ran on IBM MCA architecture for the PS/2 and the like, which also came out sometime around 1987, and has similarities to the 3Com EtherLink II (3C503, 8 or 16 bit ISA) which also uses the same National Semiconductor DP8390 family Ethernet controller chip. Even better, it looks identical to the 3Com EtherLink/NB (3C543) except for minor visual differences.
It has 4 electrolytic capacitors (C75, C76 and C77 are all 25v 22uF 85 deg C; the unlabeled one near the interface selector header pins just above the NuBus connector is 25v 47uF) and like the majority of stuff developed at the time uses exclusively through hole parts just like the 128K through the Macintosh SE, and appears to be dual layer card at most, but a 4-layer PCB is a possibility. Note the bodge wires in the images below -- considering this is a Revision J, which is the earliest revision that Apple indicates, that wouldn't be unusual, considering that the early EtherLink/NB models also had same bodge wires. A package is included in the box with hardware to affix the 10BASE-5 drop cable connector, or the T fitting for 10BASE-2.
The blank DIP socket to the far left side is probably for some optional feature. On 3Com's 3C500 and 3C501 cards, as well as the early 3C523, a similar socket was provided for an optional RPL ROM, which is a feature set not incorporated in the Mac OS, and is just a DIP chip that is installed by the user. RPL stands for Remote Program Load, to transfer programs or OS over the network without the host machine being involved (kind of like a netbooting or using TFTP to load a small OS using BOOTP), which probably was only used with cards used on IBM machines. IBM produced documentation for RPL, which can be found by digging around, and seems to mostly be concerned with OS/2.
But while netbooting was explored on the Macintosh platform, it didn't become mainstream and only a few niche products ever emerged from it. Digging deep into the topic has been done before, but as of right now is not fully understood, but has been investigated, including digging into later Mac OS software like 8.1 and such for netboot resources. Custom ROMs will be needed because the LC, Classic and IIsi era Macs do have netboot ready code in the ROMs, but it's not enabled.
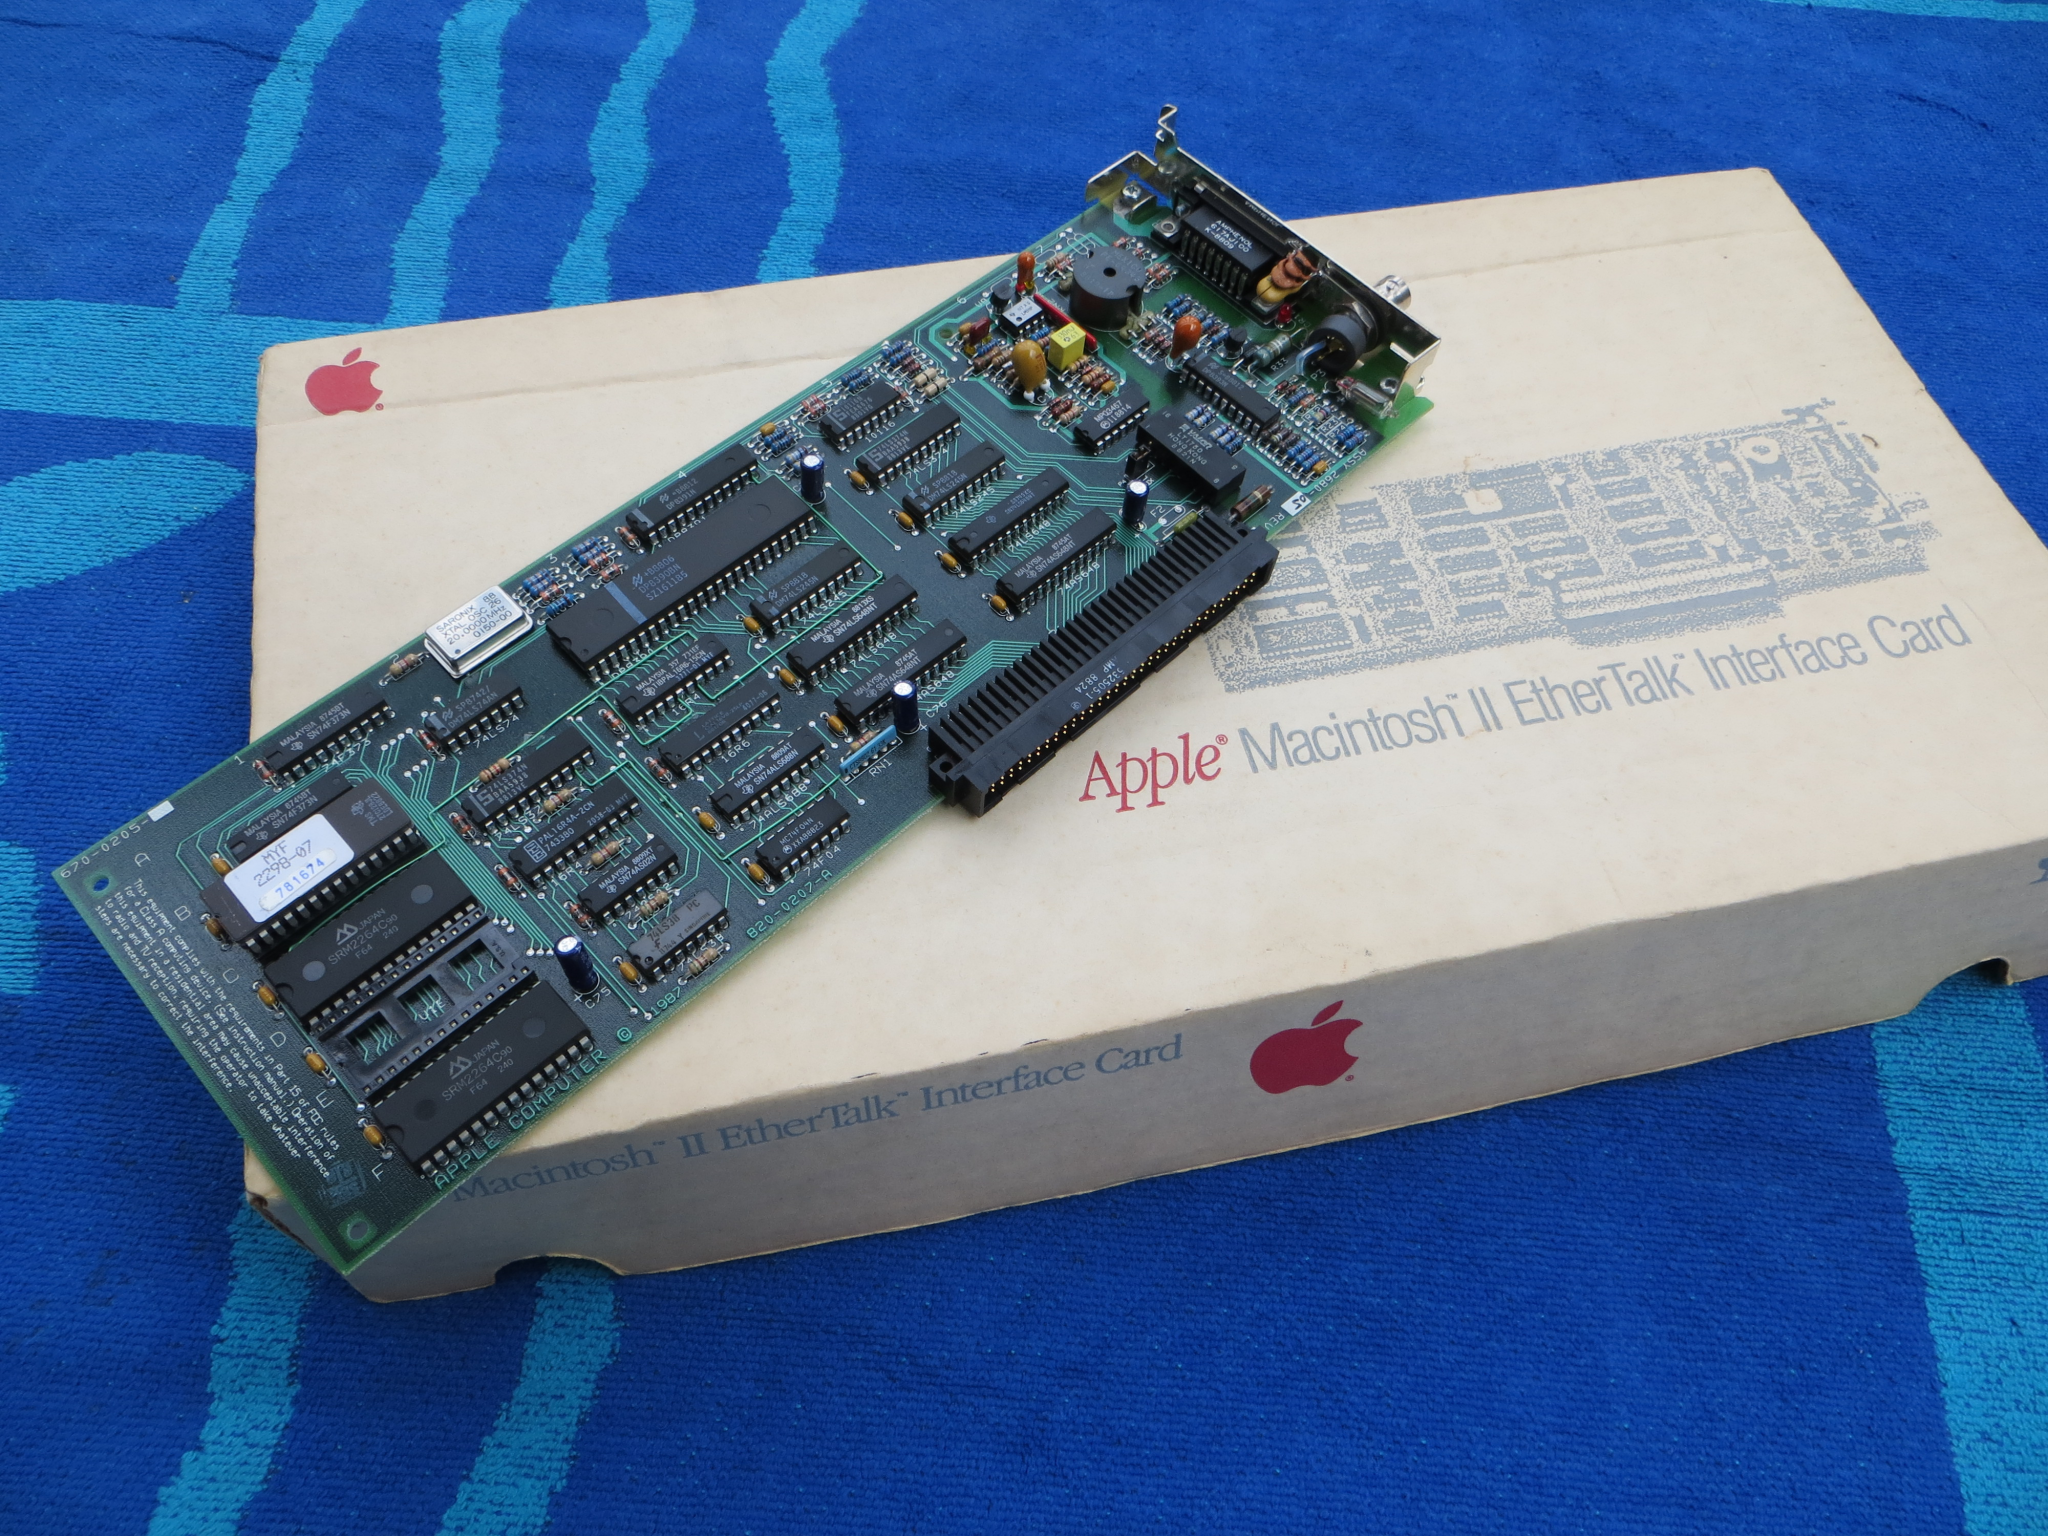 Revision J card and box |
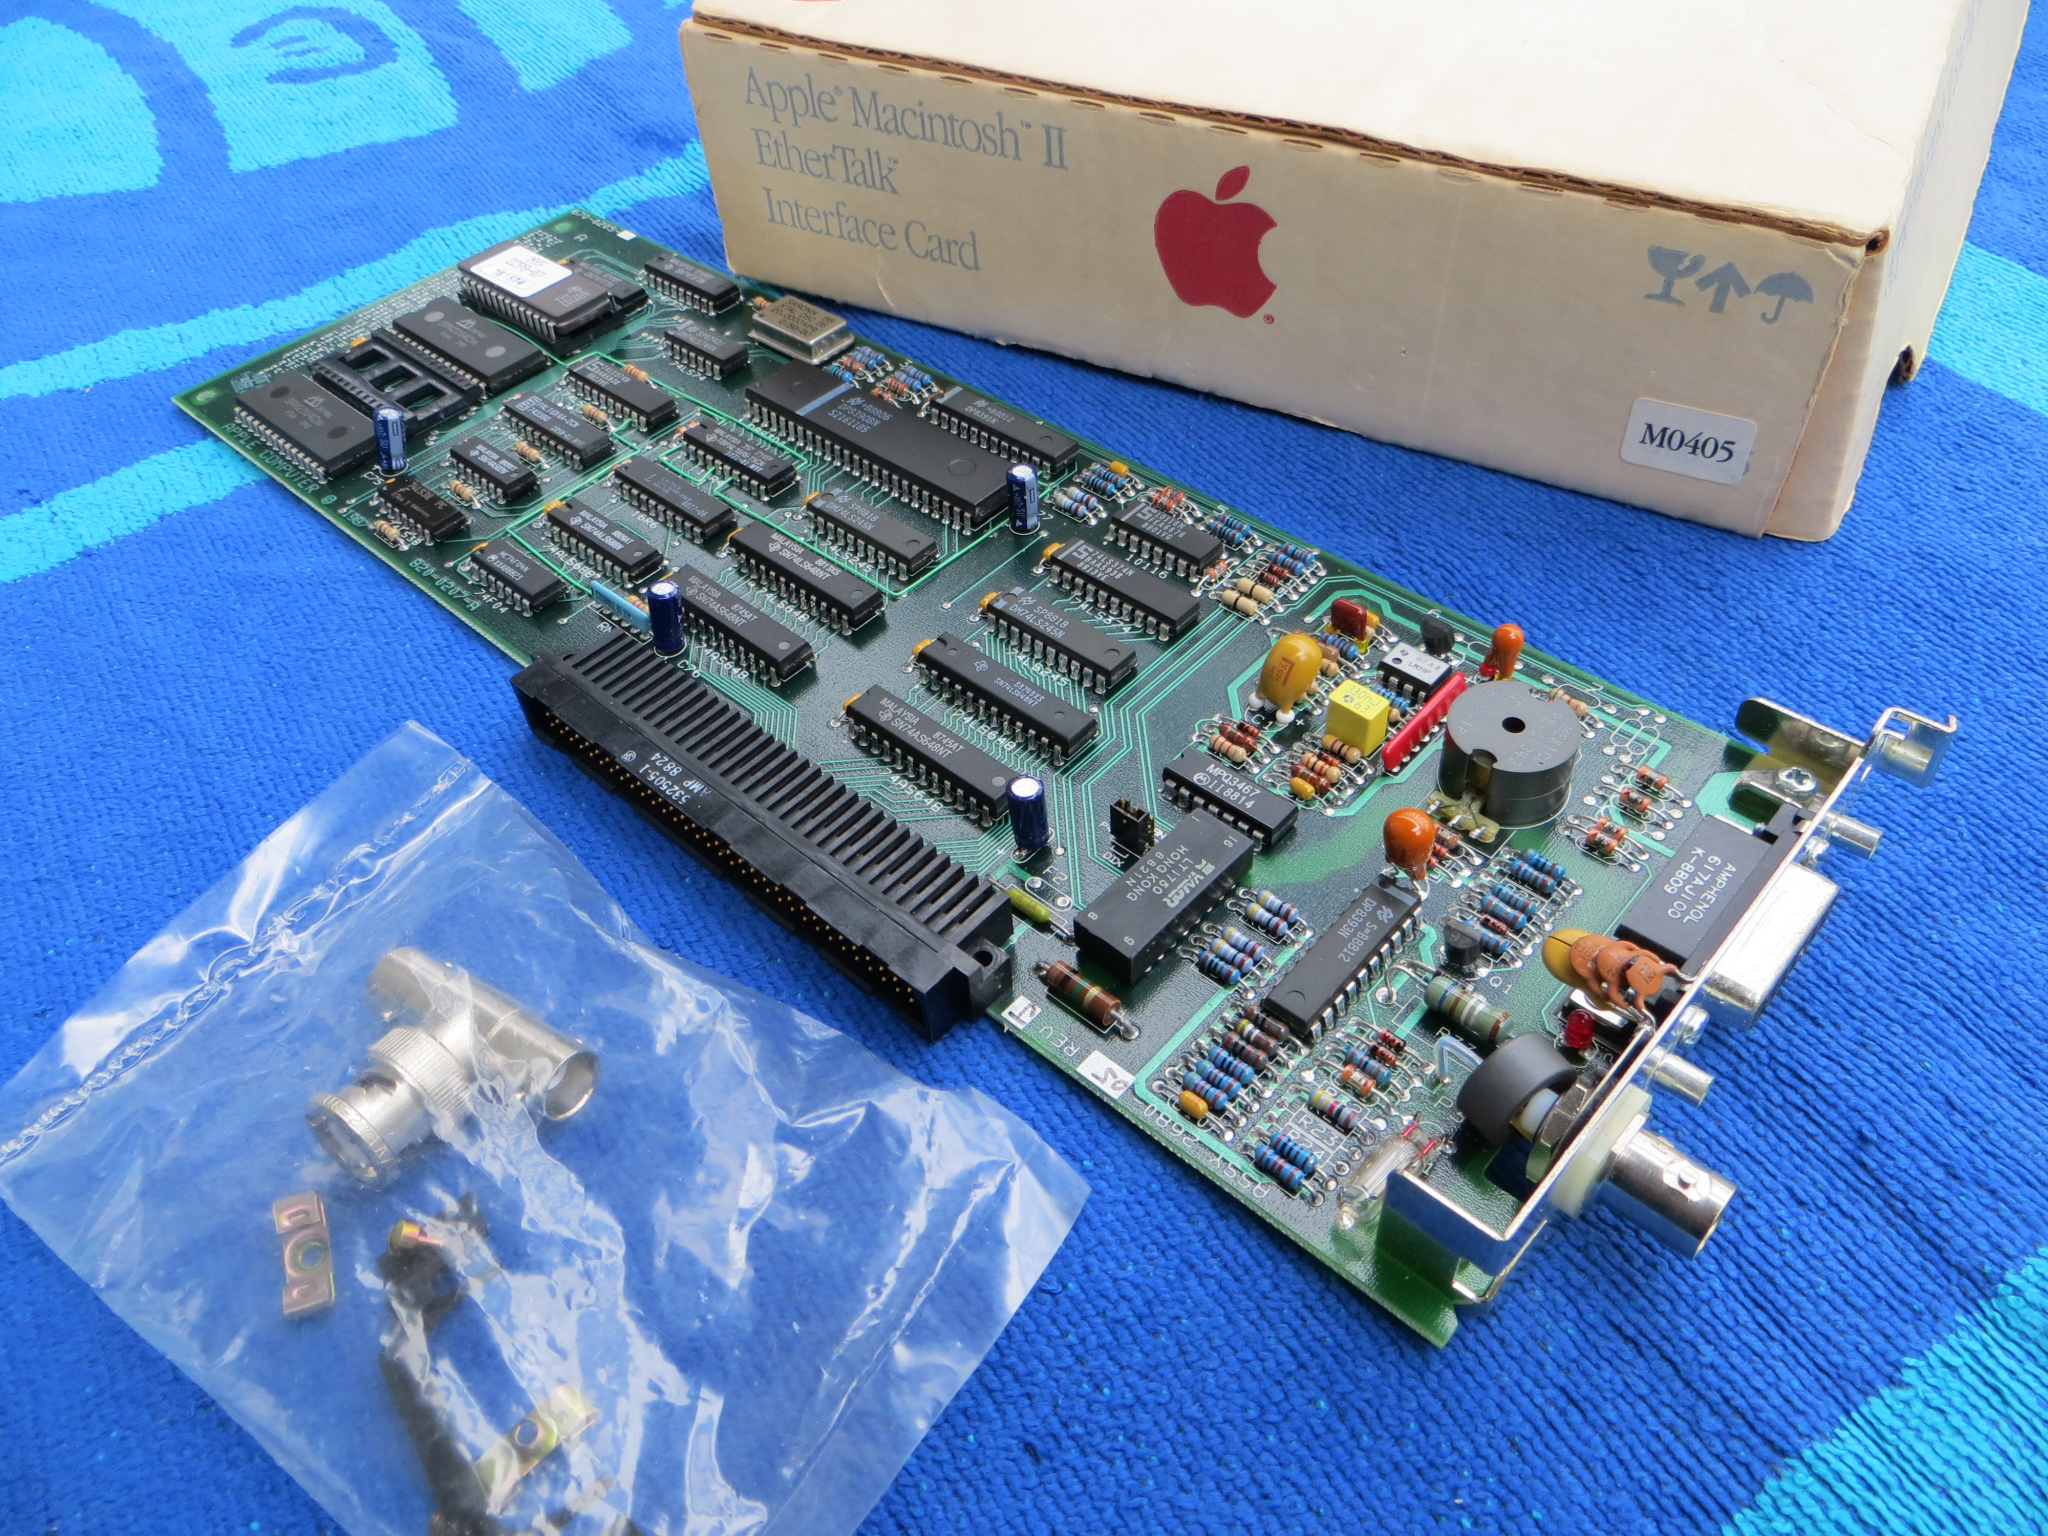 Box, card and 10BASE-2 kit |
 Back of card and manuals |
 AUI to 10BASE-T interface (Q650) |
 10BASE-2 indicator visible (see the manual) |
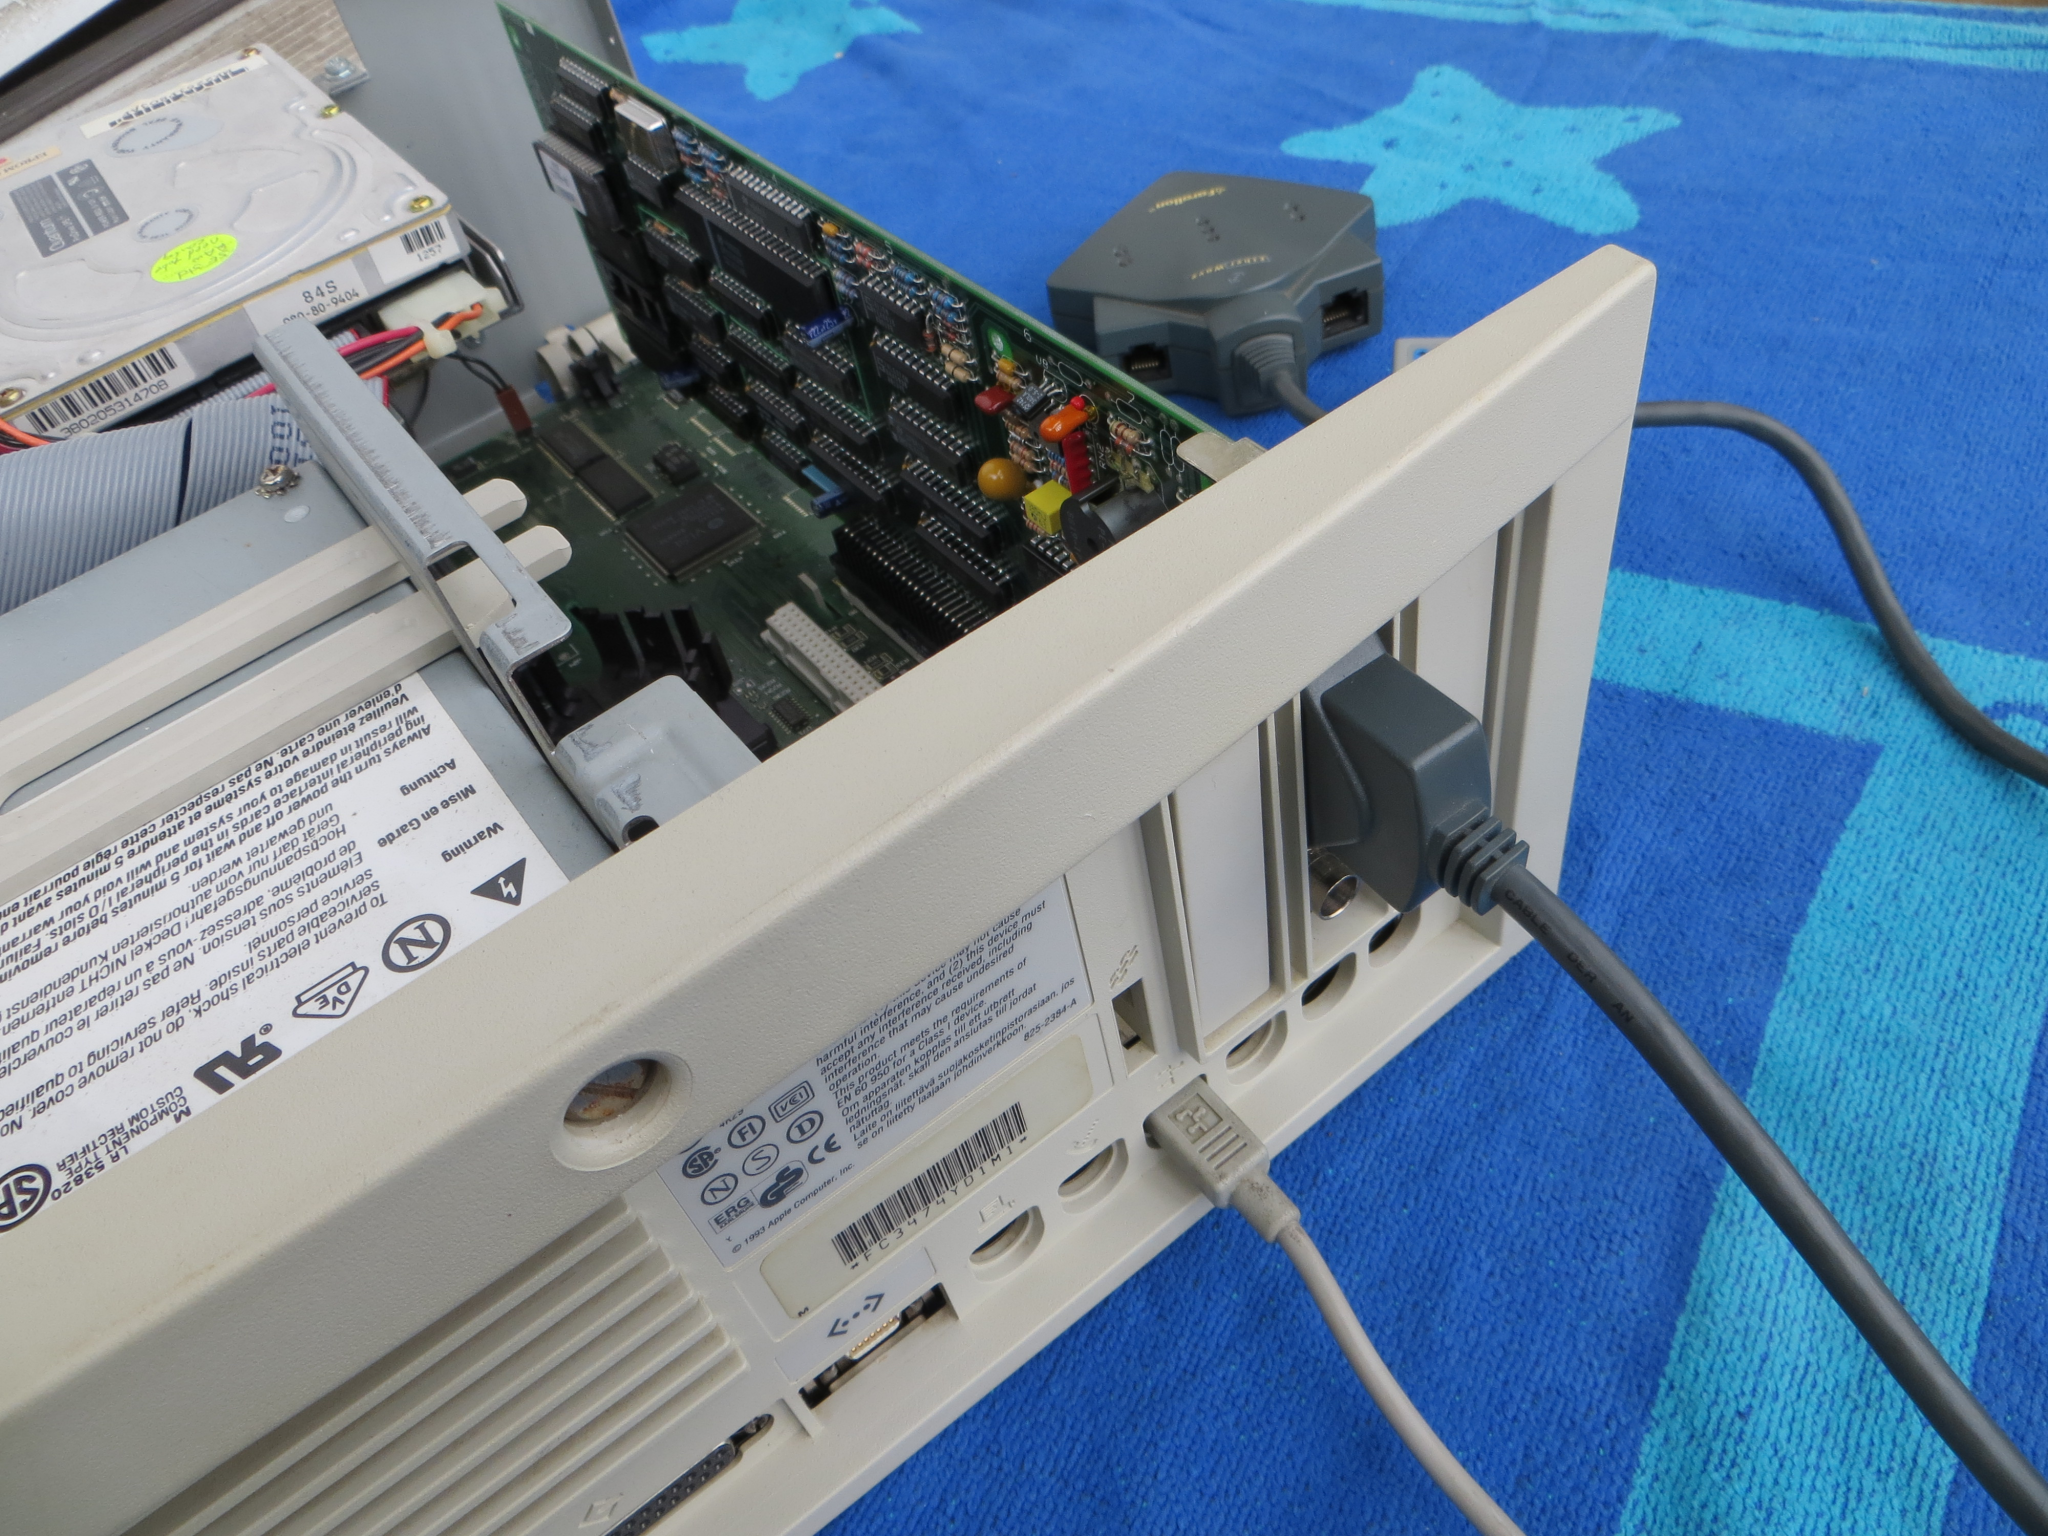
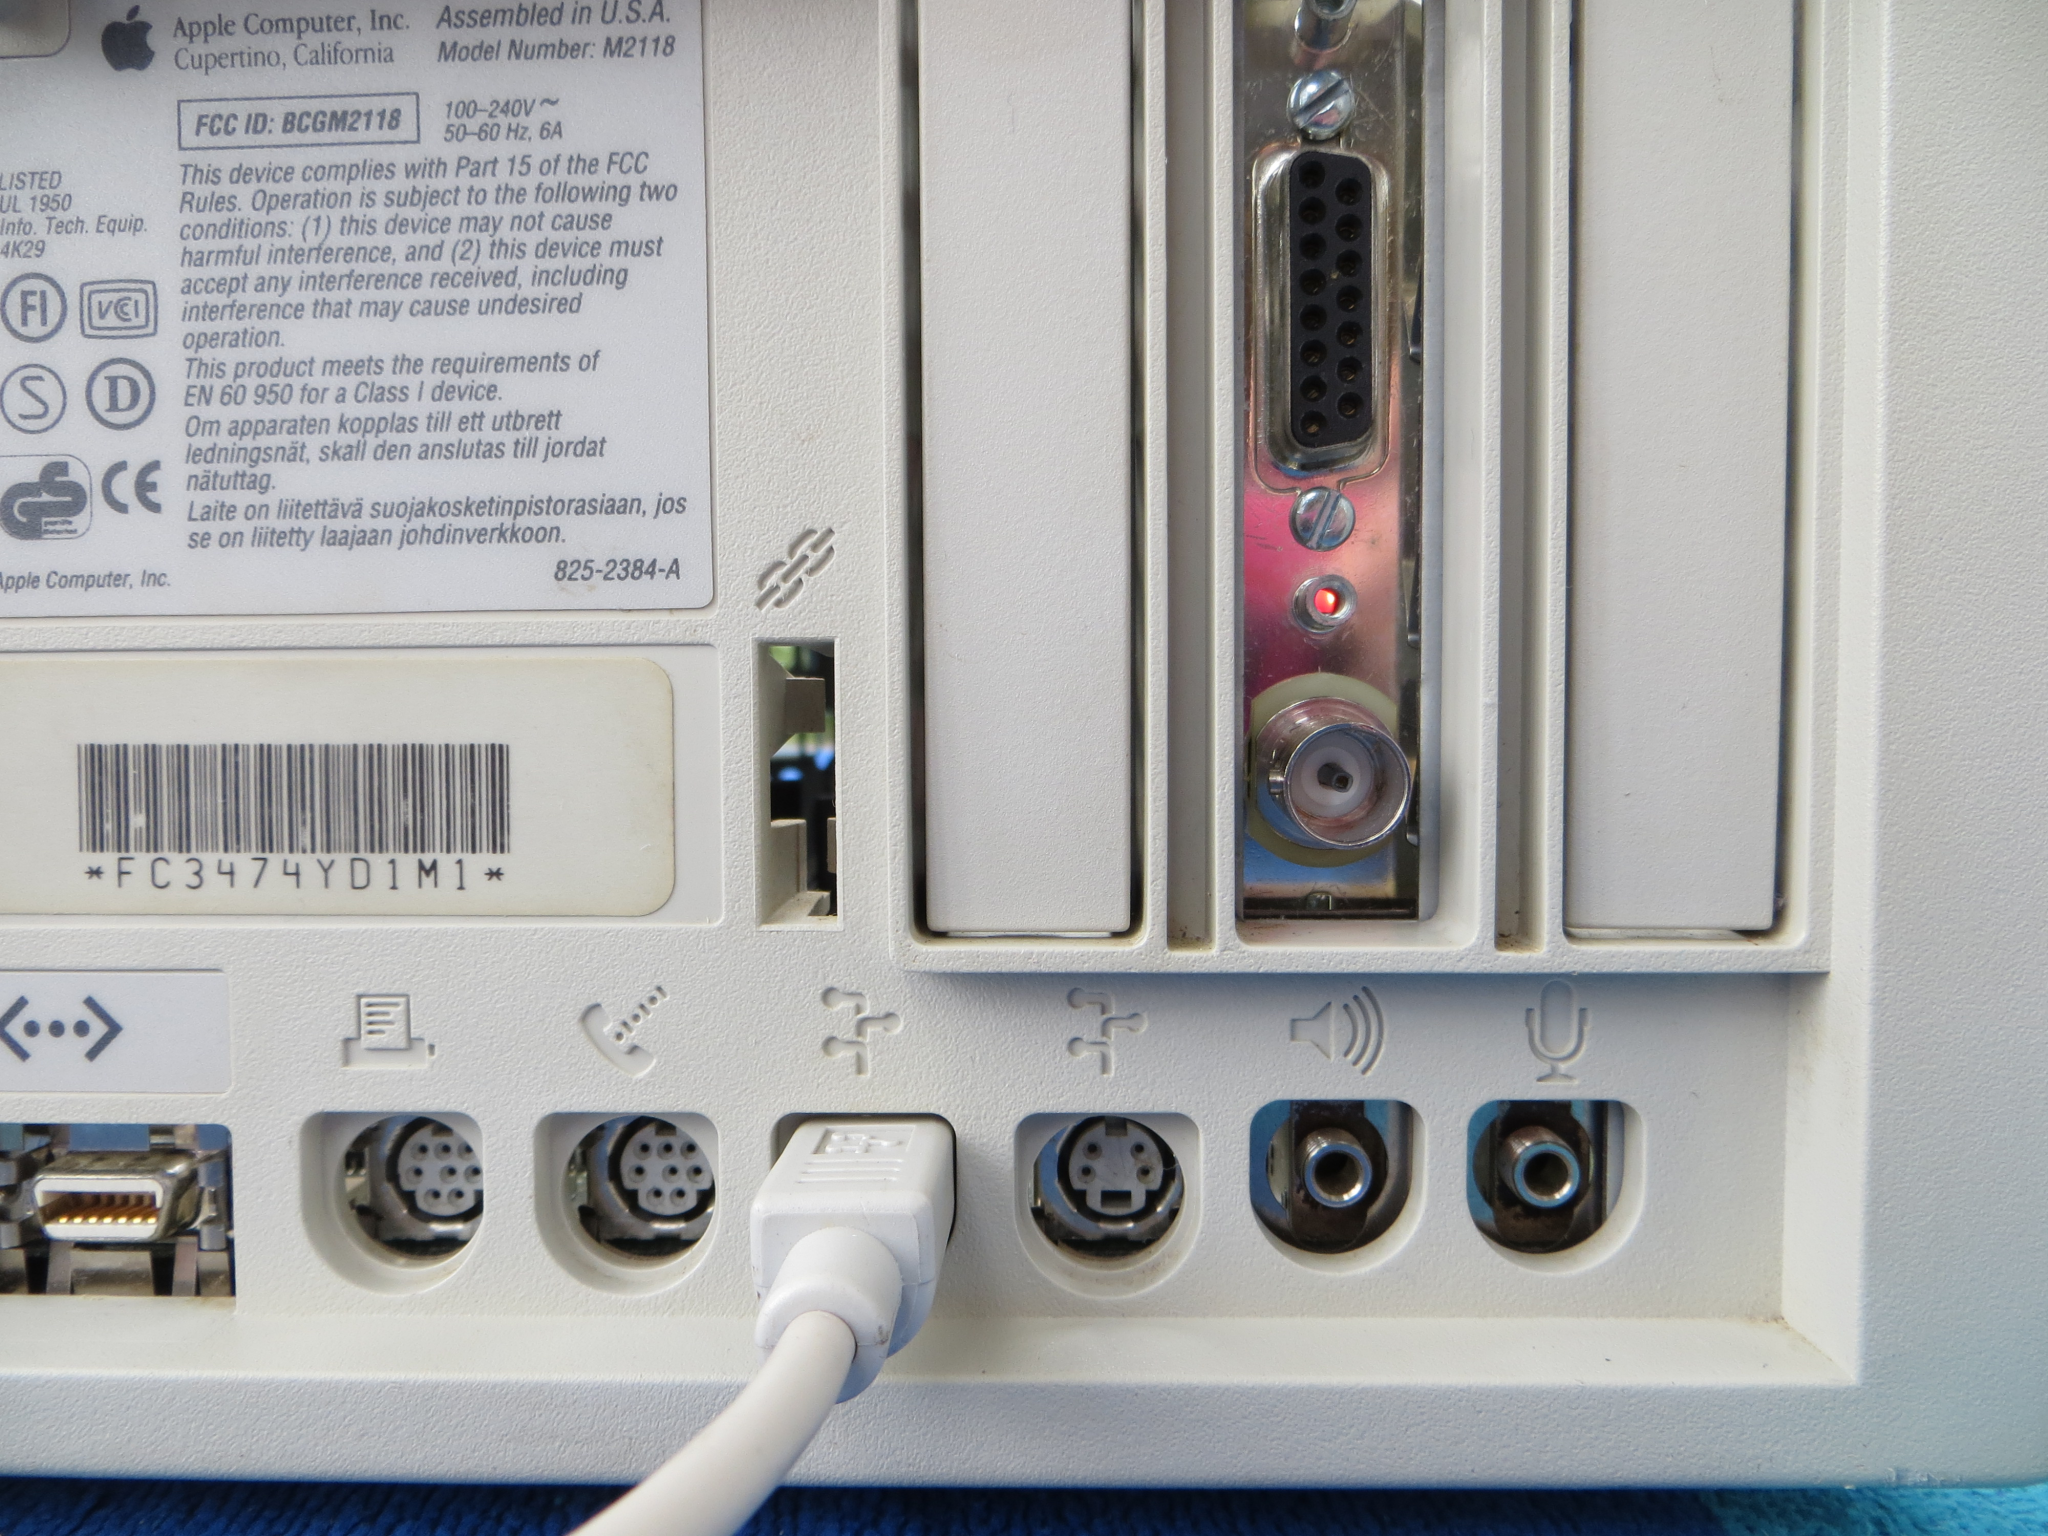
Although the card is called the EtherTalk card, which suggests that it only does AppleTalk over Ethernet, it also does TCP/IP and was specifically touted as being compatible with A/UX, although compatibility with 68040 Macs is suspect. This example refused to work on a Quadra 650, which could be an isolated instance, with AppleTalk refusing to turn on and Fetch would hang because MacTCP wouldn't work with a first trial run. Later, the same 7.1 System worked fine afterwards on a IIci with the same card and configuration. System 7.5.5 also wouldn't register the card properly with OT on the Quadra. A fresh install of 7.1 and drivers later provided no meaningful change, other than that AppleTalk would stay on, but nothing could be seen in the Chooser even though activity lights on the AUI adapter were indicating some activity. |
 Inexplicable failure |
Original software disk images for it are difficult to come by, and a very thorough dredging of the Internet resources available (in particular the useful site DiscMaster, which scrubs archive.org uploads) was unable to provide any resources that matched the original release. However a few resources were able to be dug out. No original EtherTalk Installer 1.0 disk image exists, or 1.1, but we have fragments. Version 1.1 only exists as a single extension on the BBS in a Box series, starting with Volume V, with no Installer or AppleTalk resources and is dated for January of 1988. Version 1.2 (dated for November of 1988) comes from Volume VIII: Desperately Seeking Seven, a Developer CD which dates from 1991, and does work to install on System 4.1 or System 5.0, which would be the closest thing so far to match an original release on a System 4.1 or System 5.0 equipped Macintosh II. Following this, there is EtherTalk Installer 2.0.1, which can be found via some digging around developer CDs of that era, like the "Gorillas in the Disc" developer CD dated for early 1991 with an pre-release System 7 version. The intention with that version is to install EtherTalk 2 first, then manually downgrade the EtherTalk extension if the user wants a Phase 1 compatible machine.
Despite all this, it is most certainly likely that EtherTalk 1.0 and 1.1 were actually distributed to end-users at some point, because the manual (check the Download Town section) of the EtherTalk NB card indicates EtherTalk 1.0 in an image, but also says that System 4.1 is a minimum requirement, and the Installer shows Macintosh II Installation (v4.1). Given that the copyright date is from 1987, it could have been done with articles before general public distribution, for which were instead given updated diskettes with a later revision and later System version. Also the image on the front of the EtherTalk Interface Card manual shows an Engineering Sample card. The earliest release of Network Software Installer that could be found, version 1.2, comes with System 6, as does EtherTalk Installer 2.0.1.
As for the Macintosh SE, it bears some mention here because it was released at about the same time as the Macintosh II. The Asante MacCon for the SE was one of the early Ethernet network cards for the SE, and it uses the same DP8390 Ethernet controller chip. Although the EtherTalk User's Guide (see the Download Town section) says it could be done, in technical terms, unless a custom driver is used, the EtherTalk 1.x driver isn't going to be compatible with it, as subject matter expert Glenn Anderson states (some text modified for continuity):
I disassembled the EtherTalk 1.2 and 2.0 extensions, and they both have code that looks for if the computer has the Slot Manager. If it has the Slot Manager, it opens driver ".ENET", and if it doesn't, it opens driver ".ENET0". While that means that the EtherTalk NB driver won't be opened on a Mac SE, it does mean that non-Slot Manager ethernet drivers will be used, same as on later system versions.
I had a look at what it would take to get my Racal Interlan Mac SE driver working on System 5, and it would take some changes, there are a couple of things it is doing that need System 6.0.3 or later. However I also had a look at a disassembly of the Asante MacCon SE driver, and it didn't appear to be doing anything that wouldn't work on System 5. I manually installed the Asante driver (used ResEdit to copy the DRVR resource named ".ENET0" in to the System file), and it seems to be working. I haven't gotten as far as setting up AppleShare, but if I go to the Chooser and select LaserWriter I can see the AppleTalk NBP packets on a modern Mac running tcpdump. Both EtherTalk 1.2 and 2.0 seem to work. (Private conversation, Tinker Different forums, January 2026)
Glenn also continues, with a discussion about System 6 being required for all the newer network devices:
For my drivers, I simply hadn't tested them on anything older than 6.0.4 or even 6.0.8, and after trying them out on earlier system versions, it turns out they are using newer APIs that need 6.0.3 or later. For my drivers, they are using the Revised Time Manager, which is only on 6.0.3 and later. I used that because the DP8390 specifications call for a 1500µs delay when the packet buffer overflows, and the original Time Manager only has [millisecond] precision. It wouldn't be hard to adapt that to use a 2ms delay on older systems. For my drivers that have preference files, they also try and put them in the Preferences folder on System 7, and it turns out the code that detects if the FindFolder API exists or not has some complications on systems older than 6.
The first 3Com network card for the SE was the 3C563, called the EtherLink/SE. It's distributed on a System 6 diskette with both EtherTalk Phase 2 drivers and a special EtherLink/SE 1.2 Phase 1 driver. Using an earlier System version would require modification of an existing driver or writing a custom one, which today has limited value because System 6 runs just fine on a Macintosh SE. By the way, part number 3C563 was re-used for a PCMCIA EtherLink/III 16-bit expansion card.
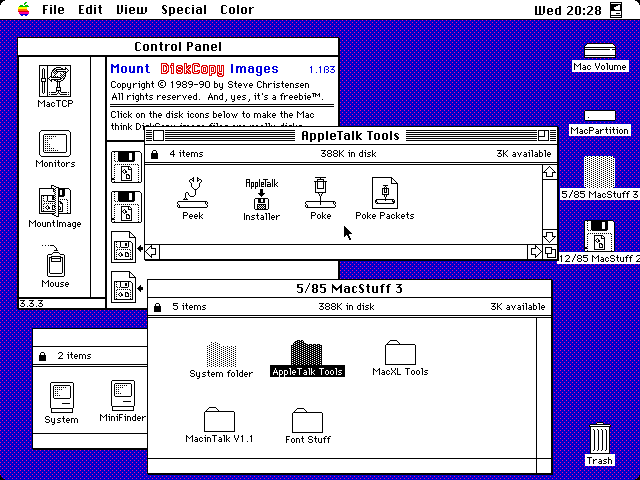
Some very early stuff related to AppleTalk can be found by digging through this file. It says it's a backup of a bunch of files from a Macintosh IIcx, but there's no supporting details of what this proposed machine was used for. In any event there's some old 1985/1986 era stuff for AppleTalk on some 400KiB MFS disks, with the earliest "formal version" being version 41 on those MacStuff disks. There's some random development related stuff on those as well, with the Namer coming up on those disks. The Namer was a program for assigning a name to other devices, usually printers, which meant it would be easier to print to a specific AppleTalk compatible printer if you knew what name it was, which made it convenient in the Chooser. ImageWriter IIs equipped with the LocalTalk card are candidates for this, as are some of the LaserWriters, because LaserWriters were expensive and networking them in such a way that everybody can use them means more value out of one machine.
 May 1985 AppleTalk stuff |
 Early AppleTalk installer |
 About box |
 AppleTalk v41 installer |
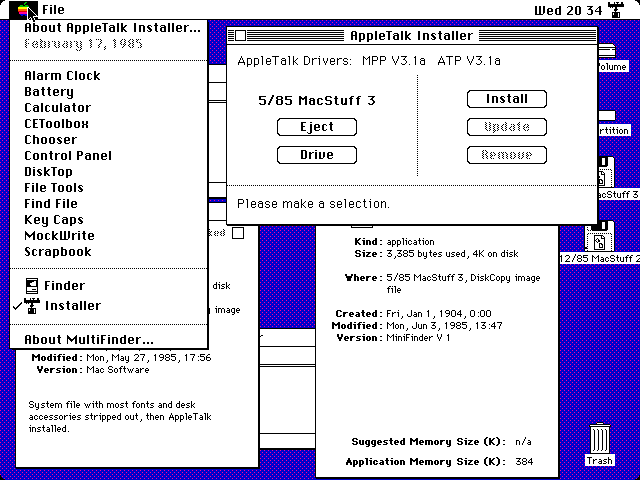
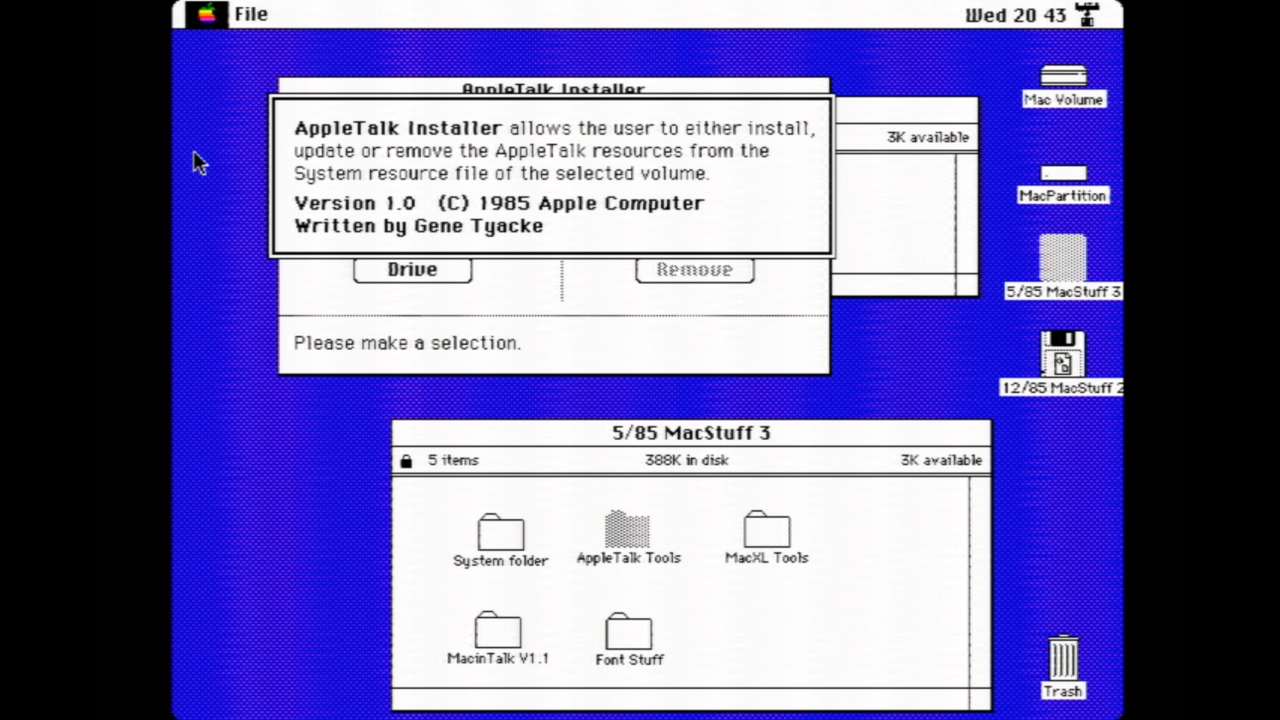
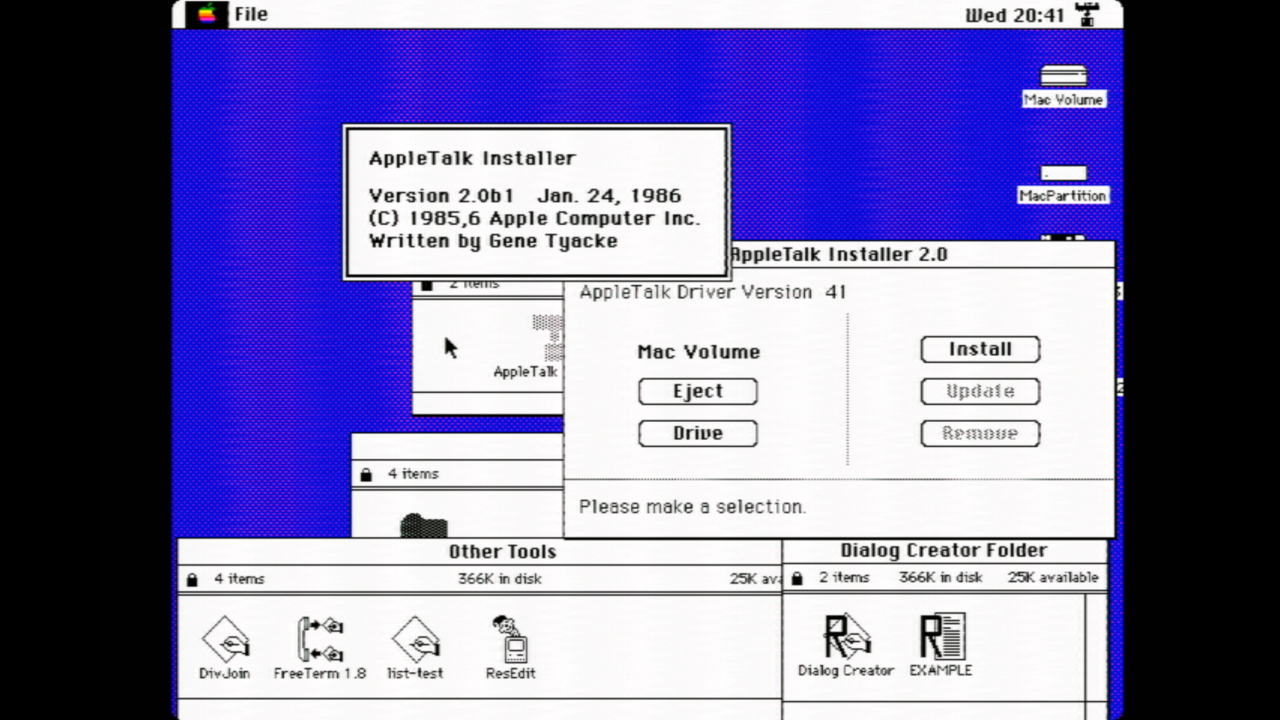
As for the AppleTalk stuff, the first one is really early, having no formal version number, only MPP and ATP version numbers (MPP stands for Macintosh Protocol Package, and ATP stands for AppleTalk Transaction Protocol; these are low level drivers and handlers) and is dated for February 1985. The next one is version 2.0b1 of the installer program which installs or removes AppleTalk version 41 to the System file. The Peek program is included for packet interception and analysis, and the whole thing is obviously development related. The Installer was required because the 512K does not have AppleTalk basic code in ROM and some extra resources are packed into the System file. In that era the additional AppleTalk resources was copied over into the System file, by the time of System 6 it was present in the System file as well as a normal system extension which adds on some additional features, such as being capable of running entirely in RAM. Searching for information about early AppleTalk and EtherTalk history, development and challenges faced is somewhat difficult, and probably the best source, if it counts as a source at all, is what limited technical notes we have combined with old Usenet postings.
Below is a chart that outlays some of the early AppleTalk version distributions.
| Software Package | AppleTalk version | EtherTalk version |
| AppleShare WS and FS 1.1 | See comments below; 30 Mar 1987 | Not available |
| AppleShare WS and FS 2.0.1 | 52, 12 Jul 1988 | 1.2 Phase 1. 3 Nov 1988 |
| AppleShare File Server 3 | Not included | Not included |
| Apple Internet Router 2 | 53, 29 Jun 1989 | Not included |
| Apple Internet Router 3 | 58.0, 18 Nov 1992 | 2.5, 18 Nov 1992 |
| EtherTalk Installer 1.2 | Not installed | 1.2 Phase 1. 3 Nov 1988 |
| EtherTalk Installer 2.0.1 | 53, 29 Jun 1989 | 2.0, 29 Jun 1989 |
| EtherTalk Installer 7.0, 2.5.1 | 56, 31 May 1991 | 2.2.2, 31 May 1991 |
| Network Software Installer version 1.2.1 | 57.0.4, 10 Jun 1992 | 2.3.1, 10 Jun 1992 |
| Network Software Installer version 1.3 | 58.0, 18 Nov 1992 | 2.5, 18 Nov 1992 |
| Network Software Installer version 1.4 | 58.1, 23 Aug 1993 | 2.5.4, 23 Aug 1993 |
| Network Software Installer version 1.4.2 | 58.1.2, 24 Jan 1994 | 2.5.6, 24 Jan 1994 |
| Network Software Installer version 1.4.3 | 58.1.2, 22 Feb 1994 | 2.5.6, 22 Feb 1994 |
| Network Software Installer version 1.4.5 | 58.1.4, 25 May 1994 | 2.5.6, 25 May 1994 |
| Network Software Installer version 1.5, 1.5.1 | 58.1.5 (Read-Me file) | 2.5.7, 21 Apr 1995 |
| System 7.5.3 with Classic Networking | 58.1.5 (Network control panel) | 2.5.7 |
InterPoll showed AppleShare WS 1.1 having an AppleTalk version number of 49 on a SE/30 using 6.0.8, which corresponds also to the AppleTalk version in ROM. It's not clear whether the ROM driver is being used or not. The AppleTalk file installed by ASFS 1.1 in the System Folder doesn't have a version number. According to Apple Document NW13, it should be version 50. AppleShare File Server 1.1 does not respond to System Information Protocol queries, even with Responder installed, but it still shows up in InterPoll. Other System versions are listed in the NW13 Document. From System 7.1 forward with Open Transport, the user can find the AppleTalk version in the AppleTalk control panel, using Get Info from the File menu. For example, Mac OS 8.1 has AppleTalk driver version 60.3, and Mac OS 9.2.2 has version 61.
KIP, or Kinetics Internet Protocol got developed into MacIP and some very early routers like the Gatorbox have accommodations for KIP. Although it cannot be confirmed at the moment, there is some likelihood that Kinetics also worked on EtherTalk, because references to Kinetics/KIP occur from here and there in EtherTalk technical documentation.
Developer stuff for AppleTalk still exists in isolated nuggets, some of which are really old. An example would be the AppleTalk Peek program, and the related AppleTalk Poke utility. Both are meant for developers for examining and working with AppleTalk packets and are available from the Macintosh Garden directly, or by diving deep into developer CDs, which is a lot of work and the easiest way of fooling around with AppleTalk packets directly is to use a Linux system with Netatalk, WireShark and a few other utilities, which can benefit from a lot of more modern implementations.
About A/UX
Apple's implementation of the AT&T System V UNIX system is interesting mostly from a historical perspective. Usability varies from version to version.
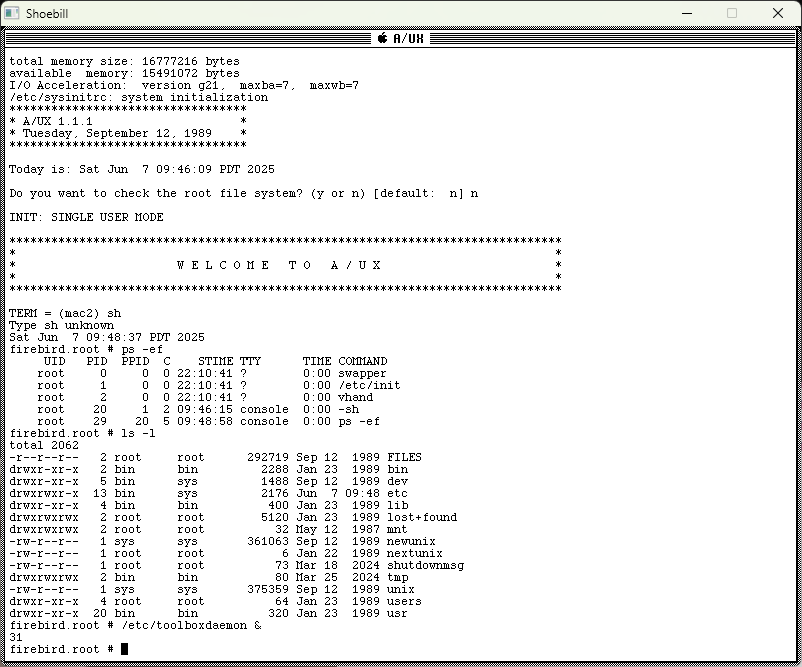
A/UX 1.1.1
Although there are earlier versions of A/UX, from 1.0 back to 0.7, realistically version 1.1.1 is the last of the version 1 chain. It starts up in a System 6.0.4 environment which is just like any other version of System 6. To enter A/UX, the user just starts up the sash program included. This switches the whole machine around to run under A/UX mode, which is a barren landscape for sure. If you are used to modern bash features and auto-completion, well that's not a thing with old shells like these. Aside from firing up the Macintosh Toolbox (type # /etc/toolboxdaemon &), you can start up term and make limited use of the hfx program to transfer files from the HFS partition(s) to the UNIX / partition. Apple does describe a way to use HFX (Hierachial Filesystem Transfer or something) to transfer desk accessories to the A/UX side System file with Font/DA Mover -- otherwise, there is not much else to do if you are not UNIX-inclined.
Installing A/UX 1.1.1 is a tricky affair involving using cpio to copy all the UNIX files as the AUX Penelope describes. It gets better because (this also applies to the later A/UX versions) the weird way that SCSI devices are mapped: for instance, c4d0s0 is SCSI ID 4 and c1d0s0 is SCSI ID 1 -- and there is no df -h or fdisk -l to help the user figure out what devices are what.
Even after all that, its usability is limited and, like the other versions of A/UX, have issues with stability and can corrupt itself. At the present moment the only emulator that can work with it is Shoebill, which emulates it well enough. (Click inside the window to capture the cursor, right-click to release the cursor. Type # powerdown to shutdown the A/UX machine.) Shoebill cannot run any version of Mac OS System Software and bootstraps into A/UX mode directly -- and is probably the best way to experience A/UX 1.1.1 because of how little there is to do with it and it's basically not worth installing on a real machine. Also keep a backup of the A/UX installation volume because it can get corrupted by Shoebill or A/UX itself. Attempting to use A/UX 1.1.1 on a two real machines failed. More images are available at Penelope's website, which aren't very many because there's not much to do with A/UX 1.x.
 Boot volume (IIci) |
 A/UX in use |
 hfx with control panels |
 term program demo |
A/UX 2.0 and 2.0.1
These versions came installed with System 6.0.5 and 6.0.7 respectively, and they are a bit more useful than A/UX 1.1.1 is while inside A/UX. Like A/UX 1.1.1, it starts up normally into System 6, and to enter A/UX mode, one just starts up the A/UX Startup program. MultiFinder is permanently enabled which can be a problem for certain really old programs and games that do not like MultiFinder. However it is kind of a unique experience as far as an operating system goes and is probably something every diehard Macintosh enthusiast should experience at least once. Networking inside A/UX mode is possible: MacTCP cannot be used and instead all the TCP setup is done in the CommandShell program. Performance on a fast 68030 is acceptable, roughly comparable to System 7.1 with extensions. In particular loading folders with lots of files in them takes a long time.
To switch from LocalTalk to EtherTalk for AFP file server access, first shutdown AppleTalk with the command /etc/appletalk -d. Next, you may either edit the configuration file /etc/appletalkrc with a command line text editor, or go to /bin/mac/ and open the TextEditor program. Change the line that starts with interface = localtalk0 to interface = ethertalk0. Save changes, then bring up AppleTalk again with /etc/appletalk -u to restart the service. A reboot may be required: recall that newconfig may need to be ran to compile a new kernel, which allows it to recognize an Ethernet card at ae0 or ao0 (depending on the card). To switch back to LocalTalk, read page 6-6 of the A/UX Network System Administration Guide (page 109 if viewed from the PDF format).
Shoebill also works fine enough with A/UX 2.0.0/2.0.1 for casual onlooking. Installation of A/UX 2.0 on a real machine is a little tricky because all the installation floppy disks are 800KiB and the manual lays out the specific way that it's supposed to be installed. Recommendation -- read the manual. bitsavers.org has a nice archive of A/UX 1.0, 2.0 and 3.0 documentation, pretty much a complete archive. Do note that A/UX 2.0.1 does not have nor uses the Kernel Archive disk. In addition the Floppy Launch and Floppy Root disks are different for 2.0.0 versus 2.0.1. Since these are usually installed via a CD, which brings up its own complications relating to the CD-ROM driver compatibility, it would probably be better to use something like a BlueSCSI device which can take disk images and present them as real disks/discs/tape drives -- and can maintain a backup of the drive in case it corrupts itself, which in the author's experience, was a common occurrence. This could be related to A/UX 2.0.1 itself, of which another user also reported stability problems with 2.0.1, or that it wants to be on the internal hard drive, or other quirks not generally known. The host IIci has 64MiB of memory, which should be manageable by A/UX 2.0, which was generally a 32-bit operating system, however A/UX handles memory differently than normal Mac OS distributions did. Try using A/UX 2.0.0 unless you are using it on a Macintosh IIsi.
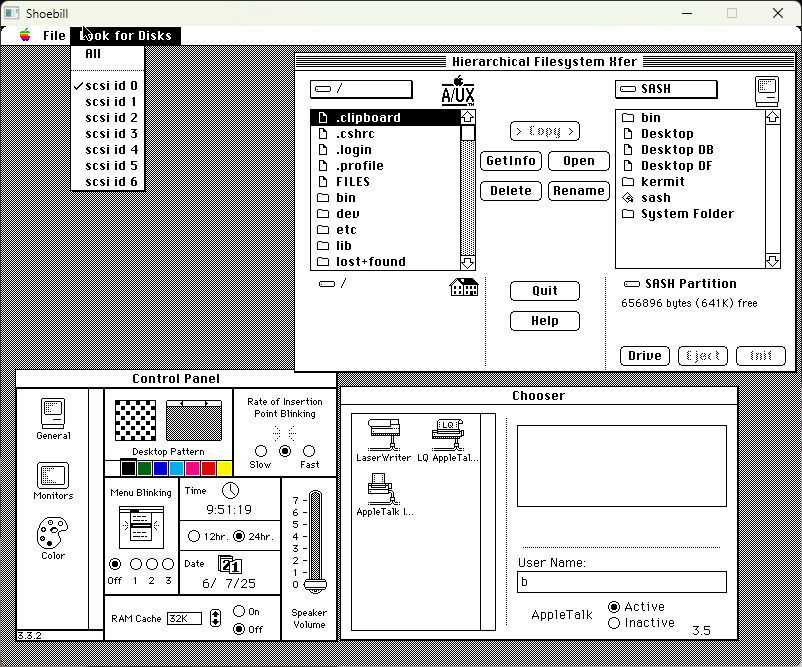
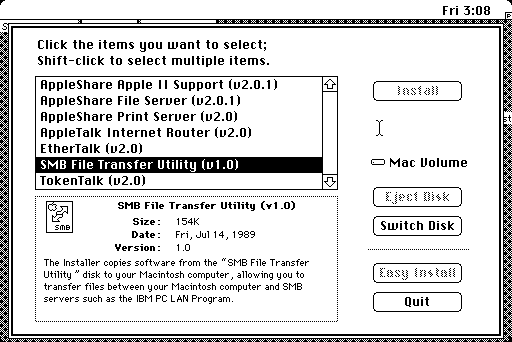
One disk that may or may not have came with the A/UX 2.0 distribution was a disk called the Network Products Installer v1.1 disk. It offers to install other services, by prompting for other disks not included with it, such as AppleShare Server elements, EtherTalk and TokenTalk drivers, and a curious program called the SMB File Transfer Utility. No amount of Internet dredging was able to dig up a copy of this program: all information that exists, which is very little, indicates that it was designed for IBM mainframes that used the NETBEUI protocol (according to a January 1990 BYTE Magazine article) over Token Ring. Finding the Apple File Exchange program is possible (on Macintosh Garden, for the Apple Technical Information Source CDs, NandC_IS_Jul_1990.iso) but not the counterpart. There is no indication that it would work over Ethernet, and the only image of it is a really grainy scan (only one page here for simplicity) from a "IBM / Apple Enterprise Networking Guide for SNA Products" PDF document. Very few Token Ring cards survive today, and although the drivers are generally OK to find, everything else associated with them is a different story.
SNA stands for System Network Architecture, designed by IBM for linking computers and programs together, which doesn't really have an OSI system model as it's basically all of the OSI layers in a single protocol. Apple made a special card called the Apple Coax/Twinax card to connect to IBM mainframes (such as the popular System/370 and System/390) over coaxial cable with 3270 terminal emulation included as well. Connection via TokenRing or using the Serial NB card was also possible. SNA•ps, commonly corrupted or truncated because of character issues into SNAps or something similar with the bullet missing, stands for "System Network Architecture products and services".
Still, if A/UX 2.0 works, it's a neat piece of history, and some lament the bloat that came with A/UX 3.0 which is a noticeable drag on a 68030. A/UX 3.0 is roughly comparable to a decked out 7.5.5 or 7.6.1 operating system in terms of responsiveness and performance, or even Mac OS 8.1 in worse cases and is more or less better used on a 68040. An image gallery of random content follows below which required a hardware capture device because screenshots were not working; all of which should be A/UX 2.0.1, which was later scrapped for unreliability and replaced with A/UX 2.0.0, unless otherwise noted. Because the scalar upscales any analog input to 1920x1080px, the aspect ratio is also skewed. Later adjustments made captures with more accurate aspect ratios possible. |
 Network Products Installer disk |
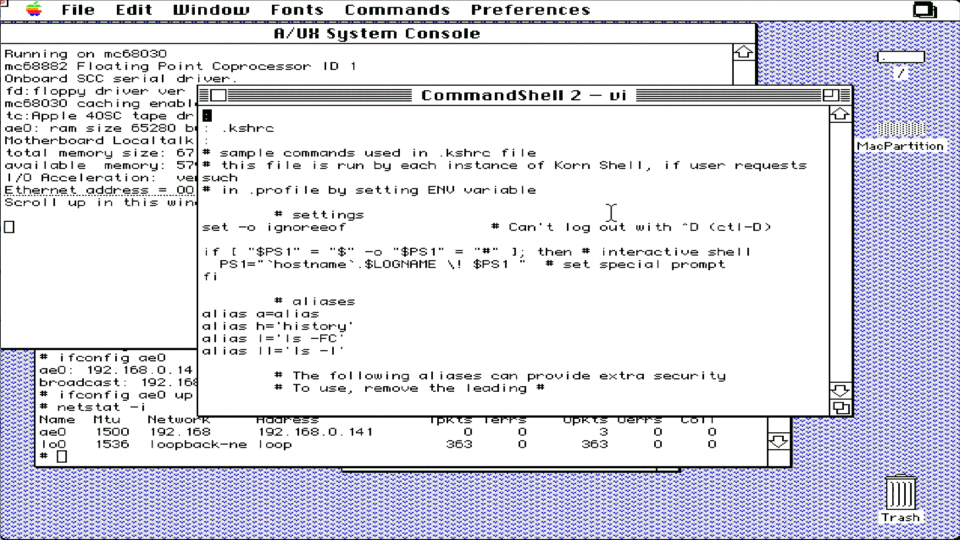 vi text editor in use |
 A/UX System Folder |
 SE/30 server mounted |
 MacTCP fixed configuration (A/UX 2.0.0) |
 MacTCP control panel |
 CommandShell shortcut helpers |
 Various internal directories |
 Note A/UX 2.0.1 issue with zones (no zones are set up) |
 AFP connections to 10.2.7 Server and Netatalk 2.1.6 (A/UX 2.0.0) |
 MacPartition contents (A/UX 2.0.0) |
 FTP via the command line (OS X 10.2.7 Server) |
A/UX 3.0 to 3.1.1
The final release of A/UX and probably the most capable owing to System 7 integration, this version works best on 68040 platforms. It works just like the others do in Shoebill but a better idea is to use a special version of QEMU which can be found on the emaculation.com forums, courtesy of Cat_7. It supports networking, which Shoebill does not and can run System 7 fine without switching into A/UX immediately upon start up. Remove the alias in the Startup Items folder to stop it from doing so.
One user, basalgangster, wrote a nice blog post about some history of A/UX including his own personal use of it. Some of his insight into A/UX 3.0 is mildly interesting too. Otherwise, there's not really much to talk about A/UX 3.0: it just runs like System 7 for GUI stuff and then works somewhat like a UNIX system might have worked like in the 1990s when the CommandShell program is ran. It functions like the Terminal GUI program functions like on OS X or macOS.
Remarks about QEMU are generally positive. It can be a fickle emulator to mess with because if there is an error in the qemu.bat file then it opens up and then immediately exits with no mention of the error or time to see what the issue is. In this case the user may be forced to run (assuming a Windows host) the Command Shell as an administrator, then collapse the whole qemu.bat file into a single command line entry and see what the error is. Shoebill is ... alright, it does work, but it's still a very early beta. There's not much else to say about A/UX 3.0, so here's an example line to start up A/UX with Shoebill: | 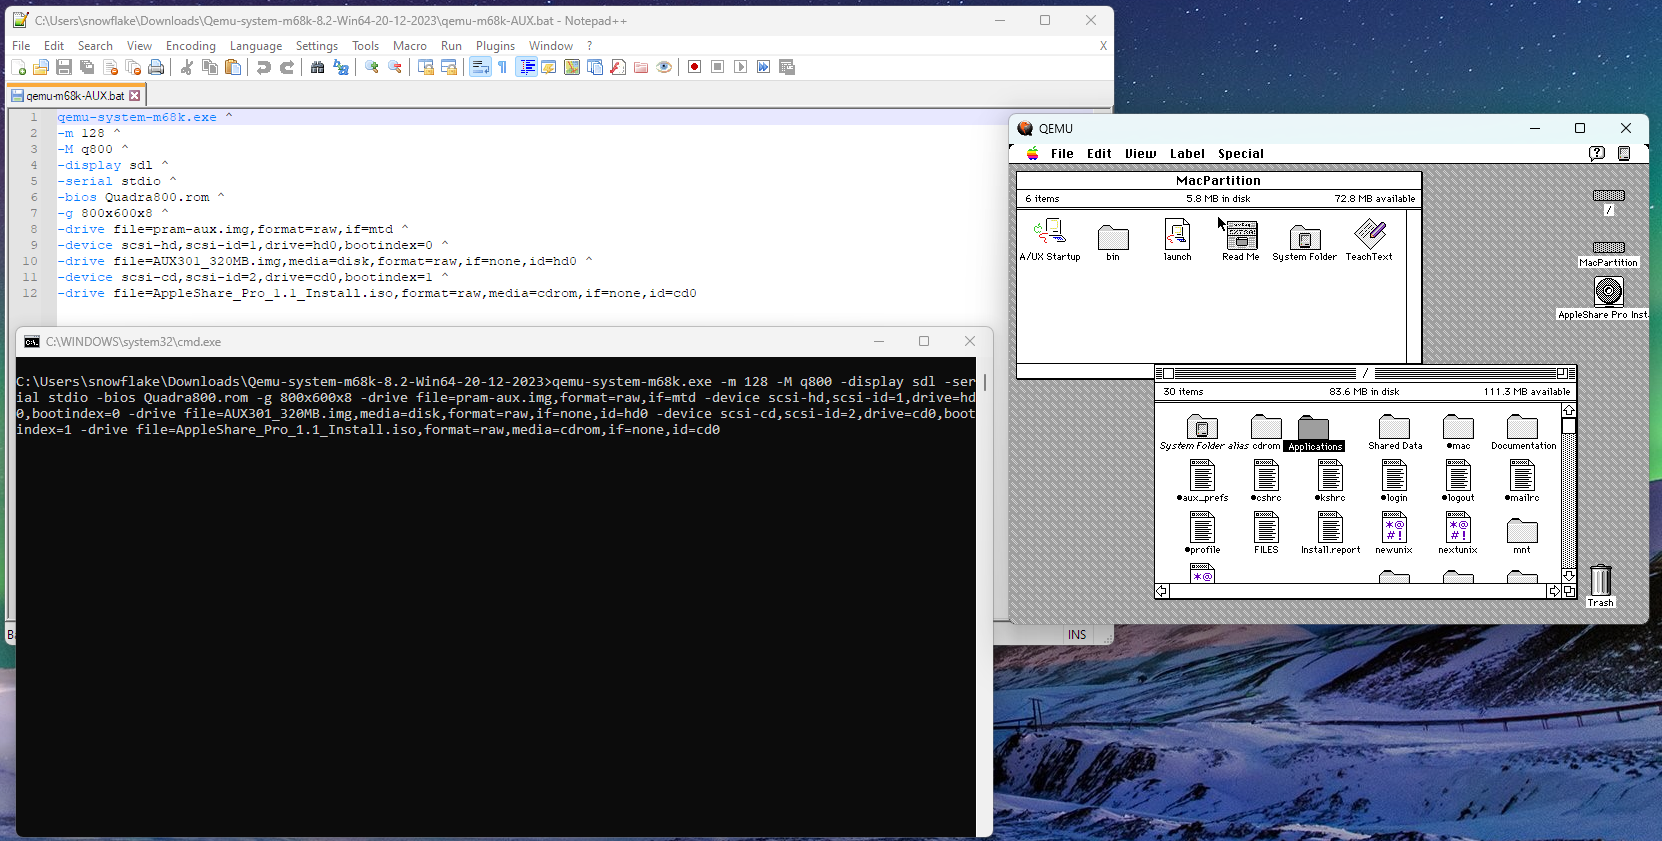 A/UX 3.0 (Modified QEMU emulator) |
Since the modified build of QEMU supports networking and other features, it's probably the way to go for experimenting with A/UX 3.0. Like A/UX 2.0 (and 1.1.1) all the TCP set up is done in the command line. DHCP and Open Transport are not supported on any version of A/UX. Experience with vi may be desirable: fortunately for those allergic to vi, there is a bitsavers.org copy of the A/UX Text Editing Tools book from Apple which more plainly describes how to use vi, ex, sed, and ed. TextEditor was introduced in A/UX 2.0 but is easier to find in A/UX 3.0: and is easier to use for the common man. | 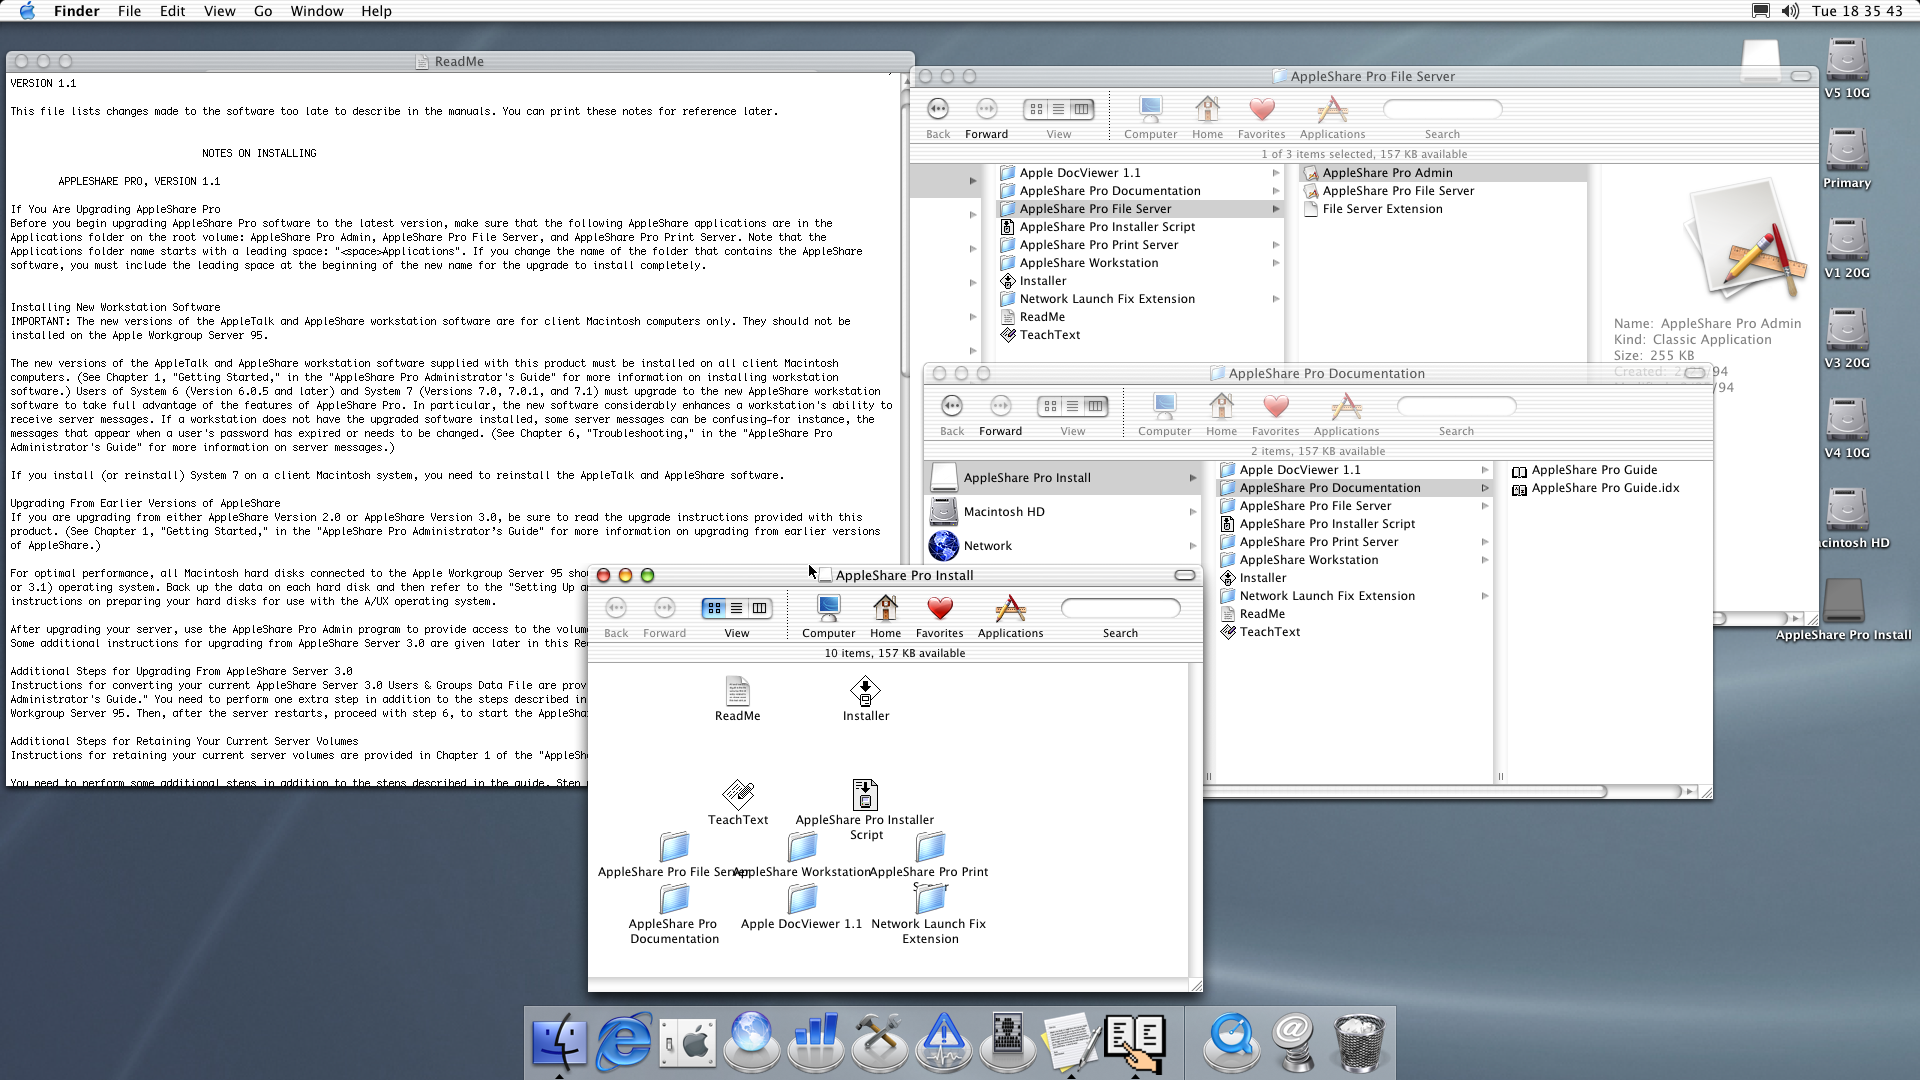 Contents of AppleShare Pro 1.1 |
AppleShare Pro 1.1 was available back in the day, ostensibly designed for the Apple Workgroup Server 95 machine and A/UX 3.1. Based on the documentation images, it appears to look and function for the most part like AppleShare Server 3 or 4. It also includes AppleShare Workstation 3.5. The Tuning Server Performance docbook, which requires two custom fonts, has a demonstration of the comparison between a Quadra 950 and a Workgroup Server 95, in which case AppleShare Pro 1.1 has roughly four times the performance of the Quadra 950 despite the specs being rather close. Of course the WGS95 comes with a 040 PDS card that provides additional Level 2 cache (on board plus extendable with slots for more cache) and a SCSI DMA feature with two channels, for a total of four separate SCSI busses. But aside from that, it does highlight the relative inefficiency of Mac OS file sharing, even if it is convenient, easy to use and the competitive offerings at the time (like Novell's NetWare) were third-party products, required some technical skill (UNIX systems) or nonexistent. Also, A/UX 3 supported multi-homing and IP forwarding, which is kind of cool.
For your convenience, the Administrator's Guide and the Tuning Server Performance (sometimes mistaken as Server Tuning Guide) are provided here. Font misalignment matches the original.
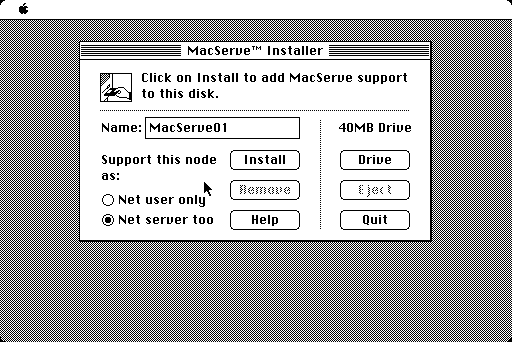
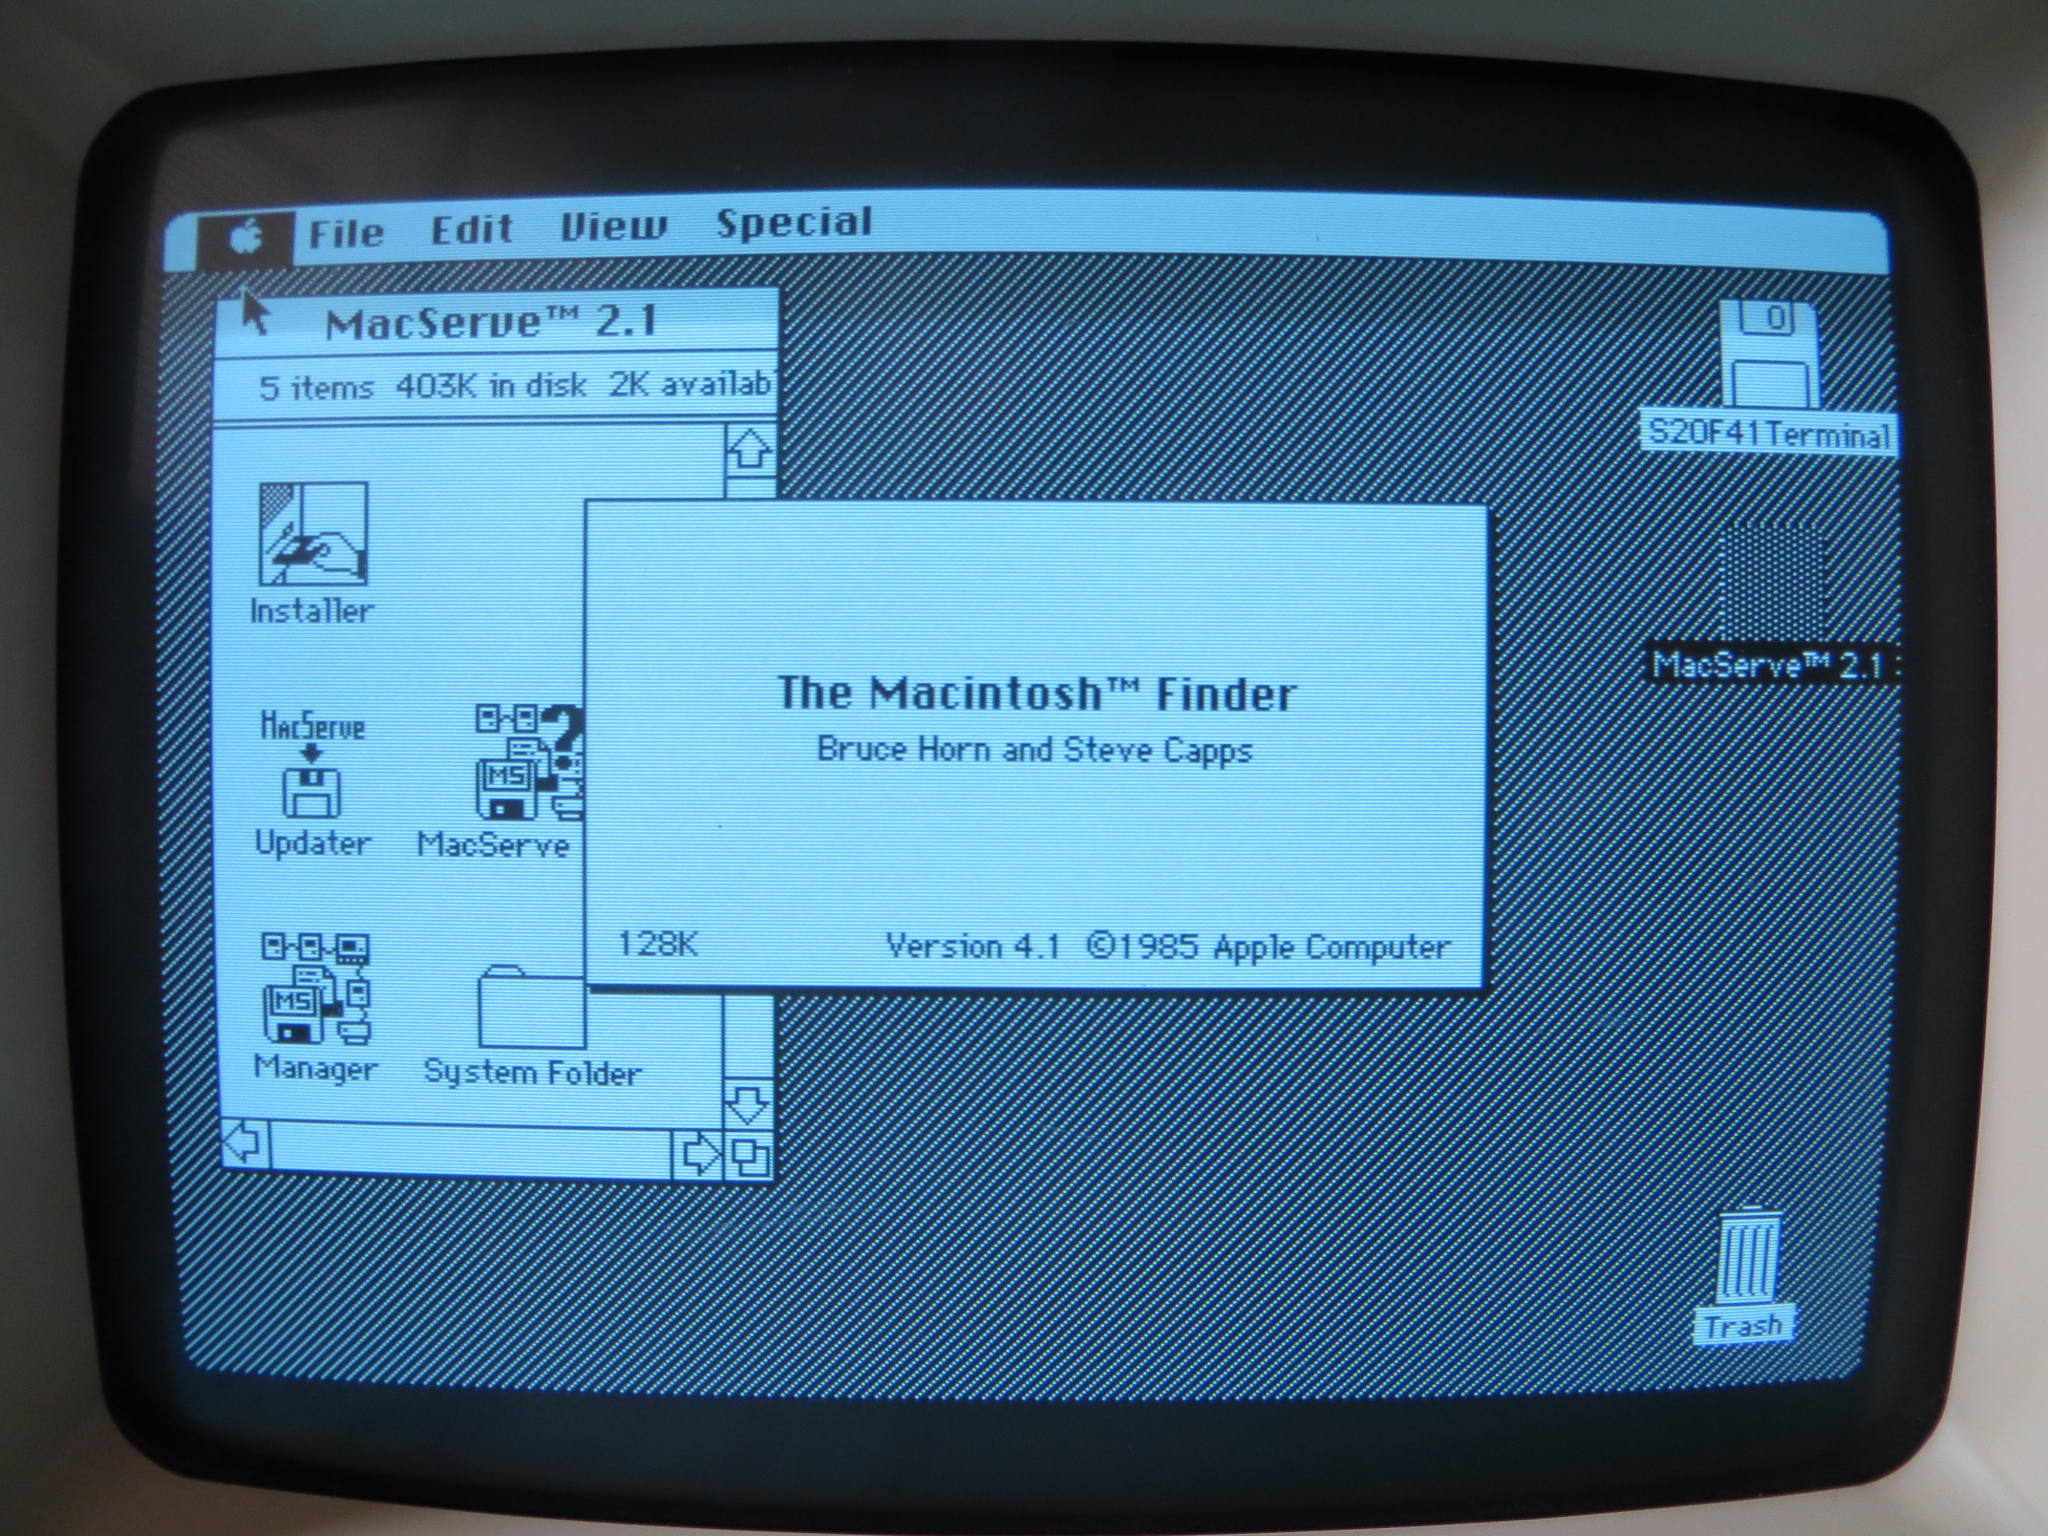
MacServe
An early AppleTalk file "sharing" service published by Infosphere around 1986, this product deserves a close look for a minute. There isn't much that is documented about it.
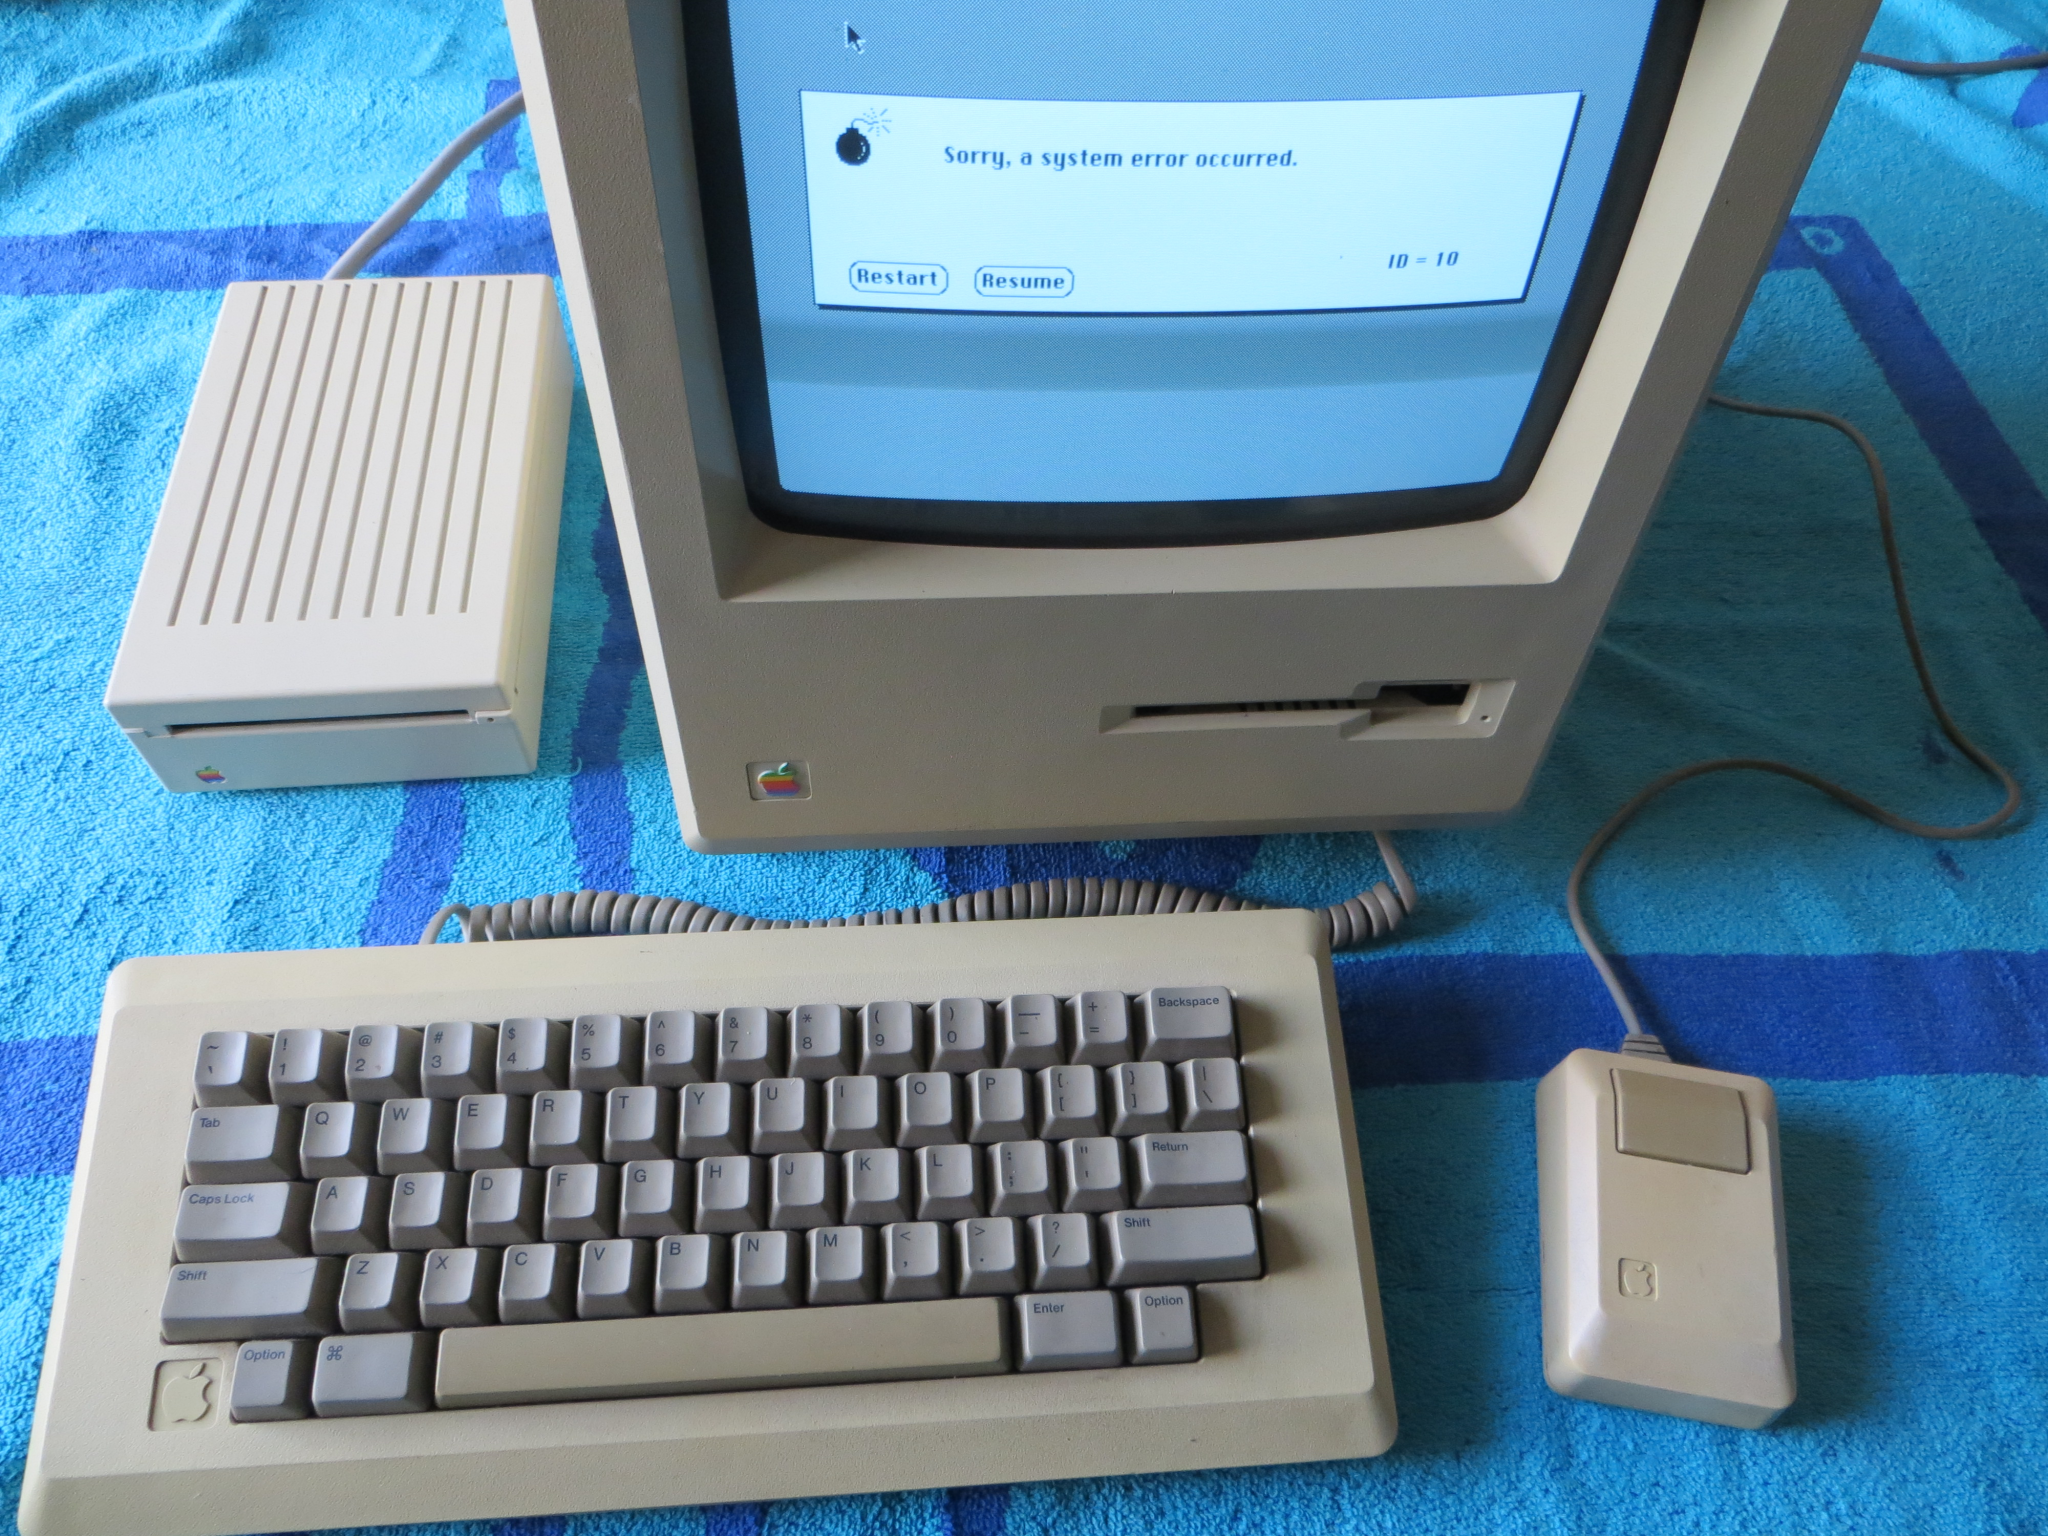
As a disk server, it does not work like a file server. A disk server shares a whole disk, all or nothing, and has no ability to manage file access rights, permissions, share specific folders only, manage user rights and so on. Virtual disks are created as files, much like how virtual machines create virtual disks to host operating systems and such. It specifies a 512K or higher, with System 2.0/Finder 4.1 at minimum. It requires a hard drive for server storage, which can be a HD20. Forcing an installation to a floppy didn't work, saying it can't load from a floppy. Hardware is the same as a normal LocalTalk or PhoneNET installation. Installing AppleTalk software, such as AppleTalk v58.0, would be a bad idea: from NSI 1.4.5, the last version for System 6, back to NSI 1.3, it would cause an address error System bomb on startup, which reduces the value of this software.
As an evolution of the late XL/Serve software, it still has marks of being related to the same. Installing onto existing System versions can be dicey: considering the date of the software, which stuff around this era liked to work with fixed memory addresses, write resources directly to the System file, direct hardware access and so on. Therefore you should install on a fresh umodified version of the System software: and as part of this, in System 6, unexpected System bombs and restricted Control Panel access should be expected. For example, Easy Access won't show up, only General, Color, Keyboard, Monitors, Sound and Startup Device show up, even if others are installed like Key Layout, FlashIt or After Dark. In addition, MultiFinder probably won't work.
Versions available as of right now on Macintosh Garden are a v2.0 promotional version, v2.1, v2.3, and v2.4 in Norwegian. Only v2.1 was demoed for this section, hopefully v2.4 is better but Scandinavian languages are hard to learn. What was involved in each of those version changes is anybody's guess because there no ReadMe of the changes. Because they're all 400KiB MFS disks, being designed for the 512K era, they are a little delicate in later operating systems. The files do have copy protection on them, but that shouldn't pose a problem.
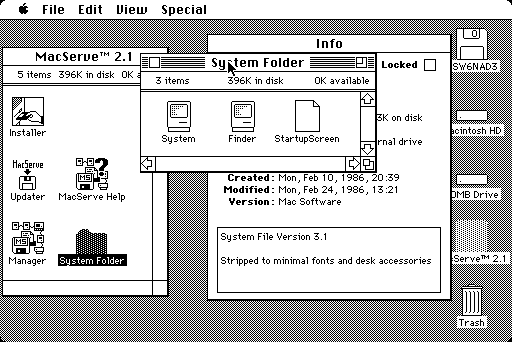 Disk contents (all versions similar) |
 Installing the server (SE/30) |
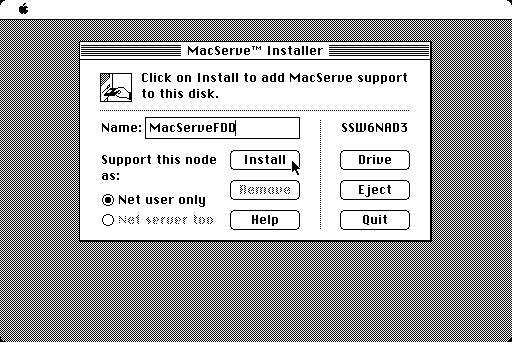 Client installation to a floppy |
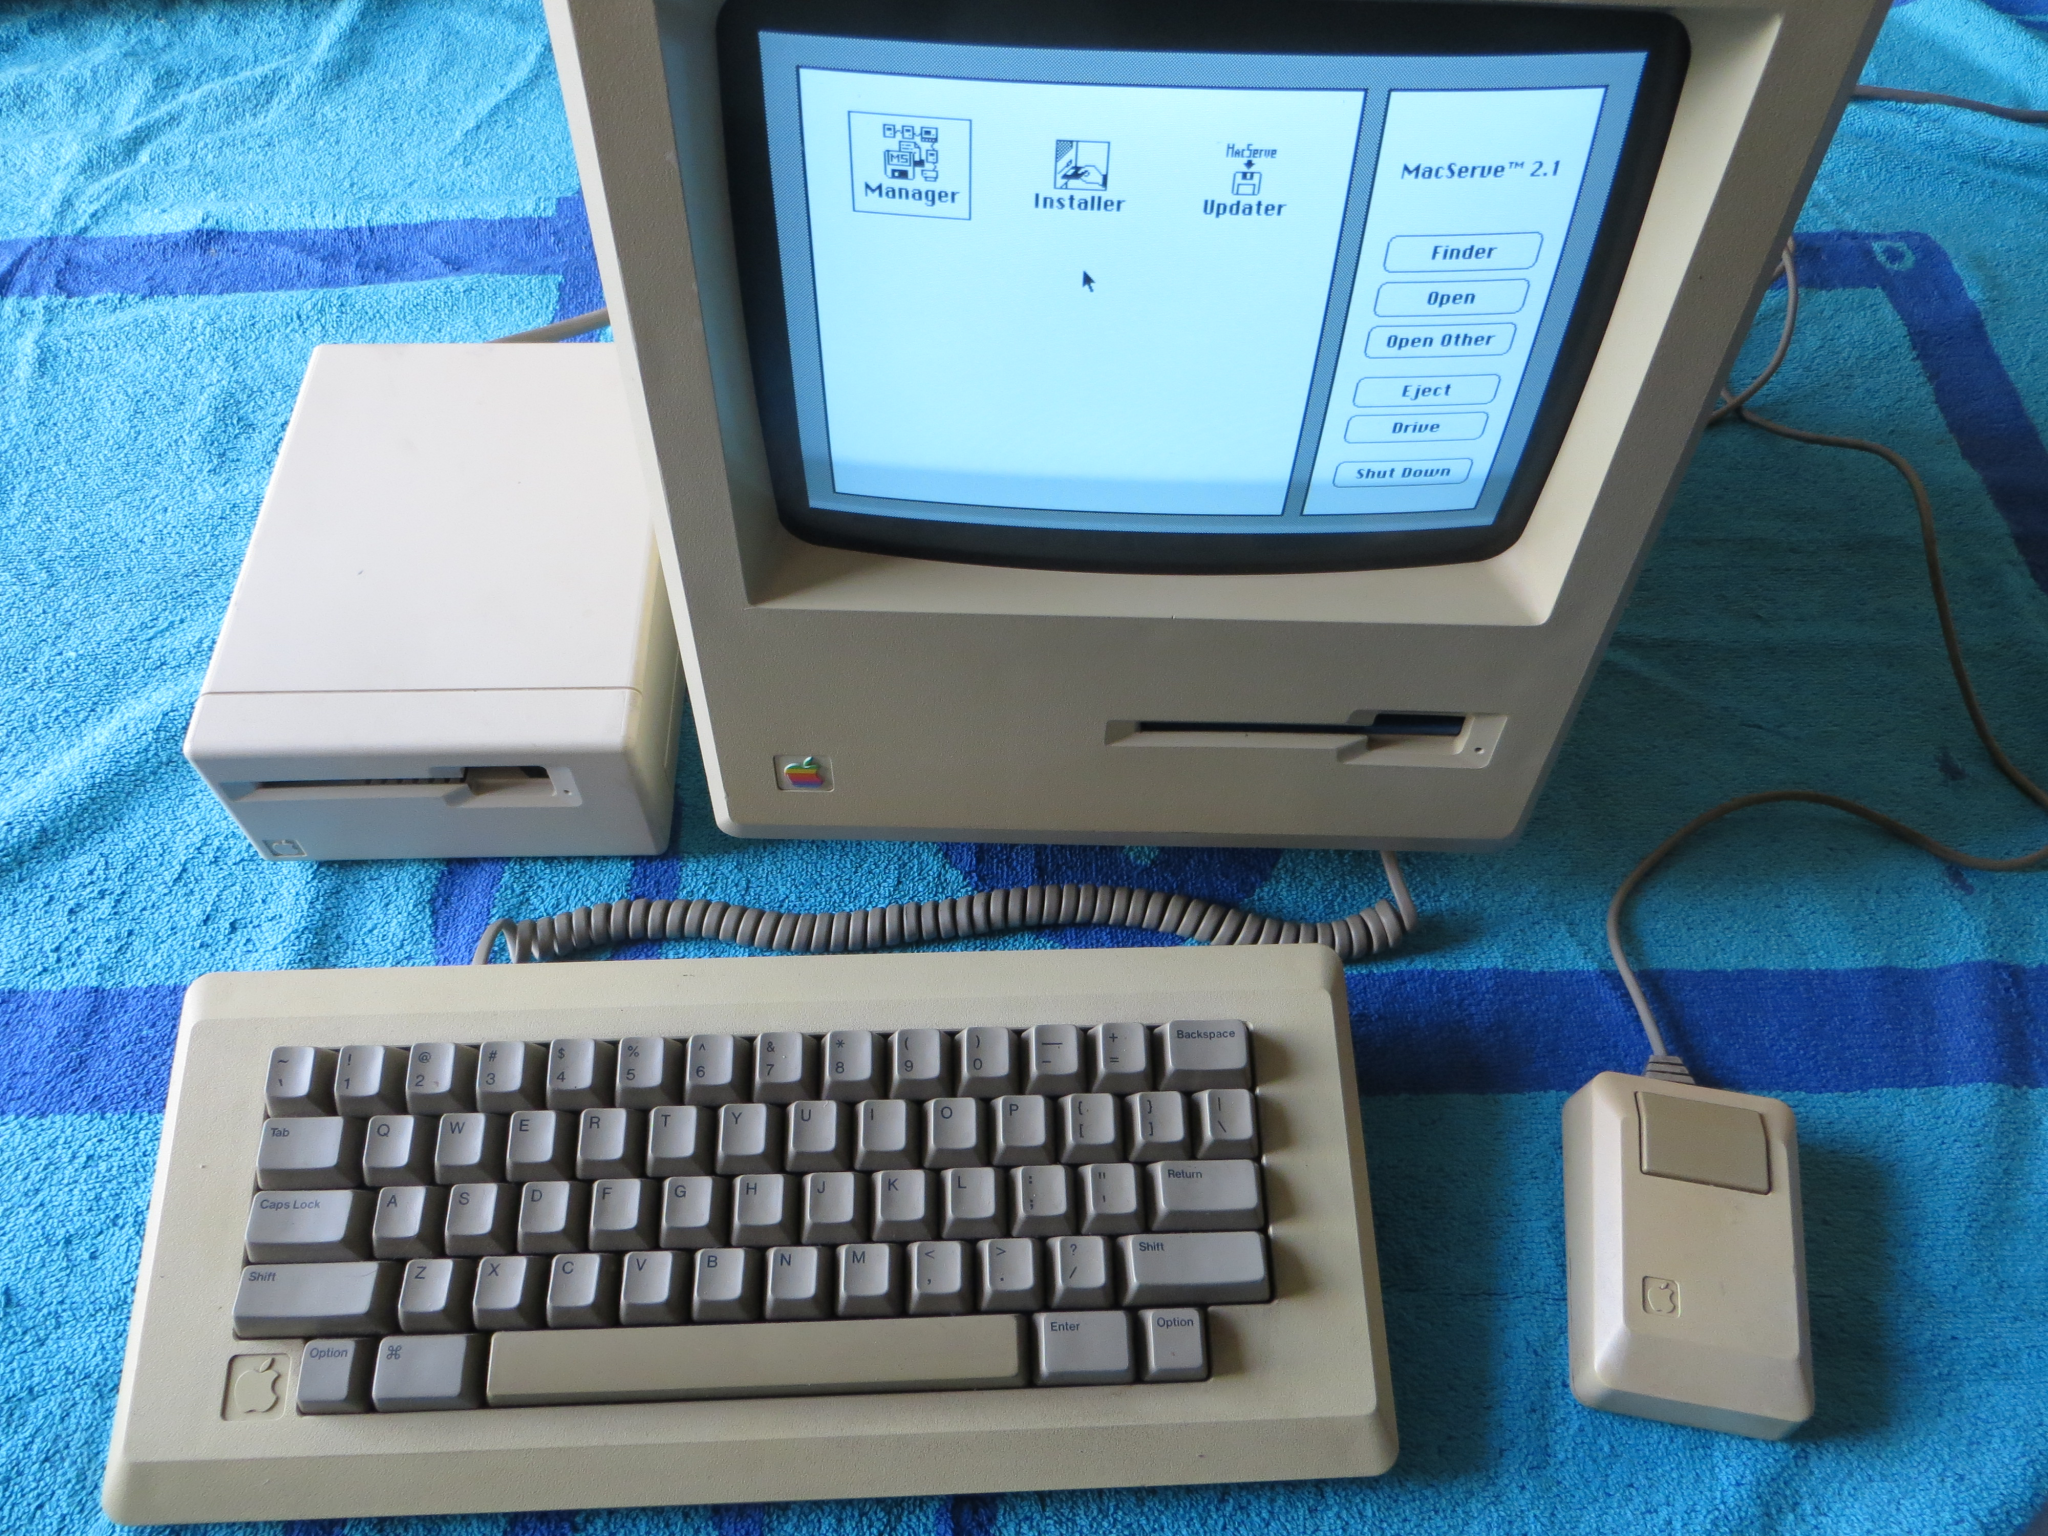
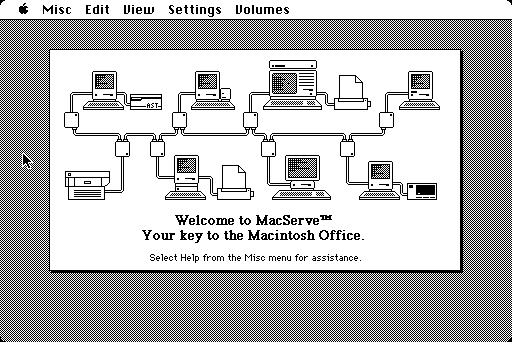 Manager program splash screen |
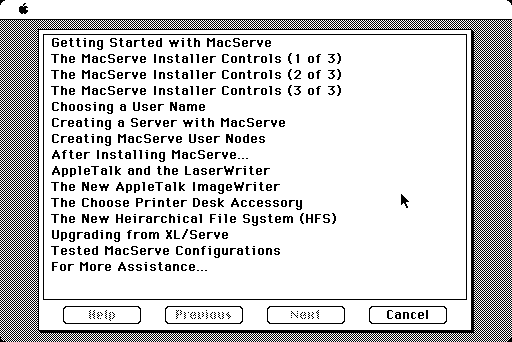 Built-in help (if copied over) |
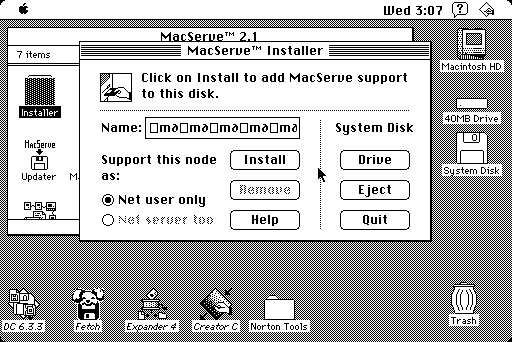
Installation is tricky because it needs to modify the System file, which can't be done on the active boot volume. Likewise, installing on a later System version than what it came with (System 3.1 and a MiniFinder) makes for a fun challenge because while it will boot something like an SE/30, it can't do anything without crashing. To get around all this, use a RAM disk as a boot volume. MultiFinder may cause issues too, so expect to disable that for the time being. Load a plain unmodified System 6 (for example, but System 4.1 and 5.0 are other options) floppy boot disk with RAM Disk+ 2.01 on it (it will not work with MountImage 1.1B3, saying it needs to modify the disk). Make the RAM disk, copy the System folder, and hot-swap to the RAM disk by holding down the Command and Option keys while double-clicking the Finder on the RAM disk. Assuming one floppy drive is available, this frees up the floppy drive for the MacServe installer disk to either install a client desk accessory to a floppy or install the server and client elements to a hard disk. Users with less than 2MiB of memory will have issues doing this, unless two floppy drives are equipped. As mentioned earlier, the server component cannot be used onto a floppy volume, even if forced by using DiskTop to copy the configuration file and a volume file.
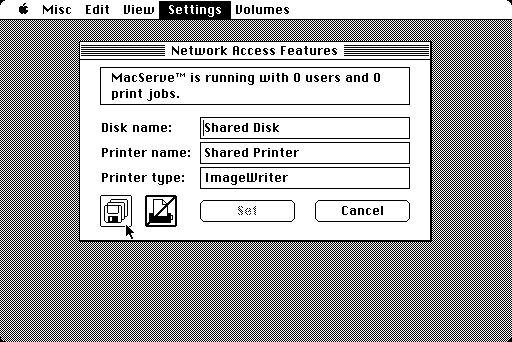
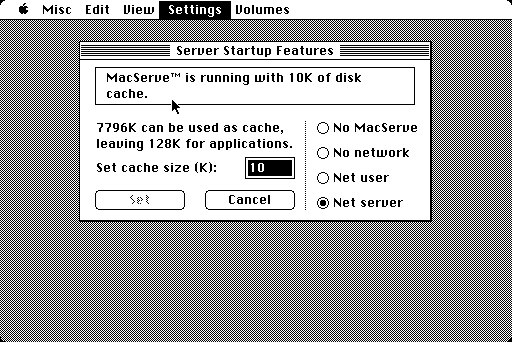
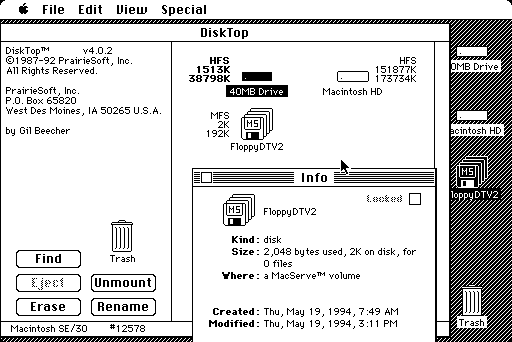
After a reboot, open the Manager program. When you reboot the first time after installing it, it'll give a message in the Welcome to Macintosh splash screen saying it can't find a config file, this is fine for now. Keeping a reserve boot volume in case it bricks itself is a good idea: should MacServe need to be turned off entirely for some reason, hold the M and S keys down when rebooting. Copying the MacServe Help file to the hard disk is a good idea because the Installer does not copy it over. It's a helpful in-program reference should the manual not work out so well: the one on Macintosh Garden isn't scanned very well and only had about one-third of the actual pages. From there, go to the Volumes menu and choose Create MacServe Volumes. This will create virtual disks, which are stored as invisible files on the host drive, as the host drive contents are isolated from MacServe sharing. Click Network checkbox, but Automatic might work too. Then find Server Startup Features from the Settings menu. The radio buttons for No MacServe, No network, Net user, or Net server should be self explanatory. Net server would make sense. Click the icon to the lower left of the image with the file icon, left of the printer icon to remove the slash through it. Reboot and the Welcome to Macintosh. splash screen should say MacServe loading... with as a network server appended if the server starts up right. Otherwise it says as a network user if the client feature is active. Other features of the Manage program like Erase Disk and other Macintosh File System (MFS) operations should probably be refrained from unless necessary.
 Probably a bad idea to use System 7 for installation |
 Enabling the file server (view when running) |
 Server startup options |
 Virtual volume info. Note the MFS (with invisible files) |
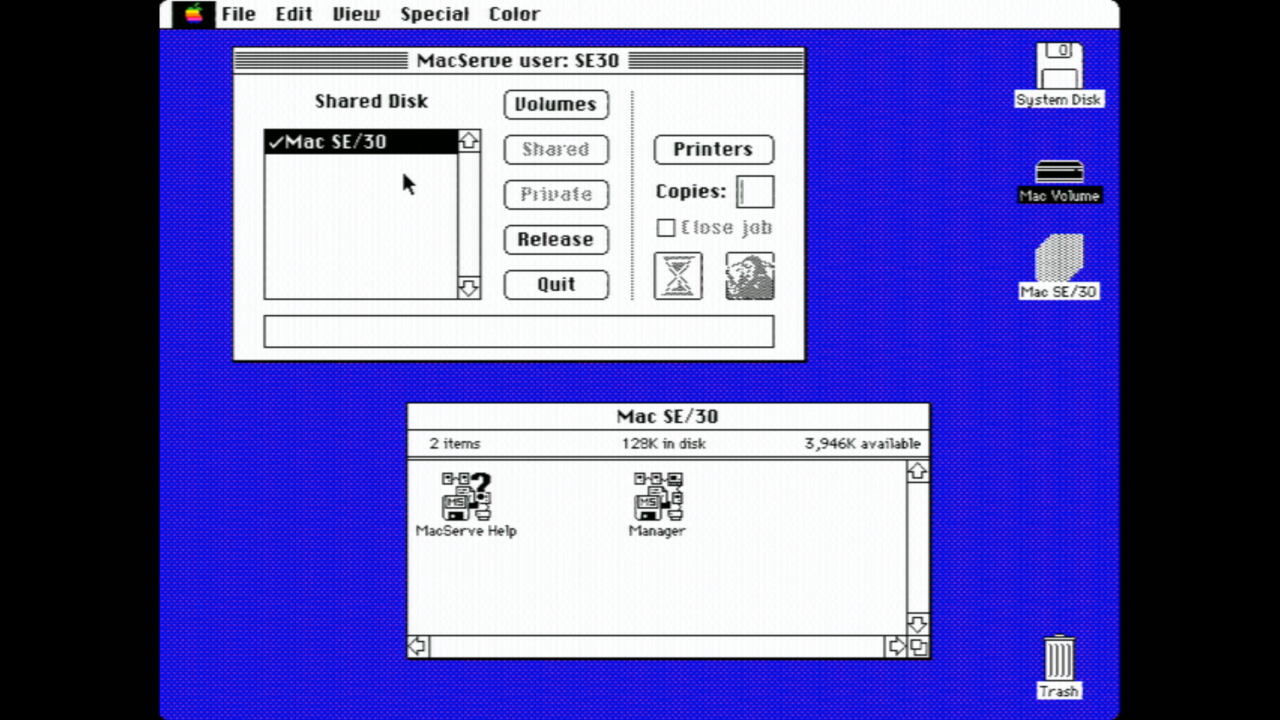 Client DA program with example files copied over (IIci) |
Anybody who wants to access the shared drive just goes into the MacServe DA in the Apple menu, double-click the volume they want and then Quit inside the DA. The target volume is mounted on the desktop with write access. When finished, open the DA again and click Release, then Quit, then drag it to the trash if it's still up, or just drag it to the trash directly. It's kind of like a floppy disk that everybody passes around to add or copy things to, and unlike a file server, only one person can use the share at a time, or at least that is what is intended. The server component, if active, restricts Shut Down and Restart procedures if another user is connected, which is probably a good thing to prevent bad writes.
 MacServe disk booted (128K) |
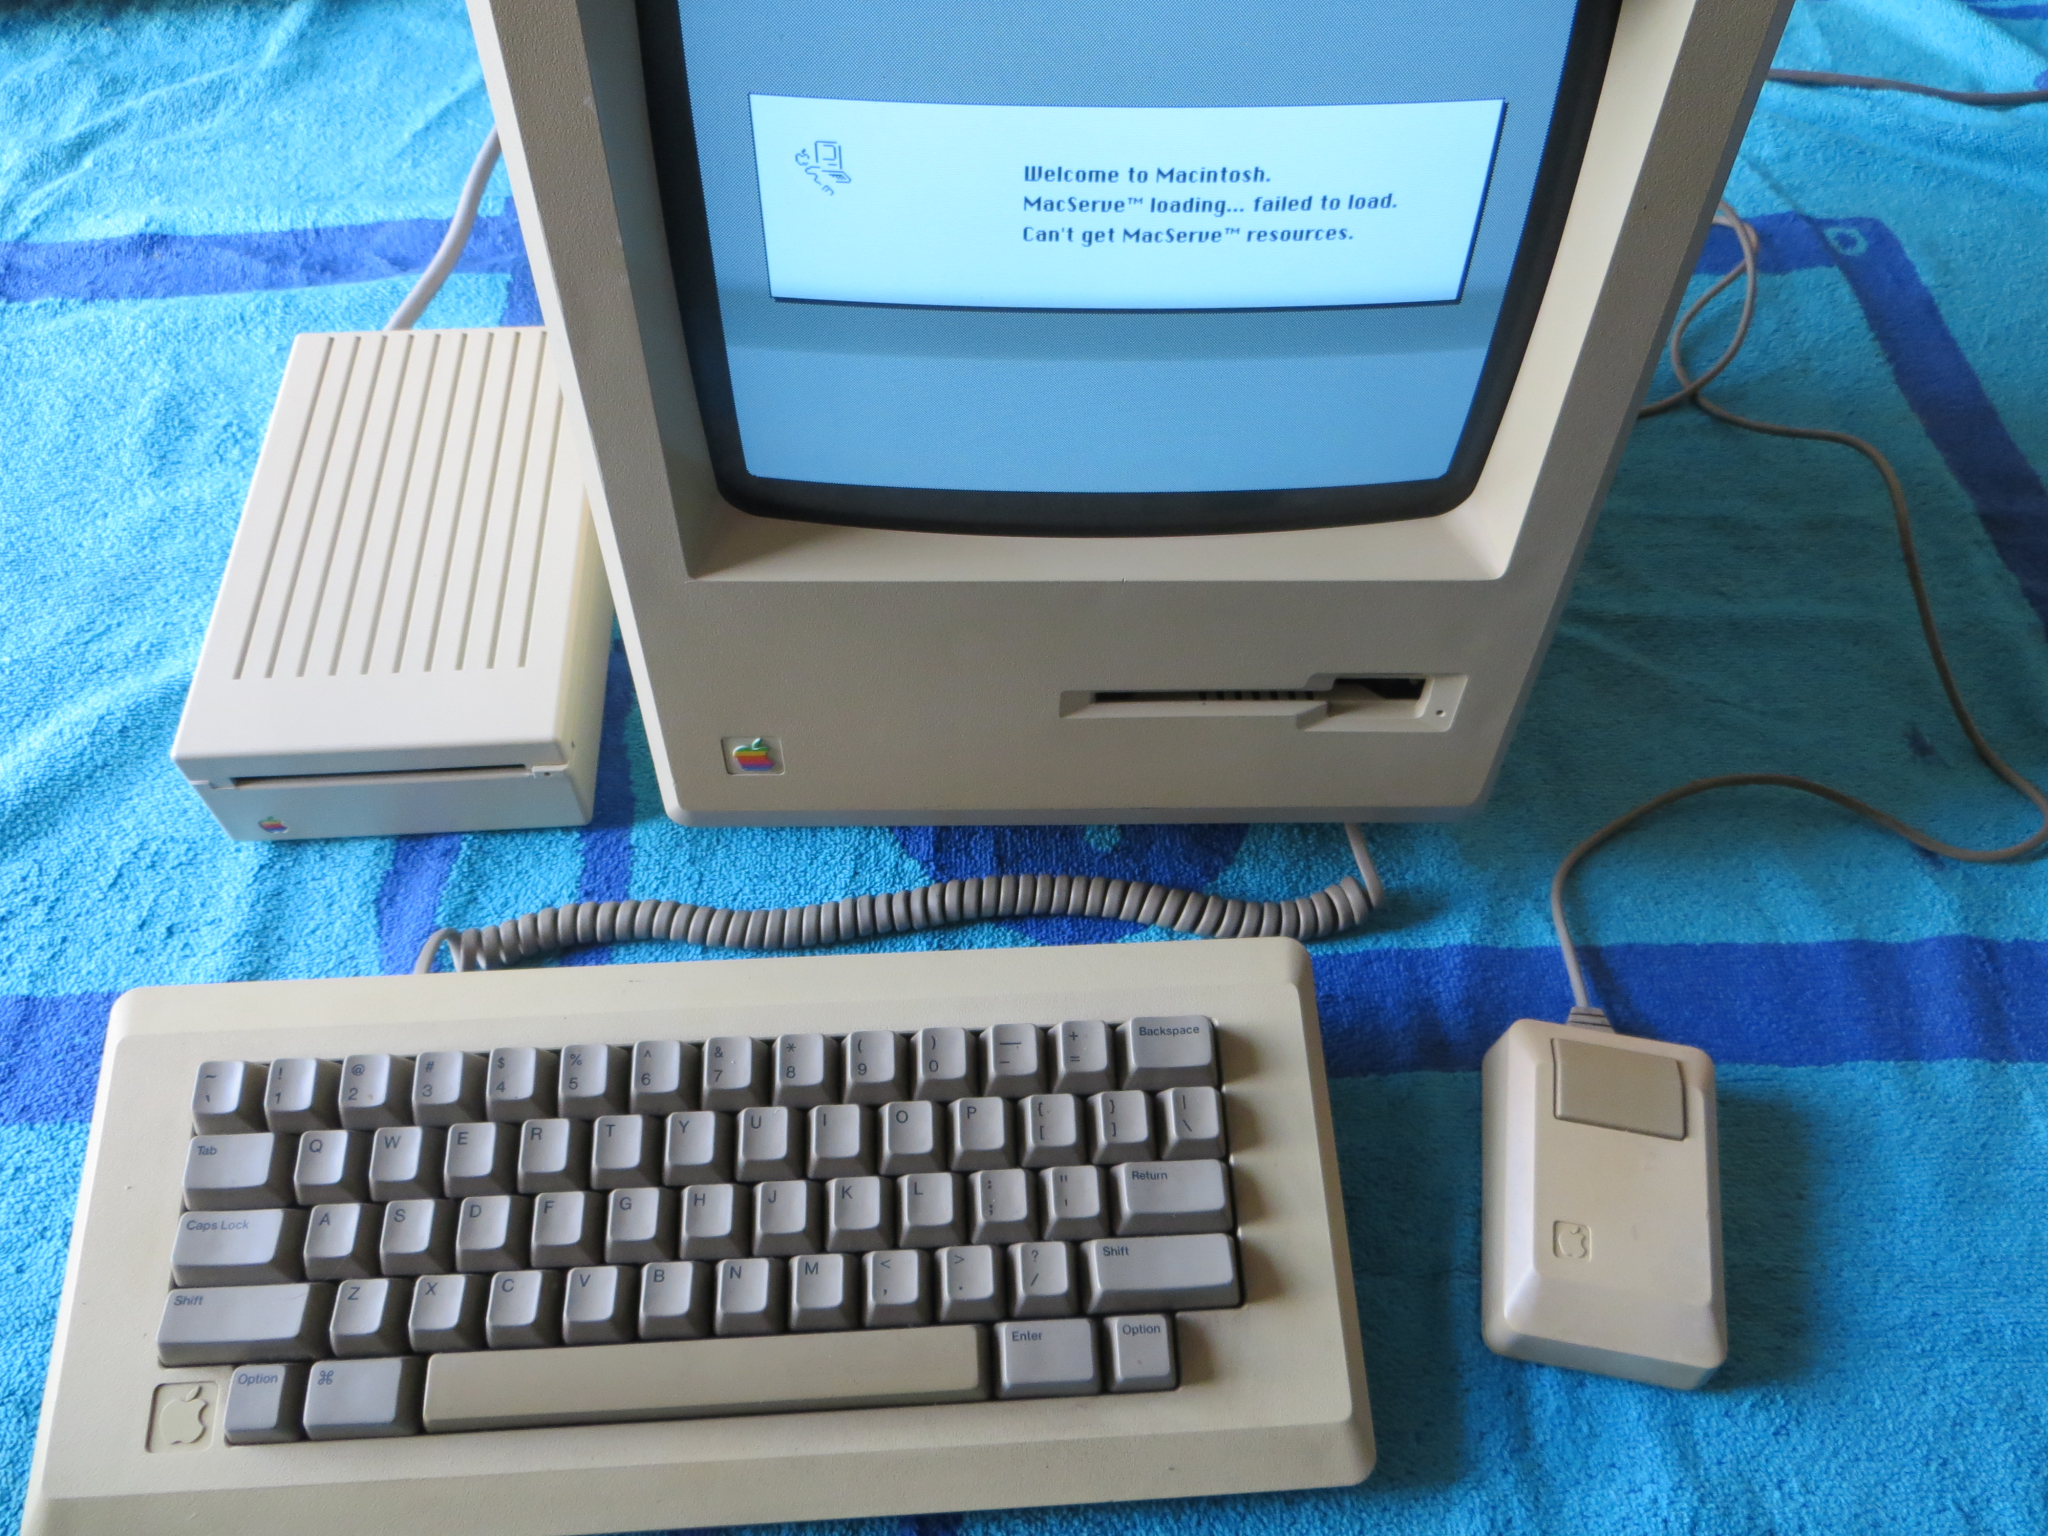 MacServe 2.1 error (128K) |
 MacServe 2.4 also fails |
 MacServe in use (512K) |
The software also can do print management, has a tiny MS icon left of the Apple menu during network activity, and a few other things. For version 2.1 at least, the password component in the Manager doesn't have a text box, so the user is typing blind. And the Installer can sometimes copy the configuration file to the wrong volume, as it is an invisible file, you need something like DiskTop to see it and copy it over. Overall the package adds about 82KiB for a client and about 197KiB for a client and server to a standard OS install, but can be kind of unstable with freezes and hangs being not unusual. It is interesting to examine from a historical point of view, however once AppleShare File Server came out there was no point for this software. A 512K already works fine with AppleShare WS 1.1, which works great with Netatalk and is much easier to work with, although the retail cost was 1/3rd that of AppleShare File Server 1.1, which was hideously expensive at some 799$. And then people might ask, "Why not just use TOPS?" Good question: TOPS was compatible with other platforms, and TOPS 2.0 is roughly equivalent to this, but TOPS had to be purchased individually for each machine, and didn't require a hard disk. The bigger question however, is does it work with a 128K or 128Ke?
No.
TOPS
TOPS, or Transcendental OPerating System, was a serverless file sharing system from about 1987 to 1990. Originally started by Centram Systems West, it was later taken up by SUN Microsystems and expanded from the Macintosh and PC originally to other systems. Only two versions persist today: version 2 and version 3. TOPS is notable for being one of the few Macintosh file sharing schemes that can share a floppy disk, even a MFS disk: EasyShare can do that too, but MacServe cannot and all of Apple's file sharing stuff required a hard disk for a server.
Thanks to cheesestraws, version 2 has been well-archived on the Macintosh Garden and elsewhere. Starting with this version, the documentation states System 3.2 and Finder 5.3 is the minimum it will work with. The 128K and 128Ke can be crossed off because they just don't have the memory to load the program code, which makes the 512K the lowest machine it will run on. Version 3 requires System 6, with both versions requiring some LocalTalk hardware, being just normal Mac serial ports or the TOPS FlashBox. As for the PC side, FlashCards for PC compatibles would be the fastest, but any LocalTalk compatible card should do fine, and whether a PS/2 model 30 or PC/AT can keep up with a FlashCard at 768Kbps would make for a fun experiment. They're all ISA bus cards which puts them squarely in the 80286, 80386 and 80486 era with MS-DOS, but some might be MCA.
TOPS is poorly documented on the open internet for the MS-DOS side, if any documentation exists at all. Bitsavers has a copy of the manual, being added only in October of 2025, but not any other articles. TOPS 2.0 was also uploaded to Macintosh Garden about the same time, so it's safe to say that archiving stuff like this has only been a recent endeavor. As of right now, no early x86 hardware is on hand for evaluating the PC side. However, should a LocalTalk compatible card and hardware be in your possession, then the Download Town has you covered, although that brings up the TOPS Key subject. The Key file just has a unique product key, which for a skilled user, is easy to crack and replicate. Since TOPS doesn't like to have two of the same Key codes on the network, you may have to address this problem. | 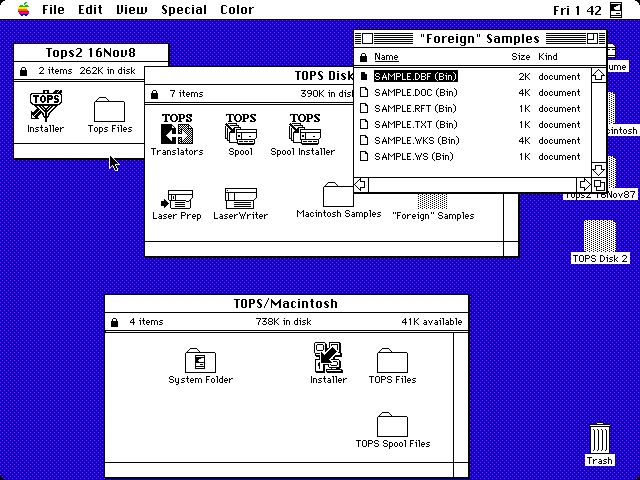 Installation disks: V2 top, V3 bottom |
What is not in the version 2 or 3 documentation is the big memory consideration. TOPS will not start up if the computer has more than 8MiB of memory. It also could be 9, or 10, or 12, but only a certain crop of Macs can boot System 6 and have such a memory configuration, namely the Portable (only the backlit M5126), IIsi, LC, LC II and Classic II. Since all the Macs used for this testing can either take 8 or 16MiB, but not any number in between, those other non-standard values could be possible but 8MiB is a safe bet for now. 24-bit addressing is supposed to be capable of 14MiB, but no Mac officially supported that. Macs that use System 6.0.8L can address up to 10MiB, which would be the exception.
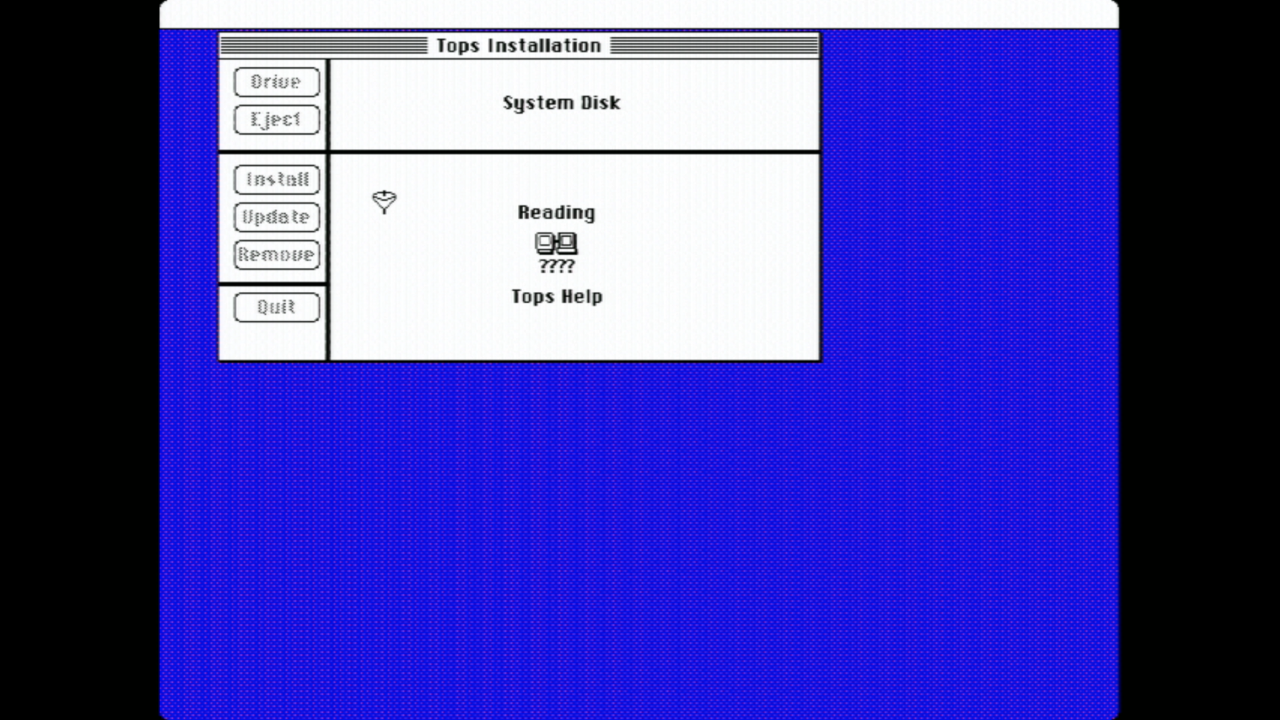 Installation; V3 identical |
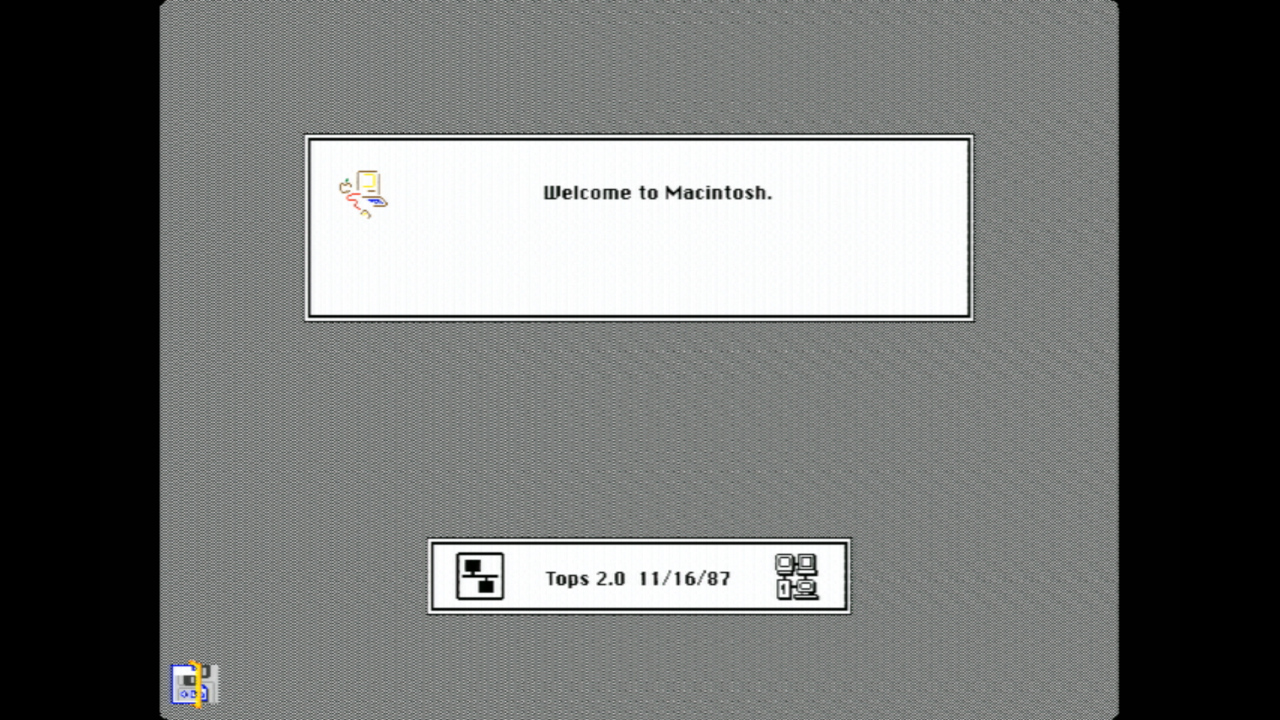 Version 2 splash screen |
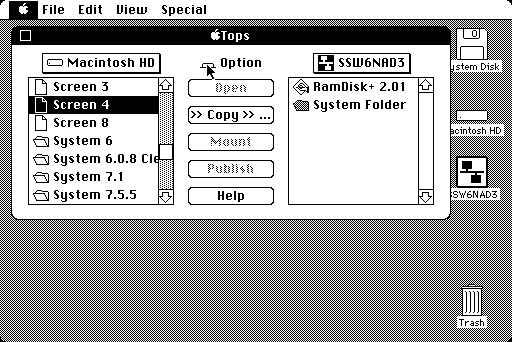 Version 2 DA in use |
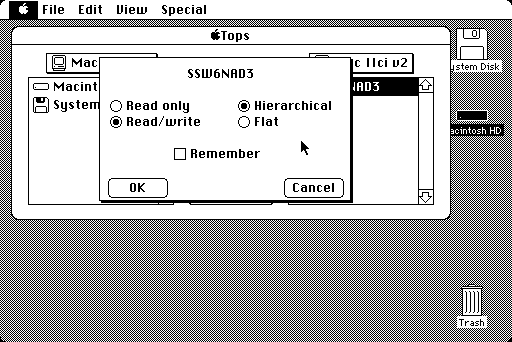 Remote volume options |
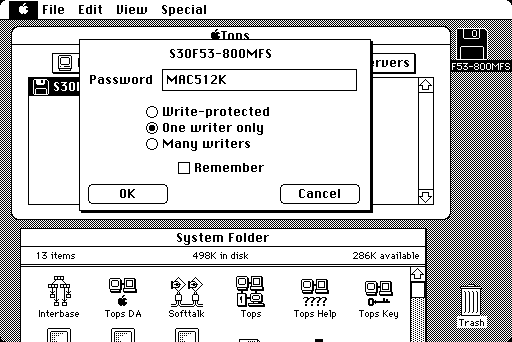 Share MFS disk options (512K) |
Version 2 is easy to get going. Start up the Mac with a boot disk or hard drive. Insert Disk 1 and run the Installer. For print spooler services, insert Disk 2 and then read the instructions for this because printing was not tested and is not the subject of this Guide. Reboot and then continue reading below, as the text for version 3 basic usage is the same.
In version 3, boot up the Installer disk. Start up the Installer. Install onto the desired hard disk or floppy: it automatically figures out what can be installed based on free space available. Quit and reboot. From the Apple menu, choose the TOPS desk accessory. Enter a unique username. It then will search for other file servers on the network, which isn't updated dynamically, but rather each time the DA is launched. Remote servers are navigated with the right pane, local volumes on the left. To publish a volume, click one on the left and click the Publish button. Close the DA and you're done. It's that simple.
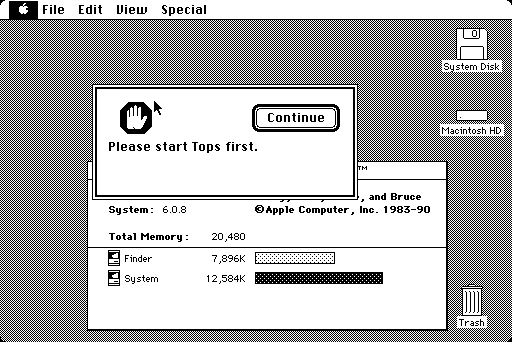 SE/30 with 20MiB RAM error (V2) |
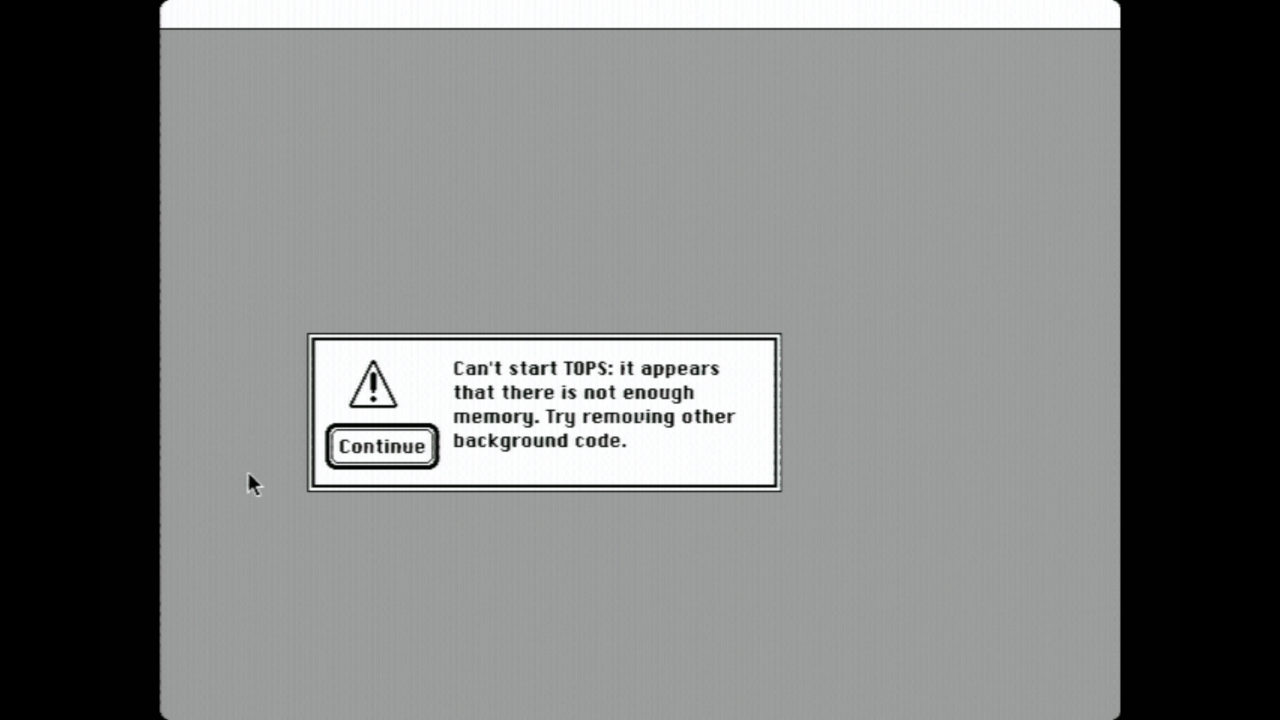 IIci with 16MiB of RAM error (V3) |
 System Folder after install (V3) |
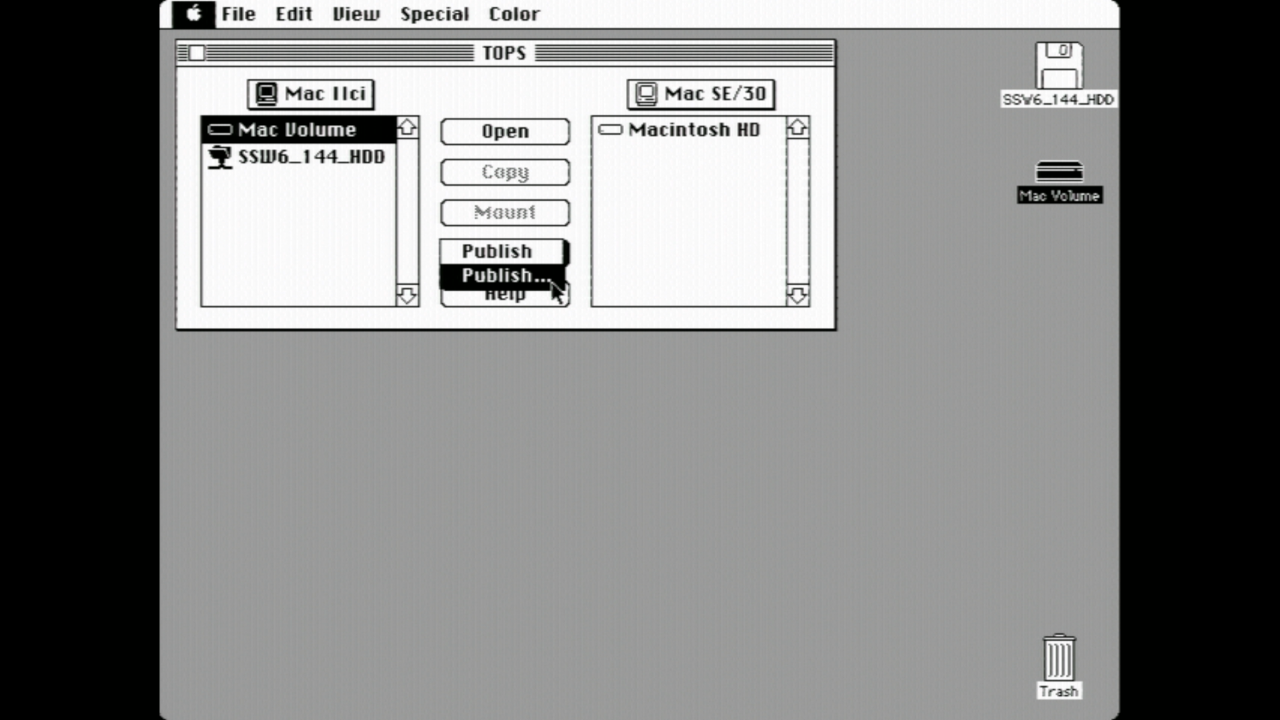 Holding on a button for menu |
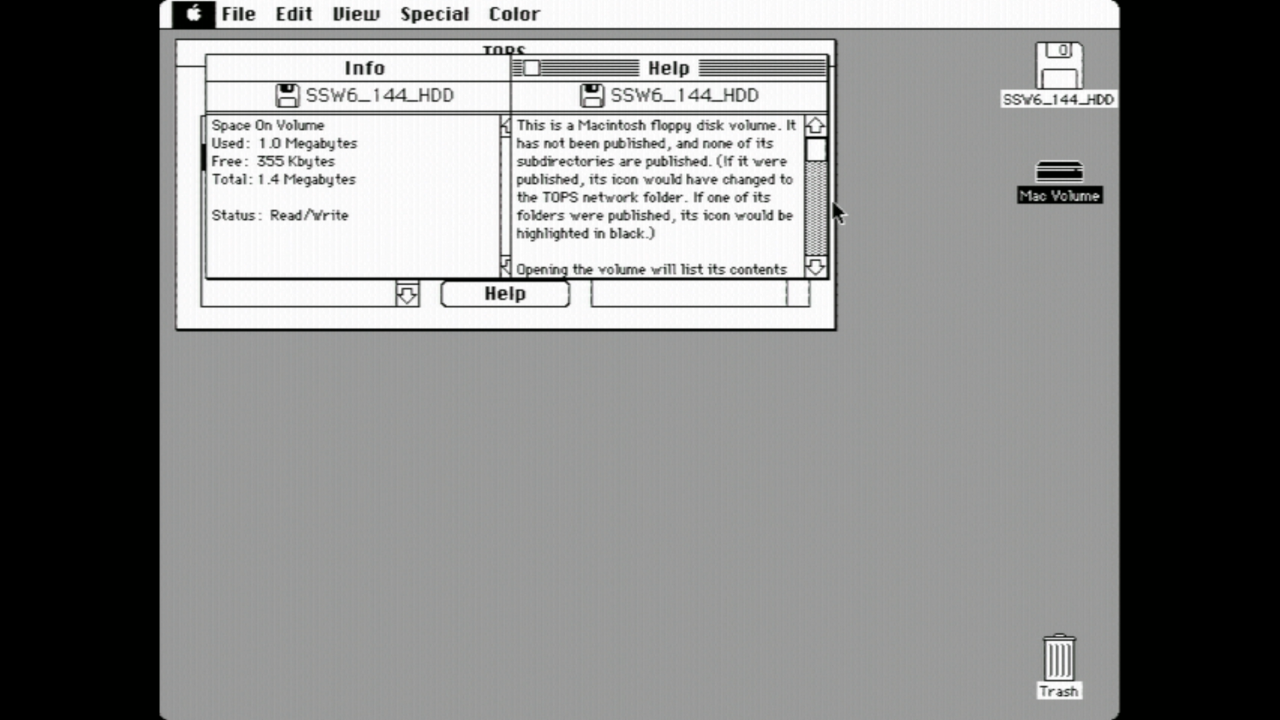 FDD volume info |
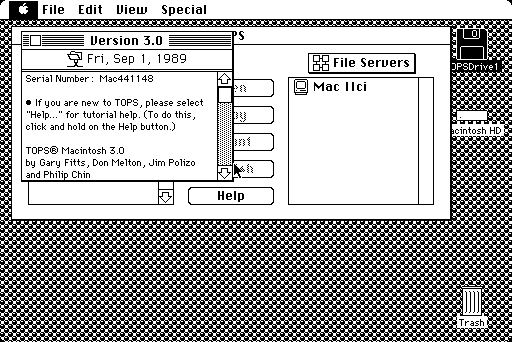 Version 3 info window |
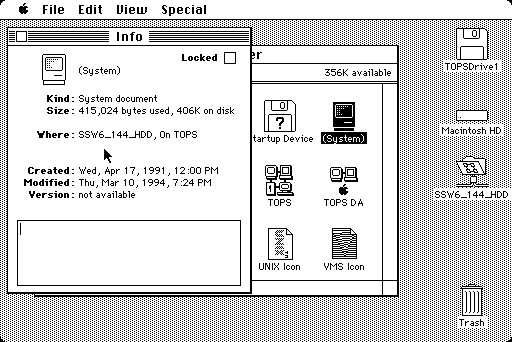 Browsing a remote floppy |
 Info menu shows who is using it |
 Using the DA instead of Finder |
Remote clients also use the same TOPS DA to find servers, which can copy files to or fro within the DA, or mounted to the desktop. The buttons have secondary features: holding down the mouse on one will invoke a drop-down selection for each if it's eligible. Beyond this simple explanation, the manual is quite well written and thorough, and it can discuss more than this simple demonstration provides, such as printer spooling or representing volumes as MFS instead of HFS, as it's almost too simple to talk about.
For the most part version 2 is a lot like version 3. Version 2 uses an "option" toggle instead of long-pressing the buttons to access advanced features, the DA is called Tops whereas version 3 calls it TOPS, the installation disks are two non-bootable 400KiB MFS disks for version 2 but a bootable System 6.0.4 800KiB disk in version 3 and some other very minor differences. Version 2 has a small splash screen when it's loaded at boot time, version 3 has a small icon that marches on the bottom row like other INITs do, and lastly the icons of mounted volumes are slightly different. Of the two, well use version 2 for Systems that don't boot System 6 and version 3 for the ones that do.
Complaints? Well you can't drag the windows that it can pop up outside the borders of the DA and the DA is sized too small even for a 512x342px display. It doesn't work with more than 8MiB of RAM, probably because it uses an older memory addressing scheme which worked well at at time when having 16MiB RAM was rare. It also doesn't work beyond System 6, or at least it's not intended to. But TOPS can share floppies, which very few programs could actually do that outside of direct program-level methods like FTP. As for value, at roughly 125$ per machine, it would probably be more expensive to outfit an office with this software than to cave in and use something else. The problem with that is when this came out, AppleShare Server 1.1 required a whole computer and it couldn't do anything else at the same time, and if it did, it would be sluggish if other tasks were going on at the same time. So for simple file exchanges, well, it was popular for a reason, and that's good enough. As no System bombs or hangs were encountered in the brief trial period, that makes it more reliable than MacServe.
EasyShare
For a long time, a serious amount of Internet dredging was unable to dig up the full version of this utility by ShirtPocket Software. Then in 2023 a certain "ryan" character, who can be considered a Hero of Our Time, was able to dig up the full version from an Apple Reference and Presentation Library v7.0 disc via this site. It's an old disc image, dating back to about early 1991; and the v6.0 disc doesn't have it, neither does v8.0. But System 7 wasn't quite ready yet and the disc is a bit of a treasure trove of interesting "Stuff" from back in the day (like Disk Copy 4.1, the manual for it is definitely not approved for public release, looking at page 4). Some files have lost some important information for them to work, but most of it should be workable, but it's an annoying disc image to work with as it works best on a real machine and doesn't like being mounted on more modern equipment or virtual machines, but is interesting to fish through for goodies and relics.
Anyways, there are two versions of this software, the full version and the demo. The demo only lasts ten minutes and then it shuts down the connection to outside clients; only one folder or volume can be shared; only one user can access it at a time; automatic sharing is disabled and it runs as a program rather than a desk accessory controller. Now that the full version is available, most of this text is irrelevant however. It's one of the very few third-party AFP compatible file servers that can serve a floppy disk volume, which most file servers do not permit.
Because this software will most likely be used on the earliest Macs, which cannot run System 7 with its light-duty built-in server element, the focus of this subtopic will be on the 512K and 512Ke. For starters, EasyShare requires System 3.2/Finder 5.1 according to the manual but in testing (both Demo and full version) and discussion with napabar, System 4.1/Finder 5.5 is the only OS version it will work on: it will bomb on System 6 with a 512Ke, but not with other systems. This software does NOT work on a 512K: it needs the 128KiB ROMs of the 512Ke.
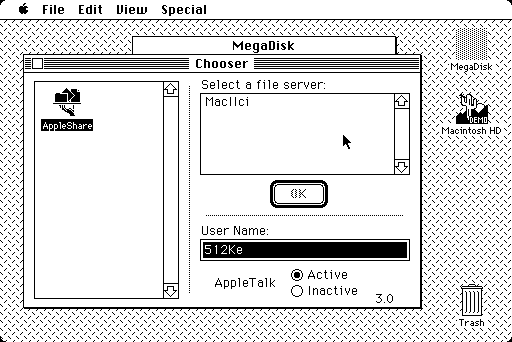 EasyShare Demo with 512Ke client, IIci server |
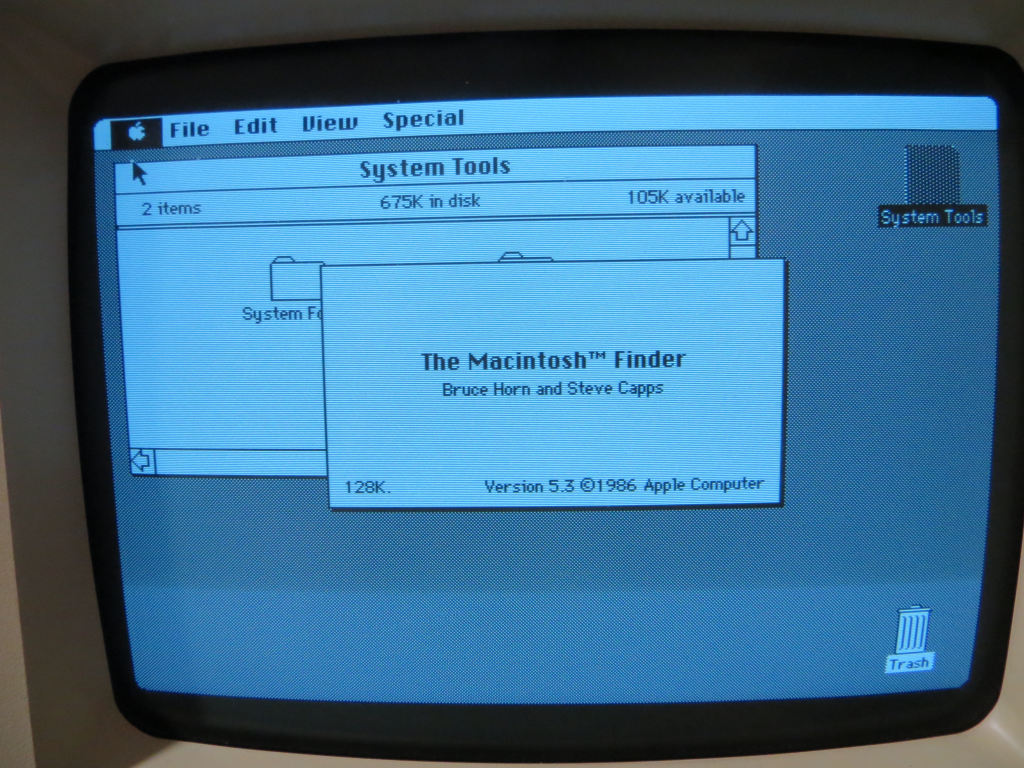 128Ke test system |
 Did not load at boot time |
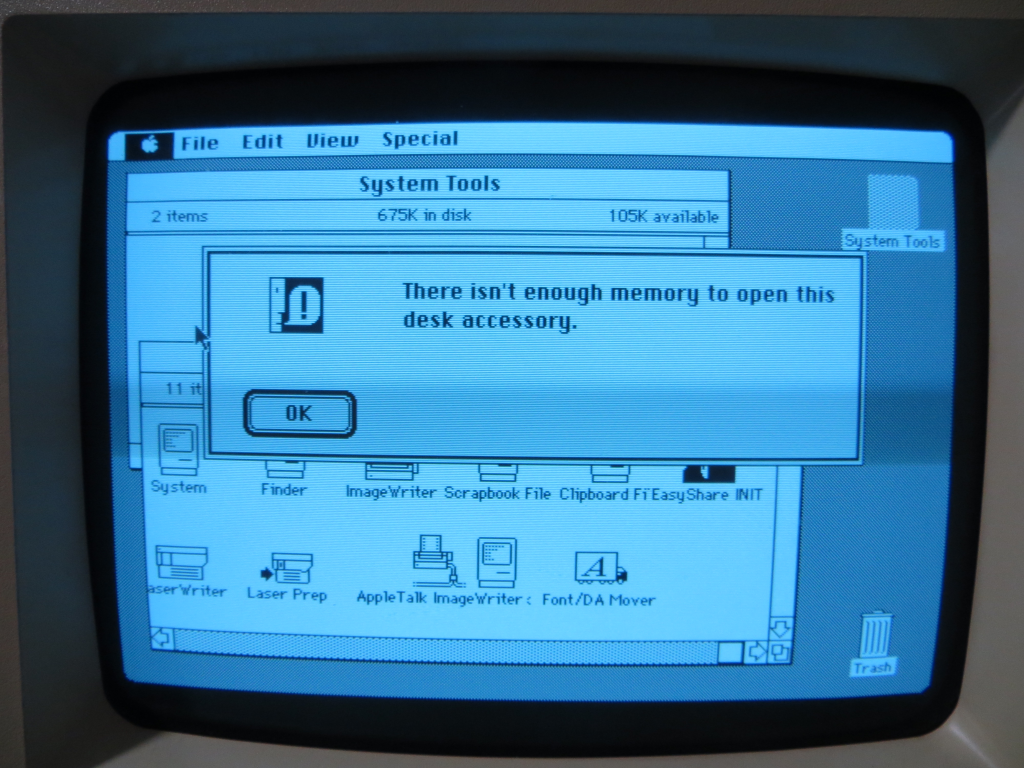 Just 128K things |
Recent access to an original Macintosh 128K provided useful information. The 128K isn't supposed to use a System Software version higher than 3.2, which isn't that big of a deal because even that System version is really tight on memory and realistically System 2.0/Finder 4.1 would be more realistic. The 128KiB ROMs from the 512Ke can be transplanted to a Macintosh 128K, which creates the fabled 128Ke. Through examination of both the Demo version and the full version reveals that yes, the 512Ke is the lowest specification computer it will run on. Both the 128K and 128Ke would return a System bomb on start up with an error code of 33, meaning negZcbFreeErr, or "ZcbFree has gone negative", which means in simple terms, the memory stack has been corrupted.
Users who intend to experiment with this program should keep a sharp eye on the INIT loading sequence because a crossed out or X'd out EasyShare INIT icon indicates trouble as it didn't load.
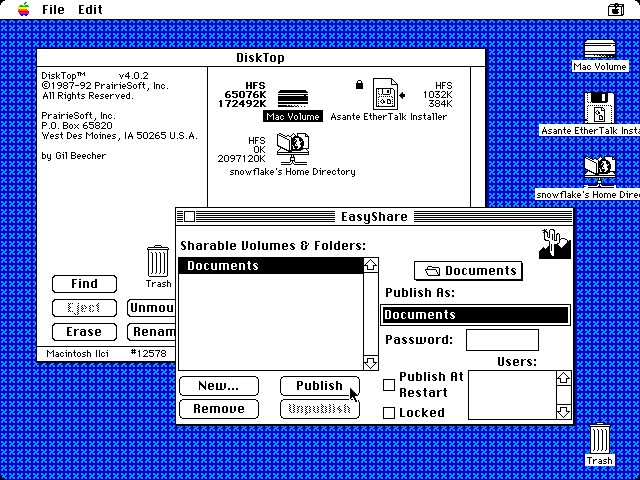 Creating a share (full version) |
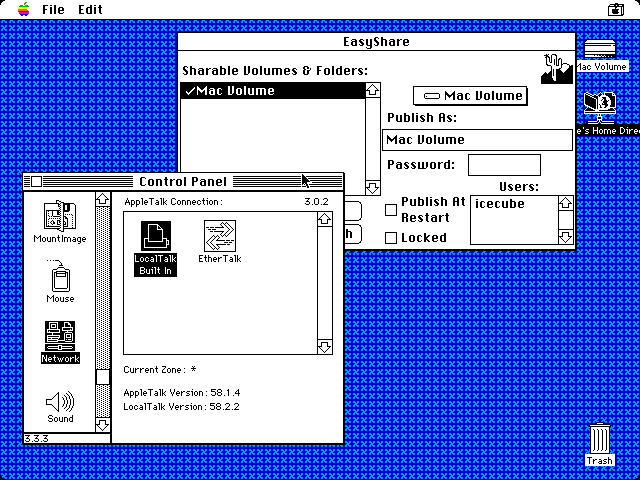 LocalTalk selected, a user is connected |
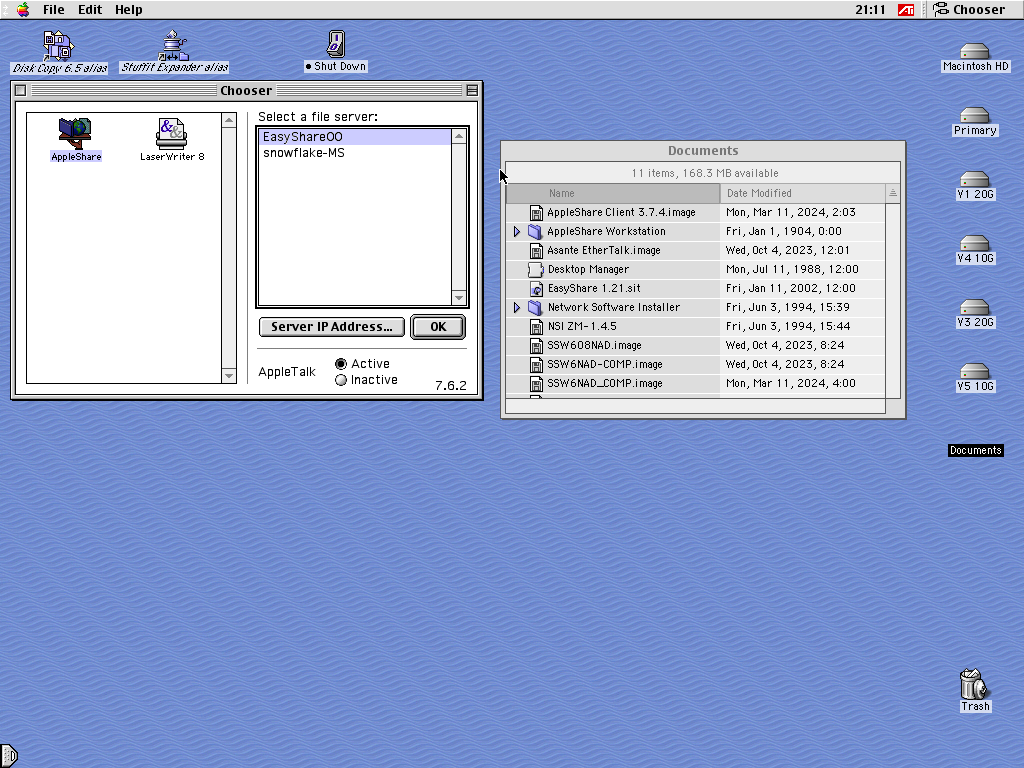 EtherTalk connection (note network volume icon) |
 Using LocalTalk (note weird icons) |
Continuing on the subject, the manual demonstrates the entire procedure of using EasyShare. It's a painless program to use. Drag the INIT into the System Folder and the application can go in the root volume or somewhere convenient. For the demo version, reboot and open the EasyShare Demo program. Click the "New..." button to create a new share -- as a reminder, only one folder or volume can be shared in the demo version. From the dialog box that opens, navigate and select a folder to be shared, then click the Select Folder button to share that folder: alternatively, select a volume and click the Select Volume button. Finally click the Publish button to make it ready to access by client computers, which mount it through the Chooser desk accessory. There have been warnings that the share folder may be deleted if accessed by a client: click the Locked button to inhibit this anomaly.
For the full version, use Font/DA Mover to copy the EasyShare desk accessory to the System stack, make sure the EasyShare INIT is in the System Folder, then reboot. System 6 can normally only handle up to 15 desk accessories but usually that isn't a problem. From the Apple menu, select the EasyShare DA, then shares can be added just like the previous paragraph. Clients can then connect from the Chooser like any normal AppleShare server.
Other findings include: Assuming there is no password set on the server side, authentication is pretty loosey-loosey. Even the username field of the logon dialog doesn't need to be filled out. Backwards compatibility? Who knows. The server computer might have to be restarted to allow a different Mac to connect properly (a file transfer wouldn't complete, restarting the machine and starting up the server again worked). The demo program must be started up each time to start the server: technically, the machine will show up in the other Mac's Chooser but it won't present any shares, so nothing will be mounted. The full version allows shares to be made available automatically upon startup.
It would not be recommended to use EasyShare over EtherTalk. It seems to be incompatible in that it is really sluggish (connecting to the server and loading folder contents seems to be slower than LocalTalk) and transfer speeds are on the same level with LocalTalk. One test transfer of a 1.44MB disk image took nearly nine and a half minutes to complete but most were about a minute or a minute and a half, roughly on par with LocalTalk speeds. Uploads seem to be a bit slower than downloads do.
AppleShare 1.1 and 2.0
AppleShare WS 1.1
The 512K uses a 400KiB MFS installer disk with System 3.3 and Finder 5.4 that came with AppleShare and the HD20 INIT. The disk itself is quite full (8K free space) and contains the bare minimums: System, Finder, AppleShare, AppleShare Prep, Hard Disk 20, Clipboard File and Scrapbook File. Like the other Workstation clients, it can only access other servers. System 6.0 included AppleShare WS 1.1 on the Utilities #1 disk, but by 6.0.2 it was updated for the AppleShare 2.0.1 version.
For the 512Ke, a recommended path is to use System Software 2.01 and install the AS 1.1 WS software, as System 2.01 has more features than the variant for the 512K. As for the Plus, II (not IIx) and SE, the primary distribution of AppleShare 1.1 WS was via a 800KiB disk that came with Finder 4.1, System 5.5. The Installer allows a choice of which platform to install for, as the System binaries are unique to each model, although just the AppleShare software can be installed onto the hard drive's System Folder or a 800KiB boot disk as normal. On a test installation onto an SE, the default install package as such was 387KiB on disk, so you do have some room left to play with a Plus or the like on an 800KiB disk as such. An external hard drive or floppy drive is a real boon to usability. |
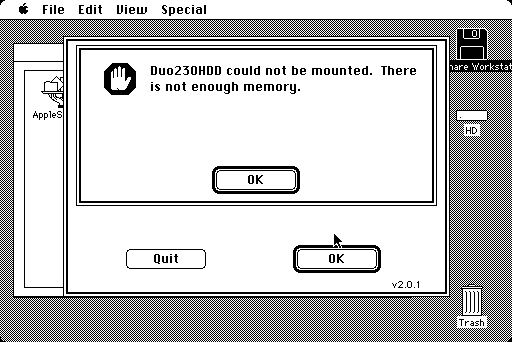 Low memory issues |
To use the software once it has installed, simply turn on AppleTalk (could be in the Control Panel for the 512K version) in the Chooser and then click AppleShare to see the list of computers available. The image to the near right was for an SE FDHD with 1MiB memory and AppleShare 2.0 WS on System 6, but the 512K family can easily run into the same issue even with older versions.
In simple terms AppleShare WS 1.1 through the System versions operates the same. System 4.1 is fairly basic, but is pushing a 512Ke to about the most it can handle. A Plus or SE can just use System 6, which is still reasonably responsive. Screenshots don't work with a bit depth beyond 1 bit (black and white) on a Macintosh II, but System 4.1 doesn't have much for color at all besides the Apple menu and any application/INIT supported colors, such as the INIT/CDEV icons generated when starting up the system or whatever MacDraw and MacPaint can handle. The Monitors CDEV has a Convergence test function, which was removed in later versions of Monitors for aligning CRTs, like the popular AppleColor High-Resolution RGB Monitor, which had relatively easy adjustments. Surprisingly, CD Sunrise 2.2 works on System 4.1.
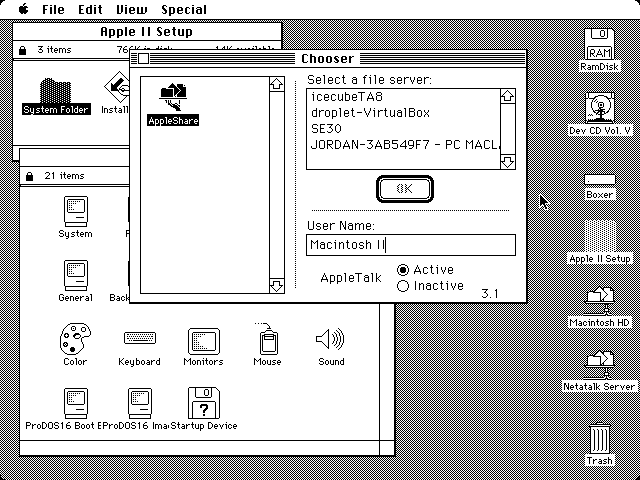 Macintosh II using AS WS 1.1 |
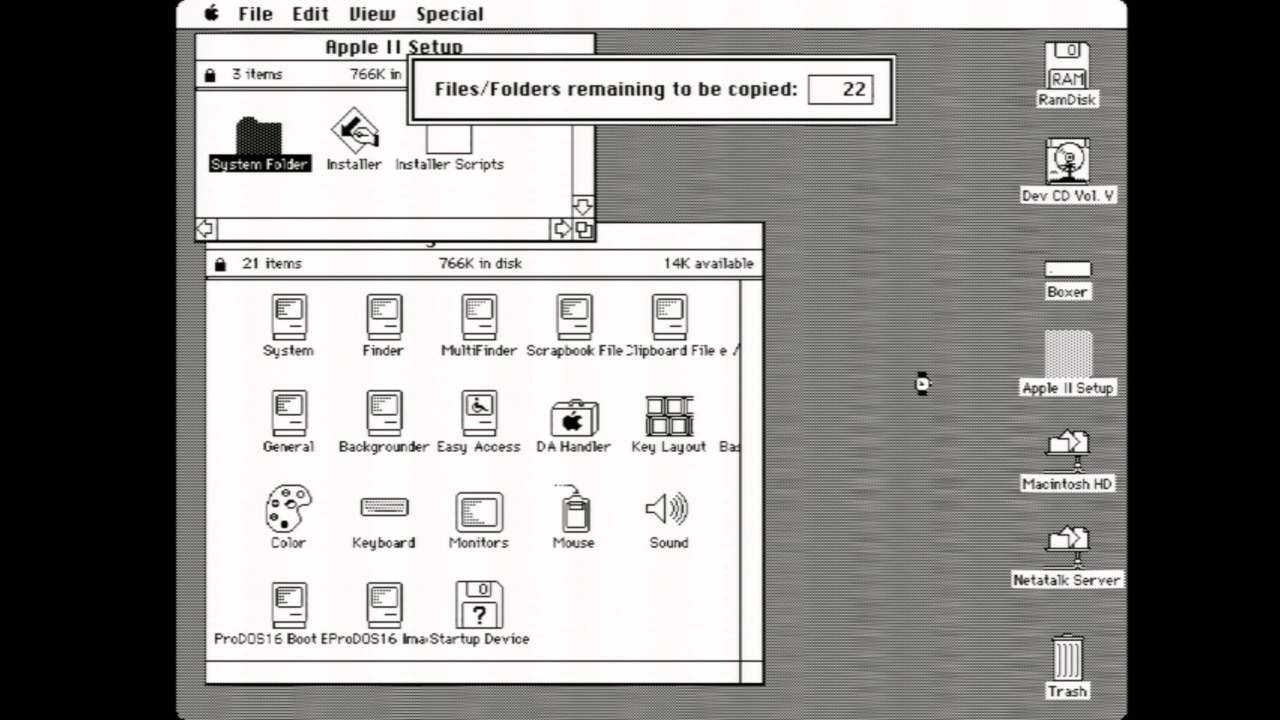 Progress bar added in SSW 6 |
 System 4.1/Finder 5.5 |
 Convergence test |
AppleShare Server 1.1 and 2.0.1
Both of these pre-System 7 native file servers are specifically designed as dedicated servers. There was also AppleShare Print Server (ASPS) too, but is exclusive to v2.0, unique in that it could run on a 512Ke. Before ASPS there was LaserShare, which very few people know about and there aren't many copies of it in circulation. AppleShare Server 1.1 was elusive for many years until a copy popped up on a bitsavers.org directory, complete with the manual, box, diskettes and diskette scans; a complete archival of which warrants some kind of national recognition medal. It used to be sold for $799 US, according to a University of Michigan Computing News article dated January 5th, 1987. (Volume 2, Number 1 is the publication.) As with the AppleShare Server 2 discussed below, AppleShare Server 1.1 will not run on a 128K, 512K or Macintosh XL: both were originally designed for the Macintosh Plus, II and the later SE. |
 A Macintosh SE/30 hosting AppleShare File Server 1.1 |
The distribution tally for the first Server package includes a Workstation Installer for the 512K/512Ke (S3.3, F5.5), a Workstation Installer for the Plus, Macintosh II and SE (S4.1, F5.5), and finally Server Installer disk which has the AppleShare Admin program which works as both the configuration program and installer.
Getting the Server going is easy. Assuming a hard disk is ready, preferably freshly formatted, insert the Installer disk, start up the Admin program, and follow it from there. It copies over the System Folder, renames it Server Folder, performs some other things, and then completes, as it is the installation and configuration program. The only way the Server can be configured from that point on forward is through the Admin disk. At least one backup method of loading the Admin program is recommended (i.e. 3 floppy disks, Floppy EMU, ...) because the server front end isn't very user-accessible. After rebooting off the hard disk, the Server main window is presented and is online. |
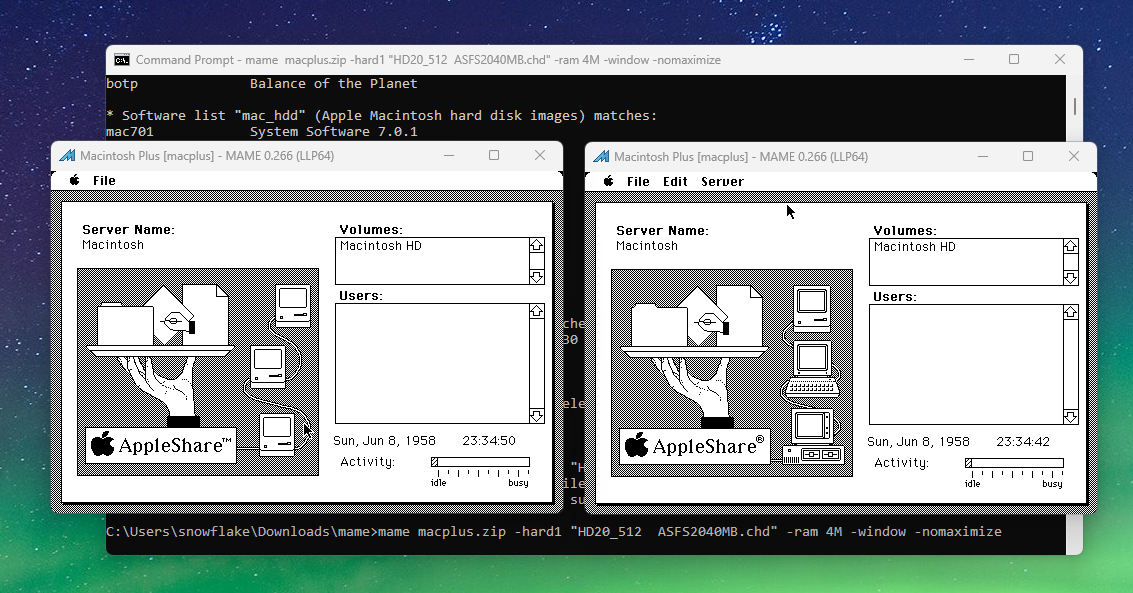 ASFS 1.1 left, ASFS 2.0.1 right (MAME emulation suite) |
To install AppleShare File Server 1.1 on a later System version, first secure a clean unmodified disk, freshly formatted as before, then follow these steps below:
- Run the Admin program as before and let it do its thing of installing a complete Server folder and setting things up. Ideally this is all done with a complete System Folder in a RAM disk with something like MountImage to mount the disk image (MountImage cannot mount disk images over a network).
- Next, trash the System file (it shouldn't copy over the Finder as it's not needed). Copy over the System and Finder from a normal, full install of System 6.0.8 or whichever version is desired.
- Use the Installer on a System 6.0.8 (for example) to install over the System Folder on the Server Installer disk. Copying the whole Server Installer disk from a 800KiB format to a 1.44MB sized disk can make this easier.
- Run the Admin program on the updated Server Installer disk again.
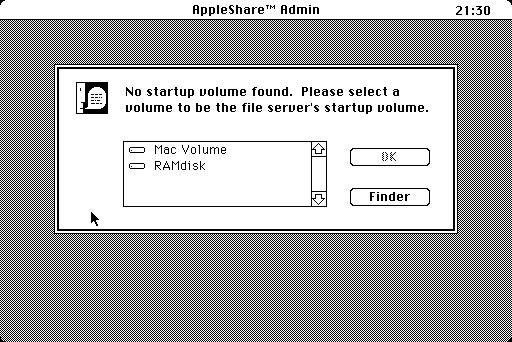 Setup phase: choosing a share volume |
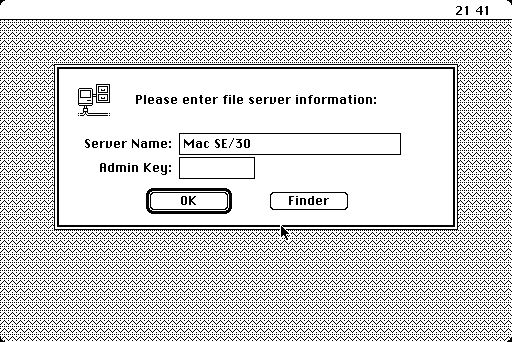 Setting the Admin Key (Macintosh SE/30) |
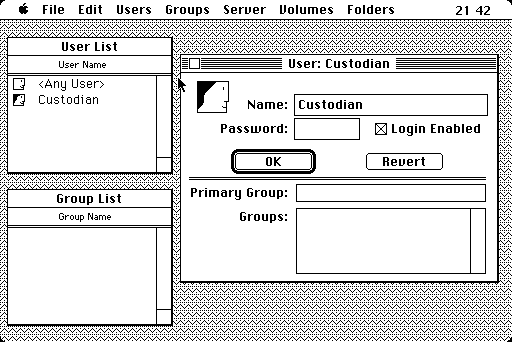 Setup complete. Custodian user config |
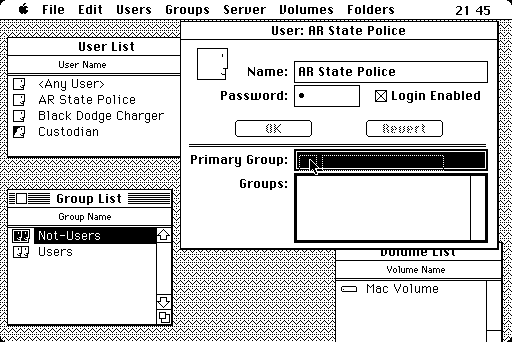 Dragging a group to a user |
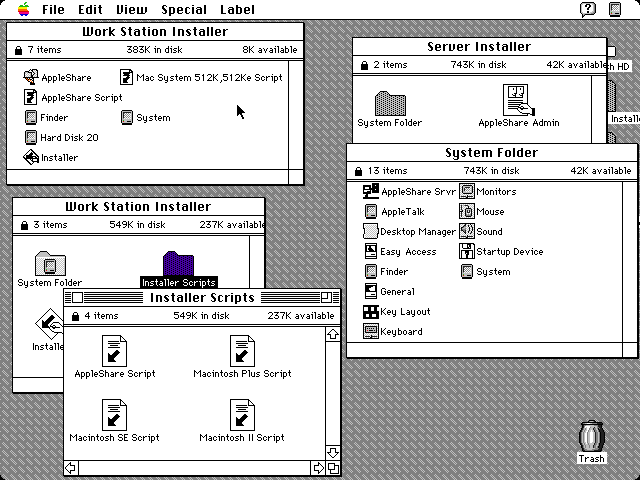 Contents of all 3 AS 1.1 diskettes |
The Admin program is where all the Server configuration is managed. It was intended to be such that the computer would have to boot from the Server Installer disk and then the Admin program would be used to configure it should that be necessary. In this program, volumes, users, directories and a few other properties can be adjusted. Aside from that, when the Server itself is running, there is nothing else to do beside look at the server messages log.
AppleShare File Server 1.0 exists in the wild off a Macintosh Garden comprehensive AppleShare package, but should be very similar to 1.1. The disk image does not appear to be complete.
Make sure that the Server volume does not have its desktop rebuilt by any other System version. This will make the Server non-functional.
AppleShare Server 2.0.1 becomes a little bit more administrative-friendly and capable but not to the same degree as AppleShare Server 3. There are five disks included in the package rather than 3 of AppleShare Server 1.1. First there is the 512Ke version comes on its own 800KiB disk and is an installer for AppleShare Workstation 2.0.1 (System 3.4, Finder 6.1); the remainder Macs are lumped together on other 800KiB disks which are the Server, Administration, Workstation and Apple II Setup disks; none of which are compatible with the 512Ke. The 512Ke version is much like as per AppleShare 1.1 WS, and much of the same verbiage applies. The other Macs which would use this software need the Server and Admin disks for running a dedicated server. The Workstation disk isn't needed because System 6.0.8 already has AppleShare Workstation on it. The Apple II Setup disk is for netbooting the Apple IIe Enhanced and Apple IIGS along with ProDOS compatible sharing extensions, and this disk comes after the Server suite has already been installed and set up. |
 AS WS 2.0.1 installer (File Server similar) |
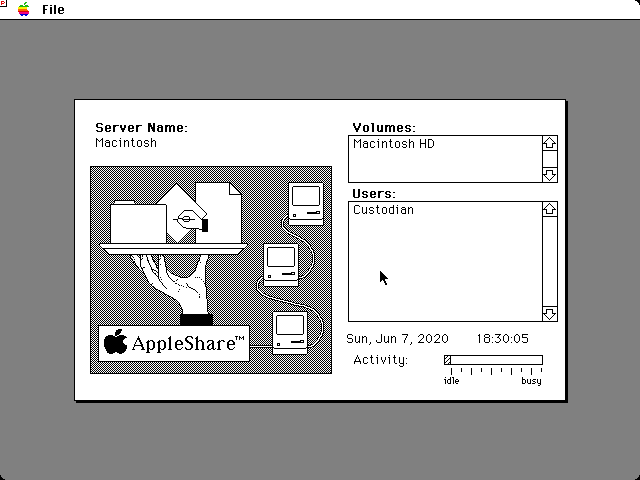 ASFS 1.1 main server view (Macintosh IIci) |
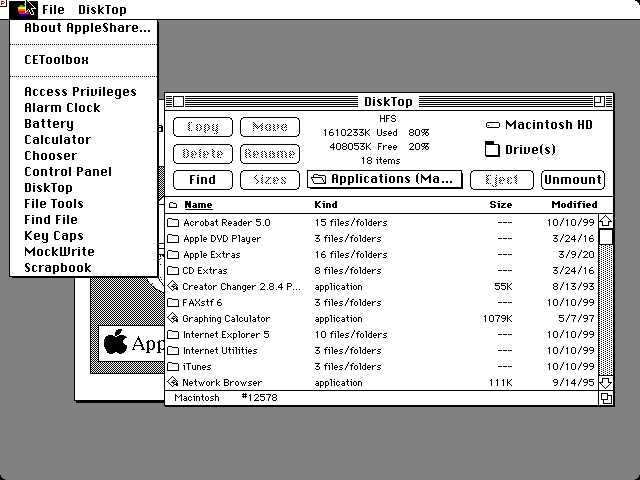 ASFS 1.1 with DiskTop and additional DAs |
 ASFS 1.1 Admin program (FlashIt was used for capture) |
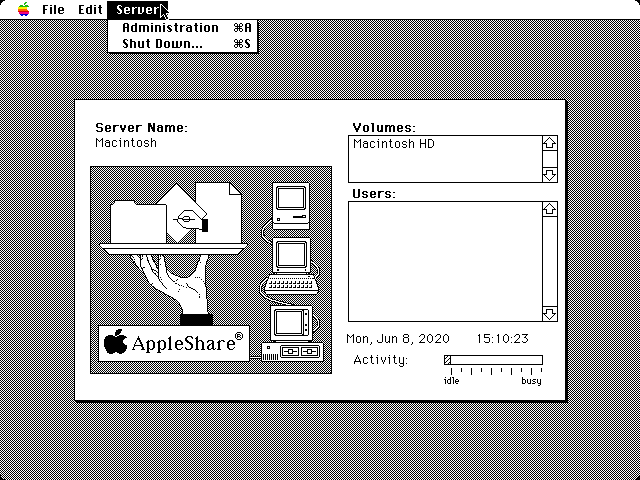 ASFS 2.0.1 main server display |
 ASFS 2.0.1 Admin program |
If you prefer to experience the original System 6.0.3/Finder 6.1, then the Server Installer disk can install an operating system on compatible models, EtherTalk 1.2 (aka EtherTalk Phase 1) and the AppleShare Server element. Otherwise, to install it on a later version, follow these steps:
- Begin by installing the intended operating system first.
- Insert or mount the AppleShare Server disk. Run the Installer, and install the AppleShare Server component.
- Next, take the AppleShare Administration disk and either update it with a more recent System installer, or copy an existing one over, replacing the older versions with the newer ones. (Note the differences between the contents. Desktop Manager is required.) Using a 1.44MB disk makes things more comfortable.
- Finally, start up the AppleShare Admin program to begin the setup process.
When the Admin program is started up, it copies the AppleShare Admin program to the System Folder, which (like ASFS 1.1; all the setup prompts even look quite similar) gets renamed to Server Folder, prompts for a Users & Groups file location, asks for the name of the Server and the administrator login (called Admin Key: if it is lost or forgotten, trash the Users & Groups file) password. The initial setup of users, groups, volumes to share, access allocations and so on is available afterwards. Unlike AppleShare File Server 1.1, ASFS 2.0 allows the Admin program to be launched when the main file server is running. Reboot off the hard disk and the Server is ready to be used.
A gallery of ASFS 2.0 in use follows below, similar how things might have been used back in the day. Images captured via a camera of the Macintosh II and 512K are credited to mcdermnd.
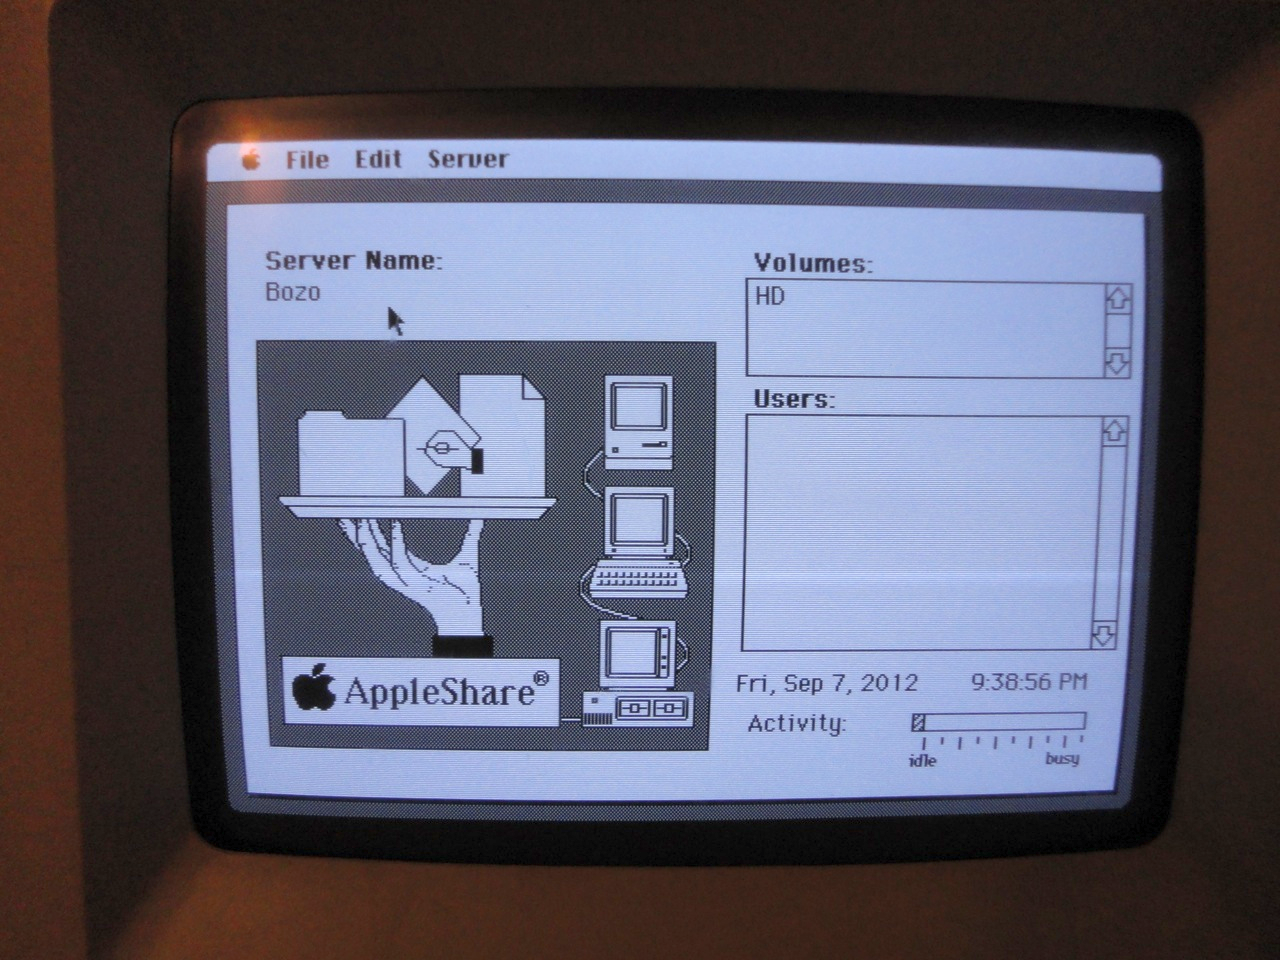 Main Server view (SE FDHD) |
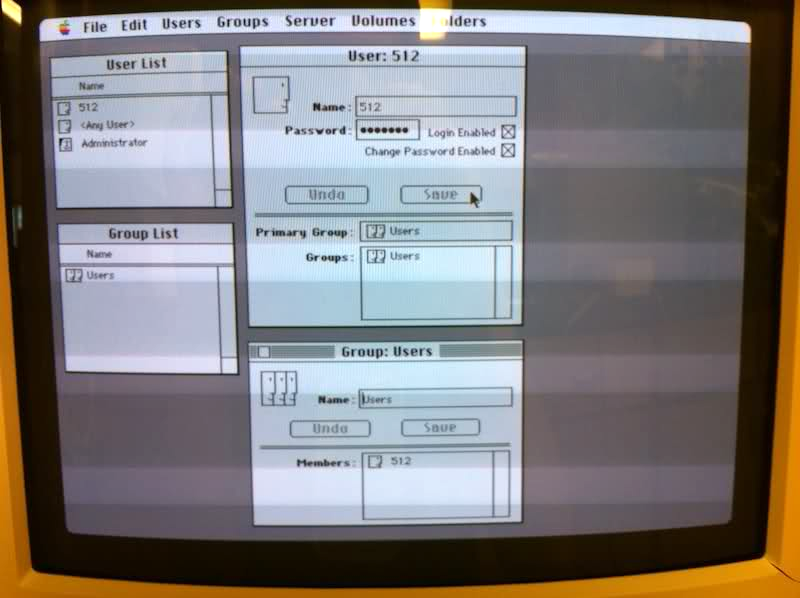 Server Admin App |
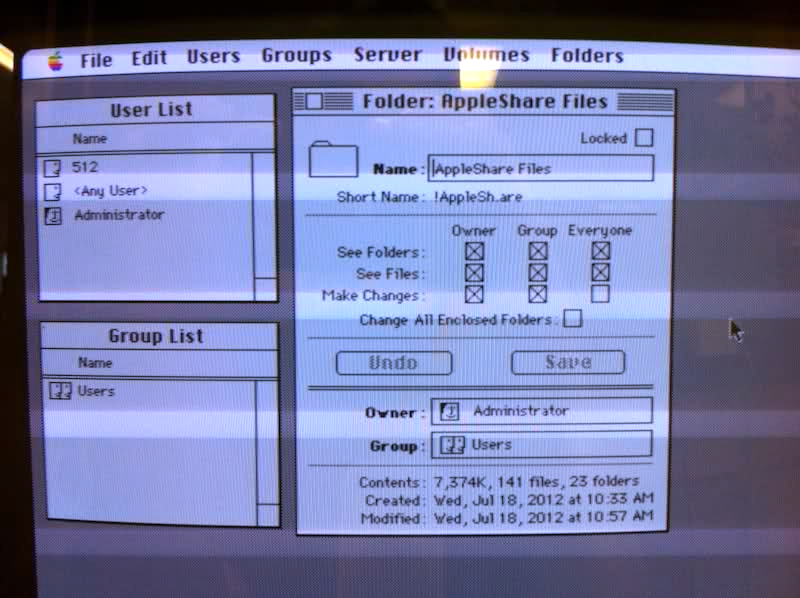 Server Admin App |
 Mac 512K as a client to Mac II sever |
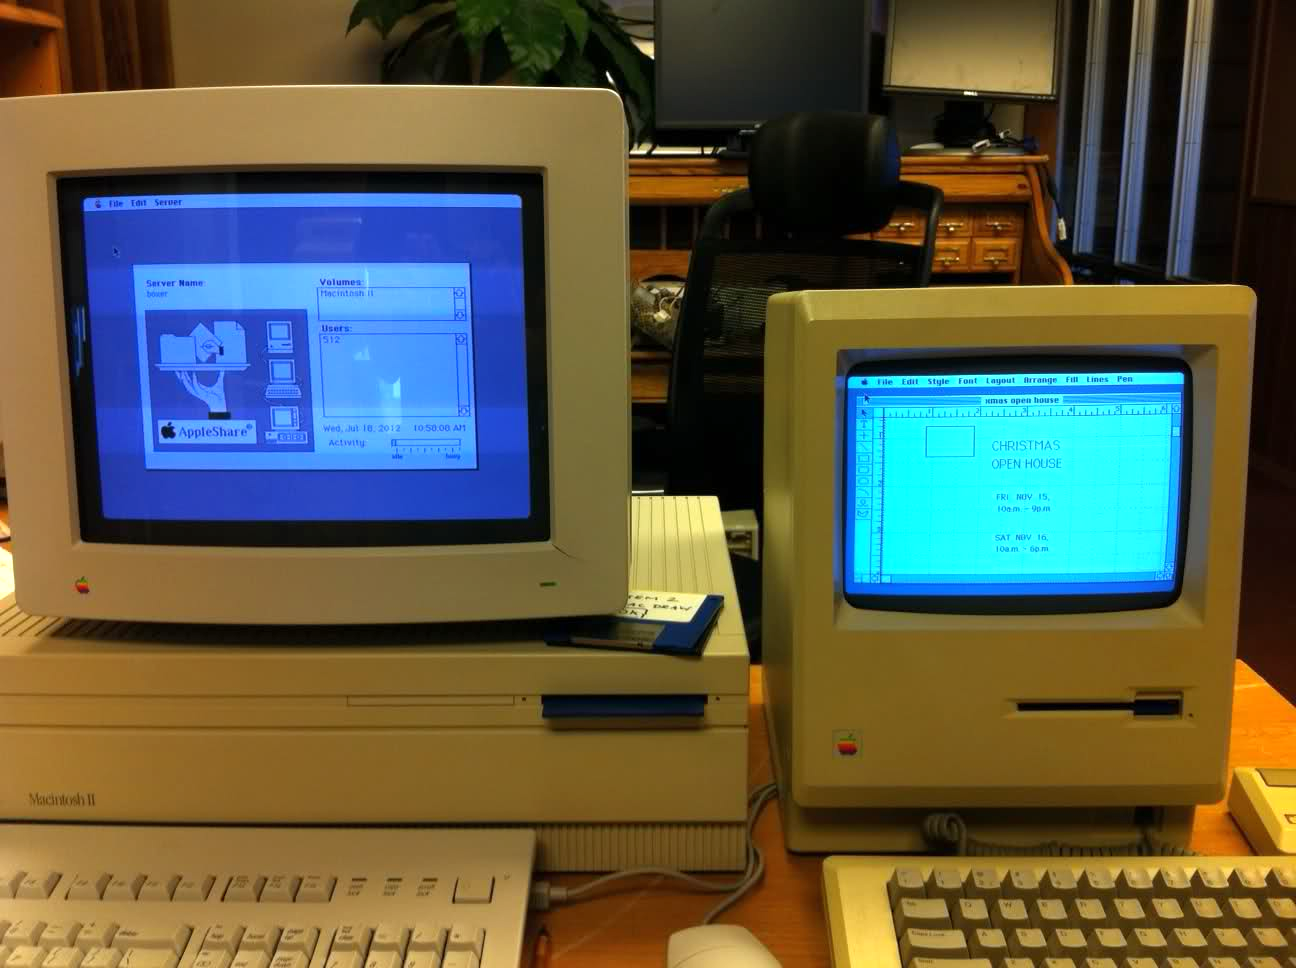 Using MacDraw served from the II |
 Server Folder contents |
 Server volume as seen from another Mac |
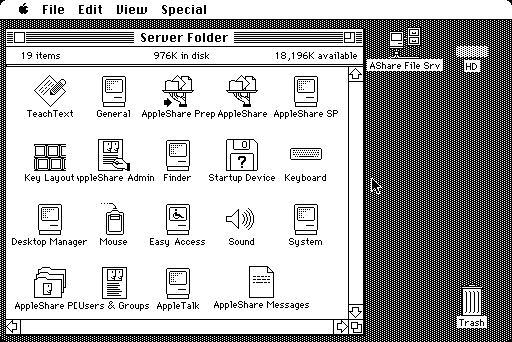 Will not work! |
Because there is no screensaver or other utilities included, it would be recommended to install After Dark if you are using this on a real machine with a CRT. The Server view won't change much so that would be an excellent opportunity to get some high-quality burn-in. DiskTop with the CE ToolBox extension can launch programs and perform most Finder tasks, including accessing remote servers if AppleShare Workstation client software is also installed, this allows the server to be a little bit more tolerable. If DiskTop cannot launch a program (such as Finder), try using FaberFinder instead. Escaping out of the Server program this way should allow the server to keep functioning. Memory may be interesting because the Server wants to reserve a bunch of memory for operations, so this could lead to out-of-memory errors.
Because Mini vMac runs a custom disk driver which basically treats volumes as modified floppy images, neither of these Server installations will work on Mini vMac. The Admin program only recognizes SCSI volumes as shareable volumes. One such emulator that is compatible is the MAME emulation suite.
Other interesting tidbits: Finder is not installed normally, and the AShare File Srv program is the only one that is set to run. Attempting to launch it outside of a launch-on-boot operation will not work. The Server Folder boot folder is invisible to outside clients and cannot be accessed, but DiskTop can get around that locally. Although floppy disks can be used to run the server suite, they cannot be shared. Only hard disks or other non-removable media (Zip disks are up in the air concerning this) can be used as share directories. A default install of the Server with a complimentary operating system is about 936KiB on a Mac SE, so that is too much for a 800KiB only model. Most of the SE FDHD computers had hard drives, although not all of them work at this age. The server should be able to use modern EtherTalk compatible networking cards as long as the driver software is installed, and the AppleTalk interface to use is switched over in the Network control pane. In rare cases the disk drive may not be properly formatted: a low-level format with something like Lido 7.56 may be necessary.
For users who intended to play with Apple II machines, it is simply better to use AppleShare Server 3 which can also work with Apple II machines (IIe Enhanced with Workstation Card and the IIGS only) and have regular access to the Finder, plus Server 3.0 is compatible with OS X up to 10.3 Panther. Both Server 2.0 and 3.0 can netboot the Apple IIGS and the IIe Enhanced if it has the Workstation Card: AppleShare Server 4 and above cannot. Although it is very unlikely that anybody these days can do it, Apple suggests a limit of 20 machines for netbooting.
AppleShare Server 3 and 4
AppleShare Server 3 breaks the hard limit of AppleShare File Server 2.0.1 and grants a regular Finder along with a nicer interface to the Server. AppleShare 3 has better handling of removable media (i.e. CD-ROMs, tapes, and so on) than AppleShare 2 does.
Both of these versions look nearly identical. The Server and Admin programs are stuffed into the System Folder for AppleShare Server 3. But AppleShare Server 4 adds links to the Apple menu, but this can be easily done with AS Server 3 too with just aliases of each added to the Apple Menu Items folder. The big point about AppleShare Server 4 is that it requires a 68040 or PPC, although a IIci with a Radius Rocket 33MHz 68040 in accelerator mode seemed to satisfy it. It won't start up unless Shared Library Manager (ASLM, and the version is important too) is installed, and the License Manager, simply remember to enable those for a custom installation. AppleShare 4 is also known for being fussy about versions: double-check the specification requirements.
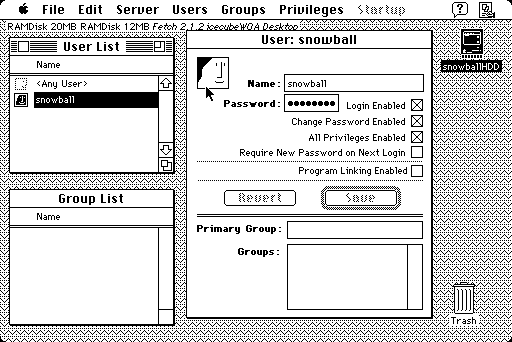 AppleShare Server 3 |
 AppleShare Server 4 first run |
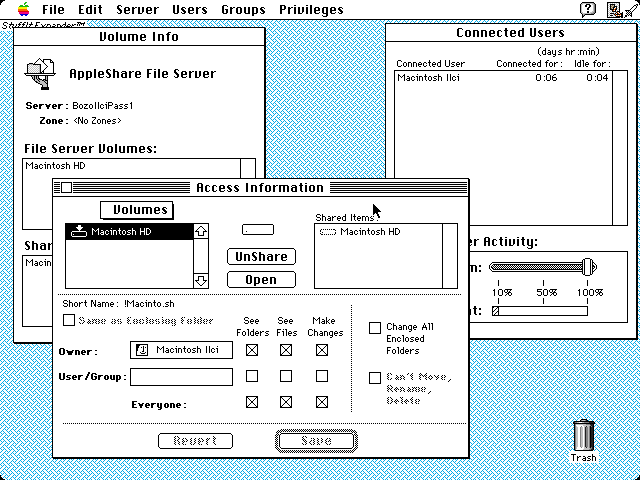 Configuring the server (AS 4.0.1) |
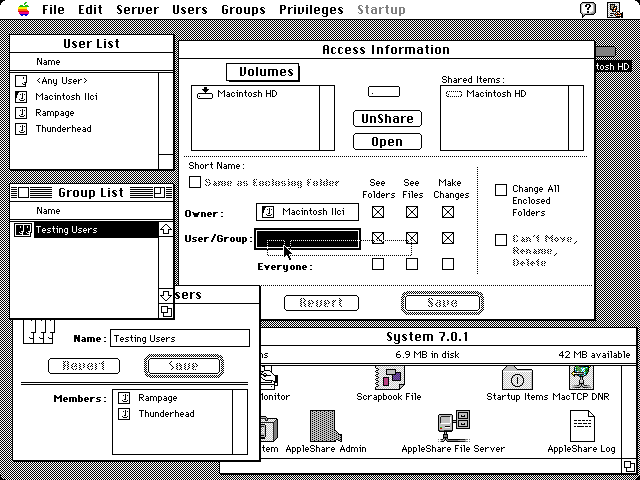 Drag a user or group to add them |
Both Server versions will not have any support for AFP over TCP, for that you'll need AppleShare IP. Only AppleShare Server 4.2.1 is compatible with Open Transport; the earlier versions are stuck with classic networking. Server 4.0.1/4.0.2 complains about running in 7.0.1 but it will run anyways. All AppleShare Server products disable the built-in Mac OS 7+ File Sharing feature in the Sharing Setup control panel, and for this reason it is better to start with a new install of the operating system rather than uninstall AppleShare Server, meaning that AS Server makes certain changes which are hard to reverse.
After the program is installed, the first thing to do is to configure all the fields in the Sharing Setup control panel with a username, password and machine name. For registering the product with the name and serial number, make sure the Organization field is filled out with something because it won't let it remain blank like nearly every other program does. As with AppleShare File Server 2.0.1, first fire up the Admin program to initialize it, add users, groups, set privileges, and designate the share directories or volumes. Both of these are capable of being mounted by OS X 10.3 Panther, which is the last OS X version to be compatible. It's not really that difficult to use and figure out, so this section and the next will break the detailed how-to methodology of this Guide.
AppleShare IP 5 and 6
By the time of the mid-1990s, the TCP world was really starting to mature and expand to new frontiers. This called for a new server suite that could natively work with IP protocols and thus AppleShare IP was born. Both of these suites are rather picky when it comes to software and hardware specifications, so a cursory examination of the specification chart for all AppleShare products is a good idea. Easiest place to get it is from the 09.00 (September 2000) Application Recovery disc image from Macintosh Garden, which also includes other things, but there could be corrupt files involved.
Let's start with AppleShare IP 5. First off, make sure OpenDoc is installed. It comes as part of the System Install CDs. Good riddance -- nobody else bothered with it, and it was a flop just like PowerTalk; or else it won't run. As with AppleShare 3 and 4, it will demand the File Sharing control panel fields get filled out: and remember the password because it is used for the Administrator. Then configure the TCP/IP control panel because it won't play nice without it. For now, just assign it to manual addressing because if it's set to DHCP, and it's not actively connected (the test machine, a Power Macintosh G3/266, wouldn't enable the Ethernet port unless the cable was hooked up to something) and assigned an IP address, then it will hold up the computer for about two minutes while it figures out how to make sense of it. AppleShare IP cannot share out to a LocalTalk network: it must be over Ethernet. But installing LocalTalk Bridge mirrors the shares out to the Printer Port, or Modem/Printer serial port, depending on the machine: or using a hardware AppleTalk bridge does the same thing.
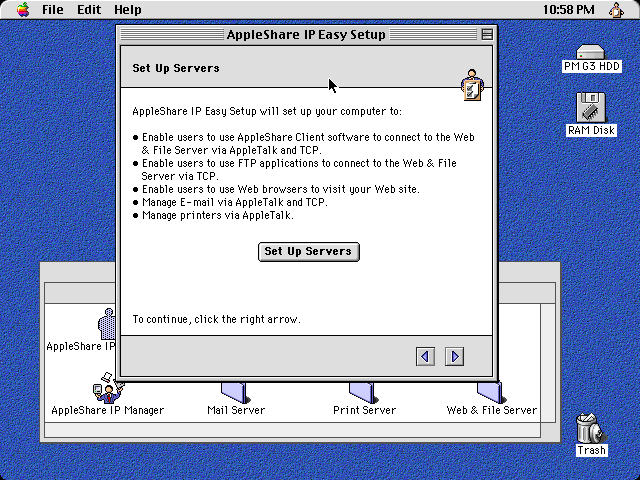 Easy Setup program |
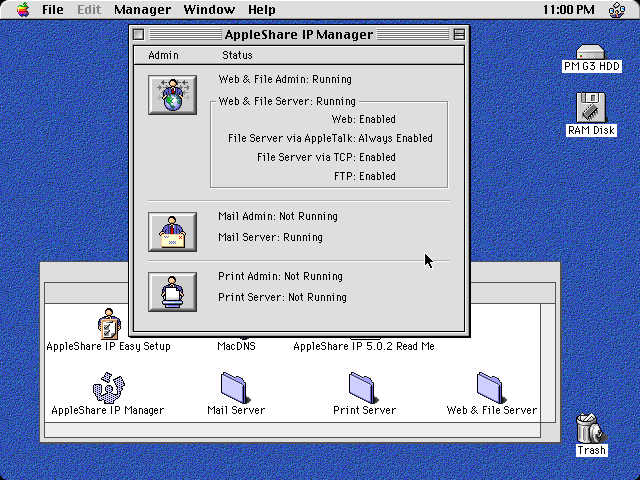 The central manager application |
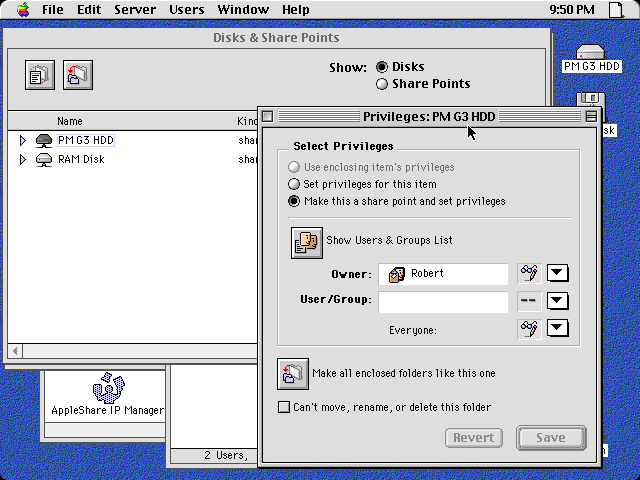 Disks, share points and privileges |
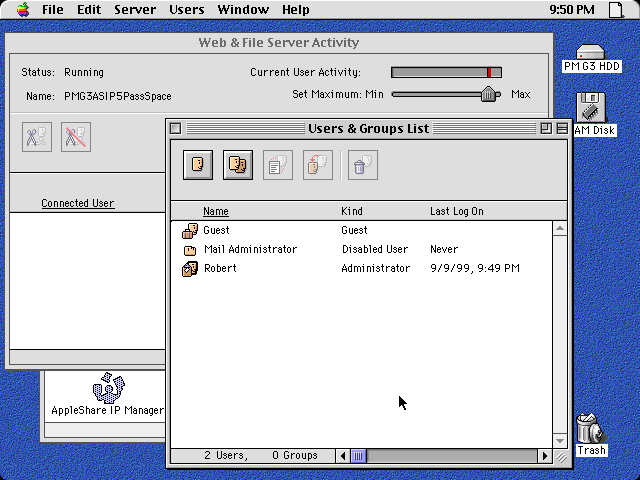 Users & Groups area |
Now, there's a convenient Easy Setup program in the root level of the hard drive under the directory called AppleShare IP 5. It is pretty painless to get through that program so we'll move on promptly. The Web & File Admin program handles the usual share directory, group and user configuration, along with privileges, and it also starts the Server. The "Show Disks & Share Points" selection from the Server menu is how a disk is shared: just open the volume by double clicking it, click the "Make this a share point and set privileges" radio button. It's all pretty easy to use, can't get things wrong. Set a user, set his privileges, add a share, start the server -- pretty foolproof. To add a user or group to the privileges window, just drag the entity from the users and groups list to the little User/Group field of the share properties window. Use the AppleShare IP Manager program as a central status and "main operating panel" for the server.
Extra tidbits: The AppleShare IP 5.0 Companion CD has AppleShare Client for Windows 3.1 and Workgroups on it. It references COPSTalk for Windows 95 users. Also it has VICOM Internet Gateway 3.8.3, which is like IPNetRouter or Apple Internet Router 3. AppleShare IP 5 has a web server, mail server, print server and file server (AFP and FTP). Attempting to share a Zip100 disk failed. Running multiple OSs on the same computer, even as partitions, can result in issues with starting File Sharing for the other operating systems. Try to just have one computer with nothing but AppleShare on it. This issue was also noted with AppleShare Server 3 and 4, but not AppleShare File Server 2.0.1. It's a good idea to copy the Electronic Library PDF files to a local volume off the install CD because the Installer doesn't install them.
Now for AppleShare IP 6. This does pretty much the same thing as the previous version, although it works a little bit differently, but in principle they're not all that apart from each other. It does tack on a SMB file server, although testing this feature against a Windows XP box failed (as did the FTP server element, in both OS X and Windows). It has the same Setup Assistant like AppleShare IP 5, and in the same fashion it will ask if it should share via AppleTalk, AppleTalk and TCP, or with IP 6, TCP only. A later prompt in the same program asks for the Administrator details: it appears that this is by default tied to the Owner of the computer listed in the Multiple Users control panel. It could probably be assigned to someone else though.
Use the Server Admin program as the central application to adjust the usual parameters concerning share directories and users. It was noticed that in the privileges window for a share, the "middle field" with User/Group, even if it is blank, should have all the checkboxes ticked, otherwise it wouldn't work exactly right. Could be a bug. Try to have a designated full-privileges user created rather than signing in all the time as the administrator. It's all pretty plain and simple to use, not very complicated at all, so this section won't put down too much detail.
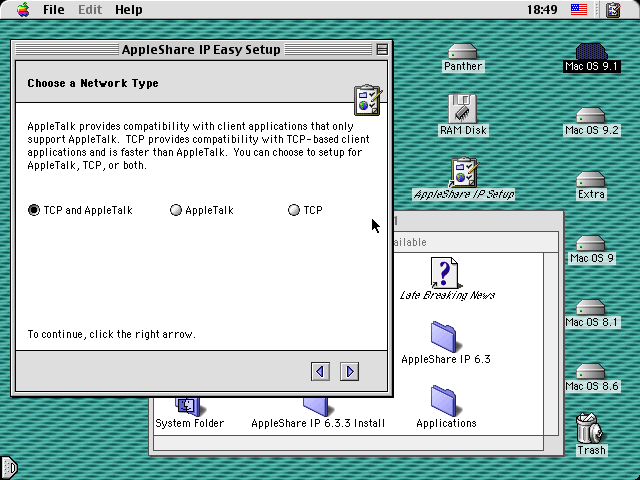 AFP over AppleTalk, AppleTalk & TCP or TCP only |
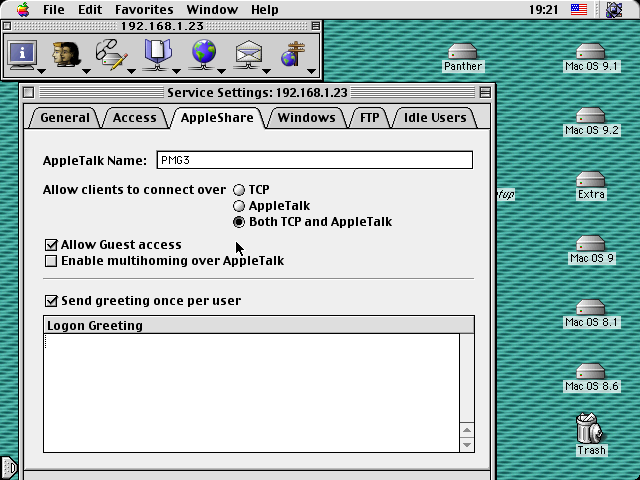 AFP Server properties |
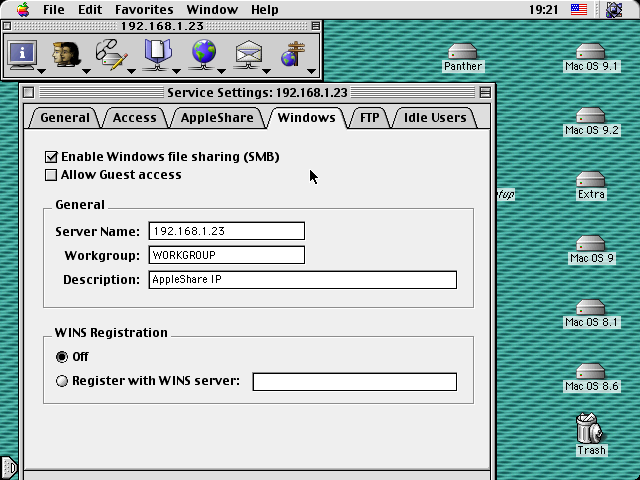 SMB Server details |
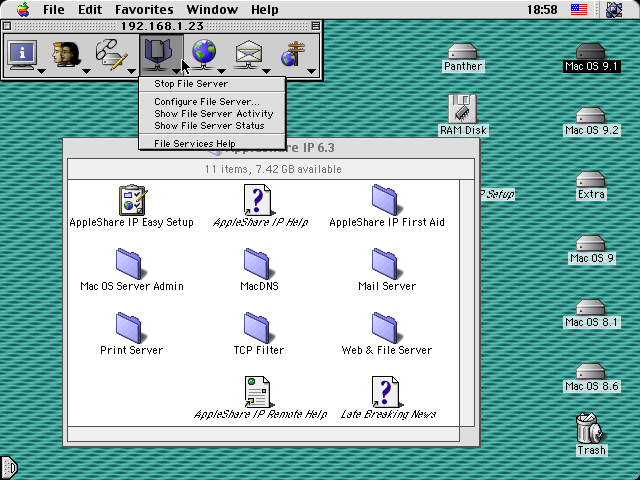 Manager program |
Little tidbits: Sharing a Zip100 disk was read only to System 3.3/Finder 5.4; taking a 40MiB disk image and mounting it, then sharing it bombed S3.3/F5.4; AppleShare IP cannot "share a share": as in, re-share a mounted network volume (that's a bit obtuse in server speak), it must be a logical volume like a CD, Zip, hard drive, et cetera; the AppleShare IP Advanced Preferences is pretty much only for setting connection timeouts and port configuration; as with earlier versions of AppleShare Server, the File Sharing feature in the File Sharing control panel is disabled and volume share settings cannot be tweaked in the Get Info window; full-time deployment of this server to older systems would probably be best used with a 2GiB "share partition" separate from the main partition; and there could be slight variations here and there because only IP 6.3.3 was tested under OS 9.1. 6.0, 6.1 and 6.2 were not evaluated. As with AppleShare IP 5, use LocalTalk Bridge to make the machine accessible via LocalTalk because Server IP 6 does not function over LocalTalk. By the way, you cannot use MacTCP to make a TCP connection to an AppleShare IP Server; also it is possible to force a connection over AppleTalk versus the usual TCP method by holding down the Option/alt key and double-clicking the server as usual in the Chooser. A long time ago someone from Apple made this unofficial document for AppleShare IP 6, which describes some tricks for ASIP 6.
Obviously, for running a central network of a bunch of Macs, AppleShare Server is fine, but for small networks, there isn't much point. Mac OS 9 can already do most of what AppleShare Server does, and Jaguar can still be plenty useful for SMBv1 networks, or a Linux box with Netatalk and Samba on it, which is probably smarter because Netatalk has been updated a lot recently and Samba has been doing that for awhile.
Mac OS X Server
Rhapsody 5.6
The predecessor to the first OS X 10.0 and 10.1 releases was this, normally called Mac OS X Server on the box with the version number (in this case 1.2v3) inscribed on the CD. It looks like a curious merging of Mac OS 8, early OS X and NeXTSTEP all blended into one operating system. Its UFS file system reminds the user of the UNIX partition in A/UX. Although there were earlier versions of Rhapsody, the only one shown here is version 5.6, demoed on a Macintosh Server G3 with ailing capacitors, failed memory DRAMs and battery bomb damage, among other issues.
Although it's not a difficult operating system to use, it is far from the best. Users with experience in obscure operating systems like Haiku or OS/2 might feel at home though, but it lasted less than a year on the market and there wasn't much stuff made for it, just like OS X 10.0 and to a certain extent 10.1. There's more to learn about Rhapsody, there's an entire website devoted to it, but for now some random findings and images concerning networking should do fine. All the images were taken with Grab, because Command + Shift + 3 doesn't work in OS X, and which saves files in a .TIFF format. This persisted with OS X until Jaguar, which saves screenshots as .PDF (and with pixel-doubling), which was changed to .PNG in OS X Tiger.
In the Apple menu is an entry called Mac OS. The first time this is selected the system does some work to create an emulation environment called the Blue Box. It runs 8.6 under Rhapsody 5.6 and appears to be fairly usable. Once the emulation environment is started, the user can hot-swap between the two modes using the program switcher on the upper right corner of both operating systems. The start up bong sound from the 8.6 environment is also rather peculiar, but while the emulation isn't as integrated as the Classic Environment in later OS X releases, it does have some perks of its own because it operates slightly differently than the CE does.
Both environments will read 800KiB and 1.44MB disks but from casual use it appears that only the Mac OS environment can copy and write to them, and the Workspace Manager which kind of does "Finder-like" duties works differently than a normal file browser. 400KiB MFS disks were rejected by both environments. The most unusual thing relevant for this Guide was the way that the OS X side works with the AFP server. Instead of a normal configurator like the NFS window offers, an administrator instead signs in from another machine (attempting locally didn't work with OmniWeb) with a Java program that does the work. The Java program didn't work in Safari 3 or Firefox 3.6, so Internet Explorer 5.2 bundled in OS X Server 10.2.7 was set for the job. Of a 10GiB disk image on a BlueSCSI device, it shrank to about 300MB with Zip compression, suggesting that OS X Server 1.2v3 only uses about 300-500MiB on disk, which is lean by modern standards. | 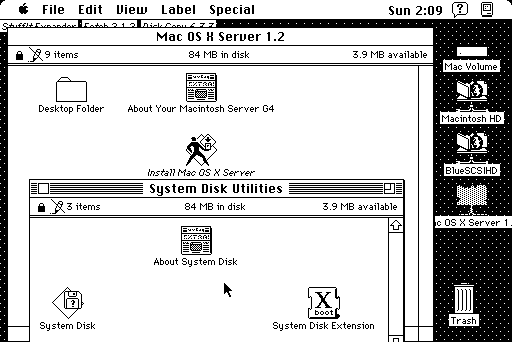 SE/30 accessing HFS server disks via AFP over TCP (7.1) |
The Startup Disk control panel can't be used to boot into OS X Server 1.2. Instead the System Disk control panel, or extension is used to select the volume with OS X 1.2 and go from there, it looks a bit like the horizontal row of volumes that OS X uses in its Startup Disk control pane view. Overall Rhapsody is a mildly interesting operating system, but its value these days is very limited because there's not much to really do with it outside of devoting a bunch of work to import programs to it, and modern ports at that too (just like A/UX). The http://rhapsodyos.org/ webpage is probably the most novel content to come out of the whole project. There's also a thread on MacRumors forums for Rhapsody specific software, an equivalent exists on Macintosh Garden.
 Basic view; program switcher |
 Server management programs |
 AppleTalk router option |
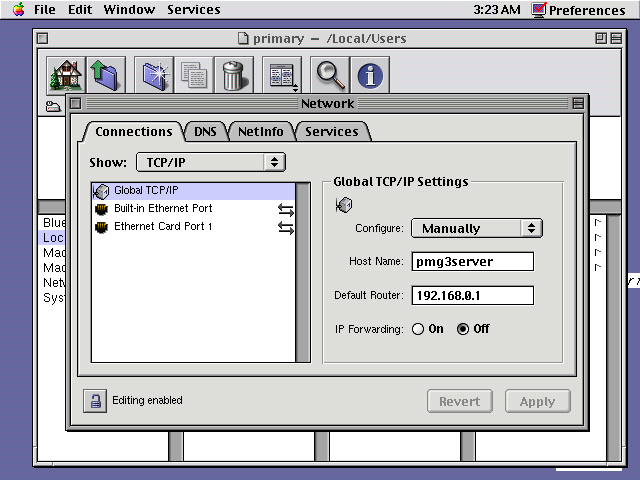 TCP/IP configuration |
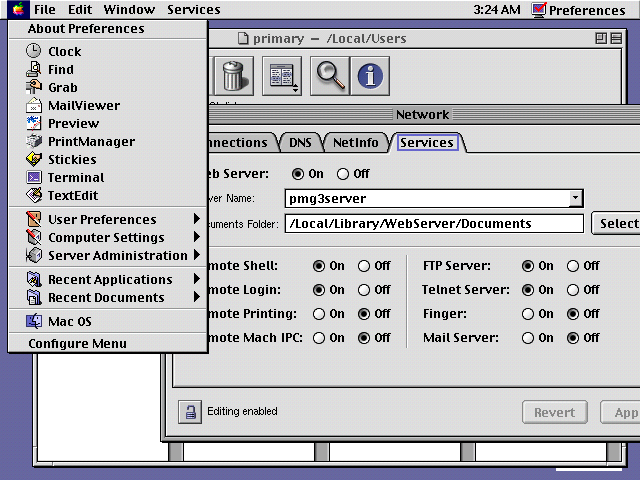 Other services available |
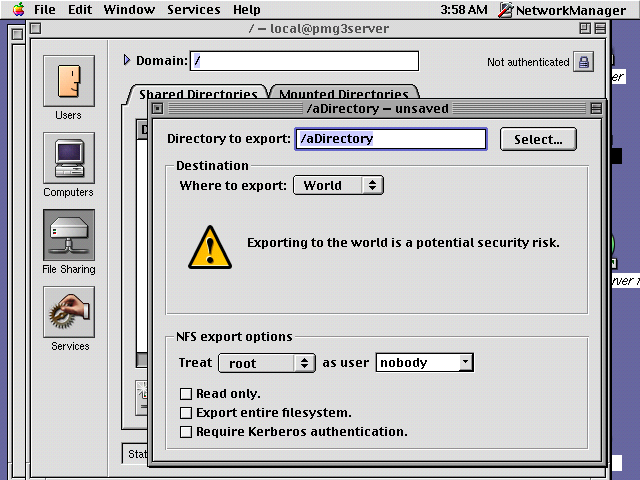 NFS management window |
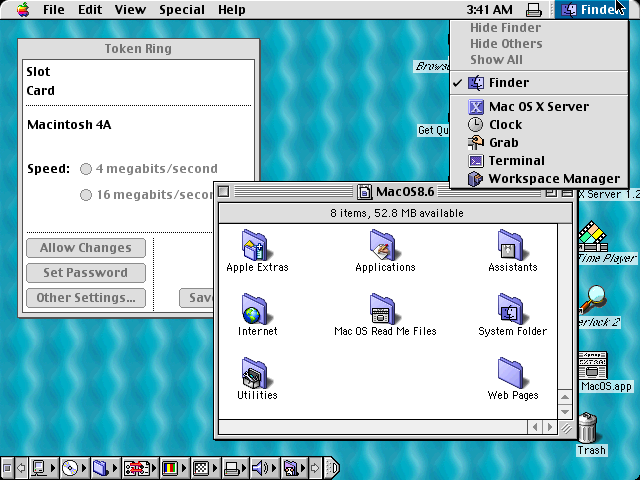 Inside the Blue Box emulation |
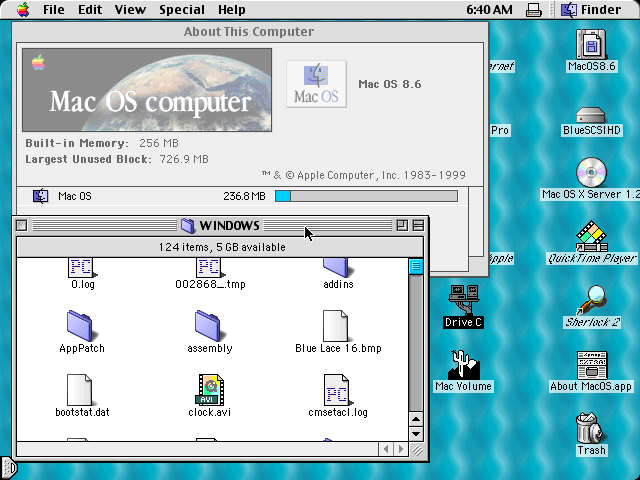 Testing networking in Blue Box |
 AFP server windows |
 More AFP server options |
 Mac OS 9 boot volumes |
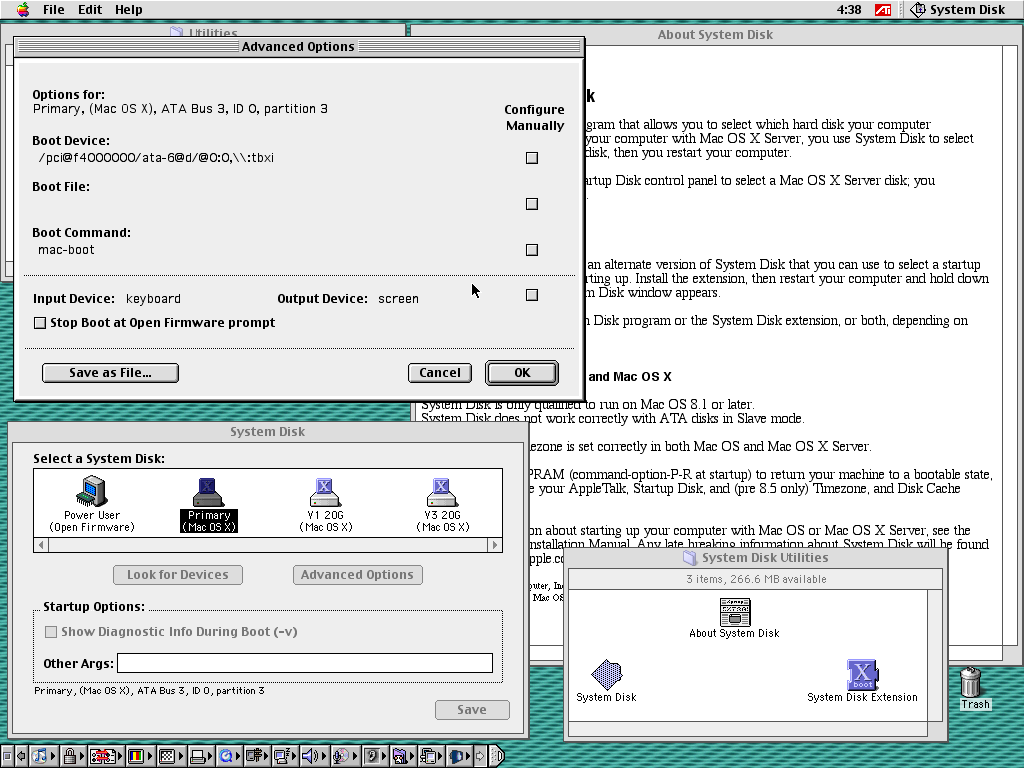 System Disk program |
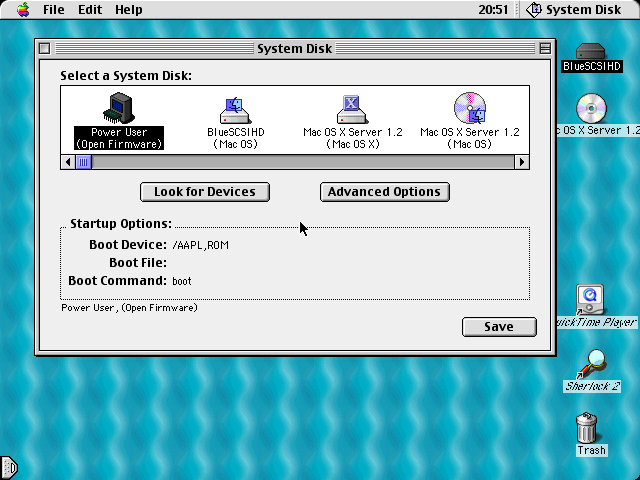 System Disk in use |
OS X 10.0 up to 10.6
The Server versions of OS X are rather similar to the standard versions. Of note, they include increased control and capability as a Server goes, such as administration, management and control programs. Aside from those features, they're pretty much the same as a regular version. The only one that is really different is Mac OS X Server 1.0, which falls under the Rhapsody branding and is very much different than the Mac OS 8 Copland which was common at the the time and was just an evolution of the NEXTSTEP/OPENSTEP lineage.
Post install starts a setup assistant which sets up some basic elements of the Server suite, the system reboots and is ready to be configured further. Other than interesting tidbits like netbooting, netinstalling, iChat server, DNS servers, time server, and so on, the AppleTalk, SMB and FTP features are pretty much the same as a normal client version. Because the server programs are used to configure the FTP server, web server, AFP server and so on, none of those services can be enabled in the Sharing pane of System Preferences (only Apple Remote Desktop, Remote Apple Events and Remote Login are available). In 10.2 and earlier there was a program to set the SLP neighborhood: SLP refers to Service Location Protocol, which is designed to allow computers to advertise and find services, defined in RFC2165. It was removed with 10.3 Server.
Since most people won't see much of this stuff, a gallery is provided below which showcase certain interesting elements across version 10.0 Server up to 10.6 Snow Leopard Server. One interesting bit about 10.0 is that it doesn't show the Setup Assistant after a fresh install properly on a 640x480px VGA display, so a different display output was required. It set the trend for appearance up to 10.2 Jaguar so they look all alike for the most part. (A copy of the Jaguar Server documentation is here.) 10.3 Server looks very similar to 10.4 Server and only an acute eye can tell them apart from each other, same with 10.5 and 10.6 Server. Starting with 10.7 Lion the Server element was a package that was acquired from the Mac App Store: it started to bleed features (especially with v5.7.1) as the version number went up until it was retired in April of 2022, and looks completely different to everything else here. |
 Server services available (10.6) |
Mac OS X 10.0 is kind of a unique experience these days. Weirdly, the earliest versions of 10.0 failed to work on a Macintosh Server G3. Usually, updating the firmware should fix such affairs, but the readme for the firmware updater says not to apply it to a Macintosh Server G3. The machine itself is nothing remarkable from a normal minitower G3, except bundled with an Apple Fast Ethernet 10/100 NIC (possibly made by Znyx Corporation, has a Digital 21140-AF chipset) in addition to the standard 10BASE-T NIC, a SCSI Ultra Wide (68 pin) card and was supposed to include Mac OS 8.1 with AppleShare IP 5. This one had two SCSI cards, an Adaptec APD-29160 MAC model and a Atto Technology ExpressPCI PSC. The hard disks failed a long time ago so no time capsules there, and battery bomb damage was evident, combined with weak capacitors. 10.0.4 booted fine, as did 10.0.3, but not earlier subversions, instead showing a "broken folder", OpenFirmware issues or boot loops. Information about the "broken folder" is difficult to find: should you experience this problem, check the links below. Most of them reference altered folders or files in an OS X installation while under Mac OS 9, but that was not representative of the author's case and is probably owing to something else on a low-level.
- 106464: Mac OS X: Troubleshooting a Startup Issue
- 88152: Mac OS X: Stops Responding While Starting Up From Mac OS X CD
- 106805: Mac OS X: "Broken folder" icon, prohibitory sign, or kernel panic when computer starts
- 106388: Mac OS X: How to start up in Single-User or Verbose Mode
Something else that is difficult to diagnose is the "breaking glass" issue, which usually suggests a memory problem, like at least one bad RAM stick, but could also be a PRAM or PRAM battery issue, the sound card is not properly inserted or something else. There's a RESET switch on the upper left corner of the motherboard near the top of the leftmost PCI card slot. Consider clearing the PRAM and NVRAM at the earliest opportunity, although this can be challenging because the "breaking glass" sound occurs before POST is completed and is equivalent to a Sad Mac. But it will complete POST and boot up just fine without a Personality card installed. Because it doesn't have any memory on the main motherboard, it requires at least one stick of RAM: if you're having memory problems, consider using a different machine, ideally a Pentium III or 4 machine which uses the same RAM type and use something like Memtest86 or Memtest86+.
Back on topic, because of the version issue, or something else, every attempt to make 10.0 Server start on a real machine was unsuccessful. But on a normal PC these days, QEMU-system-PPC works fine should you desire to poke around these operating systems, with VirtualBox for 10.5 and above. Tiger can be difficult to get working with VirtualBox, 10.5 is easier, as is using an Intel host instead of an AMD, Apple M-series or ARM processor on the host machine. Oracle does not like to support OS X guest machines on host machines that are not Intel family, as does VMWare. Consider one of these two CPU profiles for VirtualBox, one of them ought to work (VirtualBox 6.0.8r130520, required a special modification):
VirtualBox 7 can have issues as well. Consider using VirtualBox 6.1.50. Future versions may have less issues, or more. Information is current as of this writing (late 2024). Use an ICH9 chipset and USB2.0. The author owes a debt to the Macintosh Garden for hosting nearly 30GiB of disk images which was used for this section, with particular regards to Mr.Fahrenheit. Anyways, back to the show.
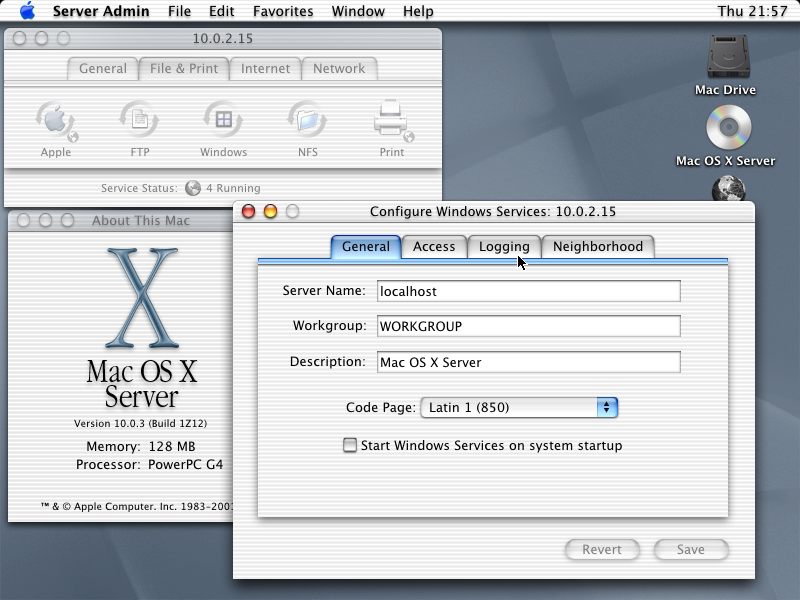 Windows server features (QEMU) |
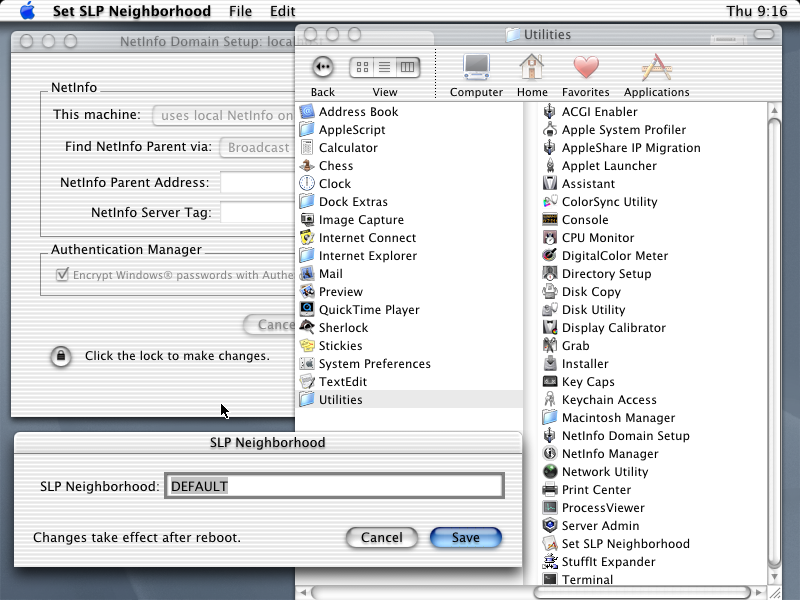 10.0 Server programs |
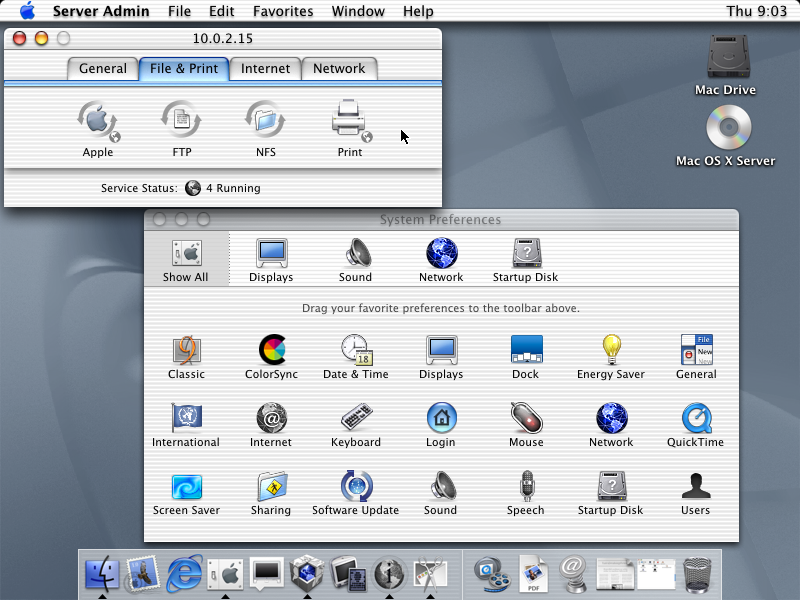 Server Admin (10.0) |
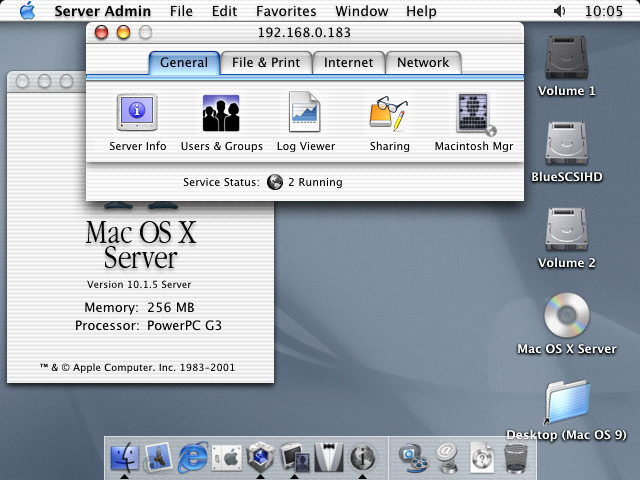 Server Admin (10.1, Server G3) |
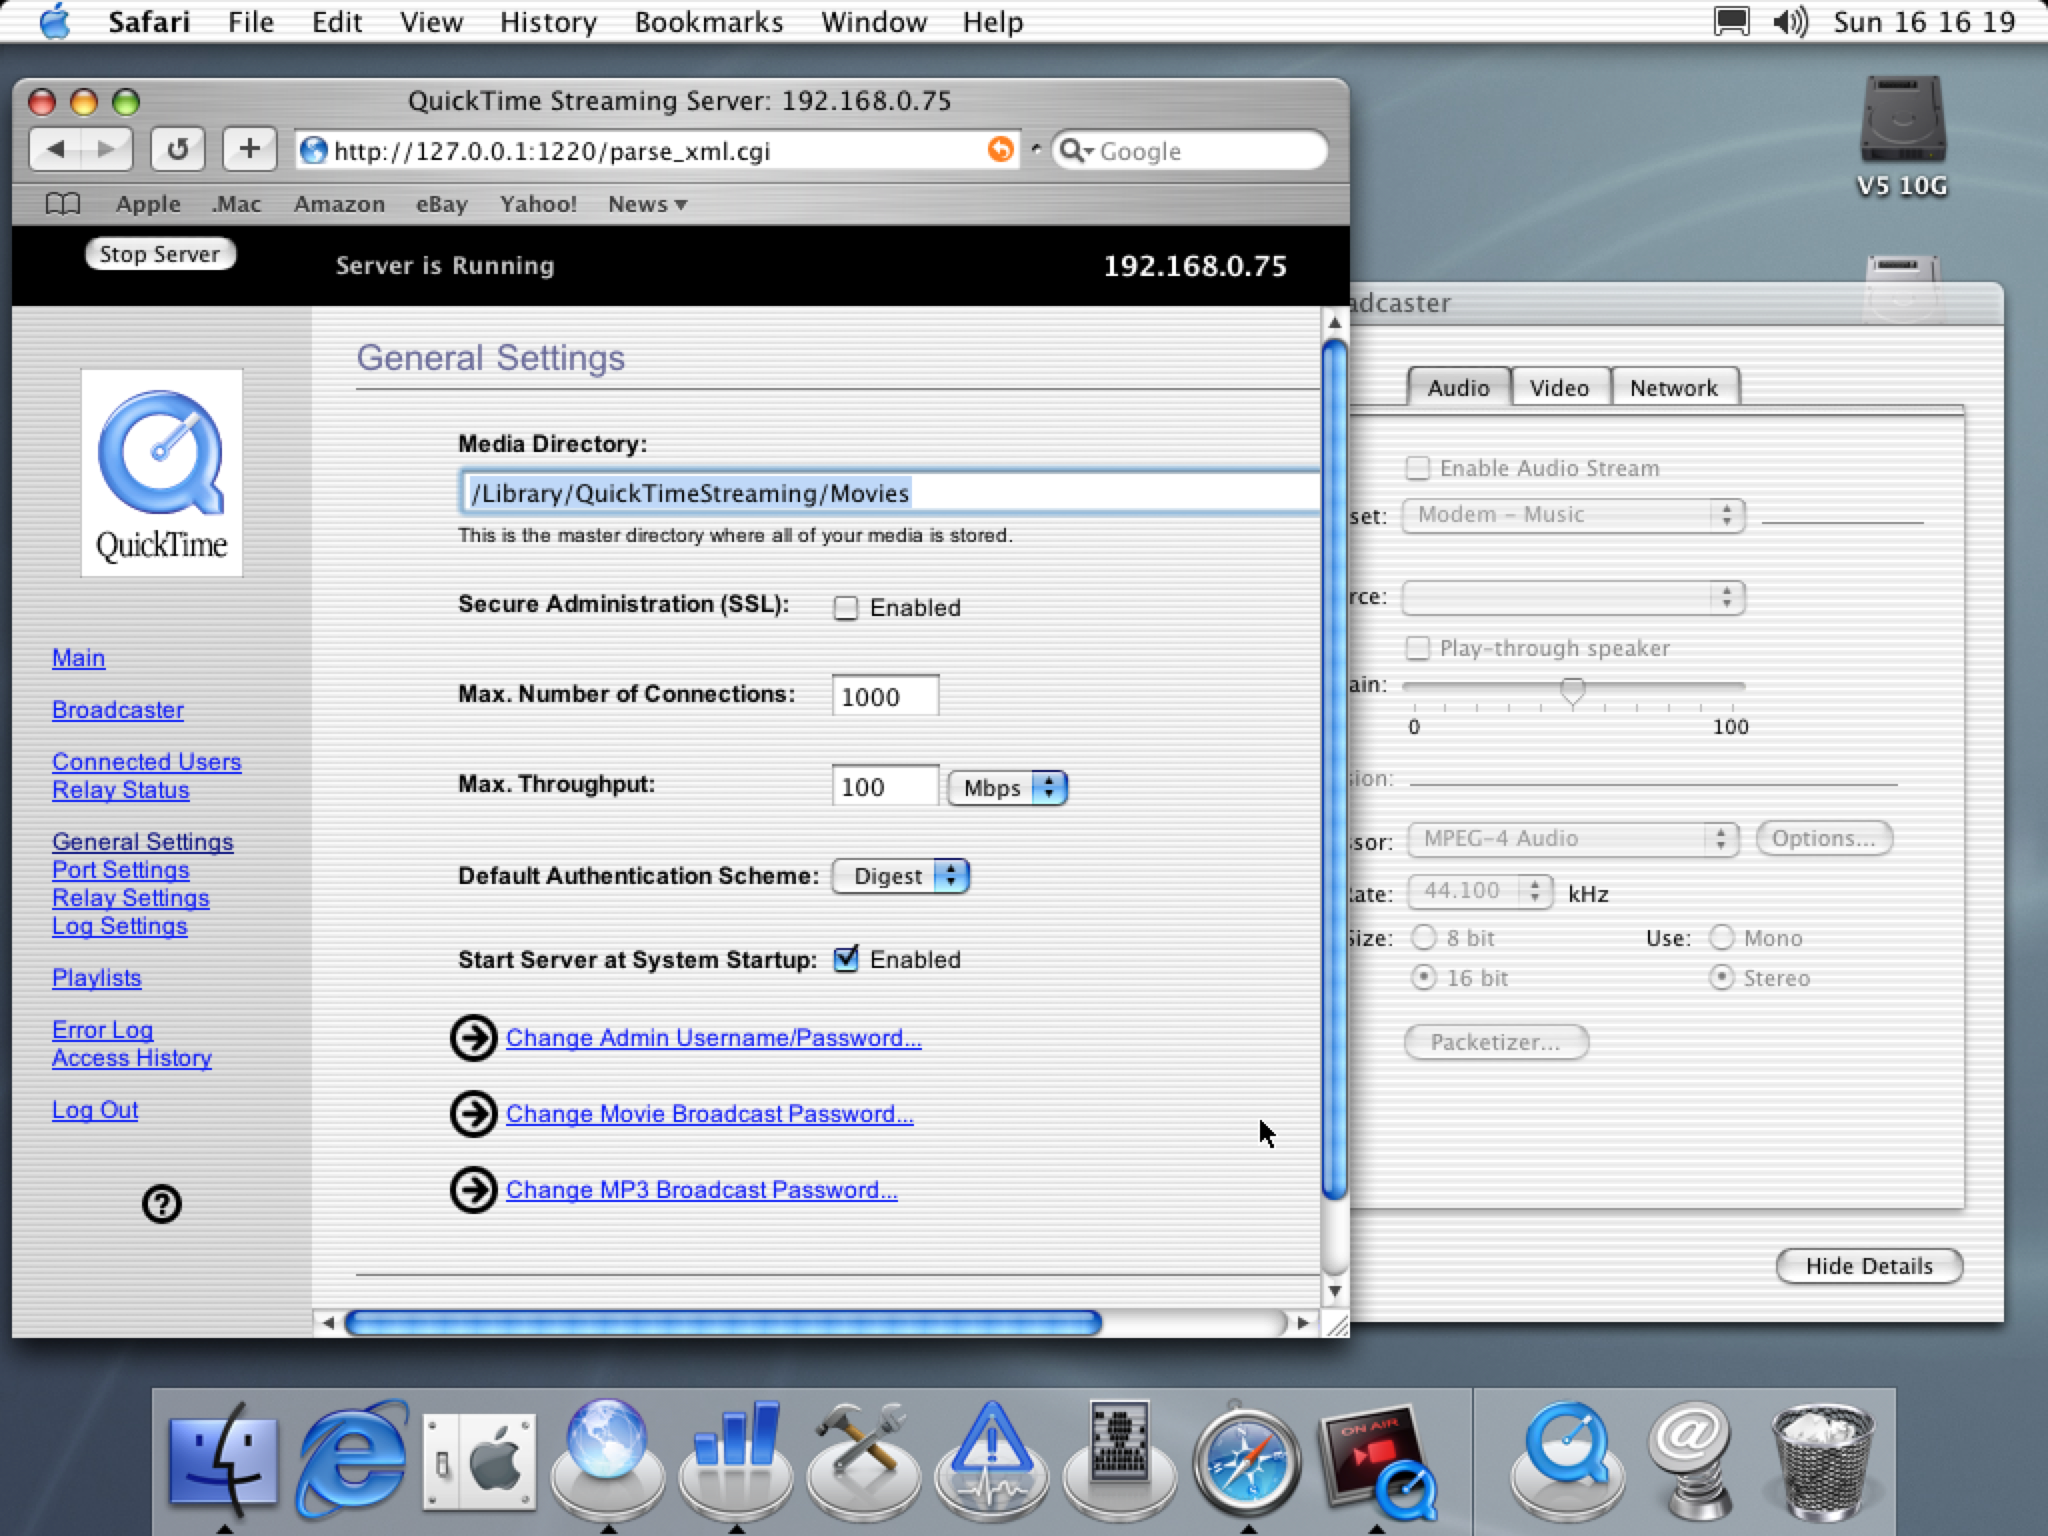 QuickTime Server (10.2, Mac mini G4) |
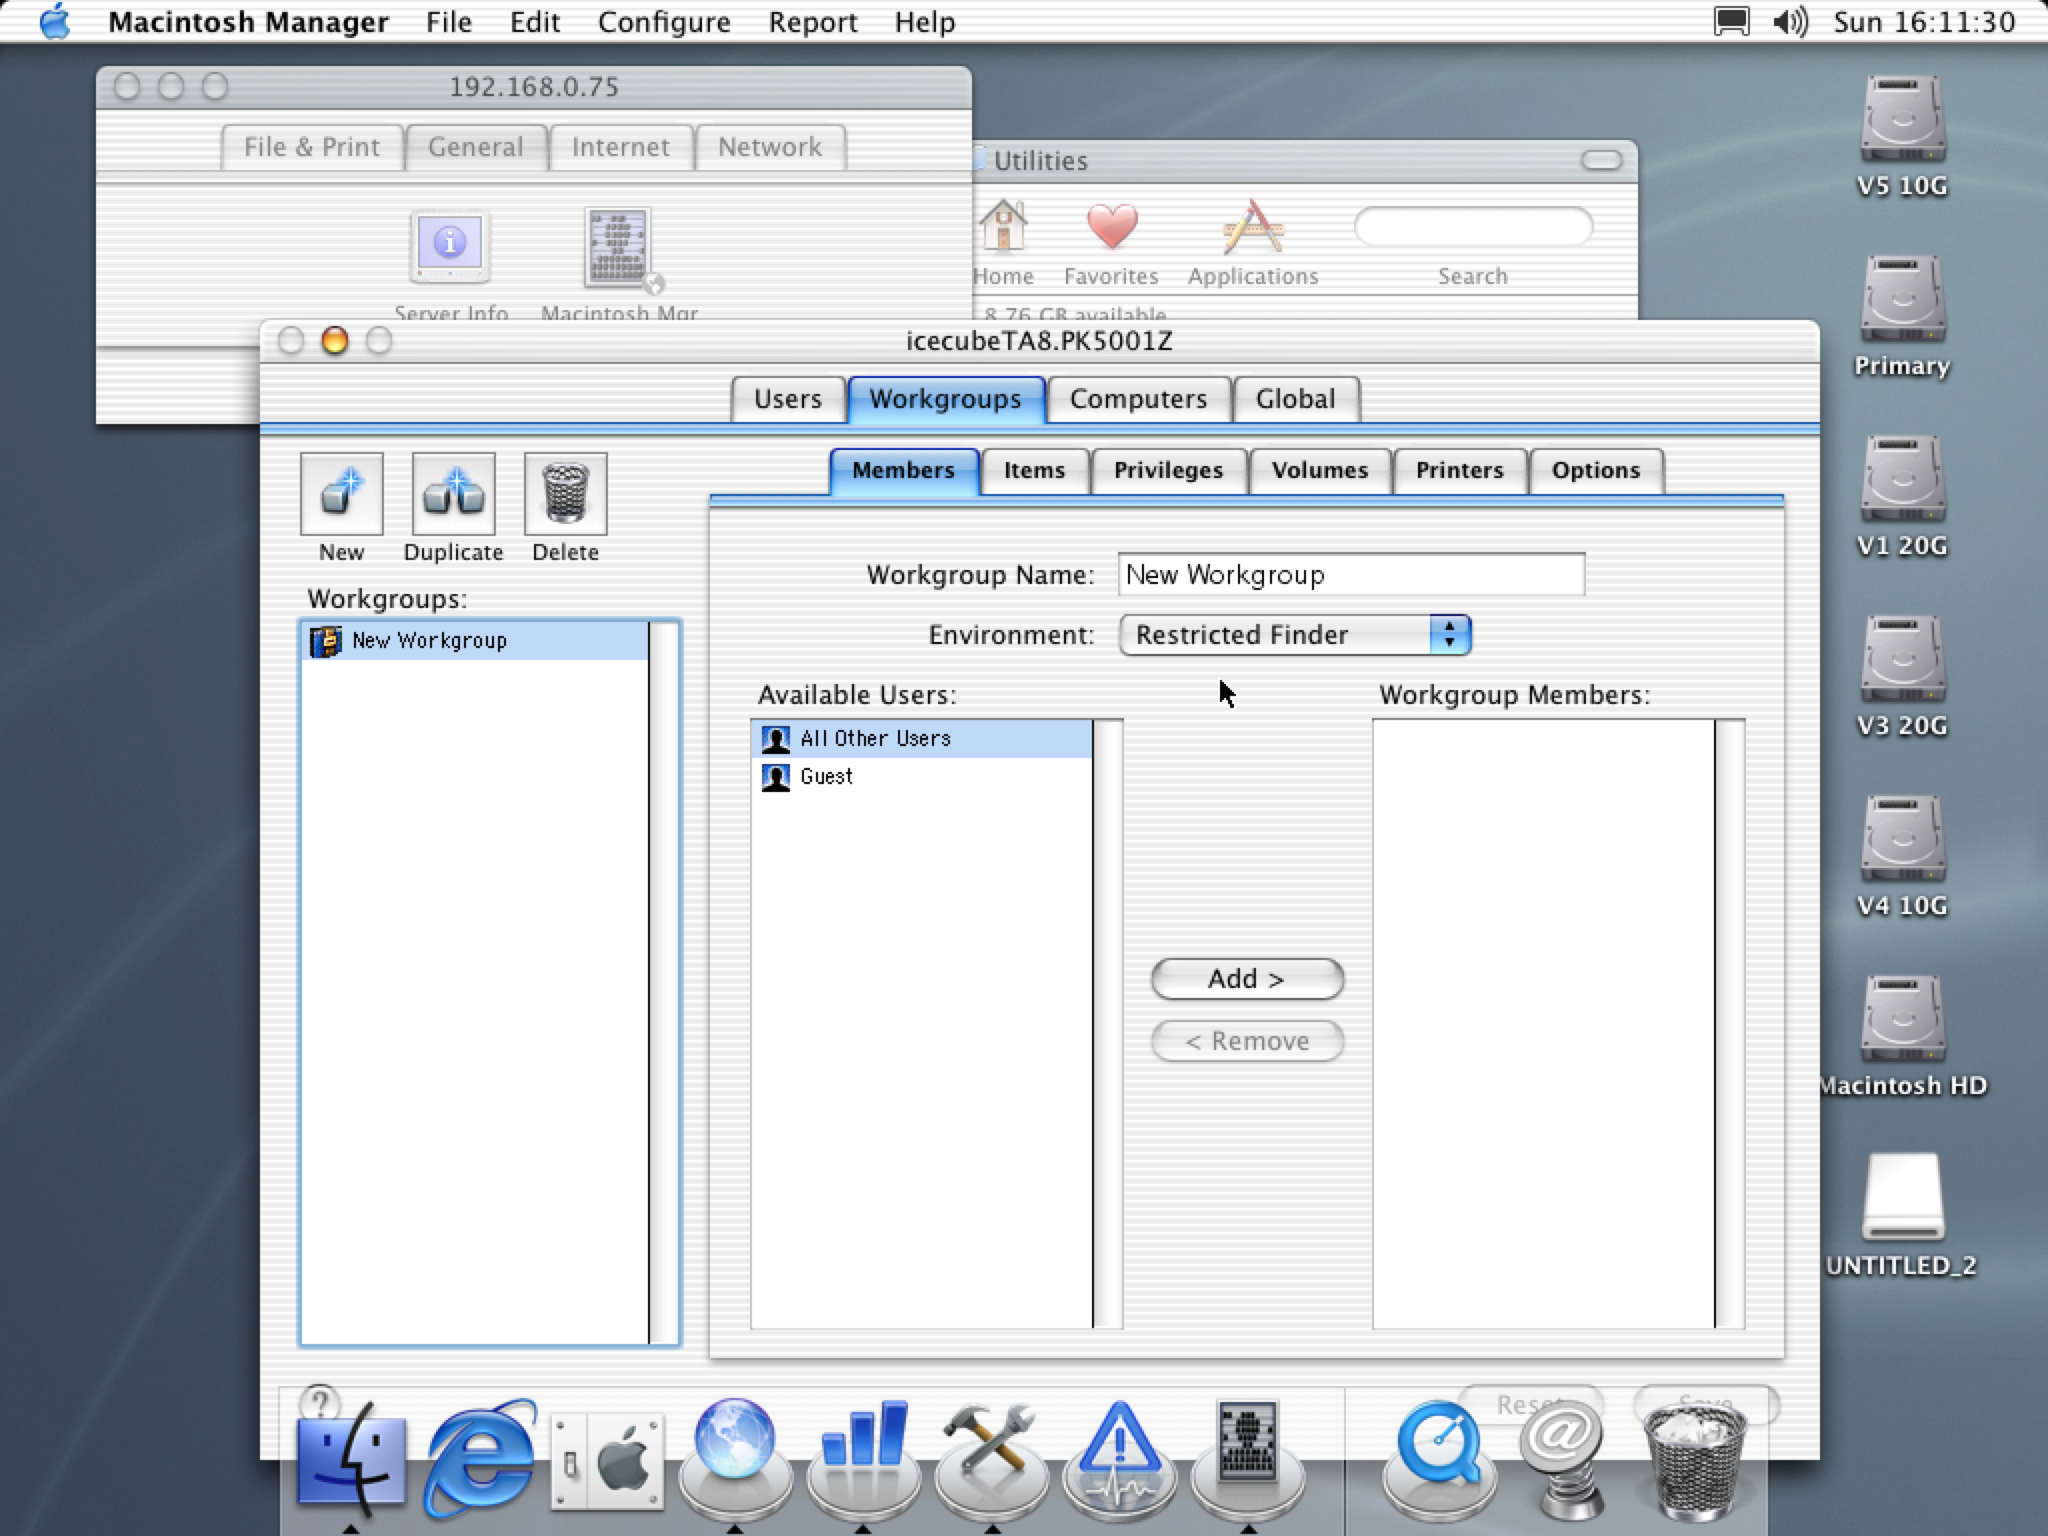 Macintosh Manager for managing 8.6 and 9 clients |
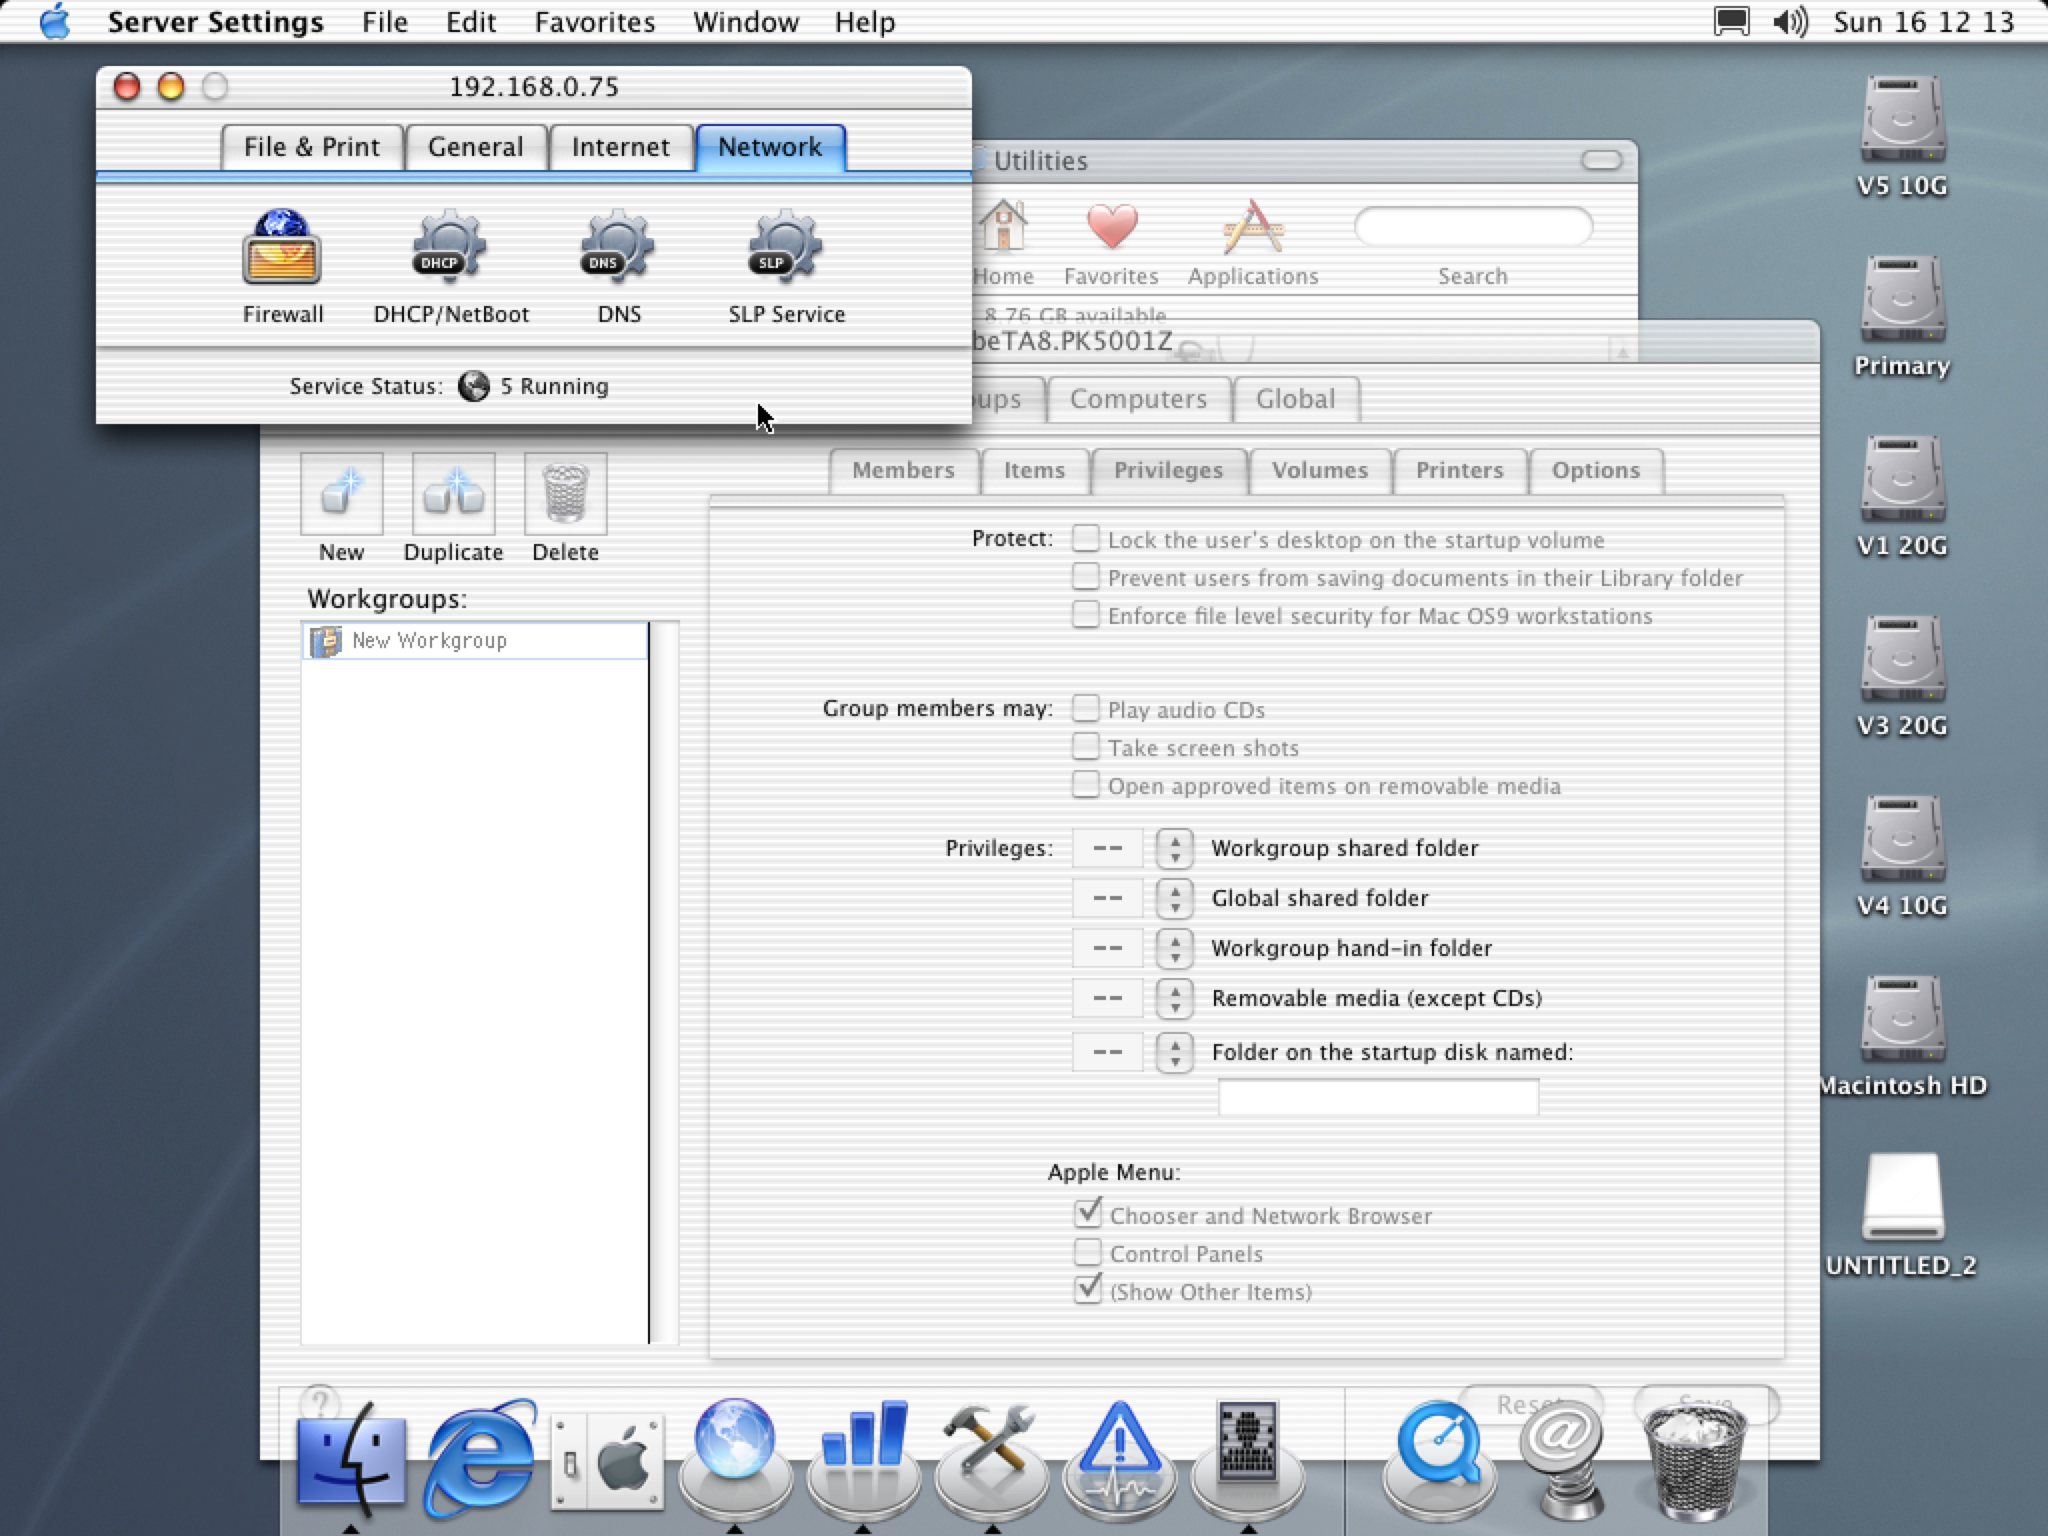 Server Settings, Macintosh Manager (background) |
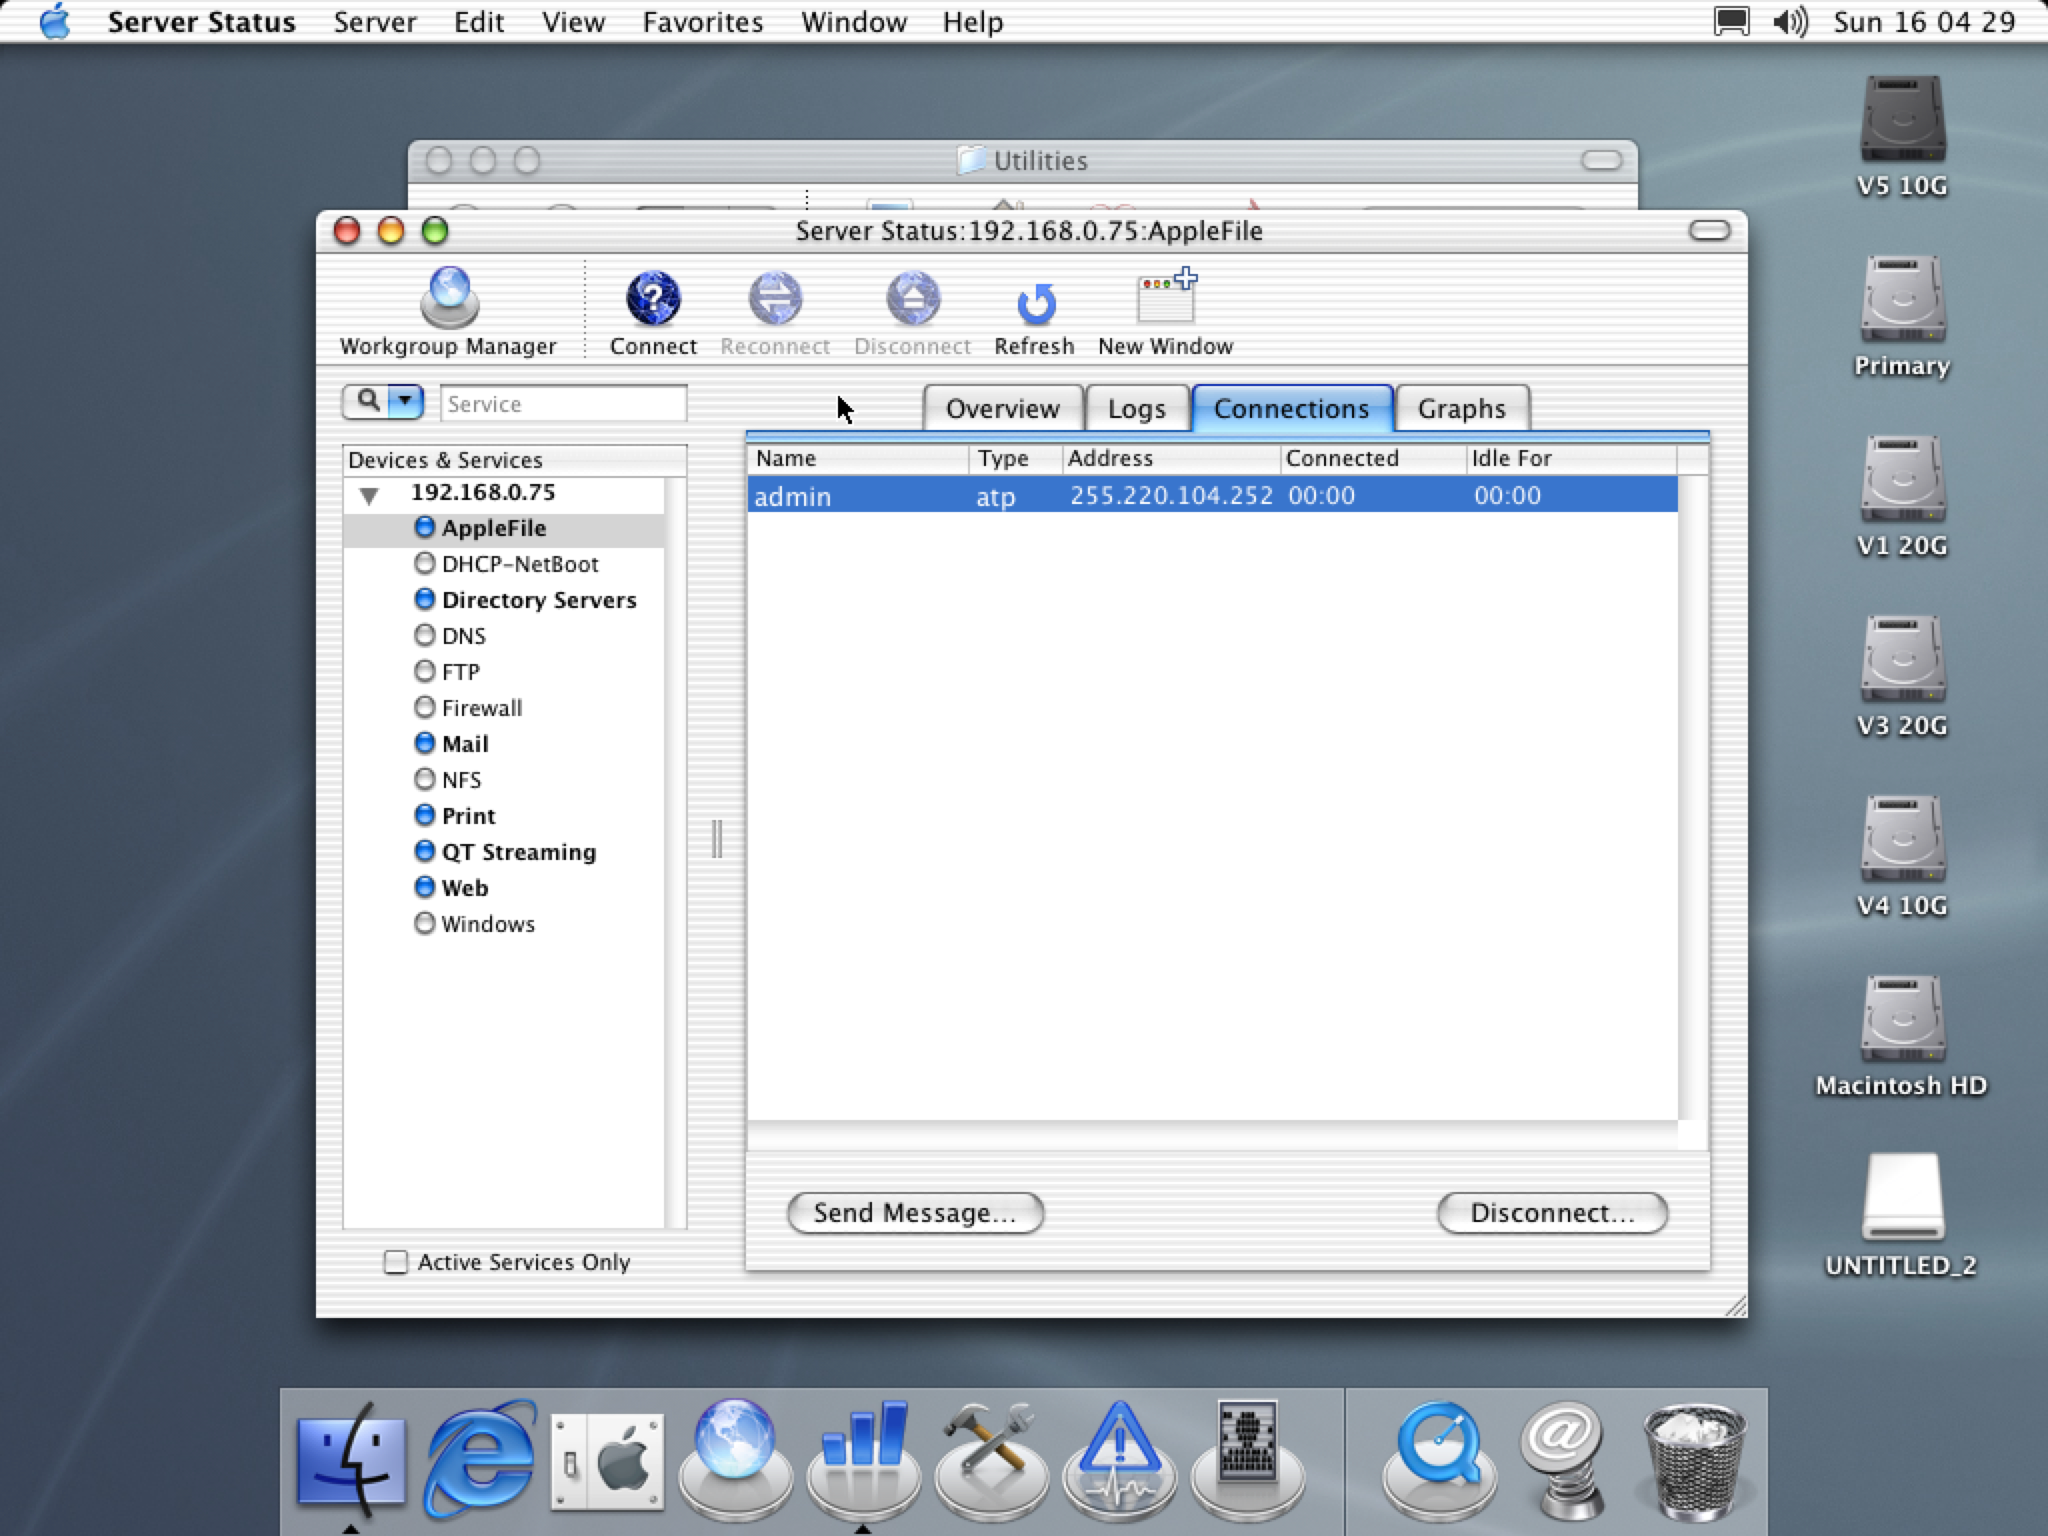 Server Status for AFP server |
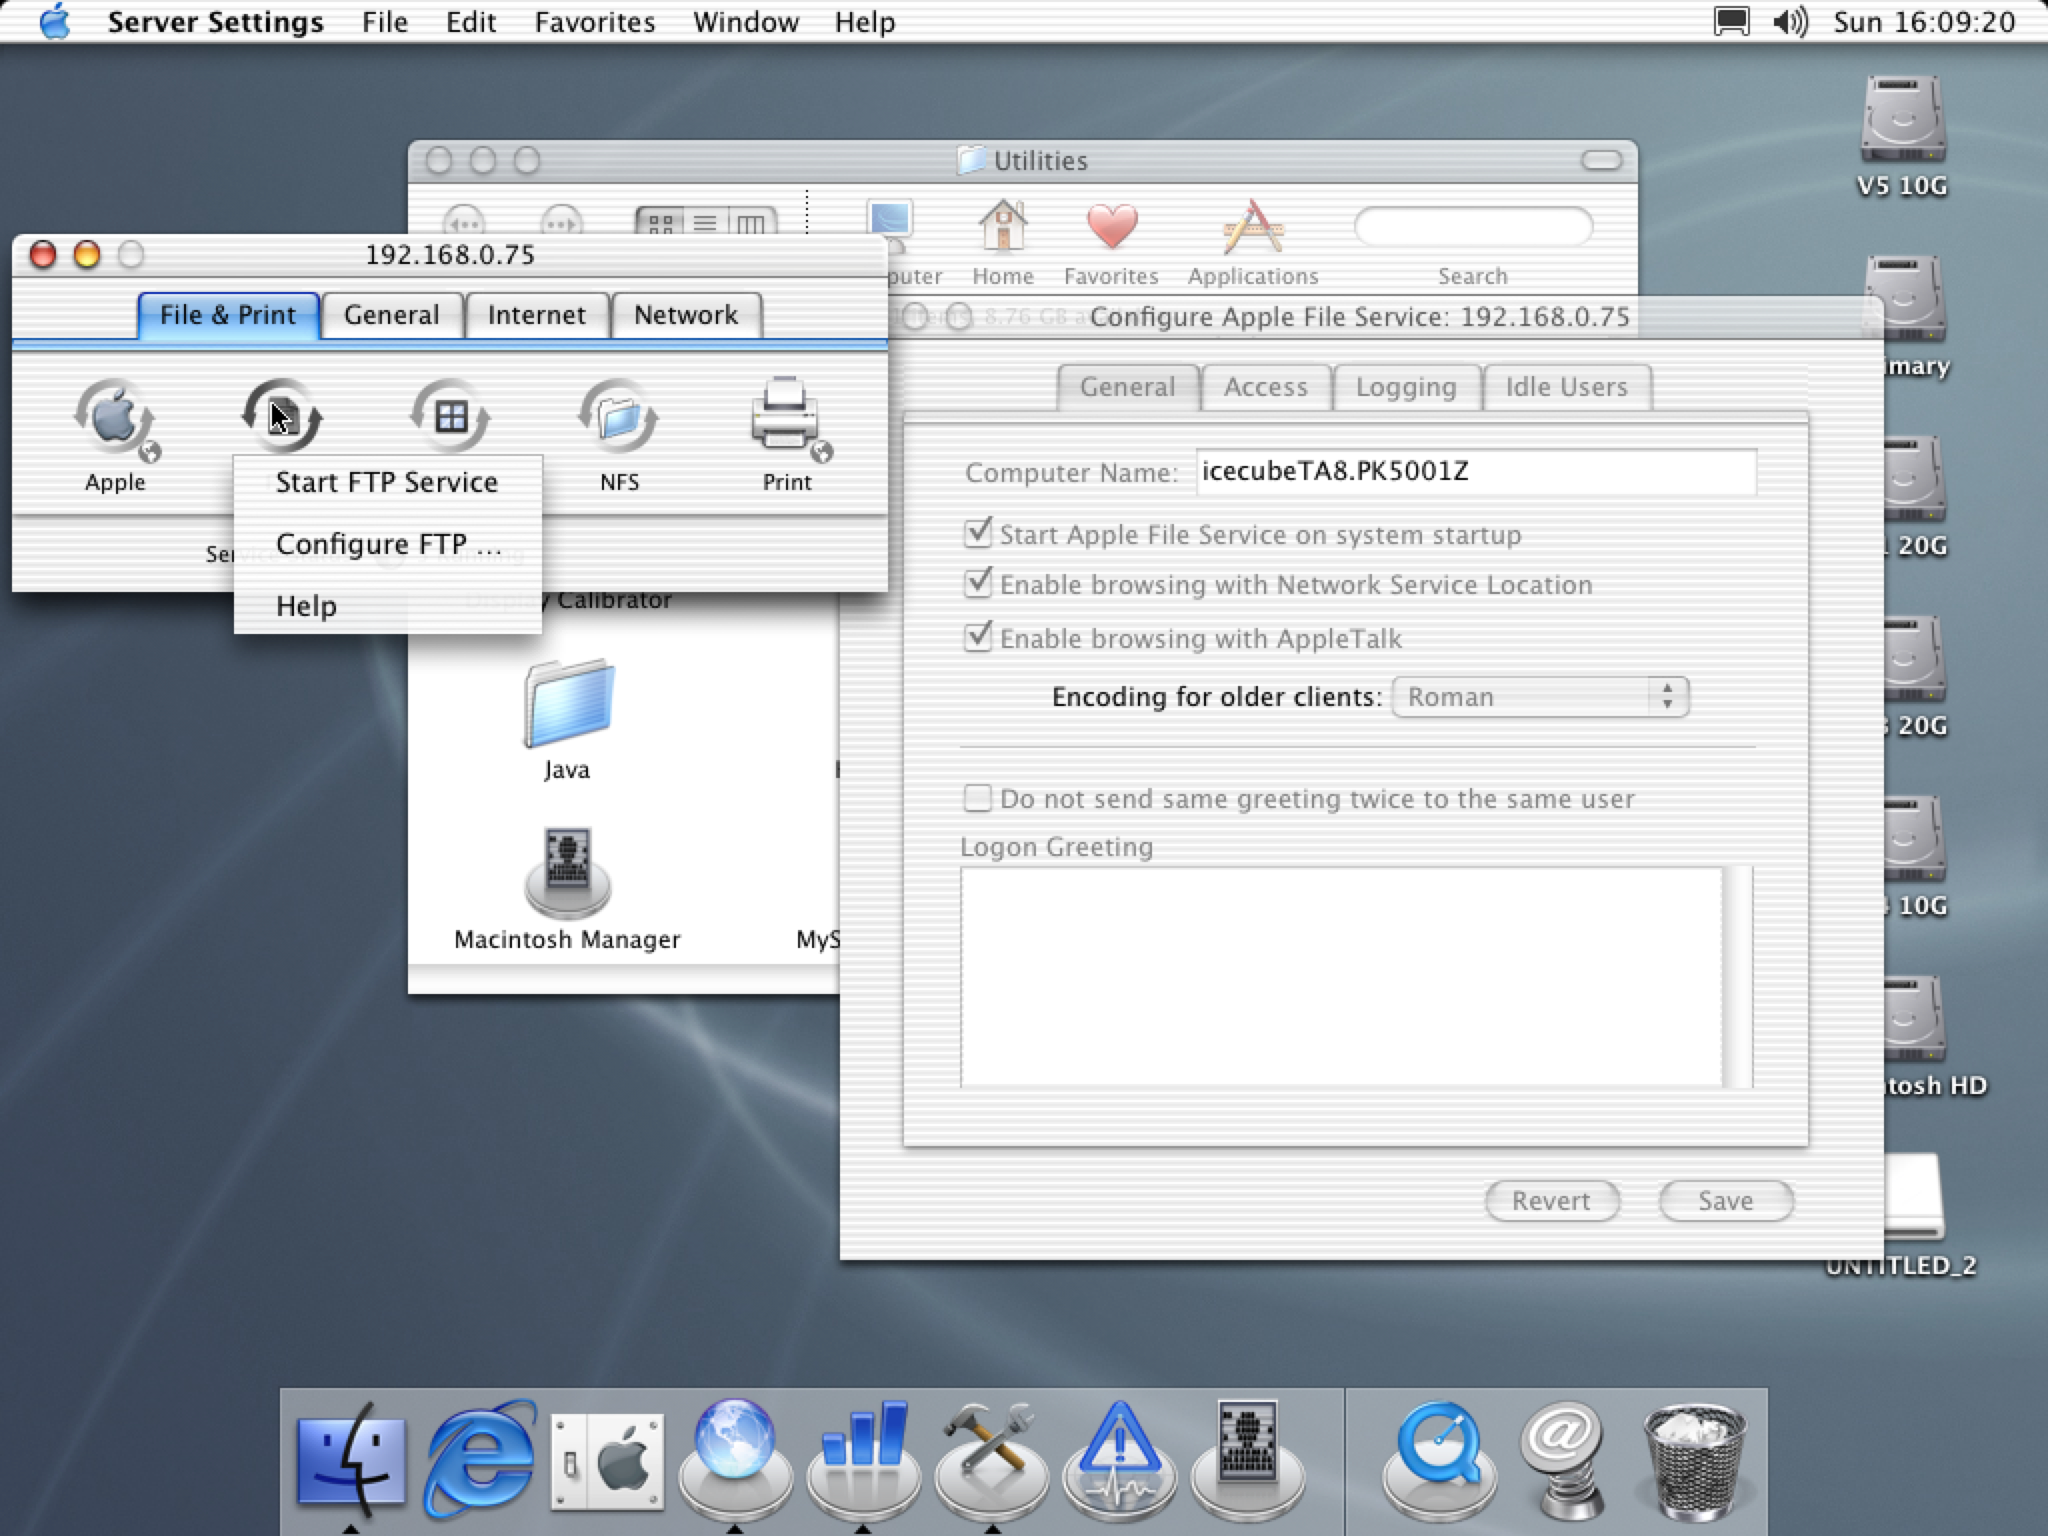 Server Settings (10.2) Server services are started with this |
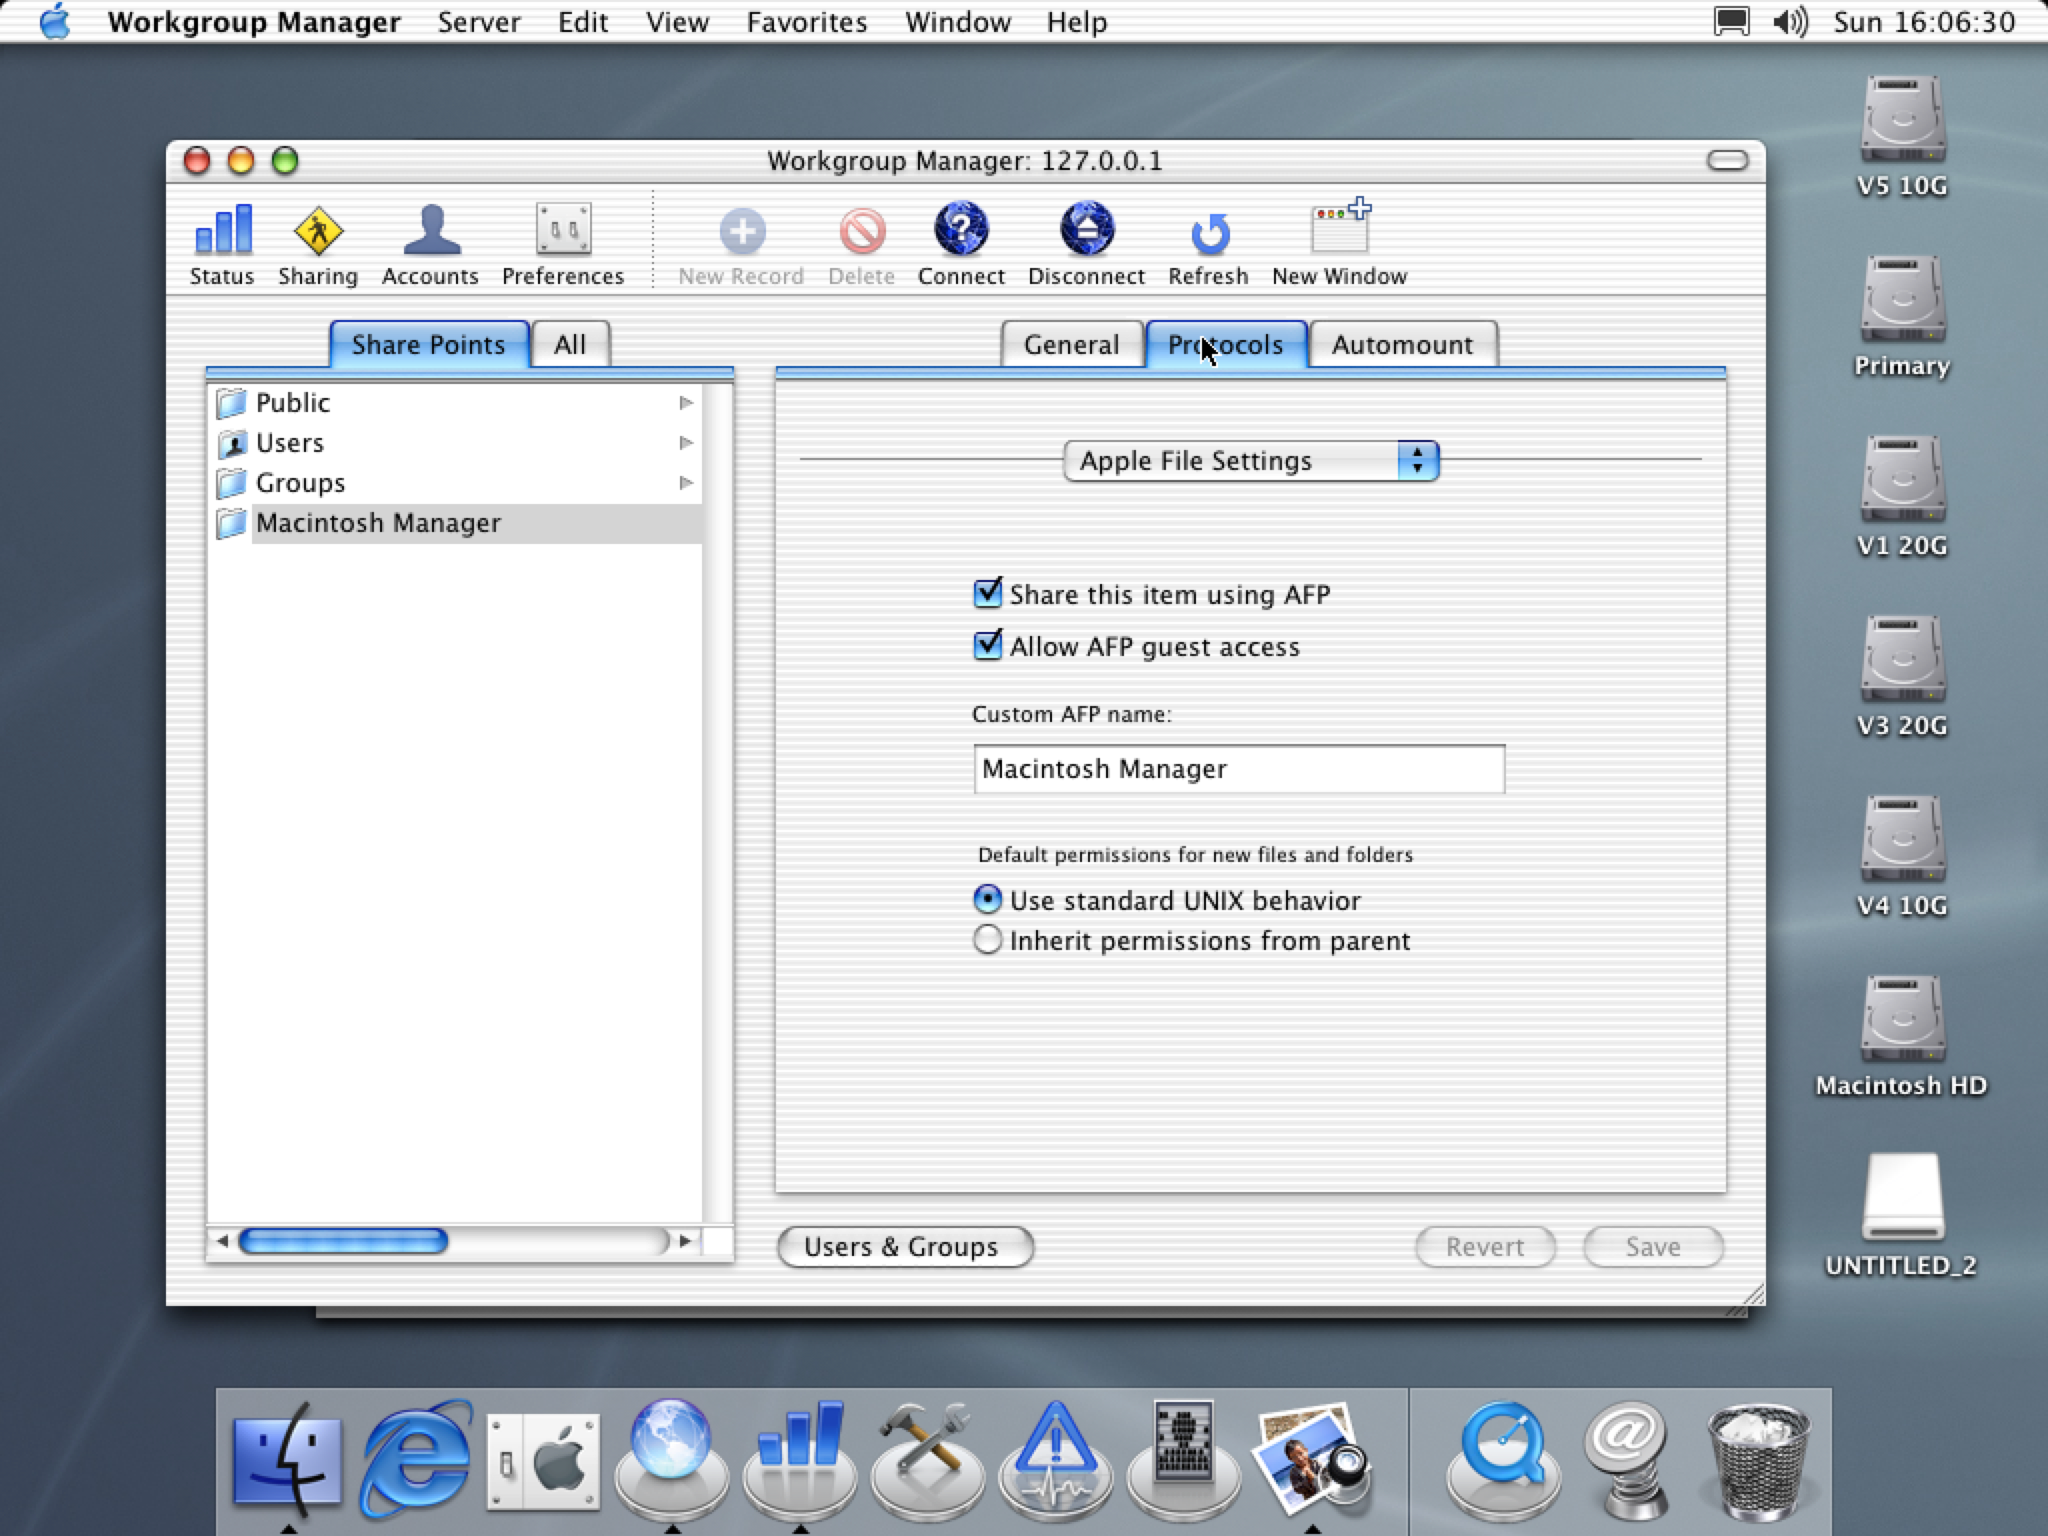 Workgroup Manager |
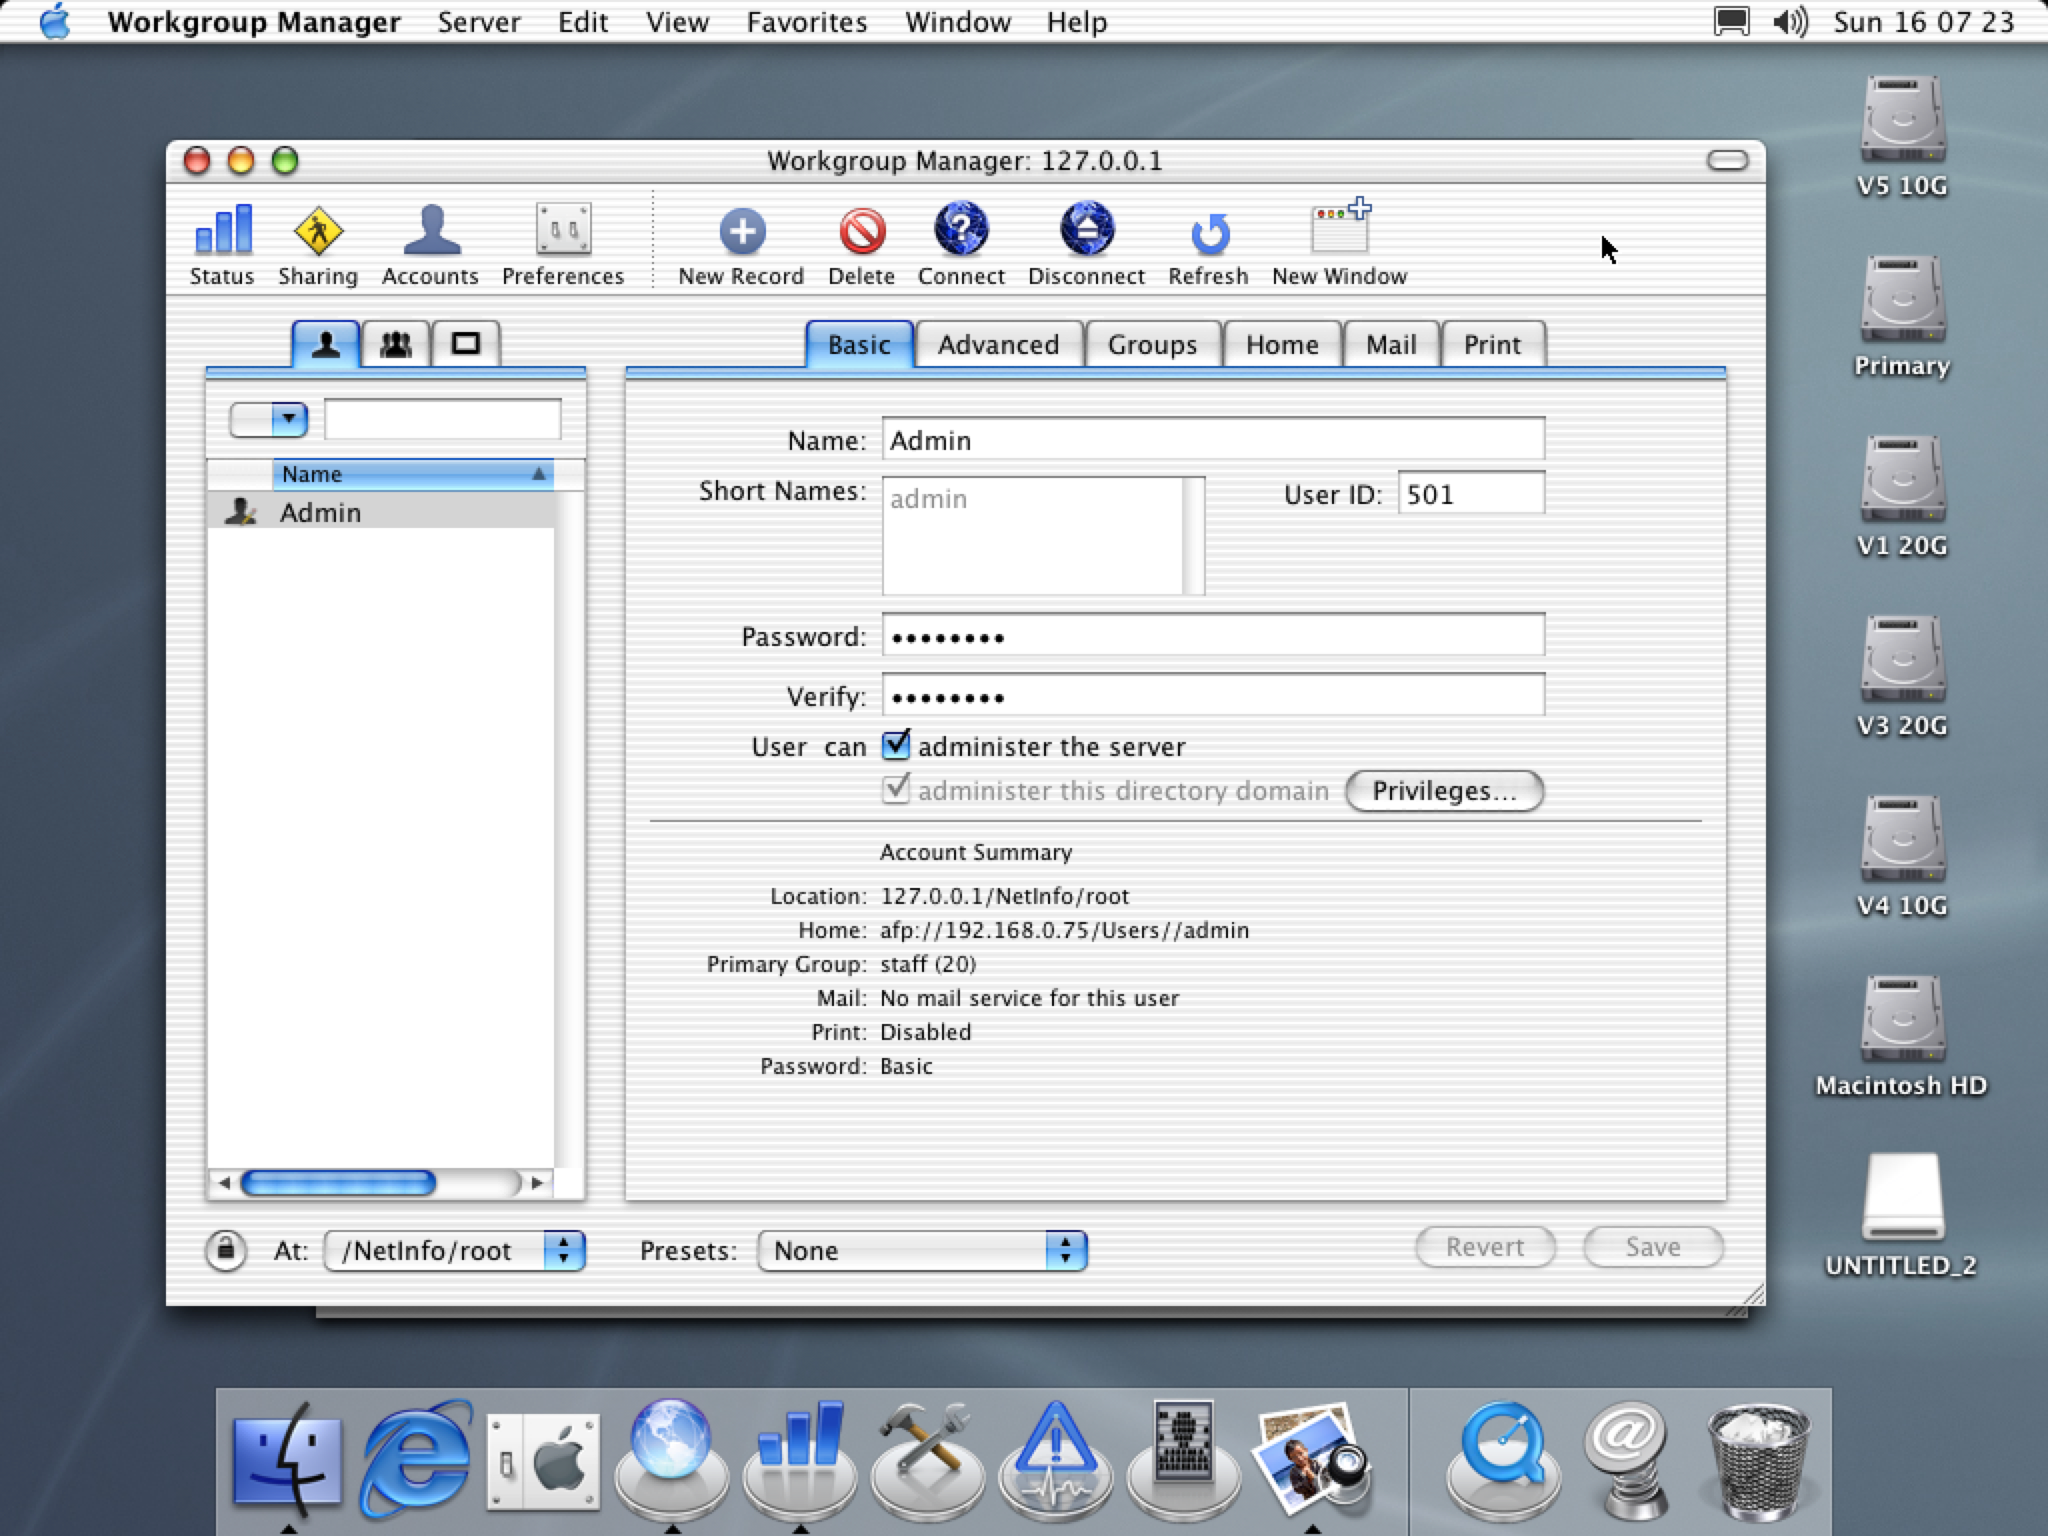 Workgroup Manager user config |
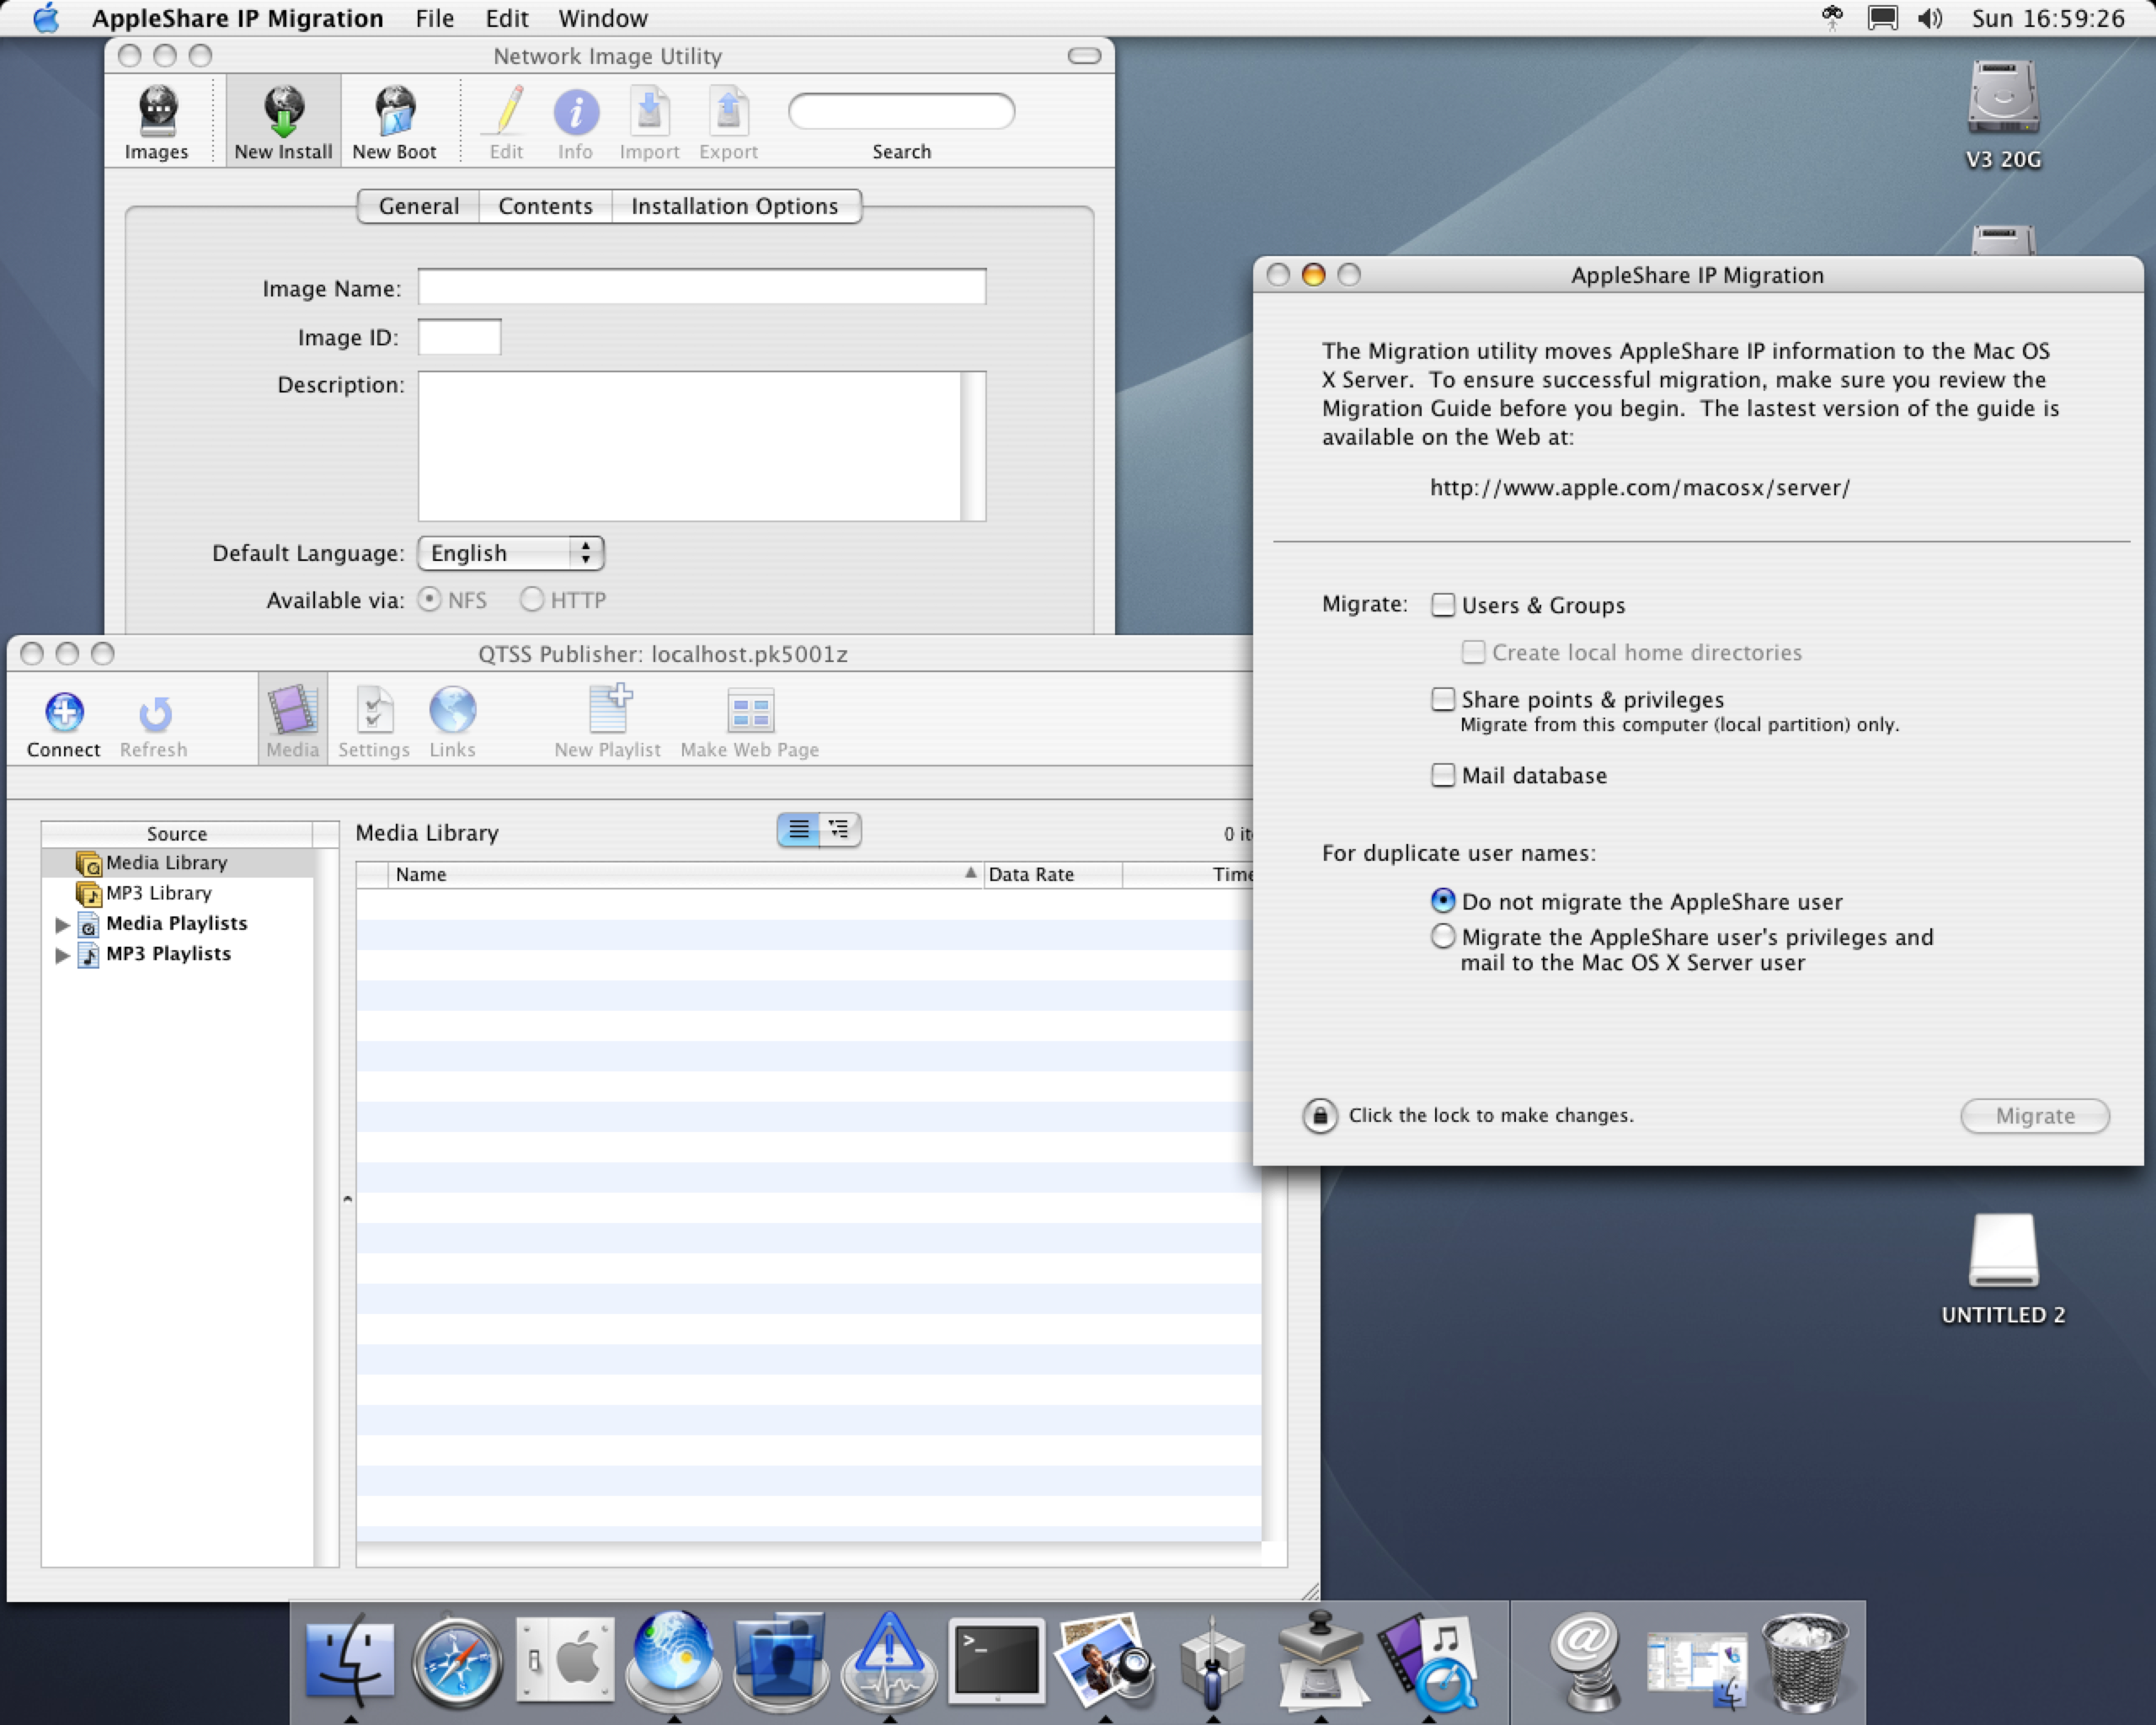 AppleShare IP Migration, Network Image Utility, and QTSS Publisher (10.3) |
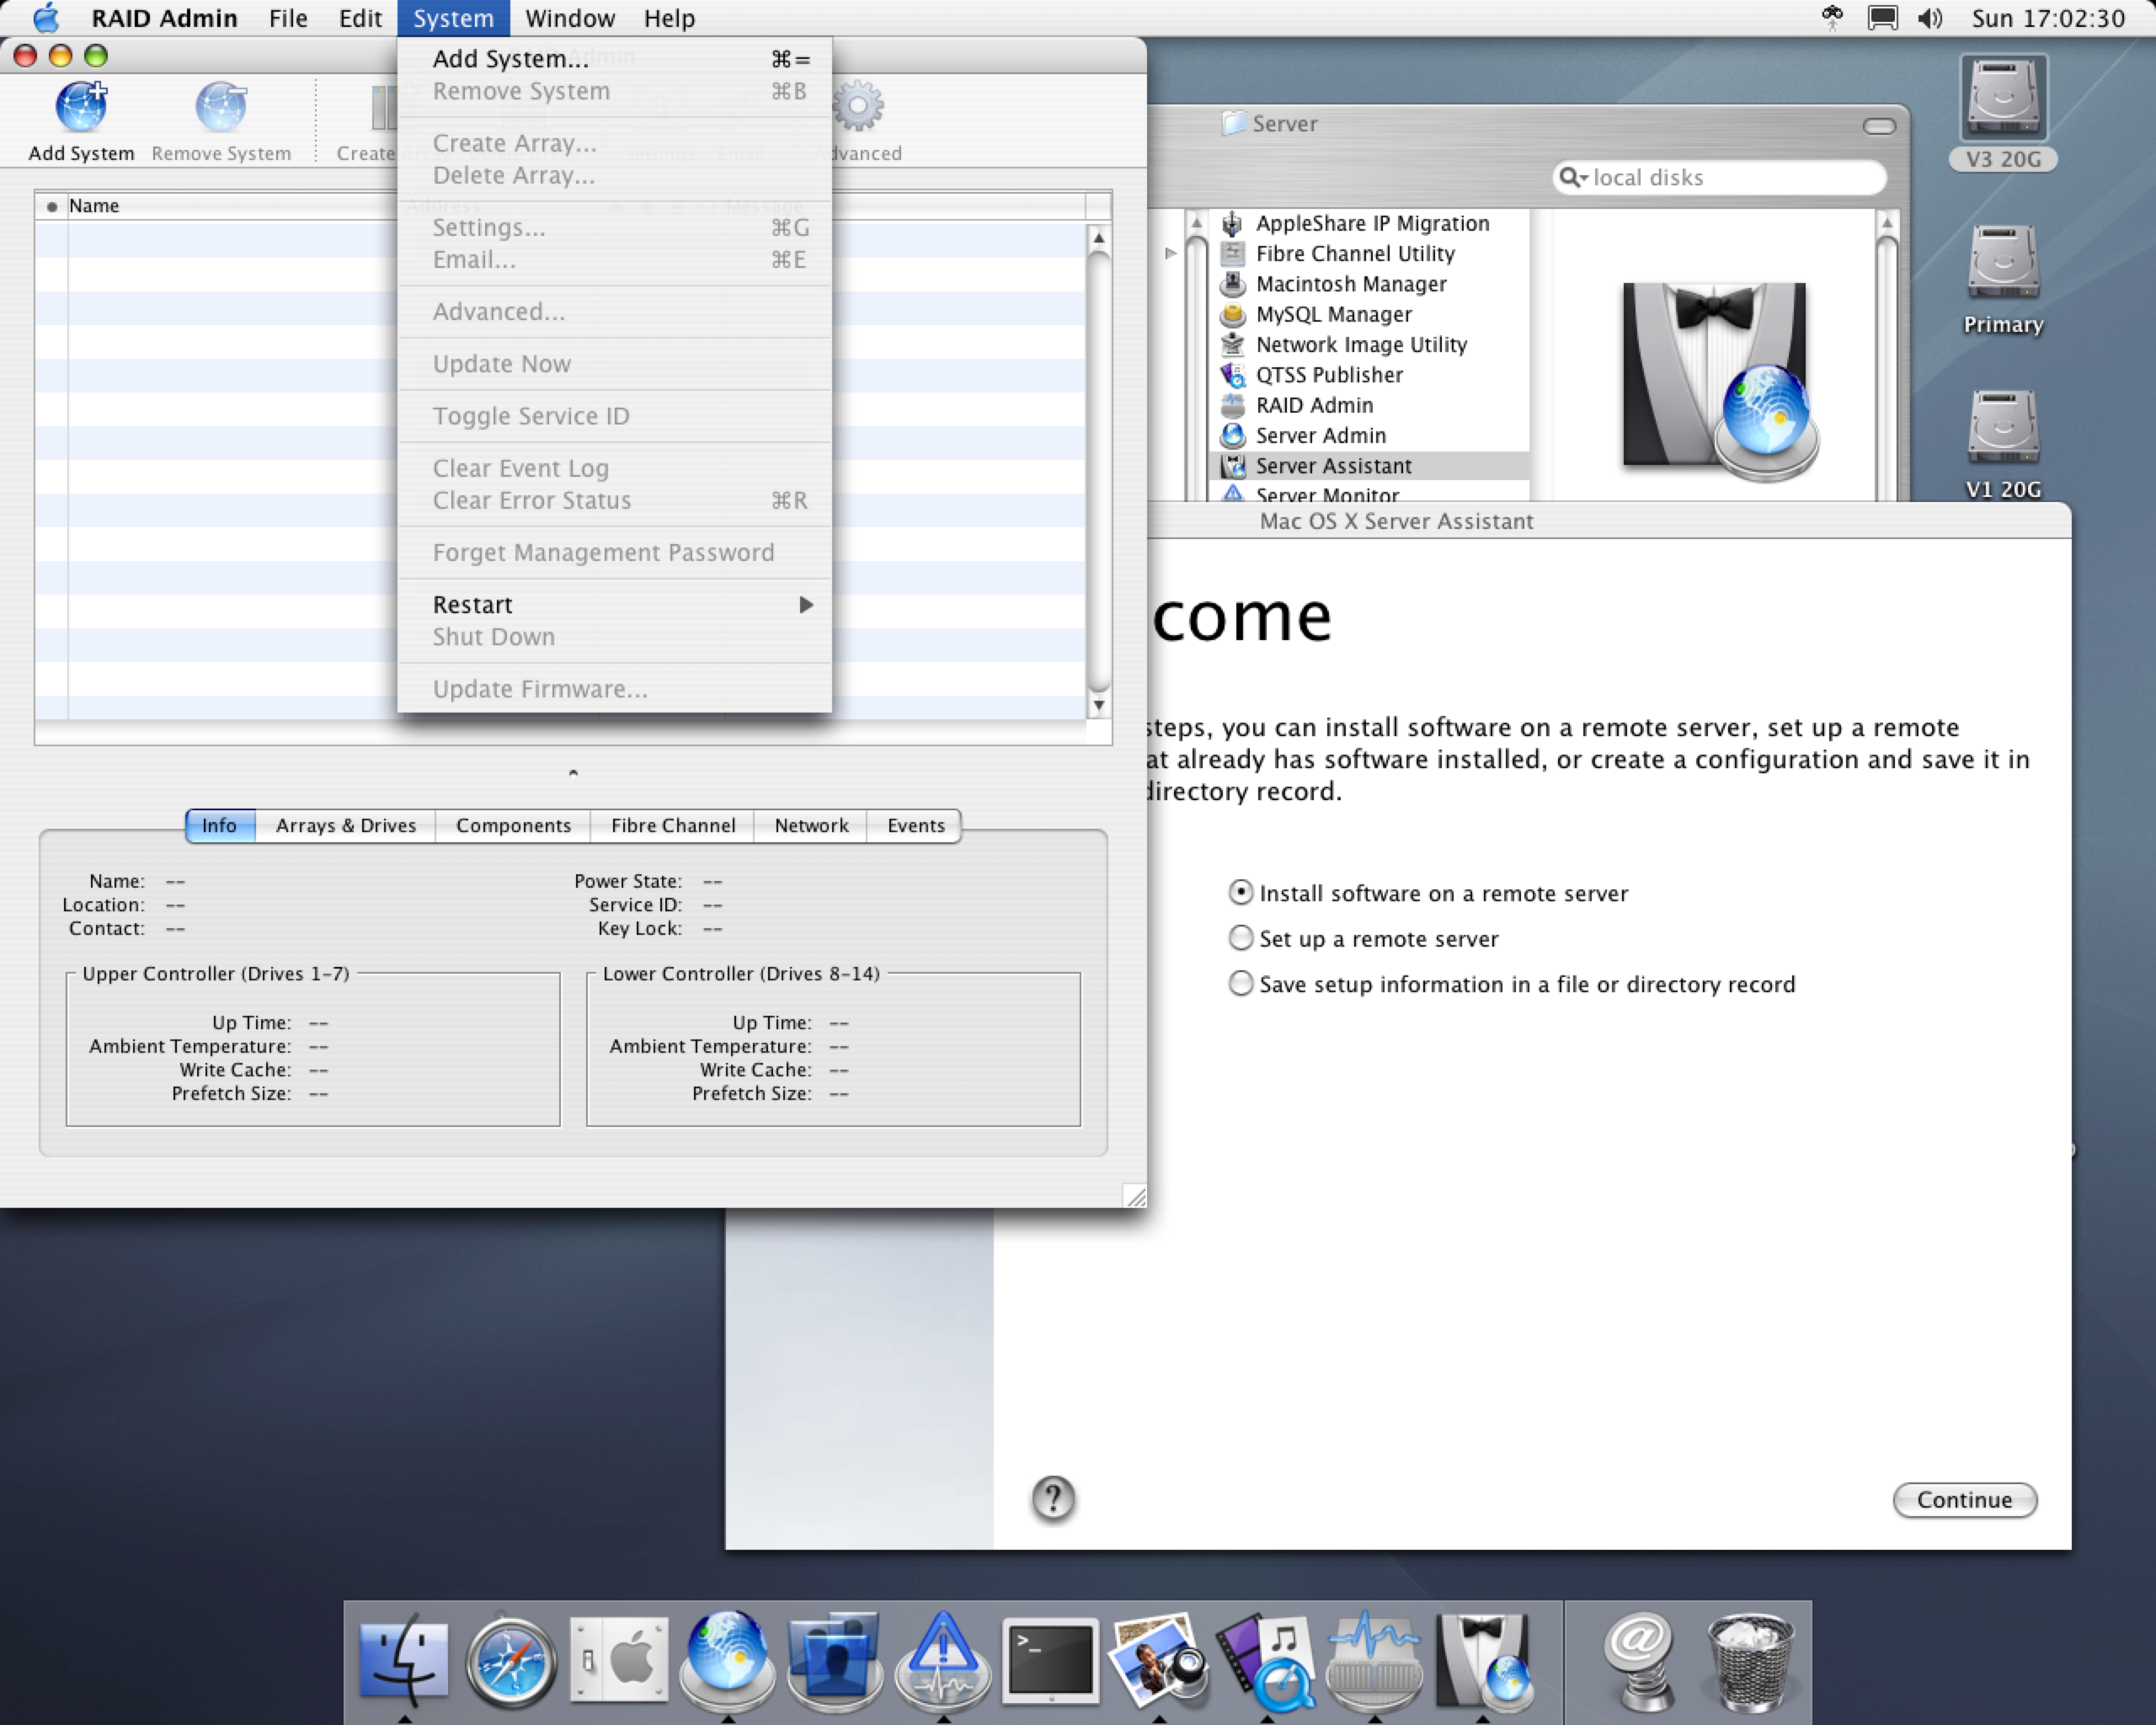 Server Setup Assistant and RAID Admin (10.3) |
 Server Admin (10.4 nearly identical) |
 Server programs: 10.2 left, 10.3 middle, 10.4 right |
 System Image Utility (10.4) |
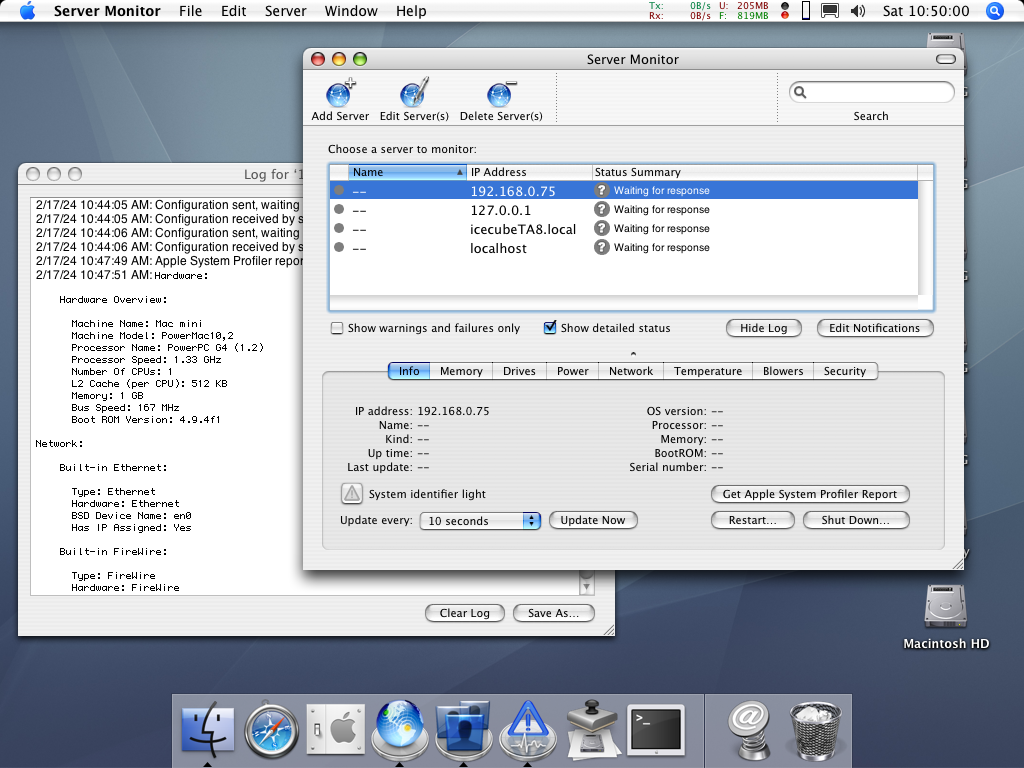 Server Monitor (only for Xserves) |
 10.5 server programs (left) versus 10.6 (right). Other programs look like 10.4 |
 10.6 Server Preferences (10.5 nearly identical) |
 10.6 Server Admin (10.5 nearly identical) |
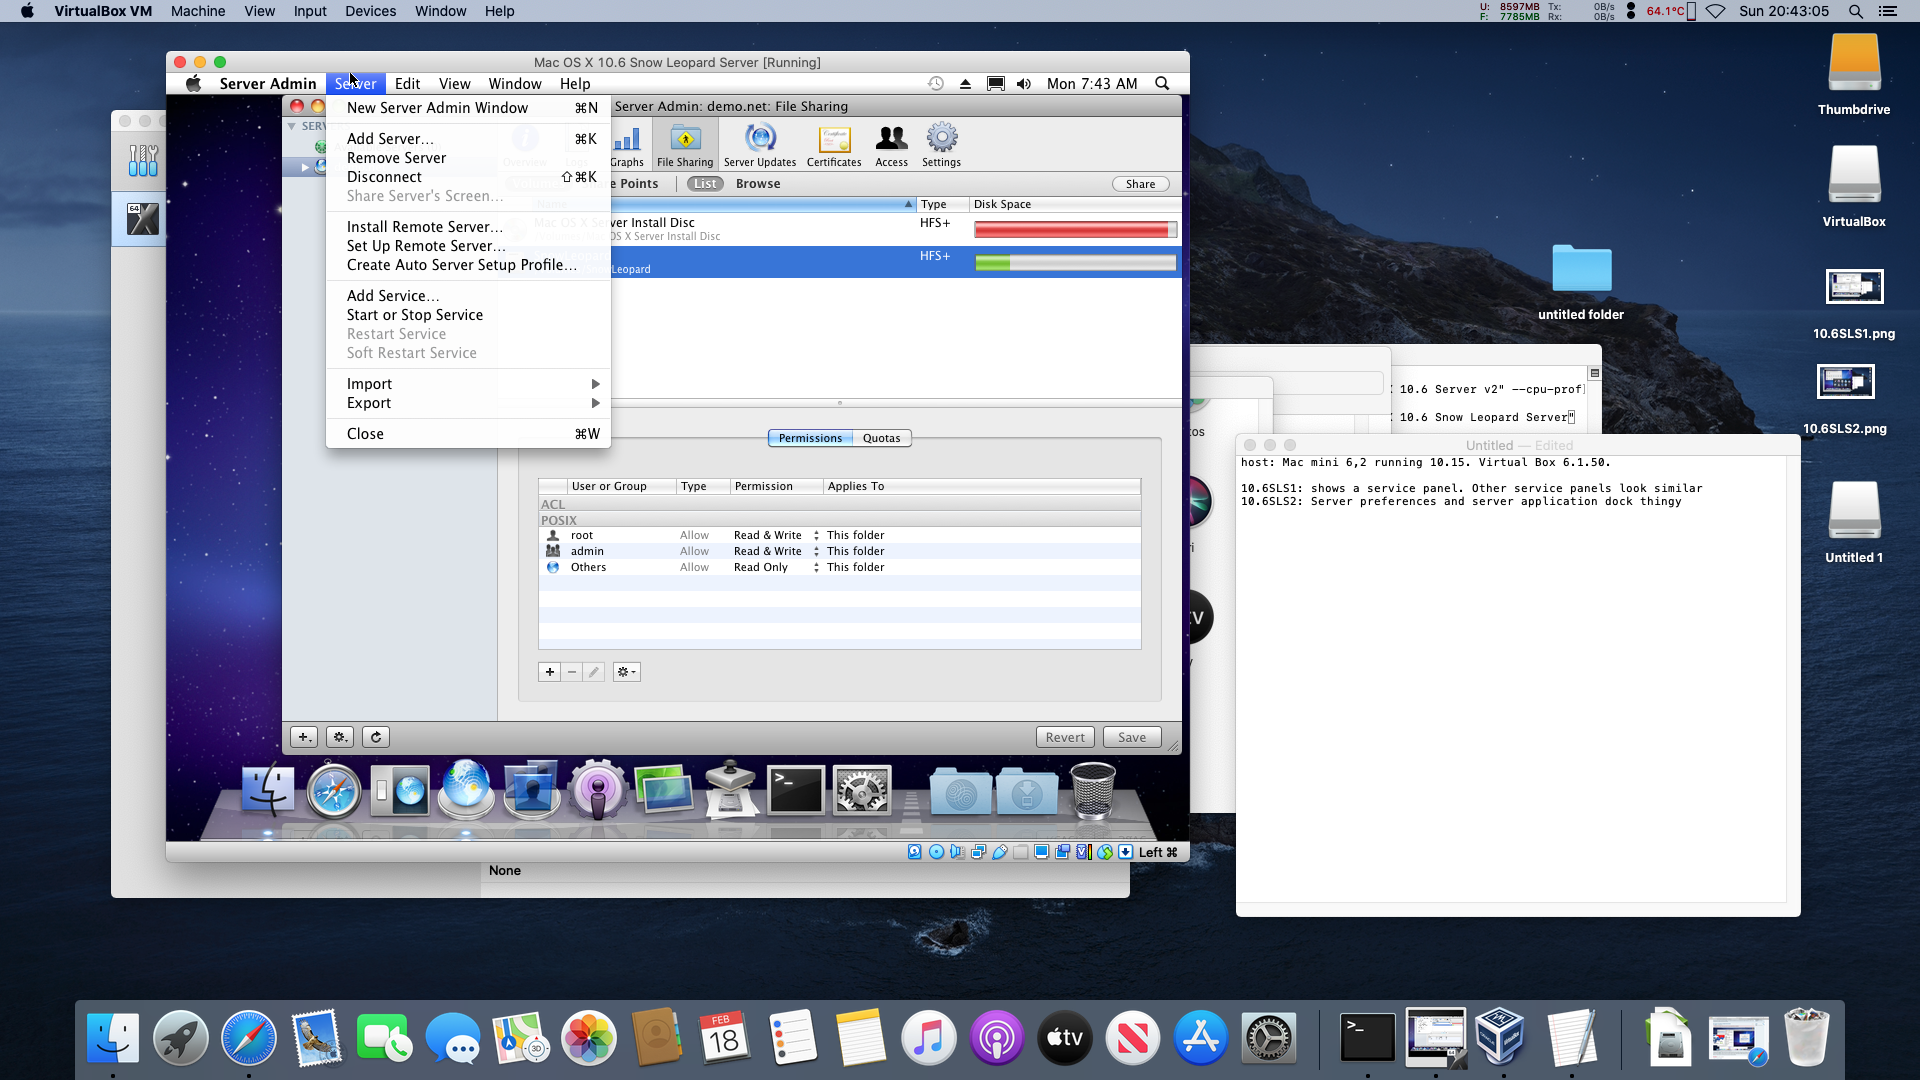 Server Admin (10.6) |
A short summary provided by Apple in the OS X 10.5 Server discs follows below, which neatly sums up the purpose of each program, formatted for clarity:
- Server Assistant: Use the Server Assistant application to install or set up Mac OS X Server on a remote computer. Server Assistant is primarily used for the set up of Xserve systems without an attached display.
- Server Preferences and Server Status widget: The Server Preferences application and Server Status widget are for remote administration and monitoring of your server when set up in either the standard or workgroup server configurations.
- Server Admin: The Server Admin application is for remote administration of one or more servers. It can be used to manage file share points, configure service settings, monitor server activity, and provide detailed logging information for each of the running services.
- Server Monitor: Server Monitor is for the remote monitoring and management of one or more Xserve rack-mounted systems.
- Workgroup Manager: Use Workgroup Manager to remotely manage users, groups, and computer accounts in advanced server deployments. Workgroup Manager is also used to set and manage preferences for Mac OS X users.
- System Image Utility: The System Image Utility application is for the creation and customization of NetBoot and NetInstall images.
- Xgrid Admin: The Xgrid Admin application allows administrators to remotely manage clusters and monitor the activity of controllers, agents, and the status of jobs on the grid. Xgrid is a type of distributed computing, where computers collaborate together into a pseudo-supercomputer.
Working with Disk Images
Introduction
Disk images are raw sector dumps of the contents of the entire disk, including header and catalog information, file metadata, icon positioning, and everything else entirely in binary form. They are often used in "crammed" disks like Apple's System 7.5 Network Access Disk which have very little free space left. Disk images are a good way to archive critical floppy disks or for emergency restore or access disks, being that they can be copied to a compatible 1.44MB floppy disk from virtually any compatible platform. 800KiB and 400KiB disk images must be handled from a Mac that has a internal floppy drive or compatible non-USB external drive (such as a PowerBook Duo with a external floppy drive MicroDock) and must be done under Classic Mac OS. Emergency restore or repair disks are best created in a virtual fashion by creating a disk image with Disk Copy |
 Detail of OS X FDD behavior (10.5) |
6.3.3, and copying over any material needed for such an application, then later converted as necessary. ShrinkWrap 2.1 can do that too, but it doesn't copy over the data checksum properly, so the folks at the Macintosh Garden recommend to import the disk image into Disk Dup+ and export it as a Disk Dup+ image in that situation. 400KiB MFS disks will not work this way because no disk tool can create 400KiB MFS disk images, as they all run under System 7, which substantially changed how 400KiB MFS disks are handled. The only way to create a 400KiB MFS disk image is to format a disk, or write out a blank disk image on the real thing, copy any data over, then image it.
Starting in Mac OS X 10.4, the Spotlight service will attempt to scan and index volumes to improve future search speeds. This process reduces the available disk space from an optimal 1.3MiB to 1.1MiB or even 1MiB. See the image to the right for this. Since these files are normally invisible, the only way to remove them is to use the Terminal program to delete them, first by using cd to go to the target volume, then double-checking with ls -al, and removing everything in the disk with something like sudo rm -R or something like sudo rm .* which removes everything that starts with a period (.), but this could also delete the .DS_Store and .localized files, but those don't really matter for a floppy disk and can be regenerated by the operating system if they're needed. Remember that entries in ls -al that start with a d, like drwxrwxrwt are directories, which need the -R switch to delete the contents inside the folder before the folder itself can be deleted.
Avoid using 1.44MB disks with tape over the right hole to fake the presence of a Mac 800KiB or PC 720KiB disk. The density of the magnetic media and strength of the magnetic particles is different. For clarification, the Oersted measurement is a way of defining how much magnetic field strength is required to magnetize the particles of iron oxide used in most common floppy disks a particular orientation to store data in a pattern recognizable as a binary 1 or binary 0. However it can work in a pinch, and on a unformatted disk, which are uncommon as most were pre-formatted, it could work.
Whenever possible, image Macintosh floppy disks with Disk Copy 4.2. It's the most compatible format for a lot of use cases, preserves the original data and tag checksums, and can be readily converted into something else afterwards if a platform doesn't handle it very well, such as Windows machines with built-in floppy drives. Do not use any other version of Disk Copy for 400KiB and 800KiB disks. While tag checksums aren't really important, they are important in the archival sense. The Lisa uses tags, but the Macintosh didn't rely on them like the Lisa did, and 1.44MB disks don't use them at all.
The Bottom Line
Here are the properties concerning Mac floppy disks, sorted by hardware and software factors.
- Hardware:
- 400KiB disk drive: (128K) 400KiB MFS. The 128K doesn't have enough memory to load the HD20 INIT normally. If equipped with a compatible 800KiB external drive, then 800KiB MFS works too
- 400KiB disk drive: (512K) 400KiB MFS. 400KiB HFS is possible if the HD20 INIT has been loaded. Can also use the HD20 (floppy port model, not the HD20SC with SCSI). The 512K can also be equipped with an 800KiB external drive. This is discussed in detail further below.
An easy way to identify a 512Ke from a 512K is to see if accepts a 800KiB diskette in the internal drive. The drives also sound different, the 400KiB drive is about double the height of the 800KiB drive, has one read head at the bottom of the unit instead of a dual-head assembly, plus the 400KiB drives have red LEDs (128K shown) for optical sensors on the inside of the mechanism. Or, in System 3.0/Finder 5.1 up to System 4.1/Finder 5.5, by going to About the Finder in the Apple menu, in the lower left, a 512K will say 512K whereas a 512Ke will report 512K. with a period appended - 800KiB disk drive: (128Ke, 512Ke, Plus, II, SE with dual floppies or one floppy and hard drive. The Macintosh ED can be either a 512Ke or Plus in disguise. Foreign markets got the 512K/800 instead of the 512Ke, marked as M0001D instead of M0001E) 400KiB MFS, 400KiB HFS, 800KiB MFS, 800KiB HFS. 800KiB ProDOS is possible too, see further below.
The HD20 INIT in ROM will allow pre-System 3 OSs to read HFS floppies. The Apple 1.44MB external drive can function as a 800KiB drive if the host computer does not have a SWIM (Sander-Wozniak Integrated Machine) floppy controller. The 128Ke is not an official Apple machine but is a user modification, rarely ever done, by swapping the ROMs from a 512Ke back to a Macintosh 128K in place of the original 64K ROMs. There are some differences between the early internal 800KiB drives and later ones. Check this file for more information - 1.44MB disk drive: (All other Macs with internal drives, from the IIx, SE FDHD (aka SE SuperDrive) onwards, Macintosh Portable and all PowerBook internal/external drives) 400KiB MFS, 400KiB HFS, 720KiB HFS, 800KiB MFS, 800KiB HFS, 1.44MB HFS.
Drives in this category should be compatible with each other, but should not be replaced with 400KiB drives. A Quadra 610 DOS Compatible was the testbed for a Sony MFD-75W 1.44MB drive (used in IIx, SE FDHD, IIfx, and so on) and a Panasonic JU-268A016C drive that came out of a Macintosh Server G3. The latter worked fine, no complaints, the former read and wrote files fine, but the Finder would hang on certain floppy operations unpredictably, such as opening a disk or ejecting it. This could be related to the drive, or not, it's hard to say, because the power supply or motherboard capacitors could be aging. The original Mitsubishi MF355F-592MA drive wasn't working all that well even after a cleaning, but it does look like it's suffered from the case of the crusties. Pinouts of the internal floppy disk drive could only be found from Macintosh Developer Notes (or Engineering Reference Specifications for the drives), which is interesting because not all of them are fully populated (i.e. IIsi is, but the LC is not). Of those, it appears that all the pinouts are compatible, but in searching, the Power Macintosh 5400 supplies +5V on pin 9, but the 5260 does not, and all the older machines did not, but we don't have access to all the Developer Notes, much less complete ones. Another deviation is that the all the normal documentation (in addition to the linked one) states that the external floppy disk port (on compatible machines) supplies -12V, but interestingly, the IIsi Developer Note says it doesn't. These could be errors, or correct: for hardware hacks, caution is advised.
Apple says System 6.0, a Sander-Wozniak Integrated Machine floppy controller chip and compatible ROMs are required to use a 1.44MB drive to its fullest: however, it should work just fine on 800KiB only machines except the 1.44MB feature won't work. See below for more - 1.44MB disk drive with PC Exchange: 400KiB MFS, 400KiB HFS, 720KiB HFS, 800KiB MFS, 800KiB HFS, 1.44MB HFS, 720KiB PC FAT12, 1.44MB PC FAT12, 800KiB ProDOS (Apple II), 1.44MB ProDOS, OS/2 DOS FAT (not HPFS). See further below about PC Exchange and Apple File Exchange
- Macs without internal drives cannot read or write 400KiB or 800KiB disks; other models with dedicated external floppy modules (like the PowerBook Duo series, the 2400c, PowerBook 100, etc) are the exceptions. Only a handful of 68K Macs have a DB19 external floppy port: none of the 68040 or PPC Macs have this port. Some PowerBooks have expansion module bays that support official Apple drives (like the 3400c, Wallstreet), these will support 800KiB disks
- Caution: The floppy drive DB-19 port on the Macs that have it is not compatible with the DB-19 Apple II floppy disk drives. Connecting an Apple II 5.25" (the UniDisk 3.5" most likely falls into this category as well) floppy drive to that port will most likely destroy the floppy driver chip on the motherboard as it is electrically incompatible and will most likely knock out the internal floppy drive too. Only the Apple IIe PDS card for Macintosh LC PDS machines supports the Apple II 5.25" disk drives via the Y-splitter cable. And of the Apple II drives, only a certain number of them, as it doesn't supply -12V which most of them require. There was a special NuBus or SE PDS compatible 5.25" floppy drive card for the Mac II and Mac SE machines as seen here. (And that, is a very nice IIfx...)
- USB floppy drives: Only 720K PC FAT12 and 1.44MB disks supported: their controllers do not support constant linear velocity read/write mechanics, where the rotation slows down towards the outside of the disk to cram more data in per angular unit of length, assuming an inside to outside radii progression. They are constant angular velocity drives (constant rotational speed). They also do not support Group Coded Recording (GCR) encoding -- only Modified Frequency Modulation (MFM) -- lots of internet articles are abound about GCR and MFM. 720KiB and 1.44MB disks use CAV and MFM
- The Imitation VST SuperDISK does not support 400KiB or 800KiB disks because it lacks GCR and constant linear velocity abilities; both the standalone USB version and the model for the PowerBook G3 series fall into this class. The USB one is the most popular; parallel would be next. A PCMCIA compatible and SCSI compatible would both be quite uncommon
- PC: Internal or USB drives are acceptable. 400KiB MFS and 800KiB HFS disks are not supported, barring exotic hardware like the Copy II PC Deluxe Option Board for a x86 machine, which was a substitute floppy controller on an ISA slot with special software which ran under MS-DOS
- Other platforms: A certain Specter GCR addon for the Atari ST platform allows reading of Mac 800KiB HFS disks. May be hard to find. One fascinating effort is this AVR microcontroller powered unit. It has become quite recognized and popular for skipping around floppy systems because it directly deals with floppy disk images and can pretend to be a HD20.
The PLI TurboFloppy (1.44MB) and SuperFloppy (2.88MB) were SCSI floppy drives for the Plus/SE era to allow them to read 1.44MB disks. A similar product was made by Applied Engineering, called the AE HD+ PlusDrive which used the DB-19 floppy port on Mac II, SE and Plus computers along with a software driver to allow them to use 1.44MB disks (used a ribbon cable adapter for the Mac II to use the second internal FDD interface).
A similar product is the DaynaFile, which was an external SCSI enclosure for fitting up to two PC drives. 360KiB and 1.2MB 5.25" and/or 720KiB and 1.44MB PC drives were supported. It worked in System 6, or as low as System 4.2/Finder 6.0 with any Mac that had a SCSI interface. Software was included to help with file translation: otherwise, it worked just like a normal external FDD would work, mounting 3.5" and 5.25" disks on the desktop - No support in Classic OS natively: A lot of formats, including Amiga FFS 837KiB, 880KiB and 1760KiB versions and special formats like Microsoft's DMF 1.68MiB variants and FAT12 360KiB single sided disks. A PC with an internal floppy drive and OmniFlop (with registration) can address quite a number of rather arcane formats
- Floppy media: We won't cover 5.25" disks since those are not the scope of this Guide, but Sony, Verbatim, 3M or similar name-brand with some sort of "reputation" should be fine concerning 3.5" disks. 1.44MB disks are labeled as HD, meaning high density, sometimes have a "2MB" (meaing 2,000,000 bytes unformatted, 720KiB disks were 1,000,000 bytes unformatted) label on them have two holes on the disk. The one on the left is the locking tab, the right is the HD identifier hole. 720KiB disks are labeled as DS/DD, meaning double sided, double density, sometimes are marked with "1MB". These have just one hole on the lower left corner for the locking tab. 720KiB disks can be used as 400KiB or 800KiB disks, just reformat them. Always keep backup floppy disk images -- floppy disks are notoriously unreliable and are not a safe long term storage media: even though some examples from the late 80's might still work, there are good chances there are also quite a lot that won't work...(Some say...the older disks in the late 1980s up to the mid-1990s were made better...probably because of the bell curve principle...)
To clean an auto-inject, auto-eject drive, first remove it from the computer. Auto-inject means the kind that grabs the disk as it is inserted rather than relying on the user pushing it in entirely. Do not touch the heads of the unit. Drop the carrier forward, using a floppy disk to see how it is done, but don't do it with a floppy inside. Unhook the two springs on the left and right sides of the unit, then extract the carrier from the rails. It takes practice but be careful and cautious. Then remove the black washers/keepers for the slide and set them aside, then remove the two black screws holding down the eject motor drive on the upper right corner. The slide should then lift out. Use something like 99% alcohol which won't leave any residue, then very lightly lube the sliding surfaces with a good-quality silicon or lithium grease (not something cheap like automotive bearing grease) - too much will gunk up the mechanism. Removing the little black plastic clip on the carrier will help in reassembly because there is a protrusion on the head assembly that rides on top of it. Study the unit beforehand and take pictures if needed. Then use a cleaning floppy disk with the fluid, which is usually just isopropyl alcohol, to clean the heads: do not use any other method to clean the heads. Because of how old the drives are now, it's probably about time for a recap job.
Unlike 5.25" floppy drives, the heads for 3.5" drives are held in position by a pre-bent and pre-aligned metal material; once it is bent by touching the heads, even very lightly, the heads will no longer be in alignment and the drive will fail to read disks and thus will have to be re-adjusted (requires expertise, certain specific equipment and know-how) or replaced. Also the nylon gears inside the eject motor assembly get stripped out eventually. Clean out grime and solidified grease before the problem manifests itself at the worst moment. 400KiB drives as used in the 128K and 512K, and the manual-inject used in the later Macs are a bit different. Word from the street is that the Sony manual-inject drives were better than the Mitsubishi models
 Disassembled auto-inject FDD and cleaning disk (1.44MB) |
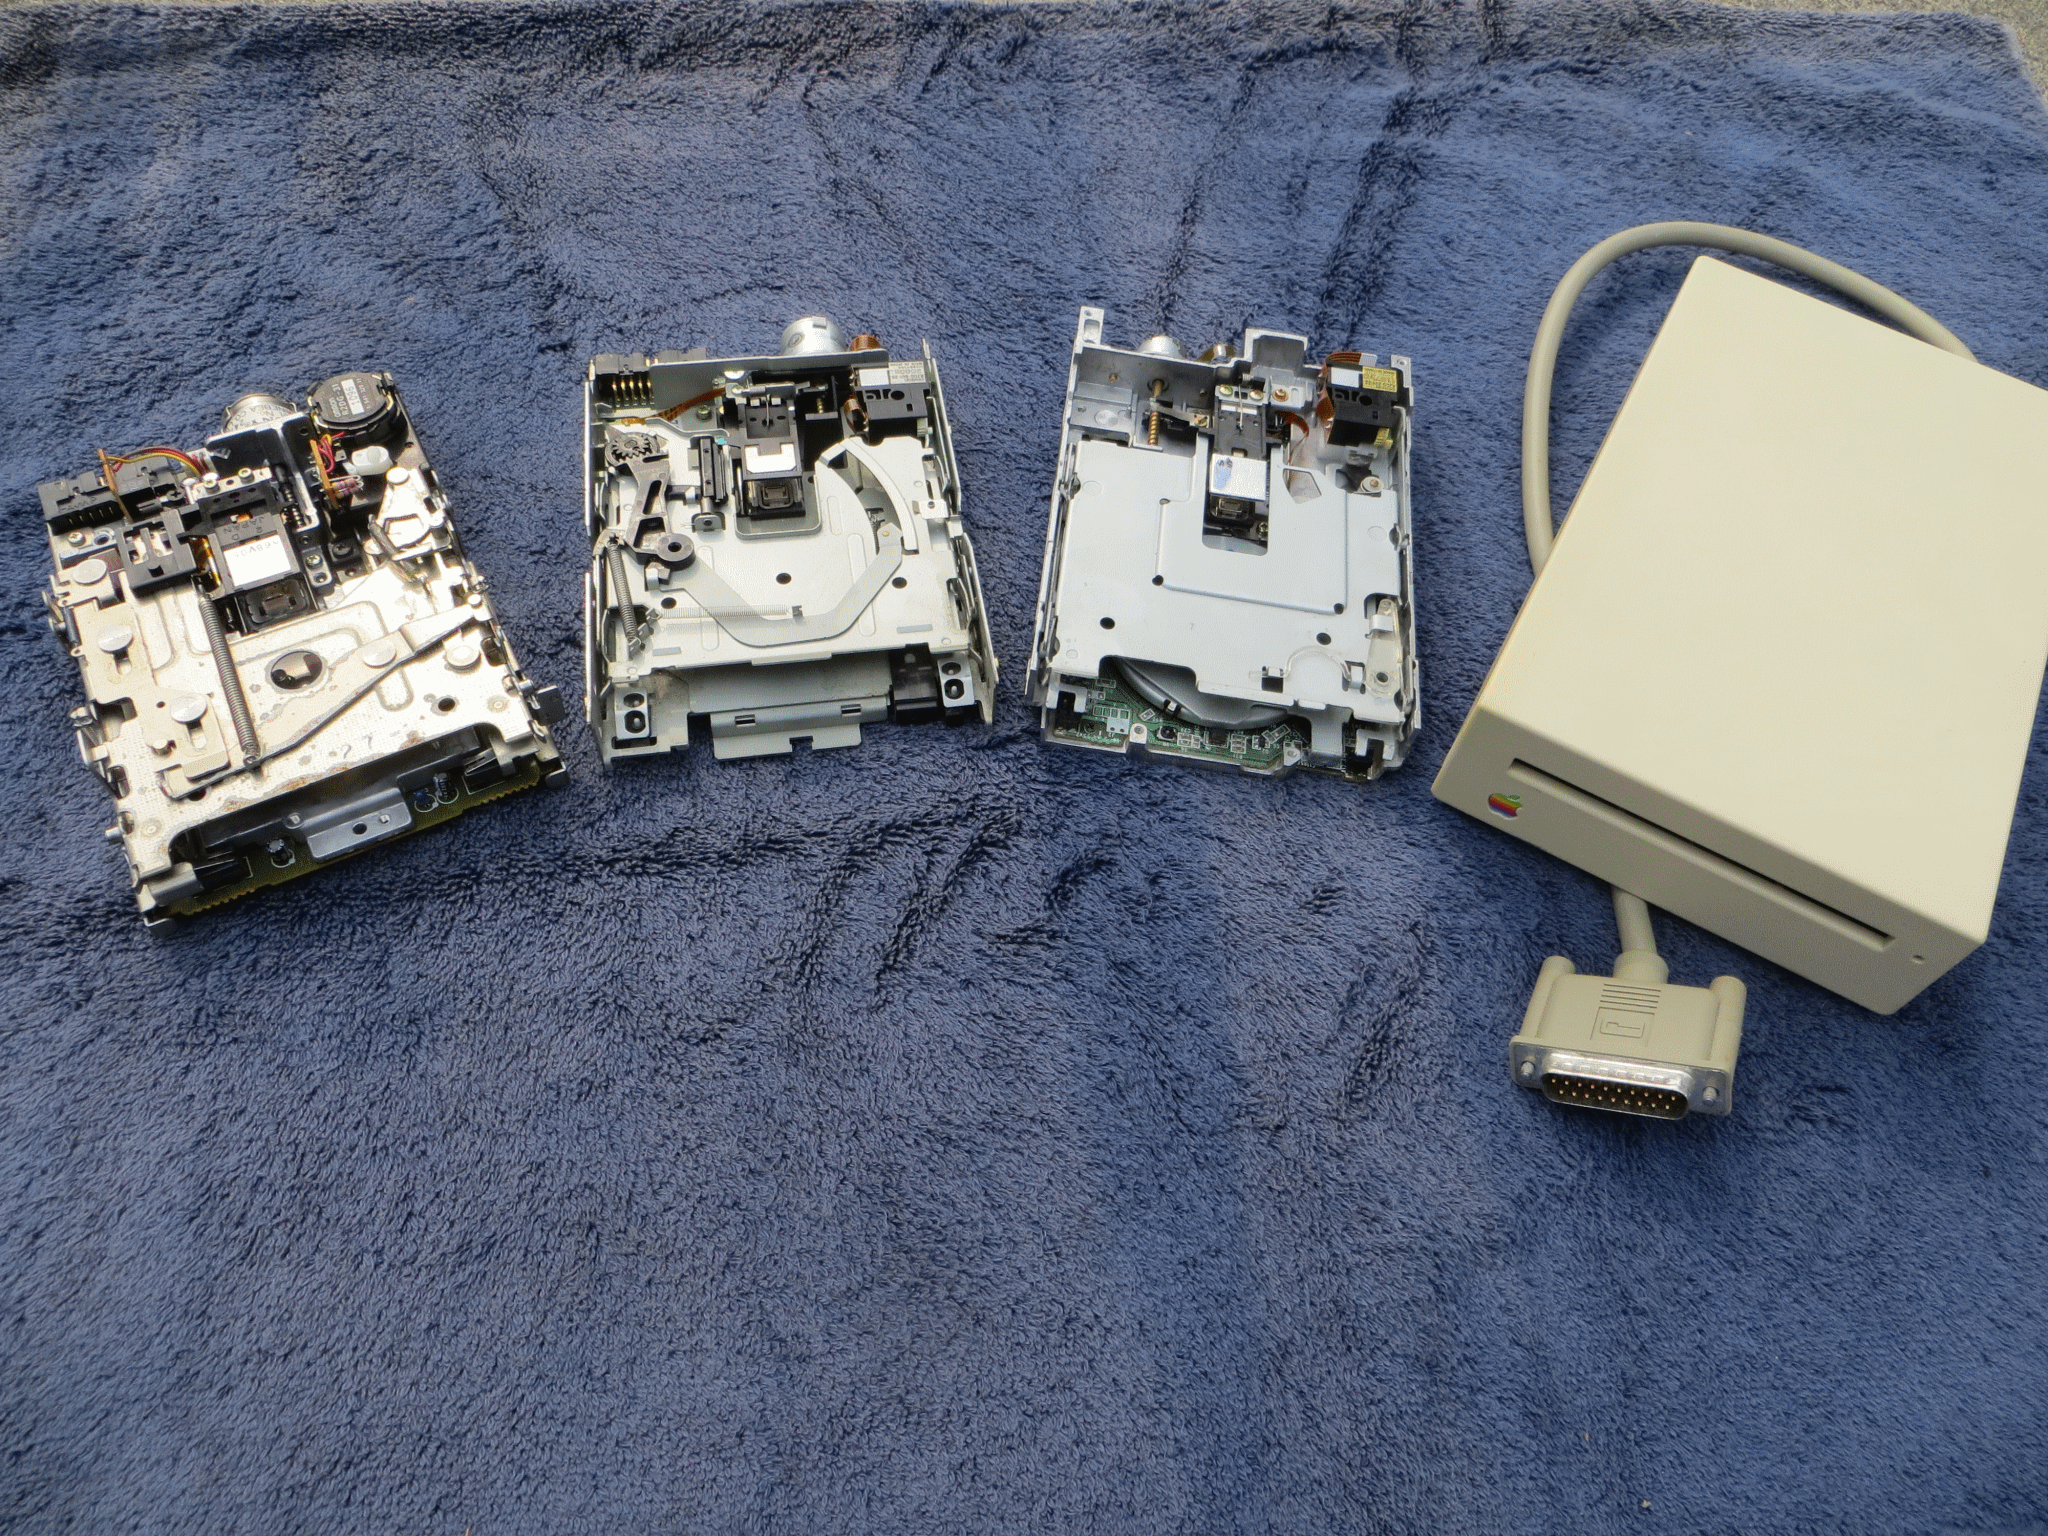 A selection of auto-eject floppy drives |
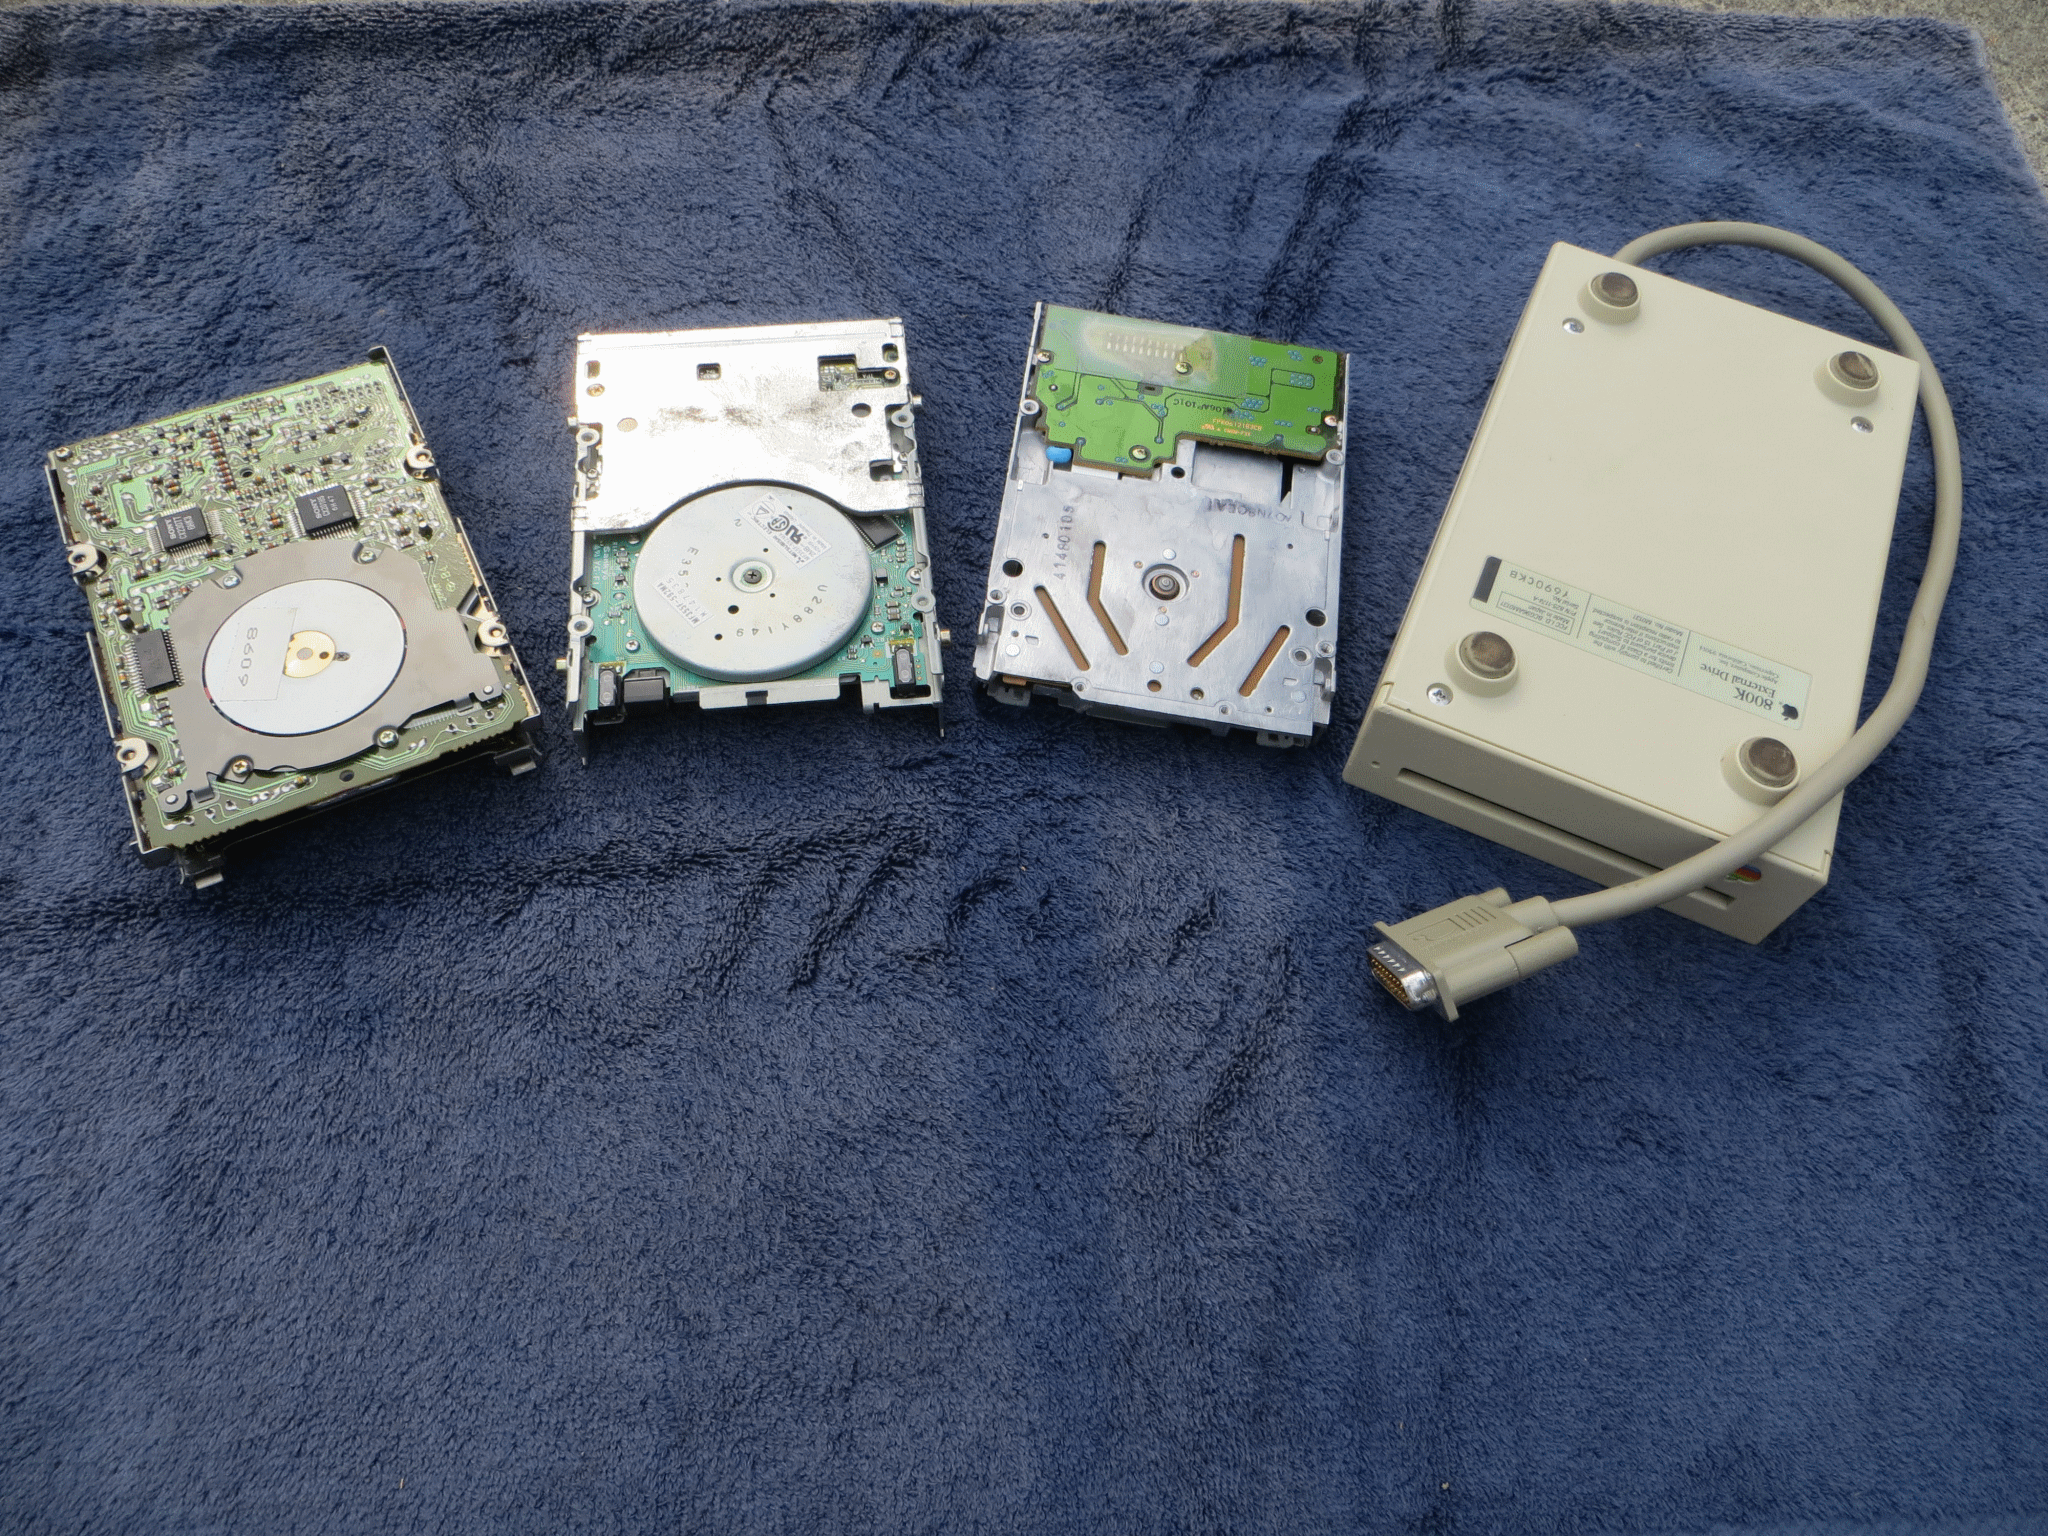 L to R: 800KiB, Q610, PM Server G3, 800KiB external upgraded to 1.44MB |
 Capacitor spec for a 1.44MB Sony drive |
- Software:
- System 6.0.8: Last to natively read/write/format 400KiB MFS disks with full file system management and support. To format a 400KiB HFS disk, hold down the Option (alt) key for the entire formatting process; for a 800KiB MFS disk, follow this walkthrough, or try booting into a pre-System 3.0 operating system and format a disk, a 512Ke formatted a 800KiB disk by default
- System 7.0/7.1: System 7.0 introduced various changes which made management of 400KiB MFS disks a sensitive process. 7.1.x is last to support formatting of MFS; may need to temporarily remove PC Exchange software if installed (Shown with PC Exchange, and without)
- System 7.5.5: Last to write to 400KiB MFS disks. Cannot format MFS 400KiB disks
- System 7.6.1: Last to read 400KiB MFS disks, last to mount 400KiB MFS disk images. For writing, this page says that writing a 400KiB MFS disk image is possible with later Mac OS versions, which is correct. Writing a 400KiB MFS DC 4.2 disk image with DC 4.2 in Mac OS 8.1 was successful with a PowerBook Duo, a PowerMac G3 was also successful within 9.0.4, and repeated on a Server G3 (with 9.1)
- Mac OS 9.2.2: Last to read or write 800KiB HFS disks
- Mac OS X: OS X does not support reading any disk from the internal drive if equipped, aka the Beige PowerMac G3, the "Molar Mac", PowerBook "Kanga", ... it will not even acknowledge the disk, and it will have to be manually ejected. It can't even tell if there is a disk: in OS X 10.0, there's no diskutil program, but there is df which doesn't detect it either, and neither does Apple System Profiler. Use a USB floppy drive instead.
There is a rumor that OS X Server 1.x can mount 800KiB disks as read only, via the internal disk drive on something like a Power Macintosh G3, which it does in Rhapsody 5.6. It also works fine to read 1.44MB disks. But it also doesn't appear to be able to write to 1.44MiB disks or 800KiB disks. In Blue Box mode, read/write access for 800KiB and 1.44MB disks works fine in the emulated environment. The Blue Box emulation environment has no influence on OS X's ability to read or write floppies. A 400KiB MFS disk was refused in both modes and simply ejected without a message - Mac OS X 10.5.8: Last to support writing to 1.44MB HFS disks from the Finder. An attempt to use the $ cp command to copy a file in OS X 10.9 produced an error report which said it is a read-only file system. dd however, still works but a diskette must be inserted first to find out the path of the drive
- macOS 10.14.6: Last to read HFS volumes. FAT12 floppies should still be supported as long as whatever modern distribution still supports it in the kernel. macOS 10.15 Catalina dropped support for HFS: to read HFS, you'll need something like macFUSE or use a virtual machine. dd should still work to write disk images out to floppy drives though
- Windows: See the Windows section below. Support for 1.44MB disks only: 400KiB and 800KiB support is lacking in both hardware and software; also cannot read HFS volumes, but HFS Explorer and HFV Explorer can, to a degree
- Linux: Support should be fine, but that can change because very few people are interested in using a floppy drive on a modern Linux kernel, and there has been some initial progress of removing floppy drivers. However that could be referring to internal floppy drives, which no modern computer has. Can read HFS volumes depending on distro and any installed libraries; installing the package hfsutils is a good idea (hfsprogs for HFS+ file systems), but 800KiB and 400KiB volumes have zero support. See Linux section below for more. The internal FDD on a Compaq Armada E500 was not supported in Ubuntu 9.10, for a note: otherwise, USB FDDs are fine
- ProDOS: ProDOS was an operating system which succeeded Disk Operating System (DOS) 3.3 on the Apple II series. Principally, the Apple IIc+ and the IIGS are the only machines which have native 3.5" floppy drives for which the option of working with ProDOS disks in Mac OS is pragmatic. Other Apple II machines will need a proper drive controller card and the proper floppy drive: for more information concerning this subject, see this page
- Apple File Exchange: This is a program that runs under System 6, 7.0 and 7.1. Version 7.0 was designed for System 7, otherwise 1.1.4 was the common distributed version with 6.0.8. MS-DOS or ProDOS disks will not read unless the program is started up. It only supports 800KiB ProDOS disks, not any other ProDOS size. It should support 720KiB and 1.44MB PC FAT12 formats, as it offers the ability to format a disk in those two respective formats. Although it is designed to work with a SuperDrive, if a 800KiB drive is used instead, the only option is to work with a 800KiB ProDOS disk. If the host machine is equipped with an Apple 5.25" drive, it can work with that, except with the Apple IIe card for the LC family, which it has no ability to use.
It can erase disks, "copy" files around, and some other basic operations but is intended to translate documents, not copy them whole and intact. It doesn't do the same thing that PC Exchange does where it works cleaner with the foreign file systems. Documentation is limited: fortunately, the Internet Archive has a Technical Reference from APDA concerning this program. It isn't meant for casual users on how to use it, but more for technical users writing translators. File Exchange, a control panel in Mac OS 8.5 and above, is a combination of Macintosh Easy Open and PC Exchange, and is not the same thing as this program is.
Apple File Exchange can be kind of weird sometimes, with certain formatting options not showing up. Note the absence of the 720K radio button - DOS Mounter, AccessPC: If Apple File Exchange isn't suitable for any reason, then either DOS Mounter by Dayna or AccessPC by Insignia Solutions should do the trick. Both allow mounting PC FAT12 compatible floppies to the desktop, and are the best choice for System 6
- PC Exchange: A control panel for enabling access to foreign, non-Mac file systems. Included with 7.5, it was optional in older versions of System 7. Version 1.x will not read or write any Apple II ProDOS disk, only 720KiB PC FAT12 and 1.44MB PC FAT12 diskettes. 5.25" disk drives are supported, but only specific ones, and not any Apple branded drives. The IIe card, when fitted to a LC series computer, can attach an Apple 5.25" drive, that won't work with PC Exchange either.
400KiB MFS floppy support is already mentioned earlier up; aside from that we can look at the other formats. A Quadra 610 DOS Compatible running a factory install of 7.1 offers four formats for a double-sided, double-density disk: 800KiB HFS Macintosh, 720KiB PC FAT12, 800KiB ProDOS, and a very interesting fourth option that most people won't encounter, 720KiB HFS. The first 3 are simple enough, nothing fancy there. But 720KiB HFS, which uses Modified Frequency Modulation instead of Group Coded Recording (has 706KiB free on a clean disk), is ostensibly designed for the fabled Amiga platform which can read HFS disks, because a lot of Amigas were not equipped with high density drives.
Instead the Amiga platform liked to push sectors tighter together and other gimmicks to get more out of double-sided, double-density drives, and then there's the 150 rpm "half speed" 1760KiB MFM format and the weird 1520KiB GCR 300 rpm specification. None of those can be read on Mac drives, so the "Macintosh HFS Interchange Format" comes into play, which allows Amigas and Macs to share a common HFS format, most likely using the CrossMAC software, but specific information concerning this relationship is difficult to find, and there is not even an acknowledgment in the Read-Me file that this feature of PC Exchange 2.0DC even exists. It could also have something to do with the Atari ST platform, for the Specter GCR add-on board. It could have been for PCs, except HFS compatibility wasn't a big priority back then and it wasn't until much later that utilities like HFS Explorer and HFV Explorer came out, and this would have come out in the DOS days.
This format option seems to be specific to PC Exchange 2.0DC, which comes on the DOS Compatibility 1.0.1 package for the Quadra 610 DOS Compatible, which can be dug out of the Legacy Recovery CD and copied into a System 7.0/7.1 system. (System 7.5.3 comes with PC Exchange 2.0.5, which lacks this 720KiB HFS capability.) PC Exchange 2.0.7, which comes with DOS Compatibility 1.5, refuses to work on a SE/30 with 7.1, whereas 2.0DC does not. In any case, a blank image should be available from Gryphel's blank disk image archive, or by checking the Restricted Files section for one made on a real machine. No special software is required to read 720KiB HFS MFM disks, aside from a SuperDrive, because the 800KiB disk drive does not have the ability to use MFM. 720KiB HFS disks will read and write on USB external drives, because it's not using GCR, but this is of limited value since 1.44MB disks effectively do the same thing.
Another way to get this capability is by installing the 720K Floppy Disk Formatter Extension. It took a lot of digging to find it, and Apple seems to have quietly dropped it, if they even announced it at all. Documentation from Apple even acknowledging this tool is hard to come by, and the stuff that was found, merely two Technical Articles, doesn't state what scenario it was for. It comes with the Quadra 610 and 650 System 7.1 CD that came with these machines. In that disc it can be dug out of the System Update 2.0.1 folder.
Documentation for PC Exchange is kind of all over the place, with TA articles on a variety of topics, but user manuals are not easy to get. Seems like the only one out there is for version 1.x, not version 2. Version 2's manual came with later factory-spec'd DOS Compatible machines, like the 6100/66 DOS Compatible, or with the DOS Compatibility Card from Apple separately, and was not included with 7.5, though 7.5 made PC Exchange mainstream by including it in the system instead of a separate software package. Instead 7.5 refers the user to the Macintosh Guide as part of the Help overhaul of 7.5, which is disappointing. A review of version 2.0's manual, scanned by NJRoadfan, provides no information that it was even for PC Exchange 2.0, but it can be inferred from the description of the features specific to 2.0, has no comparative text about the feature set difference between 1.0 and 2.0, is a rather dry document and also does not mention the 720KiB HFS format either.
Sometimes certain options don't show up, like sometimes ProDOS won't show up in a format dialog, or DOS won't, this has to do with the version differences. PC Exchange 2.1 requires 7.5.3 or later. Version 2.2 in Mac OS 8 is supposed to support FAT32
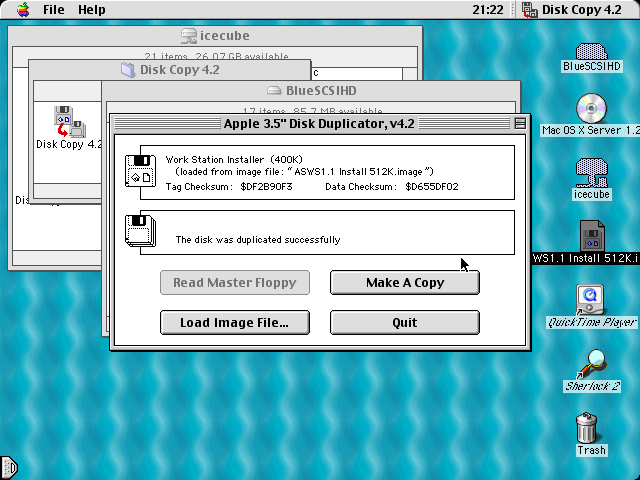
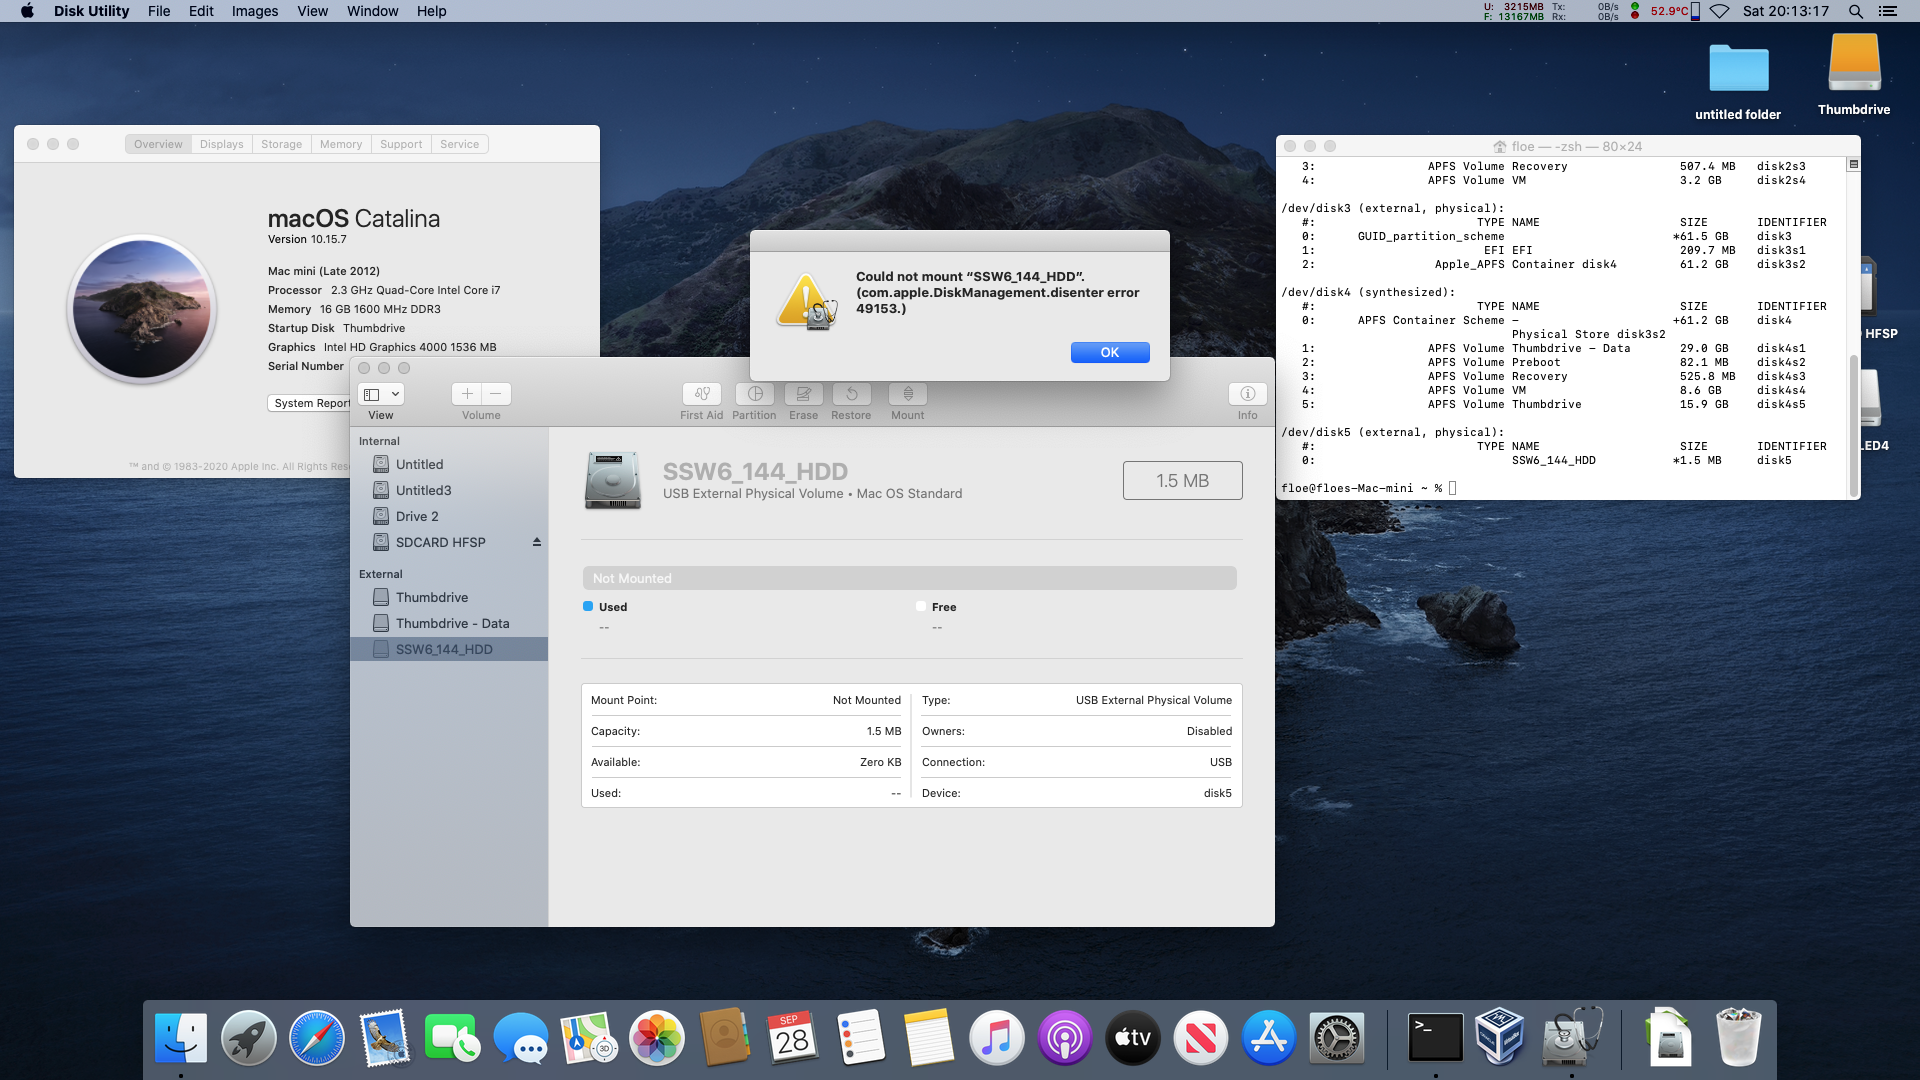
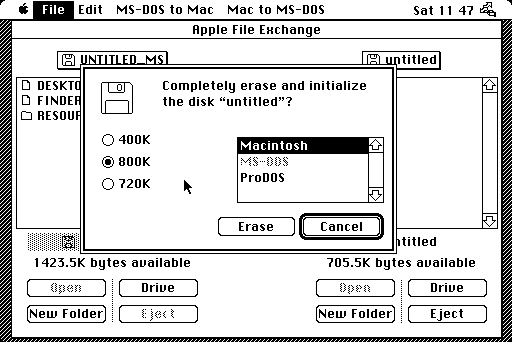
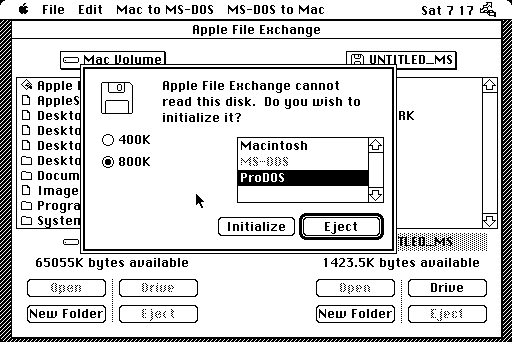
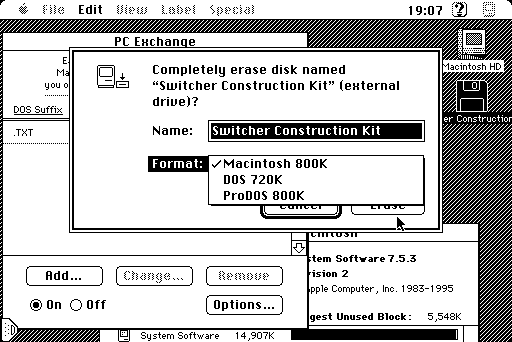
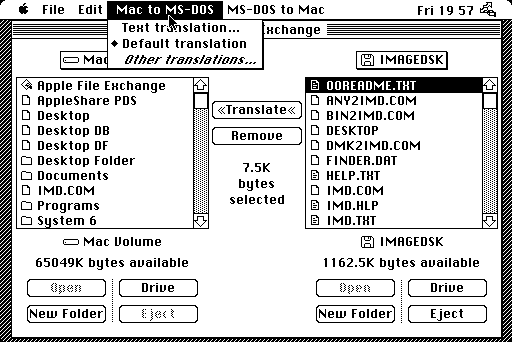 Apple File Exchange (SE/30) |
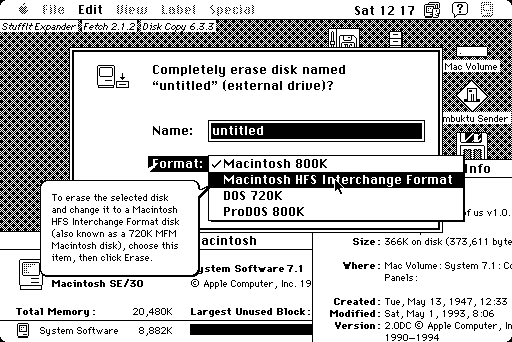 Formatting a 720KiB MFM disk |
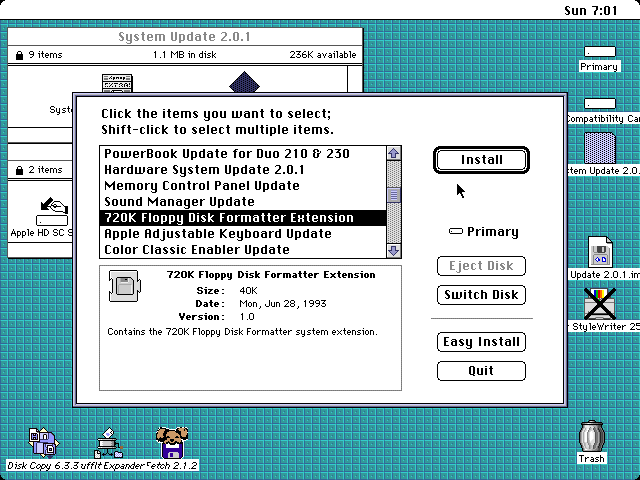 720K Floppy Formatter (IIci) |
 Disk Copy 4.2 recognized (Q610) |
 PC Exchange 2.0DC icons, not found with later versions (Q610) |
- Programs:
- Disk Copy 4.2: Only supports DC 4.2 format disk images. Format description here. Image type not supported under Windows tools. Recommended for all disk images except for tasks that require Windows platforms. MS-DOS 1MB and 2MB (aka 720KiB and 1.44MB respectively) disks are supposed to be supported but a test MS-DOS boot disk for Windows 98SE failed to image. There is no published minimum System/Finder specification for DC 4.2 but it can be said that it bombs the System in S2.0/F4.1 but not in S3.3/F5.4 (could have something to do with the MFS file system). Memory requirements are a function of the disk or disk images in question:
- Macintosh 512K, 512Ke: Won't work.
- Macintosh Plus 1MB, SE 1MB, Portable 1MB, Classic 1MB: 400KiB only.
- Any Mac with 2MiB of RAM: Without MultiFinder, 400KiB, 800KiB and 1.44MB images and disks are fine. If MultiFinder is on or System 7 is in use, then 400KiB and 800KiB images and disks are the only sizes that will be compatible. More memory will be required (2.5 to 3MiB) for 1.44MB diskettes and images.
- Remarks: It appears that the program operates with somewhere between 38 to 75KiB of RAM. So to image or write a 800KiB disk image, it will need about 840-875KiB of free memory. While the program wants 1600KiB to write a 1.44MiB image, it can do it on a little bit less than that, so probably a little more than 1500KiB. Using MemINIT 2.0.5 in System 6, about 1504KiB was measured while a 1.44MiB disk image was loaded, so 1504-1440=64KiB. But in System 7, it requires 1024KiB of free RAM to start up the program. The lowest it opened a 1.44MiB image in System 7 was 1478KiB allocated to it from the Get Info window. Using Memory Mapper without any loaded images, 1494KiB was reserved, leaving 1445KiB free which means 49KiB was used by the program itself. Error code 25 means that it ran out of memory
- Disk Copy 6.3.3: Produces NDIF disk images. Not recommended for imaging 400KiB and 800KiB disks, but writing is acceptable. MFS support may be suspect; FAT12 PC format may be supported but testing the same Windows 98SE boot disk as per the previous instance failed. Requires System 7 or higher. This application does not enable the Make a Floppy (write image to disk) if the machine doesn't have an internal FDD or compatible non-USB external, and it also disabled this feature when a Radius Rocket was active. Older machines don't like opening multiple disk images at the same time via the drag and drop method (for instance, dragging 8 disk images all at once to the program): rather, mount each one individually.
The Disk Copy 6.1.2 manual says a DOS-Compatible Mac with 7.6+ and PC Exchange 2.1+ can write Microsoft DMF 1.68MB diskettes, which is probably from a disk image, not actually reading a DMF disk - Disk Copy 6.4/6.5b13: May offer the ability to read Mac OS X .dmg images in OS 9, but only the kind that Disk Copy OS X produces. These do have a couple of additional features available like the Clone, Sign, burning images (CDs), and so on. It appears these versions do not have the DC 6.3.3 limitation on internal FDDs. Hold down the Option key while starting up the program to access some special HDI and UDIF functions (note: some may not work). Disk Copy 6.4 requires Mac OS 8.5.1 or greater, and 6.5b13 requires 9.1 or higher
- DART 1.5.3, Norton Floppier, DiskDup+, DiskDup Pro, et cetera: May offer additional features, or compressed disk images (DART) which may be useful, or a sector editor (Copy II Mac, later versions). It was meant for 400KiB disks, Lisa and Apple II disks, as it was technically an internal Apple program, and is A/UX compatible. Can read/write DC 4.2 images, and it will not work on a 512K or 512Ke.
Norton Floppier doesn't know about really big volume sizes when imaging a disk to file (like 55GB, so use a RAM disk for a temporary storage location), but does have a batch mode. Its format cannot be read by DC 4.2 or DC 6.3.3. The "Low Density Format" option will make a MFS 400KiB disk if the host OS is 7.1 or earlier: otherwise, it'll be HFS 400KiB in 7.5 and later. Copy II Mac can perform duplication, but not imaging: it can make up for that slightly with its sector editor. DiskDup Pro can mount certain disk images and may offer other features - ShrinkWrap 2.1: A generally useful program which can create images with ease, batch writing/imaging mode, and more (see the documentation). Caution: This app seems to have problems putting a descriptor in the file for the "archived" CRC-32 checksum; possibly causing other programs like DC 4.2 to reject it. Double check before using it: try converting it to see if that works then re-verify the image with the Verify Image selection. Tags for 400KiB/800KiB images are not always computed; also cannot create 400KiB MFS disk images (but can image or write them) in System 7+ because of restrictions with MFS introduced in System 7
- OS X Classic Environment: None of the previously listed utilities will operate inside the Classic emulation mode: the program won't be able to recognize that a diskette has been inserted. Use $ dd instead
- Disk Copy and Disk Utility OS X: When imaging a disk, the format is NDIF. Disk Copy OS X was removed in 10.3 but can be extracted from an 10.2 Jaguar binary. Disk Copy OS X can't write images to a floppy, but it can convert disk images, in which a test from NDIF .img to DC 4.2 conversion worked. Because it's a PPC only application, it won't work on Intel machines without Rosetta emulation, meaning 10.7 and above can't use it. A test run of it under 10.5 revealed that some features are broken: don't use it (64-bit Mac Pro 3,1). It is however, safe on 10.4 and worked fine (iMac G4 800MHz)
- OmniFlop: A Windows tool which can read many arcane formats, supports NDIF disk images
- RawWrite: Another Windows tool; images read and written are of the NDIF format (.img)
- Terminal: Featured in OS X and *nix (Unix, Linux) platforms, by using the $ dd command, either DC 4.2 or NDIF images can be handled. Only 1.44MB and 720KiB images and disks supported
- Disk Jockey: A Windows 7 or higher, Mac OS X 10.4 or higher, or Linux compatible disk image creator tool. Can easily create disk images as blanks (just zeros) for Mini vMac, Basilisk II, Sheepshaver or the Floppy EMU; for the BlueSCSI or PiSCSI devices it creates a partition map for them to work properly
- Findings: Disk Copy 6.3.3, $ dd, RawWrite, OmniFlop and HFV Explorer (last three all for Windows) are all compatible with each other, a disk imaged with one will work with another. Disk Copy 4.2 format can only be written with the following programs: $ dd, Disk Copy 4.2 and Disk Copy 6.3.3+. In addition, only Disk Copy 6.1.2+ can understand the Disk Copy 6.1.2+ Read-Only Compressed format -- no other program can make sense of it (Disk Copy 6.0 is very different than later versions are). The easiest way to identify a Read-only Compressed image is to look at the size of the file. If it's not "1.4MB" or "800K" in size, it is a compressed image
- Disk quality: Older disks and disks with lots of bad blocks may have difficulty writing disk images that are rather "full", like Apple's 7.5NAD which only have 10KiB free by default. As the number of bad blocks increases, the quantity of data that can be written to it is consequentially reduced to the point where 1.44MB images may not "fit" and thus will fail. As floppy disks age, the binder deteriorates which causes the iron oxide to separate from the plastic base media and the result can be a shower of iron oxide dust sized down to the µm (picometer) scale), because the magnetic head physically touches the media, like VHS, and for this reason the media degrades with every use. The only saving grace is that 3.5" disks were made longer and are more physically robust than 5.25" disks, which apparently haven't been made for some time now. When the dialog like as shown at right drops below 1410KiB or thereabouts, it's on its way out. If $ dd reports input/output errors, then same thing. Typical free space after formatting is shown below, for a good disk: will vary based on number of bad blocks, file system, quality of disk, etc:
- Disk Copy 4.2: Only supports DC 4.2 format disk images. Format description here. Image type not supported under Windows tools. Recommended for all disk images except for tasks that require Windows platforms. MS-DOS 1MB and 2MB (aka 720KiB and 1.44MB respectively) disks are supposed to be supported but a test MS-DOS boot disk for Windows 98SE failed to image. There is no published minimum System/Finder specification for DC 4.2 but it can be said that it bombs the System in S2.0/F4.1 but not in S3.3/F5.4 (could have something to do with the MFS file system). Memory requirements are a function of the disk or disk images in question:
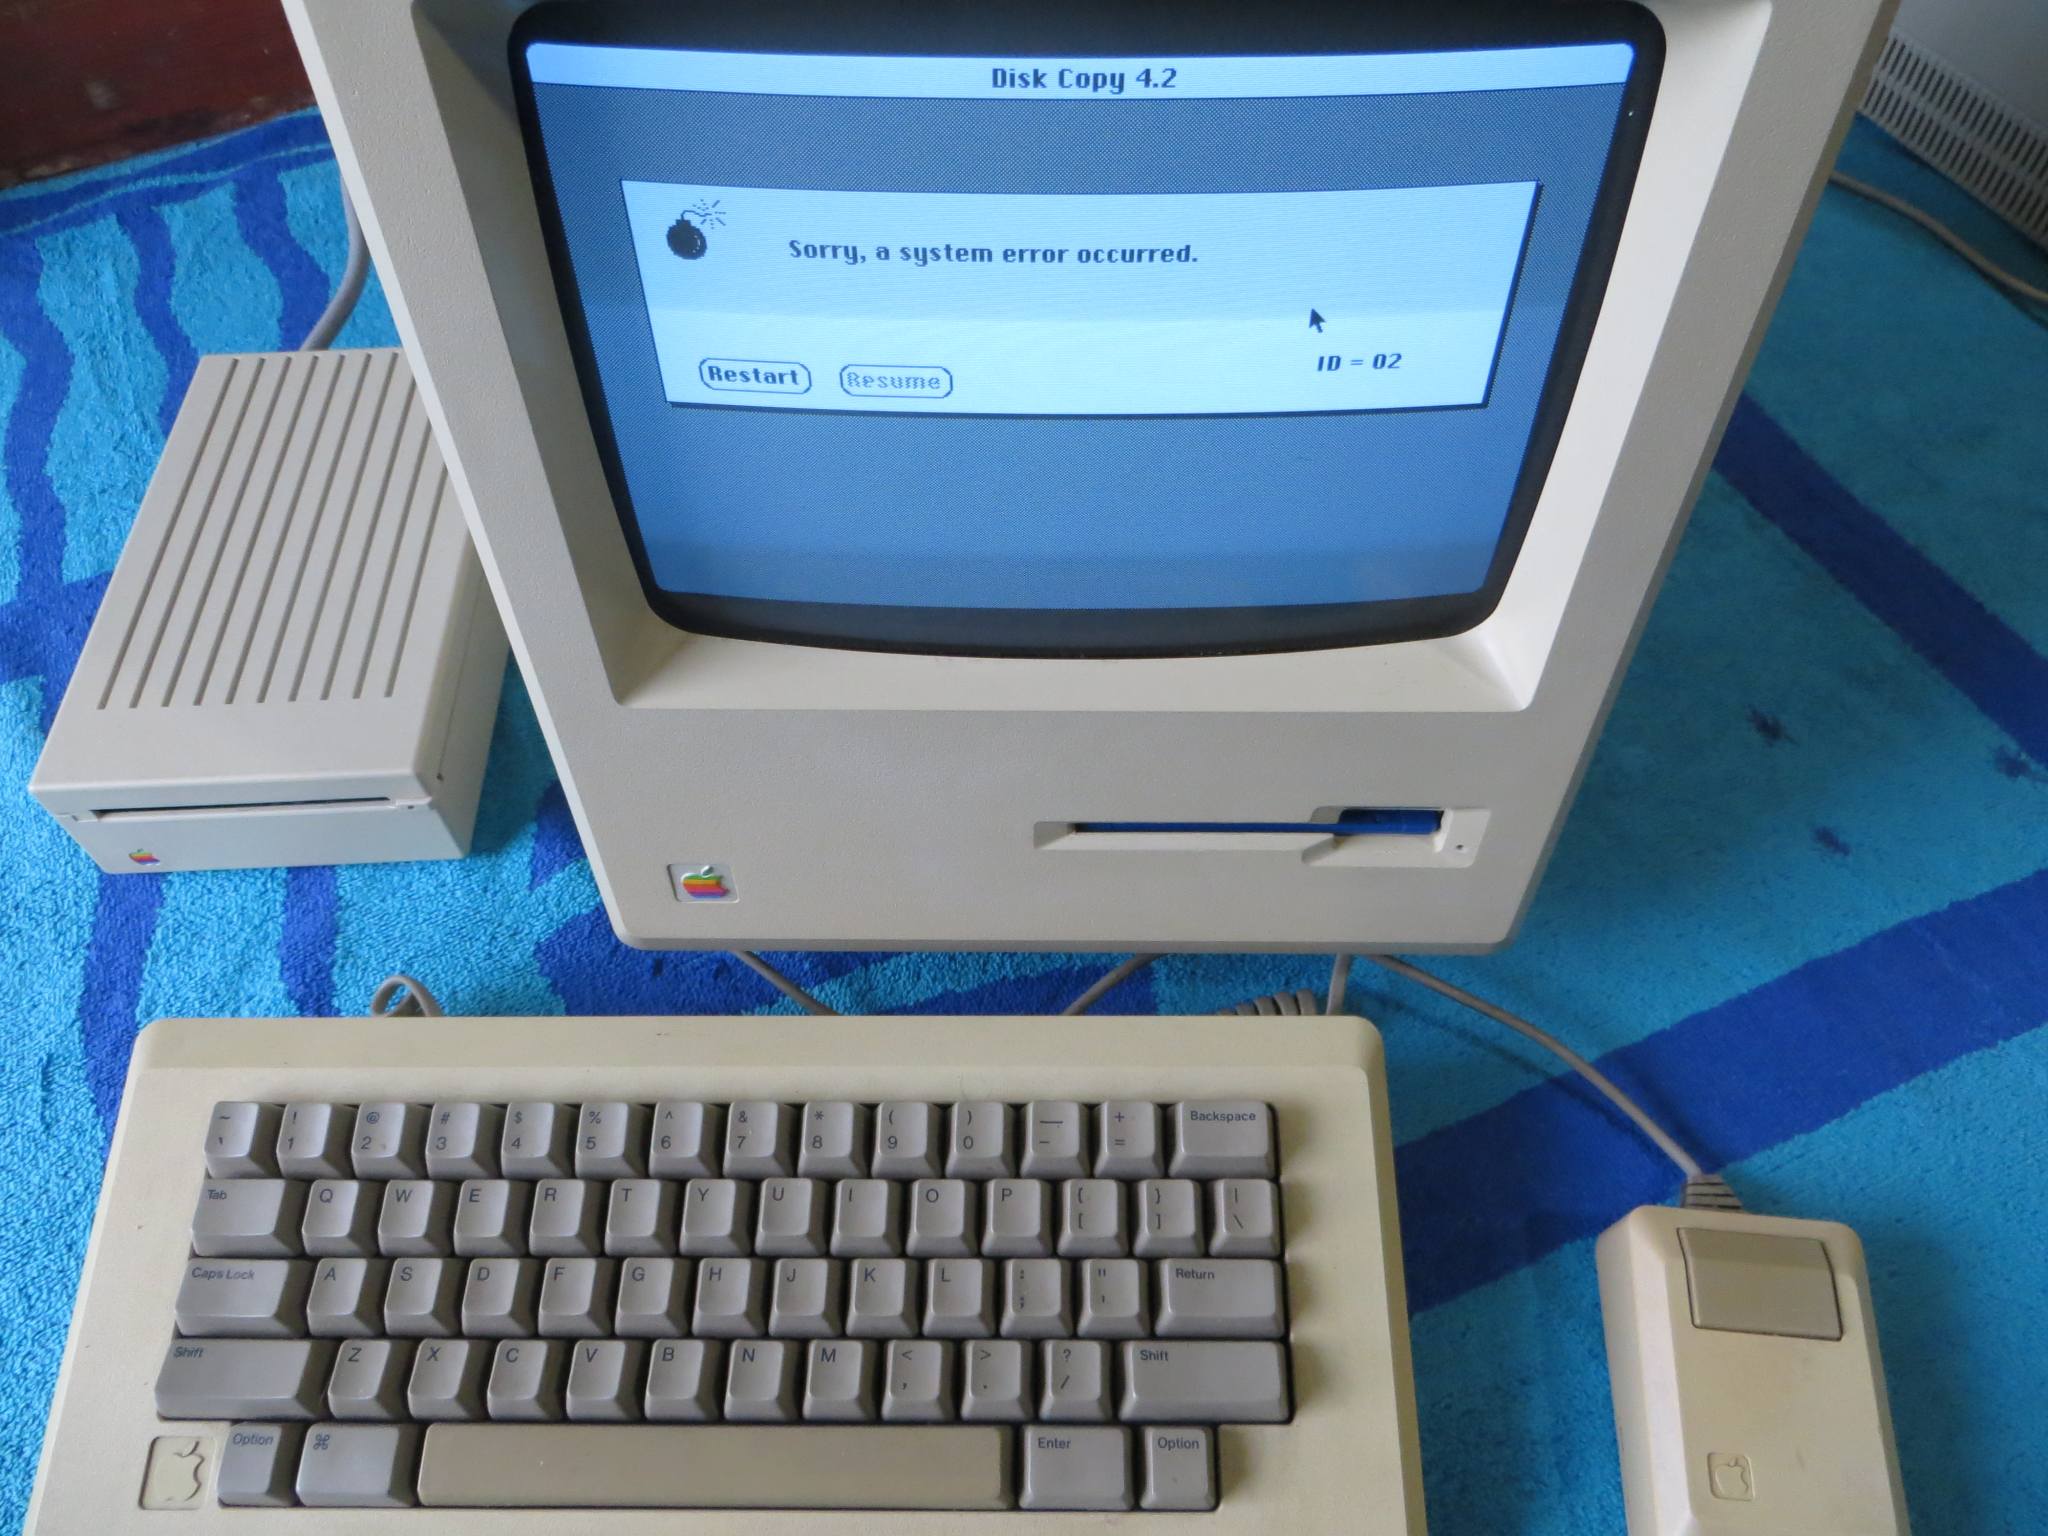
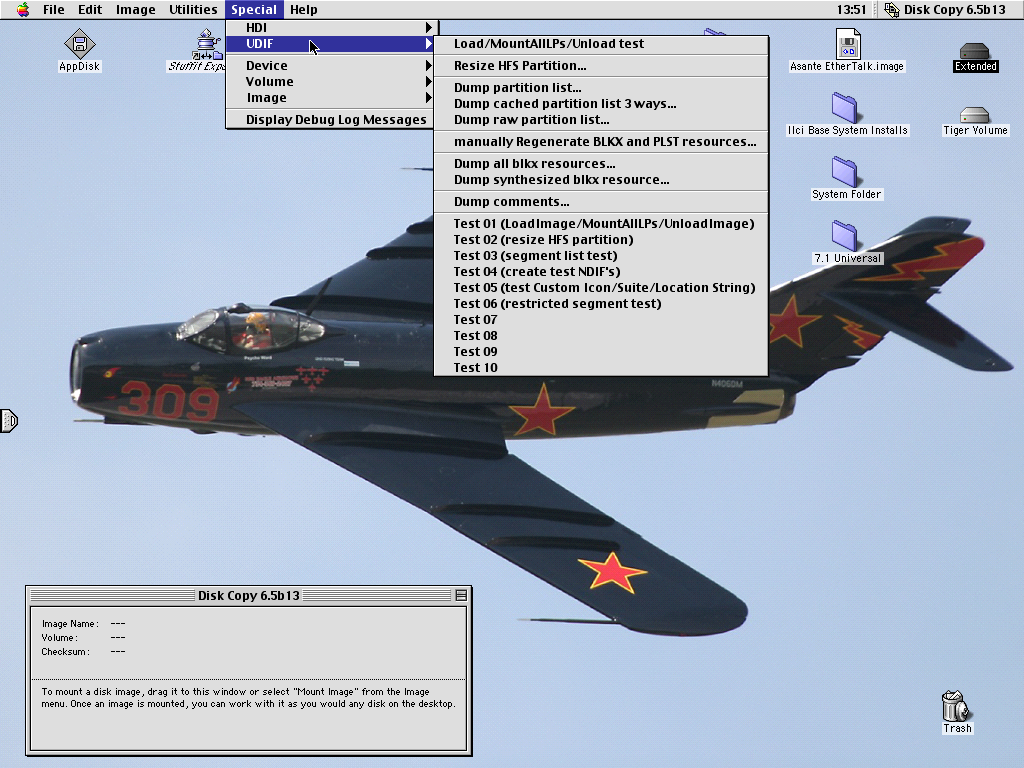
|
 The Dialog of Doom |
- Formats:
- Disk Copy 6.3.3: Type is dimg, creator is ddsk for Read/Write format, which is the default. New Disk Image Format (NDIF); output is of extension .img. Read-Only and Read-Only Compressed have a type of rohd. Note: Read-Only Compressed disk images keep some information in the resource fork: if the resource fork is lost, the disk image is unusable. A self-mounting image (.smi) has a type of APPL, creator is oneb
- Disk Copy 4.2: Type is dImg, creator is dCpy; output is .image
- DART 1.5.3: Type is DMd6, creator is DART (suffix of .dart gives it away). Note: DART disk images are compressed
- Disk Dup+: Type is DDim, creator is DDp+; this software outputs .dsk extension
- ShrinkWrap: Type is dImg, creator is Wrap; .image output and can also output other formats via the Preferences dialog
- Norton Floppier: Type is FLPI, creator is PNfl; no extension
- .dsk: Generic disk image. Try using Disk Copy 6.3.3 to mount it; if it doesn't work, try changing the type and creator to that of DC 6.3.3 as shown above. Emulators like Mini vMac can mount these
- .img: Another generic disk image. Could be produced by quite a few applications; such as RawWrite. Disk Copy 6.3.3 should be able to handle it
- .smi: Self Mounting Image. Usually created with Disk Copy 6.1 or 6.3.3. Requires System 7 or higher to mount these. Not exactly a disk image -- it is more of a virtual disk like a .dmg disk image in OS X. System 6 and earlier cannot mount these: use an emulator or another Mac to copy the content out if need be. Replaced in OS X by the .dmg format (Apple KB on the difference). Note: This class of "image" has a resource fork (for the applet responsible for mounting the image) which can get corrupted on foreign file systems. Make sure to use BinHex or MacBinary encoding for protection
- .image: Could be produced by a number of imaging tools. First try Disk Copy 6.3.3 and see what it does, or ShrinkWrap
- Resource forks: All self-mounting images have a resource fork which contains a mini-sized mounting helper. Should the resource fork become corrupted or lost, the content within the data fork is worthless. Use BinHex or MacBinary encoding, or archiving tools like Stuffit, Compact Pro or PackIt (the latter for early 128K and 512K Macs)
- Type/Creator programs: System 7 and above can use ResEdit, Creator Changer 2.8.4, or the many clones thereof. System 6 and earlier can use Finder Info 1.1.1. System 4.1 and 512KiB of RAM is the minimum to run ResEdit 1.3D7. Another variant is the File Tools desk accessory: useful for disks with extremely limited disk space: DAs generally are preferable in non-MultiFinder systems
- Useful blank images can be found here; assign them DC 6.3.3 type and creator info to use them in Classic OSes, or rename them with extension .dmg in OS X to mount them. MFS cannot be mounted any operating system higher than 7.6.1: use Mini vMac if necessary. There are DC 4.2 and NDIF format images, this can be used to write out blank images, processed with emulators and written back out, and other practices
More information
Software errata
Technically NDIF and DC 4.2 images don't really have resource forks, as the image content itself is stored in the data fork. Despite this, there can be some data stored in the resource fork like the image, type and creator, creation and modification dates, and so forth. For this reason, compressing with a program like Stuffit, Compact Pro, or similar to wrap everything into a nice box that is just a binary file tends to be the best practice. Of course the archives have type and creator information of their own, but it is easily rectified. Stuffit tends to run into version incompatibilities, using version 1.5.1, version 4, 5.5 or 6.0 are the most common choices. Consider the target audience when selecting a version: a user with a Mac Plus can't open a Stuffit 6.0 archive. Protecting the archive with MacBinary II or BinHex encoding goes even further. If it's just a plain disk image, there's no need to use a compression tool because a plain disk image already is just a binary file unless it's a self-mounting image or a Disk Copy 6 Read Only Compressed image. Double check the archive integrity before long-term backups are initiated.
Under System 2.1/Finder 5.0 up to System 6, a window from a Macintosh File System (MFS) disk will be lacking a single pixel in the title bar, whereas the Hierarchical File System (HFS) has the pixel, which is only visible in Icon or Small Icon view. See the image at the right: the area just ahead of the pointer, and compare it to the area with the other red rectangle. The foreground window with the pointer is MFS, and the windows in the background are HFS. This "MFS detection feature" was removed in System 7, and probably the only way of detecting a 400KiB MFS from a 400KiB HFS disk is to drag an item from the disk to the desktop and see if it pops a dialog "Items from 400KiB disks..." as seen in the next image to the below right with 7.6.1. Note the Disk Copy 6.3.3 -43 error, but the disk image still mounts to the desktop. There's also another prompt that pops up if a folder is copied to a MFS volume; it says "Folders cannot be copied onto 400K disks. To copy the contents of a folder, open the folder and drag the items inside it to the disk." This happens because MFS does not support folders, also known as directories. |
 MFS versus HFS title bars |
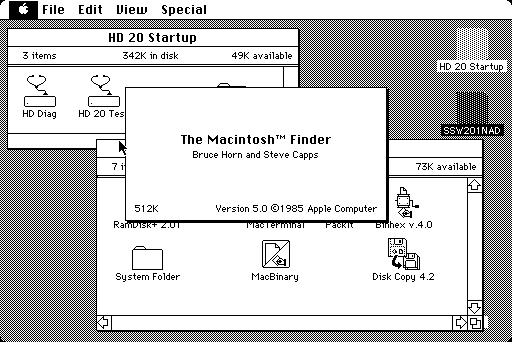
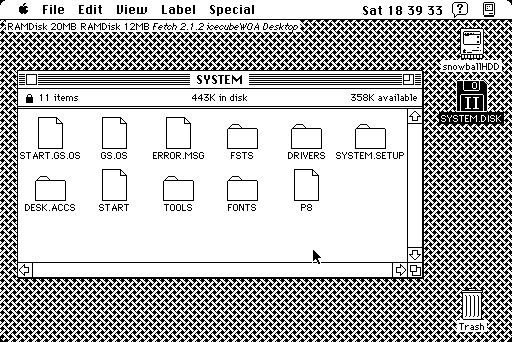 An Apple II ProDOS disk (IIGS) |
 A FAT-12 diskette with DOS-type files (Win98SE boot disk) |
 400KiB MFS in background, 400KiB HFS foreground (512Ke, S1.1/F1.1g) |
 800KiB MFS disk in foreground, 400KiB MFS in background (512Ke, S1.1, F1.1g) |
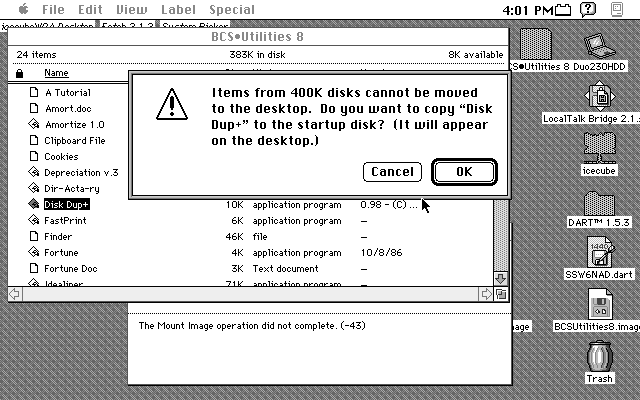 A 400KiB MFS disk in 7.6.1 |
External floppy drive overview
The first external floppy drive was this one below. The design isn't all that inspiring and feels clunky. On top of that, while the Sony 400KiB drive was more reliable than a Twiggy 5.25" drive, they're not trouble-free and they're known to have problems. On the left side of the unit, above the Underwriters Laboratories Recognized Component mark (looks like a 9U) there is a sliding latch lock for securing the diskette carrier in the down or upward position. Grease gets old and thick which interferes with the smooth operation of the system, and the spring isn't strong enough to overcome it. Considering it's hard to take apart by reason of the many circle clips that hold everything together, it isn't easy to fix. But at some point it must be done else the drive gets stuck in the down position, usually. Otherwise the drive itself is large and cumbersome, and with only 400KiB to use, well it is smaller than a full-sized 5.25" disk drive, but as long as 800KiB drives exist, they are more useful.
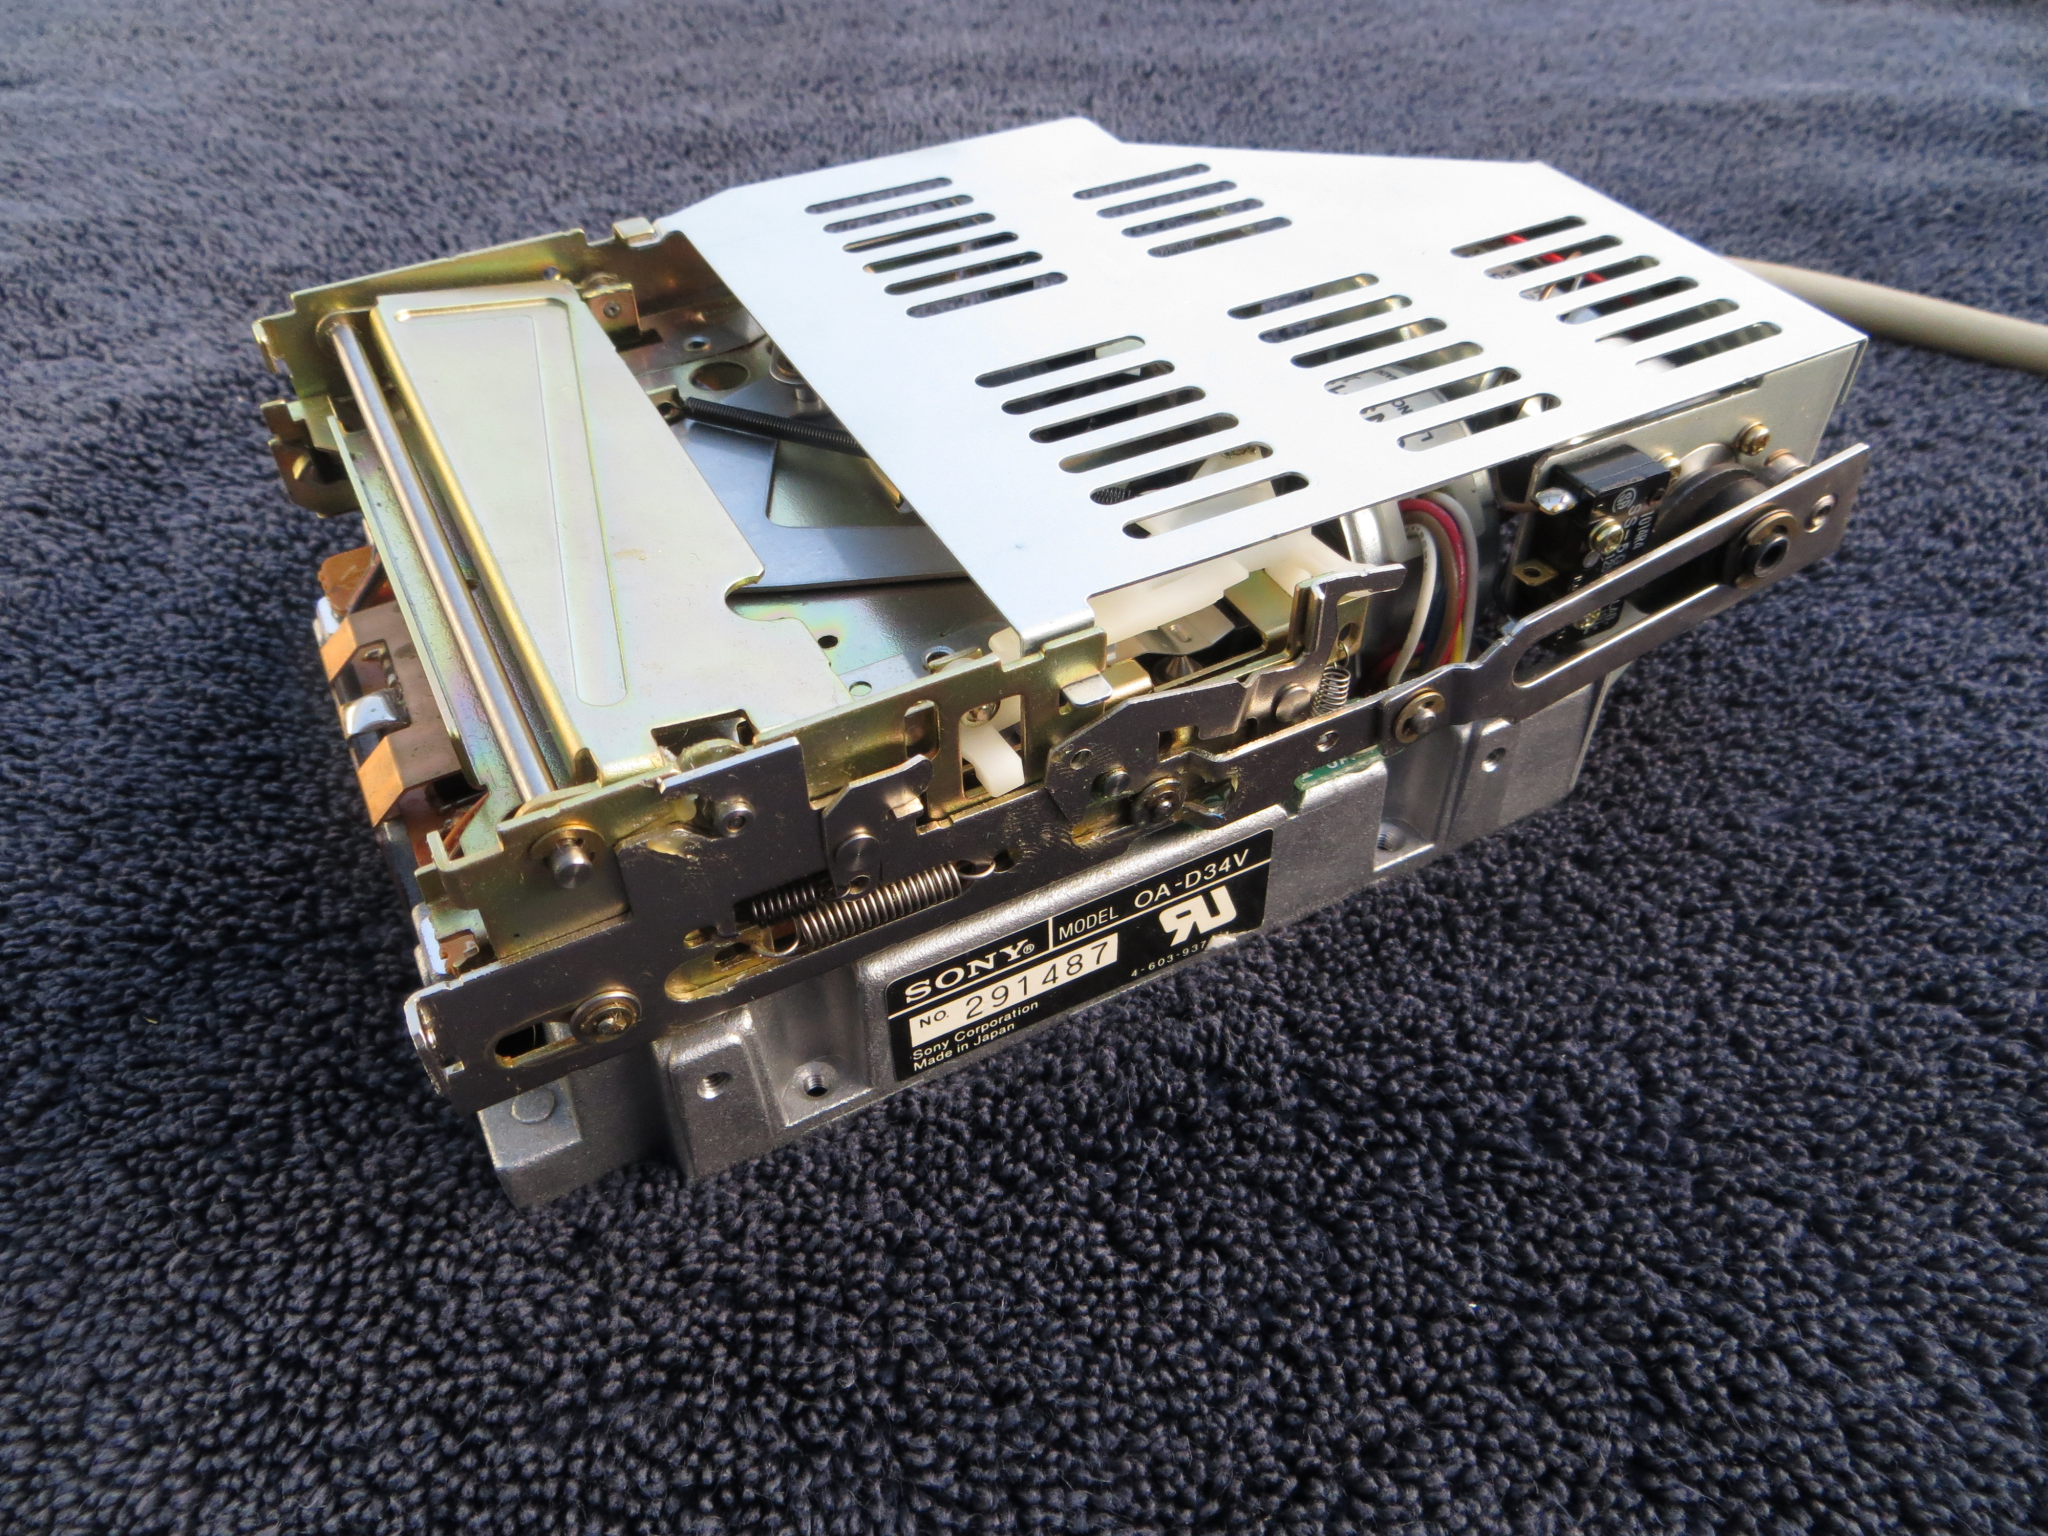
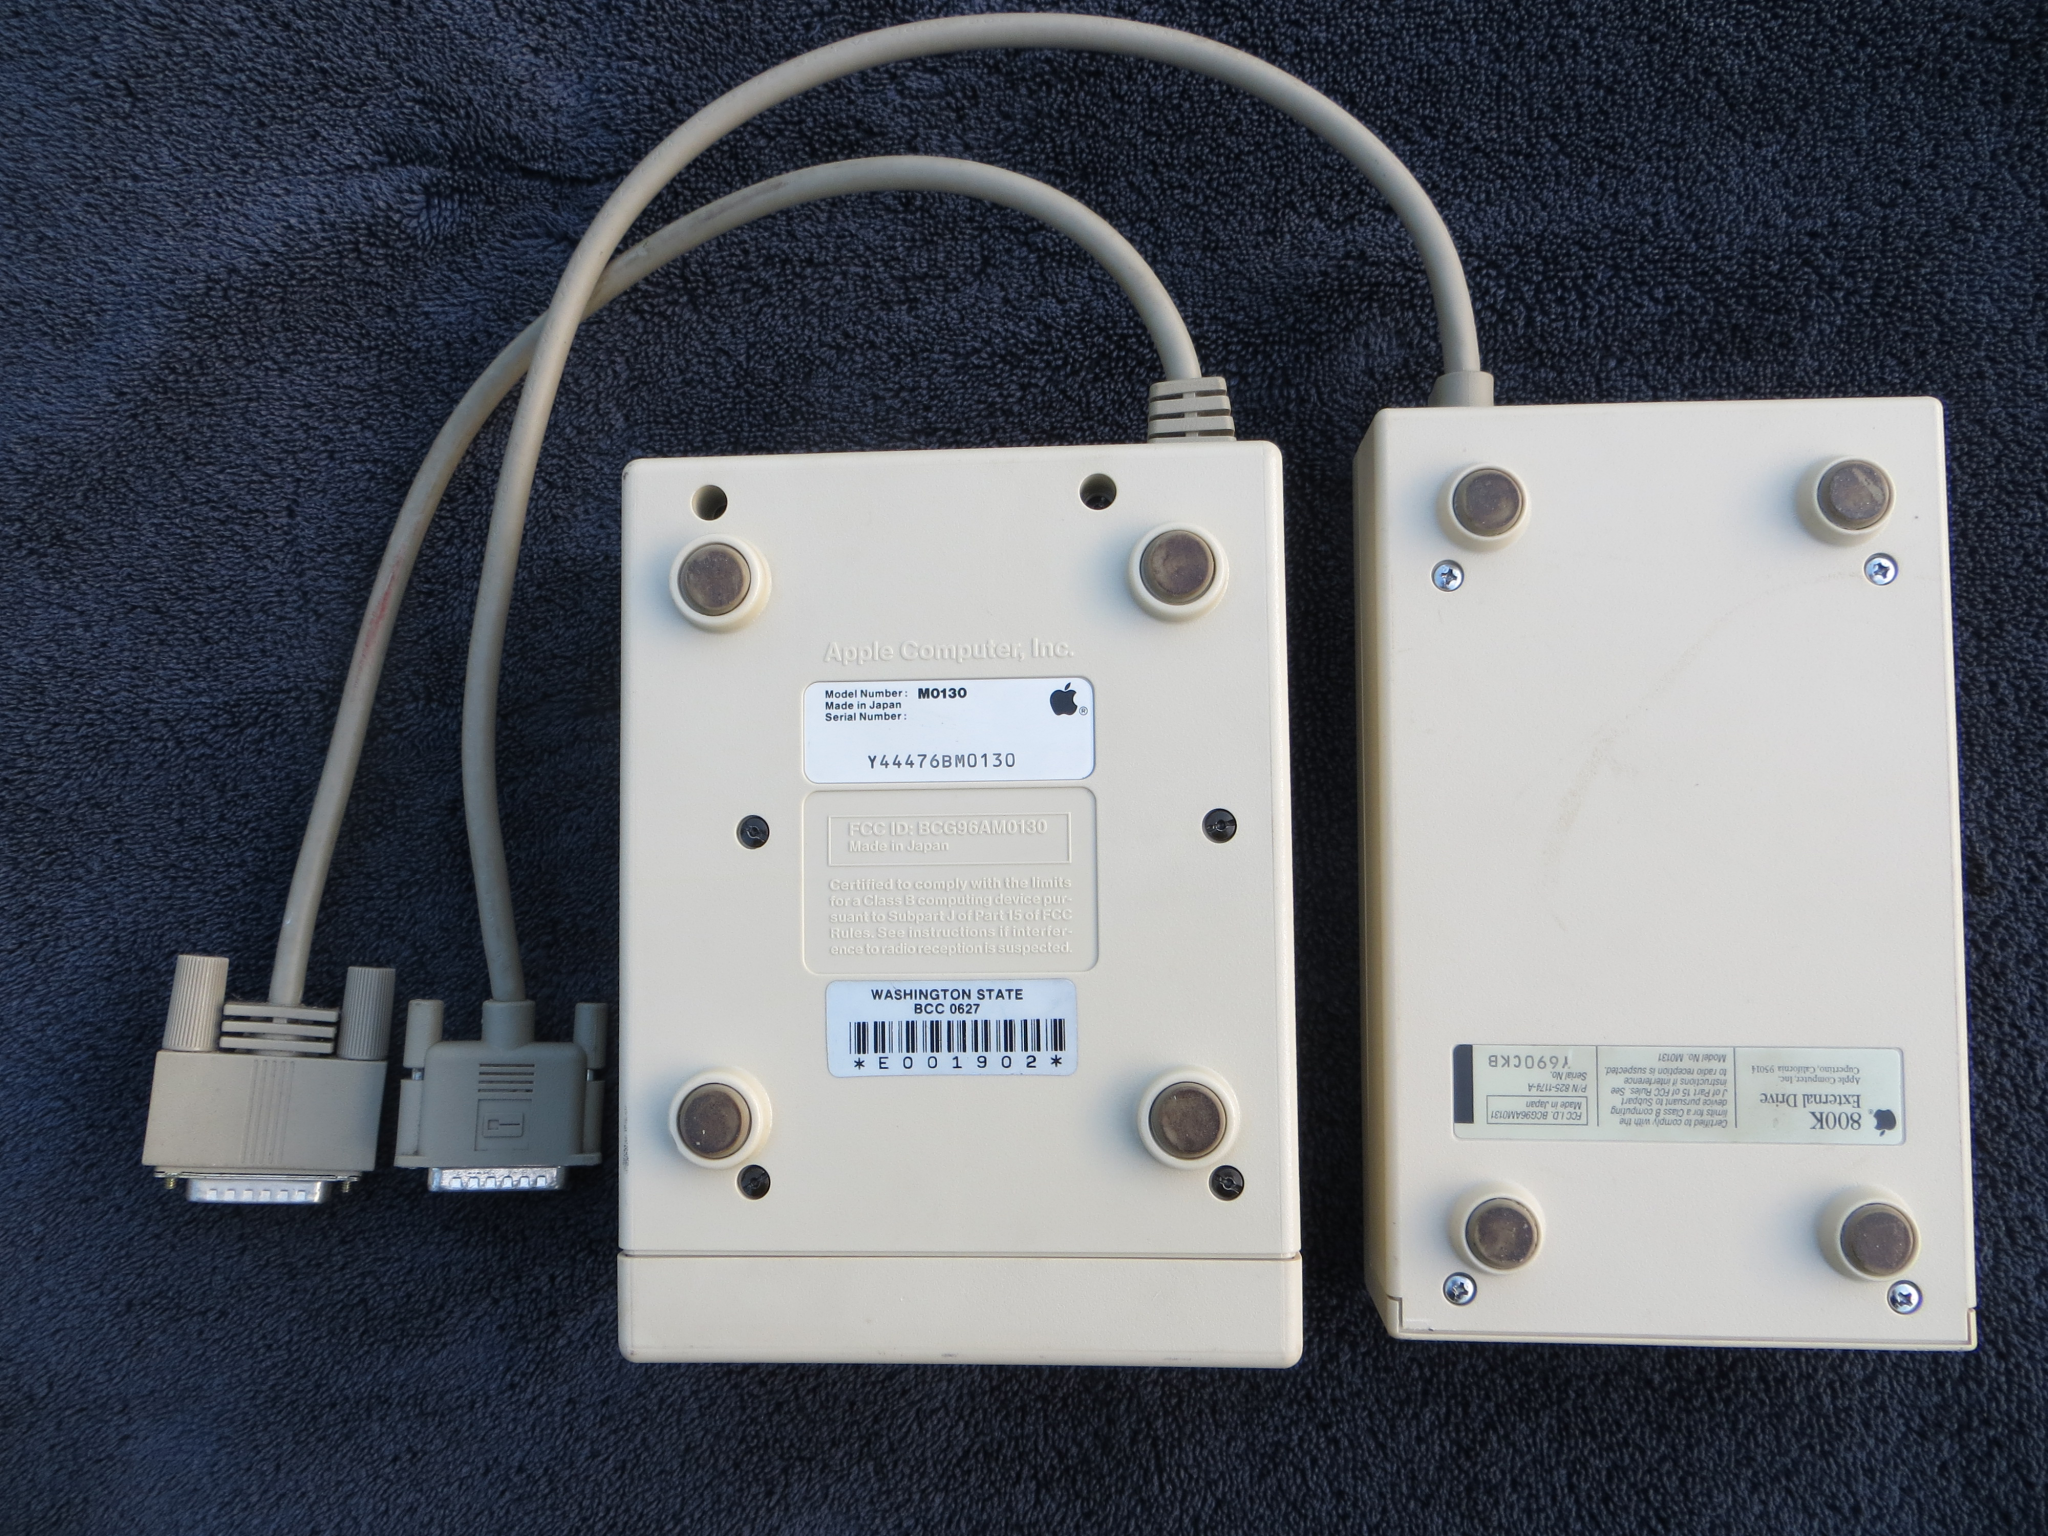 Bottom comparison |
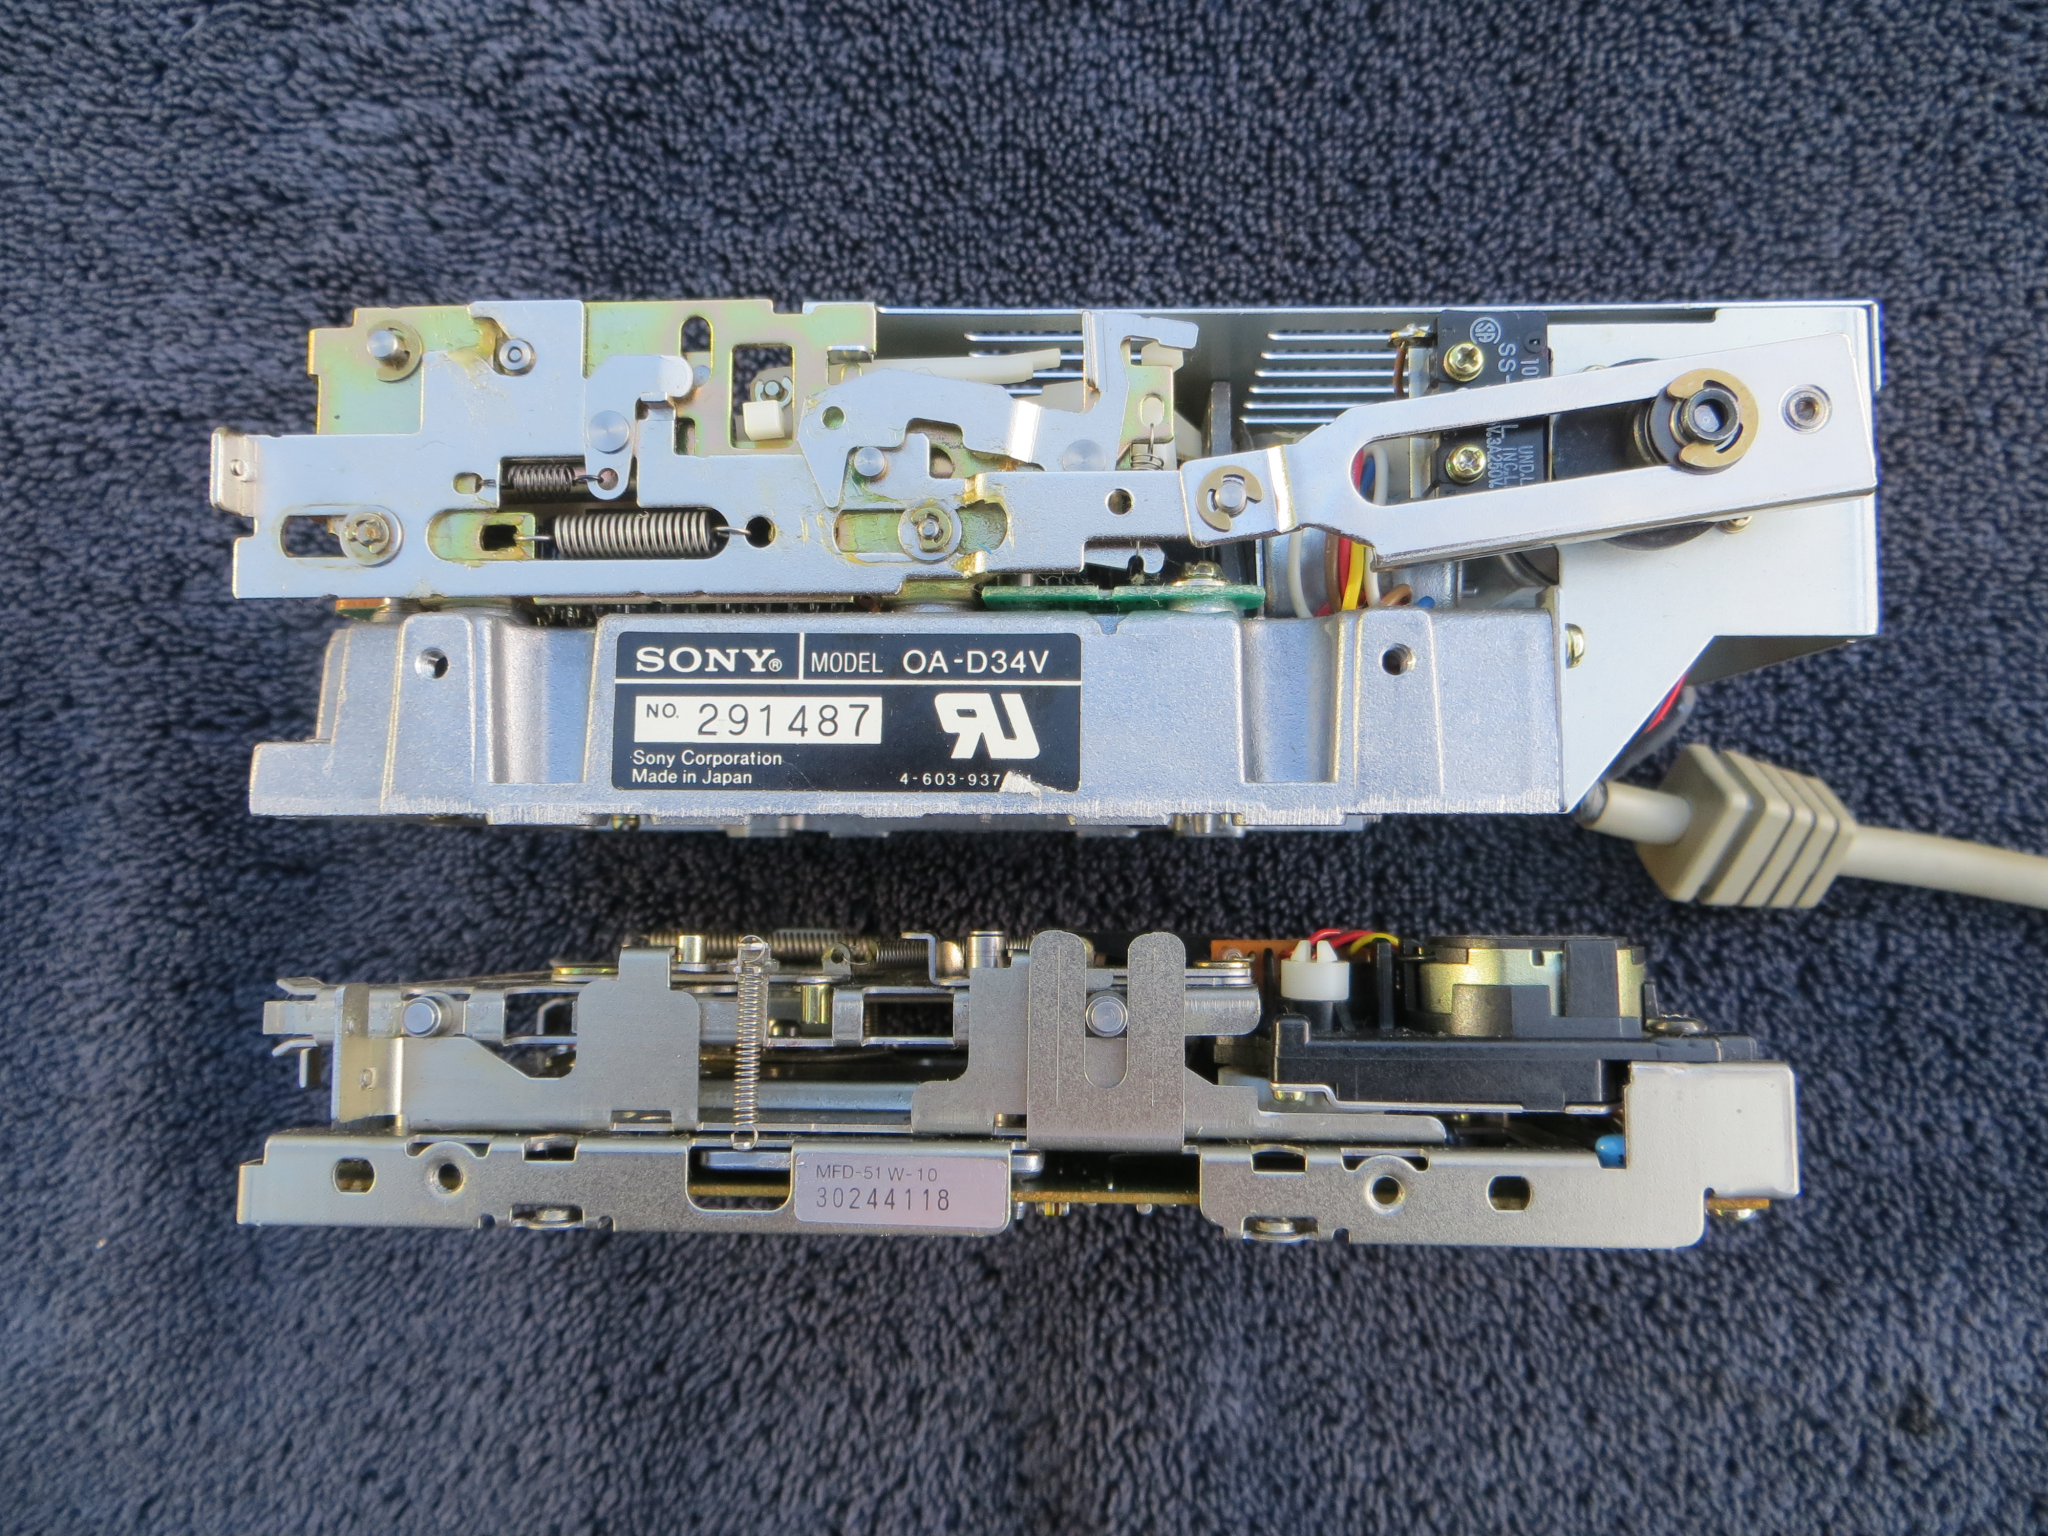 Side profiles |
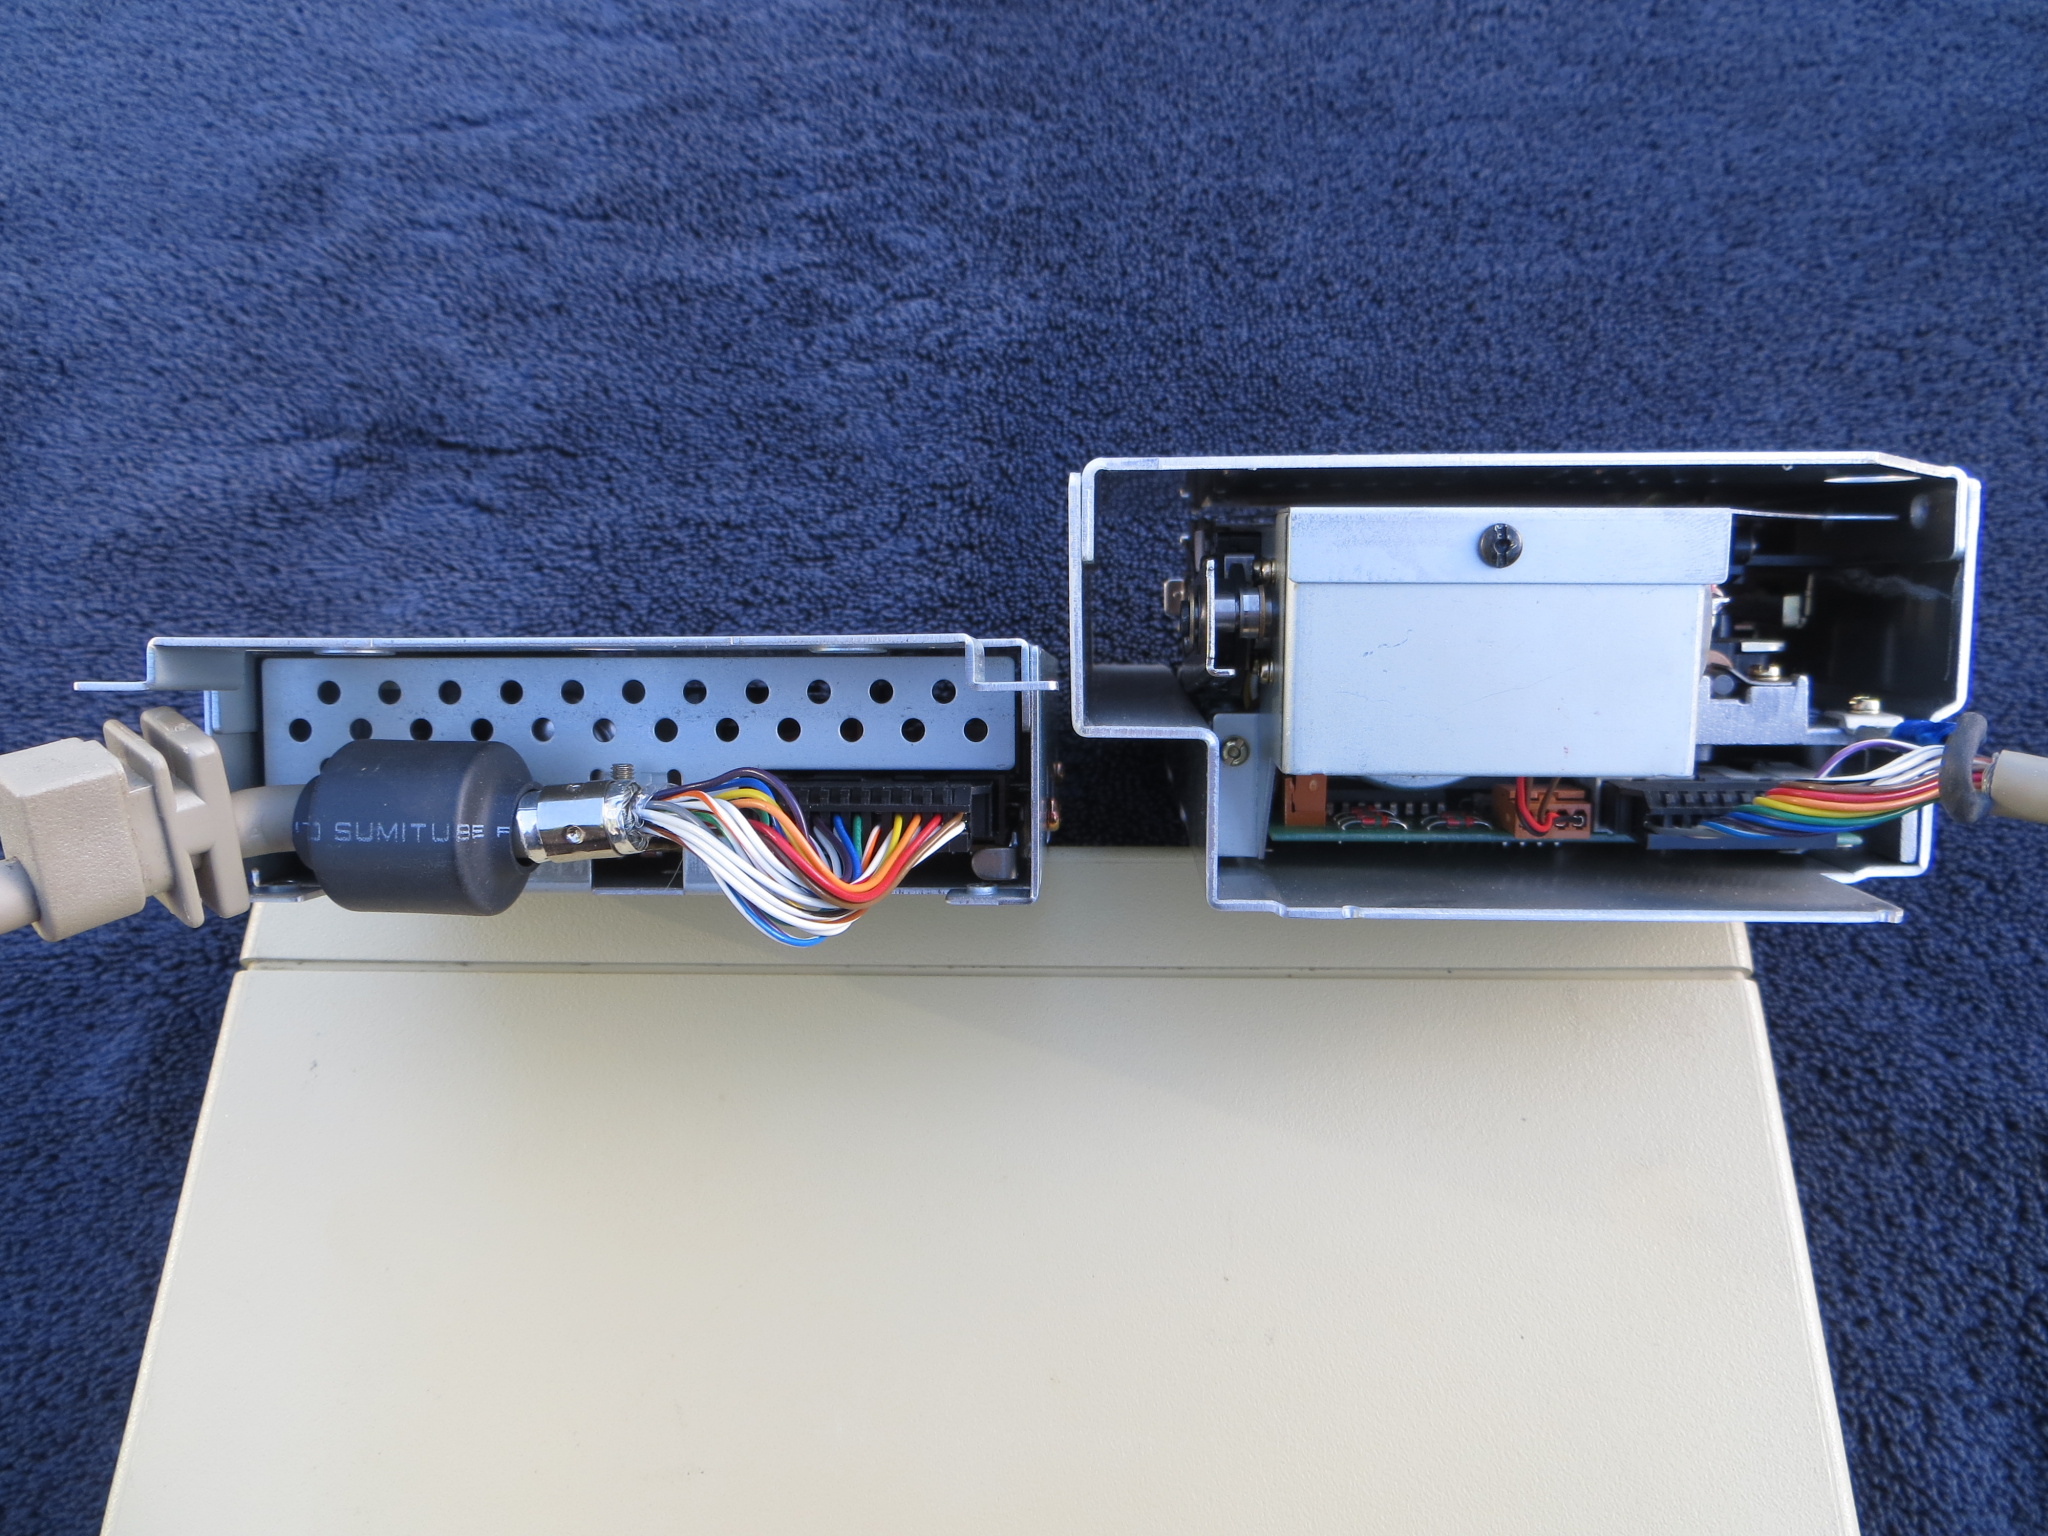 Height difference |
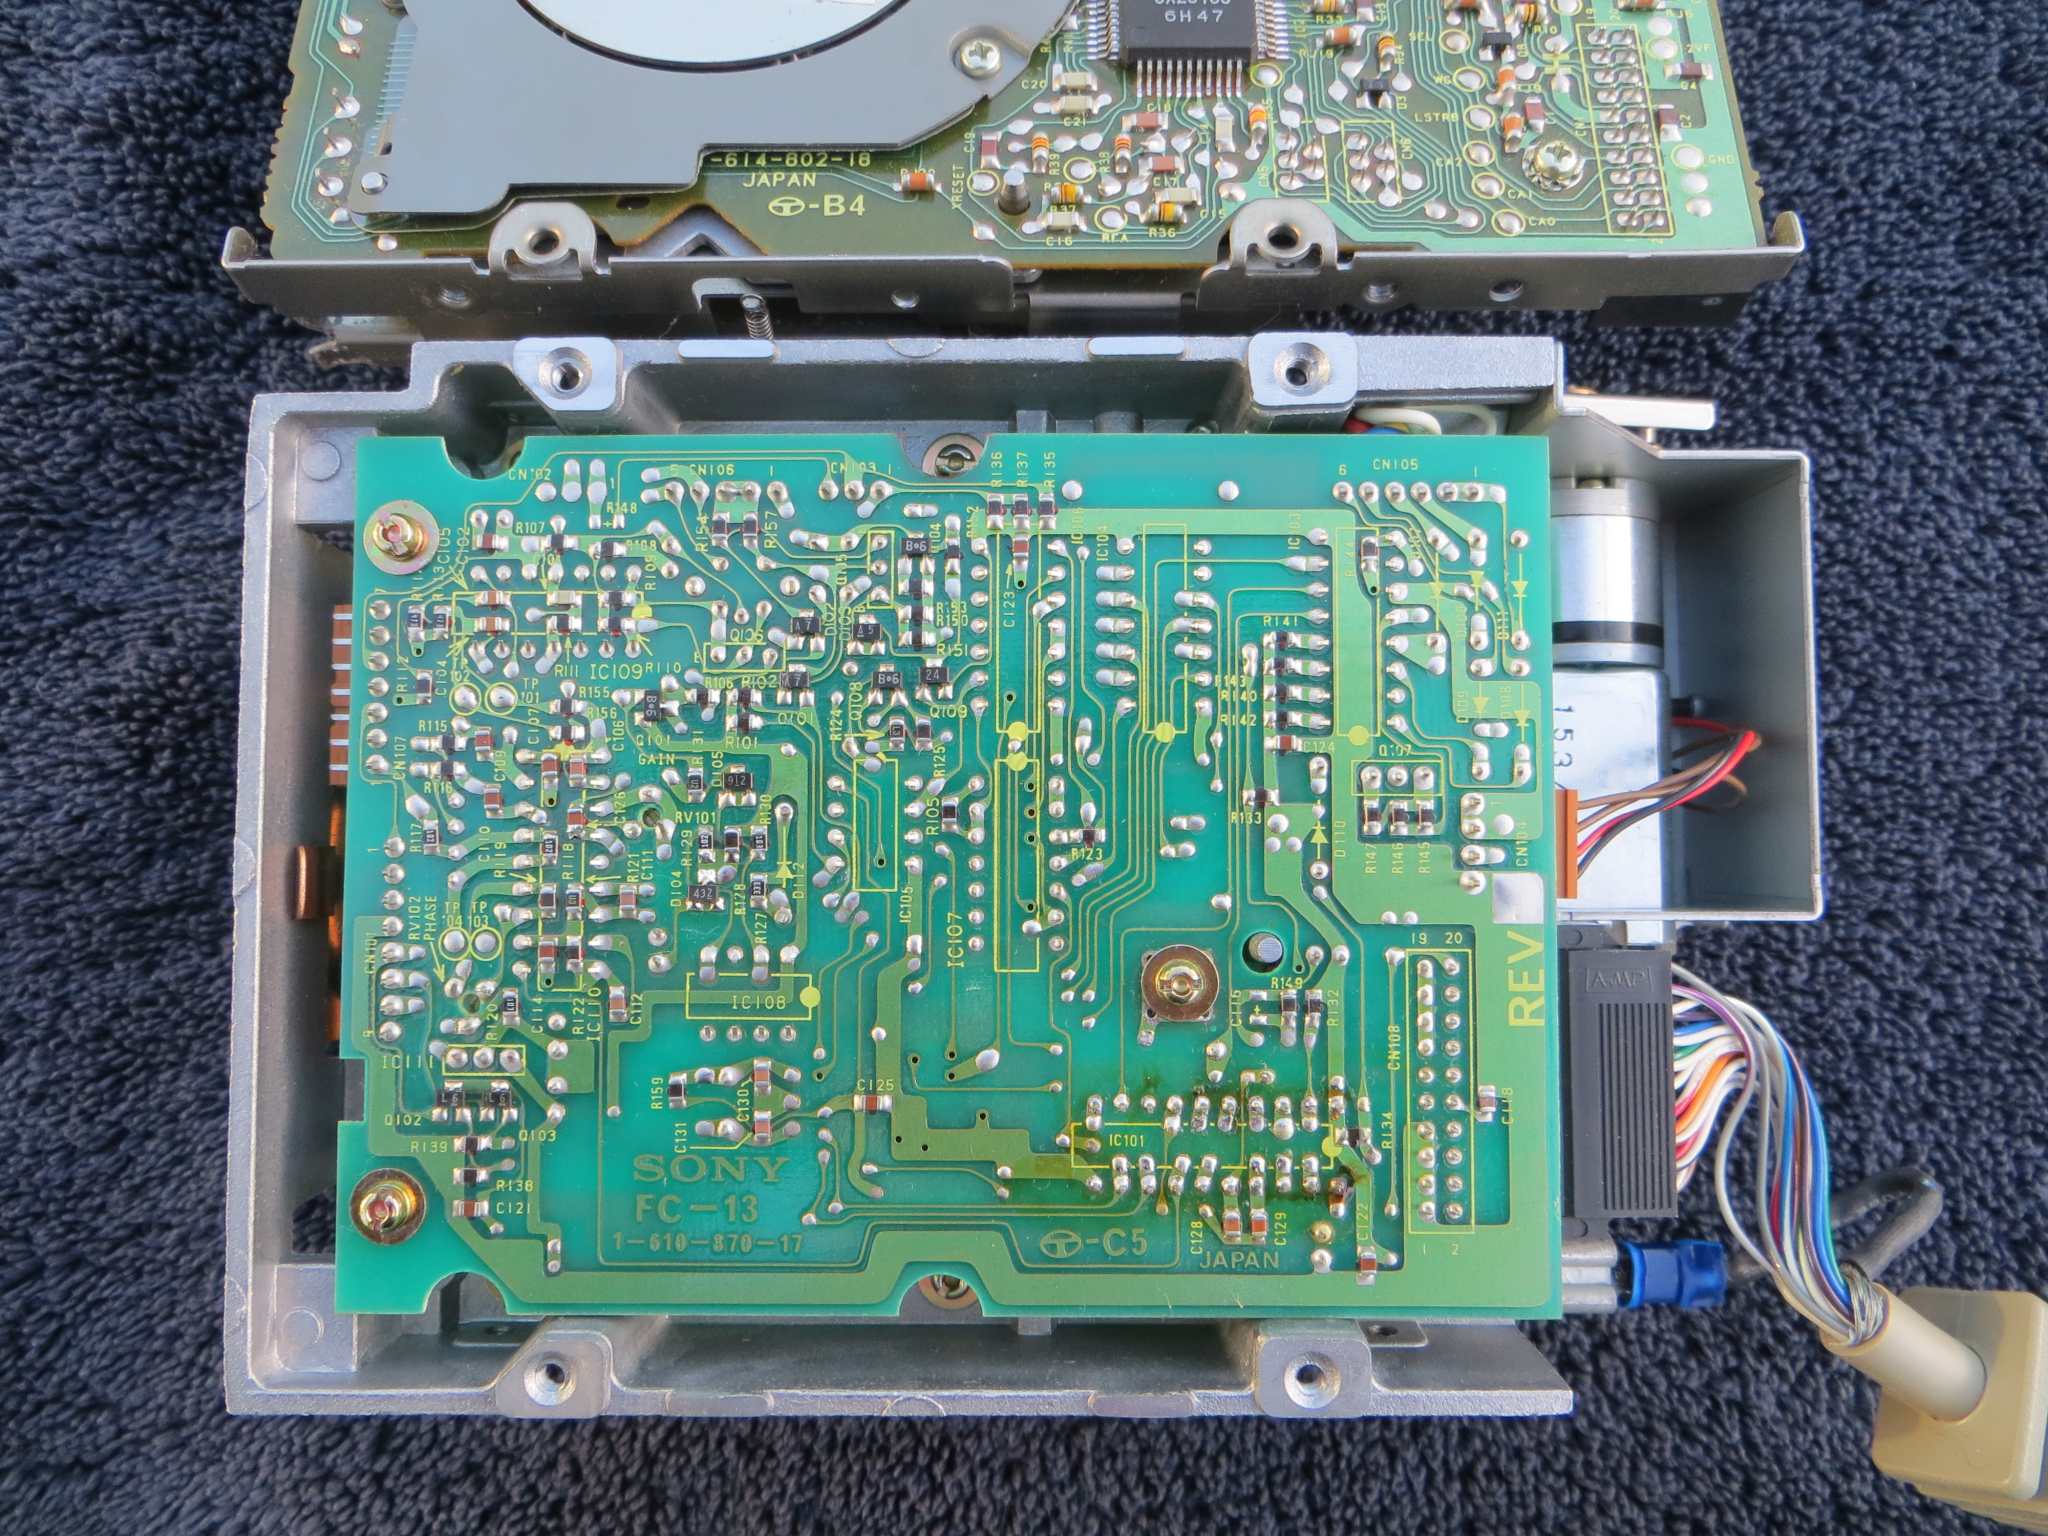 Main board bottom |
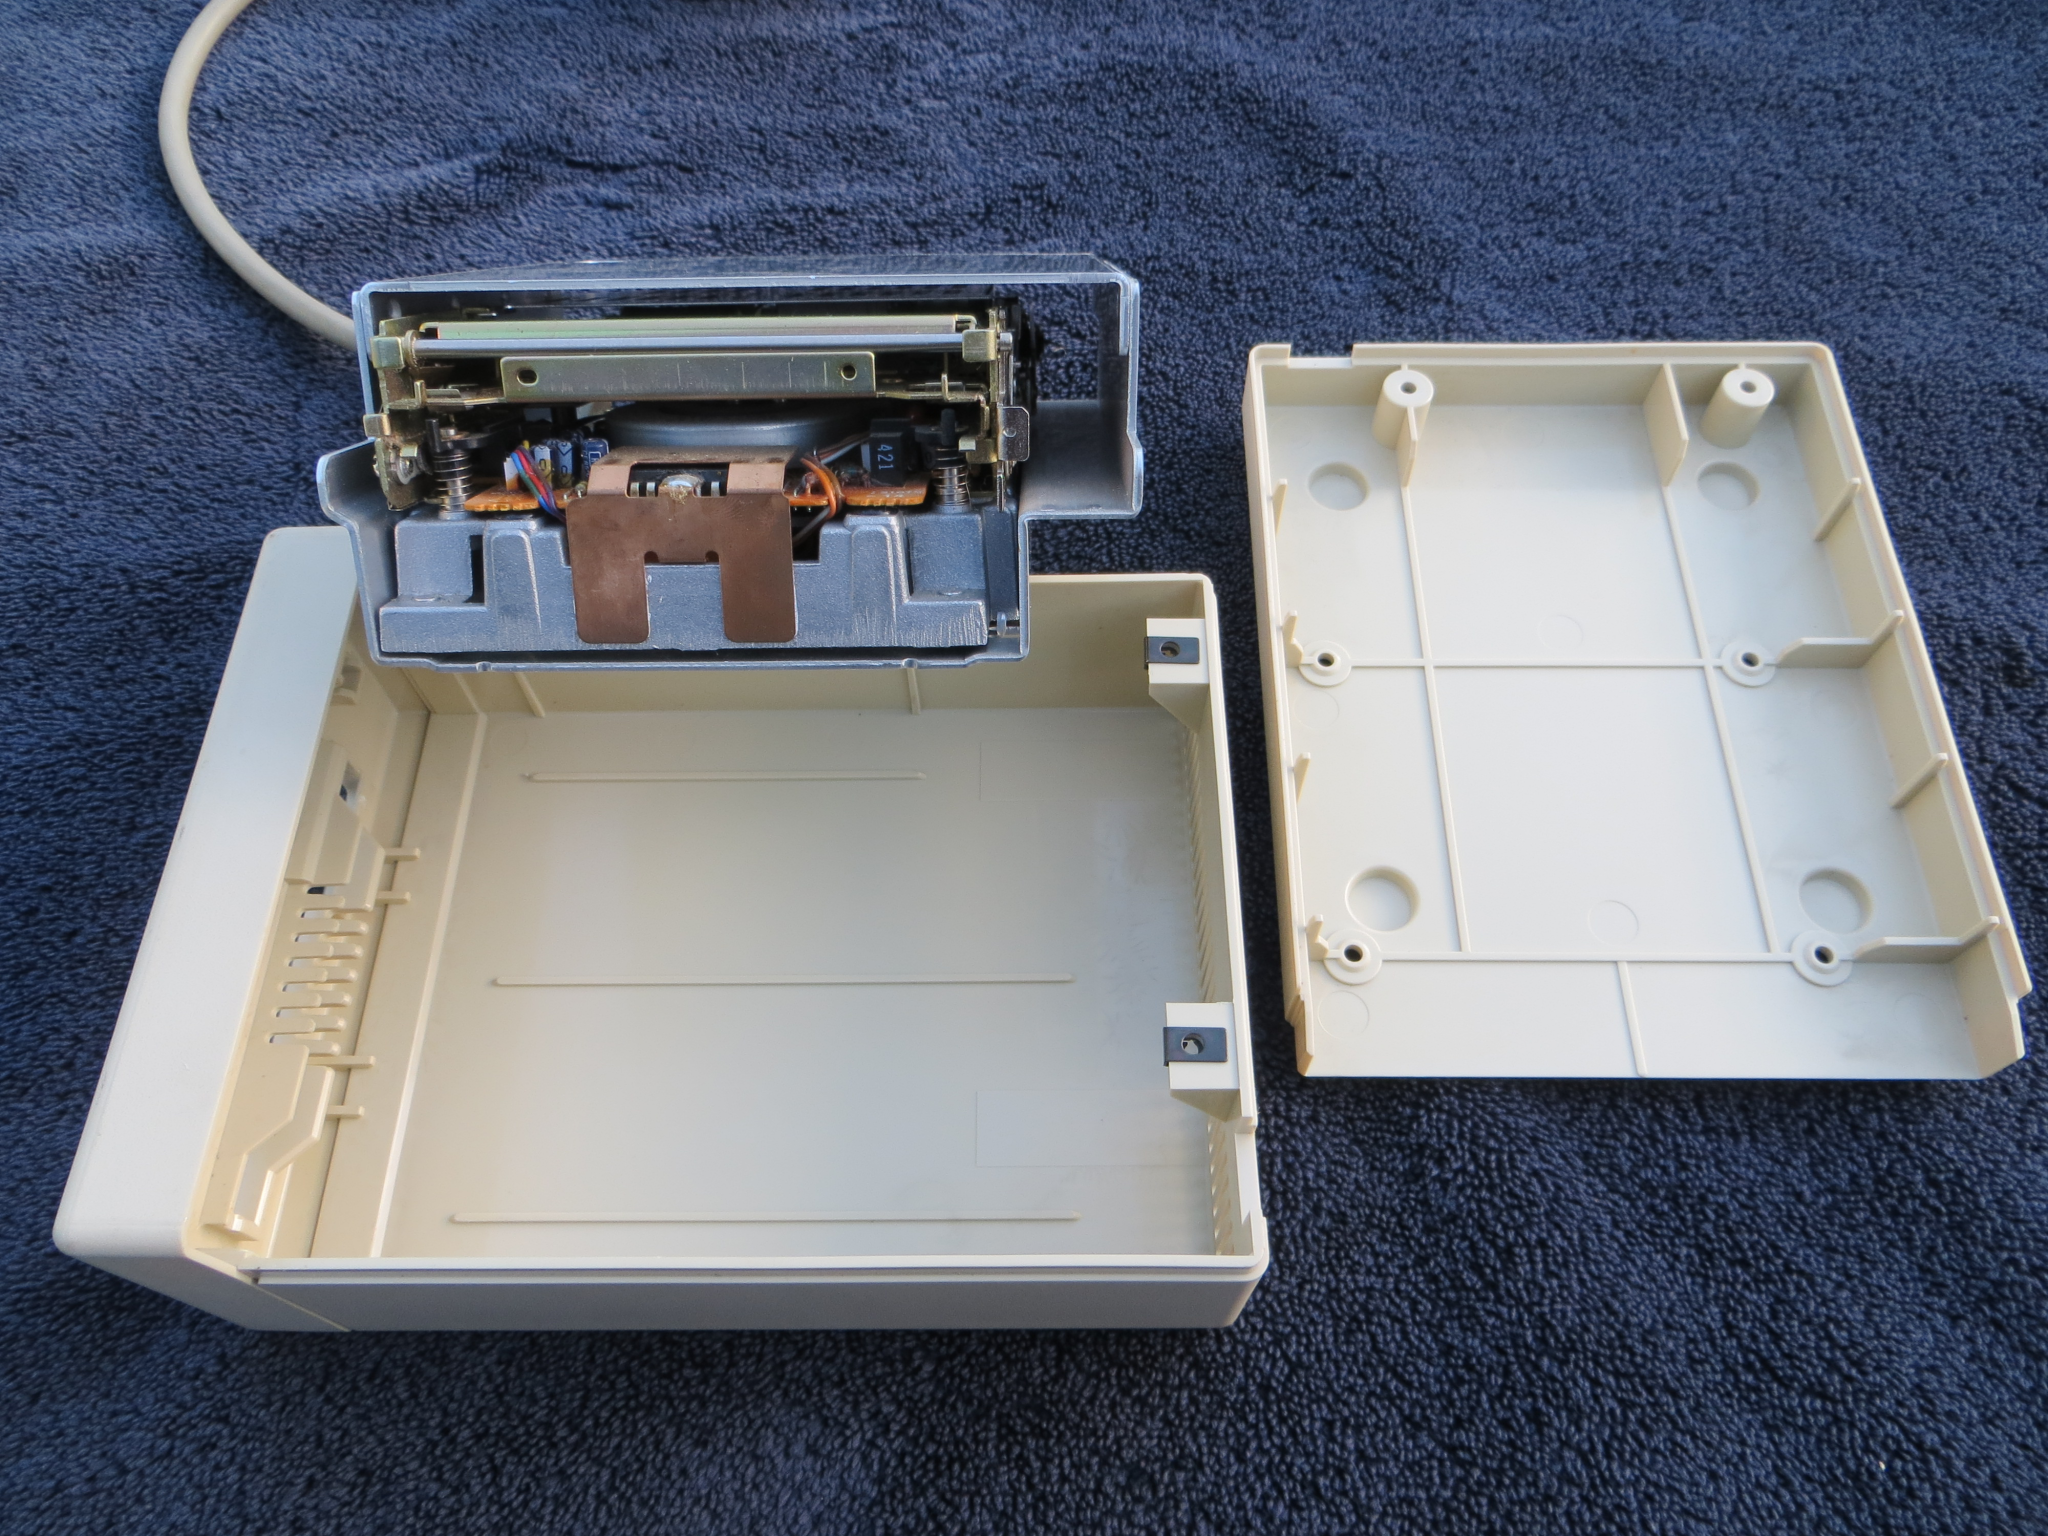 Limited internal shielding |
The next gallery is focused on the UniDisk 3.5. It's an 800KiB drive that was intended to allow the Apple IIc to use an external 3.5" drive. Other Apple II machines can use it too if they have the right interface card to go with it. It's got a trio of DIP chips on the board, one of which is visible, the other two are not, with one being a 24-pin DIP and the other a 40-pin DIP. This example, being compared to the other two like in the above gallery, obviously has an older drive assembly version. It's not compatible with the Macintosh without bypassing the subsystem board which helps the slower Apple II machines keep up with the potential data rate of this drive. It's most at home with a IIc, but it also lacks the cool light-up / indicators found on the rest of the period equipment. The Apple IIGS can use it too, but it's not really a good match and a SuperDrive is a better fit. Build quality is good, not as nice as the SuperDrive is, the back is different, the chassis assembly is made from aluminium not stamped sheet metal, but otherwise is similar to the SuperDrive. All three capacitors on the subsystem board are 50v 4.7uF 85 degree C radial electrolytics.
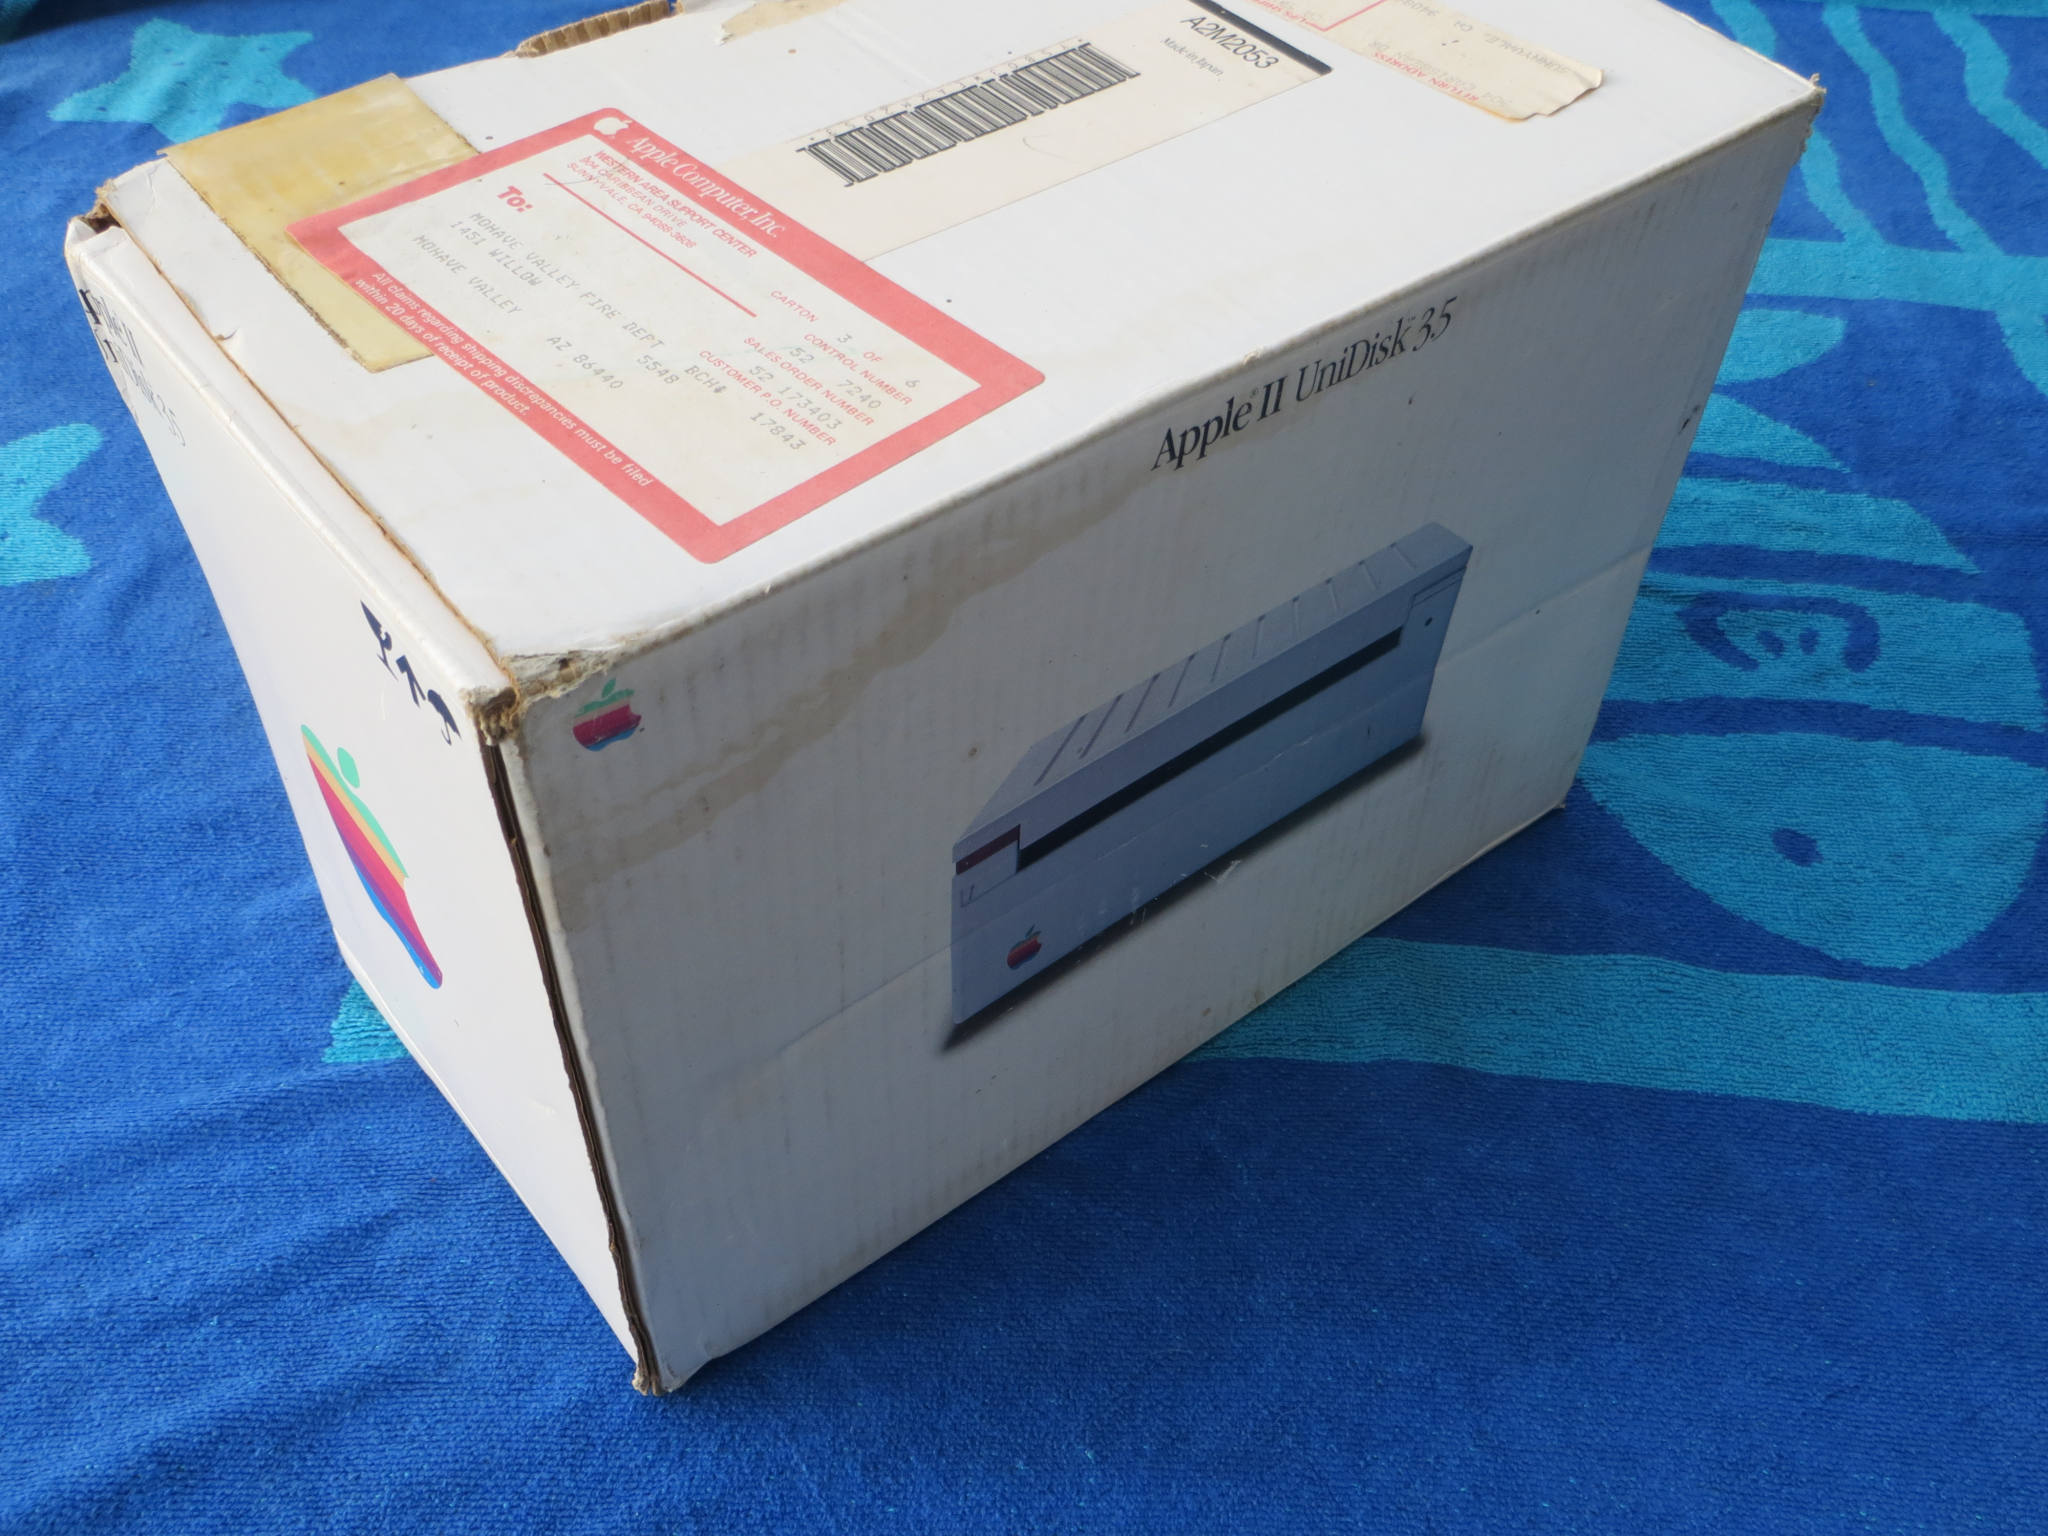 Isometric view of box |
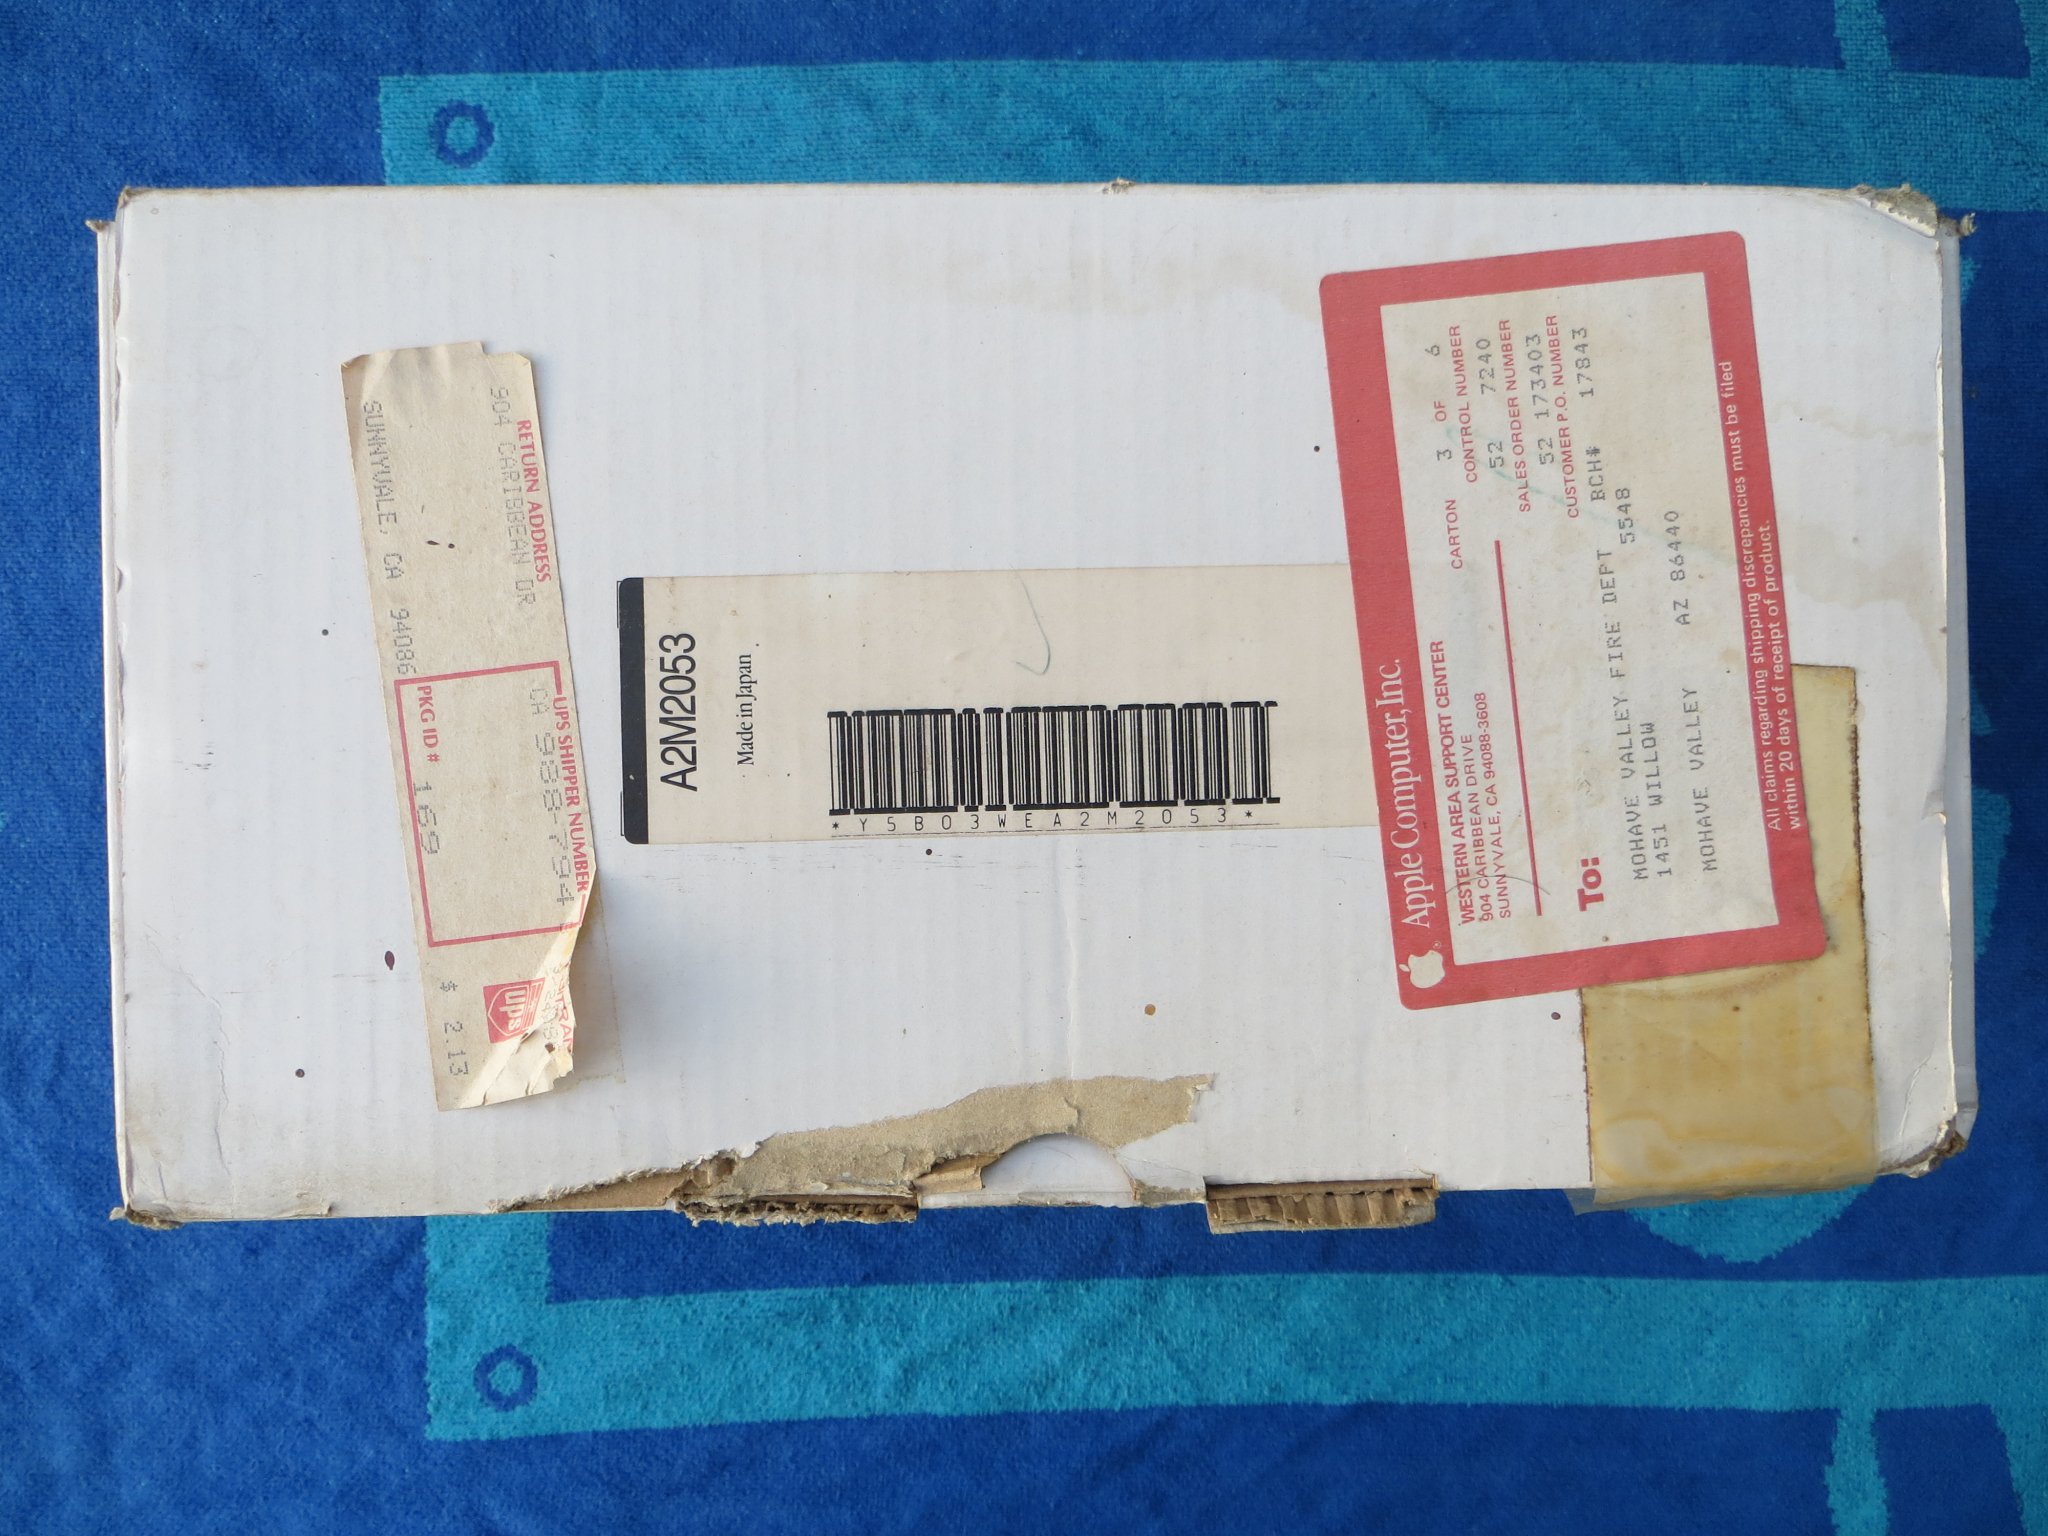 Mail was cheaper back then |
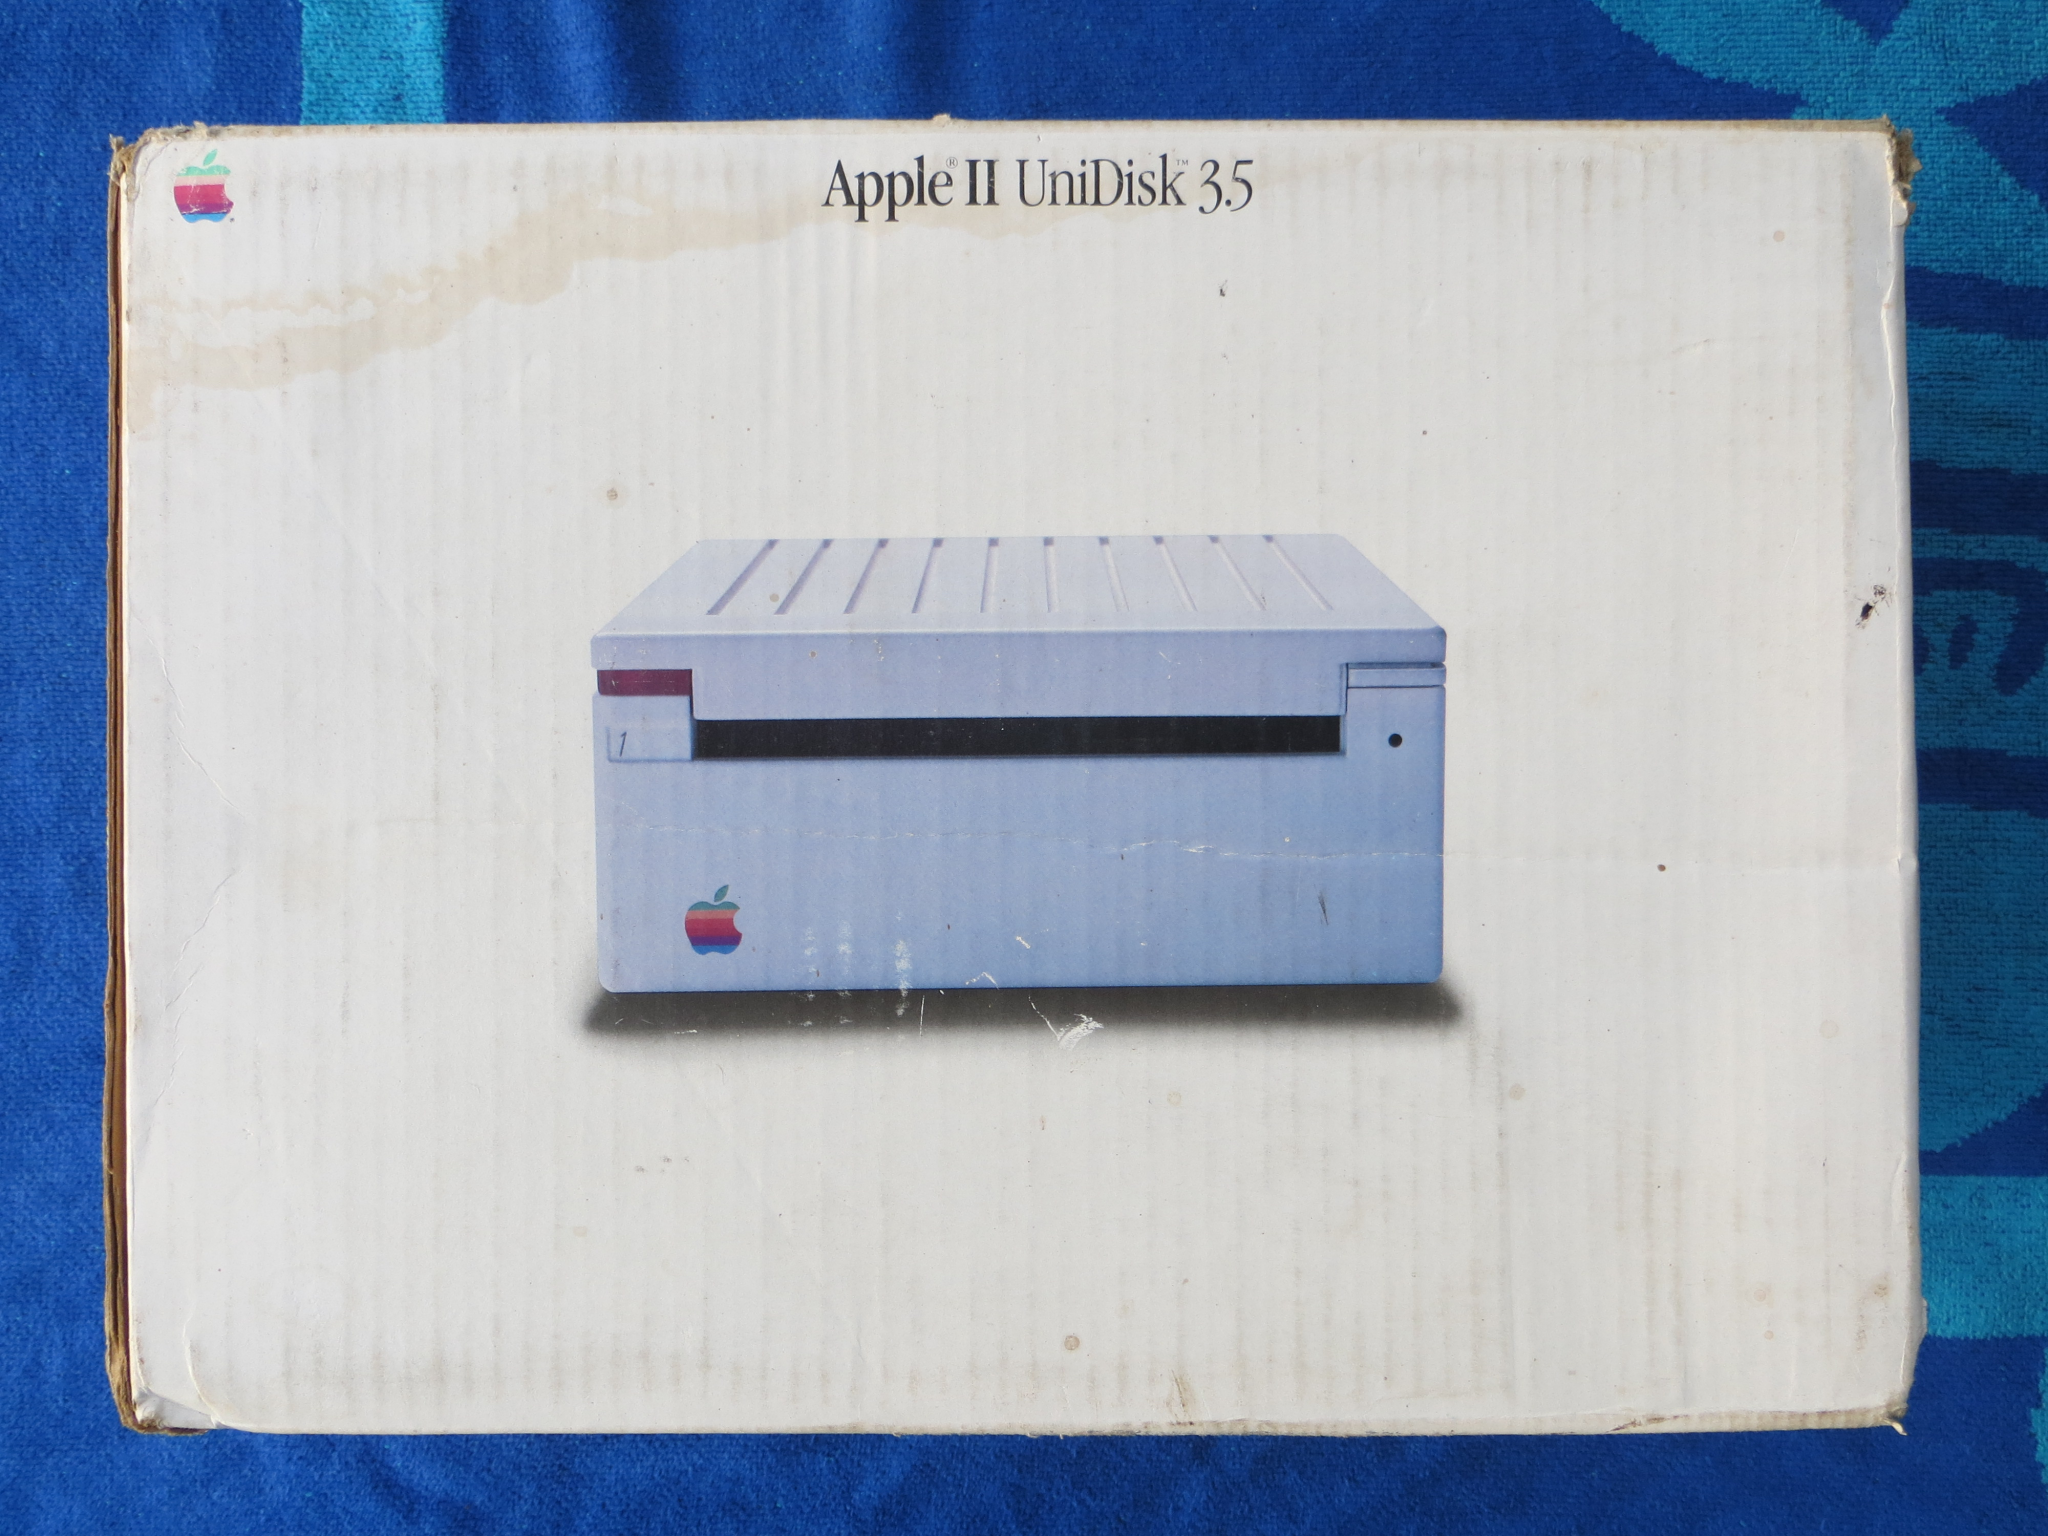 Front view |
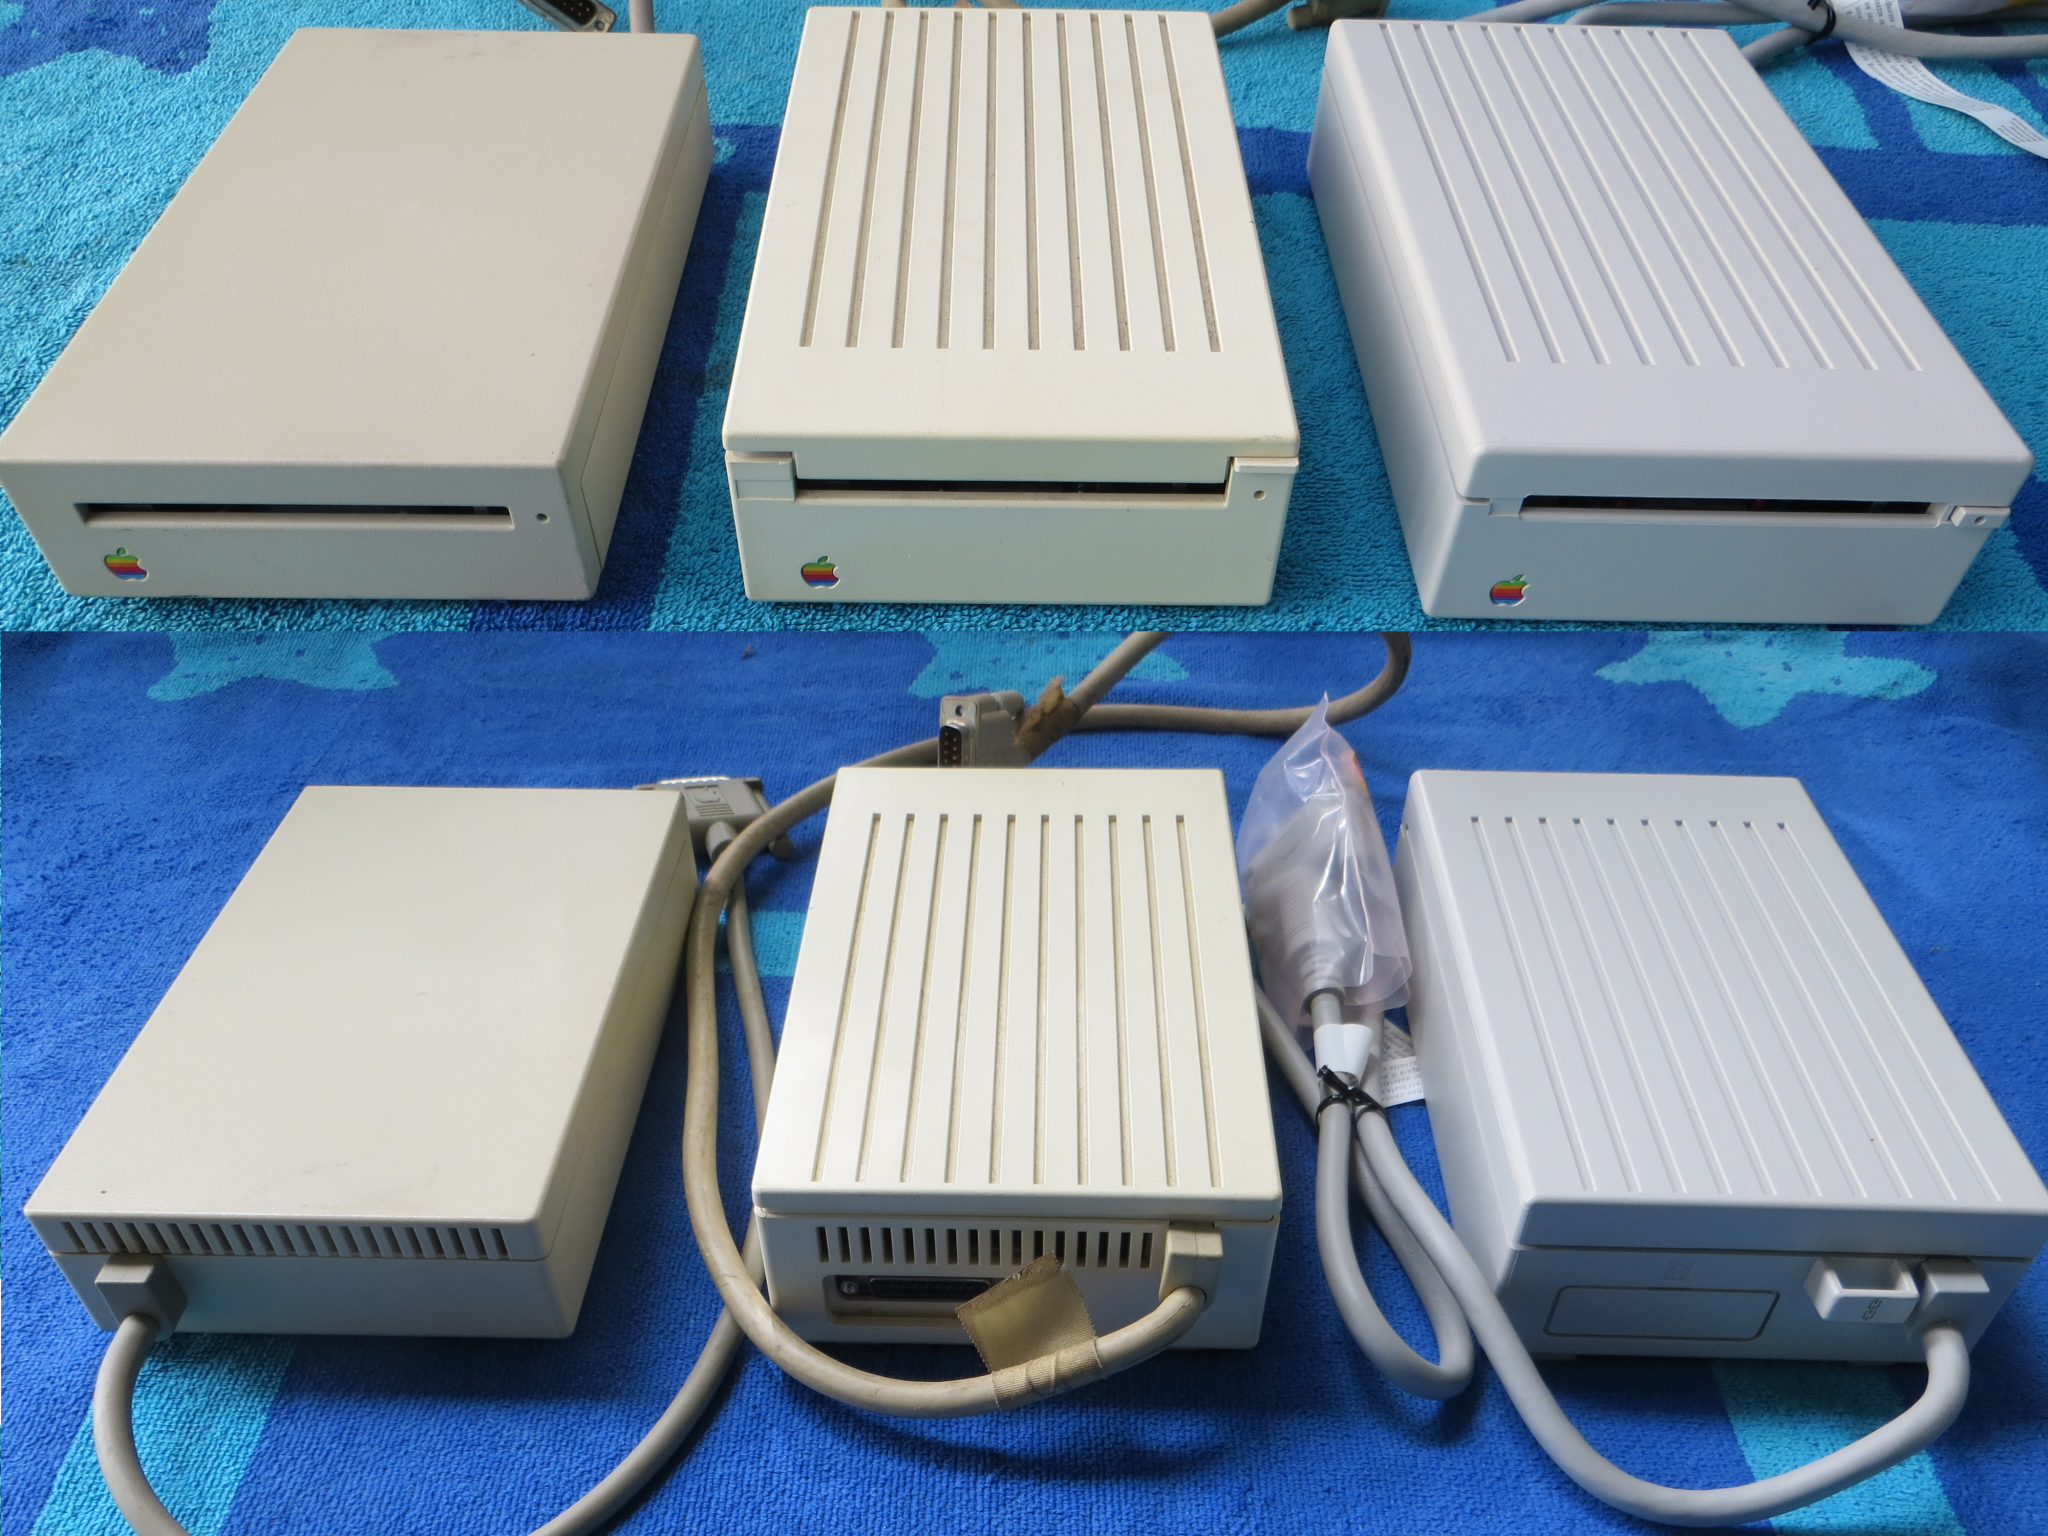 Left to right: Mac External FDD, UniDisk 3.5, SuperDrive |
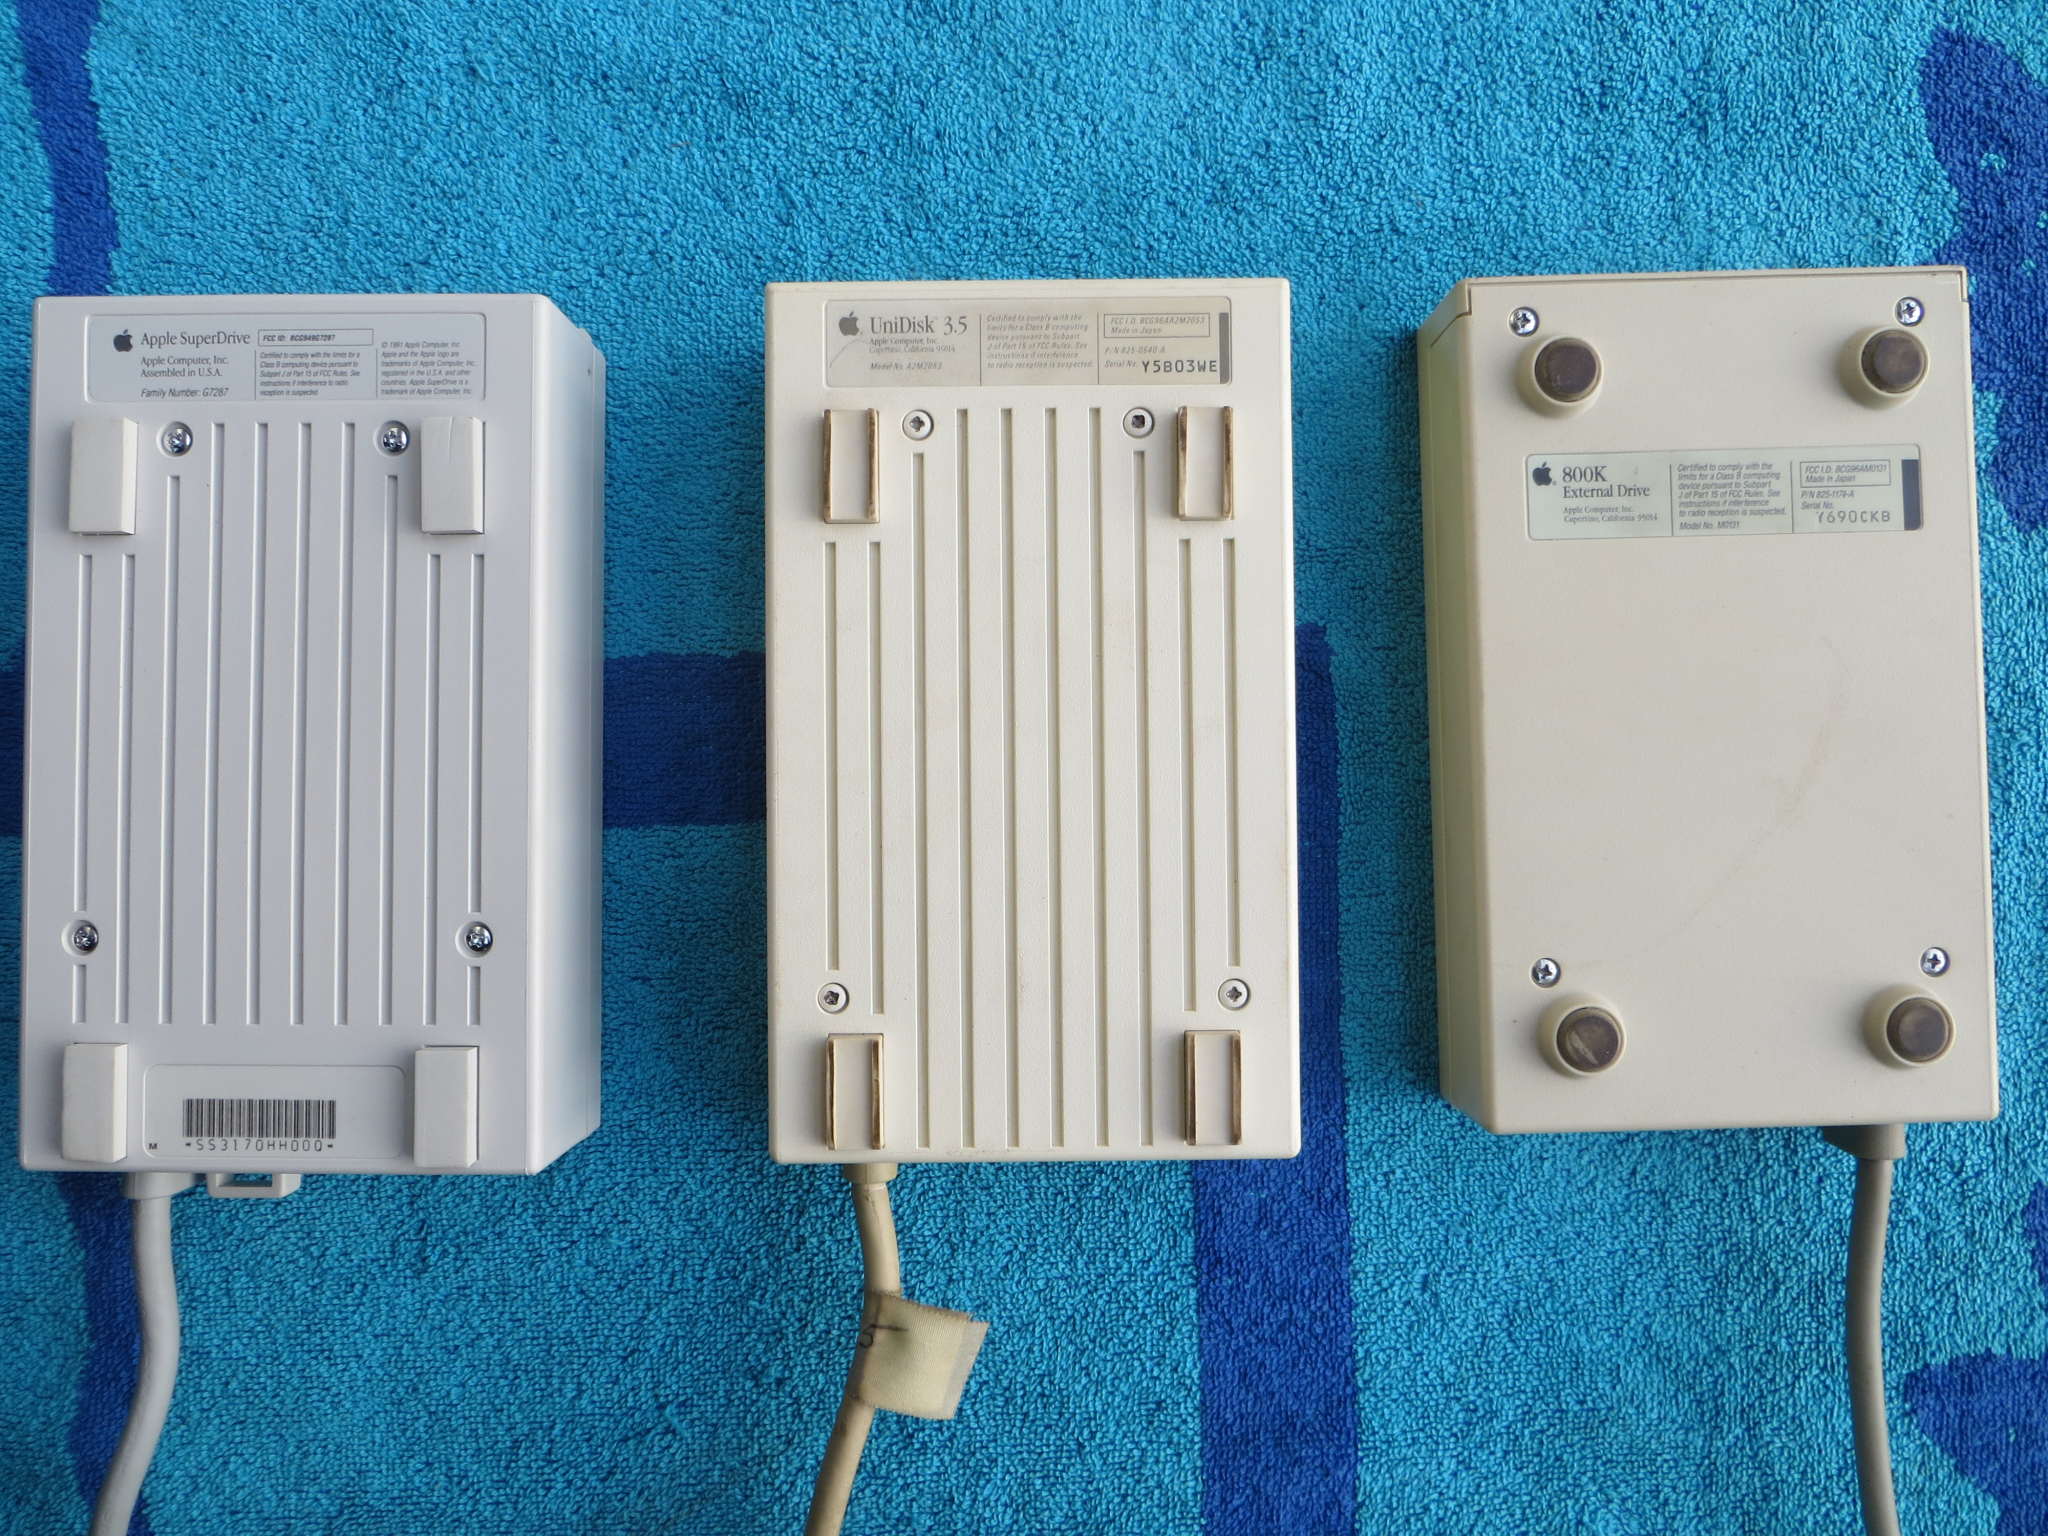 Bottom view of all 3 |
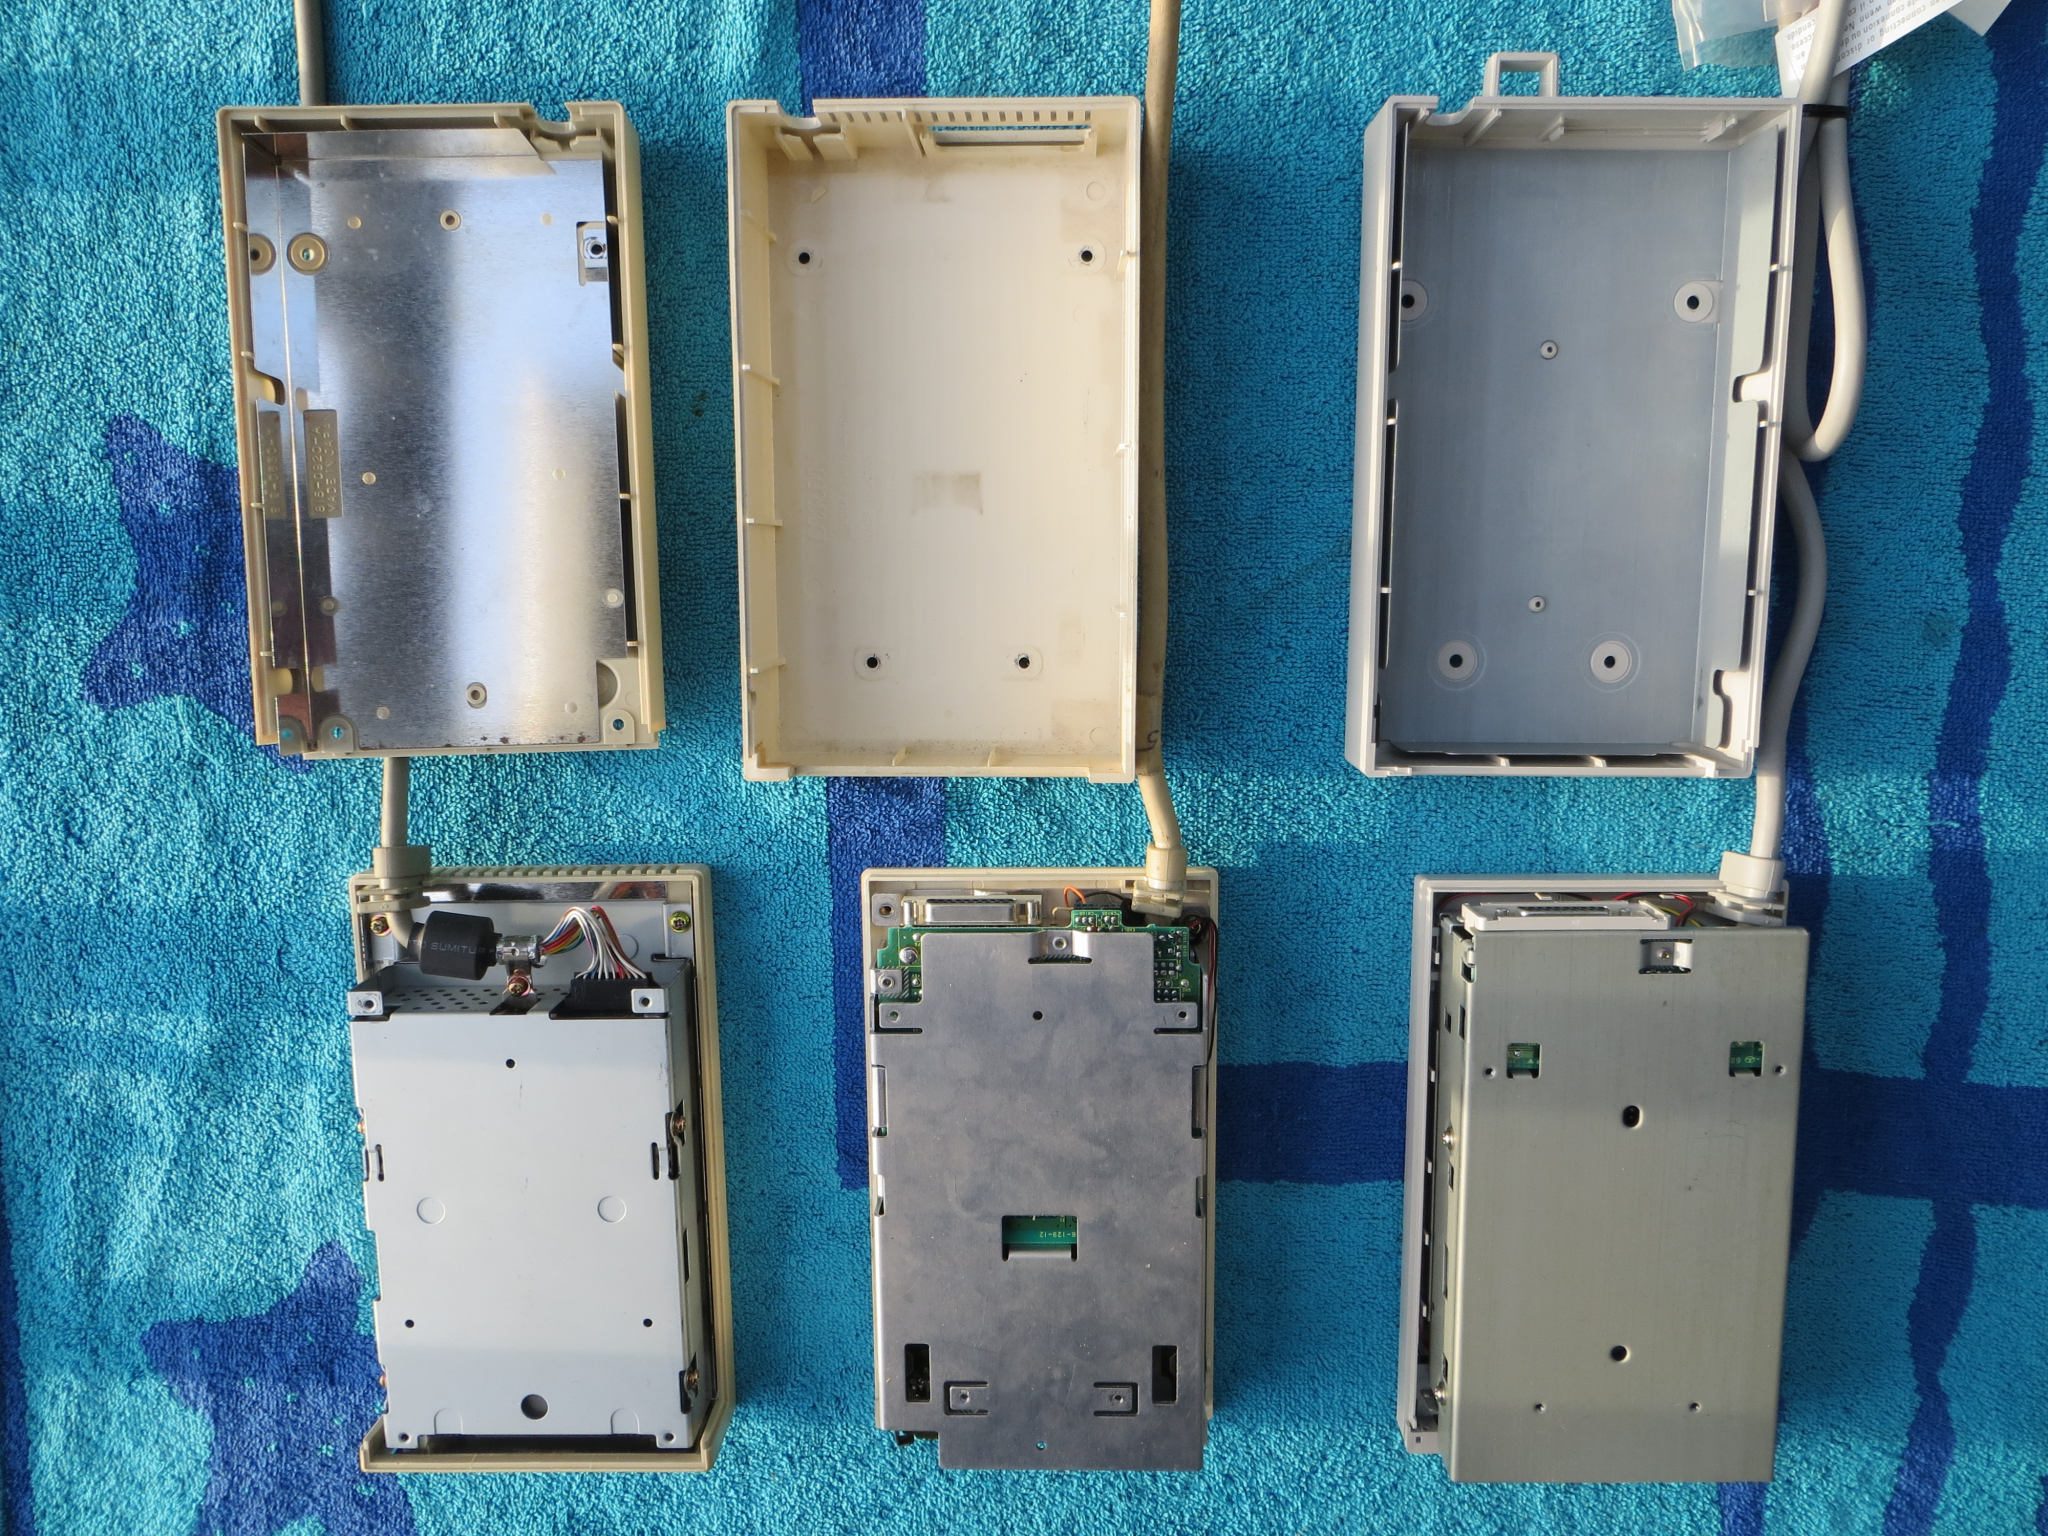 Inside, bottom of drives |
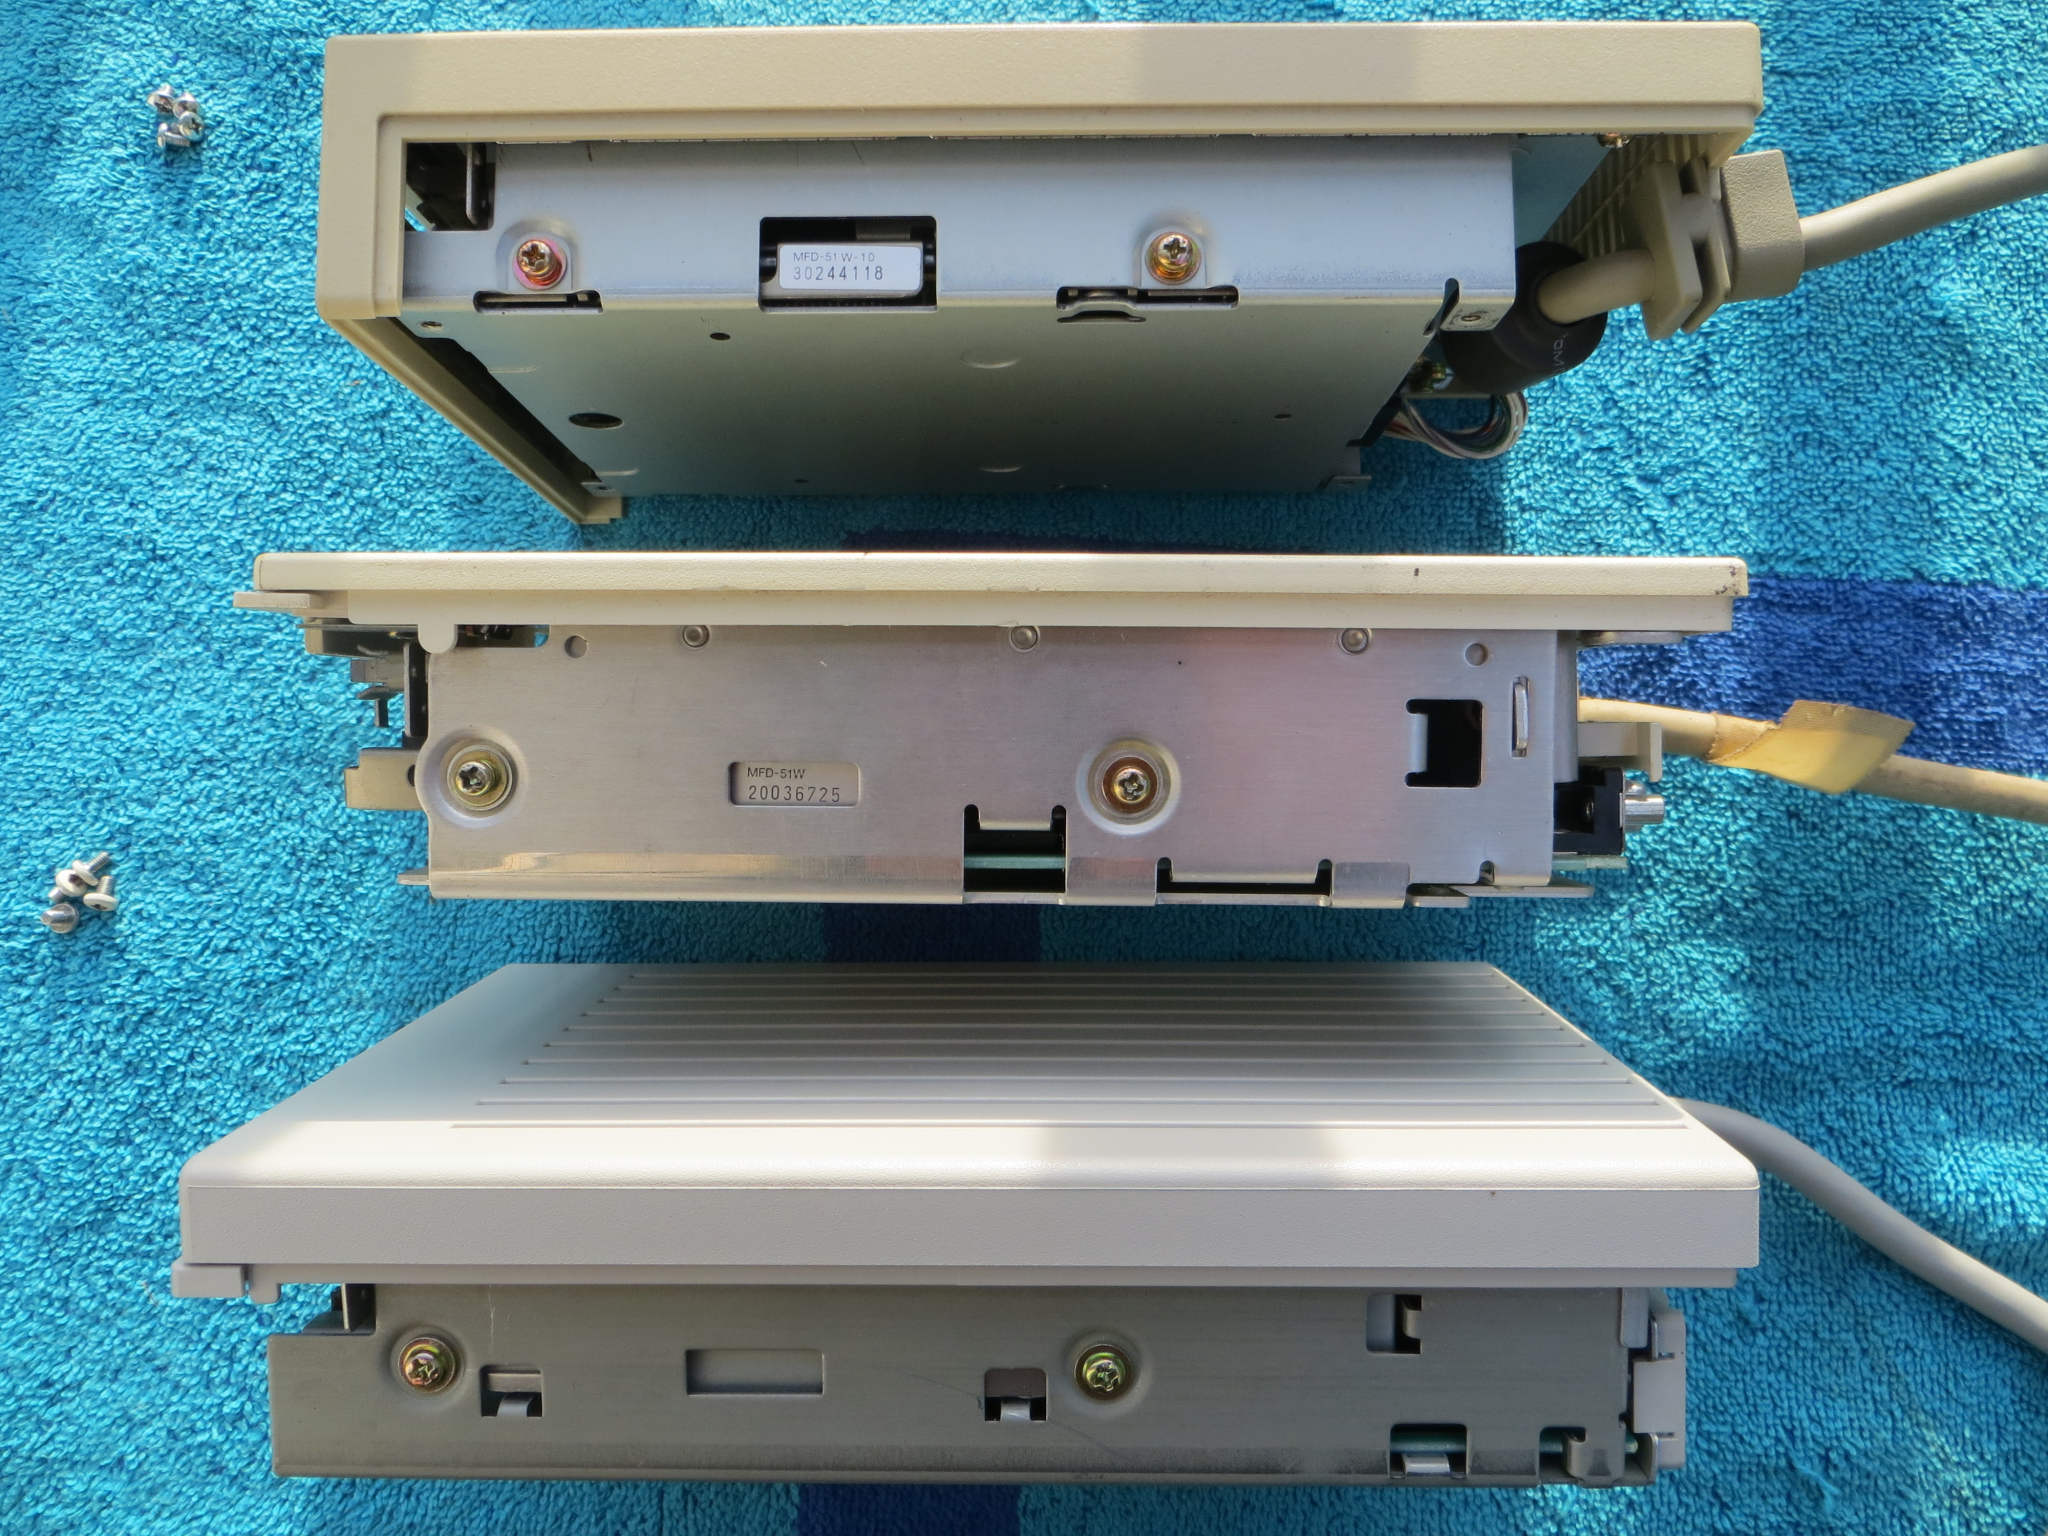 Top to bottom: Macintosh FDD, UniDisk 3.5, SuperDrive |
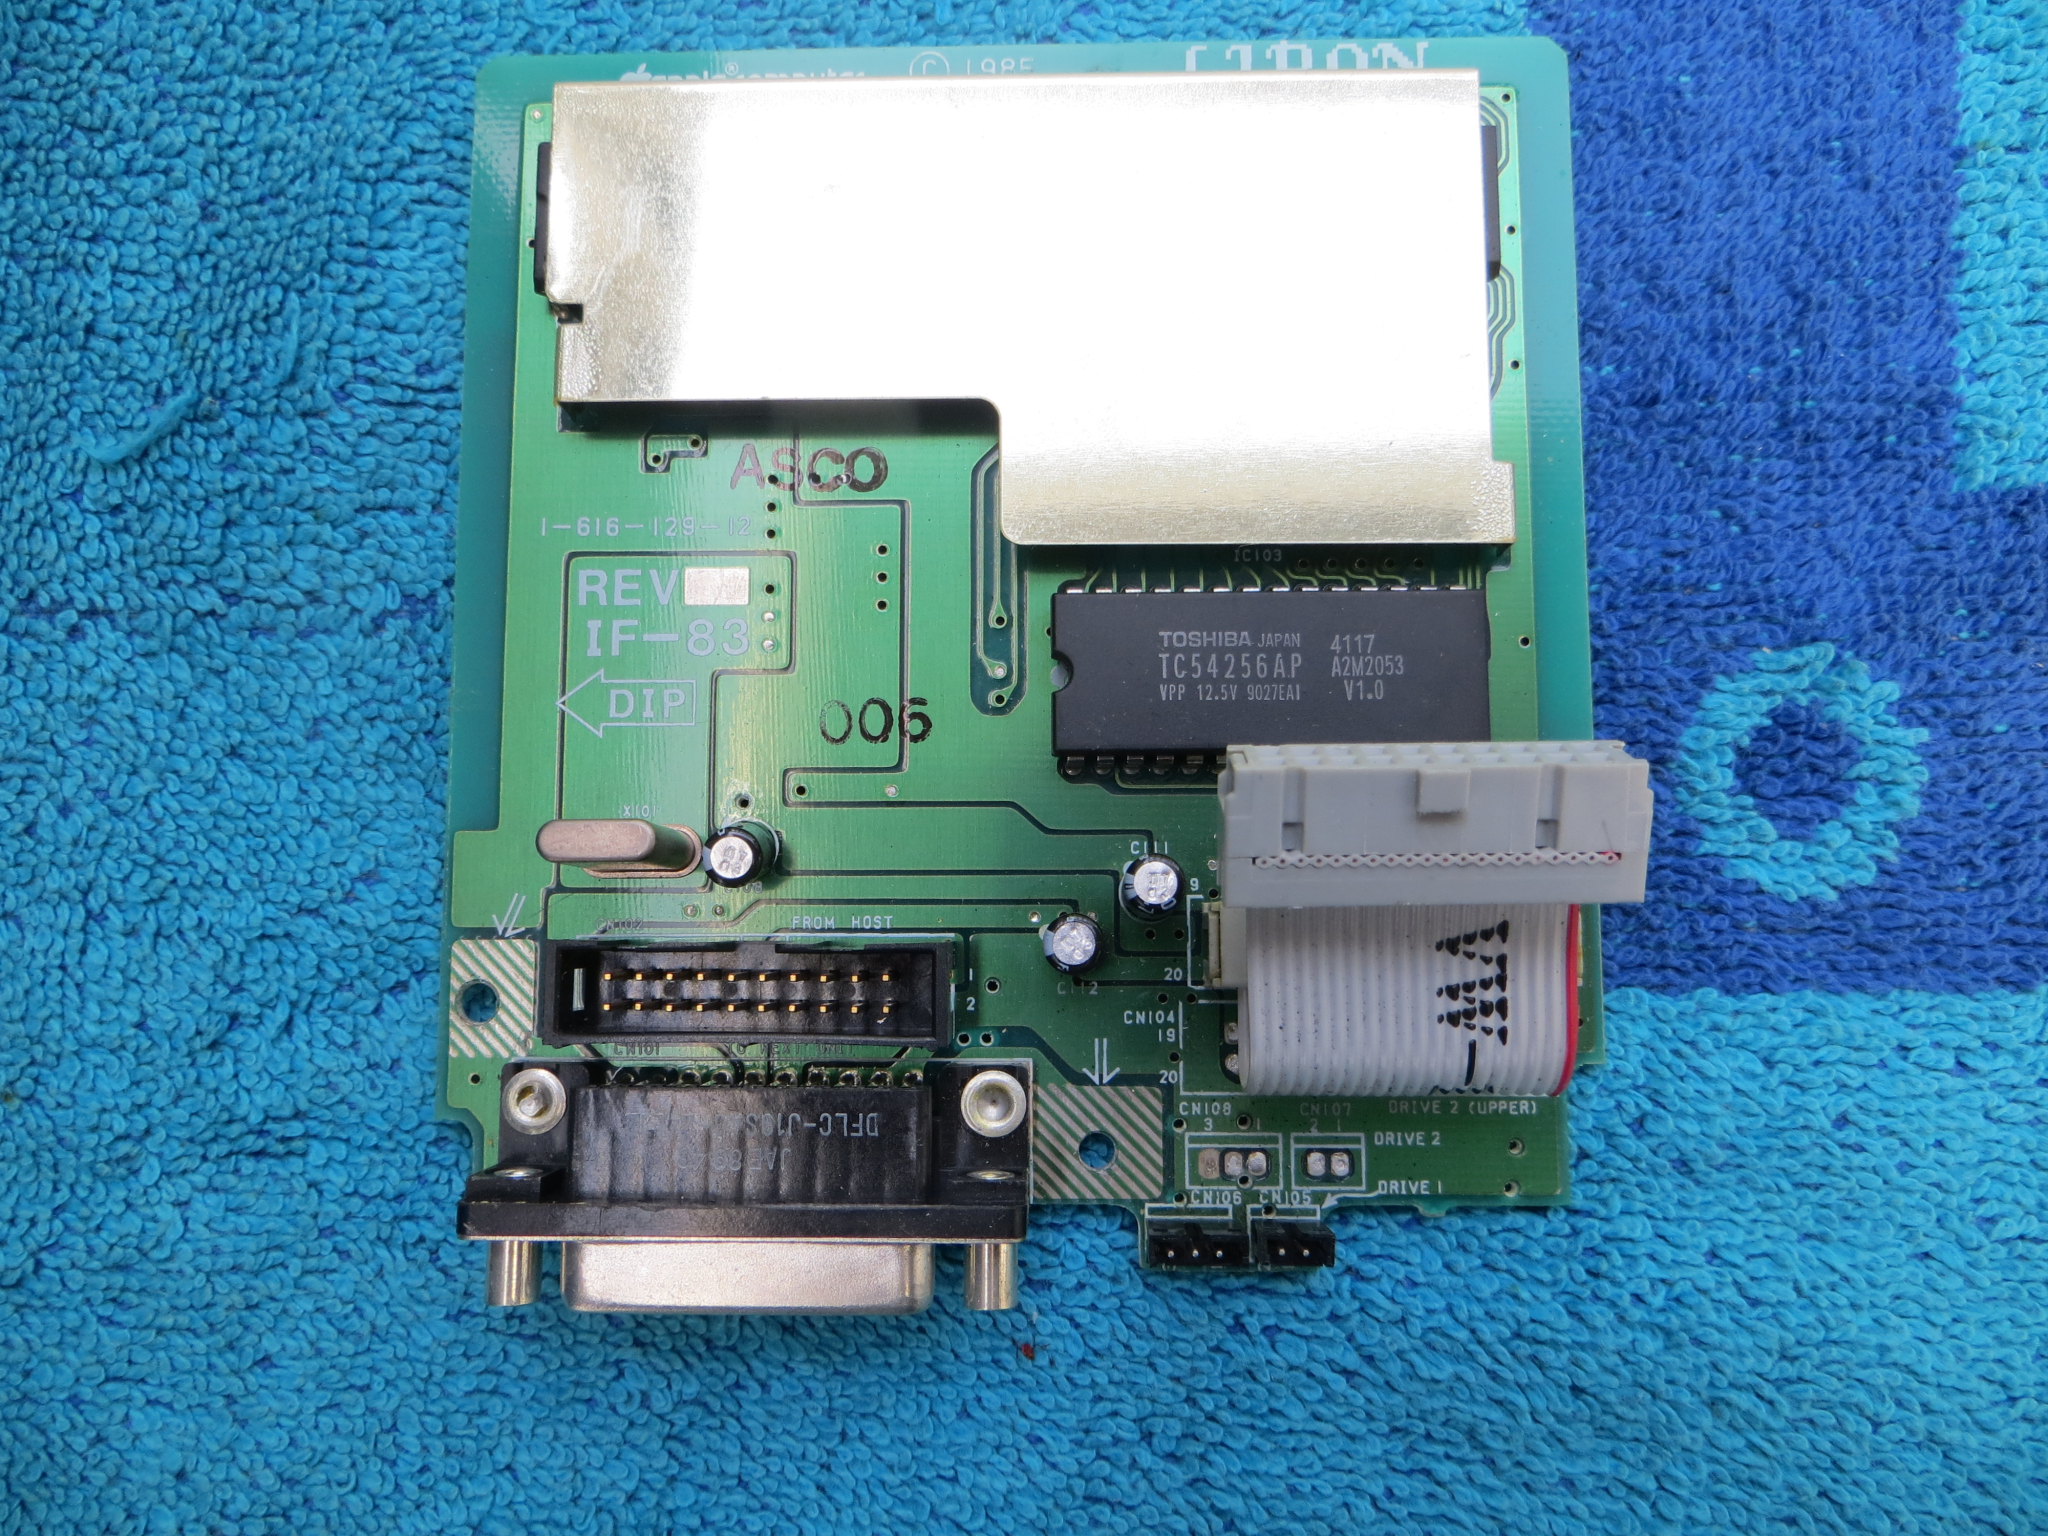 Subsystem board (bottom view) |
 UniDisk 3.5" is on the right (bottom view, UniDisk at top) |
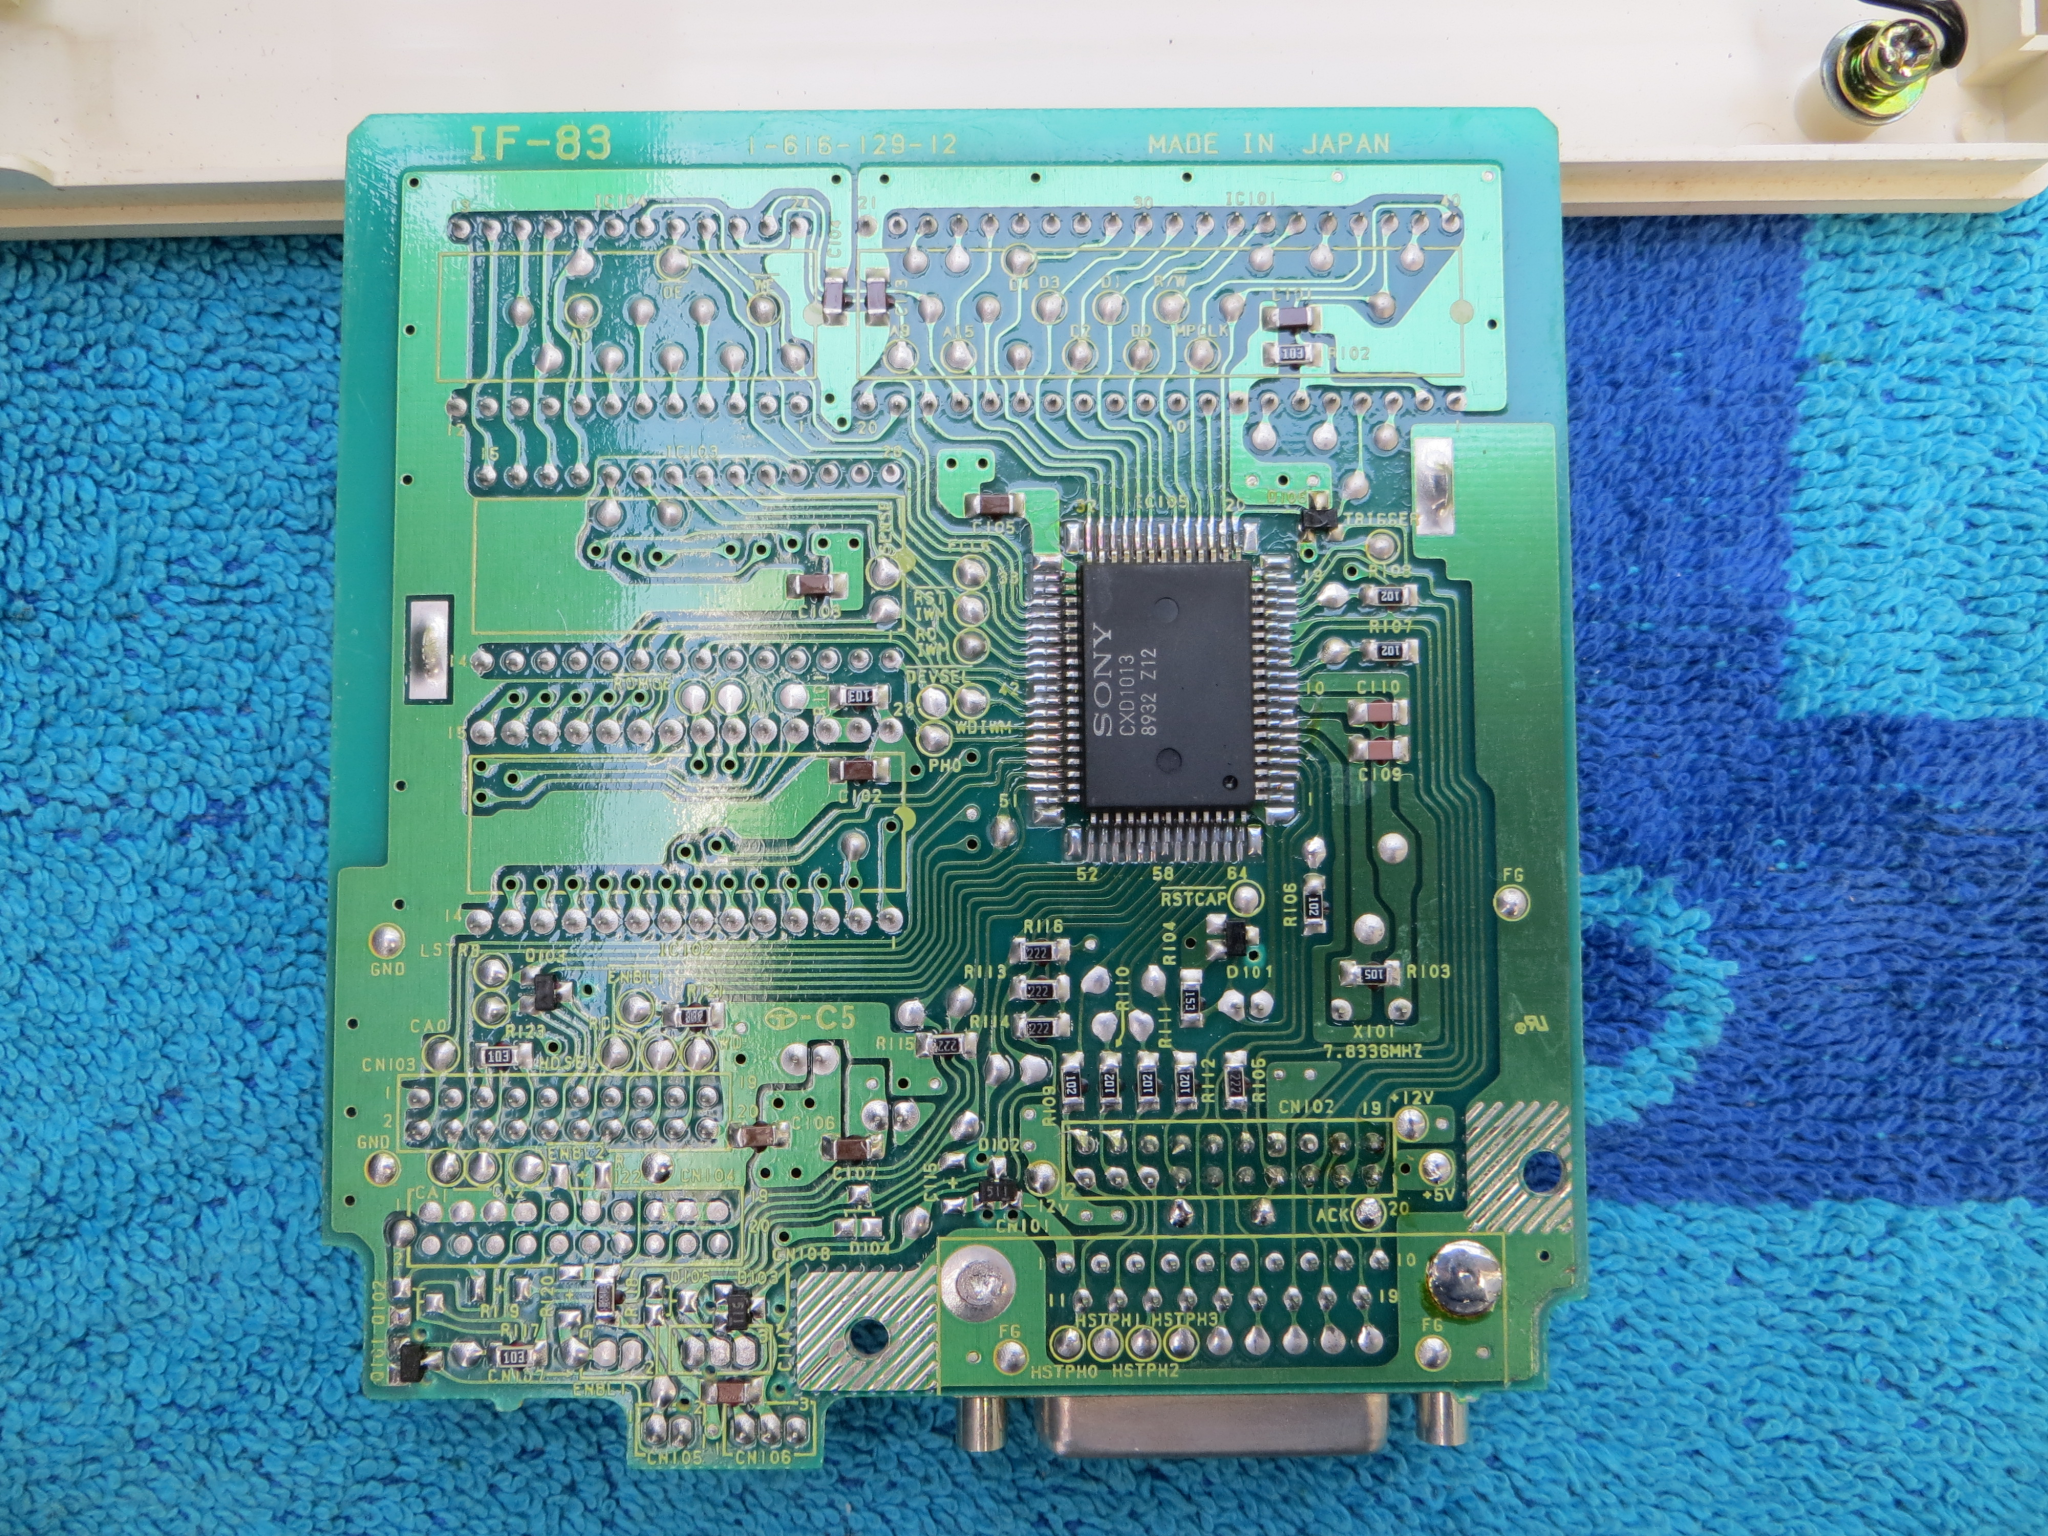
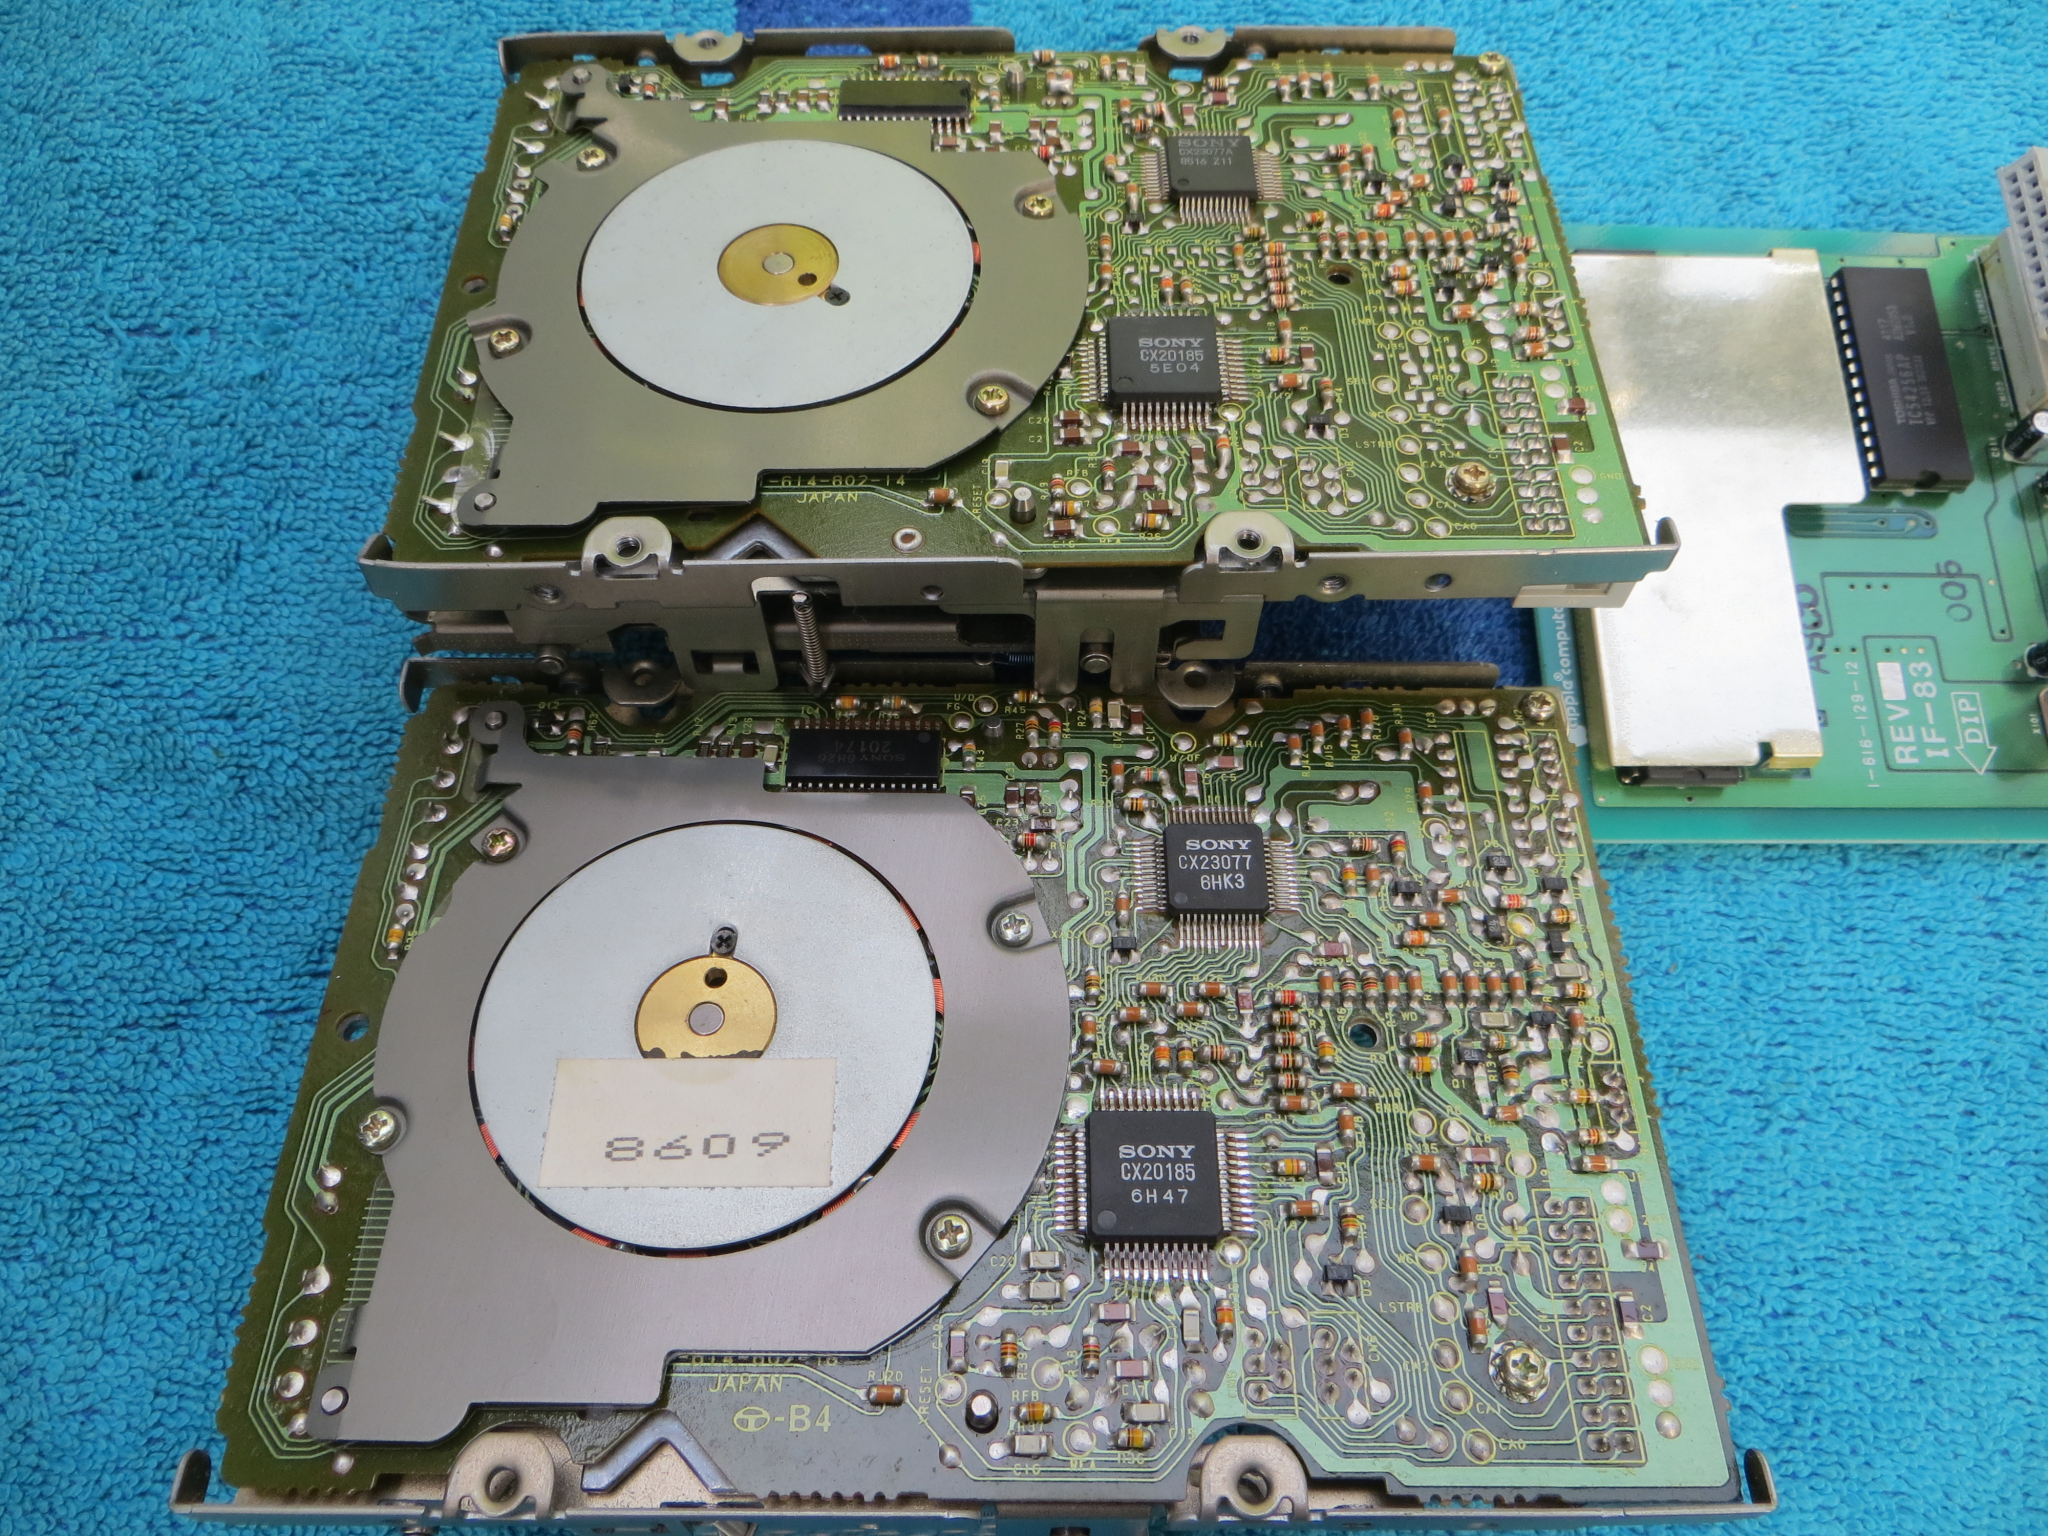
Next one to take a look at is the Apple 3.5 Drive. It has a smaller Interface Board for daisy-chaining drives and handling the Apple II situation than the UniDisk 3.5 and is much easier to take apart. Upon examination of the Interface Board, the External SuperDrive uses the same board but has an updated chipset on it. Upon testing, all Sony MP-F75W (1.44MB SuperDrives) worked with this Apple 3.5 Drive daisy-chain board, counting the 11G, 12G and 21G deviations. Only the plain 01G was not tested, there's probably other numbers but the list below provides what is known as of right now. It did not work with the 800KiB MFD-51W-10 that was in the Macintosh External Disk Drive, it couldn't eject anything and would think every disk inserted into it was defective. It's pretty clear from a casual observation that there were a number of changes to the logic board on the various 800KiB drives, which is probably a factor that can't be ignored when talking about the 512K compatibility.
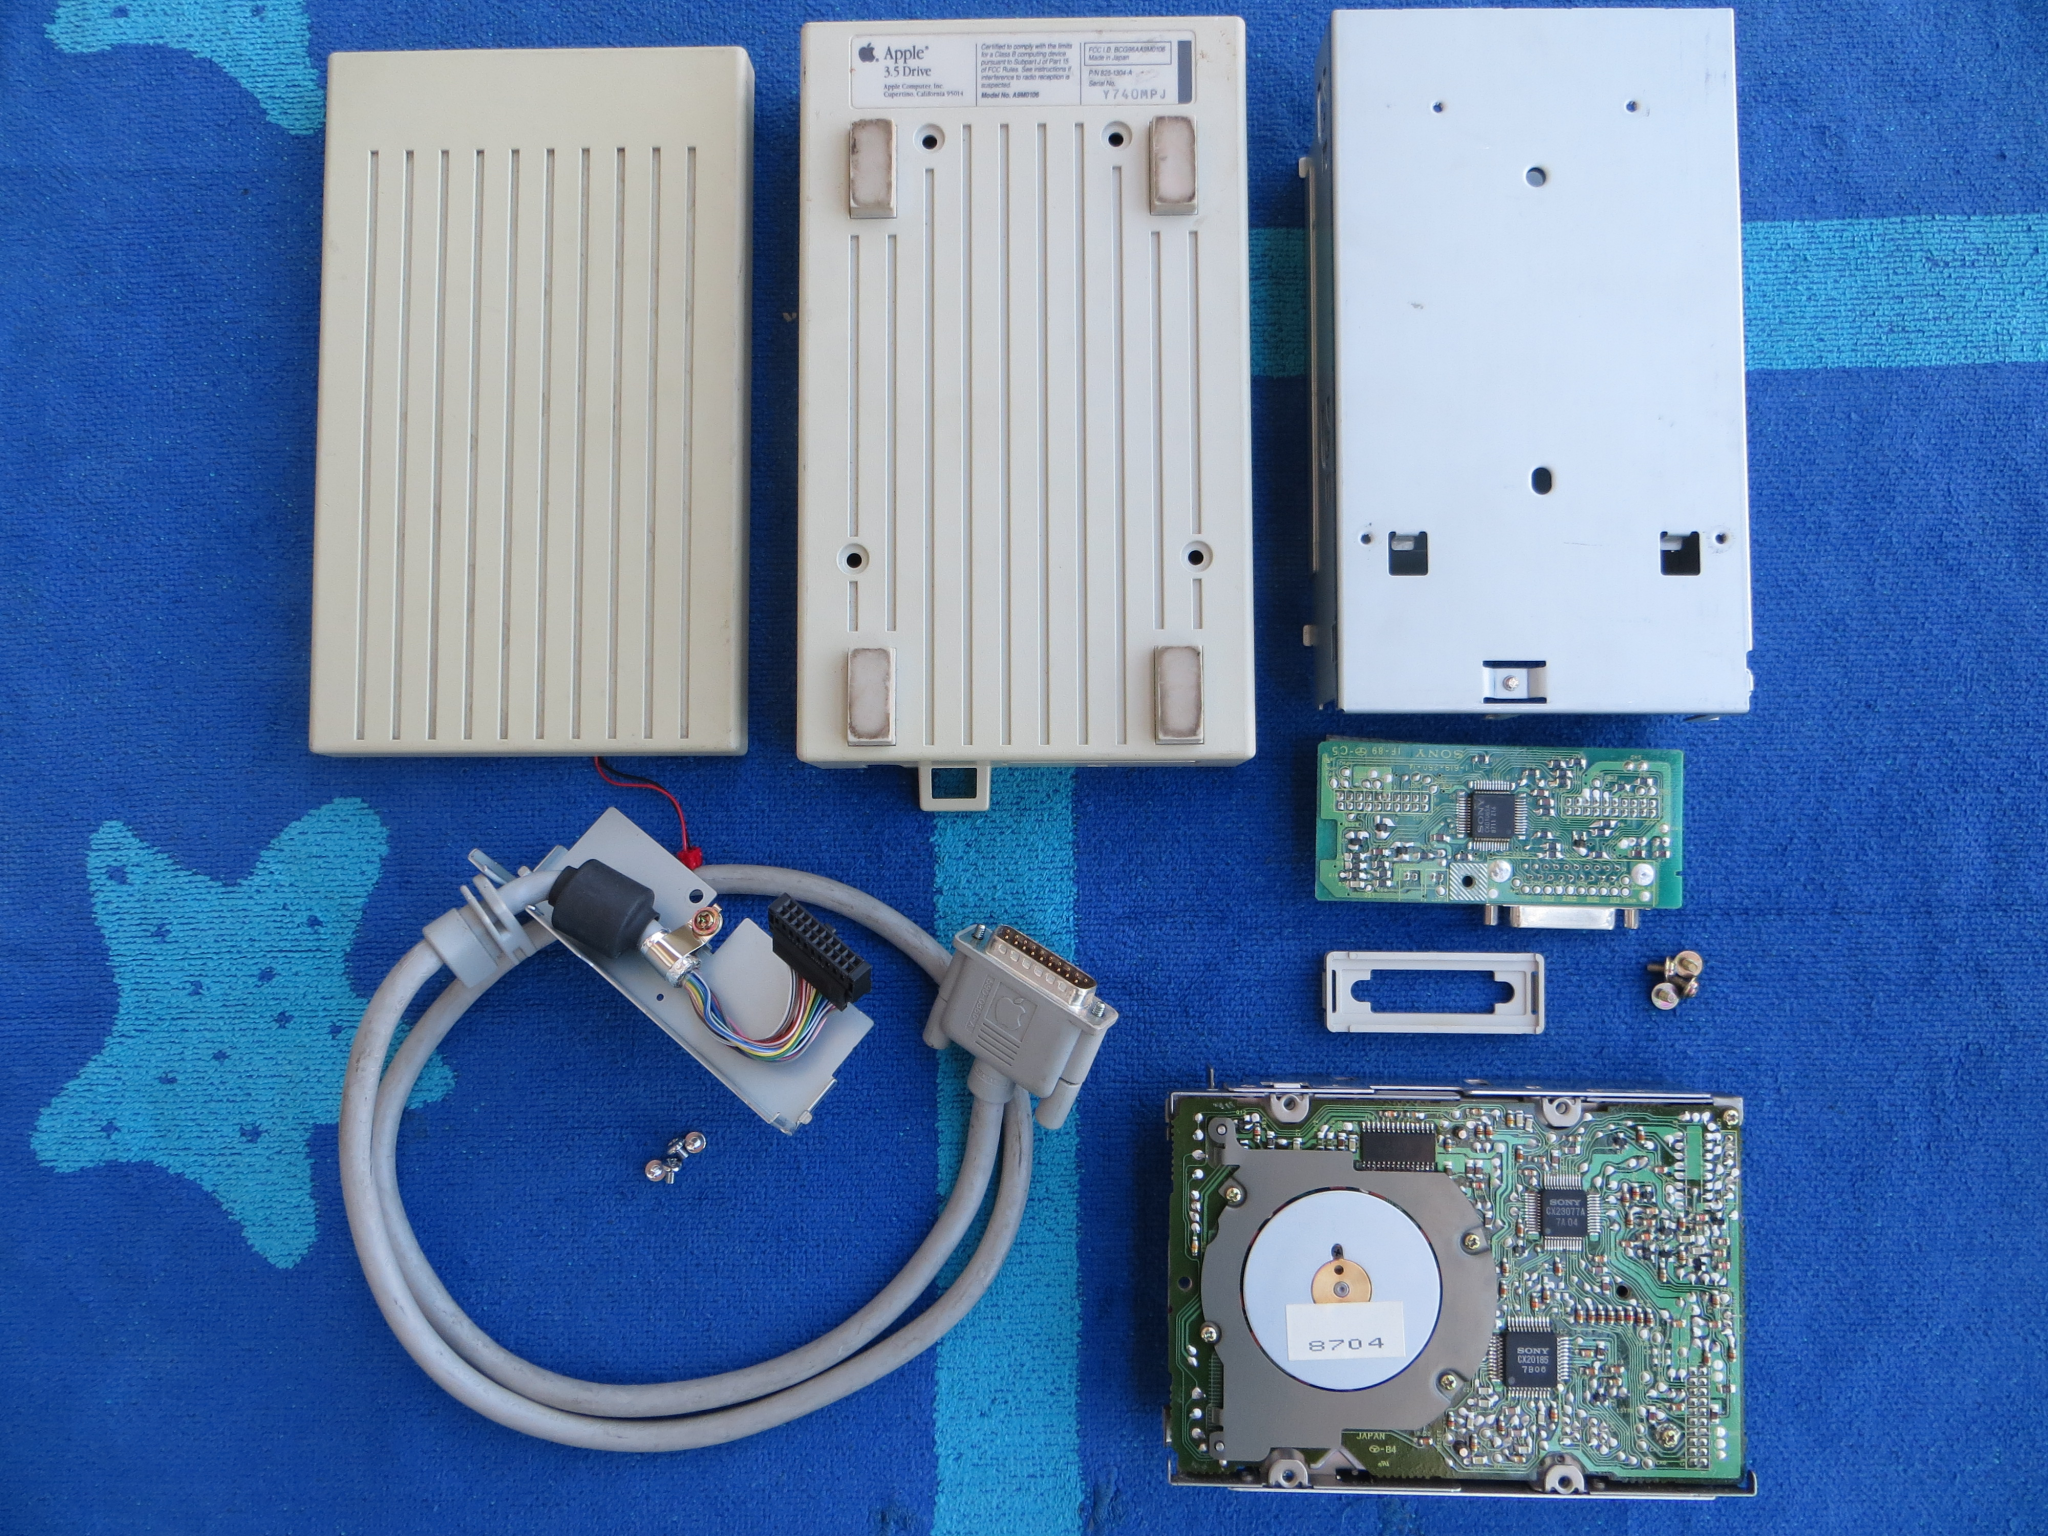 Fully disassembled |
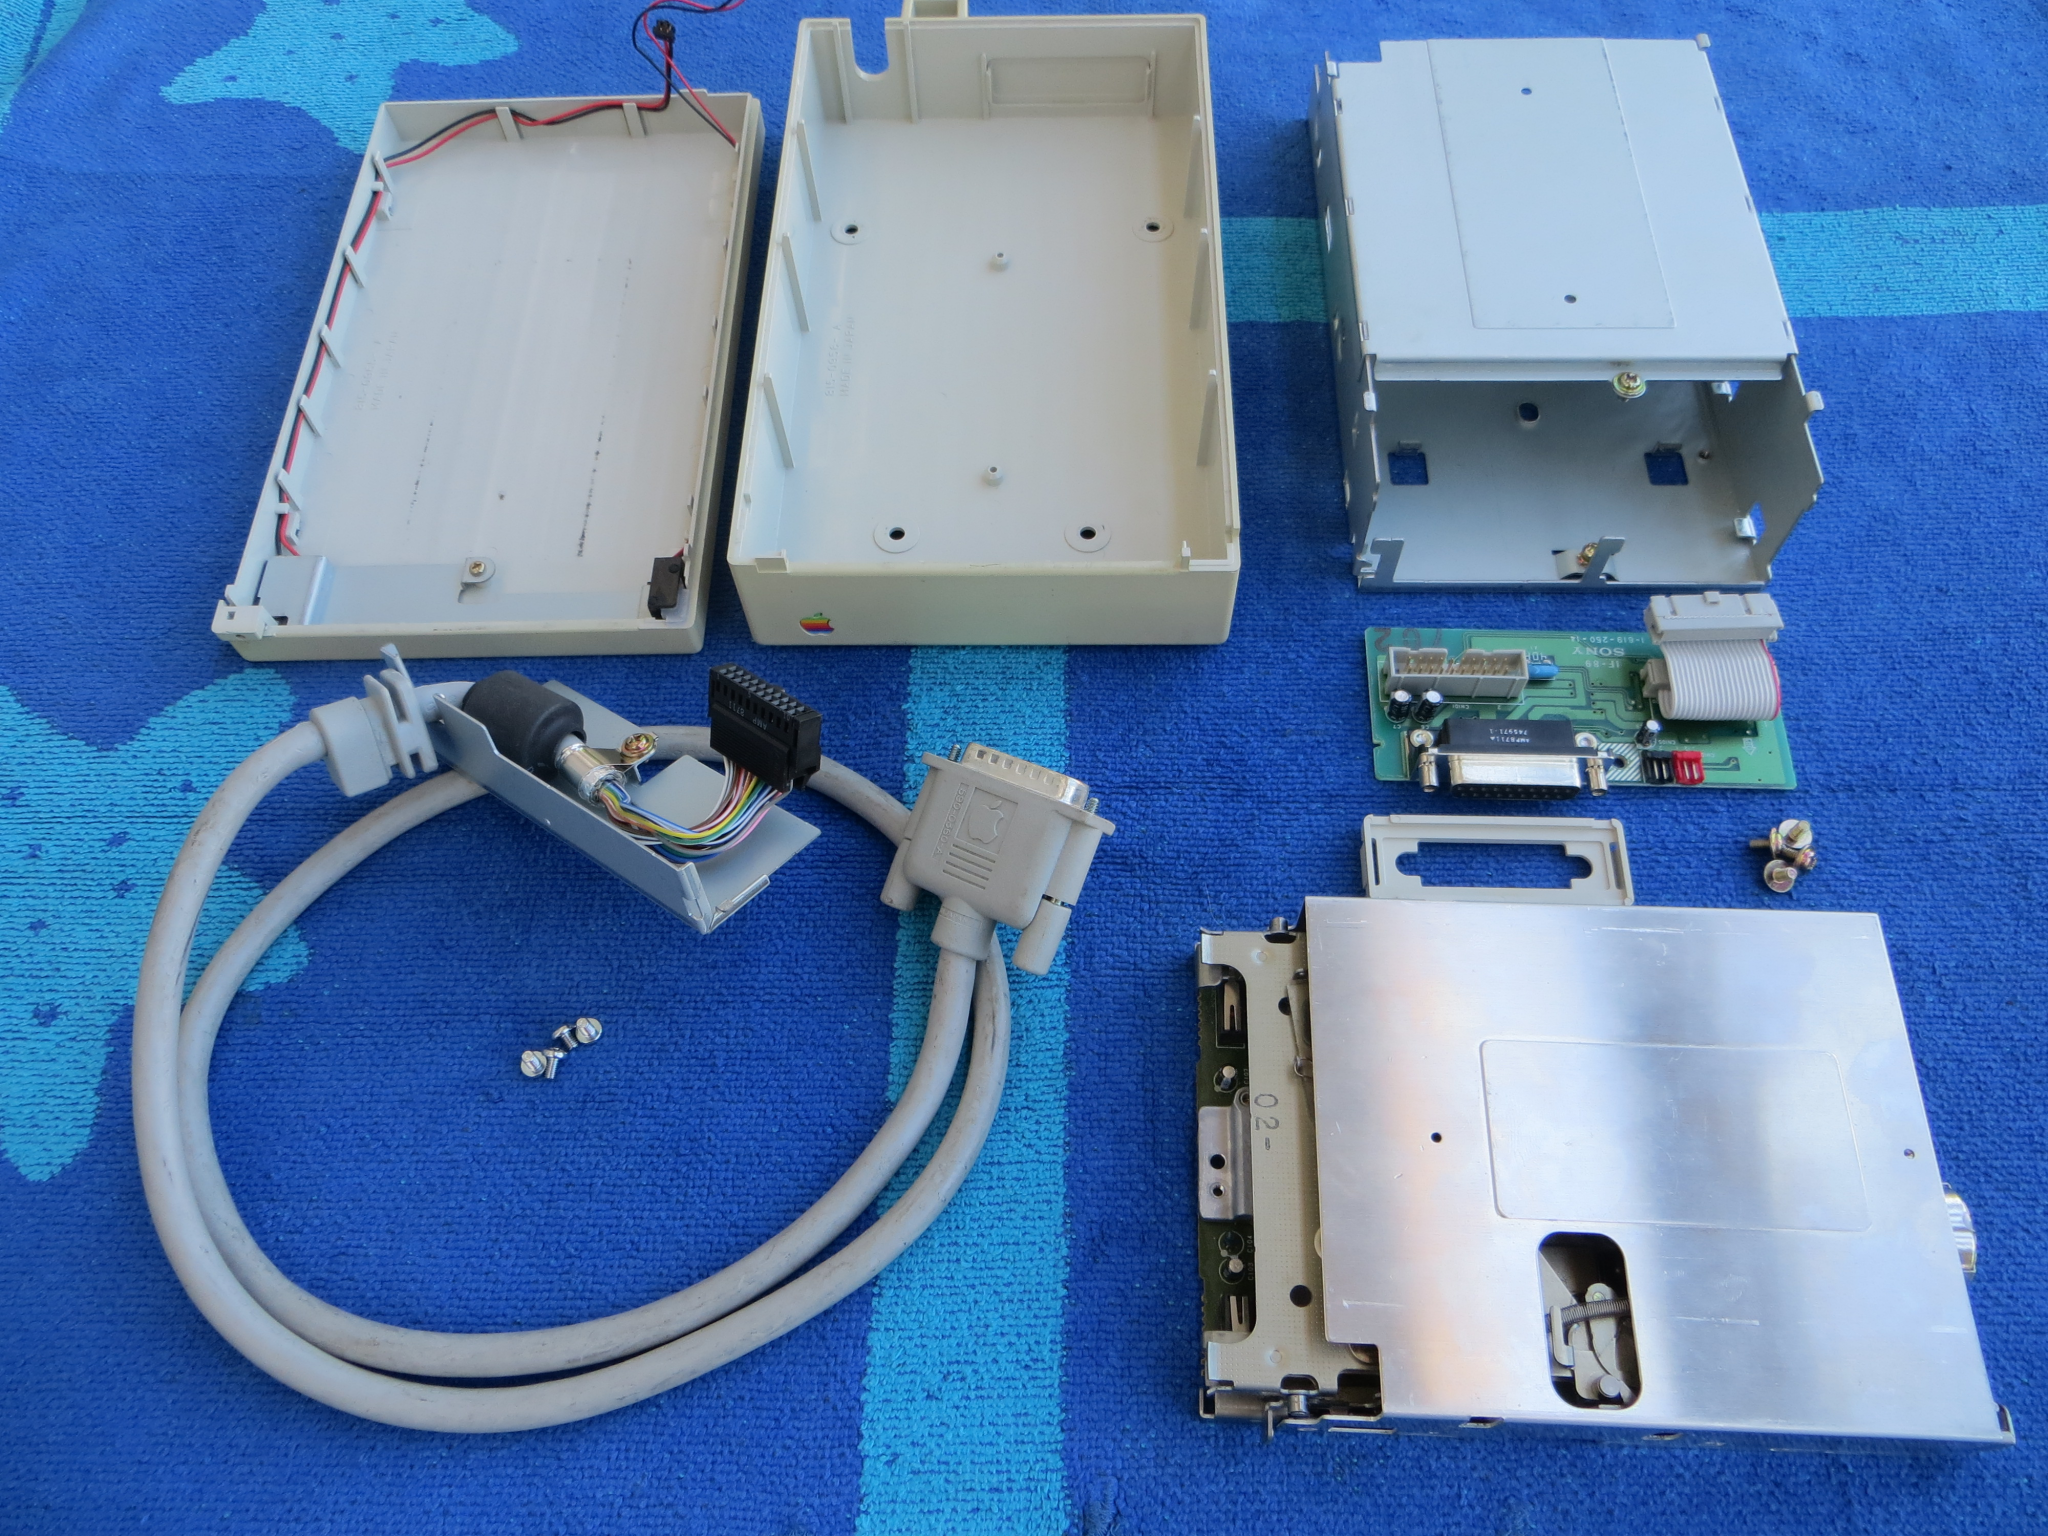 Alternate perspective |
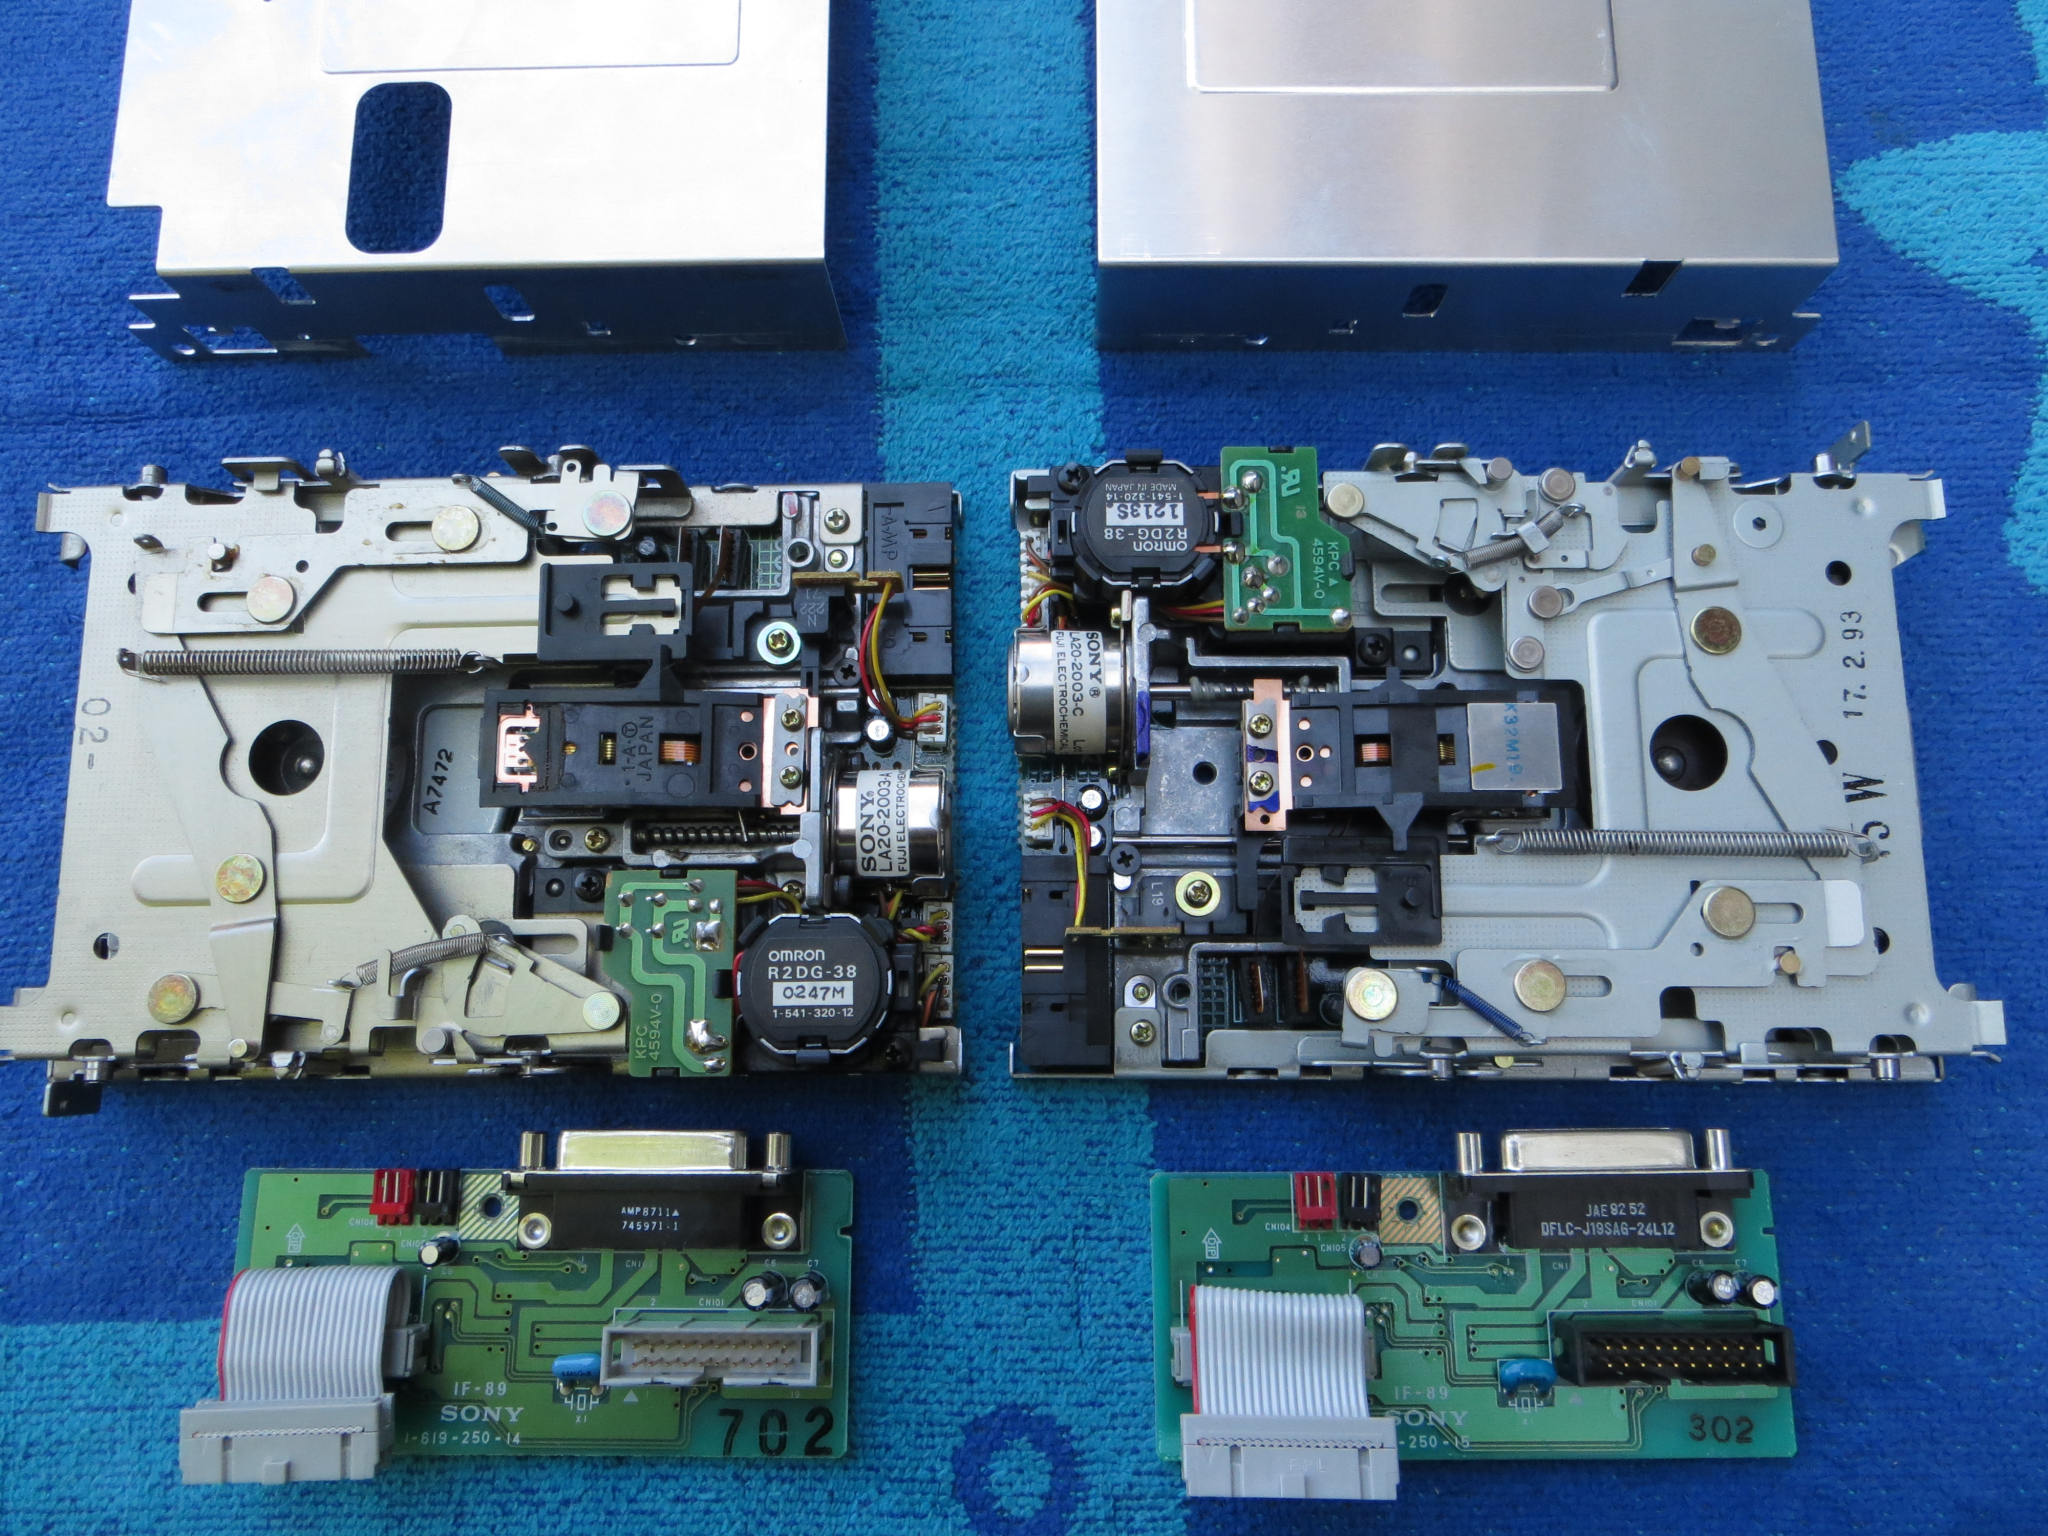 Left: Apple 3.5 Drive Right: Apple SuperDrive |
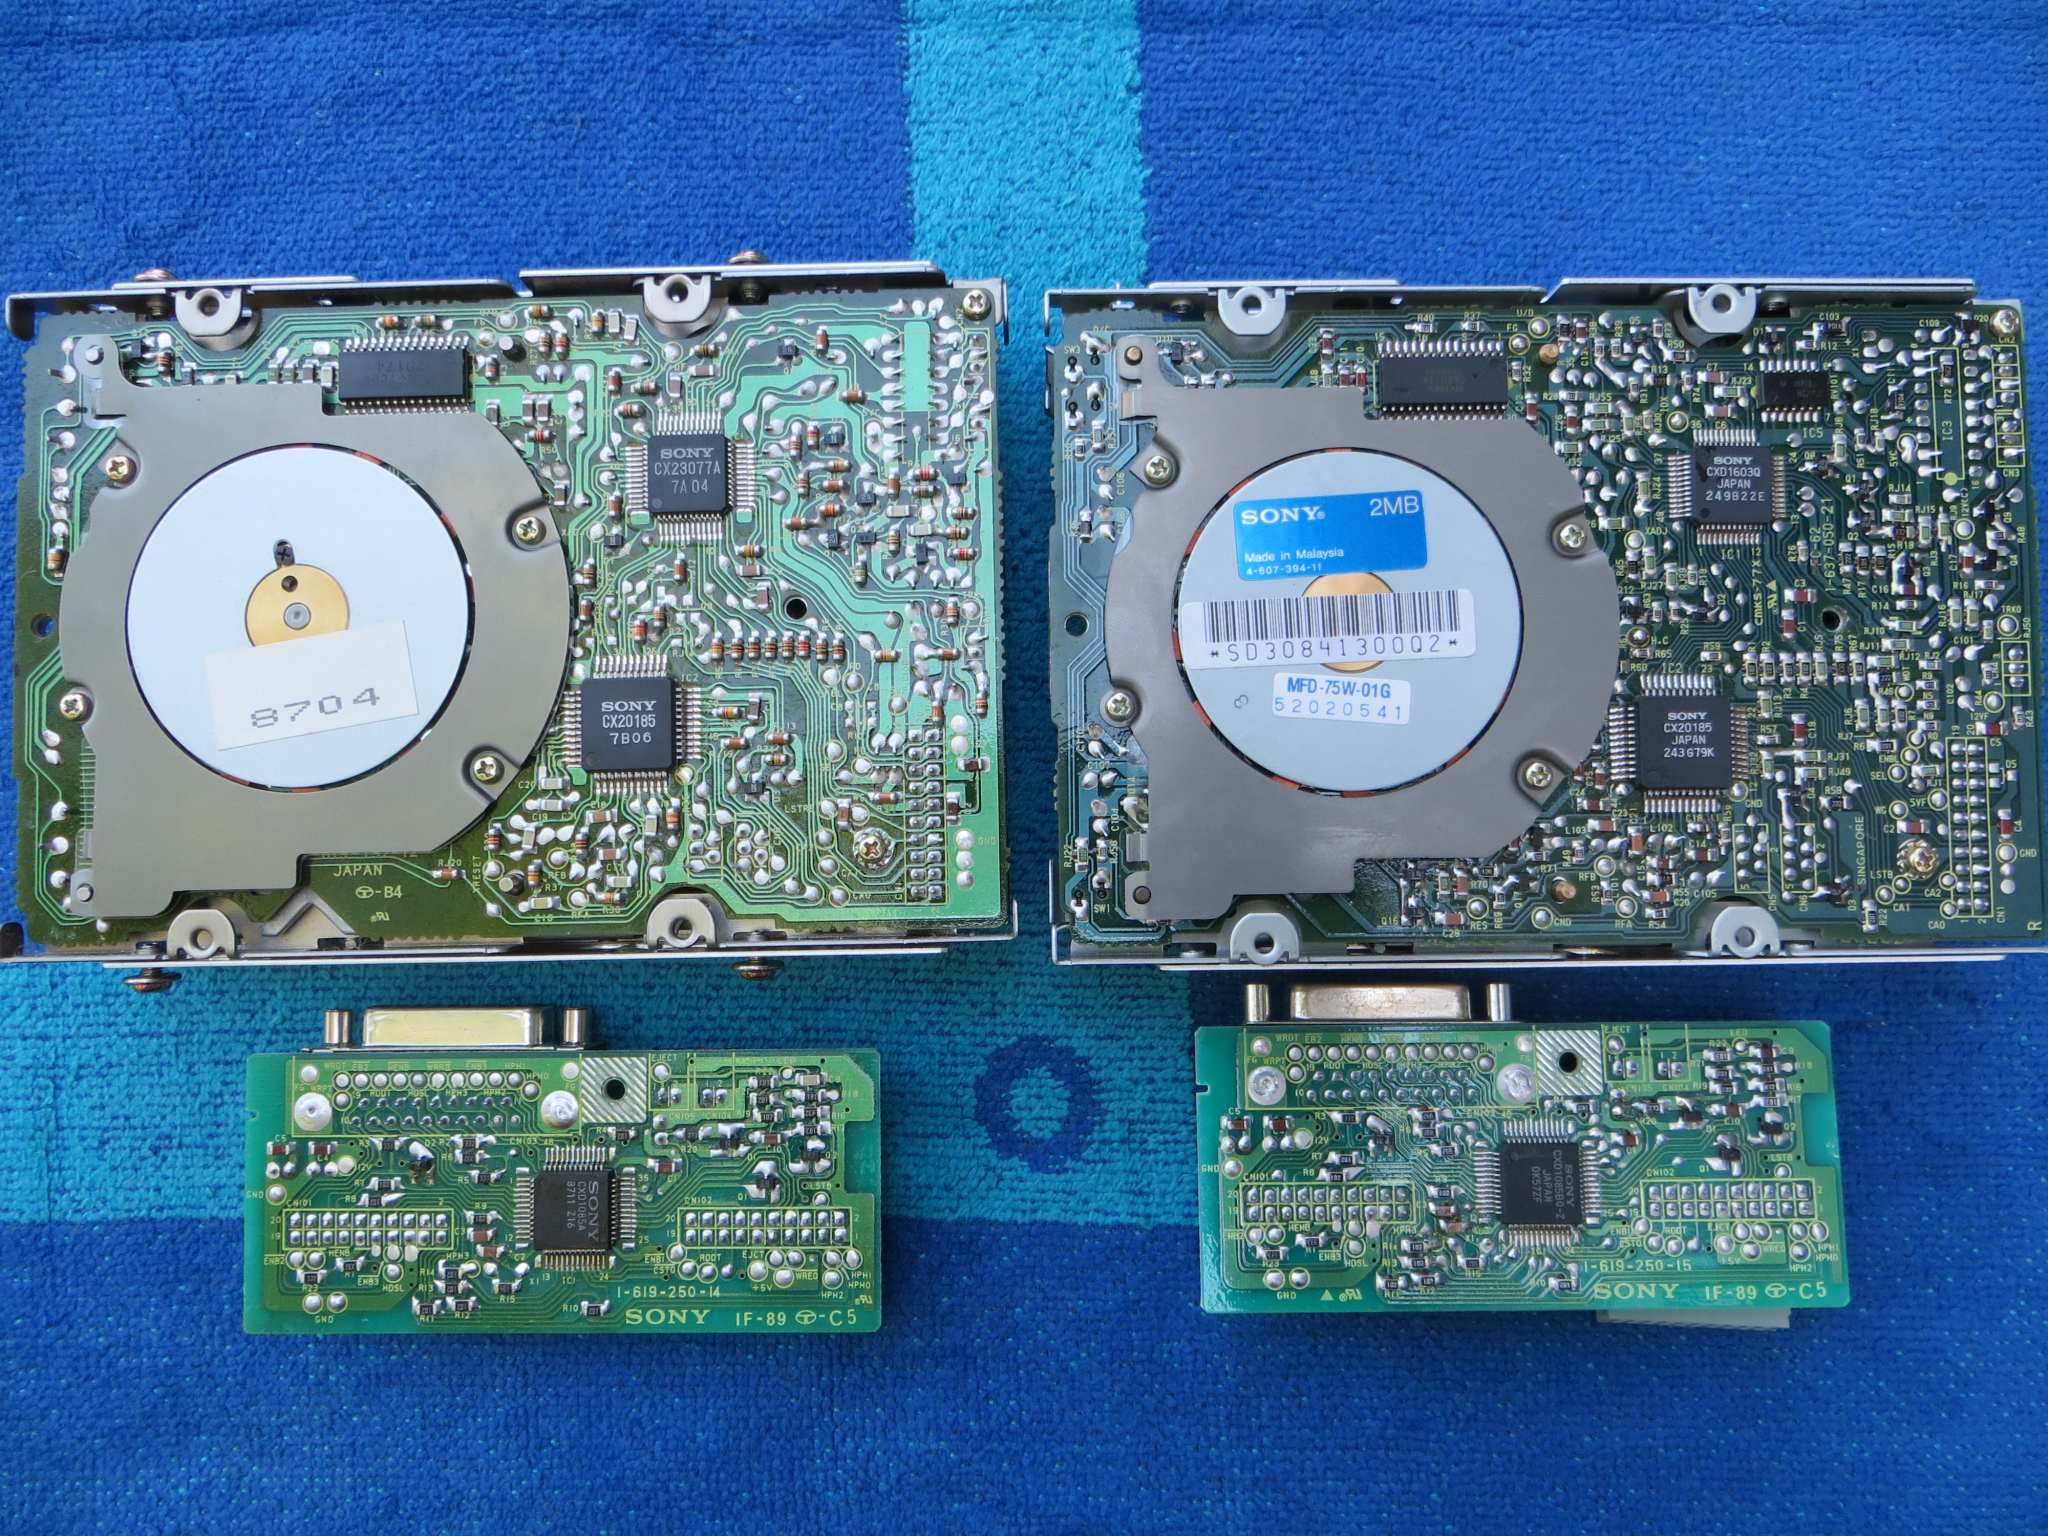 Left: Apple 3.5 Drive Right: Apple SuperDrive |
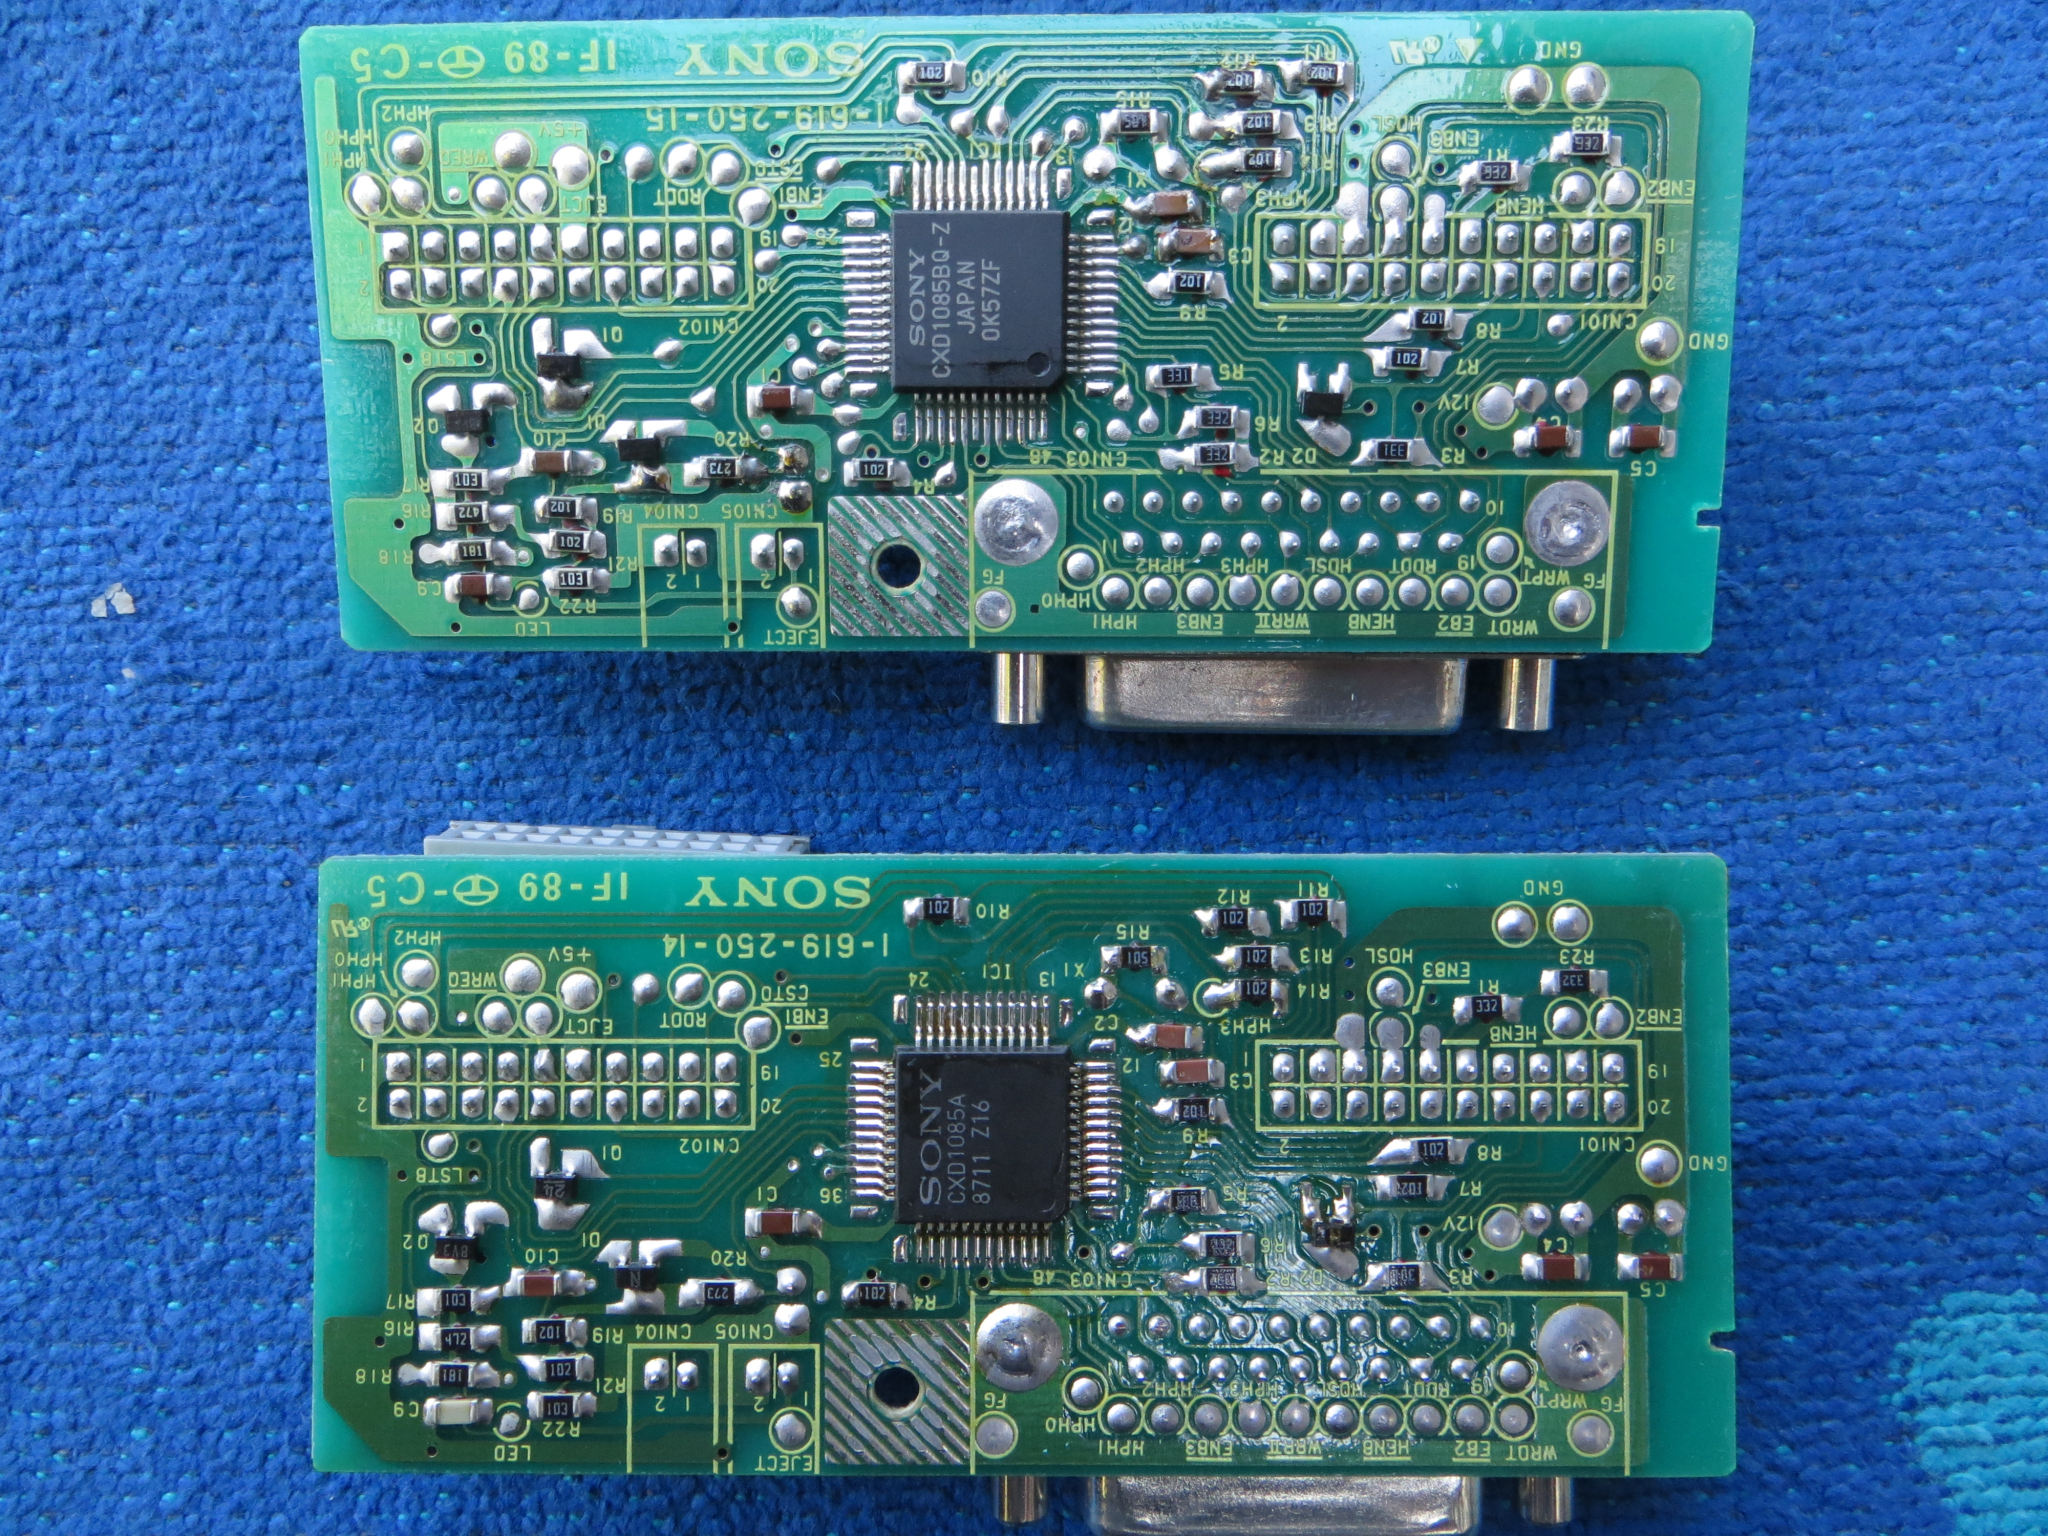 Closer view. Top is SuperDrive |
Both the Apple 3.5 Drive and the External SuperDrive have a thin aluminium shield around the drive assembly, but the example looked at here didn't have the thin sheet steel shield at the bottom of the assembly like the External SuperDrive has. It was missing 1 screw at the bottom of the case, which isn't a big deal, but suggests that it was taken apart before, maybe something went missing or that's just the way they are with the shielding. Visually they look identical, with the cool Platinum look that imparts a professional, sturdy appearance, with the red LED activity light for good measure. This example is a tiny bit loose on the top cover, but considering it was used a little bit, that wouldn't be fair to compare it to the Apple SuperDrive, which was never used, and feels solid and well-built. The Apple II daisy-chain port cover is often missing: on this one, it was luckily present. One can easily lament the difference in build quality between these articles and other things made in the mid 1990s and afterwards, even today, for which only true industrial kit is built like this.
Below is a table that provides a comparison between the models discussed so far, and how they work on a 512K, minus the 400KiB model because we know it will read 400KiB MFS disks and will also read 400KiB HFS disks if the HD20 INIT is loaded or in ROM.
| Label | Model No. | Part No. | Case Serial | Drive No. | Board No. | 400KiB MFS, 800KiB MFS | 400KiB HFS, 800KiB HFS |
| 512Ke Internal | Unknown | 661-0305 661-0345 |
Not applicable | MFD-51W-03 MP-F51W-23 |
1-619-792-13 | For reference only. Mac serial number F6377QNM0001E | For reference only |
| UniDisk 3.5 | A2M2053 | 825-0640-A | Y5B03WE | MFD-51W | 1-614-802-14 | Not for Macs | Not for Macs |
| 800K External Drive | M0131 | 825-1174-A | Y690CKB | MFD-51W-10 | 1-614-802-18 | Requires HD20 INIT to be loaded first, will not work without it | Requires HD20 INIT to be loaded first, will not work without it |
| Apple 3.5 Drive | A9M0106 | 825-1304-A | Y740MPJ | MFD-51W-03 | 1-619-792-12 | Good | Sad Mac with error code 0F0064 (Can't load System file into RAM) |
| Apple SuperDrive | G7287 | Unknown. Order # M0112 | SS3170HH000 | MFD-75W-01G | Not applicable | Not tested | Not tested |
| Apple FDHD Internal Drive | Unknown | 630-5526 661-0474 |
Not applicable | MFD-75W-11G MFD-75W-12G MFD-75W-21G MFD-75W-31G |
Not applicable | Installed in M0131 case, 11G model: Good Installed in Apple 3.5 Drive case, 11G model: Good |
M0131 case, 11G model: Sad Mac with error code 0F0064 Apple 3.5 Drive case, 11G: Sad Mac with error code 0F0064 |
Contrary to what Apple says, the 128K and 512K will boot a 800KiB disk, it just can't be HFS. System 3.3/Finder 5.5 was used for the MFS disks, with System 4.1/Finder 5.5 was used for the HFS disks. The ROMs installed on the motherboard are 342-0220-B and 342-0221-B. A Sad Mac error code of 0F0004 (Divide by zero error) can occur if the System file or something on the boot disk is corrupted, or if the HD20 INIT is required for HFS support, whereby it could trigger that code instead of 0F0064. Also try turning the computer off, and back on again, which won't work for the 0F0064 error code.
Other revision numbers are possible, just not documented anywhere and Apple's literature concerning technical changes is rare, and certainly not for something like this. Your mileage may vary because of possible hardware revisions, and reflects what is on hand for testing. Internal FDHD drive numbers also changed over the time of introduction with the IIx and SE FDHD up till the last machines to have the original Sony auto-inject, auto-eject drives. The numbers above are only the Sony ones used in the IIx, SE FDHD and through the early 68040 Macs like the Quadra 700: later Quadras used manual-inject drives, which were cheaper. It is known that the later MFD-75W models (like the 21G) had the ejection force increased, as the earlier ones were a bit lethargic. The External SuperDrive was not tested because it is in unused, original condition.
On the 512Ke internal drive, MFD-51W-03 is the number on the left of the chassis assembly, the other is printed on a label on the spindle motor. Not all 800KiB drives had the label, most of them shown here did not. A Macintosh SE 1/20 (F826CPSM5011) with only one 800KiB internal drive, is almost identical to the 512Ke drive, the only difference being that it has a board number of 1-619-792-14, so as mentioned earlier, there were definitely a number of board revisions to the 800KiB drive. nathall on 68kmla.org provided this image of the drive found in his M0131 800K External Drive, which provides yet another variation. Maybe one day we'll have this all figured out -- but that day is not today.
As shown in the table above, 1.44MB SuperDrives will work on 64K ROM Macs like the 128K and 512K but they will be constrained only by the presence or absence of the HD20 INIT. On the 512K and 128K, the Mac will "heartbeat" or pulse the drive head stepper motor (the one with the cylindrical shiny housing and a worm gear) on internal and external drives about once per second, with empty drives on a blinking floppy disk prompt, this is normal. Drives equipped with a red LED activity light, like the Apple 3.5 Drive and the Apple SuperDrive, will pulse the LED at the same time. When loading a 800KiB MFS disk on an external 800KiB drive, the drive sounds change slightly once the HD20 INIT is loaded. Without the HD20 INIT, they sound somewhat like 400KiB drives do.
In the image gallery below, the FDHD Upgrade Kit was originally specified for a Macintosh IIx. The Macintosh II could be upgraded (order number M6051) to a IIx which included four ROMs, SWIM chip and the upgraded FDHD drive by a dealer. Since the IIx originally came with a 1.44MB SuperDrive already, this M0247 order number was probably intended for the users who wanted a second internal floppy drive -- which was probably not that common as most dual floppy Macintosh II, IIx or IIfx machines were user-upgraded long after Apple stopped selling these things, owing to the fact that most people couldn't afford Macintosh II machines. According to the Apple Multivendor Network Solutions Guide, this kit was also applicable to the Macintosh SE/30, except while it was possible to order a SE/30 with no hard drive, which basically nobody did, it's unclear if any SE/30s were ever manufactured with 800KiB drives instead of 1.44MB drives: it's pretty unlikely because all the order lists specifically mention the SuperDrive included. Upgrade kits were also available for the Macintosh SE which also included the ROMs and SWIM chip similar to the Macintosh II, and dealers who upgraded SEs to SE/30s for customers most likely also offered the FDHD drive upgrade as well.
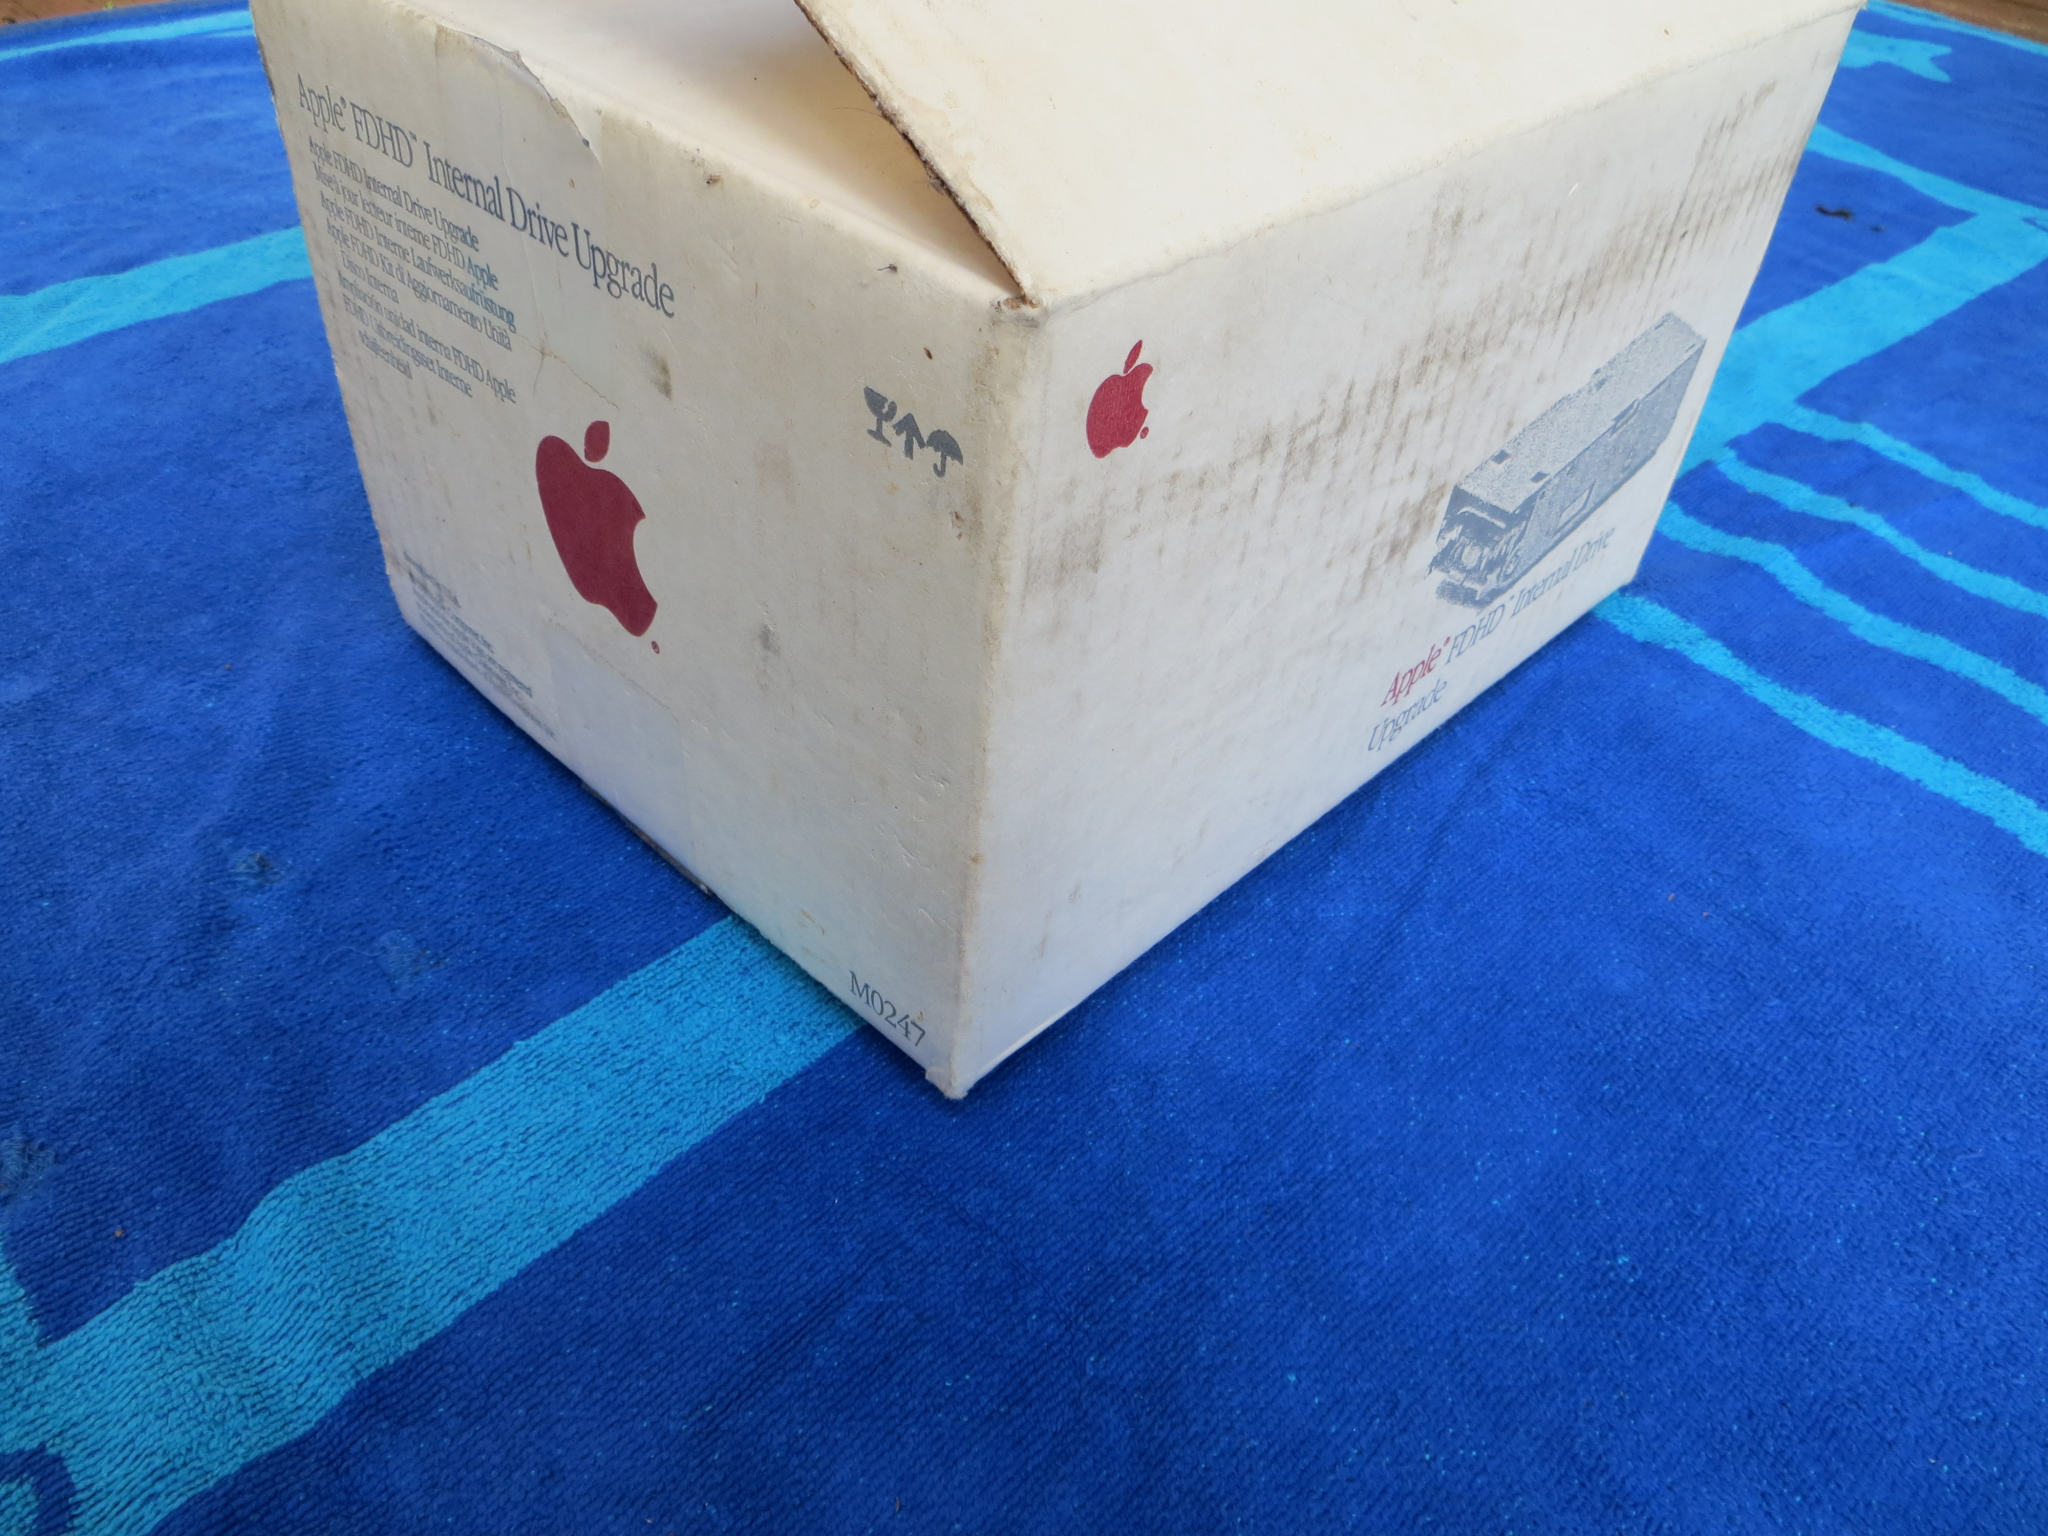 FDHD Upgrade kit for a Mac IIx |
 Side view |
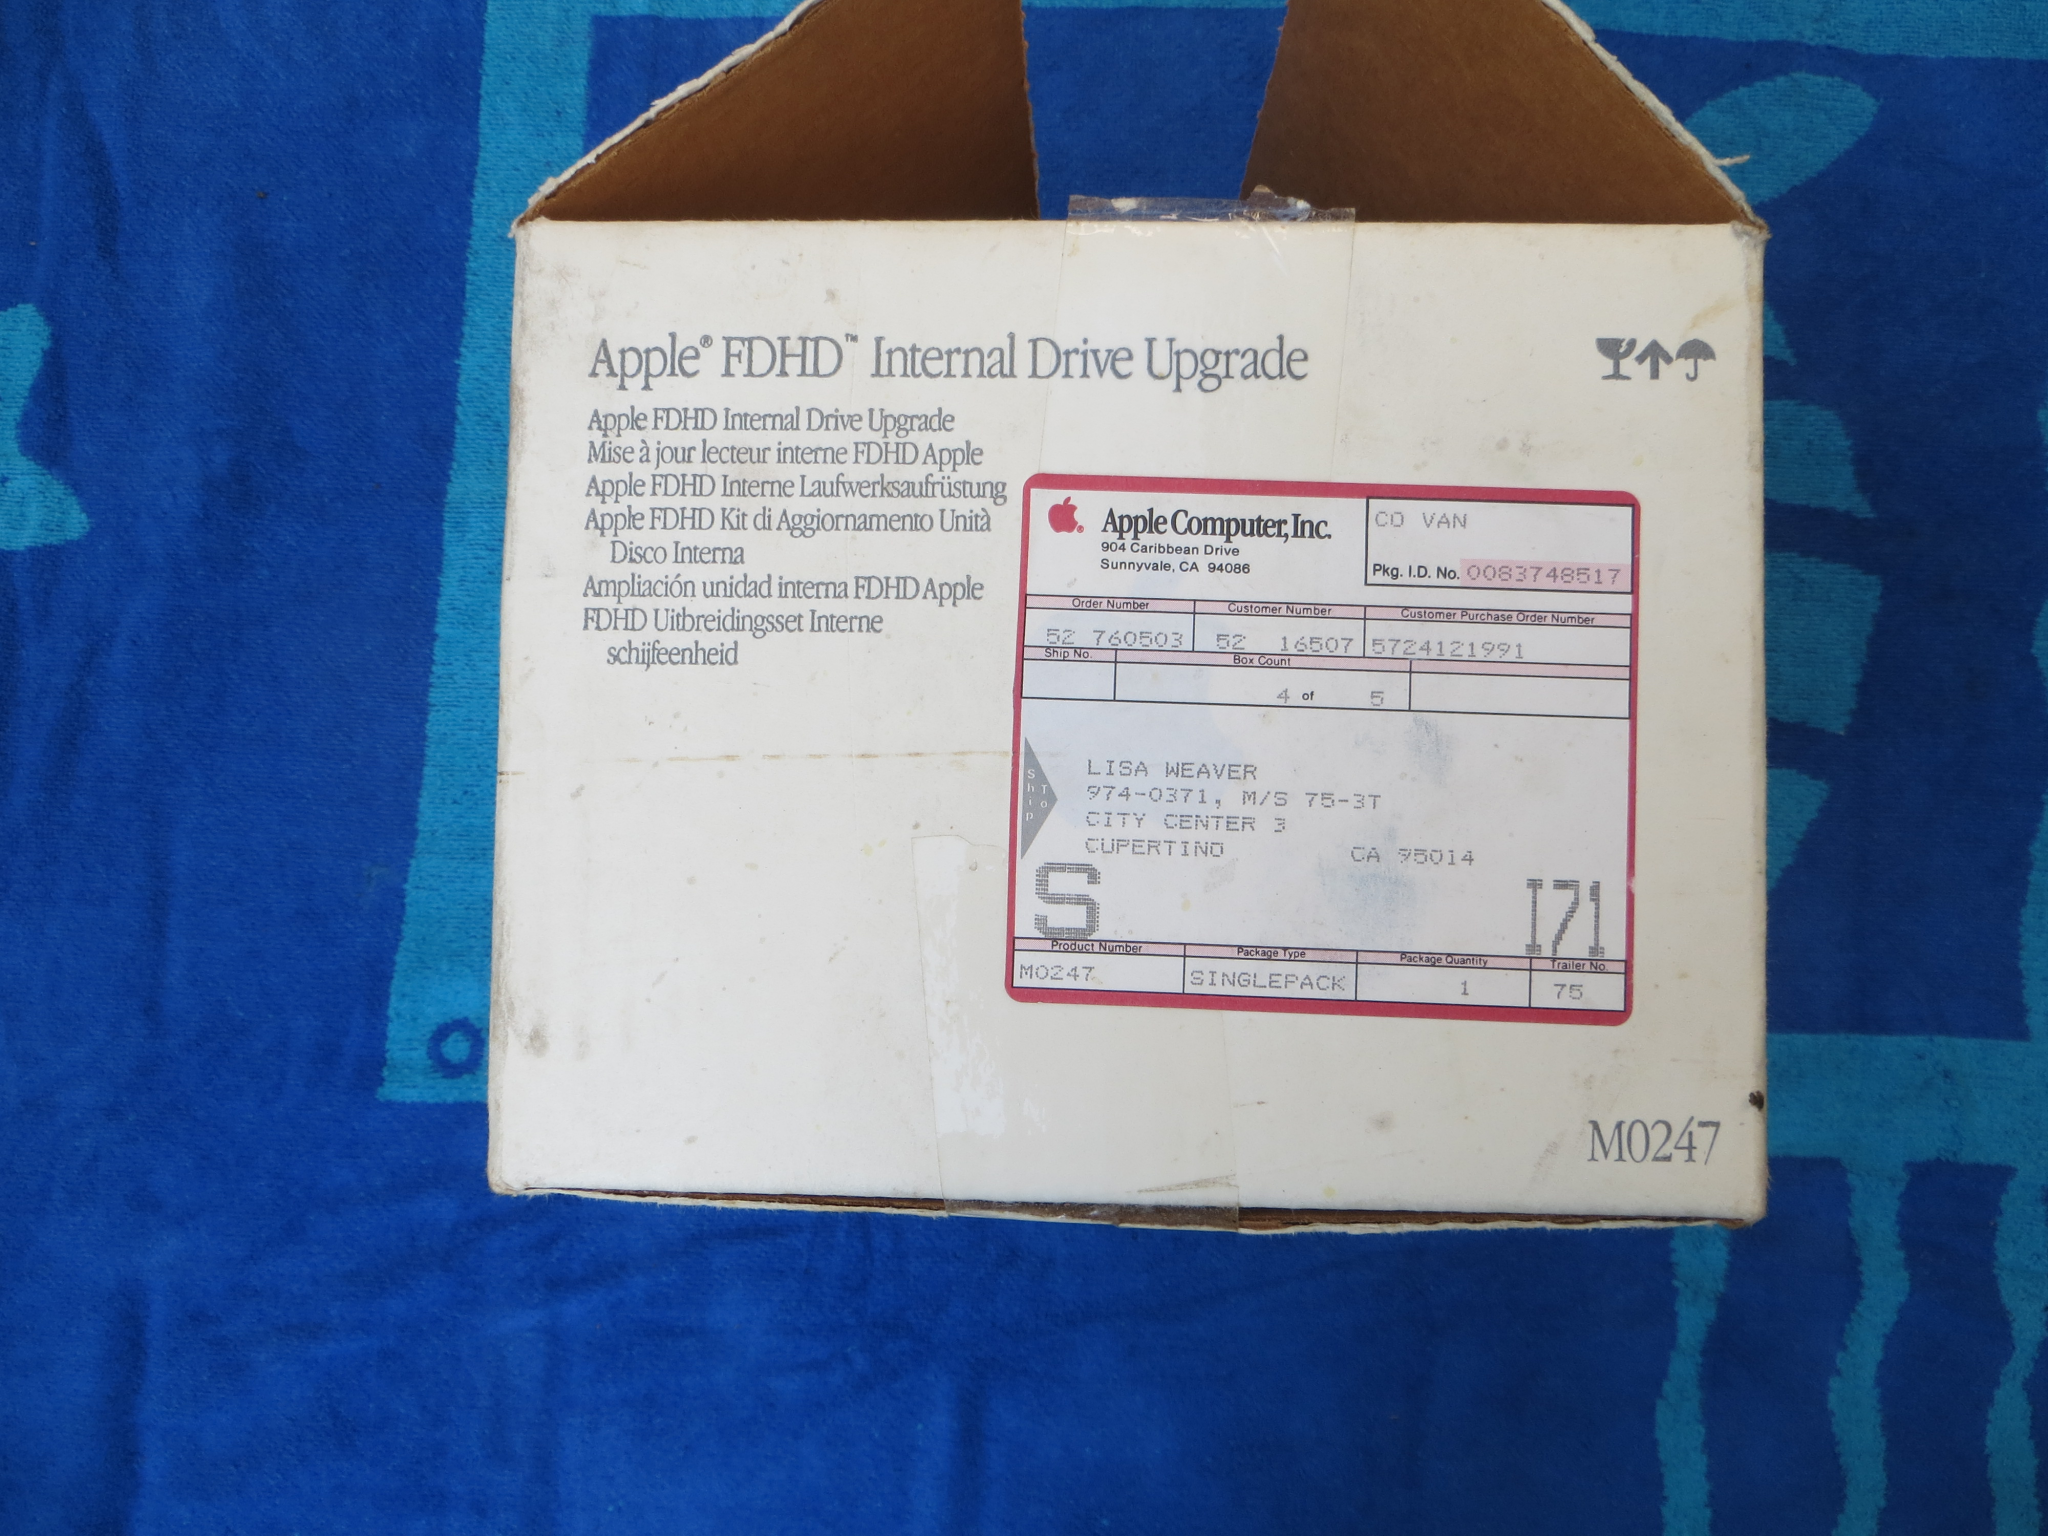 Shipping label |
 Other end |
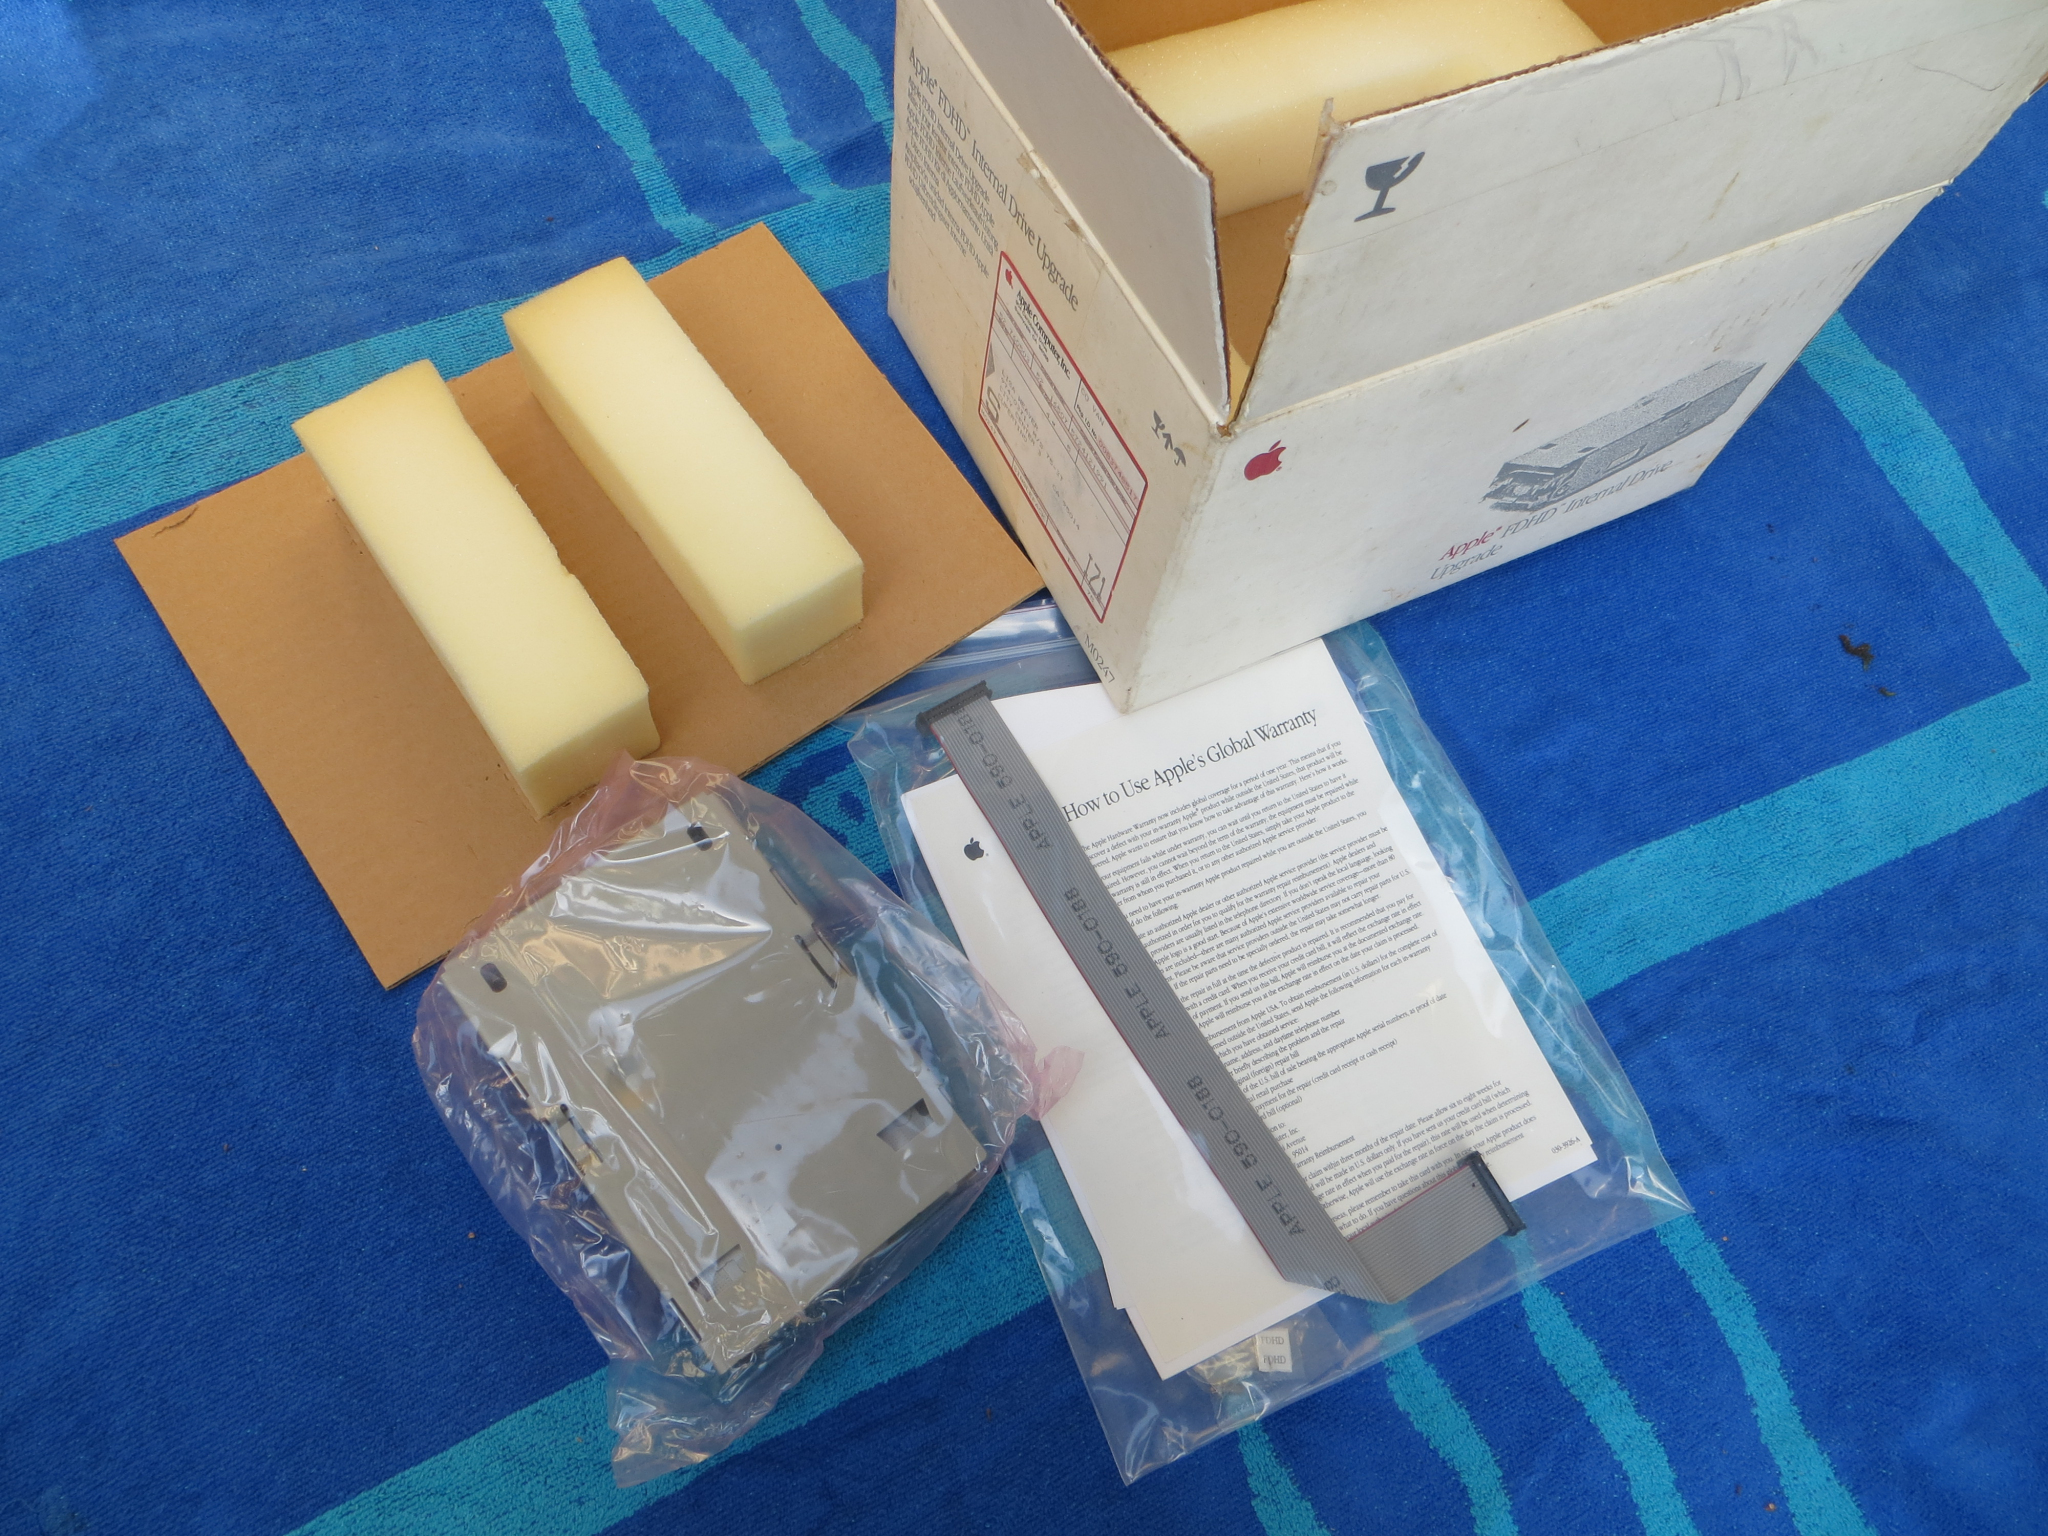 Inside contents |
 External SuperDrive unused |
 Box contents |
 Front view compared to 800K external |
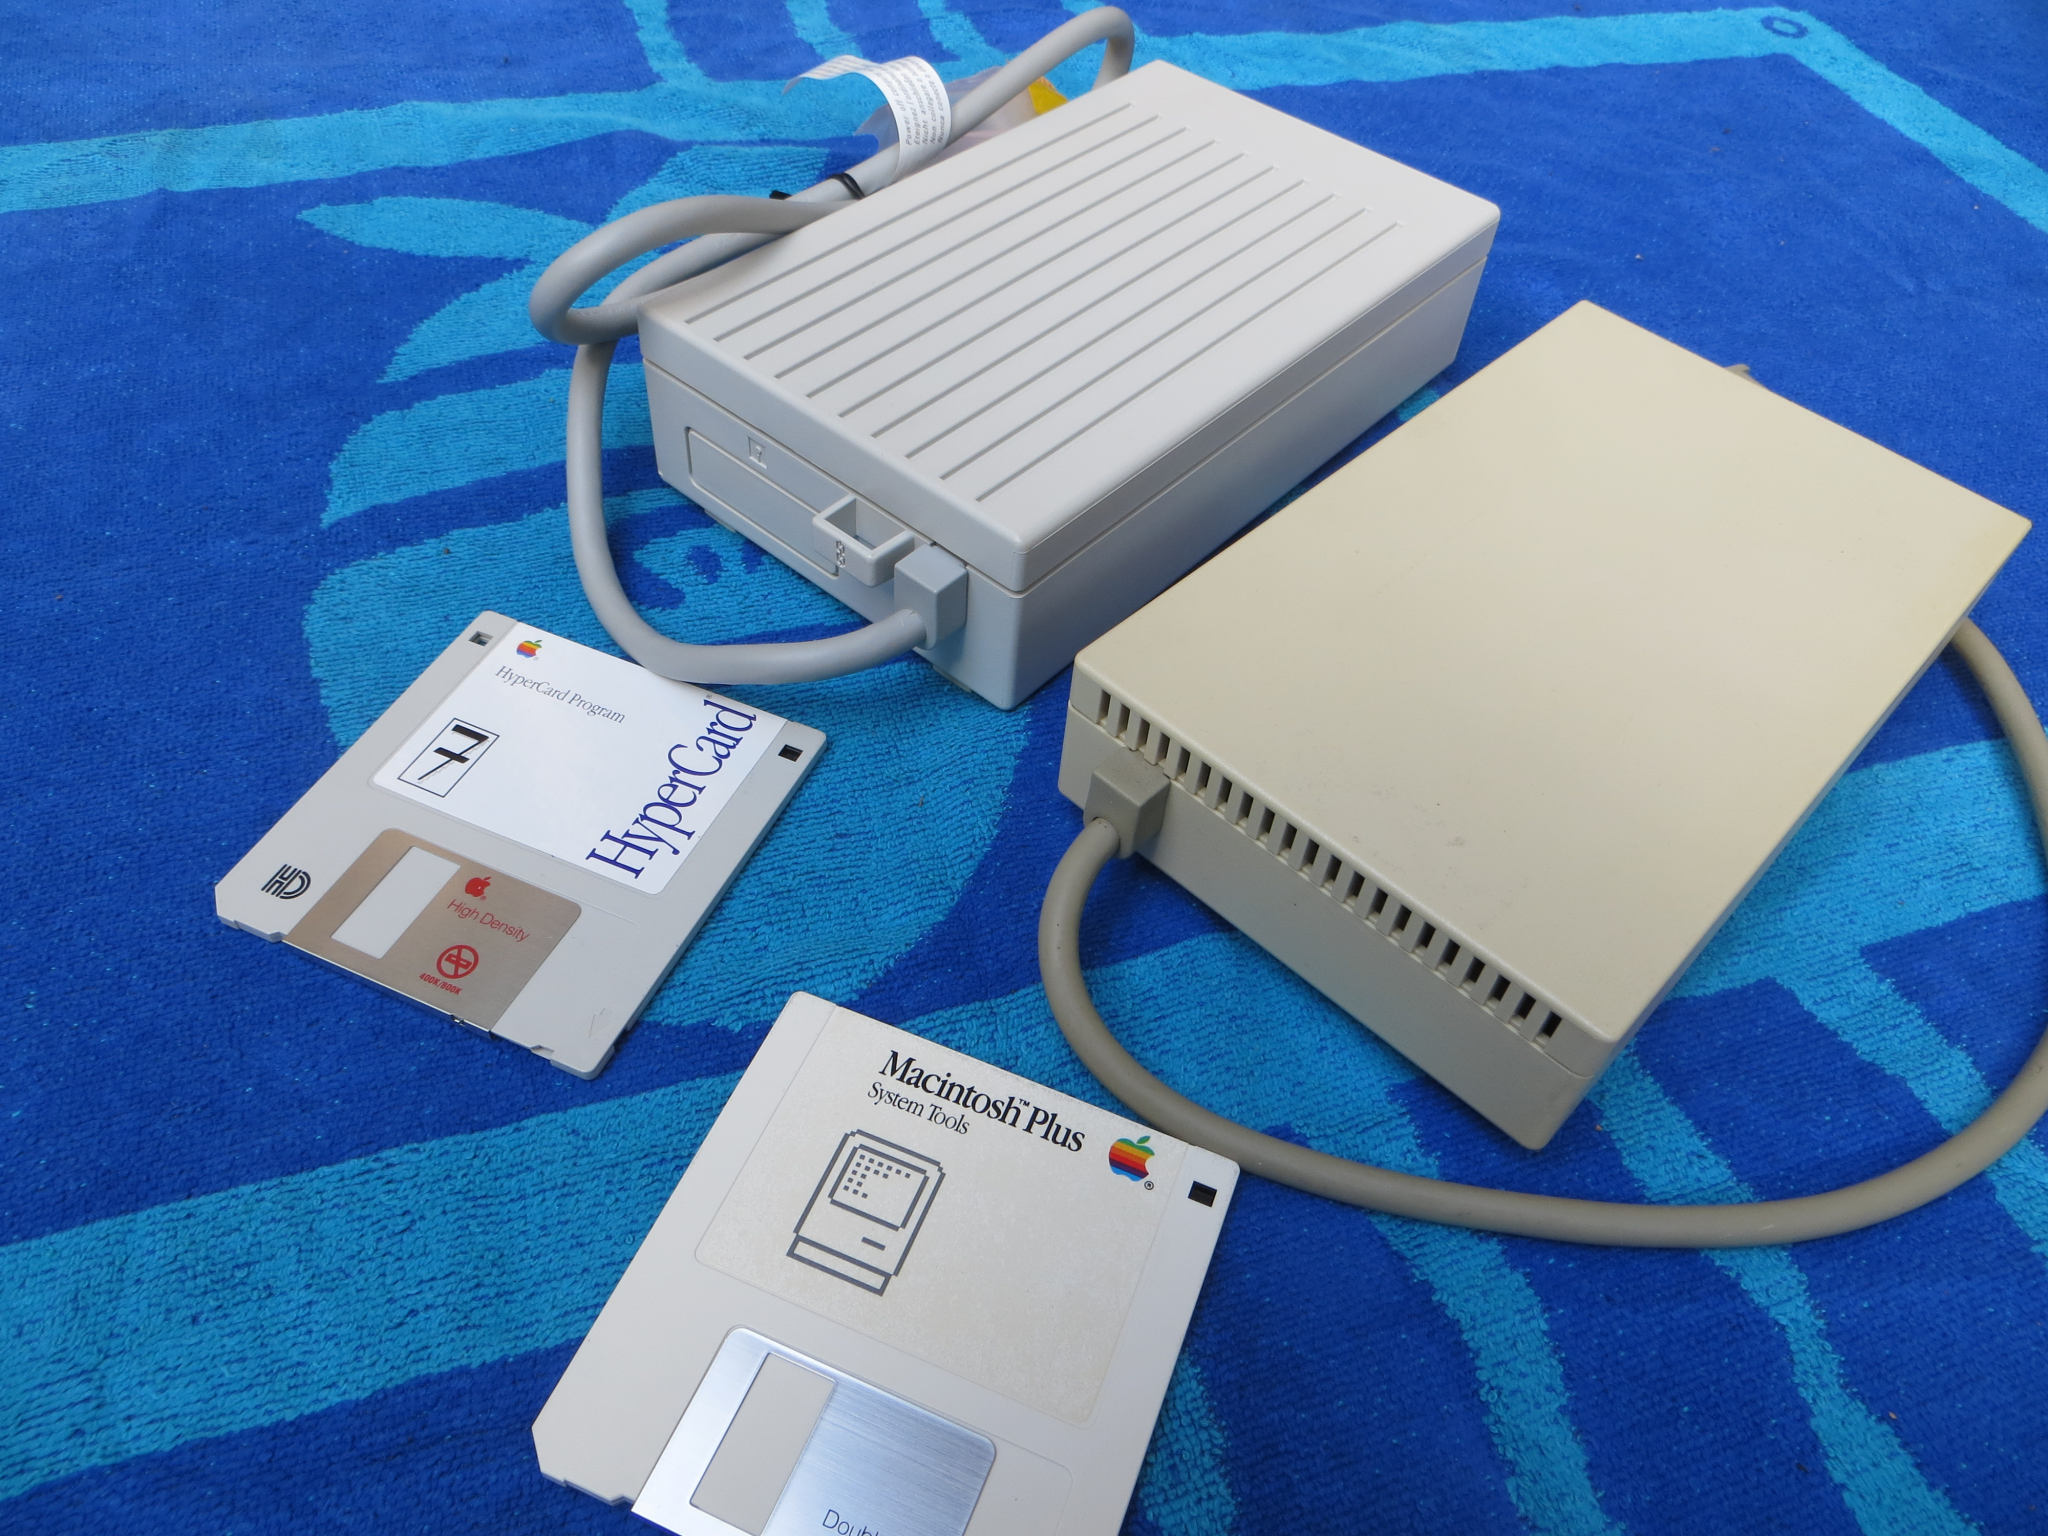 Daisy-chain option for Apple II machines |
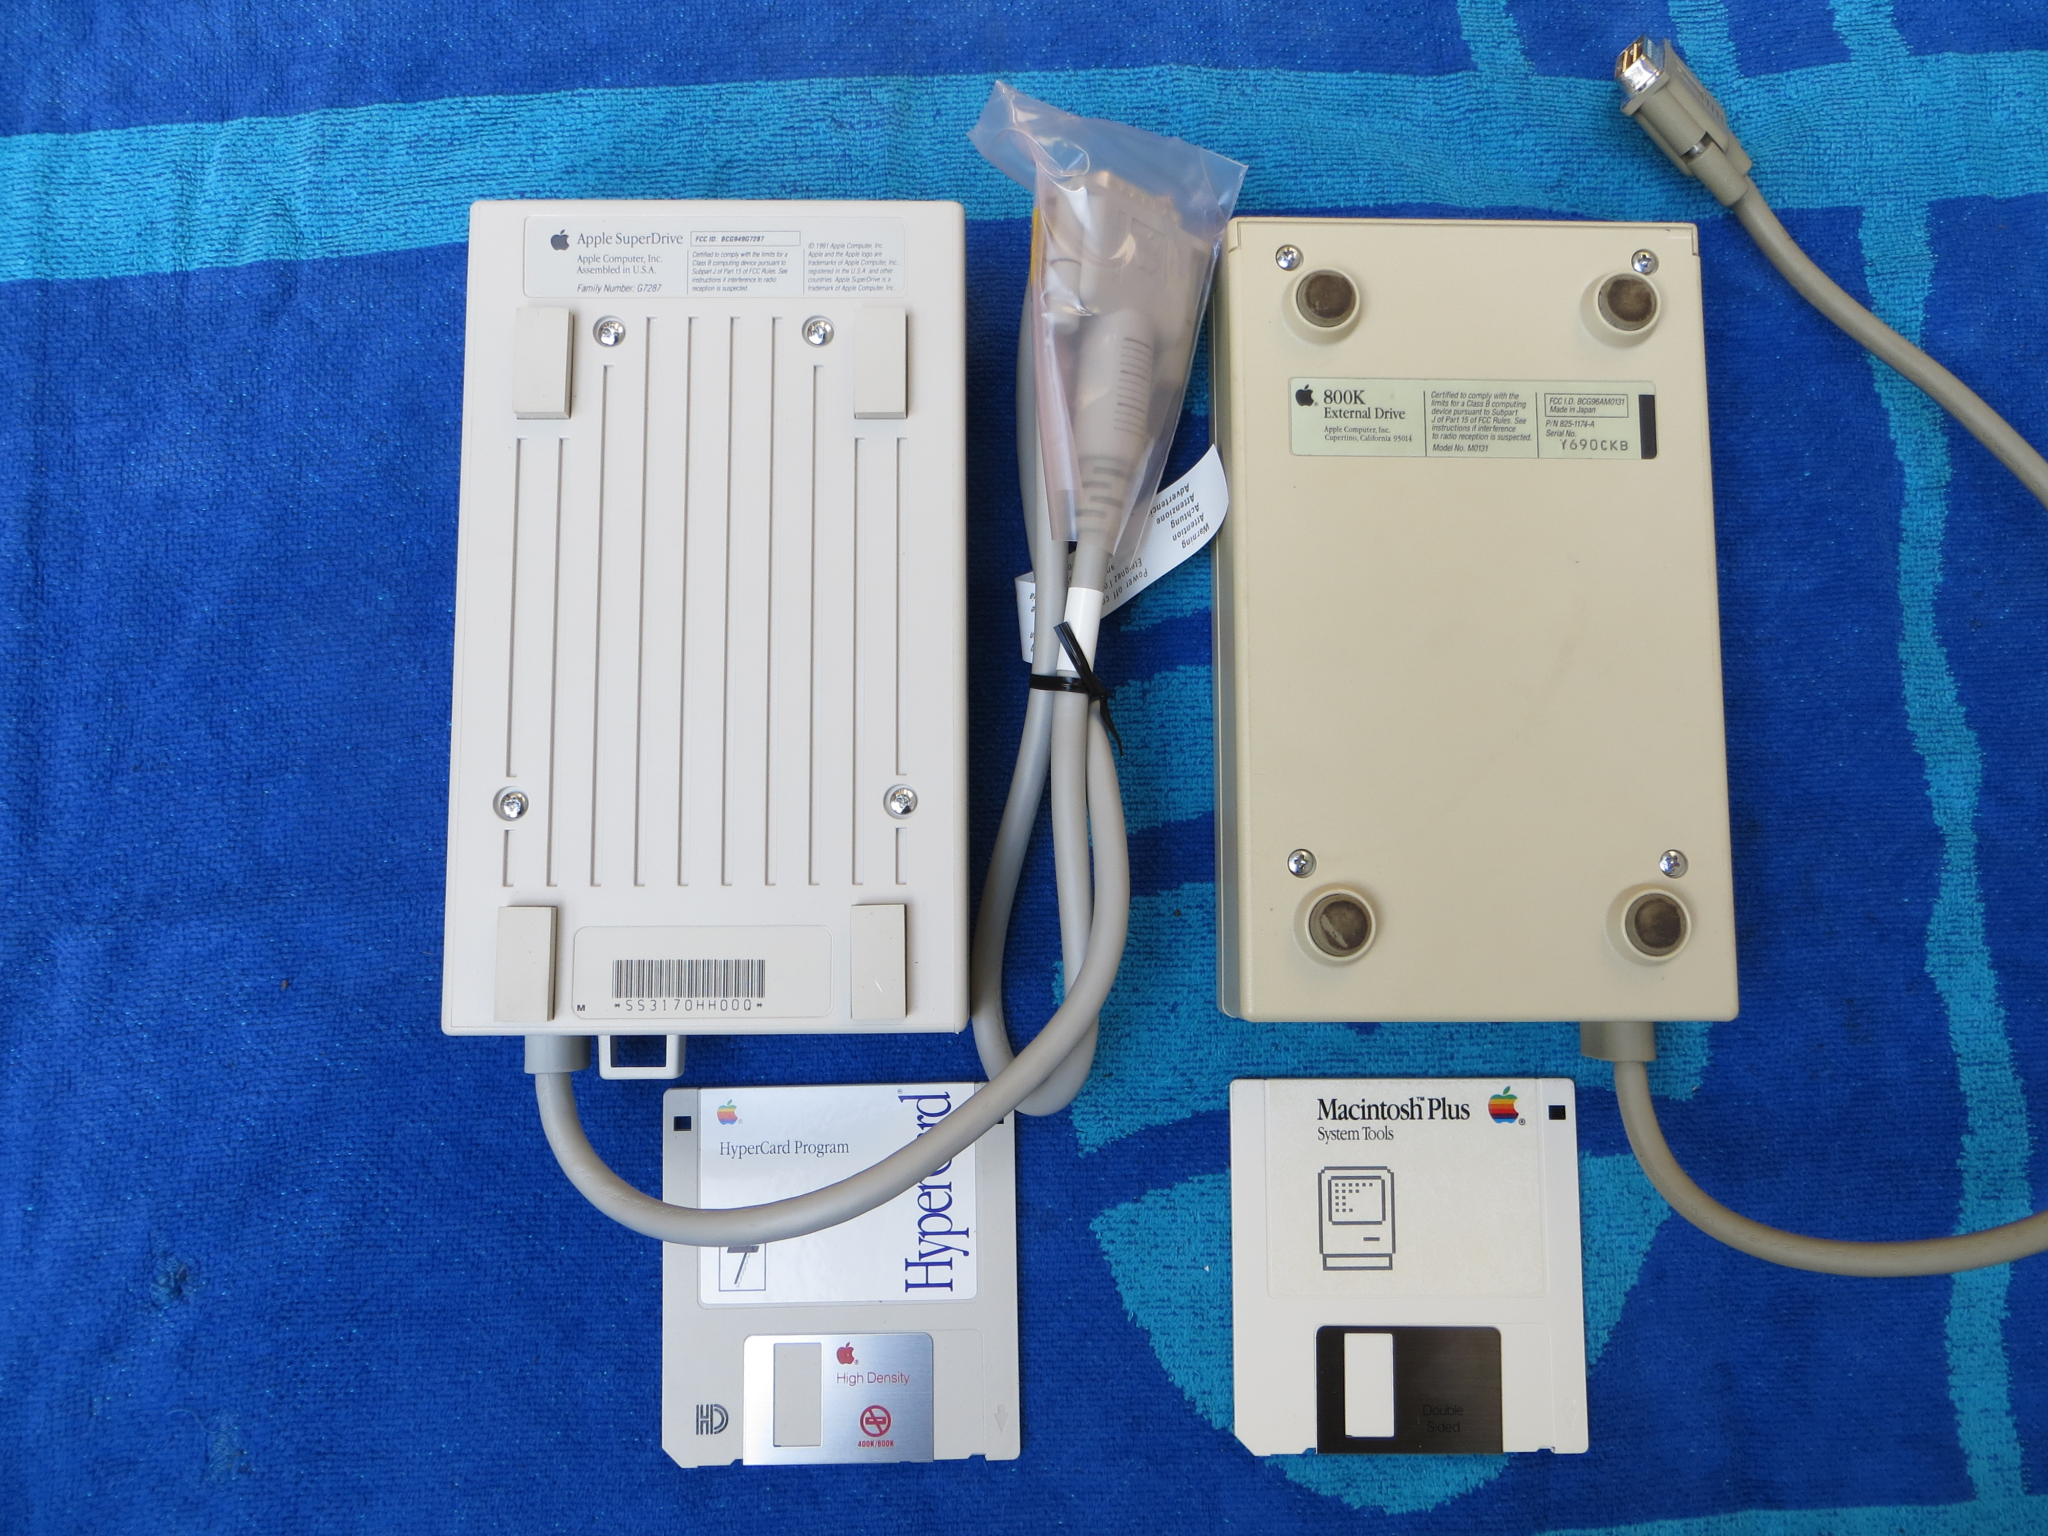 Bottom view with labels |
The External SuperDrive is best used on the Apple IIGS system. Macintosh computers cannot daisy-chain floppy disk drives, so the daisy-chain feature of this unused example is more limited, but they can still use the drive alone just fine. It's nice to see what it would have looked like essentially brand new, as external 1.44MB drives were not common accessories like external 400KiB and external 800KiB drives were, and the snazzy Platinum visual overhaul is nice to look at. Scans of the documentation included both of these examples is available in the Download Town section. It uses the same Sony MFD-75W-01G that normal SuperDrive systems use. Almost identical to the External SuperDrive is the "Apple 3.5 DrivePlus", where the only noticeable difference is the bottom label, but both use the same G7287 part number.
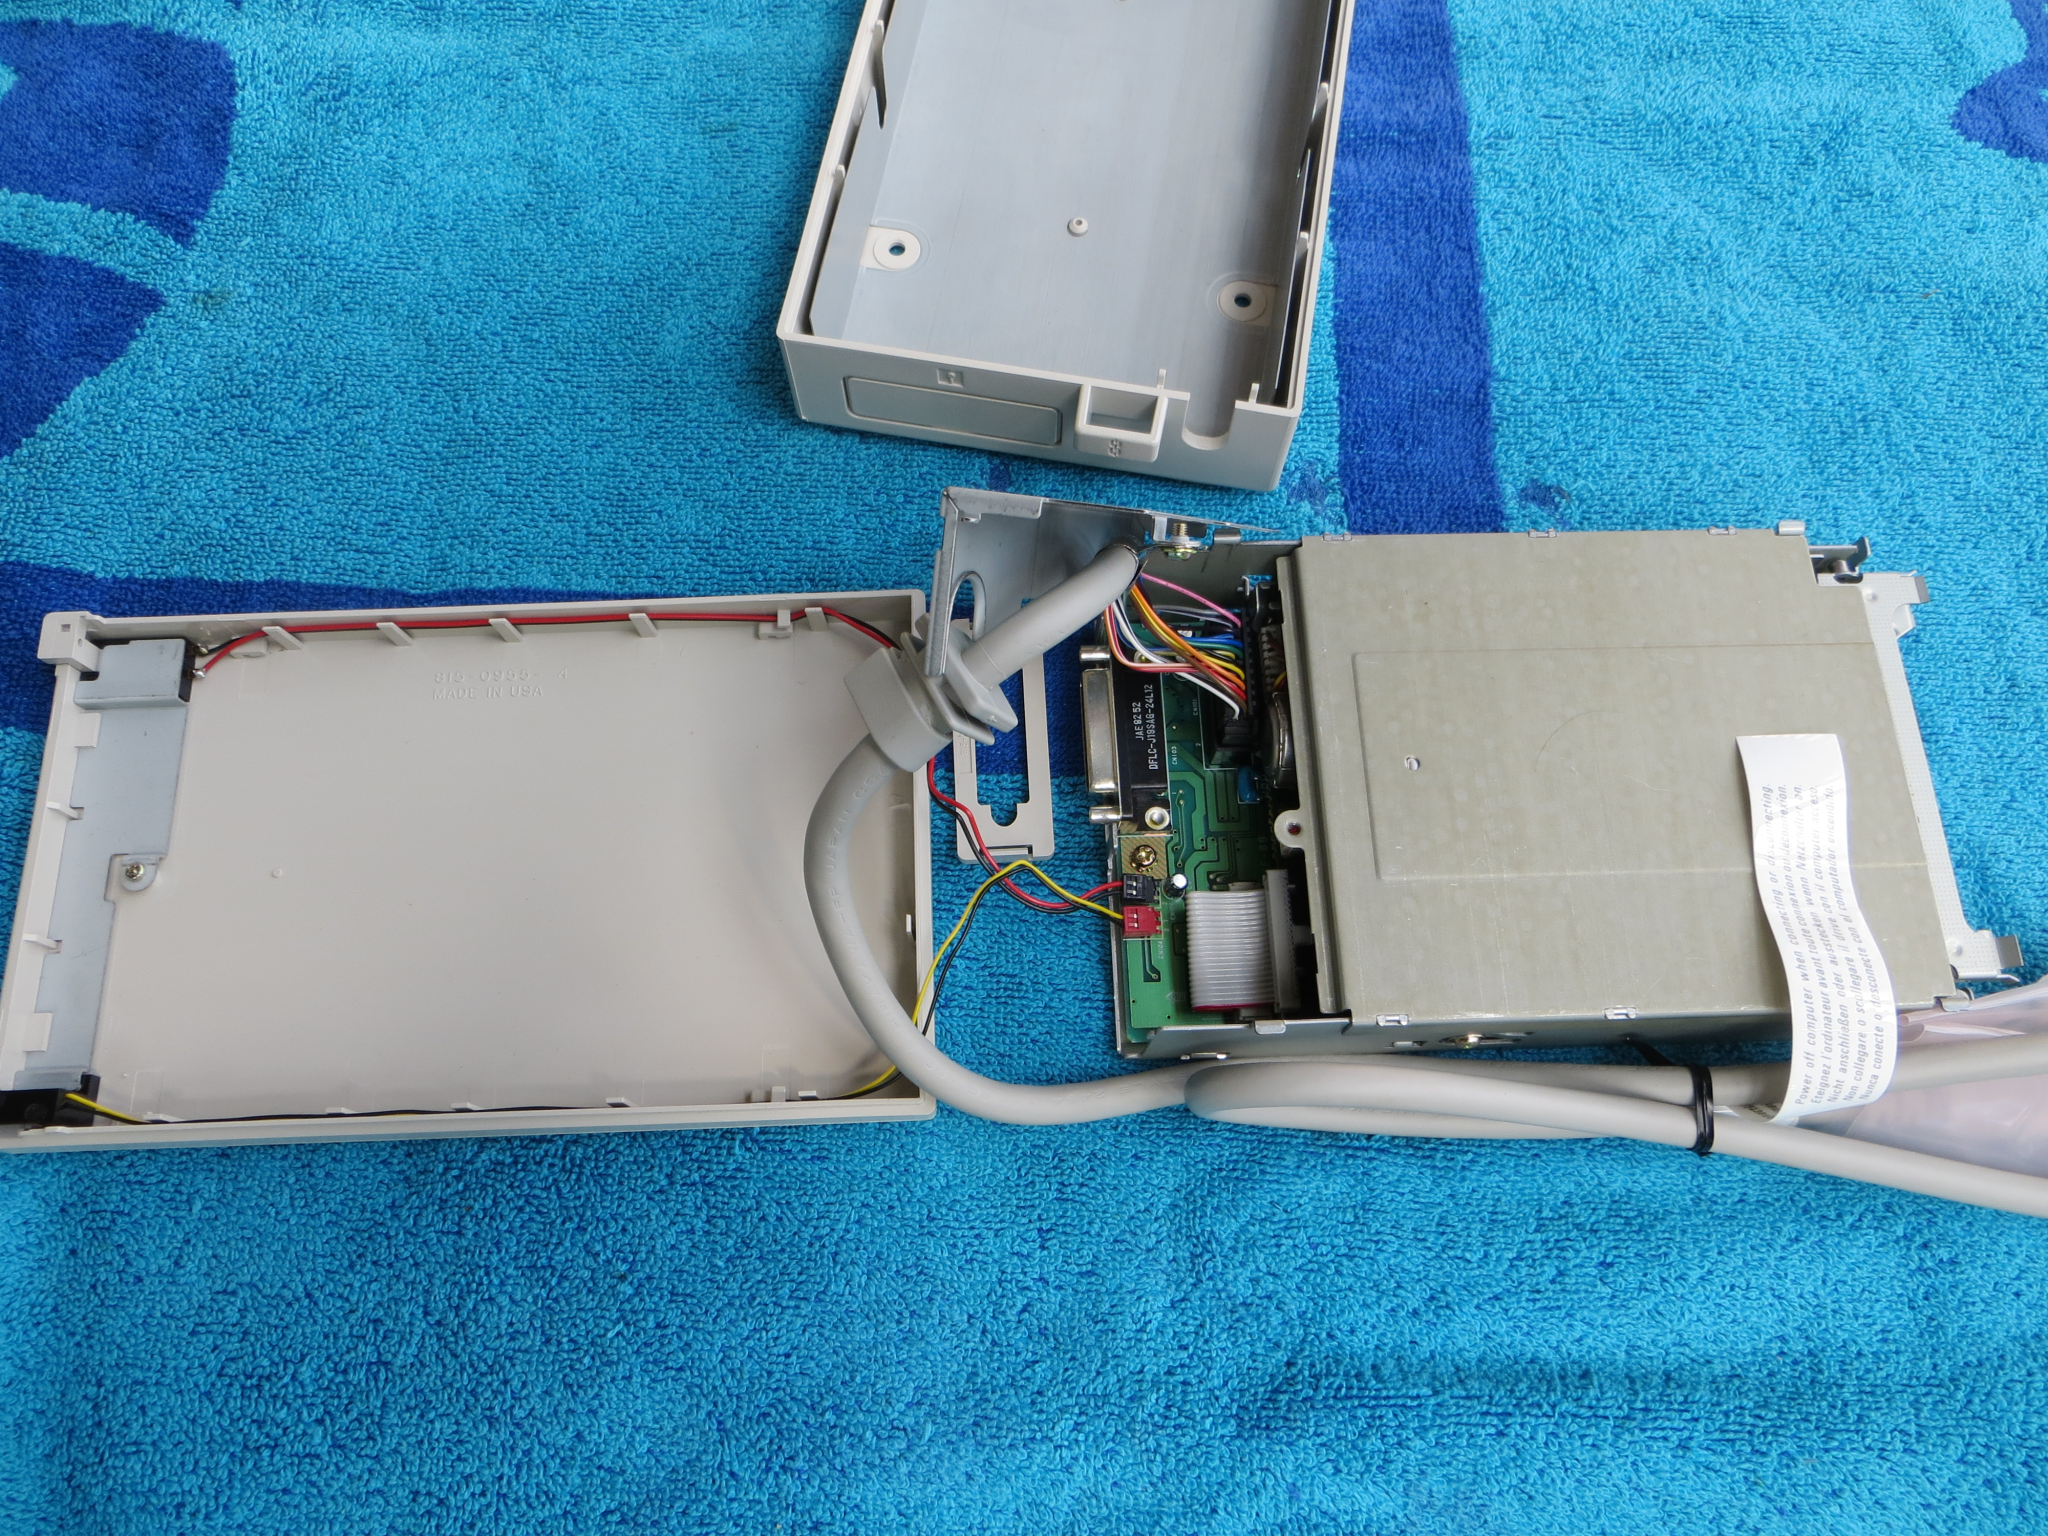
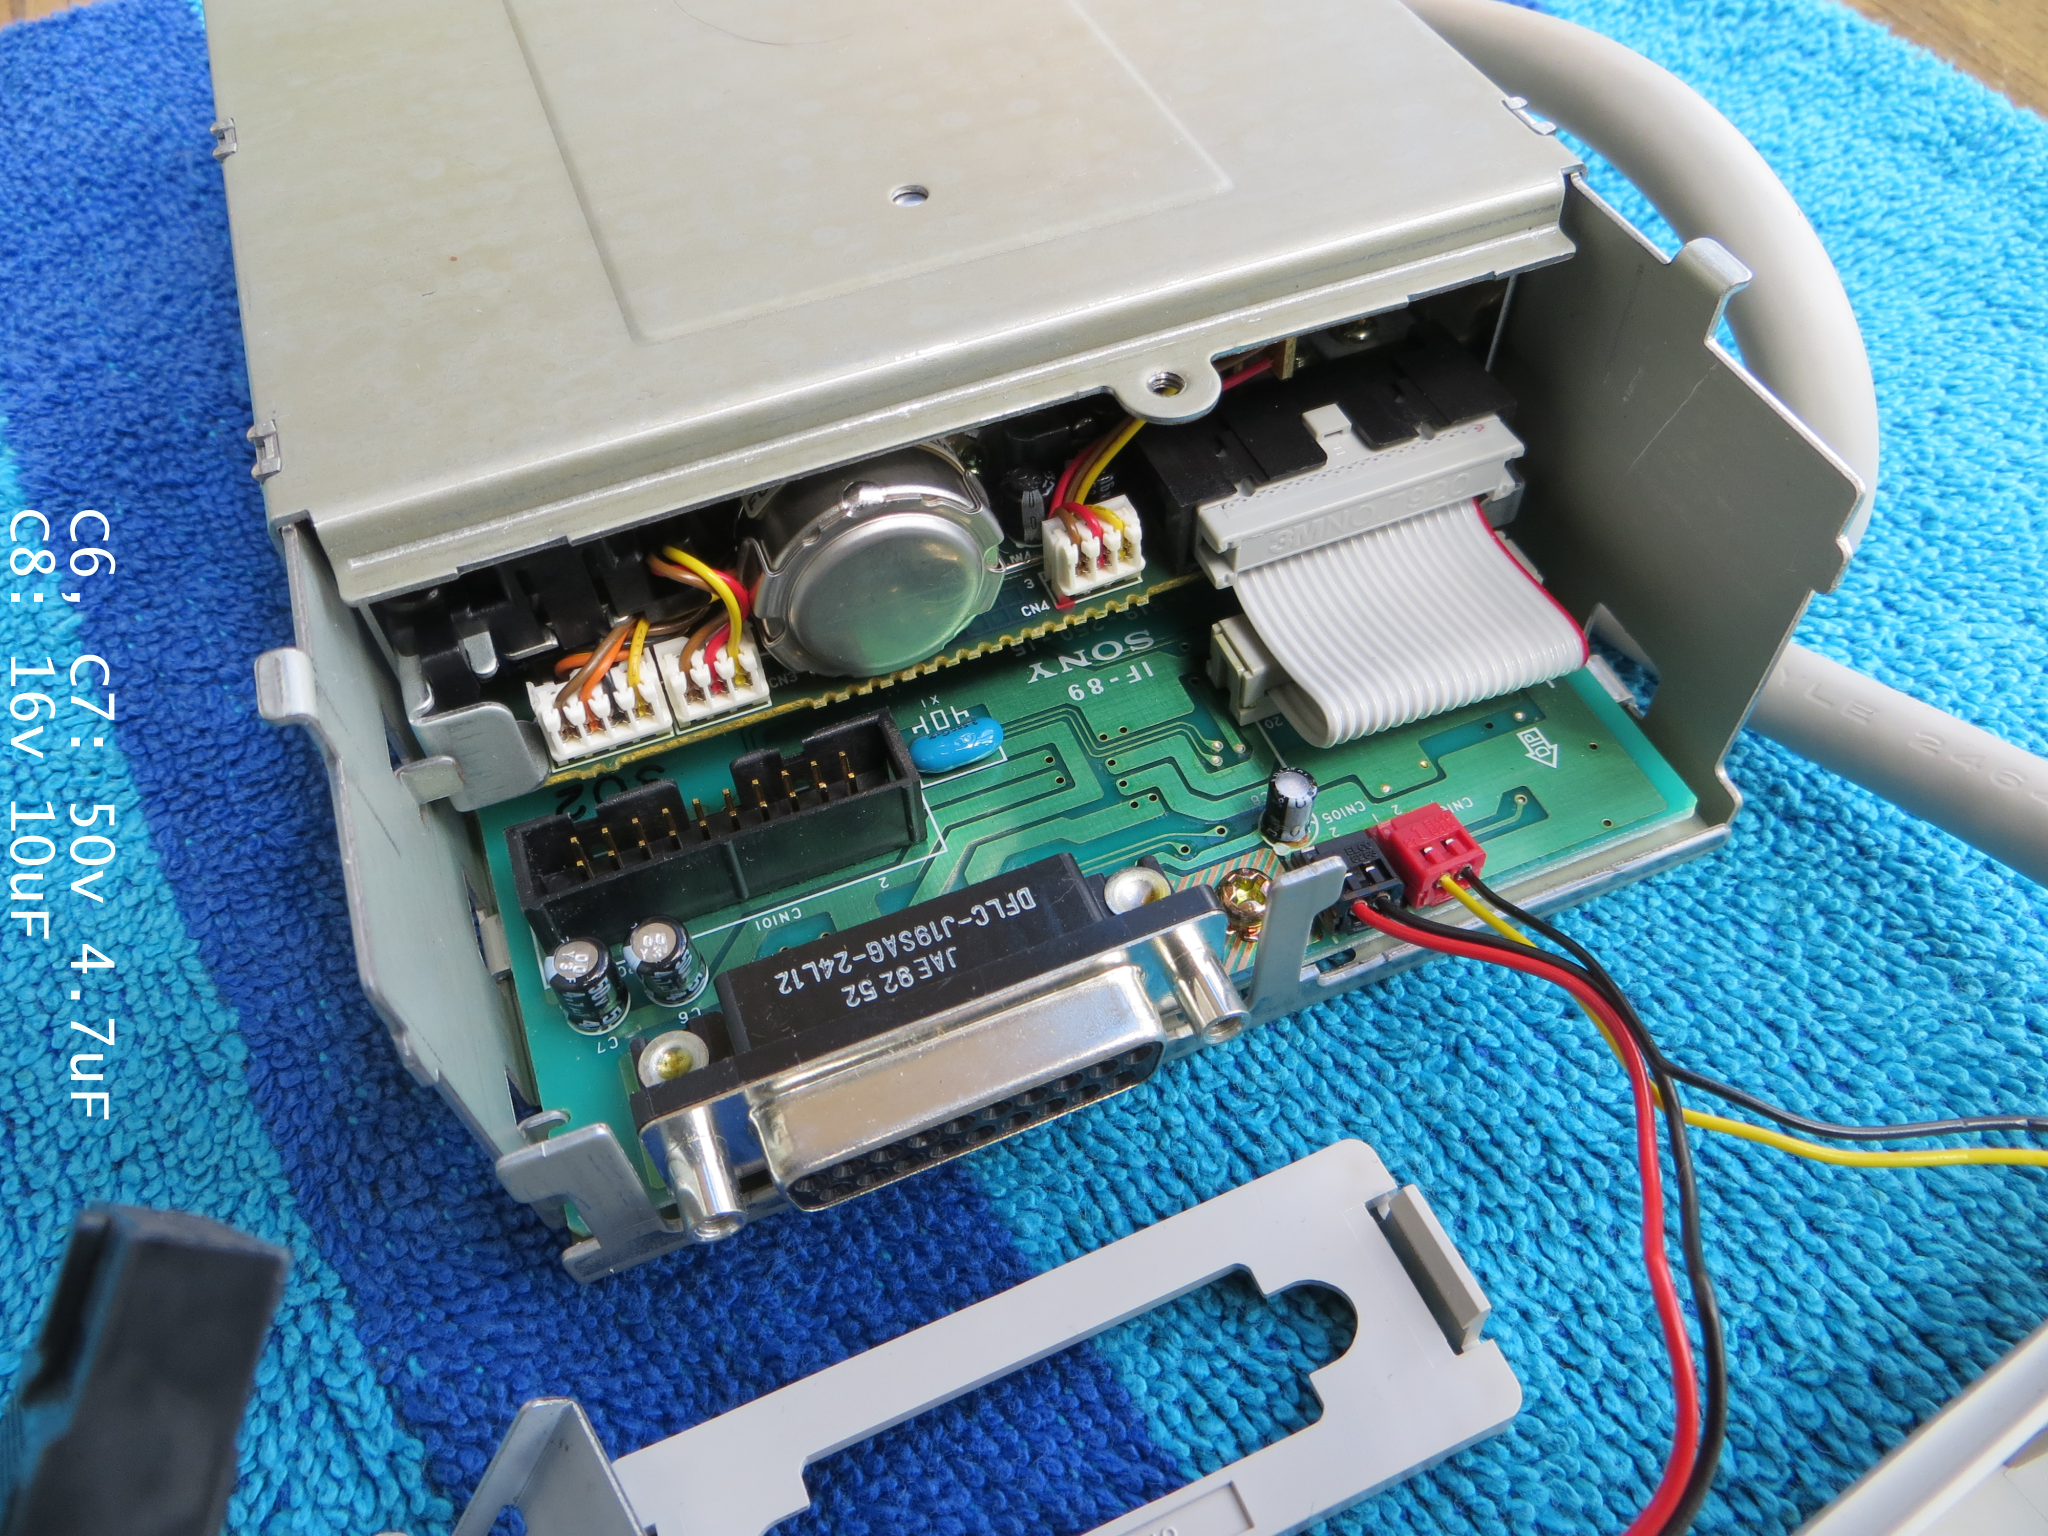
The Hard Disk 20
Plenty of other places on the Internet have adequately talked about the HD20. Being an early hard drive, well, it's slow, but compared to a 400KiB drive it is reasonably fast and the 512K really gets the most value out of it, with the 512Ke coming close behind. The other Macs like the Plus and SE don't need it, and won't want it either, but these days they're a bit of a relic. Known for being troublesome and flaky, with the 20MB Rodime hard drive surviving in our example here makes it kind of a miracle. It's supposed to use HFS, which rules out the 128K because it can't load the HD20 INIT, unless the ROMs are swapped out to make it a 128Ke, or hacking the driver to make it format as MFS.
It's kind of a cool accessory, but while the 20MB capacity is welcome on pre-System 6 operating systems, it would be nicer if it could be upgraded rather than being a unique drive. The pass-through port for attaching a second external floppy drive, did work with the M0131 800K External Drive (see above for the specifications of said drive), but not with the Apple 3.5 Drive. It also worked as a pass-through even when the HD20 itself was off.
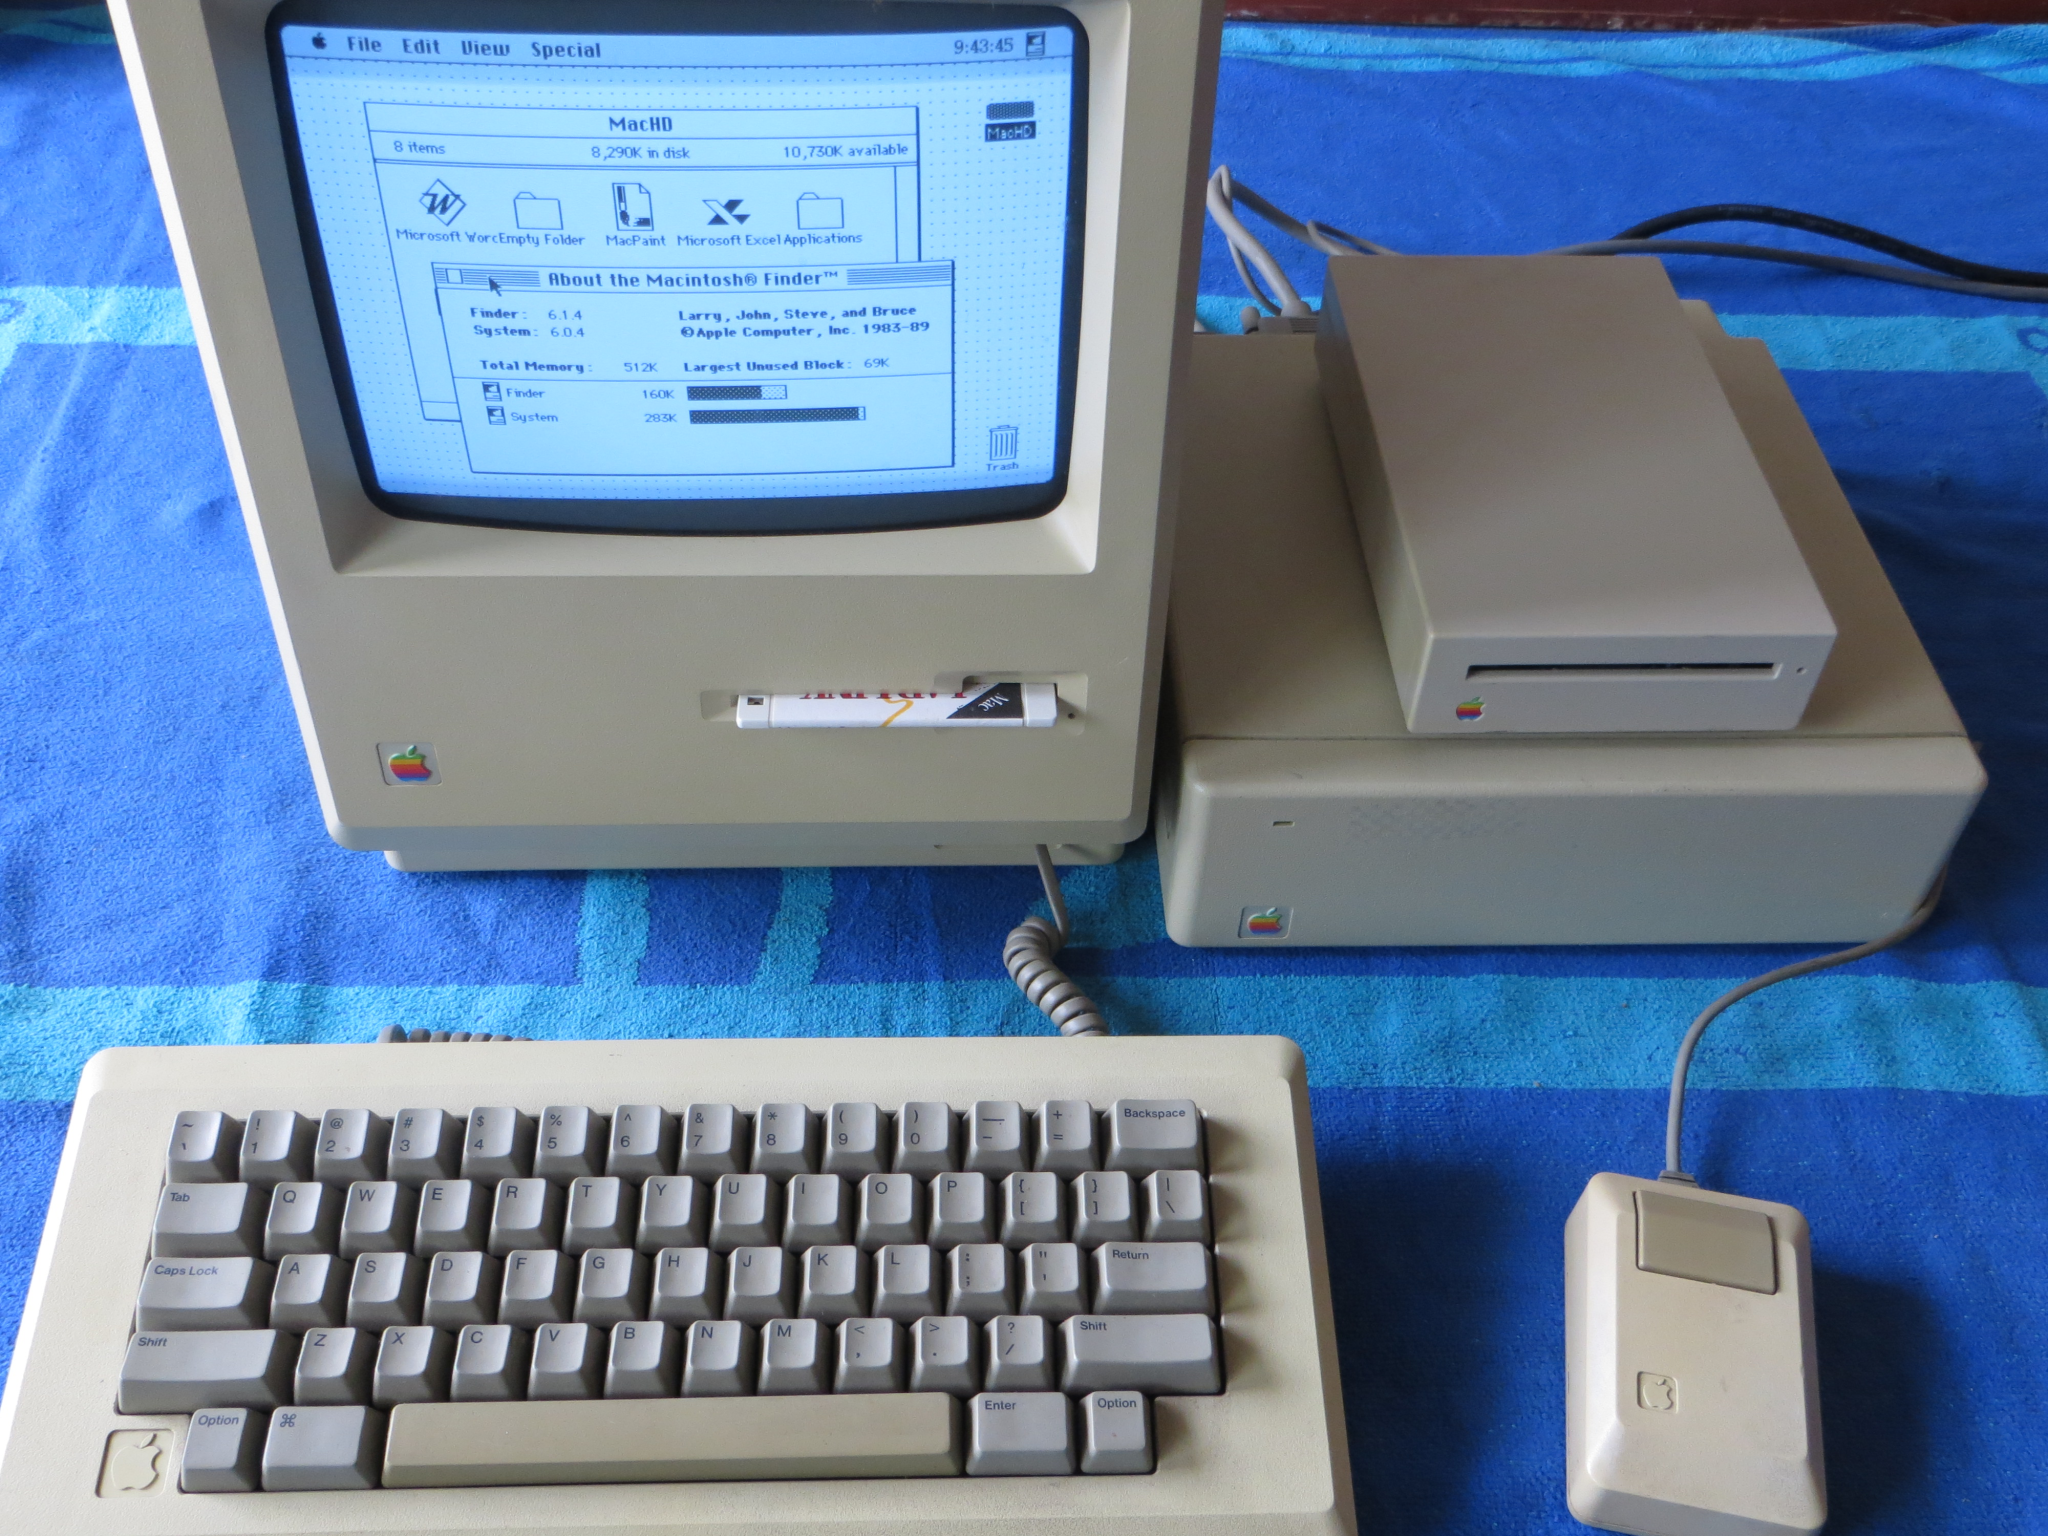 HD20 in use (512Ke) |
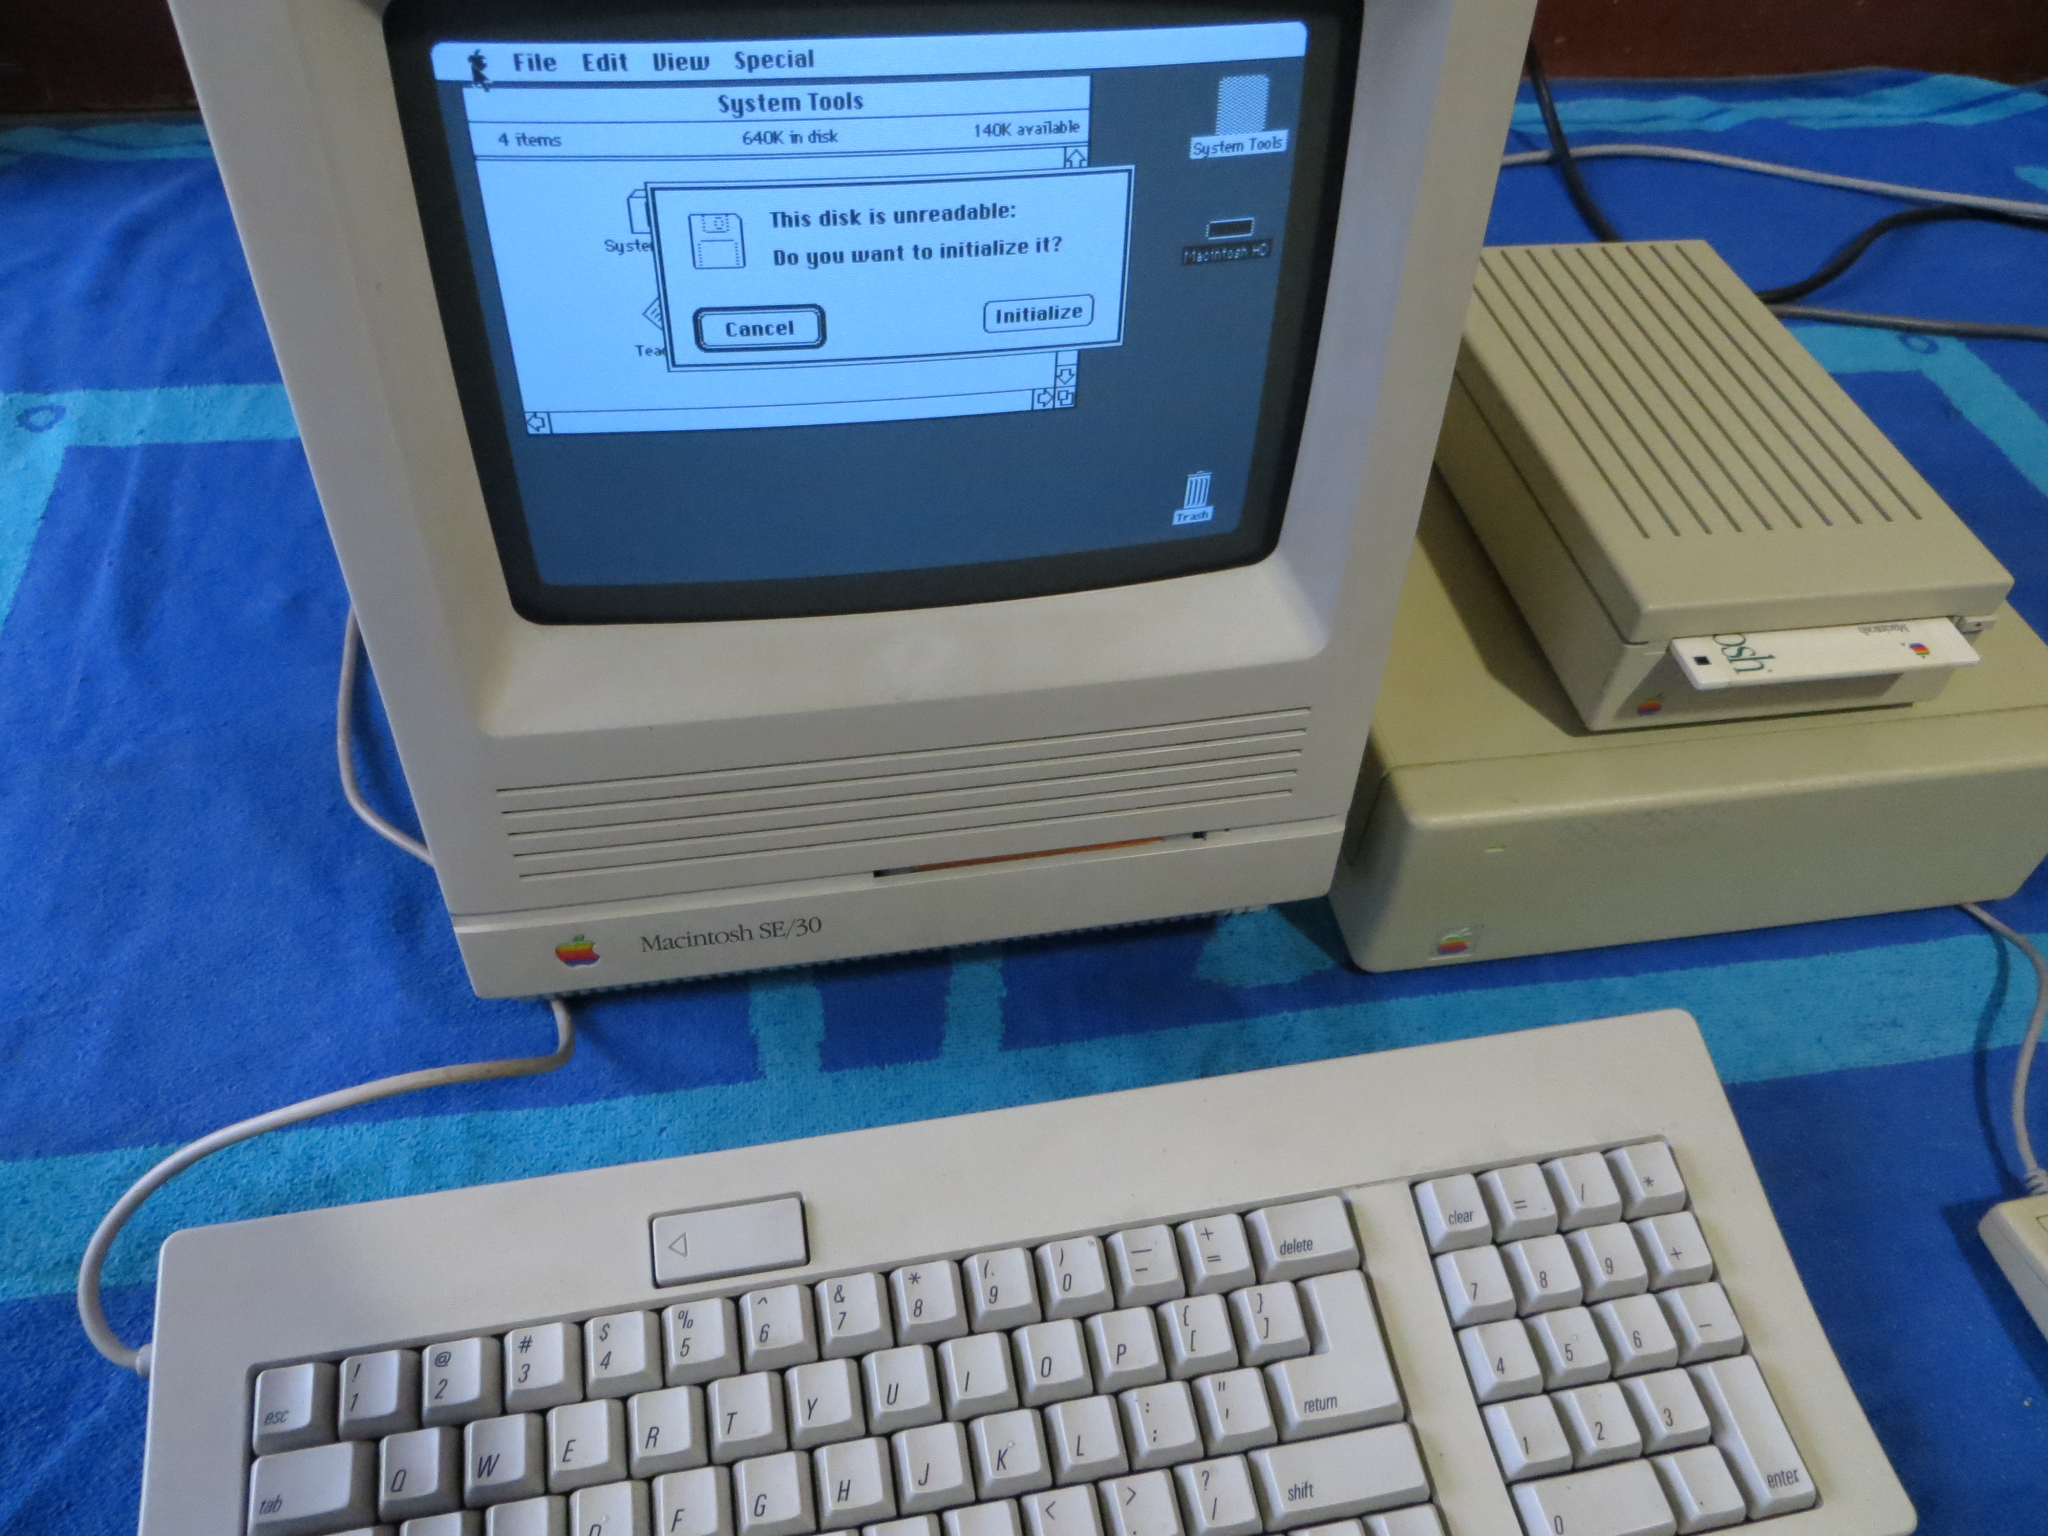 Testing the INIT utility |
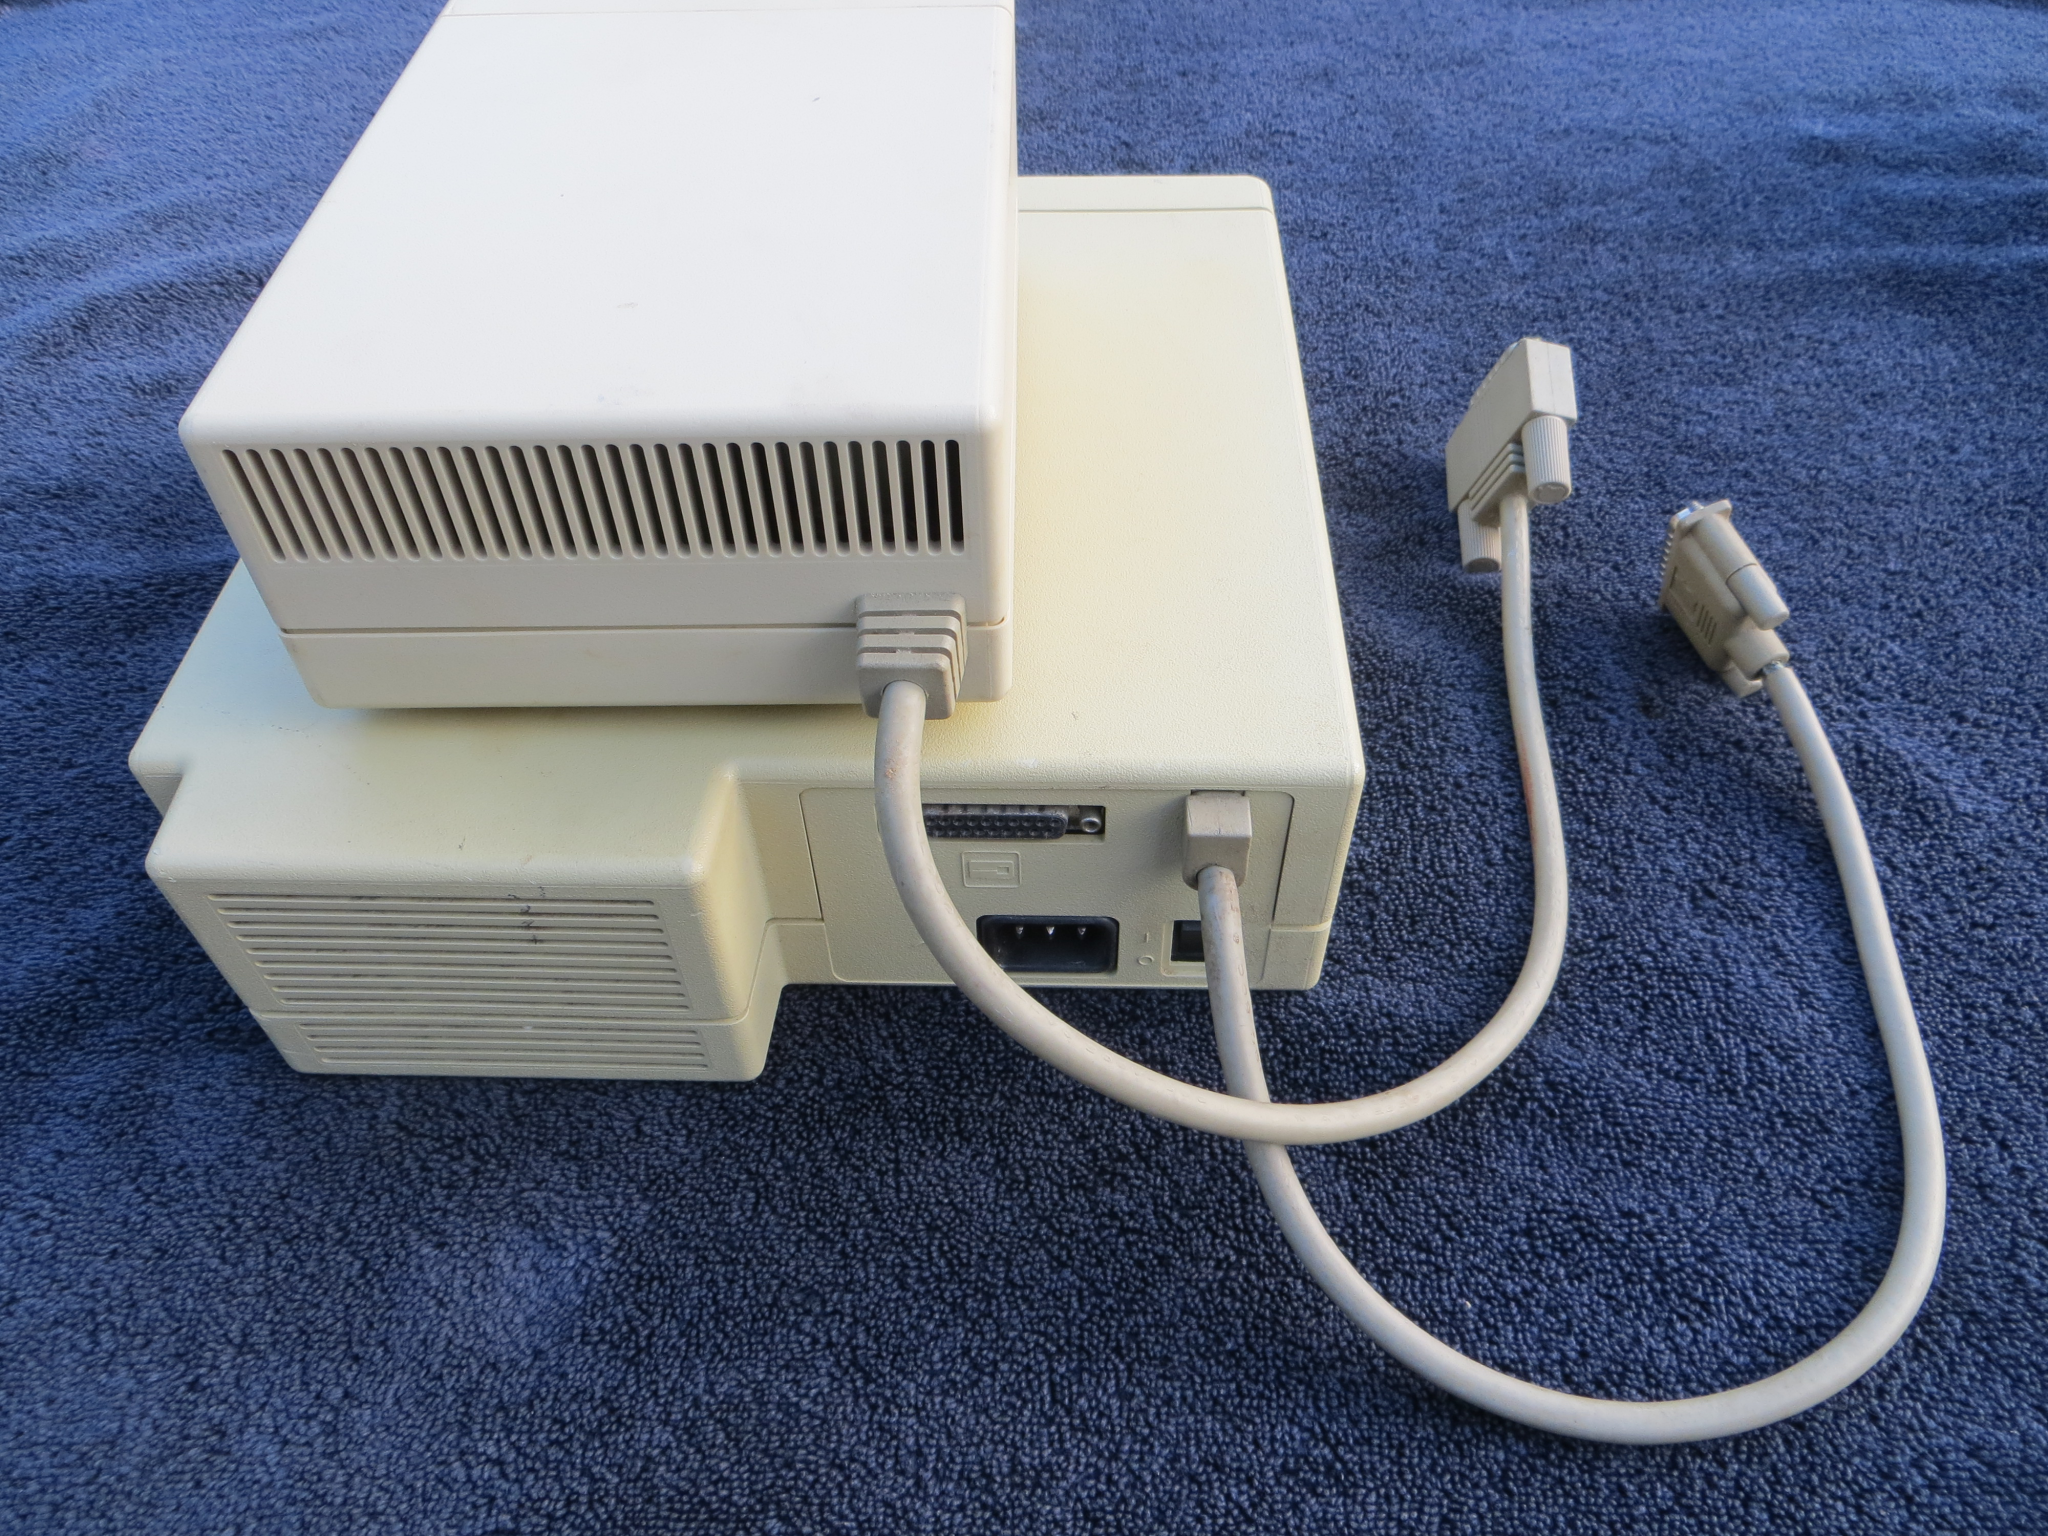 Rear view with 400K Sony on top |
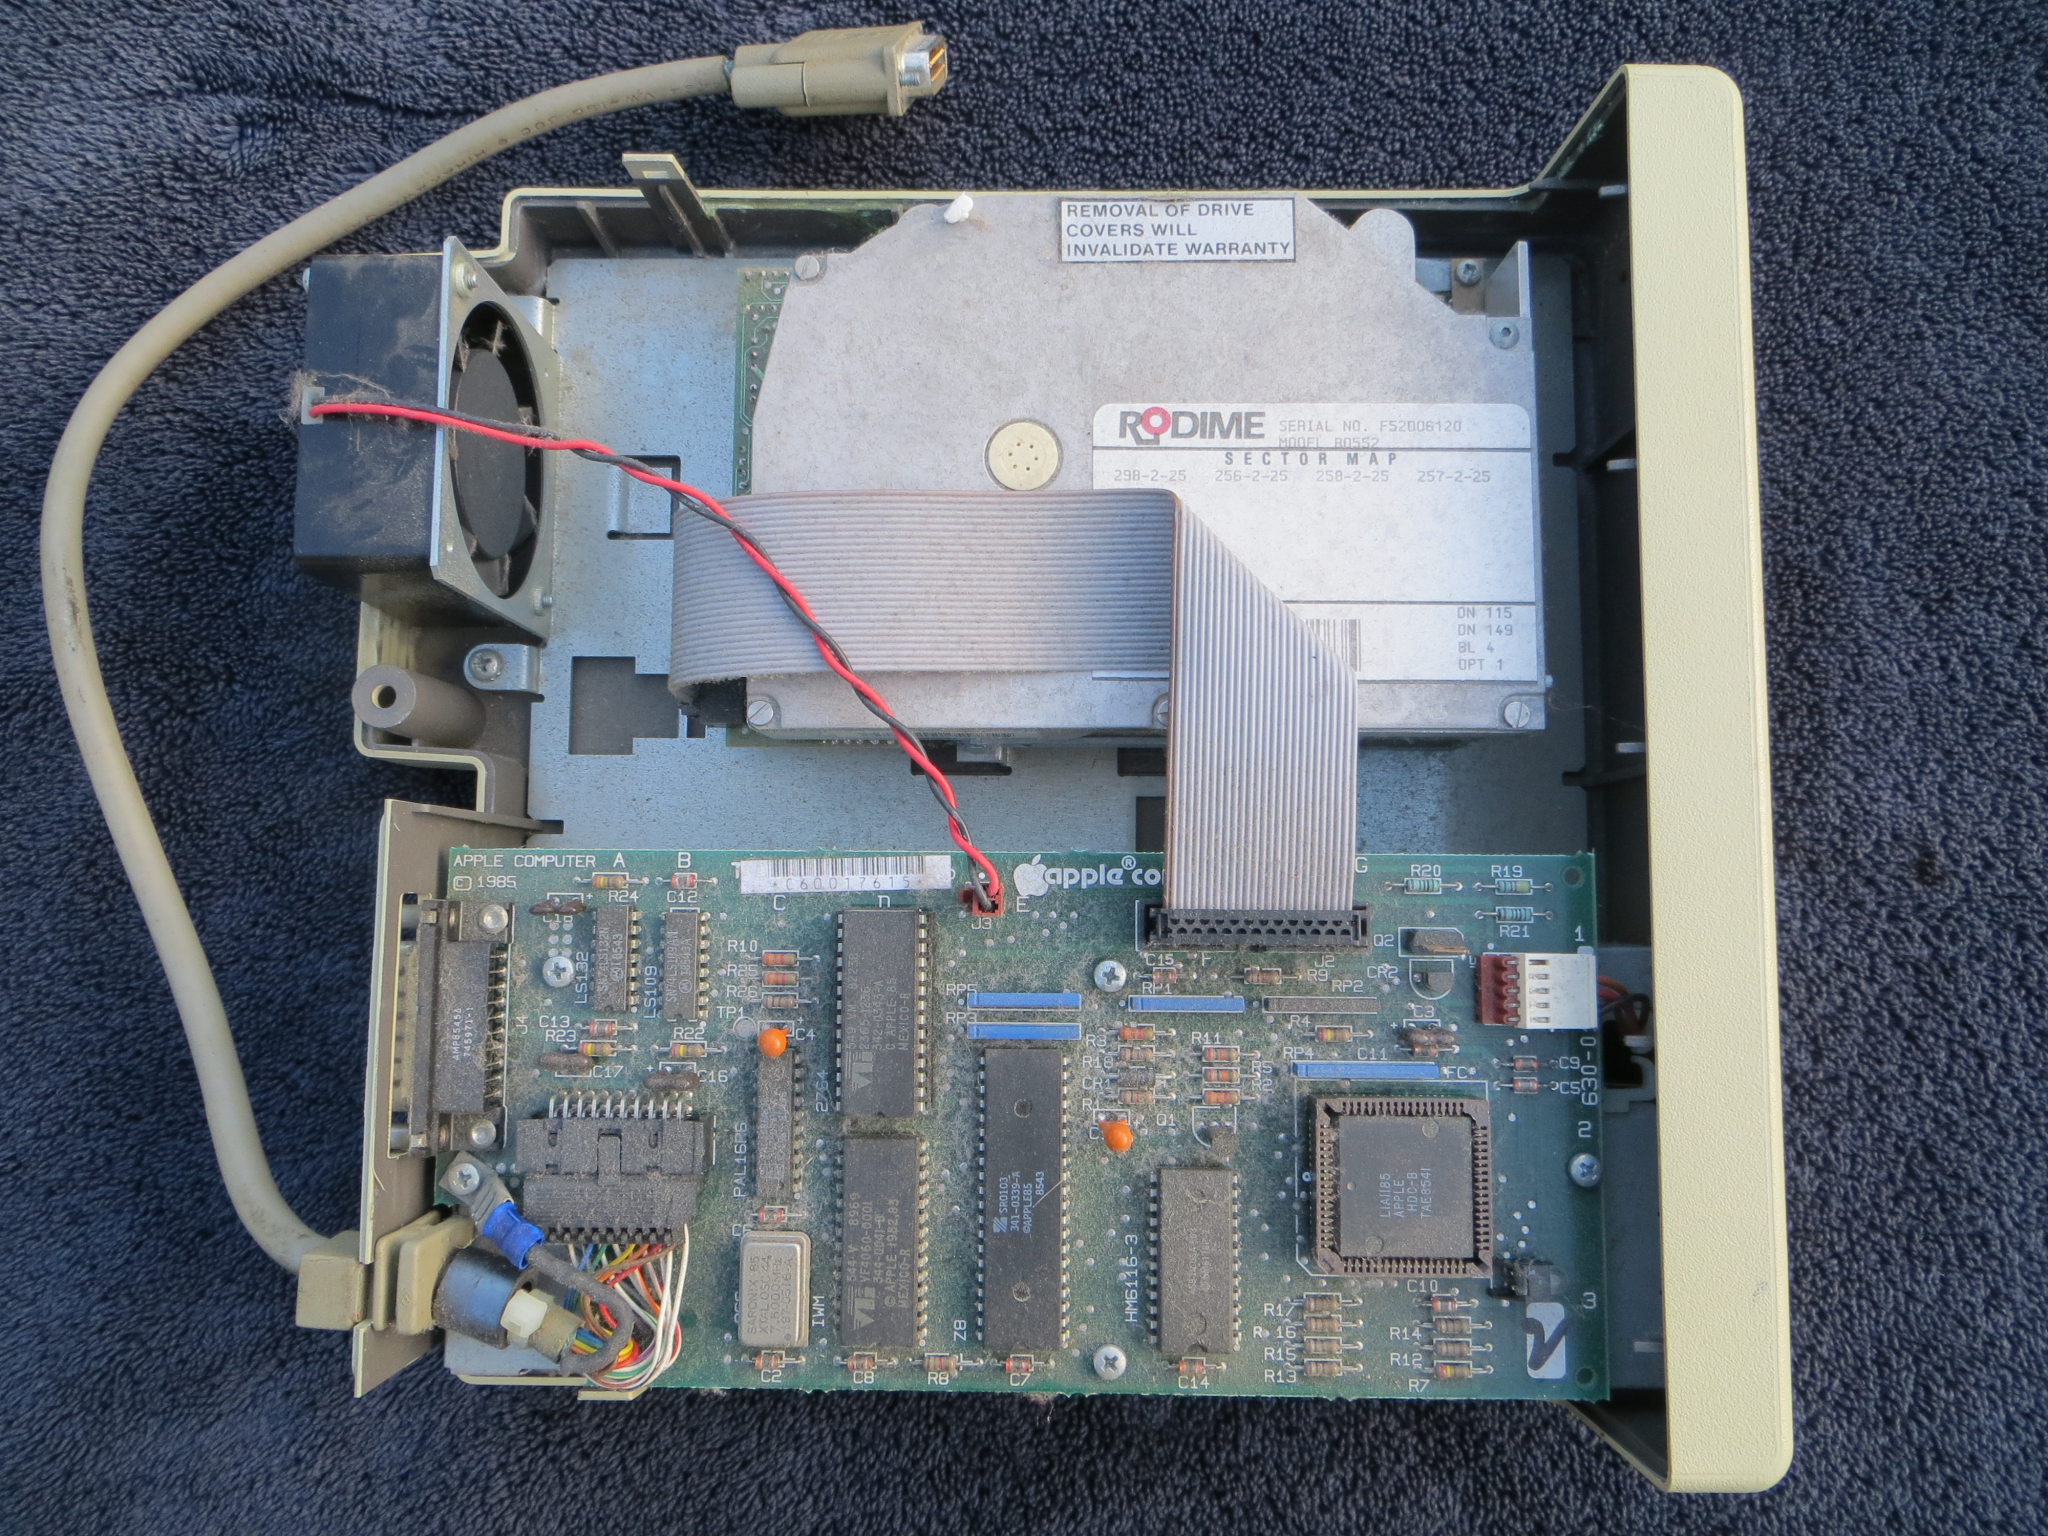 Note the dust |
 Power supply under main board |
Since the SE/30 doesn't have some vital code for the HD20 in ROM, it does not support the HD20 without an aftermarket modified ROM. Interestingly, someone from Apple Engineering made an "INIT Utility" which is probably a modified version of the HD20 INIT to allow read-only access to the HD20. A thorough search of Apple developer CDs, AppleLink CDs (AppleLink was one of Apple's internal software and information repositories), tech support CDs and so forth failed to produce any such example. Fortunately, superpete on 68kMLA indicated it can be found on a Developer Series CD (Volume V, October 1990, Night of the Living Disc), which is true. It's a curious historical artifact and seems to be most functional with System 6.0.3: although, the description of what this HD20 INIT does versus the one described in the TA article is different, so this may not be the same thing. Author's test was not successful, with the HD20 coming up asking to be initialized, which would be a spicy affair to do on a SE/30. | 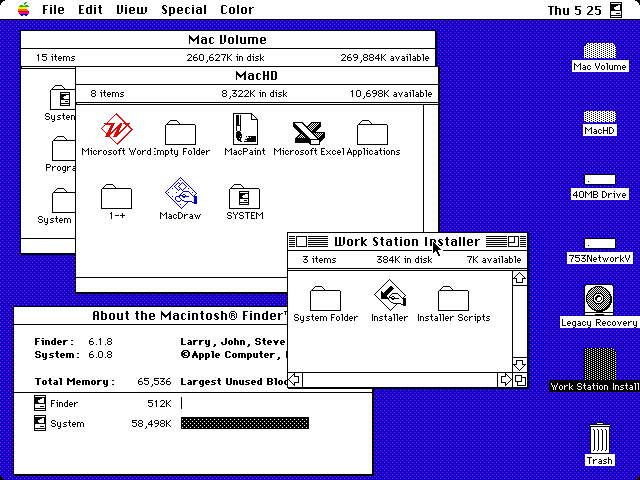 IIci with HD20 connected |
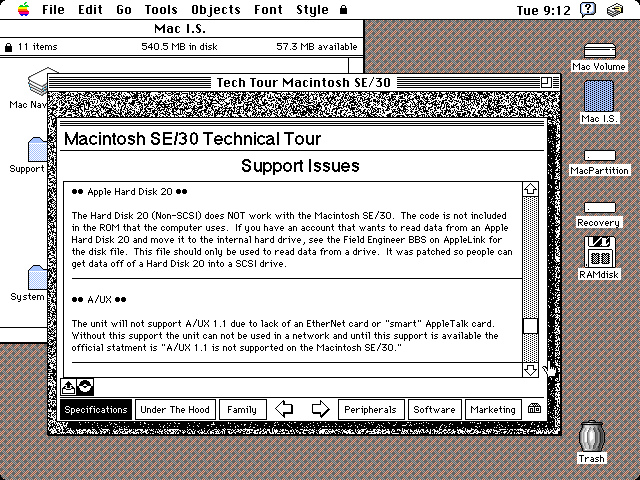
However other users have indicated success with this experimental INIT Utility. As this HD20 was using a System 6.0.4 build, which Apple recommended against, it could be blamed on that, but as it was a loaner unit, further tinkering was out of the question. In any case Apple was not really motivated to continue supporting the HD20 once the Plus and SE came out. Indeed, there's not many TIL articles about it either, and nothing on the Legacy Recovery CD for it. Diskettes for dealing with it appear to be limited to System 2.1/Finder 5.0, followed by System 3.2/Finder 5.3. Only the earlier one has a diagnostic utility, and HDBackup doesn't come on any of those disks, but lingered around other random places. With the Macintosh IIci being one of the last ones to officially support the HD20, Apple was more than happy to move on from it by 1989 or 1990. A few interesting TIL articles follow below. |  HD20 diagnostic program (512Ke) |
- TA33006: Hard Disk 20: Boot From HD20 Locks Up HD20 and Macintosh
- TA36961: HD-20: Erasing Information to Government Specs (for hidden features)
- TA38852: Hard Disk 20: Hard Drive Diagnostic 4.0 Problem/Cure
- TA40374: System 6.0.3: Incompatible with Macintosh 512Ke and HD20
- TA39231: Apple HD-20: How To Convert It Into A SCSI Device
Check out this page more on that "HD20 SCSI adapter"; that would be a rare article indeed. These days, the FloppyEMU can emulate the HD20, and makes for a more sensible gadget to get more value out of a 512K or 512Ke. In addition, because it can load drive images stored on an SD card, should the System nuke the HD20 volume, it's a few simple steps to restore it from a backup, whereas on the real machine, it's a much more involved procedure. In the manual for the HD20, it describes the set up for two stacked HD20s, that would be quite the sight to see in 1986, and would certainly not last very long in the new SCSI era. SCSI upgrade kits for 512Ke machines were not common, but they weren't rare either -- well, they are now. But should one be in good working order, it does make for a novel toy, as would any of the serial port hard disks that came out right before this thing did. Very few of those survive today and were definitely slower, although these days, more interesting with weird MFM hard drives and such.
More floppy technical info
The last topic to touch on is floppy disk and drive alignment. This is a relatively precise science, and in the old days we'd just chuck them in a box or toss them in a bin and replace it with a working example. Except as time goes on, there's only going to be fewer working drives, and considering their age, eventually they will need an alignment job. The basic concept is simple enough, but floppy alignment disks haven't been produced in at least a decade, and they don't pop up at auction places like eBay very often. These are special disks that have intentionally misaligned tracks and other specific tracks (like a series of digital "1") to facilitate testing, usually with an oscilloscope (in those days, it was primarily all analog scopes, which process and render waveforms differently than today's scopes do). The other issue is the alignment disks are not standard floppy disks and cannot be duplicated, although technically the digital ones can be, but they are produced on a calibrated machine that can produce disks on a higher quality level than a typical floppy drive can, and so there's no guarantee the copy will be effective.
Analog alignment disks are custom disks made with track patterns designed for use with an oscilloscope, and have specific patterns to help facilitate that. Digital alignment disks are just very precisely aligned normal disks to use with a program like Accurite's Drive Probe or Drive Probe Extended software, with features specifically designed to test things like azimuth, eccentricity, alignment of course and skew. Oh, and all the software was MS-DOS based software, because that was the most common platform back then, unless it was something for the CP/M, Commodore 64 or the like. In the latter case since making BASIC programs was normal affair, a user could just make a program that continuously reads a specific track, with the drive open on a desk and adjusting the read/write head position until it reads good. One alternative is to use a known-good disk made from a known-good drive which doesn't have issues producing problem disks that other computers can't read as a sample disk.
Macintosh drives natively use GCR and constant linear velocity motor controllers, so this complicates affairs because the drive speed will vary between 394 to 590 rpm. But that's only for 400KiB and 800KiB disks, not 1.44MB disks which use a constant 300 rpm with MFM just like PC drives do. As long as specific tracks are used, this shouldn't be a problem as the drive specification provides the numbers we need to align the drive. It's worth pointing out that all the floppy alignment disks that were available were made by Dysan, AlignIt, Accurite or a few others were only targeted to 1.44MB 3.5" drives, in addition to being expensive. Any disks still found around will likely be over 10 years old, if not over 20 years old, and are usually 5.25" 360KiB or 720KiB diskettes because that was a common drive and also probably the more troublesome.
Accurite specified a cost of 65$ US for the one digital 3.5" 1.44MB alignment diskette, the same cost for their 360KiB, 720KiB and 1.2MiB 5.25" disks. The 8" single density, 8" double density, and 8" double density, double sided were 150$ each, but their site hasn't been updated since 2009. Their Certifier Reference Diskette were supposed to be high precision calibration disks for calibrating disk drive testing or production equipment, and cost 250$ US each, up to 500$ for the 8" diskettes. Analog alignment disks cost 65$ with the exception of the 720rpm disk (95$), which is interesting because according to Wikipedia, nobody used a RPM that high.
Floppy drive ribbon cables are not the most ideal way of cable design for sensitive data, and they can age over time. They worked "good enough" and were cheap, and that's all that was important. The ideal way is a shielded twisted-pair cable with dedicated shield ground and a ferrite bead, like what is used on the external floppy drive connections, so a bad ribbon cable can be a problem point. Dying floppy controller chips, dirty read heads, misaligned heads caused by clumsy fingers, sketchy traces on motherboards, weak power supplies, overloaded power supplies, improper voltage levels from a power supply, accelerators or other overclocking hardware all can contribute to less than ideal floppy drive performance. After all this talk, it's still doable though. Comb through the hyperlinks below according to your fancy. The last one shows some of the technical particulars of an alignment diskette, and how much precision is actually involved. Most of it relates to 5.25" disks but they seem interesting enough to include here, and most of the concepts are the same.
- Aligning floppy disk read heads
- Floppy Disk Primer
- Zero track sensor fix
- 68kMLA - Floppy disk calibration
- Dysan 350A 3.5" Alignment Instructions
- Dysan 224A 5.25" Alignment Instructions
- Dymek Analog Alignment Disk
- 3M 5.25" and 8" Reference Manual
- Dysan floppy drive calibration and testing device
- Dysan 224/2A Engineering document
Some additional information can be found here, which includes technical matters about the 800KiB drive and other things such as the Integrated Sander Machine (ISM, it was combined with the Integrated Wozniak Machine as a SWIM) which did all the MFM stuff. Based on reading through the 800KiB engineering reference specification document, preventative maintenance was not necessary, because by the the time it wore out it would be considered an end of life product anyways, and nothing was found about disk drive alignment other than specifications, not procedures. Probably the earliest documentation of alignment a user could do was in Larry Pina's book Dead Mac Scrolls, page 274. Or, for program-wise, there is SonyTest on Macintosh Garden, but it bombs on a SE/30 with System 6 and MultiFinder off. It probably only works with a 128K and 400KiB drives as it's just too old, using pre-release System versions dated for late 1983.
Dave Dunfield's ImageDisk program, specifically designed for MS-DOS and PC compatibles, has a neat feature to help align or test disk drives. It also has a primitive feature to test RPM. ImageDisk won't run on a DOS Compatible system, and simply locks up, probably because it can't work with the floppy controller and/or the bridge interface, but it's worth mentioning. Unfortunately, outside of stuff like MacTest Pro, nothing on a Mac system is really even close to what is available, or was available for the PC world. About MacTest Pro, it takes a disk, formats it, verifies the format, then does a seek test. Good for a basic evaluation, but useless for diagnostic or calibration like what we're talking about here. |
 IMD help screen (Q610) |
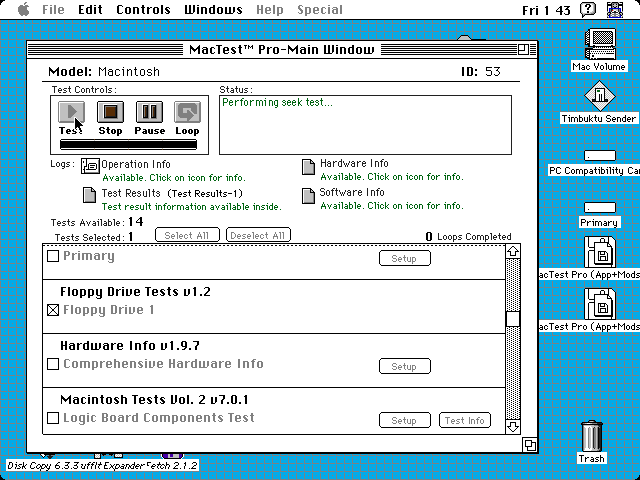
All 3.5" floppy disks are soft-sector disks. To understand this concept, we first must understand a hard-sectored diskette. These are punched with holes in the disk medium from the factory and are designed to allow the machine to know the start of a new sector, with the disk controller doing it's own job of finding the correct track. Usually, hard-sectored 5.25" disks had 10 sector holes punched out near the center spindle hole, with an extra hole as the index hole. As technology and manufacturing quality improved, the holes became unnecessary as disk drives could read sync and track/sector ID markers more accurately which made the index hole and sector holes redundant. The 3M 5.25" reference manual shows a image or two of what a hard sectored disk would look like. Soft-sectored 5.25" and 8" floppies existed too.
Floppy disk repair programs are limited. One of the few was probably Floppy Fixer (BMUG PD-ROM V2 1990), it is very clearly designed in the era of the Macintosh Plus. Like Copy II Mac it does not support high-density disks, only 400KiB MFS disks and 800KiB disks. However should the affected disk fit in that category, those two programs can do do sector-level extraction and correction, with Copy II Mac being probably the best suited and best documented. Sedit, a SCSI block-level utility similar to Fedit, was designed for hard disks.
Classic Mac OS
Disk Copy 4.2
Use Disk Copy 4.2 to write disk images from or to a disk or to duplicate a disk. It only supports Disk Copy 4.2 disk images and is the only commonly distributed disk handler that will work under System 6. It cannot mount disk images to the desktop. To duplicate a floppy, insert the master disk, click "Read Master Floppy" and allow it to copy the disk image to memory. The master disk will then eject. Then click "Make A Copy", and then insert the target disk. To save the loaded disk image to a file, head to the File menu and select "Save Disk image...". To write a disk image to a floppy disk, select "Load Image File..." and navigate to the directory where it is located, and open it. It will then prompt for a target floppy disk. |
 Disk Copy 4.2 in use |
For a lot of disk work with DC 4.2, you may want to edit out the beep sound in ResEdit or replace it with a sound resource with dead noise. Whoever put that in...needs treatment. It's also in DC 6.3.3, and it is made worse by the CPU interrupt while it plays the beeps.
Both Disk Copy 4.2 and 6.3.3 can be found around the web, or from this semi-official source here. DART 1.5.3 can also run under System 6, and it can open DC 4.2 disk images. DART bombs with error 12 under System 3.3 in Mini vMac, but opens fine in System 4.1.
Disk Copy 4.2 cannot mount images. Instead, use MountImage 1.1b3, which seems to be the most reliable, for mounting Disk Copy 4.2 images in System 6. MountImage will not mount NDIF images, such as ones made from Disk Copy 6.1 and above. There's other "versions", such as Disk Copy 5.0 and some user hacked variations, but they don't really offer anything particularly remarkable or unusual that the common man can use.
Disk Copy 6.3.3
Use Disk Copy 6.3.3 to mount floppy disks to the desktop, to create disk images, duplicate disks, convert certain types of disk images, verify disks or execute disk scripts. Certain scripts used to automate or accelerate the floppy creation process of something like the 7.5.3 install disks. DC 6.3.3 only works with System 7 or higher. Only machines with a 68020 or greater can convert or create DC 6.3.3 format compressed images: a IIci took about seven minutes to convert a read-write disk image to a compressed version.
Warning: Only Disk Copy 6.1.2 or greater can properly decompress and write Read-Only Compressed disk images. No other program can work with them, and avoid using them whenever possible. Use an emulator or some other Mac to convert them into Read-Only or Disk Copy 4.2 format.
This program should be able to handle most common disk images, but it may not handle all as there are at about a dozen different formats (.dsk, .ima, .img, ImageMaster, the lot). Try using ShrinkWrap as it can handle other types. It doesn't take a good liking to MFS 400KiB disk images, but it will mount them if the file system supports them. While DC 6.3.3 can image hard drives and other volumes, it can't write them back out again.
Disk Copy 6.3.3 will not enable the "Make A Floppy" (write disk image out to disk) selection if your machine did not come with a built-in floppy drive (i.e. iBook, iMac): use Disk Copy 6.4 or 6.5b13, Disk Copy 4.2, or ShrinkWrap. The latter two can't write NDIF images. It is possible to write disks to an image file, however. DC 4.2 will not start up unless a floppy drive is present or plugged in.
To create a self-mounting image (.smi), AppleScript must be installed, plus Mac OS 8.1 or later. Download the Disk Copy 6.3 Scripts, like from this place. This permits any System 7.0.1 or higher Mac to mount these to the desktop without requiring Disk Copy to mount them. (Disk Copy 6.4 and 6.5b13 can also use these scripts.) To use them, create a folder named Scripts in the same folder as Disk Copy 6.3.3+ and copy the AppleScript files into that folder. Then when the application is opened, there will be a new menu named Scripts which can then perform the self-mounting image feature, along with a segment option and a widget to decide what to do when a floppy is inserted. The self-mounting image script merely converts a standard NDIF .img disk image into a self-mounting variant, rather than performing a standard imaging operation of a real floppy disk, CD or disk volume. These tools can also work under the Classic Emulation environment in OS X or within an emulator. |  Scripts menu (iMac G4, 9.2.2) |
In case the type and creator information is lost for a segmented image, the first one has a type of rohd and a creator of ddsk; the remaining parts have a type of dseg with the same creator code. Each has a segment number while also indicating the total parts (like Easy Grade Pro CD.img 3of5). Shortcuts: Hold down the Command key while dragging a disk image, or multiple disk images, to start the Convert process; hold down the Option/alt key whilst dragging and dropping to initiate a Make A Floppy operation.
Other utilities
DART 1.5.3 is the choice of tool for Lisa 3.5" floppies, but not 5.25" Twiggy disks, nor the 128K Twiggy Mac format, and was originally an internal Apple disk utility application. Because the disk images are specific to this application and are compressed, the images will most likely not work correctly with $ dd in OS X. Its image type is natively supported by Disk Copy 6.1 and above. Some users have reported that this utility works well with 400KiB MFS disks. It also runs under System 6 systems.
Other programs include Disk Dup+ (not in common use) and ShrinkWrap 2.1. The latter allows batch disk imaging, batch disk image writing, and other useful features like creating MS-DOS or ProDOS images. Such features require PC Exchange 2.0 which comes with a normal install of 7.5.3. All of the above programs are fairly simple to use and thus won't get much mention here. Do be advised that ShrinkWrap won't always add the checksum data to the file -- run a Verify and make sure the computed result in the log matches the one in the file, if not present, just run a Convert operation on the original. As with Disk Copy 4.2, it will work with USB floppy drives but they must be plugged in and ready before launching the application. It also has an option for compression, enabled in the Preferences window. | 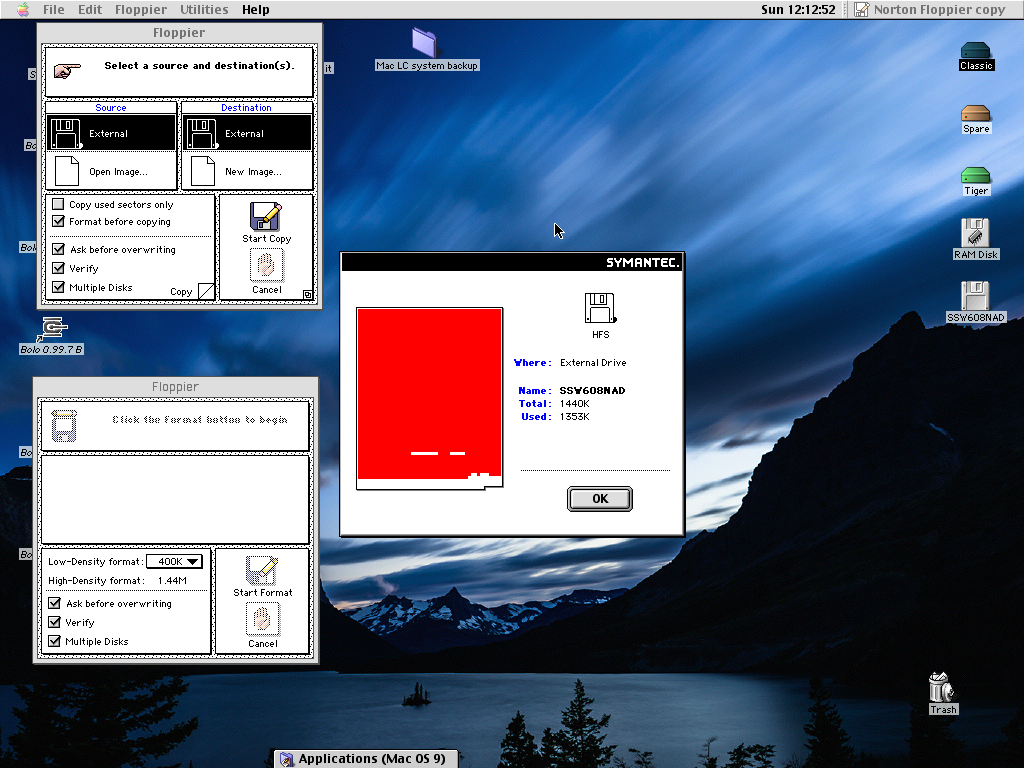 Norton Floppier (OS 9.2.2) |
For archival purposes, the best method is to image the disk with DC 4.2, verify it, then verify it in the Finder by mounting it with DC 6.3.3, then BinHex it. A second copy made with DC 6.3.3 and also verified twice and BinHexed is a good idea as well; but only use DC 4.2 or DART 1.5.3 for 400KiB and 800KiB disks.
Mac OS X
To write a disk image to a floppy, or any other volume/partition you can use the dd command in Terminal. 400KiB and 800KiB disks are not supported with dd. Open Terminal under Utilities folder, if in Tiger or higher just press Command + space bar and type Terminal, hit the down arrow and press Enter. Make sure the USB floppy disk drive is present, plugged in and has a good disk inside it. Caution: The dd command can damage or erase data if used improperly or in error. As it is a low-level binary copying method, any data overwritten cannot be recovered. (They have a nickname for it: the Data Destroyer) | 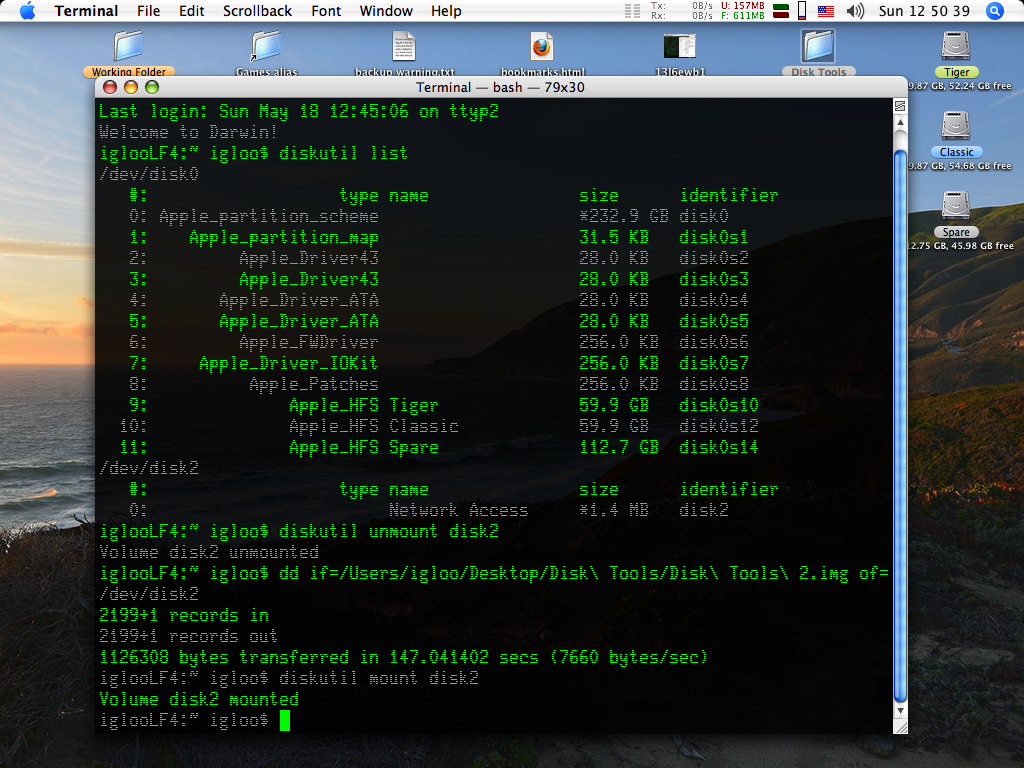 Entire process in Terminal (10.4) |
The dd command works like this when writing a Disk Copy 4.2 HFS disk image to a floppy for our purposes here in this example below. Although dd can be used many other ways:
For a NDIF disk image, such as images produced by Disk Copy 6.3.3 (except the Read-only Compressed format), Disk Copy OS X, or WinImage, use the following command somewhat like the following:
Note how the block size and skip commands are omitted, and observe the use of the escape character \ for the space character in the file name; or use single quotes ' ' or double quotes " " around the file name, like this:
Using quotes around the whole path is the best way, although single quotes are preferable, because there is a difference between single and double quotes. This is why using strange characters and spaces in filenames is frowned upon in many circles, because they can create havoc, especially with Mac Roman characters on non-Mac systems. If the skip option was used on an NDIF type image, the resulting disk would be unreadable.
Some basic level descriptions of the commands is here below:
- sudo grants temporary root-user privileges. Administrator password required. This command may or not be needed depending on the operating system and sometimes the source file location. Example: sudo dd if=/Users/icecube/NetworkAccess.img of=/dev/disk2
- dd interpreted as data description
- if stands for input file, path or directory
- of stands for output file, path or directory
- bs meaning block size. This basically says how big the "chunks" are supposed to be. Because it is assigned a value of 84, one block is 84 bytes
- skip omits the first 84 bytes of data such as the data checksum, volume information, et cetera. DC 4.2 images need this command because the DC 4.2 header info isn't needed and will cause an unexpected EOF (End Of File, basically the diskette fills up before the copying process finishes). skip being assigned a value of 1 means it skips the first block. Because each block was assigned a value of 84 bytes, it ignores the first 84 bytes of the file, as the image data starts at offset 0x54 hexadecimal, which is 84 decimal
First make sure the disk is unlocked, otherwise it will kick a "Permission denied" error, then type...
...to show a list of all volumes and partitions on the system. In the image shown above, the floppy disk has an identifier of disk2 but the path is going to be /dev/disk2 for the entire disk. Observe how the /dev/disk0 on the numbered column for how a partitioned hard drive works. If it doesn't show up, that is because a diskette has to be inserted into it first before the operating system can recognize it and assign it a drive path.
We now must unmount the disk, since disk images cannot be written onto disks that are mounted. To do this, type...
...replacing the _ mark with the appropriate disk identifier. Next, locate the disk image in the Finder. The easiest way to copy the file path of the disk image is to select the file in Finder and drag & drop it onto the Terminal window, which is what we shall do. Type the following...
...and then drag & drop the file onto the Terminal window, which inserts its path for you. Then continue with...
...making sure to place the proper disk identifier in place of the blank underscore. Double check that the proper path is referenced otherwise irreparable damage can result: accidentally writing the disk image over a hard drive or getting the if= and of= paths backwards is easy to do. Add bs=84 skip=1 for Disk Copy 4.2 images, then press Enter. For first-timers, verify that the command is analogous to the examples shown at the beginning of this section. The system will begin copying onto the disk. To halt the process, use the Control + C key sequence. Once it has finished its work, it can be freely ejected from the drive, or it can be remounted with the following command...
And that is all there is to it. To image a disk in Terminal, which produces a NDIF format image (compatible with DC 6.3.3, but not DC 4.2), use something similar to the next line below:
If you use this feature in this fashion, change the type and creator of the file to dimg and ddsk, respectively, to use it with Disk Copy 6.3.3+.
Special OS X features
In Mac OS X 10.1 and 10.2, the Advanced User Mode can be enabled to obtain access to additional options with the Disk Copy application in the Utilities folder. With Terminal, type: defaults write com.apple.diskcopy expert-mode 1
|
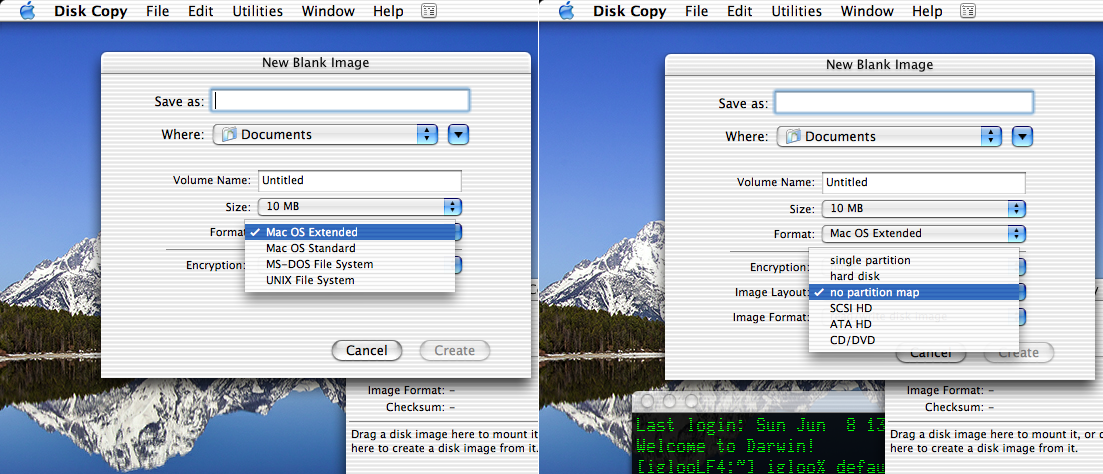 Disk Copy OS X Expert mode before, and after (10.2 Jaguar) |
To reverse the feature, change the 1 to a 0 (zero). There's also some useful tidbits in the Preferences window, although it is different with 10.2 versus 10.4, such as the ability to format as FAT16 within 10.4. (The image to the right doesn't show this, but it also adds an "HFS Extended, Journaled" formatting option) For 10.4 on upwards with DiskUtility, try this: defaults write com.apple.DiskUtility advanced-image-options 1
Additionally, the debug mode: |
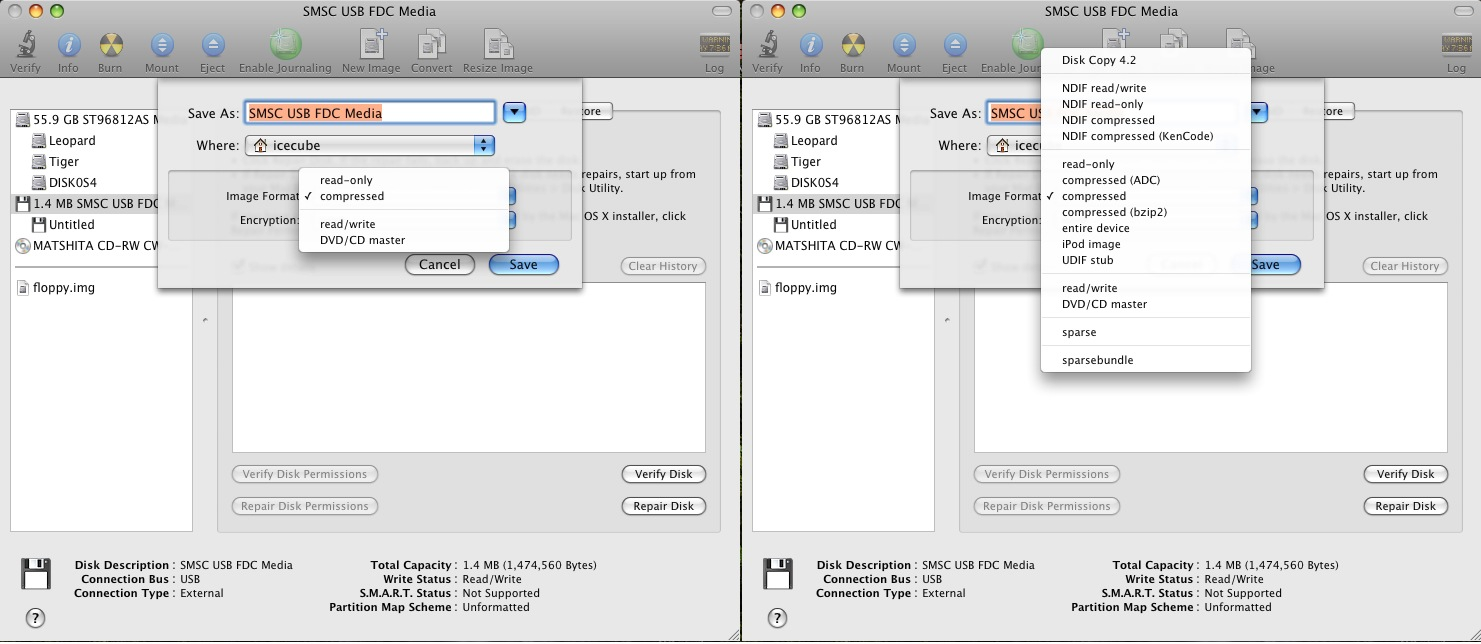 Advanced Image Options (10.5) before, and after |
To create a blank disk image, open Terminal and try something similar to the line below. blank.img may be altered to suit the desired filename:
Next, open Disk Utility. The blank image should be in the Home directory ~/ -- simply drag the disk image into the left pane where all the logical disks or disk images are shown. You can also choose Open Disk Image... from the File menu. Then double click the new disk image - a mounting error will be shown. Then click the Erase tab and either format it as Mac OS Extended (HFS+), Mac OS Standard (HFS) or FAT12 (MS-DOS). The resulting product will be mounted on the desktop and is ready to be used.
A slightly different command is below:
This creates a 10MiB size file, where 10 is how many blocks to copy and 1048576 means that the block size is in 1MiB chunks. If you want to use MB instead of MiB, then set the block size to 1000000. Then drag the image to Mini vMac, which can then format it as Mac OS Standard, if need be. The description here is a bit confusing. When count=14336, the system deals with this in 512KiB blocks * 4, or 2KiB. So it becomes 14336 / 2048 = 7MiB. To do it "his way", multiply 2048 by how many mebibytes are desired, which the result then goes into the count= entry. Example: 2048 * 18 = 36864, so then the final answer becomes count=36864. One other thing: Sometimes devices like micro-SD cards, hard drives or other kinds of volumes need to be have the block size set to 1 mebibyte blocks (1M, 1024 * 1024 bytes) when writing the image out to the physical volume, else the end result is invalid. It may be slower but it works. (Example: dd if=~/Desktop/NookFactory.img of=/dev/disk3 bs=1M) Set the block size to 1M as well when you're imaging the media too.
To image a volume in Disk Utility, click the volume on the left panel with the volumes listed. Then click the New Image button near the toolbar.
Preliminary checks with the DC 4.2 disk imaging option in 10.5 Leopard were not successful. Don't forget the man page for hdiutil via Terminal: type man hdiutil to view it. Preliminary testing to convert NDIF to DC 4.2 was not successful with hdiutil. There's also a way to create OS 9 type .img files in OS X using the Terminal.
Linux
It is impossible to cover all Linux distros in a single section, so Ubuntu will be covered since that is what the author used. Note that this is for Ubuntu 9.10, which is an unsupported and outdated distro. Our test machine has an internal floppy drive but it is not accessible in Ubuntu for some reason, so an external USB drive was used instead. 10.04LTS seemed to have hiccups with the external floppy drive. Technical "Expert Grade" users may be able to identify the culprit(s).
Head to the System menu, then Administration, and select Disk Utility. Select the floppy drive mounted from the left pane (as in the image, click the SSW6NAD mounted volume, not the drive itself named "Floppy Drive"). Unmount it by selecting the unmount icon on the title bar. Click "Floppy Drive" and note the device path. Or, type sudo fdisk -l into a Terminal window to get a listing of all the device paths on the system. Then open Terminal under the Applications/Accessories menu. The dd command works pretty much the same way as OS X, in principle. If the root user is not the active user, then "Permission Denied" will be returned unless the sudo command is used. In the image shown, the first attempt failed from a bad disk. This is why floppy disks were both numerous and cheap in the day. Eject the disk from the title bar button in Disk Utility after the image process has finished, and the task is then complete. Example code for DC 4.2 images: |
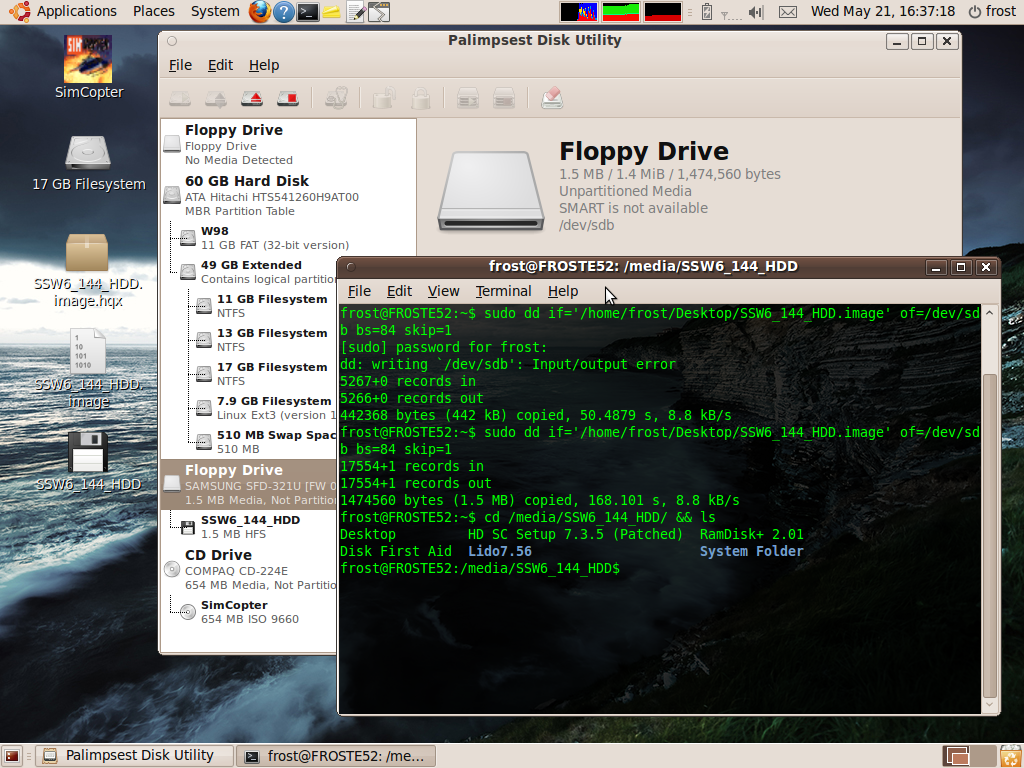 Entire process view in Ubuntu |
For a NDIF disk image, use something like the following:
It is possible to do it all in Terminal, using something like the process below. The df -h line is an alternate for sudo fdisk -l:
In some cases, the situation may be such that no networking drivers or data can be transferred because of a chicken & egg problem. On possible route involves making disk images inside an emulator and then copying out the product, then using dd or other tools to write the disk image out.
Microsoft Windows
Windows 95, 98, 2K, ME and XP can use RawWrite (alternate source); it is incompatible with Vista and above. HFV Explorer is yet another option. OmniFlop can be used as well, which requires a registration process for some types. Installing the included floppy driver can enable support for a large number of (mostly obscure) disk formats which requires an internal floppy drive to work. USB FDDs have their own controller which can't be overridden. WinImage has obtained good reports in the the past, but it is shareware and $30 for the full version. Neither OmniFlop or RawWrite support Disk Copy 4.2 disk images, only NDIF type images (such as images created by $ dd, Disk Copy 6.3.3, or Disk Utility) of the 1.44MB variety. However, in the event of a chicken & egg problem, an emulator like Basilisk II could step in and "translate" the DC 4.2 images into NDIF via DC 6.3.3 for 1.44MB images. |
 Utilities for Windows (XP shown) |
In regards to WinImage, imaging a disk with the output format of .IMA was tested in OS X's dd command as if it were a NDIF image, and the results appeared to be successful. It will not work with Disk Copy 4.2 disk images either, and testing a NDIF .img image produced on a Mac was not successful as it couldn't be read. Unless you need Vista or Windows 7 support or a feature which it provides, it is probably better to use RawWrite or OmniFlop. HFV Explorer is a little interesting, because it images a disk, then process the disk inside the file browser, then the result is imaged back out to the floppy; this has to do with the fact that Windows cannot read HFS or HFS+ volumes. Because the crop of emulators like Basilisk II can also virtually "edit" a disk image before it is written (build 142 can read Mac floppies, the current release is not so), plus the output from an emulator can be directly written with Rawrite, the emulator route is probably better and safer than HFV Explorer.
Otherwise if the only platform is a Windows 7 PC for instance, then the best option if you can't get any other option to work would be to build a Linux distro that boots off a USB flash drive. In this manner, HFS support is available to a degree, possibly more with hfsutils and hfsprogs, dd and for even more power, install and build Netatalk.
HFS Explorer runs in a Java emulation environment and can read .dsk, .img, and .dmg disk images or volumes (like an external HFS+ formatted hard drive or CompactFlash card), but not floppy drives or DC 4.2 images. It can be useful for certain circumstances.
Another handy widget for mostly Apple II disks is CiderPress, and the sequel, CiderPress II.
Data Encoding Techniques
In the old days with analog modems acting as the principle computer transmission and communication device, file encoding was essential to protect file integrity over the phone lines. Large industries and mainframes had either more lines or something different. Today, such steps are usually transparent or handled in a different manner, so manual encoding and decoding is not as prevalent as it used to be. Still, there is a place for it in a variety of circumstances, and is a good idea when archiving old Macintosh programs and software on modern media.
Although Mac OS X can sometimes use multi-forked files, Apple has been encouraging a move away from this type of file configuration. Basically, pre-Mac OS X files typically have two forks and some file metadata, depending on the file type and design. A Mac OS Finder 5.5 file for instance, has a resource fork which stores some data, a data fork which stores additional data, and a type of FNDR and creator of MACS, along with creation/modification dates, Finder icon data and so on. Icons can sometimes be restored by rebuilding the desktop or reassigned with the Get Info window in System 7 and above.
Now the Windows platform along with other OSes such as *nix, Amiga OS, et cetera do not use or recognize Macintosh resource forks and can (and most often do) strip away the resource fork leaving nothing but a data fork. The result is a corrupted husk of a file -- which even compressing in .zip will not help because .zip doesn't support Macintosh file attributes like these. Assuming the Mac file is compressed into a .sit file, the very instant the file is decompressed it is usually corrupted by the host file system. Encoding is used to inhibit this behavior while transmitting a file until it reaches its destination whereby it can then be "safe" on the Mac system. Certain operating systems, like Windows Server 2000 with the Services for Macintosh feature, make an effort to mitigate this problem, as does Netatalk for Linux machines.
MacBinary II came out in 1987 and was one of the two major encoding types for Mac OS platforms. MacBinary III was established around the time of Mac OS 8, but it wasn't as popular and most people didn't use it; and most people also never used MacBinary I or II+. BinHex 4.0 is the other main type. MacBinary II produces a binary file and BinHex 4.0 is ASCII text with some shuffling to enable compatibility with email programs. Encoding a file, opening it in a text editor, copying all the encoded text and placing it an email message body was not unusual back in the day. BinHex 5.0 is a completely different application than BinHex 4.0 -- and it's not worth the upgrade. In the former days, an interesting chicken & egg problem presented itself: BinHex 4.0 was distributed as a binhexed file itself -- so the solution to this was to download the MSBASIC (BINHEX4.BAS) or MacPascal (BINHEX4.PAS) source code and compile it manually (apparently there's also BINHEX4-SOURCE-ASSEMBLY.HQX).
BinHex originally came from the TRS-80 platform written in BASIC. The program was ported to the Macintosh and after a couple of releases (.hex and .hcx being the original extensions, .hqx for BinHex 4.0), the default pretty much became the BinHex 4.0 format. Because older Macs can open the program and is lightweight (about 8KiB on disk, wants 192KiB RAM max, will work under System 1.1, Finder 1.1g) and is fairly well supported on the other platforms, it is hereby recommended for these reasons over MacBinary. Furthermore, ASCII is less likely to be corrupted over binary transfer methods, although the risk of such an occurrence is rather low, at least these days. The Handbook of Data Compression (page 43; David Salomon et. al, Springer: 2010. ISBN-13 9781848829039) explains:
Both File Transfer Protocol (FTP) and serial comm methods like ZTerm over serial ports require this procedure. The various configuration for each will vary slightly, but both have the ability to send files via either Binary, or via ASCII (sometimes called "Text") transmission methods. Archiving files for future purposes or storage on "Mac-foreign" file system types like ext3 (Linux), NTFS (Windows NT series and Windows 2000+), ZFS, HPFS (OS/2) and the like should also use this kind of protection.
Before archiving or backing up "for the long term" make well sure that the file itself is valid and isn't corrupted.
Bottom line: BinHex and MacBinary protects the host or source file from corruption by reason of the loss of the resource fork or type/creator data. When a BinHex or MacBinary (or resource-fork protected archives like .SIT or Compact Pro archives) file is transmitted or received, the product may have to have its type and creator information updated to be read by the Mac. So the BinHex and MacBinary protocols are merely a wrapper for the source file so that it is not corrupted -- but you'll still need to change the BinHex or MacBinary file to enable it to be read by the client operating system, because without that information, it doesn't know what to do with a file with no descriptors, neither does it know how to process it.
BinHex or MacBinary encoding cannot be applied to a folder with a multitude of files -- instead, pack the contents into Stuffit or Compact Pro for a single archive, then encode the resulting archive. Let's take a look at some of the programs appropriate for various software platforms for these purposes.
Classic Mac OS
For all systems from System 0.97 (tested in Mini vMac) to 9.2.2, the BinHex 4.0 app works acceptably. It does not like input file names longer than 29 characters, is clearly not suited to System 7 environments and big displays, is not drag and drop enabled and is slower than other BinHex encoders and decoders like Stuffit Deluxe 5.5, so avoid it for later PPC G3 and G4 Macs. But it is a good program, does what it is supposed to do, and it works on a 128K. To use it, the file must have a type of TEXT and a creator that is compatible with it. Or, deselect the "TEXT Filter" option in the File menu to show all normal files, otherwise it won't list any files it can't process in the window. From there, if the file needs to be decoded, head to the File menu and choose "Upload -> Application"; alternatively to encode, choose "Application -> Upload".
The popular Compact Pro application has BinHex 4.0 encoding and decoding capabilities. Hold down the Option/alt key when selecting "Convert FROM BinHex4..." to see all files rather only showing TEXT type files. Stuffit Deluxe 4.0 runs under about 1536KiB RAM and thus should run on every Mac assuming sufficient memory with System 6 or higher. The 512K and 512Ke is unlikely to run it considering that DropStuff and Expander apps specify 512KiB in the Get Info window. It can also encode/decode BinHex files, along with other types like MacBinary, uuencode (Unix) and .zip, although not all .zip headers are supported because it is an older program that won't recognize newer header formats.
Stuffit Deluxe 5.5 says it wants a ludicrous 5750KiB of RAM and thus is only suitable for newer machines using Mac OS 8 and higher. But the Installer says it's for "a Macintosh with System 7.5.3 or greater and 15MB of free hard disk space", with Stuffit Expander and DropStuff being able to run in 7.1.1 or greater. While those are reasonable specifications, some mention should be made for 68000 processors like the SE or Plus, or the original Macintosh II or the LC with their 68020 CPUs, and all of which can run 7.5.3 but rather poorly to say the least. It's probably a safe bet to say that program wouldn't run very well on either of those scenarios.
For MacBinary II encoding, there is a MacBinary II+ app in circulation which requires System 7, as it is a drag and drop only program. It is slightly modified from the core MacBinary II principles and thus MacBinary II+ is the only app that can decode them, or perhaps a later version of Stuffit, but Stuffit Deluxe 4.0 decoded it successfully. Stuffit 1.5.1 can encode BinHex files as well, and decode, but the Unstuffit app cannot. The MacBinary 1.0.1 program works for MacBinary encoded files, and more closely adheres to the MacBinary II specification, but it requires a minimum of System 6 to operate.
Self-extracting archives pack a minimalist extraction program in the resource fork. Protecting the self-extracting archive with BinHex 4.0 or MacBinary encoding is essential to inhibit the loss of the resource fork, because once the resource fork is lost, the archive cannot be extracted. Conventional compressed archives do not need any such protection but it is still a good idea.
PackIt 1.0 can run under very early Mac OS systems and is a binary encoding/decoding application. It is ideal for early systems as it is lightweight (9KiB) and does the job. Mac OS X's Unarchiver can decode them but Stuffit cannot. Make sure the application is on both ends because they are not self-extracting. The documentation says it will work with the file as long as it has .pit extension. Tiny Transfer, a more modern program by David Cook, is probably also great for 128K and 512K computers because it has built-in XModem and BinHex capabilities, is lightweight on disk and requires no other programs or extensions.
If the file fails to be recognized, here is a short list of commonly used file type and creators, based on the output of the applications in question:
- BinHex 4.0: Type is TEXT; creator of BNHQ. Extension is .Hqx
- Compact Pro: Usually the standard archives end with the .cpt extension or .sea for self-extracting.
- Default archive: type of PACT and creator of CPCT
- Self-extracting archive: has a type of APPL and creator of EXTR
- BinHex 4.0: type of TEXT and creator of ttxt with an extension of .hqx
- Segments: All have a type of PACT and creator of CPCT with an extension of .#1 that increments to .#2, .#3, .#4 and so on. Self-extracting segments are the same except only the first one has a type of APPL and creator of EXTR, the rest are the usual PACT and CPCT affairs
- MacBinary II 1.0.1: type of TEXT and creator of GJBU; no file extension
- MacBinary II+: type of TEXT and creator of MB2P; file extension is .bin.bin
- PackIt 1.0: type of PIT (space after the T) and creator of PIT (also a space); file extension is .pit. It is a binary file
- Stuffit 1.5.1: Default archive: type of SIT! and creator of SIT!; file extension is .sit. For BinHex: type of TEXT and creator of BnHq; file extension is .hqx
- Stuffit Deluxe 4.0:
- Default Stuffit archive: type of SITD and creator of SIT!; file extension is .sit
- Self extracting archive: type of APPL and creator of aust; file extension is .sea. Only Stuffit archives can be made self-extracting
- Segments:
- First one: type of Seg1 and creator of SIT!; file extension is .1
- Second one: type of Seg2 and creator of SIT!; file extension is .2
- Third one: type of Seg3 and creator of SIT!; file extension is .3
- Thereafter: type of SegN and creator of SIT!; file extension is .# where # is the number of the segment (4, 5, 18, and so on)
Self-extracting segments. Only native Stuffit archives can be made self-extracting: - First one: type of APPL for the first part, and creator of AUs2; extension is .sea
- Second one: type of Seg2, and creator of AUs2; extension is .sea.2
- Third one: type of Seg3, and creator of AUs2; extension is .sea.3
- Thereafter: type of SegN, and creator of AUs2; extension is .sea.# where # is the number of the segment
- AppleSingle: type of BINA and creator of PCXT; file extension is .AS
- BinHex: type of TEXT and creator of BNHQ; file extension is .hqx
- MacBinary: type of TEXT and creator of MBin; file extension is .bin
- Tar Unix archives: type of ???? and creator of ????; file extension is .tar
- uuencode Unix text file: type of TEXT and creator of ttxt; file extension is .uu
- Zip: Cannot create Zip archives, and doesn't need type/creator data to unzip the files. Not all Zip headers supported
- Stuffit Deluxe 5.5:
- Default Stuffit archive: type of BINA and creator of SITx; file extension is .sit
- Self extracting archive: Same as Stuffit Deluxe 4.0
- Segments: As per Stuffit Deluxe 4.0
- AppleSingle: type of ApSi and creator of SITx; extension is .as
- BinHex: type of TEXT and creator of SITx; file extension of .hqx
- MacBinary: type of BINA and creator of SITx; file extension of .bin
- Tar Unix archives: type of TARF and creator of SITx; file extension is .tar
- uuencode Unix text file: type of TEXT and creator of SITx; file extension is .uu. These are binary to ASCII files similar to BinHex
- Zip: type of ZIP (space in there after the P) and creator of SITx; file extension is .zip
- Stuffit Deluxe 6.0:
- Default Stuffit archive: type of SIT5 and creator of SIT!; file extension is .sit
- Self extracting archive: Same as Stuffit Deluxe 4.0
- Windows self extracting archive: type of PCFA and creator of crsX; file extension is .exe
- Segments: As per Stuffit Deluxe 4.0
- AppleSingle: type of ApSi and creator of SITx; extension is .as
- ASCII: type of TEXT and creator of ttxt; extension is .ascii. Not the same thing as a BinHex or UUencode text file
- BinHex: type of TEXT and creator of SITx; file extension of .hqx
- BZip: type of Bzp2 and creator of SITx; extension is .bz
- GZip: type of Gzip and creator of SITx; extension is .gz
- LHA: type of LHA (space after the A) and creator of SITx; extension is .lha
- MacBinary: type of BINA and creator of SITx; file extension of .bin
- Tar Unix archives: type of TARF and creator of SITx; file extension is .tar
- Unix Compress: type of ZIVU and creator of SITx; file extension of .Z
- uuencode Unix text file: type of TEXT and creator of SITx; file extension is .uu. These are binary to ASCII files similar to BinHex
- Zip: Same as Stuffit Deluxe 5.5. Also like Stuffit 5.5, expect issues with the many different types of Zip files
In System 7, you can use Creator Changer: drag a whole bunch of files to change them all in batch mode, as long as you have the Macintosh Drag and Drop extension. Or can make pre-defined "types" that allow faster assignment. ResEdit uses the Get File/Folder Info from the File menu, or there are other similar programs to Creator Changer. Earlier systems like System 6 which cannot run those apps can use Finder Info 1.1.1, which will work all the way down to System 1.1, Finder 1.1g, plus there are early releases of ResEdit like version 1.0D7 which can run on a 512K, but it requires System 4.1 or higher. Finder Info 1.1.1 will not run on a 512K. DiskTop can change type/creator information by changing to Technical mode. The File Tools desk accessory takes up very little space and is probably ideal for the 512K/512Ke machines. |
 TCDB database (10.2 Jaguar) |
A dated and somewhat incomplete database within this software (best used with Mac OS 9 or early OS X like Jaguar with the supplied Panorama program). It works, but exporting the data is difficult and the .xlsx Excel document is sketchy because of Mac OS Roman characters. It is probably not worth the effort and has a number of glaring errors and omissions, but it's something. Check the Macintosh Garden for older versions and any updates.
Mac OS X
This appears to be a somewhat curious creation, it will work with PPC Classic OS and PPC OS X. It works okay under Rosetta OS X, although it can crash from time to time. The documentation explains how to use it, but basically the user drags a folder or file onto the application alias or icon in Finder. Mac OS X and Linux can run uuencode from the console but uuencode will not process resource forks properly. Mac OS X 10.5 thru 10.8 have BinHex and MacBinary utilities accessible from the command line as well (...they really should have been included with 10.1 on up...) with a simple usage of something like binhex encode launcher.sit. Stuffit Deluxe 8 or similar should run under OS X fine, may need a higher version for x86 Intel processors without Rosetta. Or just use the Stuffit Expander if decoding is all that is needed, but the DropStuff app can encode into BinHex and create self-extracting archives, if need be, but the archives won't work for older Mac Stuffit programs..
The popular multi-extractor application Unarchiver can decode BinHex encoded files. Support for MacBinary files is lacking.
Linux
For Linux, uudeview (xdeview has a X11 GUI thingy for uudeview) should work fine, like uudeview -i resedit213.hqx; or macutils for Debian based distros is another option (search for the man pages online, or better, this page). From a Debian command prompt in the Terminal, you can run sudo apt-get install uudeview xdeview to install uudeview and xdeview: simply type xdeview in the command line to start up the X11 app. Also there are emulators that are compatible with Linux, although you'll most likely have to compile the program from source code manually. Mini vMac should work fine; as most computers who run Linux can also run Windows natively, the Windows Mac emulators may offer more stability. Do be advised that uudeview cannot encode as BinHex, so something else will have to be used to encode, like an emulator. |
 uudeview and xdeview in operation |
megatron is a package that comes with a Netatalk 2.4 and earlier install. It's mostly for encoding or converting from the BinHex 4.0, AppleSingle or MacBinary into either AppleDouble or MacBinary. It can't encode a BinHex file like macutils can. AppleSingle and AppleDouble were ways of storing resource fork and file attributes on non-Mac file systems: for additional information, see this article. However it appears that Netatalk 3 removed megatron, it's difficult to say precisely which version but it's also not included in Netatalk 4.0.
There are earlier formats of AppleSingle and AppleDouble, which the previous KB article says is Appendix B of the A/UX Toolbox: Macintosh ROM Interface manual but it's actually in Chapter 6. A/UX 2.0 and A/UX 3.0 have those manuals but not A/UX 1.0, and there may be differences between the A/UX 2.0 and A/UX 3.0 implementations.
Microsoft Windows
For regular file encoding and decoding on a Windows platform specifically for Mac purposes, the most sane method is to use an emulator. Mini vMac, Basilisk II or SheepShaver are all suitable and should work without any significant issues. Furthermore, the emulator can be used for other purposes as well.
Otherwise, there are various applications for Windows that can encode and decode BinHex files, such as this port of uudeview from the UNIX world. Like Linux, it can't encode as BinHex though. Stuffit Expander can decode BinHex and should work with MacBinary files; word is that Stuffit Deluxe (according to this page) can encode and decode MacBinary along with BinHex, plus WinZip says it can decode BinHex. Generally speaking, an emulator is simply more convenient and won't corrupt any metadata or resource forks. Some caution is suggested with the Windows world on this subject because some programs could be less than savory...Anyways most of the software for this task is going to be somewhat dated because in modern times BinHex or MacBinary encoding isn't really needed to the same degree anymore as it once was.
Emergency Network Access Disks
The NAD is a bootable floppy disk that contains the essential elements to network via AFP or FTP services in case of hard drive or operating system failure. The real star of this show is System 6, because its compact footprint makes it just the perfect solution for bootable floppies. However this is not possible with all systems of this era. Technically, the System 6.0.8 System Startup disk already is a Network Access disk, as it has AppleShare 2.0 on it and can hookup to a LocalTalk server. However it doesn't support EtherTalk or have any other essentials like a screensaver, MacPPP, ZTerm, or the like. Certain Mac OS Install CDs such as the Mac OS 8 Install CD already have AppleShare on them and have bundled Ethernet drivers in the boot CD's System Folder.
Pre-System 6Unless a hard drive is available, i.e. HD20 or a SCSI HDD, floppy disks are the only storage method, so these are naturally network access disks. Still, it's a good idea to make one specifically for networking with all the requisite tools on hand in case of need. An example is shown to the right, with System 3.3/Finder 5.4 loaded on a 800KiB HFS disk, but a 512K could just as easily use an external drive to accomplish the same thing. Make a number of duplicates and image the disk on a compatible machine in case of failures. |
 |
Before System 6, a system could be set up with a MiniFinder which is a launcher-type mini application to reduce memory overhead on old machines like the 512K. The way it was used is that a user would select all the programs to be added to it, which in those days, they were generally all in the root volume of the disk, and then choose "Use MiniFinder..." from the Special menu. The disk must be unlocked as well. Then the operating system kicks a prompt to "Install the MiniFinder using the selected documents or applications, or remove the MiniFinder." The next time the system is booted it will load a Launcher-esque program. System 6 does not include this feature but the MiniFinder can be imported into it. |
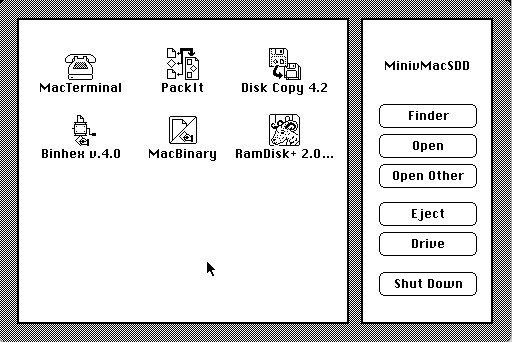 System 2.01 MiniFinder (Mini vMac) |
System 6
The procedure to create a System 6 NAD is best conducted in a System 7 system by using either a RAM disk directory or a virtual floppy disk (Disk Copy 6.3.3, ShrinkWrap 2.1, et al) and installing a minimal install for the Mac in question. Universal builds of System 6 can also work, though it just depends on whether the target machine has a 800KiB or a 1.44MB drive and if it is meant for multiple machines or just one.
After the basic System software has been installed, the remainder is AppleShare WS 3.5 and the relevant Ethernet drivers. A basic screensaver is a recommended addition. 6.0.8L consumes slightly more space on disk than 6.0.8 but all the Macs that could boot 6.0.8L had 1.44MB drives so that is not a problem, however space is still a bit of a problem. For 1.44MB drives, copying RAMDisk+ 2.01 and a self-extracting archive of Fetch 2.1.2 is a good idea, and there should be enough space for a Universal build of System 6. For Macs with 800KiB drives, a minimal install and a screensaver is enough to fit on a 800KiB disk, and a companion disk with RAMDisk+ 2.01 and Fetch should be sufficient. Use the RAM disk (2MiB capacity should be plenty) to free up the floppy drive for other tasks and speed up the whole process. |
 An example 6.0.8 NAD |
A full-featured Universal build of System 6 on 800KiB disks is also possible, but a minimal install for the target Mac is a better idea. In this configuration, a regular install of System 6 is used, but a minifinder is a requirement, such as FaberFinder. First the primary disk is loaded and the minifinder is loaded. The minifinder loads RAMDisk+ 2.01 from a second floppy, wherein the second floppy has just System and the regular Finder on it to make it bootable. RAMDisk+ then copies the entire contents of the second floppy into RAM, and finally returns to the minifinder. Then opening the Finder on the RAM disk hot-swaps the boot volume to a regular Finder. The final step is to copy all the networking and relevant CDEVs and INITs from the first floppy disk (if a INIT or CDEV wasn't present when the machine was booted, it won't load) to the RAM disk's System Folder. Use MacPPP for systems that don't have Ethernet support.
 RAM disk as primary volume with a 1.44MB boot floppy |
 Minimal builds for AFP and FTP (for LC II) |
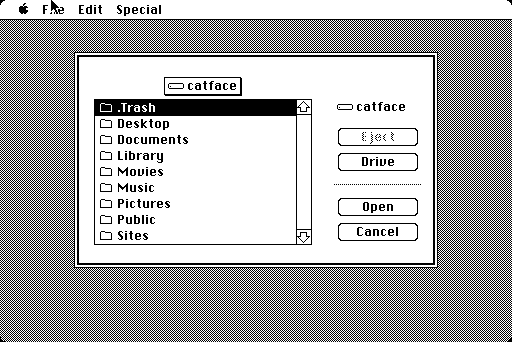 Accessing 10.2.8 from 800KiB with FaberFinder |
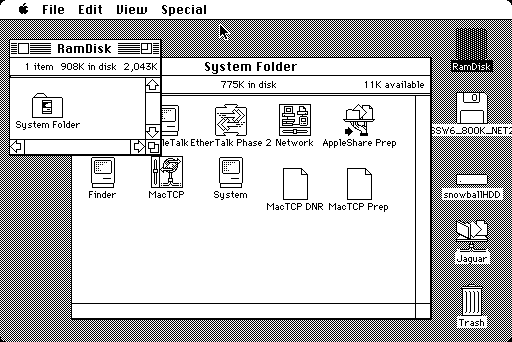 Full-blown from two 800KiB disks with RAM disk on primary |
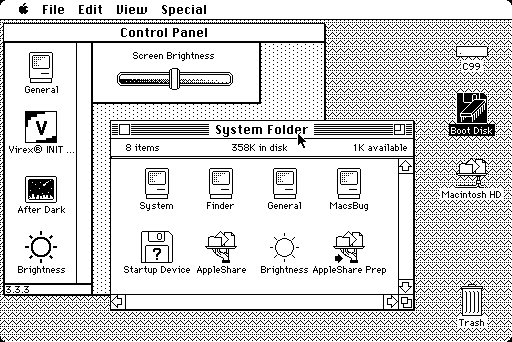 Macintosh Classic reserve network access volume in RAM |
Both the Macintosh Classic and Classic II have a hidden reserve OS in ROM. Hold down Command + Option/alt + X + O (not zero) and then turn the power on. As it has the AppleShare client data loaded, it will be able to access AppleShare networks over the serial port. There is no space inside the RAM disk to copy anything, but at least it allows some network access and as such, it is possible to run DC 4.2 off a network volume and write out any floppy disks as needed, then hot-swapped into a proper volume. The image shown above is with the OS hot-swapped to the internal hard drive, since screenshots cannot be packed into the RAM disk. The network volume was mounted before the hot-swap process was executed. The Brightness CDEV looks different than the one shown, with the correct version to the right. There are no other programs or data on the RAM disk other than the contents of the System Folder, as shown. | 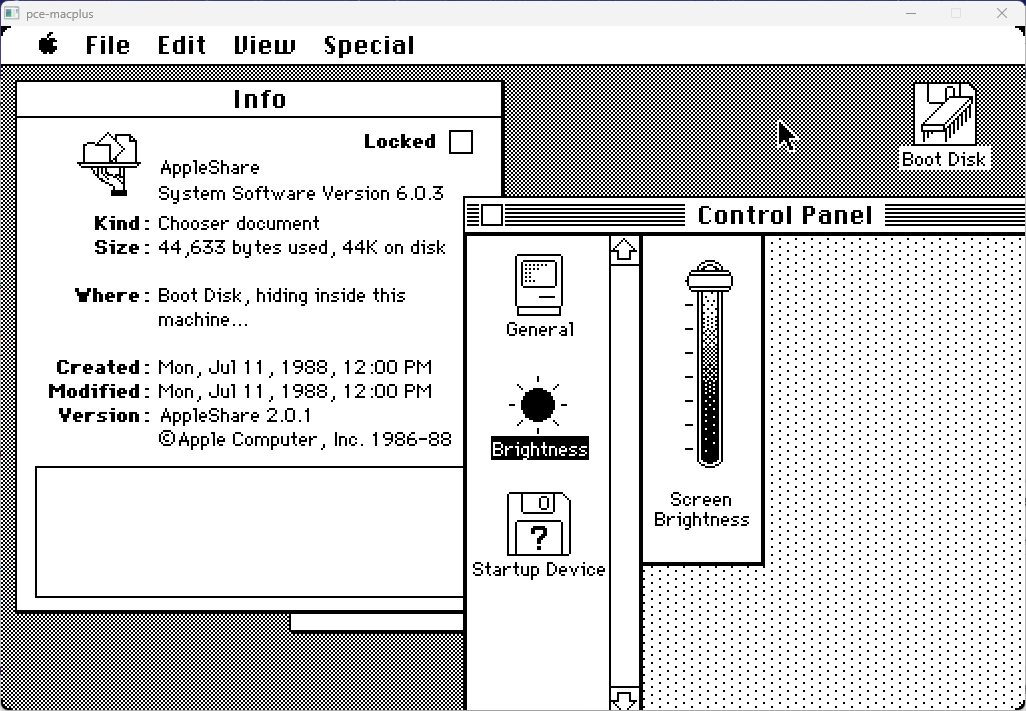 Macintosh Classic (PCE emulator) |
Why every computer since 1993 or so hasn't had this similar feature built in is a complete mystery, since it is fully possible to run a Linux install off a single floppy disk, so how much harder could it be to pack a simple GUI mini OS with an FTP server and client, RS232 terminal shell and some other basic necessities inside 8MB of ROM?
System 7 and 7.1
System 7.1 consumes slightly more space on disk than 7.0, but is still possible. Basic testing revealed that 7.0 on a SE/30 and LC II worked without any tweaking required, though the free space on the disk is quite limited. 7.1 required the use of this utility to strip the System files to a size that allowed it to fit with like 4KiB free on the disk. System 7.0 with a minimal install as used here had about 7KiB free. There are a few minifinders that can help free up space if need be, though they may have limitations that may or may not be acceptable. The Disk Tools disks can be of use in the search for lightweight binaries. For instance, a regular Finder might be 450K, but the lightweight Finder might be 230K. Every single KiB counts. For a start, Finder and System are the obvious requirements, which eat up about 1MiB total. AppleShare, EtherTalk Phase 2, and the Network control panel are the necessary components for AFP over Ethernet. |  SE/30 with 7.0.1 NAD to 7.6.1 |
On machines with 800KiB disk drives, it might be possible to build a System 7 NAD, but it is very unlikely: Gamba has done two versions of a compact version of 7.0 that fits on a 800KiB floppy (at 642KiB System) with some free space, but there is most likely zero networking accessibility of any kind. One of them is corrupted, but the "Clock" one can also work, but it only works on an SE, Plus or Classic. The limitations of such a system can be rather extreme -- this avenue should only be explored for a challenge (amusement?) or for very specialized purposes. But the real pincher is that a minifinder is required, you can't hotswap boot volumes like System 6 and one floppy drive alone with 7.0/7.1 is a rather distasteful concept for this subject. Certain Macs like the Color Classic require a System Enabler to use 7.1 -- this can be a slight problem. But there is also a Minimal System Enabler on some of the 7.1 Disk Tools disks. For a minifinder, try looking at Substitute 1.5 or 1.6, available from umich.edu's Macintosh archive, or use FaberFinder with the ResEdit hack described in the ReadMe. Gamba does also describe a few minifinders on a page that should offer some ideas.
System 7.5 and higher
Apple's 7.5NAD is a model for this section but the problem is that there is no 7.5.3 PPC version available. Most of the 603e Macs wanted 7.5.3 minimum and the 7.5NAD will not work. The other problem is that most of the Macs that can boot this disk can use something else which doesn't take so long to load up. But it can work fine regardless and is a good disk image to have on hand, provided it is applicable to the machines in question. Otherwise, building a custom 7.5.3NAD is pretty much a high-level exercise requiring arcane knowledge of the System resources, although it could be compared back-to-back with the 7.5NAD using ResCompare and ResEdit. The first major problem with this endeavor is that 7.5.3 introduced a lot of changes, the second is that the 7.5NAD uses LZW resource compression, which is uncompressed into RAM when the disk is loaded. The LZRes utility (check the University of Michigan archive mirrors) can sort of do this as well but this is a fairly involved subject which will require time and experimentation. | 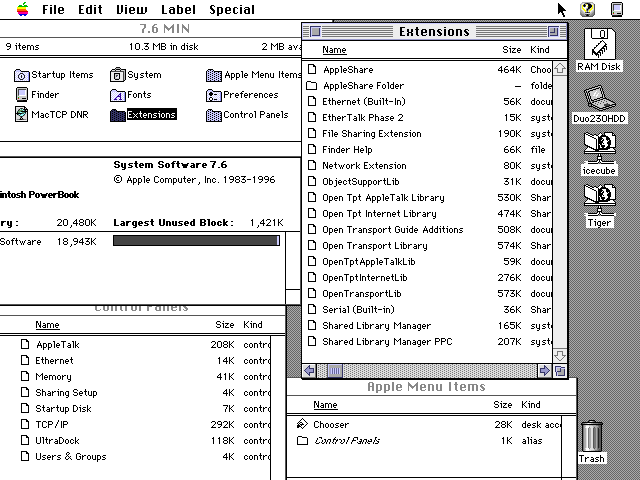 7.6NAD-RAM on a 2300cTB |
Certain Macs can use RAM disks through the Memory control panel which unlike other RAM disk programs is persistent through reboots. It does persist through Shut Downs, unless the checkbox to save the contents to disk is marked, which just dumps the contents of RAM into a file. Thus, the first step is to make a minimal install of 7.5.3 through the Installer for a floppy disk. Or use the Disk Tools disks, which is even easier, just trash the unneeded programs, there might be enough room to add System Picker as well. Add the Memory and Startup Disk control panels. Then create a new installation folder with the minimal 7.5.3 installation folder with the bare minimum networking (use MacTCP), which should take up less than 10MiB on disk. Earlier Macs which have the RAM disk feature that will run 7.1 should use 7.1 instead. For 7.6, there is no option for "Minimal install for this Macintosh", only "Minimal install for any Macintosh" which gobbles up a healthy 6.5MiB on disk by itself, not to mention you are stuck with OT. Use the Disk Tools disks for 7.6 and up, then modify the contents so the Memory and Startup Disk control panels are included.
Create the RAM disk, reboot, copy the minimal networking startup disk folder. This can either be from a CD or segmented compressed floppy disk parts: may need to copy the modified Disk Tools disk to the RAM disk and reboot that way first so the floppy drive is freed up, then use System Picker to select between them. Then use Startup Disk to boot into the RAM disk. Macs with less than 20MiB of memory may have major problems with this technique (see the image above, as the System eats up about 8MiB) and building a custom bootable HFS CD is a better idea for CD-ROM drive equipped Macs. In this manner, a CD-ROM disk could hold loads of recovery tools and a full System Folder with a minimal networking System Folder on the disk that just has to be copied onto the RAM disk. AppleShare cannot operate on locked disks: try experimenting with the Mac OS Install CDs that do have AppleShare working on a locked disc, such as the Mac OS 8 Install CD with its ASC 3.7.4 and OT 1.3. 7.6 and above require Open Transport for TCP/IP services and cannot work with MacTCP: if disk space is limited, then you might have to settle for LocalTalk only; alternatively, use ZTerm or pseudo-PPP dialup. Gamba has cooked up an interesting SuperBooter 7.5 disk, intended as a hard disk formatter disk and has JCRemote on it but JCRemote can only talk to other JCRemote-enabled computers, not AppleShare servers. (The disk may not work properly on some machines or not at all.)
Newer developments in ROM hacking and custom Flash-based ROMs has meant that a number of 68K machines that didn't have the RAM disk option in the Memory control panel can do so with "after-market" ROM images. These ROM binaries can also have ROM-based emergency recovery partitions just like the Macintosh Classic and Classic II does.
Using Mac OS X's Personal Web Server
Mac OS X includes a version of Apache Web Server software, which is open source and freeware, which makes it popular for light duty server purposes and also means that Apache is a frequent target of hackers. This will be just a quick word toss-up to get you going on a simple web page with Hello World! references aside, which could be done with an Arduino microcontroller and an Ethernet solution. This allows a simple file server for a local area network.
A more modern HTML language would be based on XHTML or HTML5, but HTML 2.0 and 3.2 were common back in the the days of classic Macs, as were email lists. Because we want to keep the load speed down and are just tossing up a file list, we don't need JavaScript. Or CSS, interpreted as Cascading Style Sheet, which basically describes common elements in the document like the background color or picture, the primary font, font size, table proportions and so on. The CSS for this page can be read by downloading the entire page, which should include the images folder, index.html (main document) and style.css. Open style.css in a text editor like WordPad, gedit or TextEdit to see all the lovely details. It is also perfectly possible to open index.html in TextEdit and see all the HTML code that generates tables, headings, line breaks, designates code boxes, images, hyperlinks, and so on as this is actually a very simple webpage, with no cookies, scripting, Flash or other embedded elements. | 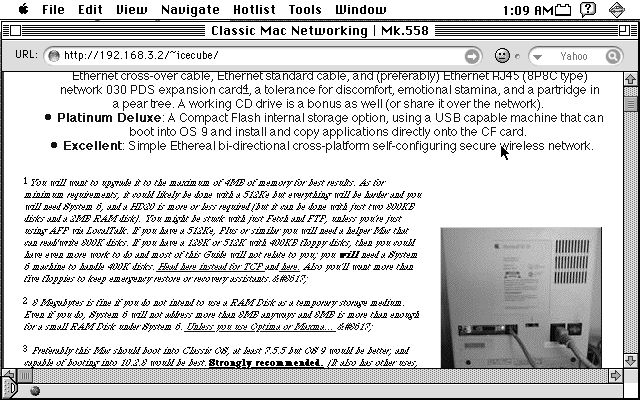 Local website accessed locally (still slow to load on this Duo 230/100) |
First time prospective web developers should first look at simple web page sources like this one or other HTML4 sites and get a decent WYSIWYG HTML editor, like Kompozer; there are more free options for Windows than Mac OS X. Safari 5 used to have a handy set of web dev tools and inspector, but it's no replacement for a full on professional suite like Adobe Dreamweaver CS and it's long out of date. But because we're going to just toss up a simple example, we'll just code it all by hand. One way of using something like this is to keep a "hidden" page on a home server, such as a Linux box that is serving a home web server, although this section would be quite redundant if that was the case (not to mention the possibility of a security weakness). After some time and experience under the collar you can then just edit it raw in a text editor and keep a browser page open. Save the changes in the editor, then reload the page in the browser. | 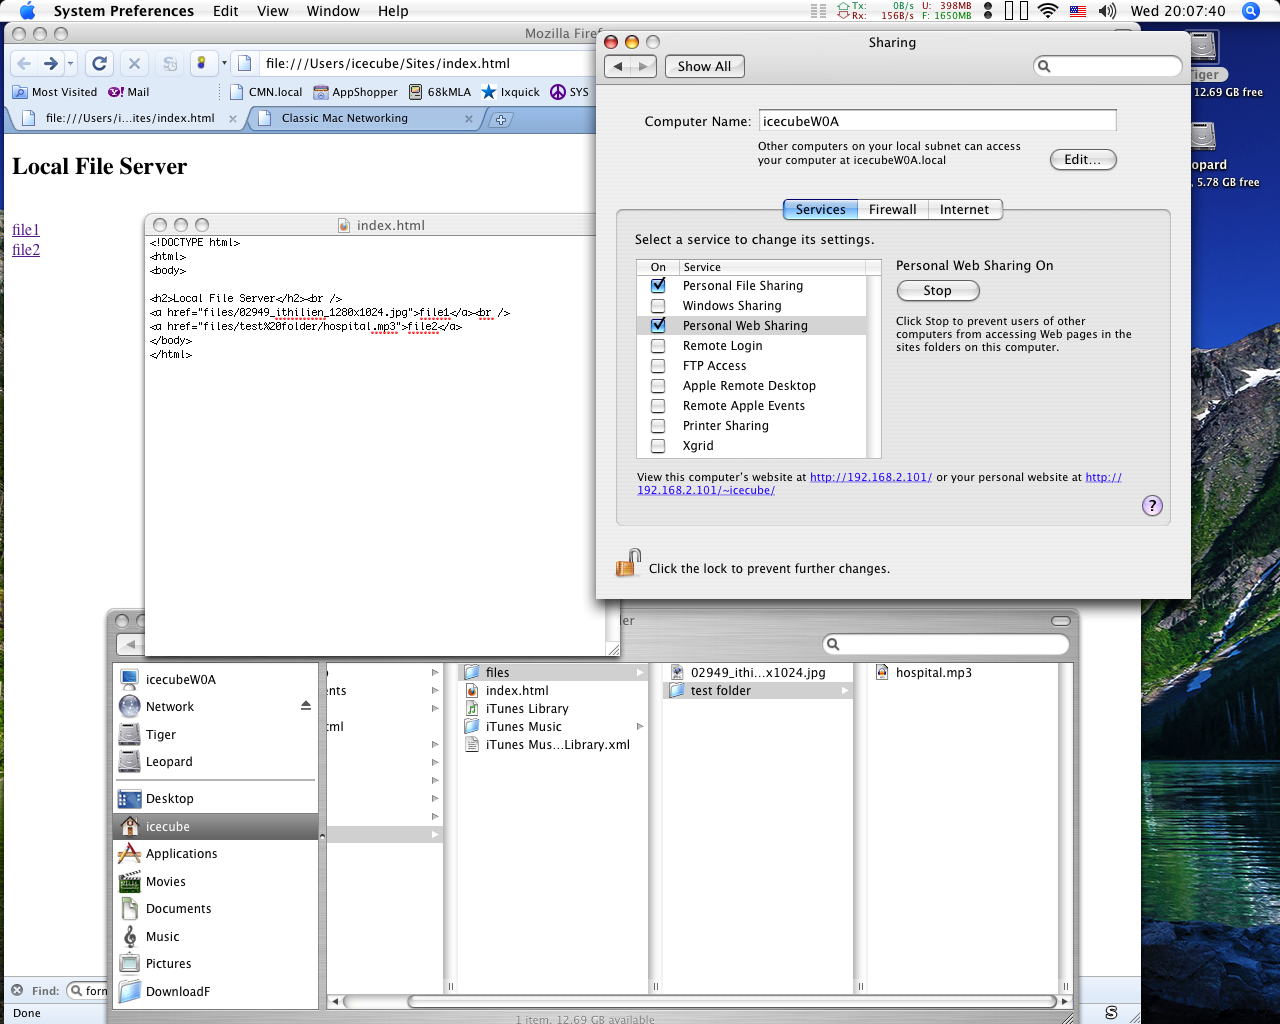 Full operation displayed |
Open TextEdit. Head to the TextEdit menu and choose Preferences. Select the Plain Text radio button. Deselect the Wrap to Page button, if it is checked. Disable the toggle that adds ".txt" to text files, which is what this one will be, but not of the same kind as a text file. In 10.4, for instance, the document can be saved as HTML 4.0 Strict for instance, if that is desired. Tick the "Ignore rich text commands in HTML files" box. Enter the following text into the editor, except the comment text that starts with // and is red aka C code style:
Save the file into the home folder, in the the Sites directory as index.html. Create a new folder in the Sites folder, called files. Dump the files into that folder, or if you just want to test the concept, then try tossing some random text files in there, just edit the code correctly. For additional directories and subdirectories, simply edit the path for the file in the index.html source file. For instance, a file named bolo.sit located in the directory path of ~/icecube/Sites/files/Backup/Classic\ Mac/, the line in the HTML source would look like this:
Here is a list of the various ways characters are expressed in HTML code. There are many ways to tweak this and adjust it, but as this is just a proof of concept demonstration and not a full on HTML book, it should suffice.
Open System Preferences. Click Sharing, then enable the Personal Web Sharing function. Observe the address it states for accessing the server, then head to the other computer(s). Open a browser and type in the address it states for the Personal Website, as shown in image below, it is http://www.192.168.2.101/~icecube/. In our test case of iCab, the rendered page is visible, so the only thing left to do is click and hold onto the link to bring up a menu to download the item. Obviously this could be expanded to a full server page accessible from the the WWW, but that is beyond the scope of this Guide as it is primarily concerned with LAN networks. | 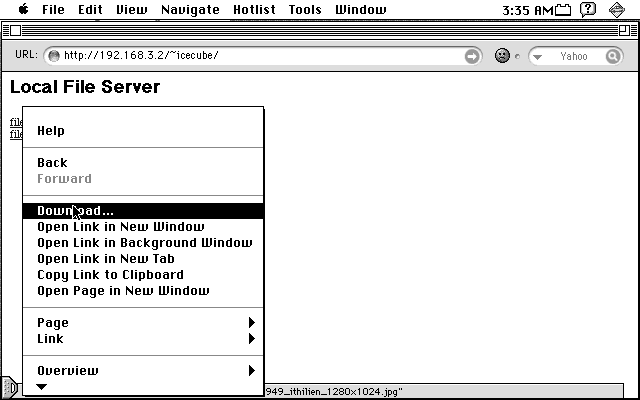 Downloading in iCab 2.9.9 |
Now that the method for manual page generation has been explained, we can try the easy route. Assuming that Personal Web Sharing is on, head to the ~/[your username]/Sites folder. Remove index.html from the folder. Now whenever a user types out, for instance, http://192.168.2.101/~icecube/, the Directory Listing is produced. This is automatically updated each time the page is reloaded, so the administrator can drop files in there and pull it out the other end without having to edit any HTML source code. The Directory Listing is on by default in the Apache Web Server. On our test machine, the page took about ten seconds to load in iCab; slower than a manually generated page, but easier to use. As long as there isn't a webpage document called index.html, index.htm, or index.php, or just plain index.*", with * meaning anything; it can be renamed to something else like mainindex.html, then the Directory Listing will be presented. | 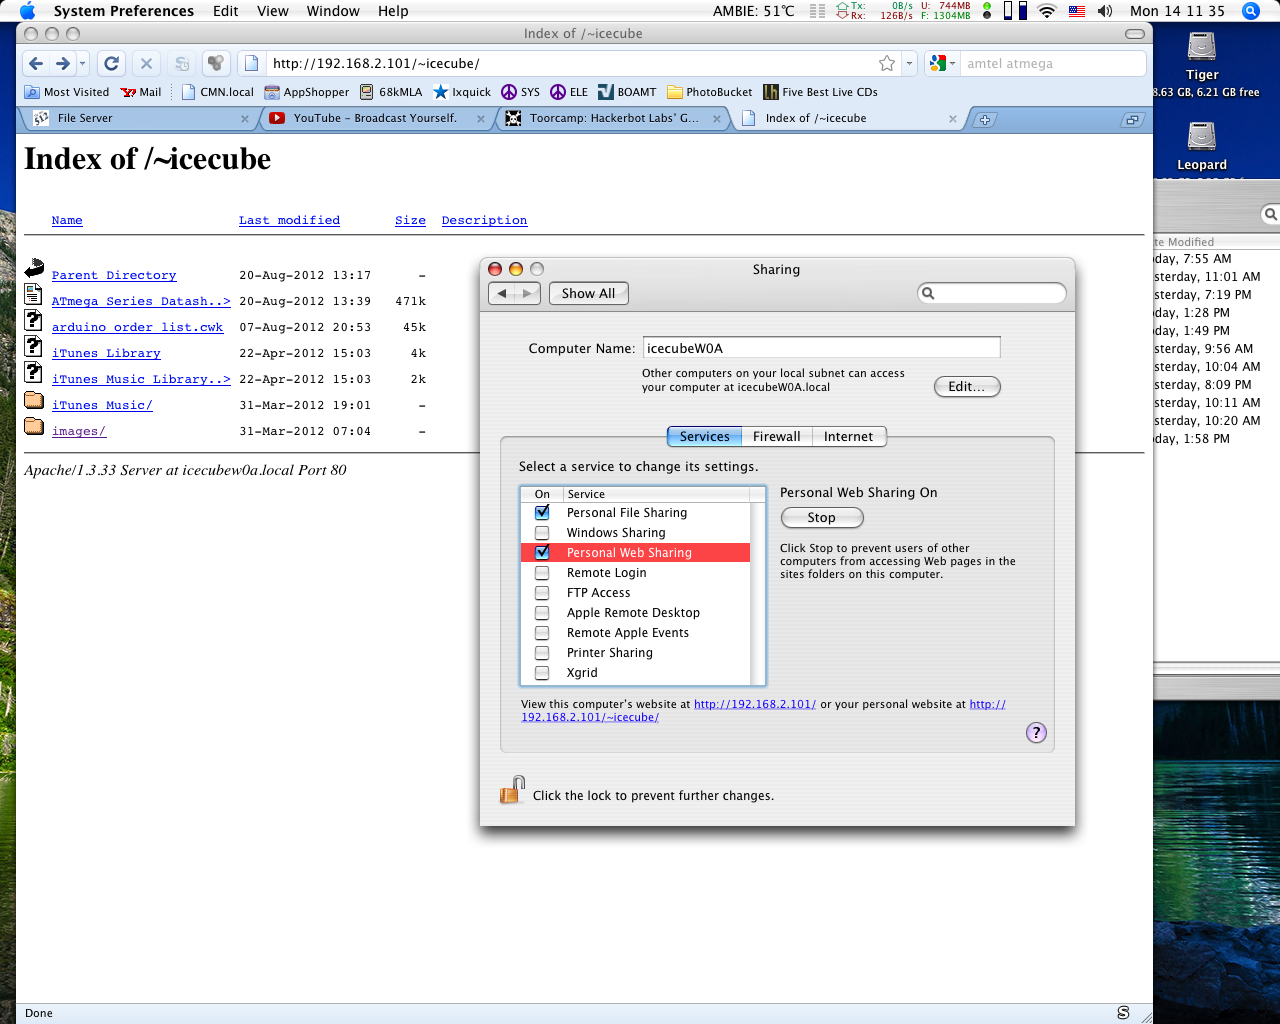 Using the Directory Listing |
This method can also be used to import photos into older pre-iOS 7 based devices without using iTunes.
Data Transfer Rates
This section showcases a number of different file transfer methods and how fast they were from actual usage. Individual numbers may vary slightly. Nearly all numbers are calculated by using a known file size and a stopwatch, started from the moment the mouse button was released or the Enter key was pressed until the point where the file was obviously "done", or the file appears on the target computer, including time to update the folder contents. This calculator was used to crunch the numbers. This table is only meant to serve as a representation of possible average transfer rates and it doesn't mean that equivalent results will apply to all situations.
For the tests here, all the tests are with typically a single binary file, called sequential write or read operations. Writing a bunch of small files like 4KiB and less may end up taking longer because the unit has to jump to different sectors all over the disk. Other tools include LanTest (available from the Macintosh Garden), in the Newer Technologies EtherTech driver disk (available below) there is a Performance program in the Applications folder. For the floppy disk speed tests, the sizes in KiB were divided by 1024 (i.e. 720/1024 = 0.703125MiB). Definition of 400KiB: 0.390625MiB; 720KiB: 0.703125MiB; 800KiB: 0.78125MiB. Figures were rounded up, so 0.3969812Mbps would become 0.397Mbps.
The basic hardware specifications follow below:
- Mac mini CD is an Intel Mac mini 1.1 model with a 2.16GHz Core Duo T2600 upgrade (formerly 1.66GHz), 2GiB RAM and stock 60GB hard drive.
- Mac mini G4 is a PowerMac10,2 with 1.33GHz model with 1GB of RAM, standard internal hard drive. Runs a variety of operating systems, including a modified version of 9.2.2.
- iMac G4 is an 15" Flat Panel 800MHz model with 512MiB RAM and a 250GB hard drive. Note: This model has a ATA/66 bus.
- PM 7100/66 is a Power Macintosh 7100/66 with CD drive, 56MiB of RAM, BlueSCSI hard drive and using the High Performance Video PDS video card. The built-in AAUI Ethernet interface was used.
Using System 7.1.2 with OT 1.3 and ASC 3.7.4 was unstable, with uploads failing after completing, so was not recorded below. A download operation was clocked at 261.9KiB/s, 2.095Mbps. - Duo 2300cTB is a PowerBook Duo 2300c with a trackball upgrade from a Duo 230 (doesn't affect performance, only usability), UltraDock 16sce, IDE 2.5" 44 pin laptop Compact Flash adapter (Syba Best Connectivity) with a Transcend Industrial 2GB card and 20MiB RAM. Also known as the 230/100 when equipped with the Duo 230's passive matrix display (16 greys, max).
- Quadra 650 has the stock original hard drive, 8MiB of RAM, 7.1 running on a RAM disk and built-in Ethernet. MacTCP was used and the built-in decoders/encoders were disabled. Meant to compare BinHex to MacBinary transfer speeds.
- Quadra 700 has the stock original hard drive, 4MiB of RAM and 7.1.
- Quadra 610 has 64MiB main memory, Apple AAUI Ethernet dongle, a 500MiB hard drive and a DOS i486SX25 Compatibility Card with 4MiB of memory onboard.
- Quadra 610 Spl is the same setup as previous, but with a stripped down version of 7.5.3, 16 colors, default greyscale background and the file copies were done to and from the RAM disk. The purpose was to show the difference between Classic Networking and Open Transport networking. OT version is the same as a normal 7.5.3 install (OT 1.1).
- IIfx is a standard Macintosh IIfx with 8MiB of memory and a Raster Ops 24STV graphics card.
- IIci is a Macintosh IIci with 8MiB of RAM, 50MiB hard drive and using built-in video with a cache card. Ethernet card is a AsanteFAST 10/100 NuBus version: the 100BASE-T LED was on. For the 10/100 Ethernet card test, a 68040 33MHz Radius Rocket with 20MiB of RAM was used as the accelerator, if noted. For System 6, MultiFinder was off. Used with RAM disk storage; hard drive speeds could be slower. Later this machine was acquired, not borrowed, and bumped to 64MiB of memory, Asante MC3NB and a Rasterops 24S display card.
- IIsi is a Macintosh IIsi with 68MiB of RAM, Apple 8*24 graphics card using a RAM disk as boot drive.
- LC II is a standard LC II with a standard 40MB hard drive of that generation with a Farallon LC-PDS Ethernet card and 8MiB RAM.
- SE/30 is a basic SE/30 with 32MiB RAM, a Farallon EtherMac 030 PDS Ethernet card (or Asante MacCon 30ie) and a 250MB SCSI hard drive. It may also be equipped with an internal BlueSCSI v2 and zigzagjoe 48MHz accelerator.
- Macintosh SE is a 800KiB only SE with 4MiB of RAM, BlueSCSI external hard drive. RAM disk copy to and fro, no MultiFinder.
- E500 is a Compaq Armada E500 with a Pentium III 900MHz CPU, the standard Intel-based 10/100 NIC card, 384MiB RAM, 60GB 5400RPM hard drive with a native RS232 COM1 port. (HyperTerminal refuses to open the port if the bitrate is greater than 115200bps.)
- T420 is a Lenovo ThinkPad T420 (with NVS 4200M and 1600x900 display) with a Core i5 2520M processor, 8GB of RAM using a Intel 530 series 80GB mSATA SSD.
- X200 is a Lenovo ThinkPad X200 with a 2.26GHz Core 2 Duo P8400 processor, 6GiB of RAM (1066MHz), and a 7200RPM 250GB hard drive.
- AppleTalk bridge is a Farallon iPrint LT model.
- USB to RS232 adapter is a model sourced from Adafruit with a FTDI FT232RL based chipset and was used for the ZTerm 1.2/HyperTerminal max speed test at 115200bps. Cut the figures in half to get an idea how fast 57600bps is, and quarter it for 38400bps, and so on.
- The router used for all the tests with Ethernet (except the 1000BASE-T testing) is a DLink WBR1310 rev. A model (10/100BASE-T). Some tests were done with a Linksys WRT54g.
- Netatalk 2.1.6 is a USB 2.0 thumbdrive with Ubuntu 10.04.4LTS (2.6.32-49-generic kernel) and Netatalk 2.1.6.
- EtherWave Mac/PB model number 842 was used. PB Adapter driver. Used with a Linksys WRT54g router in Wireless Client Bridge mode. AFP file transfer. Farallon EN 2.2.2 software. The PowerBook 170 has a 330MiB hard drive with 8MiB of RAM. The EtherWave Printer Adapter was also used for this section.
- Direct Parallel Port test was an interesting experiment. A custom cross-over DB-25 male to male cable is wired up. Turns out, such a configuration is a 4-bit parallel cable -- odd, since a parallel configuration is usually 8-bit. Anyways, hook the cable up, set one computer as a direct connection host using the LPT1 port, set another to access as a guest, then login. "4Mbps" shows up in the lower right hand corner as the connection speed. Discover the IP addresses of the server and client, then just use FTP from the command line. There were apparently cables and software back in the day that allowed for allegedly higher speeds using ECP mode via BIOS but they are long gone now. Setting the mode to ECP changed nothing concerning the bitrate of this setup.
| Host / Server | Client / Peer | Protocol / Method | Download: Client from Host | Upload: Client to Host |
| LC II 7.0.1 | Duo 2300cTB 7.6.1 | AFP over Ethernet 10BASE-T | 100.8KiB/sec, 0.806Mbps | 48.6KiB/sec, 0.389Mbps |
| Mac mini CD 10.4.11 | SE/30 7.5.5 | AFP over Ethernet 10BASE-T | 201.2KiB/sec, 1.61Mbps | 266.6KiB/sec, 2.13Mbps |
| Mac mini CD 10.4.11 | Duo 2300cTB 7.6.1 | AFP over Ethernet 10BASE-T | 398.8KiB/sec, 3.19Mbps | 463.4KiB/sec, 3.71Mbps |
| E500 Win 2K Server | Duo 2300cTB 7.6.1 | AFP over Ethernet 10BASE-T | 434.0KiB/sec, 3.47Mbps | 456.7KiB/sec, 3.65Mbps |
| Mac mini CD Netatalk 2.1.6 | Duo 2300cTB 7.6.1 | AFP over Ethernet 10BASE-T | 437.7KiB/sec, 3.50Mbps | 37.8KiB/sec, 0.302Mbps Slow! |
| Mac mini G4 10.2.7 Server | Quadra 6107.1 | AFP over Ethernet 10BASE-T | 209.1KiB/sec, 1.673Mbps | 185.2KiB/sec, 1.481Mbps |
| Mac mini G4 9.2.2 | Quadra 610 Spl w/Classic7.5.3 | AFP over Ethernet 10BASE-T | 678.1KiB/sec, 5.425Mbps | 615.2KiB/sec, 4.921Mbps |
| Mac mini G4 9.2.2 | Quadra 610 Spl w/OT 1.17.5.3 | AFP over Ethernet 10BASE-T | 416.5KiB/sec, 3.332Mbps | 330.3KiB/sec, 2.643Mbps |
| VirtualBox VM with Netatalk 4.0.4 Linux Mint 22 |
PM 7100/66 7.1.2 Classic 7.1.2 Classic w/RAM OS 7.5.3 Classic 7.5.3 Classic w/RAM OS 7.5.3, default OT 1.1 7.5.5 ASC 3.7.4, OT 1.3 7.5.5 OT 1.3 w/ RAM OS 7.6.1 ASC 3.8.3, OT 1.3 8.1 ASC 3.8.3, OT 1.3 9.1 ASC 3.8.8, OT 2.7.4 |
AFP over Ethernet 10BASE-T | 254.4KiB/sec, 2.035Mbps 273.5KiB/sec, 2.188Mbps 367.2KiB/sec, 2.937Mbps 345.7KiB/sec, 2.766Mbps 325.8KiB/sec, 2.607Mbps 551.4KiB/sec, 4.411Mbps 582.8KiB/sec, 4.662Mbps 699.7KiB/sec, 5.598Mbps 601.8KiB/sec, 4.814Mbps 516.9KiB/sec, 4.135Mbps |
264.6KiB/sec, 2.117Mbps 279.3KiB/sec, 2.234Mbps 379.9KiB/sec, 3.039Mbps 396.0KiB/sec, 3.168Mbps 239.1KiB/sec, 1.913Mbps 470.5KiB/sec, 3.764Mbps 482.5KiB/sec, 3.860Mbps 474.7KiB/sec, 3.798Mbps 420.3KiB/sec, 3.362Mbps 579.6KiB/sec, 4.637Mbps |
| iMac G4 9.2.2 | IIci 6.0.8, 7.1 Rocket #1: 7.1 w/Rocket Rocket #2: 6.0.8 w/Rocket |
AFP over Ethernet 100BASE-T | SSW 6: 635.1KiB/s, 5.08Mbps
SSW 7.1: 207.5KiB/s, 1.66Mbps 332.7KiB/s, 2.66Mbps Rocket #1 866.5KiB/s, 6.93Mbps Rocket #2 |
SSW 6: 401.4KiB/s, 3.21Mbps
SSW 7.1: 170.7KiB/s, 1.37Mbps 256.7KiB/s, 2.05Mbps Rocket #1 605.6KiB/s, 4.84Mbps Rocket #2 |
| E500 Win 2K Server | Mac mini CD 10.4.11 | AFP over Ethernet 100BASE-T | 10882.5KiB/sec, 10.63MiB/sec, 87.1Mbps | 10317.4KiB/sec, 10.08MiB/sec, 82.5Mbps |
| Mac mini CD Netatalk 2.1.6 | iMac G4 10.2.8 | AFP over Ethernet 100BASE-T | 8033.9KiB/sec, 7.85MiB/sec, 64.3Mbps | 9143.2KiB/sec, 8.93MiB/sec, 73.1Mbps |
| iMac G4 10.4.11 | Mac mini CD 10.5.8 | AFP over Ethernet 100BASE-T | 10516.0KiB/sec, 10.27MiB/sec, 84.1Mbps | 10005.6KiB/sec, 9.77MiB/sec, 80.0Mbps |
| X200 Ubuntu 10.04.4LTS | Mac mini CD 10.5.8 | AFP over a cross-over cable, Gigabit Ethernet 1000BASE-T | 29054.0KiB/sec, 28.4MiB/sec, 232Mbps (hard drive limit) RAM Disk: 84509.2KiB/sec, 82.5MiB/sec, 676.1Mbps |
26362.2KiB/sec, 25.7MiB/sec, 210Mbps RAM Disk: 91151.5KiB/sec, 89.0MiB/sec, 729.2Mbps |
| X200 Windows XP SP3 | Mac mini CD 10.5.8 | SMB over a cross-over cable, Gigabit Ethernet 1000BASE-T | 35271.5KiB/sec, 34.4MiB/sec, 282Mbps (hard drive limit) | 21490.5KiB/sec, 21.0MiB/sec, 172Mbps |
| iMac G4 10.4.11 | IIci with Rocket 33 7.1 | Built-in FTP Server/Fetch 2.1.2 100BASE-T | 47.1KiB/sec, 0.377Mbps | 32.1KiB/sec, 0.256Mbps |
| iMac G4 10.4.11 | Mac mini CD 10.5.8 | Built-in FTP Server/Terminal 100BASE-T | 10893.4KiB/sec, 10.64MiB/sec, 87.1Mbps | 8754.9KiB/sec, 8.55MiB/sec, 70.0Mbps |
| E500 Win 2K Server | Mac mini CD 10.5.8 | Built-in FTP Server/FileZilla 100BASE-T | 8529.3KiB/sec, 8.33MiB/sec, 68.2Mbps | 11070.0KiB/sec, 10.81MiB/sec, 88.6Mbps |
| Mac mini CD 10.5.8 | Duo 2300cTB 7.6.1 | Built-in FTP Server/Fetch 2.1.2 10BASE-T | 85.2KiB/sec, 0.681Mbps | 128.3KiB/sec, 1.03Mbps |
| E500 Win 2K Server | Duo 2300cTB 7.6.1 | Built-in FTP Server/Fetch 2.1.2 10BASE-T | 89.7KiB/sec, 0.717Mbps | 130.1KiB/sec, 1.04Mbps |
| Mac mini G4 10.4.11 | Quadra 650 7.1 | Built-in FTP Server/Fetch 3.0 Binary file 10BASE-T |
250.8KiB/sec, 2.00Mbps | 331.2KiB/sec, 2.65Mbps |
| Mac mini G4 10.4.11 | Quadra 650 7.1 | Built-in FTP Server/Fetch 3.0 BinHex transfer10BASE-T |
199.2KiB/sec, 1.59Mbps | 110.1KiB/sec, 0.881Mbps |
| Mac mini G4 10.4.11 | IIci 7.1 | Built-in FTP Server/Fetch 2.1.2 10BASE-T | 112.7KiB/sec, 0.902Mbps | 128.8KiB/sec, 1.030Mbps |
| Duo 2300cTB 7.6.1 | Mac mini CD 10.5.8 | NetPresenz 4.1/FileZilla Client 10BASE-T | 99.1KiB/sec, 0.792Mbps | 75.9KiB/sec, 0.607Mbps |
| ftp.ncsa.uiuc.edu FTP server | Duo 2300cTB 7.6.1 | Fetch 2.1.2/1.5Mbps DSL 10BASE-T | 48.4KiB/sec, 0.387Mbps | Cannot be calculated |
| Generic HTTP | SE/30, Duo 2300cTB | iCab 2.9.9, 10Mbps Comcast Cable 10BASE-T | 66KiB/sec, 0.52Mbps maximum, 50KiB/sec rough average | Cannot be calculated |
| Mac mini G4 9.2.2 | IIci 6.0.8, 7.1 RAM Disk was used for swap and MultiFinder was off. HDD host OS, no Open Transport. AFP only. Dayna driver v7.5.3 |
Asante MC3NB 10BASE-T Asante Mini EN/SC 10T Dayna Pocket SCSI/Link-T |
6.0.8: 413.9KiB/sec, 3.31Mbps 7.1: 160.6KiB/sec, 1.28Mbps 6.0.8: 163.9KiB/sec, 1.31Mbps 7.1: 95.1KiB/sec, 0.761Mbps 6.0.8: 184.6KiB/sec, 1.48Mbps 7.1: 107.0KiB/sec, 0.856Mbps |
6.0.8: 322.0KiB/sec, 2.58Mbps 7.1: 144.8KiB/sec, 1.16Mbps 6.0.8: 157.5KiB/sec, 1.26Mbps 7.1: 90.4KiB/sec, 0.723Mbps 6.0.8: 155.2KiB/sec, 1.24Mbps 7.1: 94.1KiB/sec, 0.753Mbps |
| VirtualBox VM with Netatalk 4.0.4 Linux Mint 22 | PM 7100/66 with Dayna v7.7.2 driver7.5.3 | Dayna Pocket SCSI/Link-T 10BASE-T | Classic: 101.4KiB/s, 0.811Mbps OT 1.3: 141.8KiB/s, 1.134Mbps |
Classic: 67.0KiB/sec, 0.536Mbps OT 1.3: 114.0KiB/sec, 0.912Mbps |
| Mac mini G4 10.4.11 | SE/30 7.1 | VIG gateway using AFP over TCP (Q610 bridge)230Kbps | 9.738KiB/sec, 0.078Mbps | 7.547KiB/sec, 0.060Mbps |
| Mac mini G4 10.4.11 | SE/30 7.1 | Vicom Internet Gateway bridge via FTP (Q610 bridge) 230Kbps | 11.93KiB/sec, 0.095Mbps | 16.42KiB/sec, 0.131Mbps |
| Mac mini CD Netatalk 2.1.6 | Duo 2300cTB 7.6.1 | AppleTalk bridge 230Kbps | 20.11KiB/sec, 0.161Mbps | 17.24KiB/sec, 0.138Mbps |
| E500 Win 2K Server | Duo 2300cTB 7.6.1 | AppleTalk bridge 230Kbps | 20.25KiB/sec, 0.162Mbps | 18.10KiB/sec, 0.144Mbps |
| Duo 2300cTB 7.6.1 | iMac G4 10.2.8 | AppleTalk bridge 230Kbps | 10.20KiB/sec, 0.082Mbps | 17.60KiB/sec, 0.141Mbps |
| iMac G4 9.2.2 | Duo 2300cTB 7.6.1 | AppleTalk bridge 230Kbps | 20.21KiB/sec, 0.162Mbps | 18.06KiB/sec, 0.144Mbps |
| IIci 7.1 | 512K (via RAMDisk) S3.3/F5.4 | LocalTalk Direct 230Kbps | 7.5KiB/sec, 0.060Mbps | 6.1KiB/sec, 0.049Mbps |
| LC II 7.0.1 | Duo 2300cTB 7.6.1 | LocalTalk Direct 230Kbps | 9.16KiB/sec, 0.073Mbps | 14.5KiB/sec, 0.116Mbps |
| iMac G410.2.8 | PowerBook 170 7.1 | Farallon EtherWave Mac/PB adapter via AFP | 44.5KiB/sec, 0.356Mbps | 42.5KiB/sec, 0.340Mbps |
| Mac mini G49.2.2 | IIfx 6.0.8 | Farallon EtherWave Mac/PB adapter via AFP | 104.4KiB/sec, 0.835Mbps | 95.8KiB/sec, 0.767Mbps |
| Mac mini G49.2.2 | IIsi 6.0.8 | Farallon EtherWave Mac/PB adapter via AFP | 97.8KiB/sec, 0.783Mbps | 86.9KiB/sec, 0.695Mbps |
| Mac mini G49.2.2 | SE/30 6.0.8 | Farallon EtherWave Mac/PB adapter via AFP | 66.9KiB/sec, 0.535Mbps | 61.6KiB/sec, 0.493Mbps |
| Mac mini G49.2.2 | Macintosh SE 6.0.8 | Farallon EtherWave Mac/PB adapter via AFP | 45.4KiB/sec, 0.363Mbps | 41.7KiB/sec, 0.333Mbps |
| E500Ubuntu 9.10 | Quadra 700 7.1 (IIci posts similar numbers) |
Farallon EtherWave Mac/PB adapter via AFP | 65.5KiB/sec, 0.524Mbps | 65.8KiB/sec, 0.526Mbps |
| iMac G410.2.8 | IIci 6.0.8 | Farallon EtherWave Mac/PB adapter via local FTP | 29.7KiB/sec, 0.238Mbps | 29.5KiB/sec, 0.236Mbps |
| VirtualBox VM OS X 10.4.1 | Mac mini G4 9.2.2 | NiftyTelnet SSH w/SCP 100BASE-T | 1504.6KiB/sec, 12.037Mbps | 3855.7KiB/sec, 30.846Mbps |
| Mac mini G410.4.11 | Quadra 6107.1 | NiftyTelnet SSH w/SCP 10BASE-T | 17.3KiB/sec, 0.139Mbps | 20.0KiB/sec, 0.160Mbps |
| VirtualBox VM10.04.4LTS | Mac mini G4 9.2.2 | MacNFS 3.0 NFS client 100BASE-T | 7396KiB/sec, 59.2Mbps | 1379.7 KiB/sec, 11Mbps |
| Mac mini G410.4.11 | IIci 7.6.1 | MacNFS 3.0 NFS client 10BASE-T | 115.2KiB/sec, 0.922Mbps | 27.7KiB/sec, 0.222Mbps |
| VirtualBox VM10.04.4LTS | IIci 6.0.8 | NFS/Share NFS client 10BASE-T | 117.7KiB/sec, 0.942Mbps | 85.5KiB/sec, 0.684Mbps |
| VirtualBox VMWin XP SP3 | Mac mini G4 w/RAM disk 10.4 | Built-in SMB server/client 100BASE-T |
9402.7KiB/sec, 9.18MiB/sec, 75.2Mbps | 9436.2KiB/sec, 9.22MiB/sec, 75.4Mbps |
| VirtualBox VMWin XP SP3 | Mac mini G4 w/RAM disk 9.2.2 | Built-in SMB client, DAVE 6.2 100BASE-T |
7772.4KiB/sec, 7.59MiB/sec, 62.2Mbps | 9071KiB/sec, 8.86MiB/sec, 72.6Mbps |
| VirtualBox VMWin XP SP3 | SE/30 7.5.5 | Built-in SMB client, DAVE 2.1 10BASE-T |
103.1KiB/sec, 0.825Mbps | 91KiB/sec, 0.729Mbps |
| VirtualBox VMMS-DOS 6.22 VM not a substitute for real machine |
SE/306.0.8 Speed same as 9.2.2 AFP server |
Novell NetWare 3.12 AFP server 10BASE-T |
270.9KiB/sec, 2.167Mbps | 255.3KiB/sec, 2.042Mbps |
| Mac mini CD 10.5.8 | E500 Windows 2000 SP4 | ZTerm 1.2 / HyperTerminal at 115200bps | 11.08KiB/sec, 0.089Mbps | 10.91KiB/sec, 0.087Mbps |
| iMac G410.4.11 | LC 7.0.1 | Pseudo-PPP Dialup, 38400bps (Built-in FTP Server, Fetch 2.1.2) |
2.73KiB/sec, 0.0218Mbps | 2.05KiB/sec, 0.0164Mbps |
| IIci7.0.1 | 512Ke S1.1, F1.1g | MacTerminal 1.1 at 19200bps with XModem, XOn/XOff; ZTerm 0.9 | 0.488KiB/sec, 0.004Mbps | 0.875KiB/sec, 0.007Mbps |
| E500 Windows 2000 SP4 | ThinkPad R31 Win 2000 | Direct Parallel Port (4-bit) with FTP 4Mbps | 52.5KiB/sec, 0.420Mbps | 70.6KiB/sec, 0.564Mbps |
| Host | Method | Read data from media | Write data to media |
|
512K SSW 2.01 (S4.1, F5.5) Macintosh IIci 6.0.8 Power Macintosh 7100/66 7.5.3 iMac G4 10.4.11 iMac G4 10.4.11 PowerMac G3/266 9.0.4 Duo 2300cTB 7.6.1 iMac C2D 2.66GHz 10.6 Macintosh IIci 6.0.8 iMac G4 10.4.11 X200 Ubuntu 10.04.4LTS X200 Windows XP SP3 T420 Linux Mint 17.1 x64 iMac G4 10.4.11 Duo 2300cTB 7.6.1 iMac G4 9.2.2 X200 Ubuntu 10.04.4LTS |
HD20 Hard Drive (floppy port) (1) Internal SCSI Hard Drive (2) Internal 2X CD-ROM Drive Internal IDE Hard Drive (3) Internal CD-ROM/DVD-RW Drive, Pioneer DVR-104 (4) Internal Zip100 Drive Module (5) Compact Flash IDE Adapter (6) Imitation LS-120 SuperDISK (7) SCSI Zip 100 Drive (8) USB 2.0 Flash Drive, USB 1.1 host (9) USB 2.0 Flash Drive (typical) (10) USB 2.0 Hard Drive (11) mSATA 80GB SSD (12) FireWire 800 Hard Drive on FireWire 400 interface (13) RAM Disk: Duplicate file on RAM disk (3.9MiB) (14) RAM Disk: Duplicate file on RAM disk (113.4MiB) (14) RAM Disk: Duplicate file on RAM disk (2.2GiB) (14) |
25.1KiB/sec, 0.201Mbps 635.1KiB/sec, 5.08Mbps 228.3KiB/sec, 1.826Mbps 13791.2KiB/sec, 13.5MiB/s, 110.3Mbps 2288.6KiB/sec, 2.23MiB/sec, 18.3Mbps 1043.6KiB/sec, 1.02MiB/sec, 8.35Mbps 937.9KiB/sec, 7.5Mbps 465KiB/sec, 3.72Mbps 637.1KiB/sec, 5.10Mbps 832.5KiB/sec, 6.66Mbps 21730KiB/sec, 21.2MiB/sec, 173.8Mbps 28284KiB/sec, 27.6MiB/sec, 226Mbps 322475.2KiB/sec, 314.9MiB/s, 2579Mbps 35467KiB/sec, 34.6MiB/sec, 284Mbps 2170.4KiB/sec, 2.11MiB/sec, 17.4Mbps 45537.9KiB/sec, 44.5MiB/s, 364.3Mbps 885641KiB/sec, 864.9MiB/s, 7085Mbps |
17.1KiB/sec, 0.137Mbps 306.0KiB/sec, 2.45Mbps Not equipped with write functionality 14849.3KiB/sec, 14.5MiB/s, 118.8Mbps 1112.1KiB/sec, 1.09MiB/sec, 8.9Mbps 545.3KiB/sec, 4.36Mbps 918KiB/sec, 7.34Mbps 180KiB/sec, 1.44Mbps 239.2KiB/sec, 1.91Mbps 655.4KiB/sec, 5.24Mbps 9826.9KiB/sec, 9.60MiB/sec, 78.6Mbps 24824KiB/sec, 24.2MiB/sec, 199Mbps 139380.9KiB/s, 136.1MiB/s, 1115Mbps 29434KiB/sec, 28.7MiB/sec, 235.5Mbps |
| Host | Method | Imaging (Reading disk to image file) | Writing (Writing image file to disk) |
| Mac mini CD 10.5.8 | Samsung SFD-321U/EP USB floppy drive with $ dd | 1.44MB HFS: 13.0KiB/sec, 0.104Mbps, 1:53.29s 720KiB FAT12: 8.86KiB/sec, 0.071Mbps, 1:21.23s |
1.44MB HFS: 7.56KiB/sec, 0.061Mbps, 3:14.98s 720KiB FAT12: 5.00KiB/sec, 0.040Mbps, 2:23.79s |
| E500 Win 2000 Pro SP4 | Standard internal floppy drive using RawWrite (1.44MB) and OmniFlop (for 720KiB) | 1.44MB HFS: 33.3KiB/sec, 0.267Mbps, 0:44.23s 720KiB FAT12: 14.4KiB/sec, 0.116Mbps, 0:49.85s |
1.44MB HFS: 33.8KiB/sec, 0.271Mbps, 0:43.59s 720KiB FAT12: 14.4KiB/sec, 0.116Mbps, 0:49.87s |
| Duo 2300cTB 7.6.1 | Standard external floppy drive using Disk Copy 4.2 | 1.44MB HFS: 29.5KiB/sec, 0.236Mbps, 0:50.06s 800KiB HFS: 15.9KiB/sec, 0.127Mbps, 0:50.46s 720KiB FAT12: 22.7KiB/sec, 0.182Mbps, 0:31.71s 400KiB MFS: 12.8KiB/sec, 0.103Mbps, 0:31.14s |
1.44MB HFS: 18.0KiB/sec, 0.144Mbps, 1:21.87s 800KiB HFS: 15.0KiB/sec, 0.120Mbps, 0:53.50s 720KiB FAT12: 17.0KiB/sec, 0.136Mbps, 0:42.26s 400KiB MFS: 13.0KiB/sec, 0.104Mbps, 0:30.84s |
| 512K System Software 2.0 OS was hosted on the external drive to isolate it from the copying process |
Internal 400KiB drive, 800KiB external, 35KiB file via RAM disk | 400KiB MFS: 5.93KiB/sec, 0.047Mbps, 0:05.9s 800KiB HFS: 6.73KiB/sec, 0.054Mbps, 0:05.2s |
400KiB MFS: 3.37KiB/sec, 0.027Mbps, 0:10.4s 800KiB HFS: 4.73KiB/sec, 0.038Mbps, 0:07.4s |
Footnotes:
- (1): Copied to and fro with RAMDisk+ 2.01, 200K allocated. Booted via the HD20. Could be faster on a Plus or SE.
- (2): Using RAMDisk+ 2.01 for swap. "Read data" means going from HDD to the RAM disk (upload).
- (3): Also using a RAM disk.
- (4): Copied file from CD to internal hard drive using the Finder. Write speed was on a CD-R using Disk Utility, 8x speed (max); read limit is 24x.
- (5): 95.9MB free by default in FAT16 format. After Mac OS Standard formatting, 94.3MB available. Using internal hard drive.
- (6): Using RAM disk for swap space.
- (7): Copied to and fro with the internal hard drive, USB interface. May be significantly slower in OS 9. Nominal capacity of disk unformatted (Disk Utility report) g 126,222,336 bytes; after FAT16 formatting, 126,185,472 bytes. Contributed by Anonymous Freak.
- (8): Lido 7.56 low level format and driver used. Write verification assigned to drive, 32KiB cache. Very unstable: could be a dying drive. No errors detected on media. Copied to and fro via the RAM disk.
- (9): Using internal hard drive. SanDisk Cruzer Glide 8GB.
- (10): Using internal hard drive. Same as last.
- (11): Using internal hard drive. Model is a Orange Micro USB 2.0/Dual FW800 5400RPM unit.
- (12): Copying a file to and from a RAM disk. No specific SSD optimizations were used, practically just after a fresh install. Steps: created a mount point (sudo mkdir /mnt/tmpfs); created the RAM disk (sudo mount -o size=5G -t tmpfs none /mnt/tmpfs); created the binary file (dd if=/dev/urandom of=~/random.file bs=10485760 count=400); then timed it (time cp ~/random.file /mnt/tmpfs) and then timed it the other way (time cp /mnt/tmpfs/random.file ~/Desktop). 4.2GB file (4005.432MiB) in 12.717sec read and 29.427sec write.
- (13): Using internal hard drive. Model is a Orange Micro USB 2.0/Dual FW800 5400RPM unit. This speed figure is pretty much the most you'll get out of any normal modern HDD, no matter the bus type (PATA/SATA/1394/whatever).
- (14): These tests aren't very scientific -- just create a RAM disk, choose a file that is about half the memory size, and duplicate it from the RAM disk to the RAM disk. For OS X and Linux, the command "time cp <source file> <destination>" was used, using the "real" result for computation, copying from one RAM disk partition to the other (113.4MiB, 02.55s for the iMac; 970.4MiB, 1.122s for the X200). Because of many variations and limited memory these results have a +/- 10% chance of deviation.
Amiga Networking
The curious Amiga platform does not support AFP based networking. A vintage card was produced called the PPS DoubleTalk which supported AFP and LocalTalk with RJ-11 PhoneNET style ports; but it is a fair chance those would be fairly hard to find these days and would command a hefty premium if it was available for market.
Thus, the most pragmatic option is via Ethernet, or over serial ports. Ethernet was not available on all Amiga computers, thus a bridge Amiga with onboard Ethernet is the best option. For a serial port, you will have to build your own or find one that is compatible, likely to a DE-9 configuration. As the author lacks any Amiga hardware of any sort, the easiest plan for this case is to inquire further at a forum portal.
If a connection can be established via Ethernet, which has its own peculiarities relating to the TCP stacks and drivers, then the options are FTP networking or TCP/IP based file transfer, such as creating a personal LAN web server (as demonstrated earlier with Mac OS X's built in web server) and pulling files down. Even better would be to provide an upload method for bi-directional file access. Initial inquires did not reveal any particular FTP options available. One such avenue is SneakerNet, aka physical media like CDs with CDFS, Zip disks, CompactFlash media, and so forth.
One route is to use a Mac emulator like Basilisk II (requires AmigaOS 3.x) and use SLIRP over the Amiga's TCP stack. Different TCP stacks are available depending on what is compiled for the system platform. Another method is Novell's Netware, as apparently there is a 680x0 native software binary available for cross-platform options. In any case, networking outside of the Amiga framework can be a pretty rough experience. There may also be application to application level file transfer, but any specifics or details are outside the scope of this Guide.
Apple II Networking
As far as Ethernet goes for the II platform, the Uther card is practically the only card available. Originally there was supposed to be an official Ethernet card but the plan was unfortunately scrapped. Sad, really.
Owners of a Uther card should have all the materials to make it work available, including the Contiki OS. Otherwise, there are no publicly available Ethernet options available. The only options remaining are SneakerNet and serial data.
As far as SneakerNet goes, a LC-class machine with a IIe card and a 5.25" disk drive can solve that problem. The IIGS and the IIc+ have 3.5" drives, so that eases the difficulty somewhat. There are driver cards for running 3.5" drives on other machines. The Mac will have to have a 1.44MB drive and PC Exchange to handle ProDOS format disks.
For AppleTalk, only the IIe Enhanced and the IIGS are compatible. The IIe Enhanced uses the IIe Workstation Card to provide a pair of Mini-DIN 8 ports while the IIGS comes with these built in on the back of the machine. From there, PhoneNET to AppleShare Server 2, 3 or Netatalk enabled Linux computers running as servers is possible. A SE/30 could be useful in this case as a bridge machine, running AppleShare Server 3 and an Ethernet card: there are provisions in AppleShare 2 and 3 for netbooting a IIGS (use the updated Apple II setup disks here for Server 3, the name to look for is Apple_II_Setup_Disk_2.2.sea.bin) plus a properly compiled version of Netatalk can do this as well. The II+, IIc and other models are not compatible with AppleTalk networking protocols or software -- thus, SneakerNet or terminal (i.e. VT100 terminal shell) transfer software is practically the only method. Be advised that the Apple IIGS uses AppleTalk Phase 1, not Phase 2.
Most of this information was gleaned this link and should be able to offer more information. A LocalTalk to Ethernet AppleTalk bridge like a Farallon iPrint LT or similar might work okay with a IIe or IIGS. There is the A2SERVER project for the Raspberry Pi that runs a minimized version of Linux which has Netatalk 2.2.4 on it. Some hobbyists have made custom serial data transfer hardware using microcontrollers or other logic chips, so that is one avenue. There is of course, the well-known ADTPro software, too.
To netboot the IIGS with a Linux machine, the Netatalk package must be compiled (or recompiled and reinstalled) with the --enable-a2boot flag. This article on this page talks about how to do it in general terms. One change the author noted was the path of the a2boot daemon was not as the page indicated, but it was rather /usr/local/sbin/a2boot, so the paths will have to be changed to suite (search for the file location on your end) in the /etc/init.d/netatalk config file; also the author didn't need to copy the a2boot daemon, either, as it was already installed and copied. (See the author's version: however, it has not been tested.) There's also an options:prodos for AppleVolumes.default: see the man page. Also this interesting discussion concerning Mac OS X running a Netatalk server is quite informative.
A Word About Emulators
Mini vMac
Mini vMac by its default distribution emulates a Macintosh Plus. It's fairly workable and flexible for running System 6 for dealing with MFS on computers that don't speak MFS at all. The home page is easy enough to understand and follow. Try to install on to a 200MiB or 320MiB volume to allow for expansion. You can get other versions of Mini vMac, such as the 512Ke or Macintosh II but the Plus is standard -- the only real problem is the 4MiB RAM ceiling, followed by zero networking of any kind, but there has been some progress on LocalTalk support with a beta version. There's also a binary of Mini vMac for OS 8/9 and a slew of binaries for other platforms like the PocketPC. Because Mini vMac uses its own custom disk driver, it doesn't work properly in certain situations because it's basically emulating a bunch of floppy disks. |
 Mini vMac (10.5, Intel Mac mini) |
Those who wish to compile Mini vMac in Linux may have to install the build-essential, libx11-dev, and libxext-dev libraries from the respective repositories (at least for Ubuntu: this may have changed over time, as this was correct for v3 of Mini vMac).
No emulator is able to perfectly match the original hardware and Mini vMac is no exception. However, it does work acceptably and the speed control is a very useful tool. It is a good emulator to keep on hand, even if it's not really needed. For transfer in and out of the emulated environment, one method for OS X is to use a blank disk image. These same .dsk images can also have their type changed to dimg and creator to ddsk to mount with DC 6.3.3. Extract the image, rename the extension to .dmg, mount on the desktop. Copy the files over, unmount it, then drag the .dmg into Mini vMac. Because of this simple transfer method it is ideal for preparing DC 4.2 disk images ready to be written out with dd under OS X, but caution must be exercised to unmount the transfer volume before it is mounted on the other system because it will get corrupted or damaged. |
 OS 9.2.2 with Mini vMac (3.2.3) |
Otherwise, you'll need ExportFl and ImportFl: ExportFl calls out a Save prompt which requests the destination to "save the file", while ImportFl makes used of Mini vMac's drag and drop interface to import a file. Raw binary files and BinHex 4.0 encoded files are both workable. It is not possible to drag & drop DC 6.1.2+ NDIF "Read-Only Compressed" images. For some reason, it was observed that DC 6.3.3 wouldn't start in 7.0.1 with Tune-Up 1.1.1, 7.1 or 7.1 with Update 3.0. It complained about the inability to start the disk image driver. Plain jane 7.0.1 works though, or apparently DC 6.1.2 (from another internet report).
The disk image creator Disk Jockey by One Geek Army can create disk images of varying sizes compatible with emulators, adapters and real machines. Versions are available for Mac OS X 10.4 up to current releases, and Windows platforms. A command-line version (called djjr) can run on Linux. To reduce headaches caused by chicken and egg problems, make sure to install Stuffit Deluxe 4.0, BinHex 4.0, PackIt, Compact Pro, ResEdit 2.1.3, Creator Changer and Disk Copy 6.3.3 to handle any inputs. (Disk Copy 4.2 won't be of much use, however.) A dual-bootable System 6 and System 7 platform allows for additional flexibility.
Basilisk II and SheepShaver
Basilisk II and SheepShaver are fairly similar. Neither has the speed control function of Mini vMac, so they run at full-tilt off the host system, but they can run in the background, unlike Mini vMac and have color support. Although there is a beta version of Mini vMac as a 68020 Mac II, which is capable in some respects. Basilisk II has a rather poorly designed X11-style preferences editor, but it works nonetheless. SheepShaver is a more reliable alternative unless there is something specific that Basilisk II suits the best. Most games will work fine in either emulator but there are always going to be games like Oxyd which will not work in any emulator. The management of disk images, decompressing .sit archives, binhexing and so forth is great in SheepShaver but Mini vMac can do that too, up to a point (that 4MiB RAM thing again) although Basilisk II is fine. |
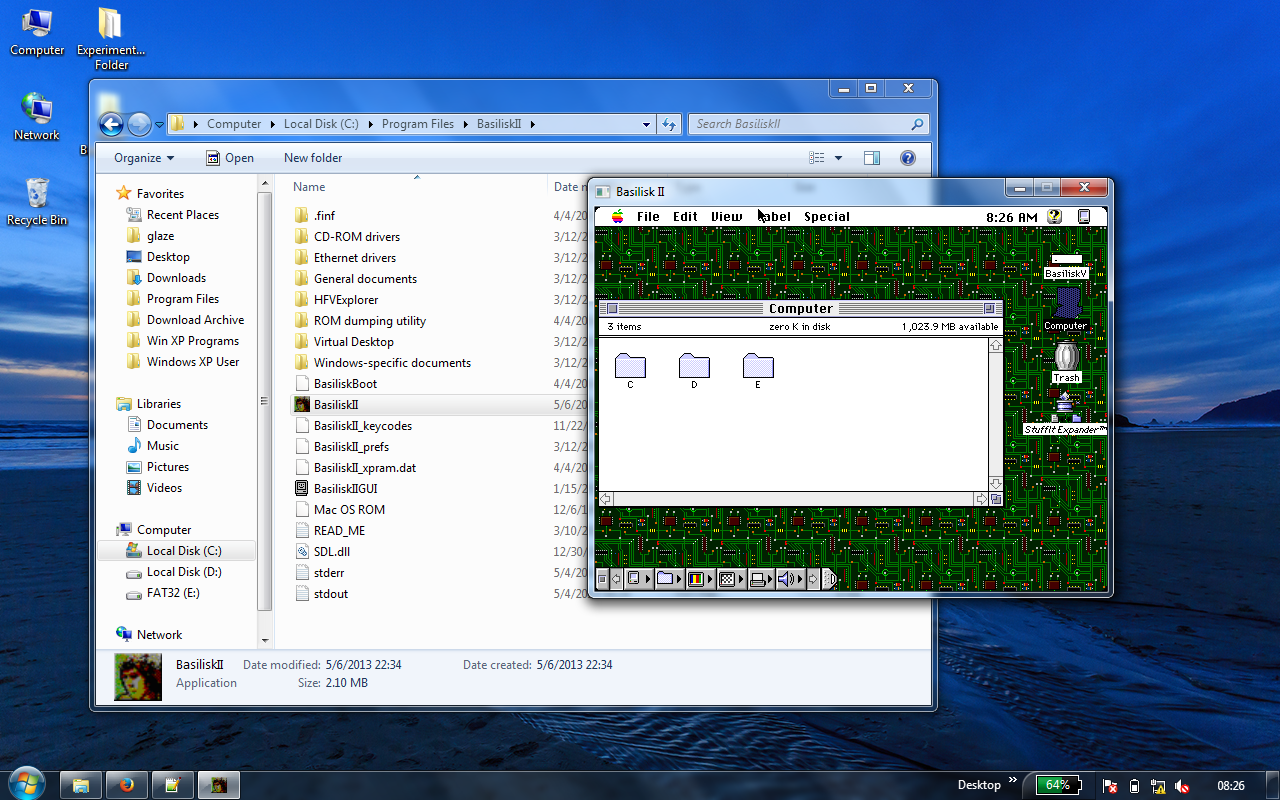 Basilisk II under Windows 7 |
Both Basilisk II and SheepShaver can connect out to the Internet through SLIRP and apparently it is possible to network out with it via AppleTalk, although this has not been personally tested, and usually leans on build 142 of Basilisk II or a modified deviation from the emaculation.com forums. One problem is that to use AppleTalk networking you need a TAP bridge to forward the traffic, which usually involves something like the OpenVPN TAP bridge (if you do this, deselect all options from the installer except the TAP bridge). Even then it may not bridge Ethernet and the TAP properly in Windows. In Windows 10 and 11, you may need to search for View network connections to get the right window to bridge the interfaces. A workaround is to use Linux in a virtual machine, which doesn't have the same problem as Windows systems do natively and the headaches of macOS.
Make sure to add the ROM file into the path field for the ROM file before setting the system type drop-down menu, lest it will crash. Based on all this, an emulator of some kind could be useful in emergency purposes or just reliving the antiquated experience without the bother of maintaining the hardware, if all the components work without crashing or corrupting on a regular basis. Make sure to keep backups of the emulator boot disk images. Most testing was done on a 2.16GHz Core Duo T2600 Mac mini with 2GiB RAM. PowerPC machines running SheepShaver or Basilisk II may suffer performance problems, especially the former.
Mac OS X's Built-in Emulation
In OS X 10.0 through 10.4, PowerPC processors can use the Classic Environment. It is more of a integrated virtual machine because it is tied to the OS X kernel. When it boots up, it looks like the image to the right but once it has started up then it ties in to the standard menu bar and becomes more like an application rather than the more popular image of a virtual machine. There are many applications for which it ought to work fine but generally speaking there are also a lot that don't work well in it and are simply better served by a real OS 9 capable machine. In the image to the lower right, HyperCard is one example of a program that works well in Classic, but GopherGolf is ... it can work but when the player hits the ball, the motion isn't drawn very well and is kind of kludgy. Other games like Age of Empires: Rise of Rome are also "workable" but only just. Most of the full-screen games like Factory or Ultimate Pool will be okay, but games like Bolo or Frog Xing which run in a dedicated window usually work better. | 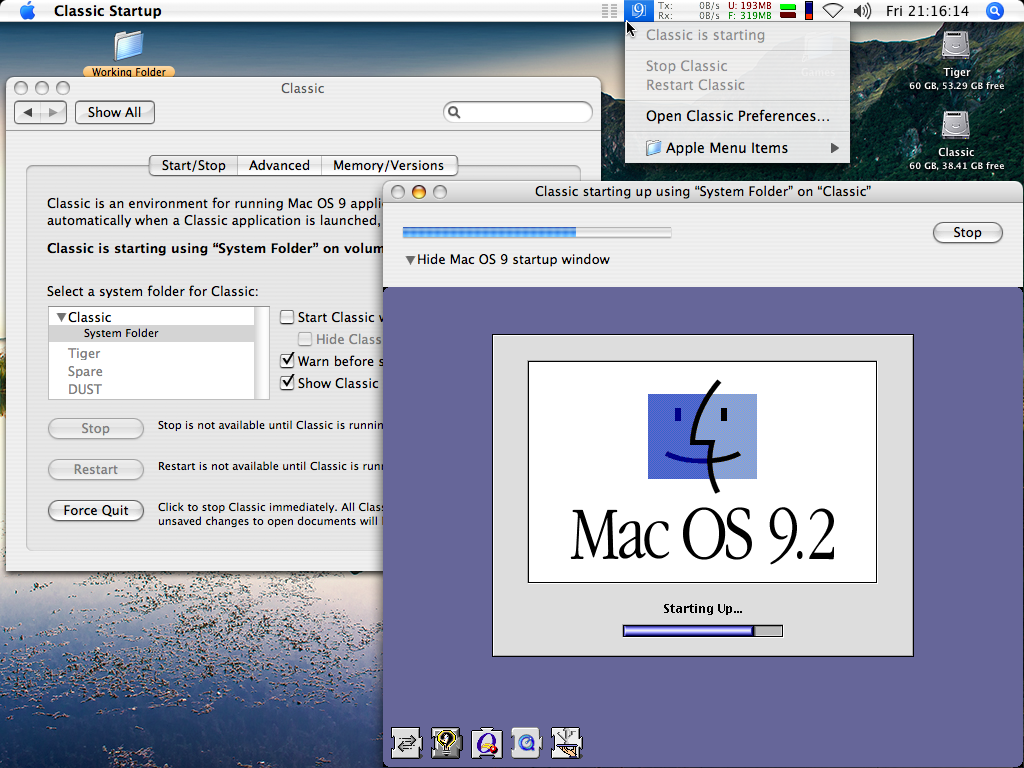 Classic starting up (iMac G4 800MHz) |
Try to use Carbon compatible applications (such as EV Nova, Bushfire, and so on) which are compatible with OS X natively, or reboot into OS 9 for most cases. Early System 6-era programs such as Microsoft Works 2.0, Word 1.0 and games like Airborne! and Banzai! are not compatible with the Classic Environment and can crash the virtual machine; but the host operating system is usually fine after such an event. For Intel based CPU Macs, the Rosetta emulation interface is included from Mac OS X 10.4.4 (the first public Intel release, for the iMac 1.83GHz T2400 17" display) to 10.6 for running PPC applications: Macs that started showing up with first generation Intel Core i5 and i7 processors cannot boot 10.6 and thus this area relates to the older Core Solo, Core Duo and Core 2 Duo series machines. It works alright in most cases and like Classic Emulation, there can be hiccups here and there but generally speaking most application binaries for OS X work fine as such. |  Classic Environment demo |
LocalTalk will not work in the Classic environment because all the networking is routed through the OS X kernel, so anything the host operating system doesn't support will also carry over into the emulated environment. Apple did a fairly reasonable effort with Classic Emulation and Rosetta, although eventually the sun sets on those kinds of implementations. Intel Macs cannot run the Classic Emulation mode. (Guess all that work porting Mac OS to Intel machines was in vain.) Unlike the Classic Environment on PPC machines, the Rosetta emulation is transparent to the user and there is no "booting of the emulated machine". Applications simply open as if they were Intel native and just work -- or they crash horribly and unpredictably. Usually really old OS X applications that date back to the 10.1 Puma or 10.2 Jaguar days are the most troublesome, or have the highest risk of unexpected behavior.
Other emulators
MAME, a very flexible emulator package which can emulate a wide variety of different and obscure hardware boxes, has some advantages over the others. It can deal with SCSI and floppy drives, however it can be rather intimidating and can get complicated very quickly. Once the software is downloaded, you need to get a ROM package which is a little bit different than the ROM files used by the other emulators, in that it includes keyboard ROMs, high and low ROM dumps, floppy driver ROM, and so on. That goes in the /roms/ directory. It will also work with BlueSCSI disk images by renaming them from .HDA to .chd. It has some other limitations compared the others, but can be handy for certain cases. An example command to start up a Macintosh Plus is shown below.
QEMU is another versatile emulator with a generous span of emulatable machines. Like Basilisk II it relies on a TAP network bridge to use AppleTalk out and if that doesn't work for you then AppleTalk is a dead end. It's notable for being able to run A/UX 3.0 on a modified build and it does very well at that. Like MAME it can also get complicated quickly, is sensitive to command line errors and can be sometimes fussy. However both are valuable in their own ways and can solve problems for some people very well.
The last one to mention is PCE by Hampa Hug. It's an emulator for the 128K, 512K, 512Ke, Plus, SE or Macintosh Classic. While it does not support AppleTalk, it does support serial ports. It hasn't been updated in awhile, at least of time of writing, but it can be useful for certain cases. Like MAME and QEMU it uses command line based options and configuration. Complete ready to use systems are available from the author's website.
Download Town
All disk images are binhexed for transport security against corruption and loss of type/creator data and are Disk Copy 4.2 disk images, unless otherwise described. See the previous sections about data encoding and disk images for processing. Choose "Save as..." if your browser doesn't work with download links directly. It appears that System 3.2/Finder 5.3 is the minimum to open CompactPro self-extracting archives. All the Zip archives open in Stuffit Expander 4.0.1 or later. All have been triple-checked for integrity and inspected with Disinfectant. Note: Some disks may have blank or generic icons for the content therein. This is a function of the way the Desktop file is handled when working with disk images created virtually. Because the risk of bad media, most disk images provided here (such as the SSW6 NAD disk images) were created virtually. Rebuild the desktop file if needed to rectify this issue.
A text file with a MD5 and SHA-1 checksum of every file is provided here. To compute the MD5 checksums, older Macs can use this utility. Mac OS X can use the command line, like md5 'AS Client 3.7.4.image.hqx', and Linux does it similarly with md5sum 'AS Client 3.7.4.image.hqx'. Windows boxes used to use FCIV, but Microsoft stopped advising it sometime after Windows 7 and the download for it doesn't exist anymore. Third party tools are probably the way to go. Run the MD5 tool against the raw download, as demonstrated, rather than the decoded or decompressed output. All the PDF manuals are version 1.4 or earlier documents, capable of being read by Acrobat 5.0 or later with OCR.
Drivers and Extensions
| Item | Comments |
| AppleShare Workstation 3.5 1.44MB | AppleShare Workstation 3.5 installer, no boot folder. System 6 to System 7.5.1. 7.5.2 ought to use WS 3.6.5 |
| AppleShare Client 3.7.4 1.44MB | AppleShare Client 3.7.4 for English only, no International options. 7.1 to 7.5.5 compatible, requires OT |
| AppleShare Client 3.8.3 Self-Mounting Image | AppleShare Client 3.8.3 installer for 7.6 and higher |
| AsanteTalk Driver Installer disk 1.44MB | Driver version 5.6.1 for Asante EtherTalk products |
| CD-ROM Toolkit1.44MB | FWB CD-ROM software. Version 3.0.2c |
|
DaynaPORT 7.5.31.44MB DaynaPORT 7.7.2 DaynaPORT 7.7.2 alternate |
First one should cover most of Dayna's earlier products, the latter two for later production items. If you need to use these on a 800KiB machine like a Plus, SE or Macintosh II, then use MountImage 1.1b3 within System 6 or mount them with Disk Copy 6.3.3 in System 7 |
| ClearVue SE APD800KiB | Driver software for the Radius ClearVue SE Apple Portrait Display 68000 accelerator with video output |
| EtherTalk Installer 2.0800KiB | French installer version of the EtherTalk NB, Ethernet NB and Macintosh Ethernet LC cards. Apple part number 680-0417-B. EtherTalk 2.0 only, not bootable. Sourced from Siliconinsider on 68kmla.org via a friend who got it from Aconit, an information technology museum out of Grenoble, France. Aconit article number 18931. Reference image, image credit Aconit. |
| UltraDock and MicroDock Ethernet driver 1.44MB | Newer Technologies PowerBook Duo Ethernet device installers with some testing/diagnostic software. Not bootable |
| Farallon driver disks for Farallon cards or adapters: Version 2.2.1: 800KiB original, 1.44MB adapted Version 2.2.2: 800KiB original, 1.44MB adapted |
Ethernet installers with some testing/diagnostic software. Not bootable. Not for CommSlot Ethernet cards. May not work in 7.5.3+ or with OT software. Mainly for System 6, 7 and 7.1 |
| Farallon PC Card Installer 3.0 1.44MB Windows Driver .ZIP Windows Driver BinHex |
Driver disks for the Farallon PN595A family of PCMCIA 16-bit 10BASE-T Ethernet cards. Not bootable, unknown system requirements. The Windows versions have drivers for Windows 95, 98 and NT 4.0; seems to have a weird issue with the disk name. In Classic Mac OS it is called AWin95; in OS X it is called PN595A. BinHex and .zip provided, ripped with dd, Mac version with DC 4.2. Can be related to the 3COM EtherLink III 3C589. PN595A is NOT compatible with Newton products |
| Network Software Installer 1.4.5 1.44MB | NSI 1.4.5 for System 6 only |
| Network Software Installer 1.5.1 1.44MB | NSI 1.5.1 for System 7/7.1. Not used for 7.5+ |
| Open Transport 1.3 Installer disks: 1, 2, 3 and 4 1.44MB | OT 1.3 installers: Disk 1 and 2 for 68K only, all four for PPC. 7.1 up to 8.0 only. 8.1 comes with OT 1.3, and 8.5 uses OT 2.0 |
| Apple Internet Router X.25 Extension 800KiB | The AppleTalk X.25 Wide Area Extension. Allows AppleTalk to be tunneled over X.25 networks. Provided here because it's difficult to find. Unlikely that it will see use today though |
| Mac OS 8/9 Serial device driversCompactPro SEA | Prolific PL2303H/X driver (v. 1.3.6b1); FTDI "FT8U232" (v. 1.0f4) Keyspan drivers: v.2.4 and 2.5 for OS X, then v.1.9, 2.1 and 2.1b4 for OS 8/9 |
| TOPS FlashBox software800KiB | No documentation. Only has drivers. Version 1.0 |
| WaveLAN Installer 1.44MB | Installer for ORiNOCO WiFi PCMCIA adapters. Stuffit Deluxe 4.0 archive. Also check the Restricted Files directory |
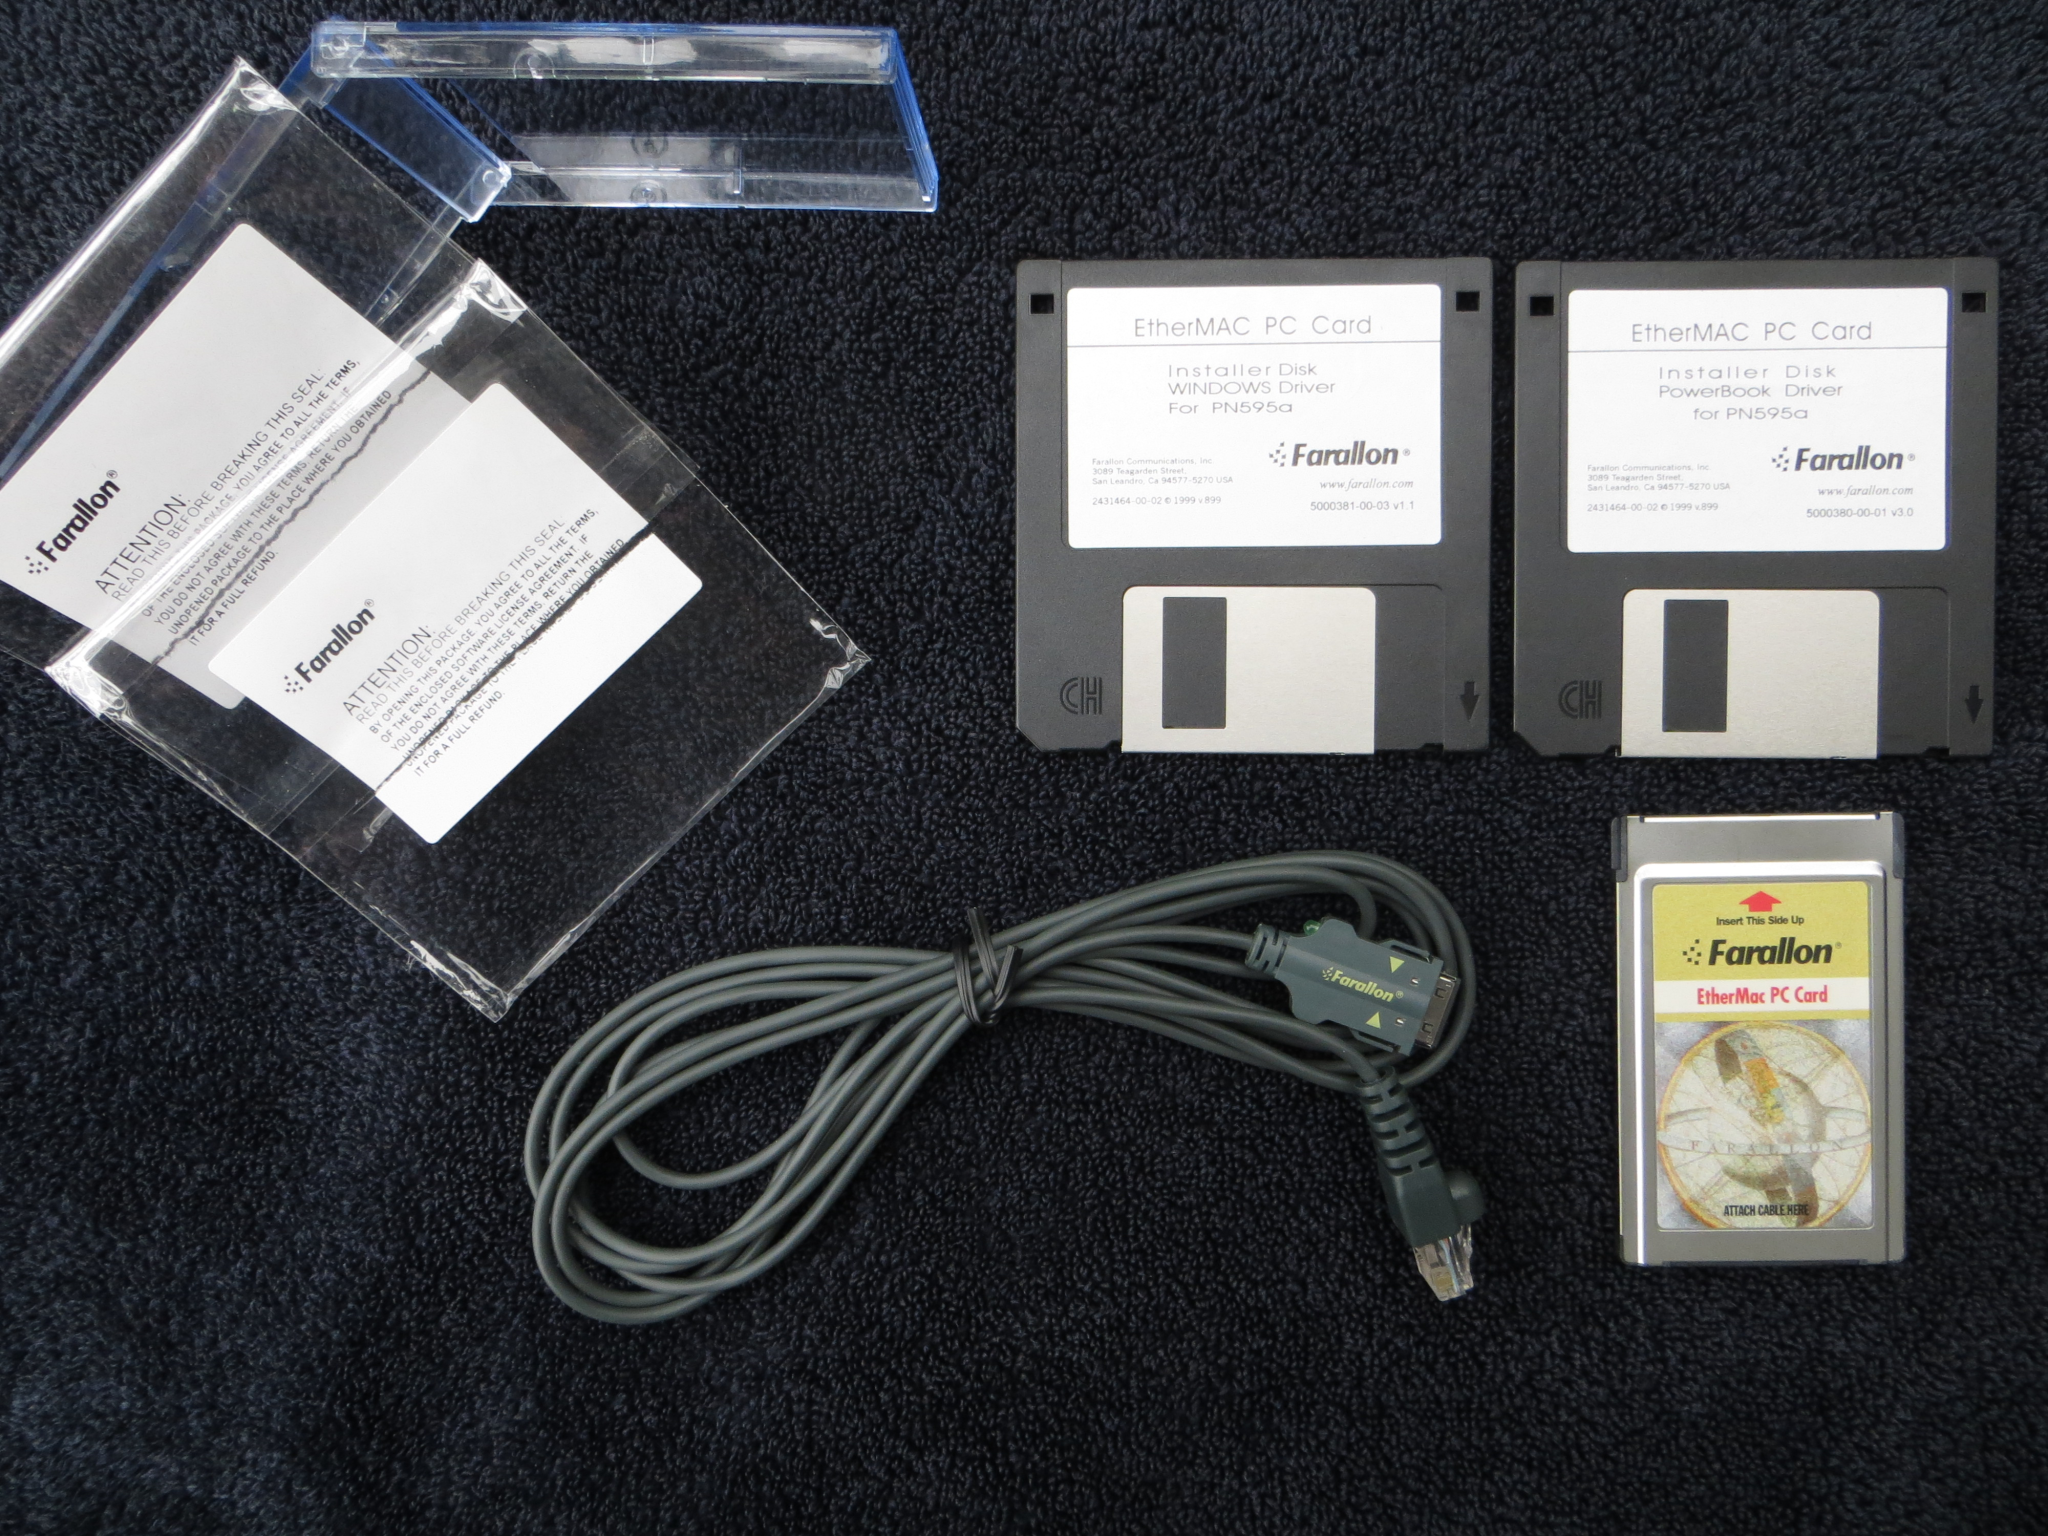
Programs and Utilities
| Item | Comments |
| AppleShare WS 1.1 for the 512K and 512Ke 400KiB MFS AppleShare WS 1.1 for the SE, II and Plus 800KiB AppleShare FS 1.1 for the SE, II and Plus 800KiB |
AppleShare Work Station 1.1 installer: System 3.3/Finder 5.4 with the HD20 INIT AppleShare Work Station 1.1 installer: System 4.1/Finder 5.5 AppleShare File Server 1.1: System 4.1/Finder 5.5. All sourced from bitsavers.org repository |
| Anubis SCSI Utility Software1.44MB | Version 3.04f |
| Bolo ArchiveStuffit 4.0.1 SEA | Comprehensive archive including Bolo, map editors, over 2000 maps, utilities and useful HTML page dumps. Stuffit Deluxe 4.0 self-extracting archive as CompactPro is limited to 1500 items |
| Copy II Mac v7.2800KiB | Bootable S4.3/F6.0 disk. Does not boot Mini vMac. Included was an old duplicate, attached here. Manual available below |
| Disk Copy PackageCompactPro SEA | Disk Copy 6.4, 6.5b13 and Disk Copy 6 Scripts |
| Eject ExtrasCompactPro SEA | This is for certain Macs like the iMac G4 and PowerMac G3 which don't have a physical Eject key on the keyboard. Fetched from the iMac G4 700/800MHz OS 9 Install CD. Only used in Mac OS 9 |
| GatorBox Software 800KiB, DiskDoubler Archives | For the Cayman Systems GatorBox, original and CS model. From Scott Alfter's blog. See below for manuals |
| InterPoll Network Admin800KiB Responder Installer 512K/512Ke400KiB Responder Installer Plus, II, SE800KiB |
InterPoll. Also known as Inter Poll, Inter-Poll, or Inter•Poll. Used for detecting problems with AppleTalk networks. Manual available below |
| Maccessories Professional Type Fonts400KiB | Boots a System 1.1/Finder 1.1g system. Manual available below. A product of Kensington |
| Lap-Link for Mac version 1.2Zip container | System 3.2/Finder 5.3 bootable 400KiB MFS disk in the archive. PC disks are Zipped in a package containing a 720KiB PC FAT12 3.5" disk in DC4.2 and NDIF formats, the 5.25" disk in .IMG, .IMD and disk contents dumped in a folder |
| MacPrint Program 1800KiB MacPrint Program 2 MacPrint Fonts |
MacPrint 1.2.3u. Software for running PC compatible printers equipped with a parallel port. Cable was included, pinout is in the manual, available below. MacPrint Program Disk 1 has the text Ser # M 35276 U; on the back of all the disks is the marking AHX726 |
| MacServe 2.1400KiB | Bootable System 3.2/MiniFinder disk. Same as Macintosh Garden, but with a different serial number. Manual below |
| Mac SECRETS 2nd Edition Diskettes1.44MB | Disk images of the three disks that come with the Mac SECRETS 2nd Ed. book. All are freeware or shareware, some require registration. Of those mentioned in the book, only DiskTop specifies a code of 12578, although you can probably use any number. Included are: AppDisk; Applicon; AreaCodeFinder; Before Dark; Bitstream Fonts; Color Coordinator; Color It!; CP DriveLight; CP Undelete; Disinfectant; DiskTop; Extensions Manager; Flash-It; Kaboom! sounds; Label Secrets; MacMan Pro; MenuChoice; MultiClip Lite; Olduvai Fonts & Sounds; Open-wide; PopChar; Power to Go; PwrSwitcher; QuickDEX; Remember?; ResEdit; SCSIProbe; SmartKeys; Speed Disk; Sunset Screen Saver; SuperClock; System 7 Pack; TempoEZ; TypeIt4Me; WYSIWIG Menus; and ZTerm. Start by mounting all disk images with something like Disk Copy 6.3.3, then start with SECRETS Disk 1's Installer to pick which ones you want. They will be copied to a folder on your hard drive |
| MacTerminal PackageCompactPro SEA | MacTerminal 1.1 (400KiB MFS), MacTerminal 2.2 (800KiB), MacTerminal 2.3.1 (800KiB), and MacTerminal 3.0 (800KiB, 1.44MB). Version 1.1 comes on a System 1.1, Finder 1.1g OS; version 2.2 comes on a System 3.2, Finder 5.3 OS; 2.3.1 and 3.0 are not bootable. Concerning MacTerminal 2.2: This was a real exercise because getting a real disk in the wild is nearly impossible. A 68kmla member provided a MacTerminal 2.2 disk which was corrupted and not bootable, with System 3.2/Finder 5.3, based on the creation dates. The provided disk was based on making a modified version of the System 3.2/Finder 5.3 for the 512Ke series, then copying in the MacTerminal data and making it "presentable". This provided copy is not an original and should not presented as an original copy of a MacTerminal 2.2 master disk. |
| NFS/Share800KiB | Version 1.1.2. See documentation below for PDF dump of the manual and all articles |
| PC MacLAN Connect Admin800KiB PC MacLAN Connect 1.1360KiB PC 5.25" |
PC MacLAN version 1.1. File server service only, runs on MS-DOS 3.3 or higher on certain PC Compatibles. No AppleShare client. Top disk is Macintosh, exactly as received, with just a remote administration program. Zip archive has binary format, .IMD ImageDisk format and dumps of both disks into folders. Disk 1 has the text serial number 2300401. Also see this KB article, but it's not clear what version is being used. Zip folder created with Stuffit Deluxe 8 on OS X 10.4 Tiger, should be using the DEFLATE format, so it should be compatible with most older systems |
| Snooper v.2.01.44MB | System profiling and diagnostic testing software |
| StarCommand 2.2.1800KiB | For a Farallon StarConnector AUI to RJ45 Ethernet adapter. StarCommand control program, ReadMe, basic System 6.0.5 boot folder |
| Switcher Construction Kit800KiB | Version 5.0. See PDF manual below |
| TOPS/Macintosh Software800KiB TOPS Inbox Admin Disk TOPS Inbox User's Disk MacLink Plus/TOPS |
Version 3.0. The File Sharing disks are signed, you can't use the same one multiple times. The Restricted Files section has an additional TOPS 3.0 disk set for a two-computer setup. Manuals are available below |
| TOPS for DOS 2.05.25" 360K PC | Zipped package with .IMG, .IMD and contents of both disks dumped into a folder |
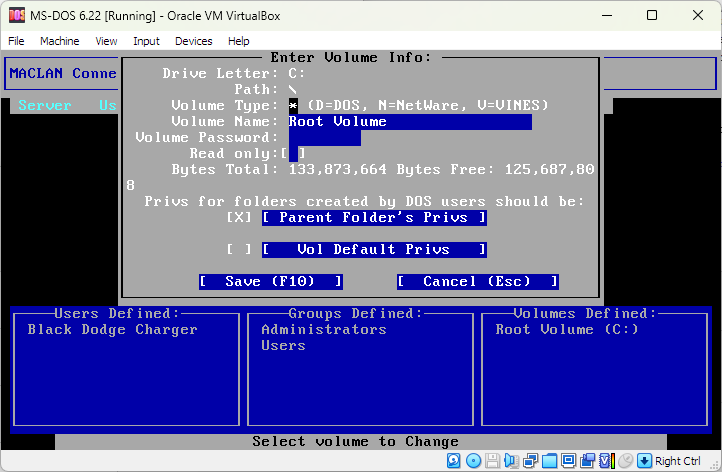
Manuals and Documentation
| Item | Comments |
|
Apple Internet Router 3 Administrator's Guide Apple FDHD Internal Drive Upgrade AppleShare File Server Administrator's Supplement for Apple II Workstations (ASFS 2.0) ClearVue/SE Owner's Manual CompactPro User's Guide |
Packaging for ClearVue/SE 68000 accelerator for the Macintosh SE with video out and onboard RAM |
|
Copy II Mac version 7.2 Copy II PC Deluxe Option Board Manual DART 1.5 Disk Copy 6.1.2 User's Guide EtherTalk Interface Card |
This version of the Copy II Mac manual is older than the one presently uploaded to Macintosh Garden. It was falling apart, with glue visible on the scans of the binder which has failed. Page 1 and 2 are missing, the page was ripped out previously. DART 1.5 PDF conversion was facilitated inside a custom version of Mini vMac II which ran at 1024x768. Screenshots were captured (DocViewer format, in System 6, no other OS would work), converted to PNG, cropped to 547x685 and then passed to Adobe Acrobat X Pro. PNG to PDF conversion by markyb at thinkclassic.org. All artifacts and other errors are exactly as per the original. No OCR applied |
|
EtherTalk User's Guide EasyShare Demo Fedit 3.0 Flash-It 3.0.2 Flex 3.0 |
Flash-It manual conversion by mcdermd at thinkclassic.org. Fedit 3.0 documentation not complete. On the EtherTalk Interface Card scan (previous block), the scanner is unable to pick up the gray rectangle on the front cover. Packaging for an EtherTalk NB card, minus the packing list and install disk(s) |
|
GatorBox User's Guide Cayman Systems Network Reference Setting up your GatorBox InterPoll Network Administrator's Guide LapLink Macintosh Manual |
GatorBox User's Guide and Network Reference PDF manuals supplied by BPR of vintage-computer.com forums, and converted to legacy Acrobat format with OCR processing using Acrobat X Pro by markyb of thinkclassic.org. Setting up your GatorBox provided by roughana of the comp.sys.apple2 newsgroup and processed by markyb. InterPoll can also be called Inter-Poll, Inter•Poll or Inter Poll because of foreign character issues. PDF page 25 and 26 are exactly as scanned, there must have been a layout error. Packaging for InterPoll followed by Lap-Link for Mac |
|
MacBinary 1.0.1 Maccessories Professional Type Fonts MacLinkPlus/TOPS Macintosh Plus Internal Disk Drive MacPrint 1.2.3u Manual |
The Macintosh Plus Internal Disk Drive booklet is probably for users who upgraded from a 128K, 512K or 512Ke to a Macintosh Plus. Included disk is here, System 3.2/Finder 5.3, probably common by now anyways. Packaging for MacPrint and Maccessories Fonts |
|
Macintosh SE/30 Quick Start Guide MacServe 2.1 User's Guide MacTCP 1.0 Evaluation Kit MacTerminal 2.0 Manual MacTerminal 3.0 User's Guide |
Developer materials are difficult to find, usually expensive, and are often hoarded by tight-gripped collectors. Images of Disk 1 and Disk 2 (DC 4.2 800KiB). Includes the Administrator's manual and the Programmer's manual. The SE/30 quick start fold-out pamphlet didn't have any disks with it. Materials for MacServe |
|
NFS/Share PackIt 1.0 PCMacLAN Connect User's Guide Version 1.1 PhoneNET Connector User's Guide Ready,Set,Go! 4.0 User's Guide |
Packaging for NFS/Share, which does not cover any version 1.3 changes. Version 1.1.2 was included. PCMacLAN Connect complete package. Packaging for Ready,Set,Go!, PhoneNET User's Guide and Switcher |
|
SuperDrive Owner's Guide Switcher Construction Kit TOPS User's Guide to File Sharing and Printing for Macintosh TOPS Administrator's Guide to Inbox for Macintosh TOPS User's Guide to Inbox for Macintosh |
Materials for the entire TOPS Network Bundle. MacLinkPlus/TOPS is just above |
|
TOPS Network Bundle box papers and materials TOPS for DOS version 2 ZTerm 0.9 |
Packaging for the TOPS for DOS software. The white form paper is a carbon paper stack with 1 white original, 2 yellow, 1 pink and 2 green copies. Manual was shrinkwrapped, binder was unpopulated |
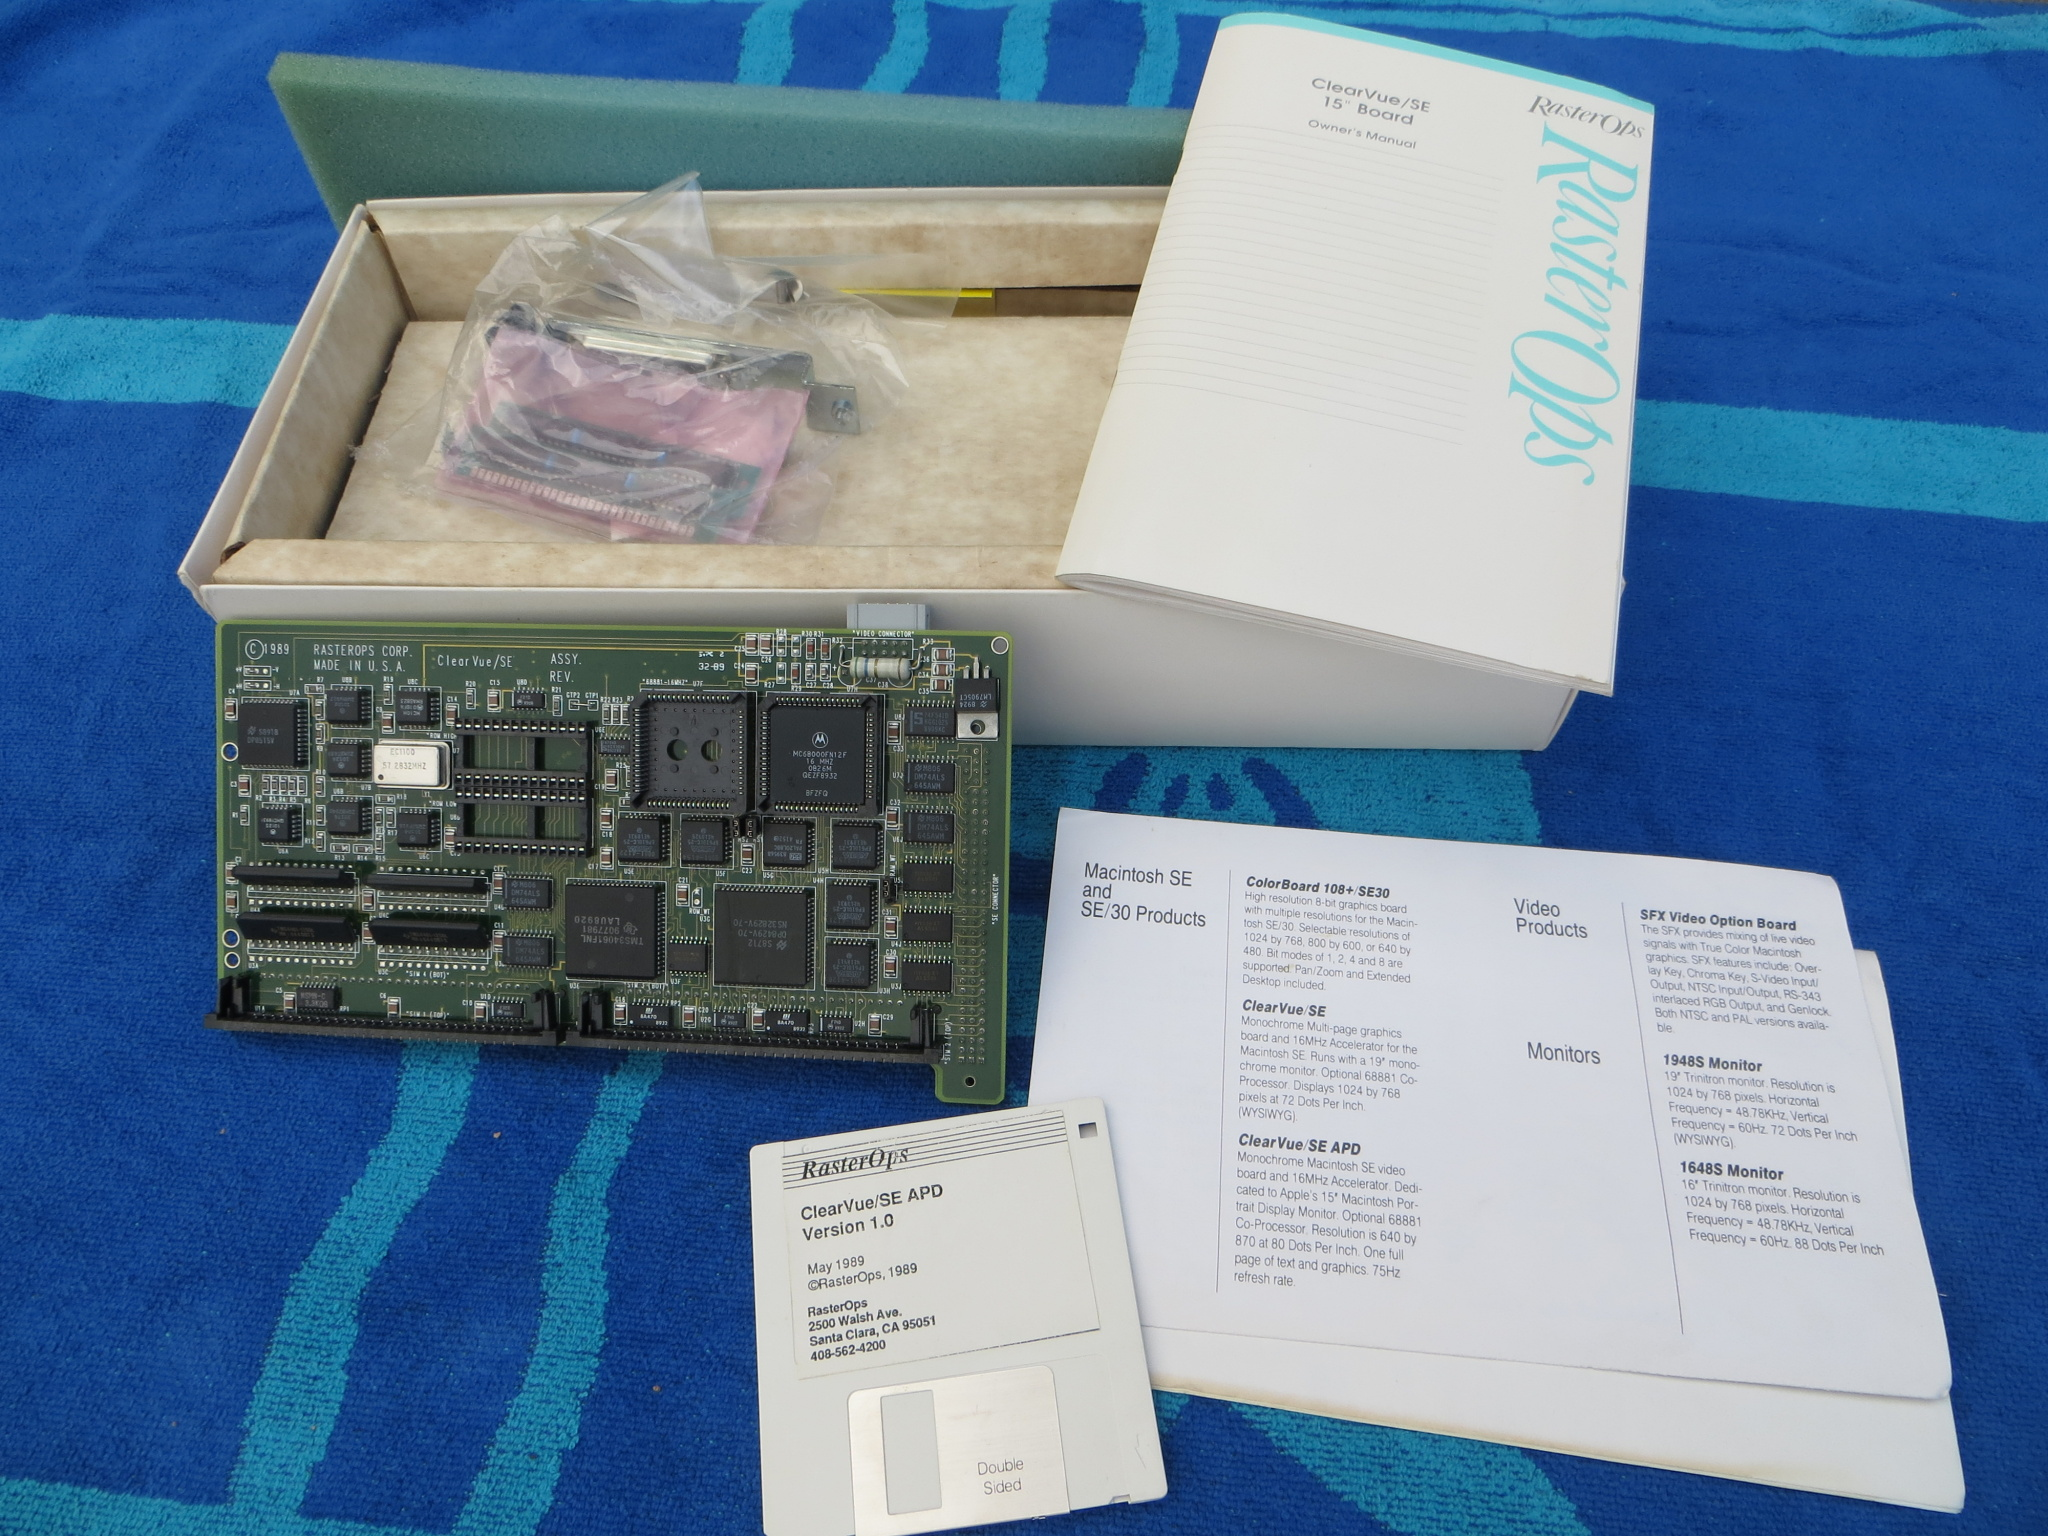
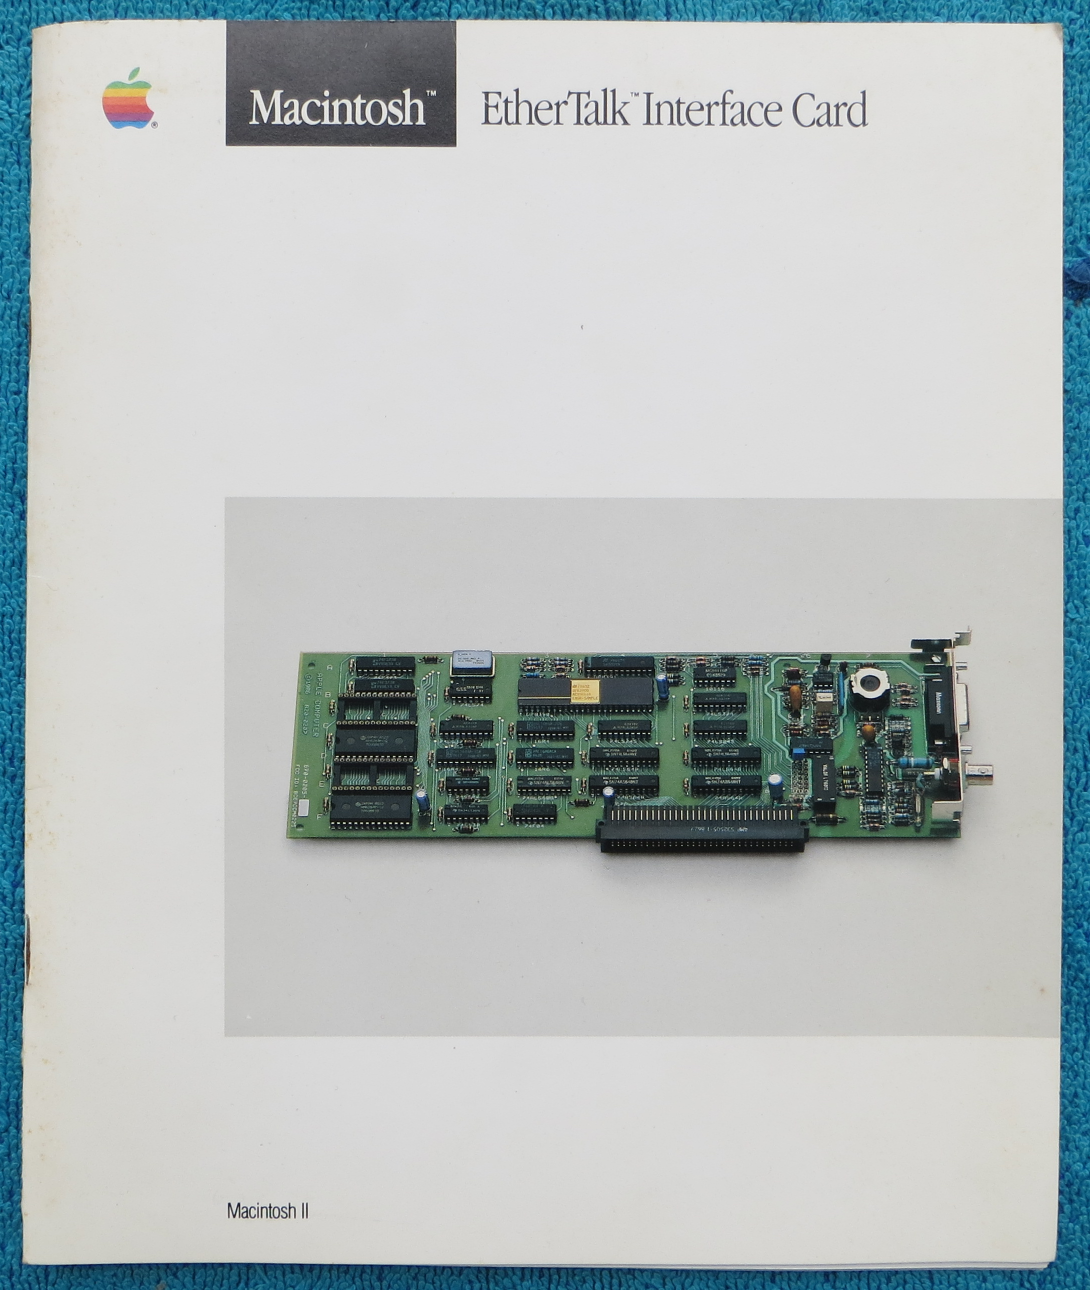
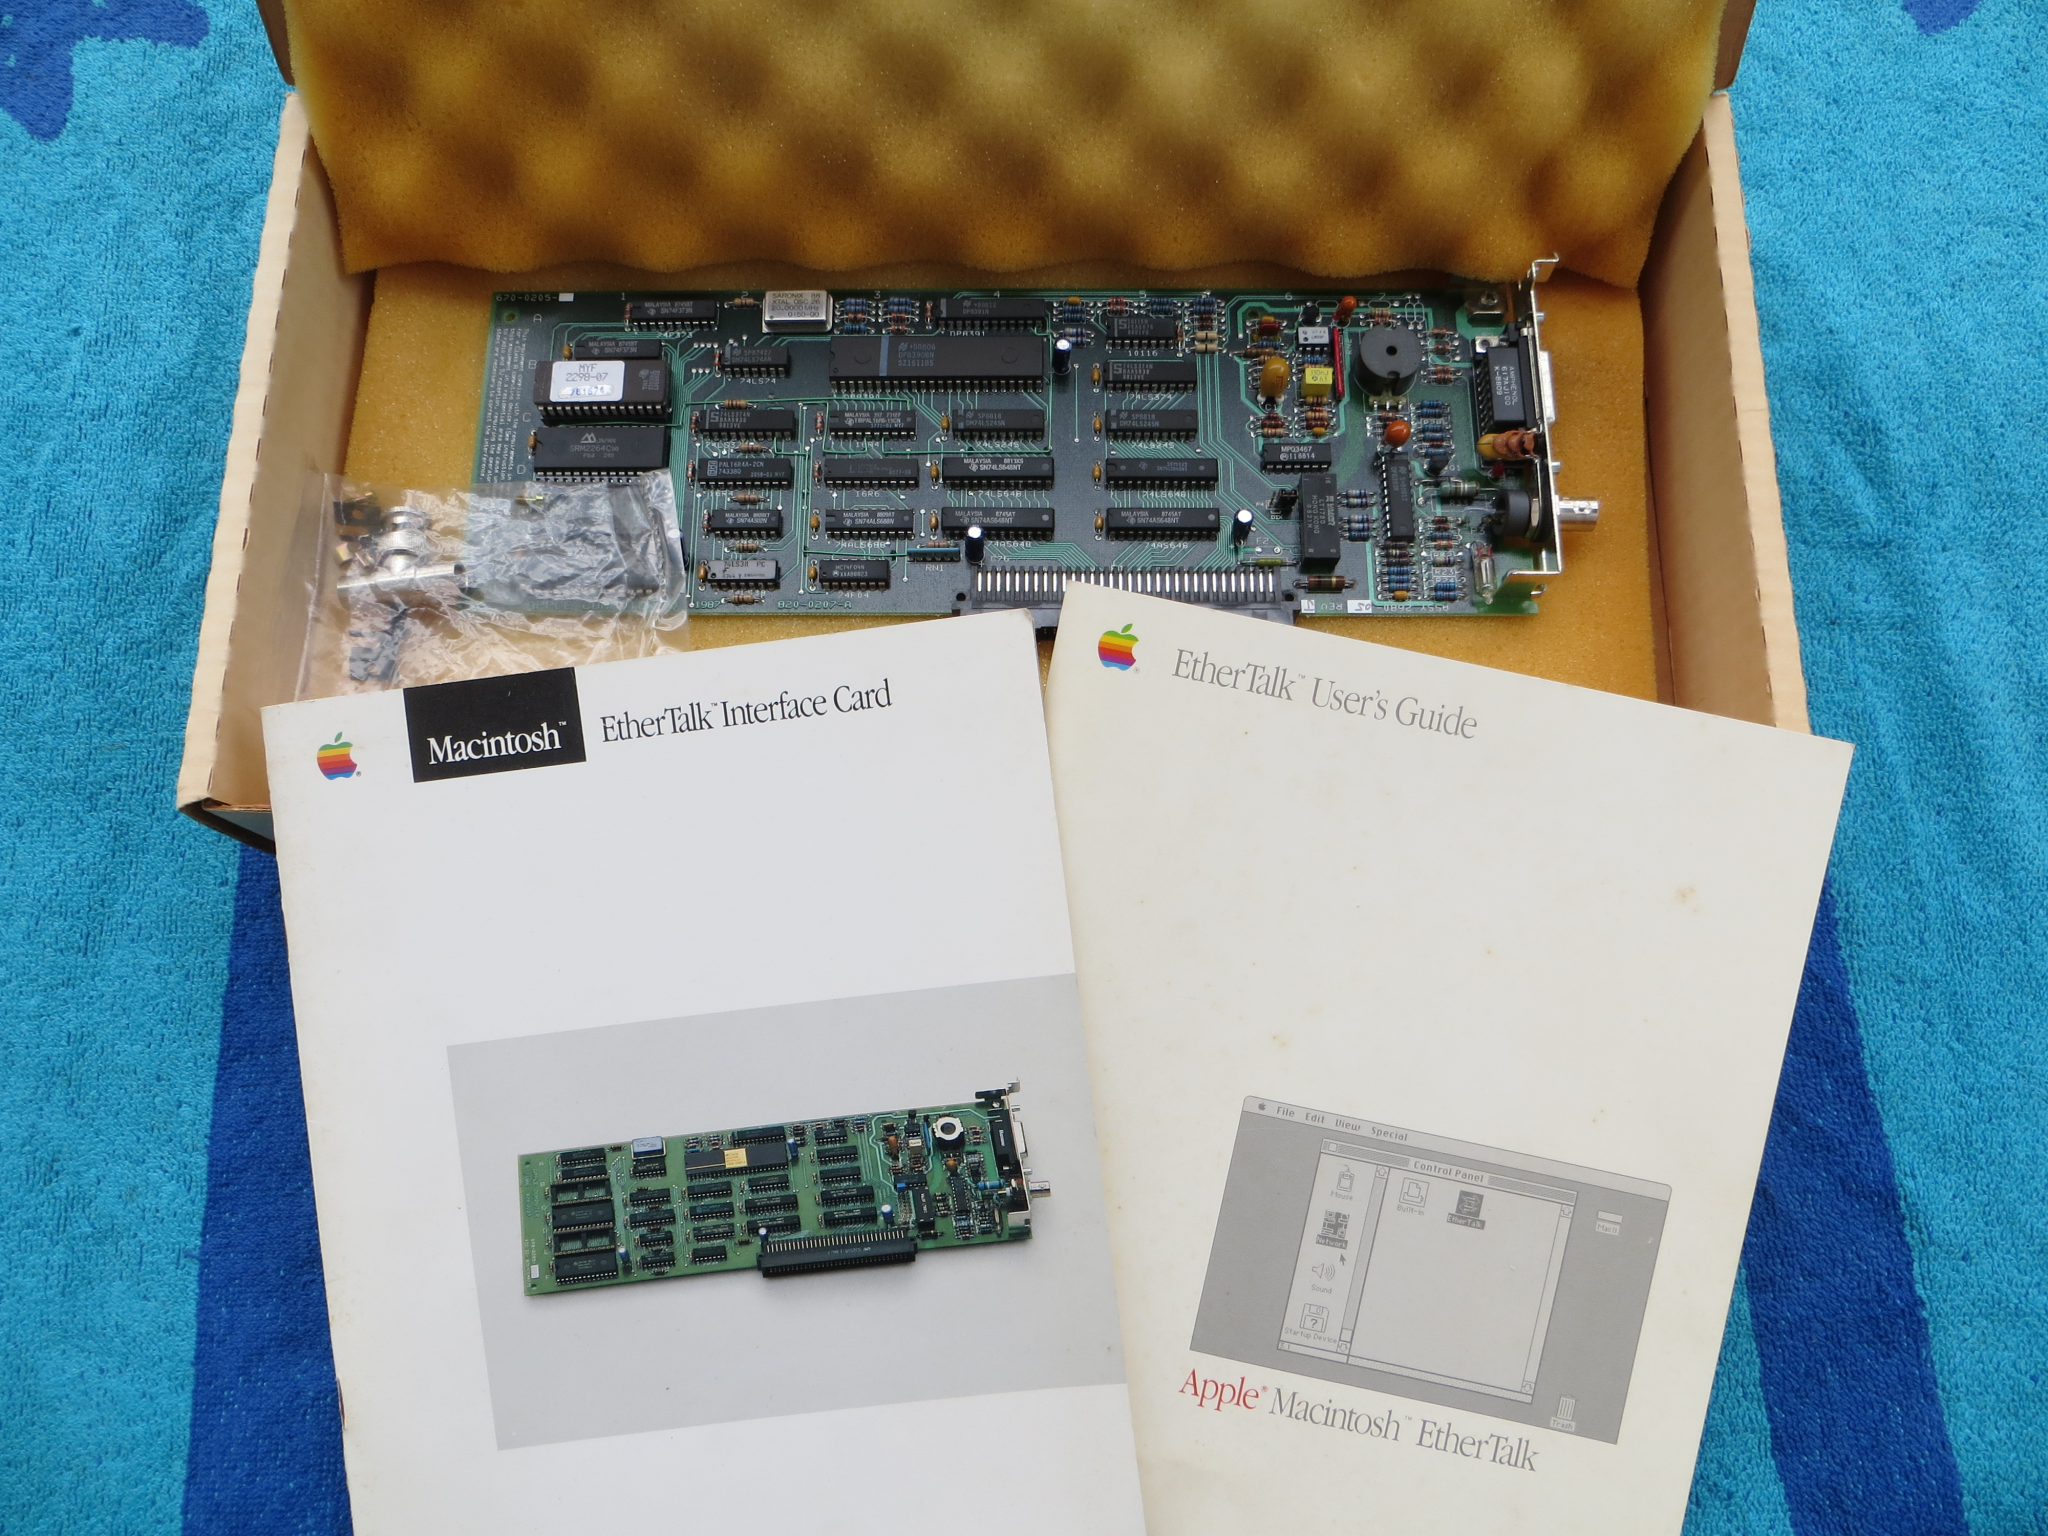
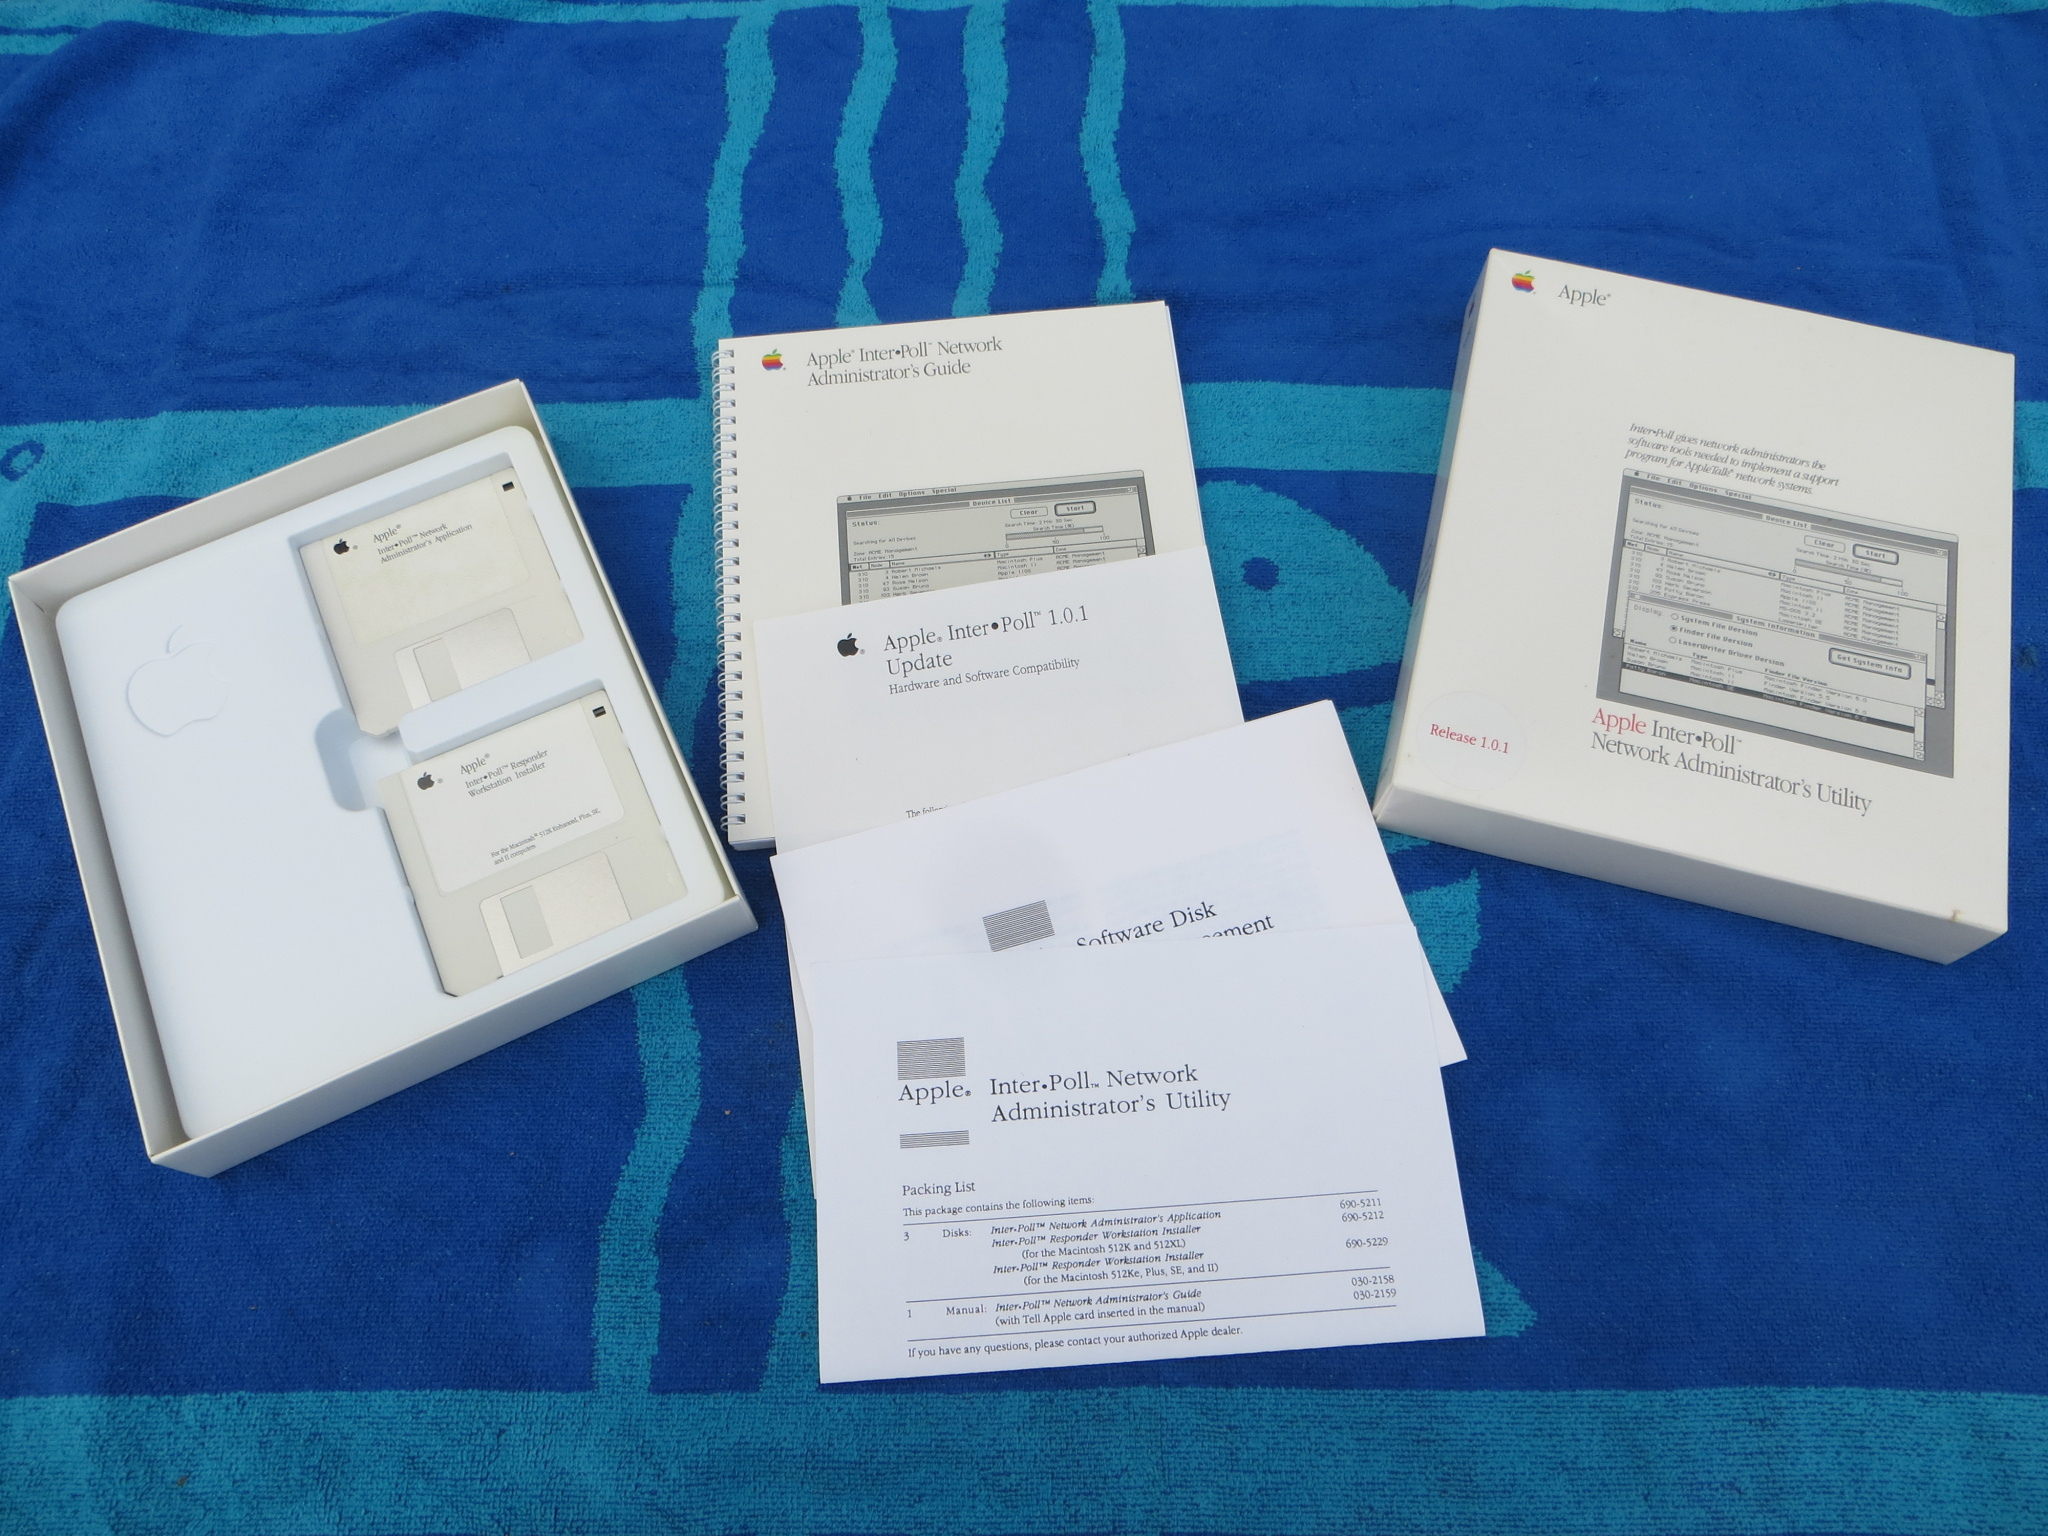
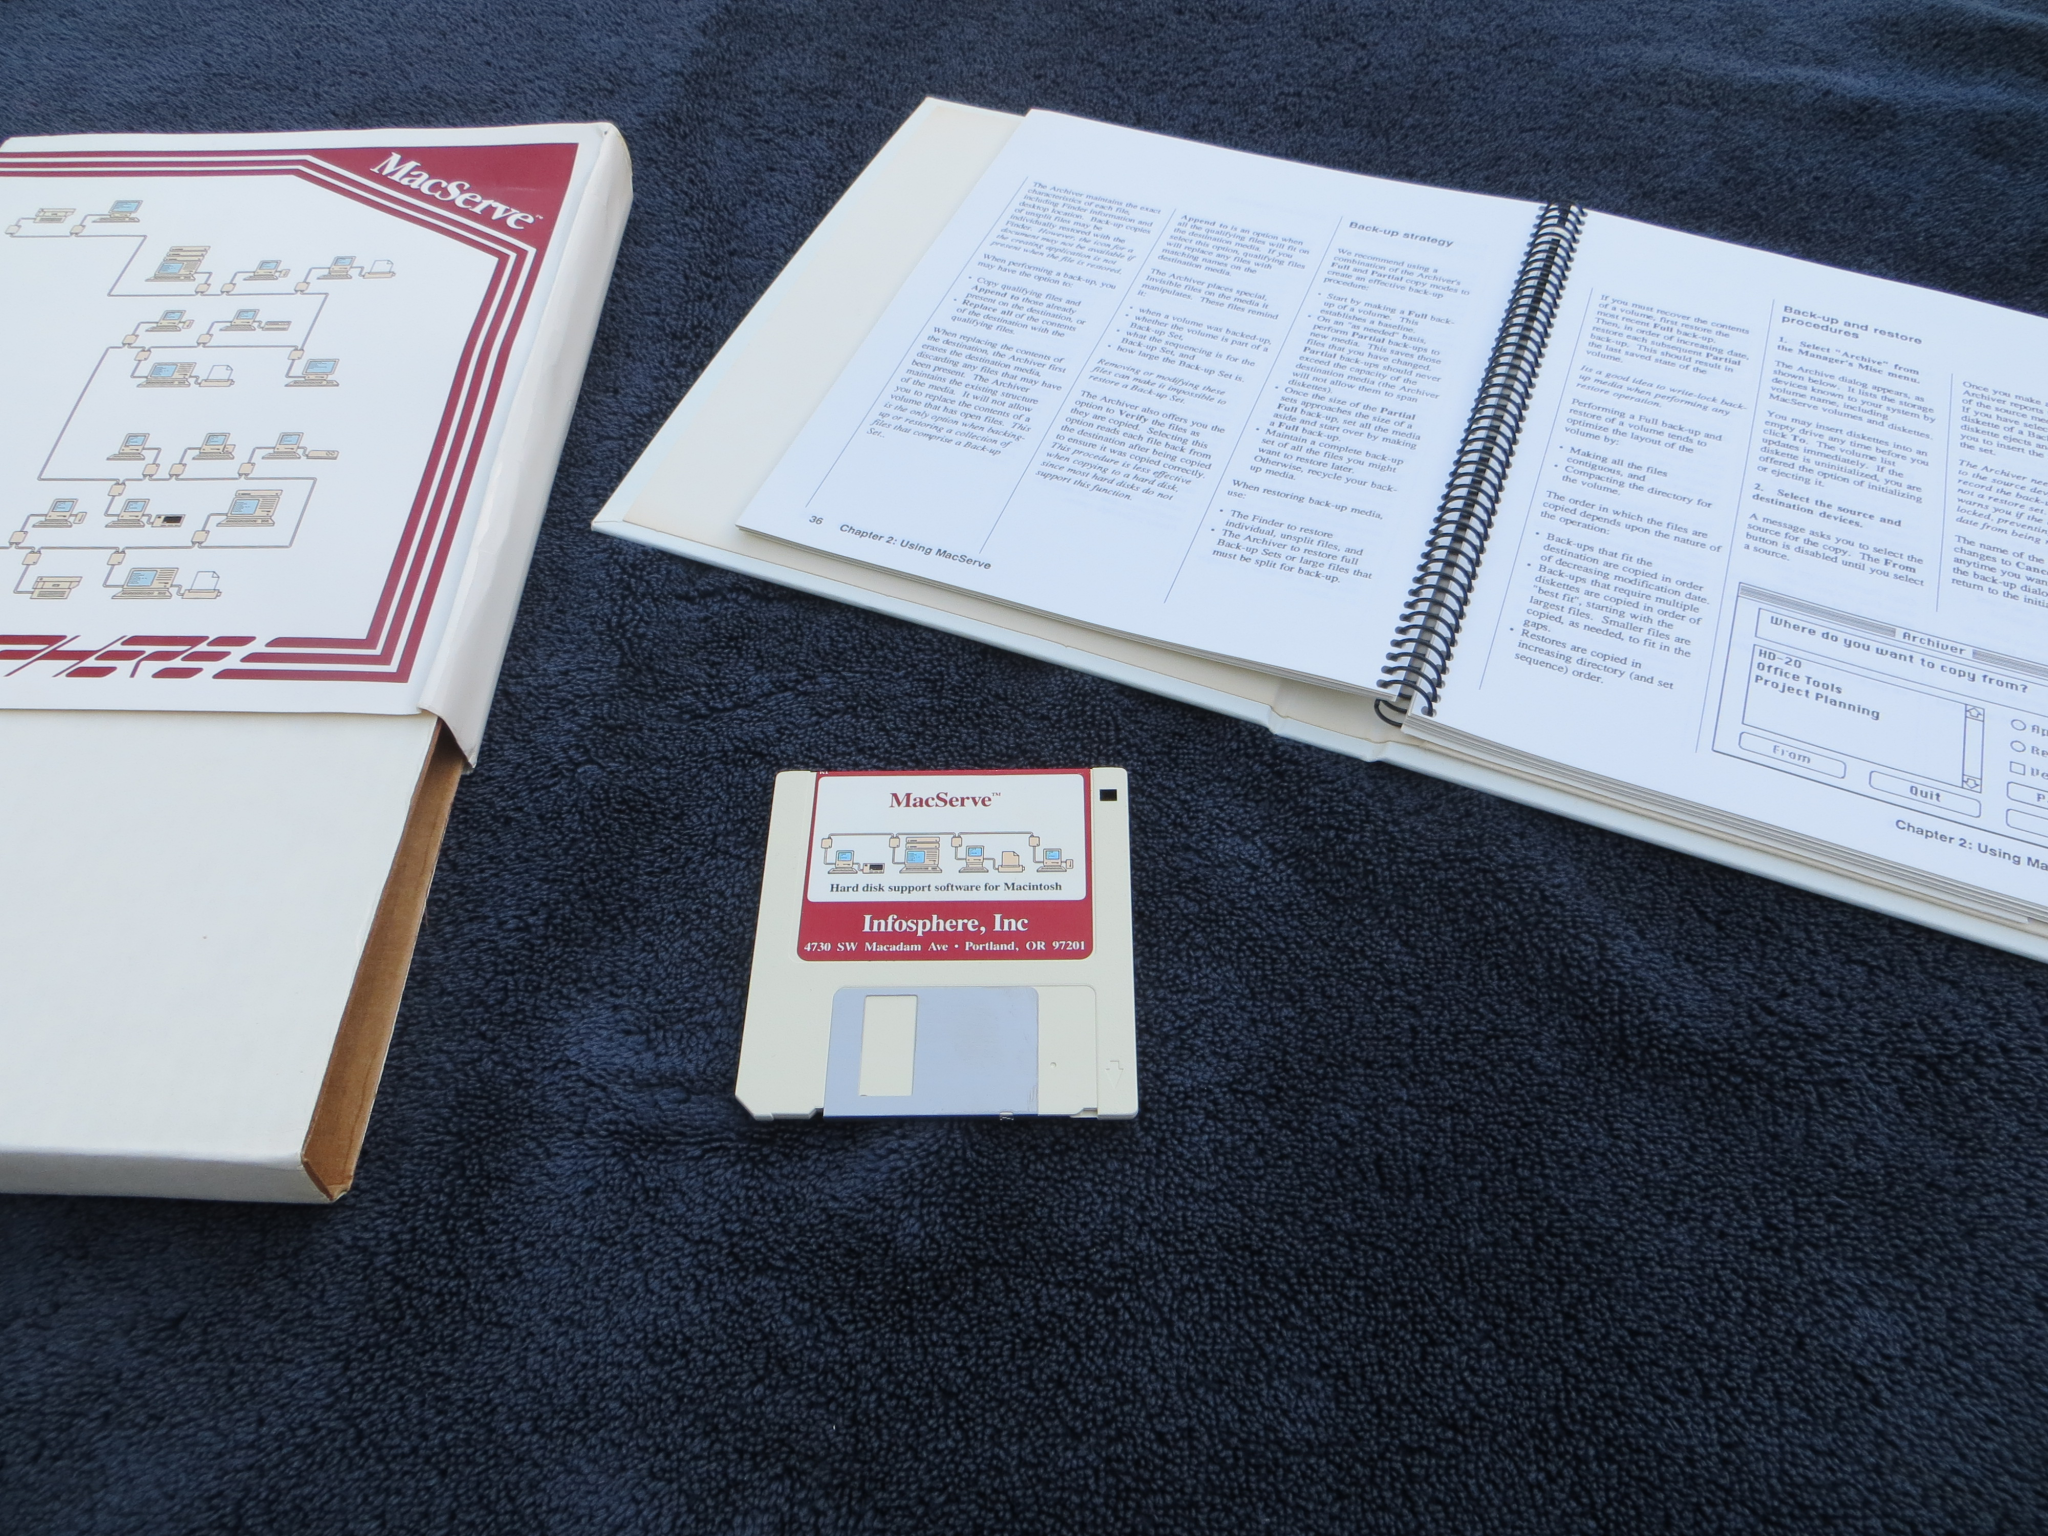
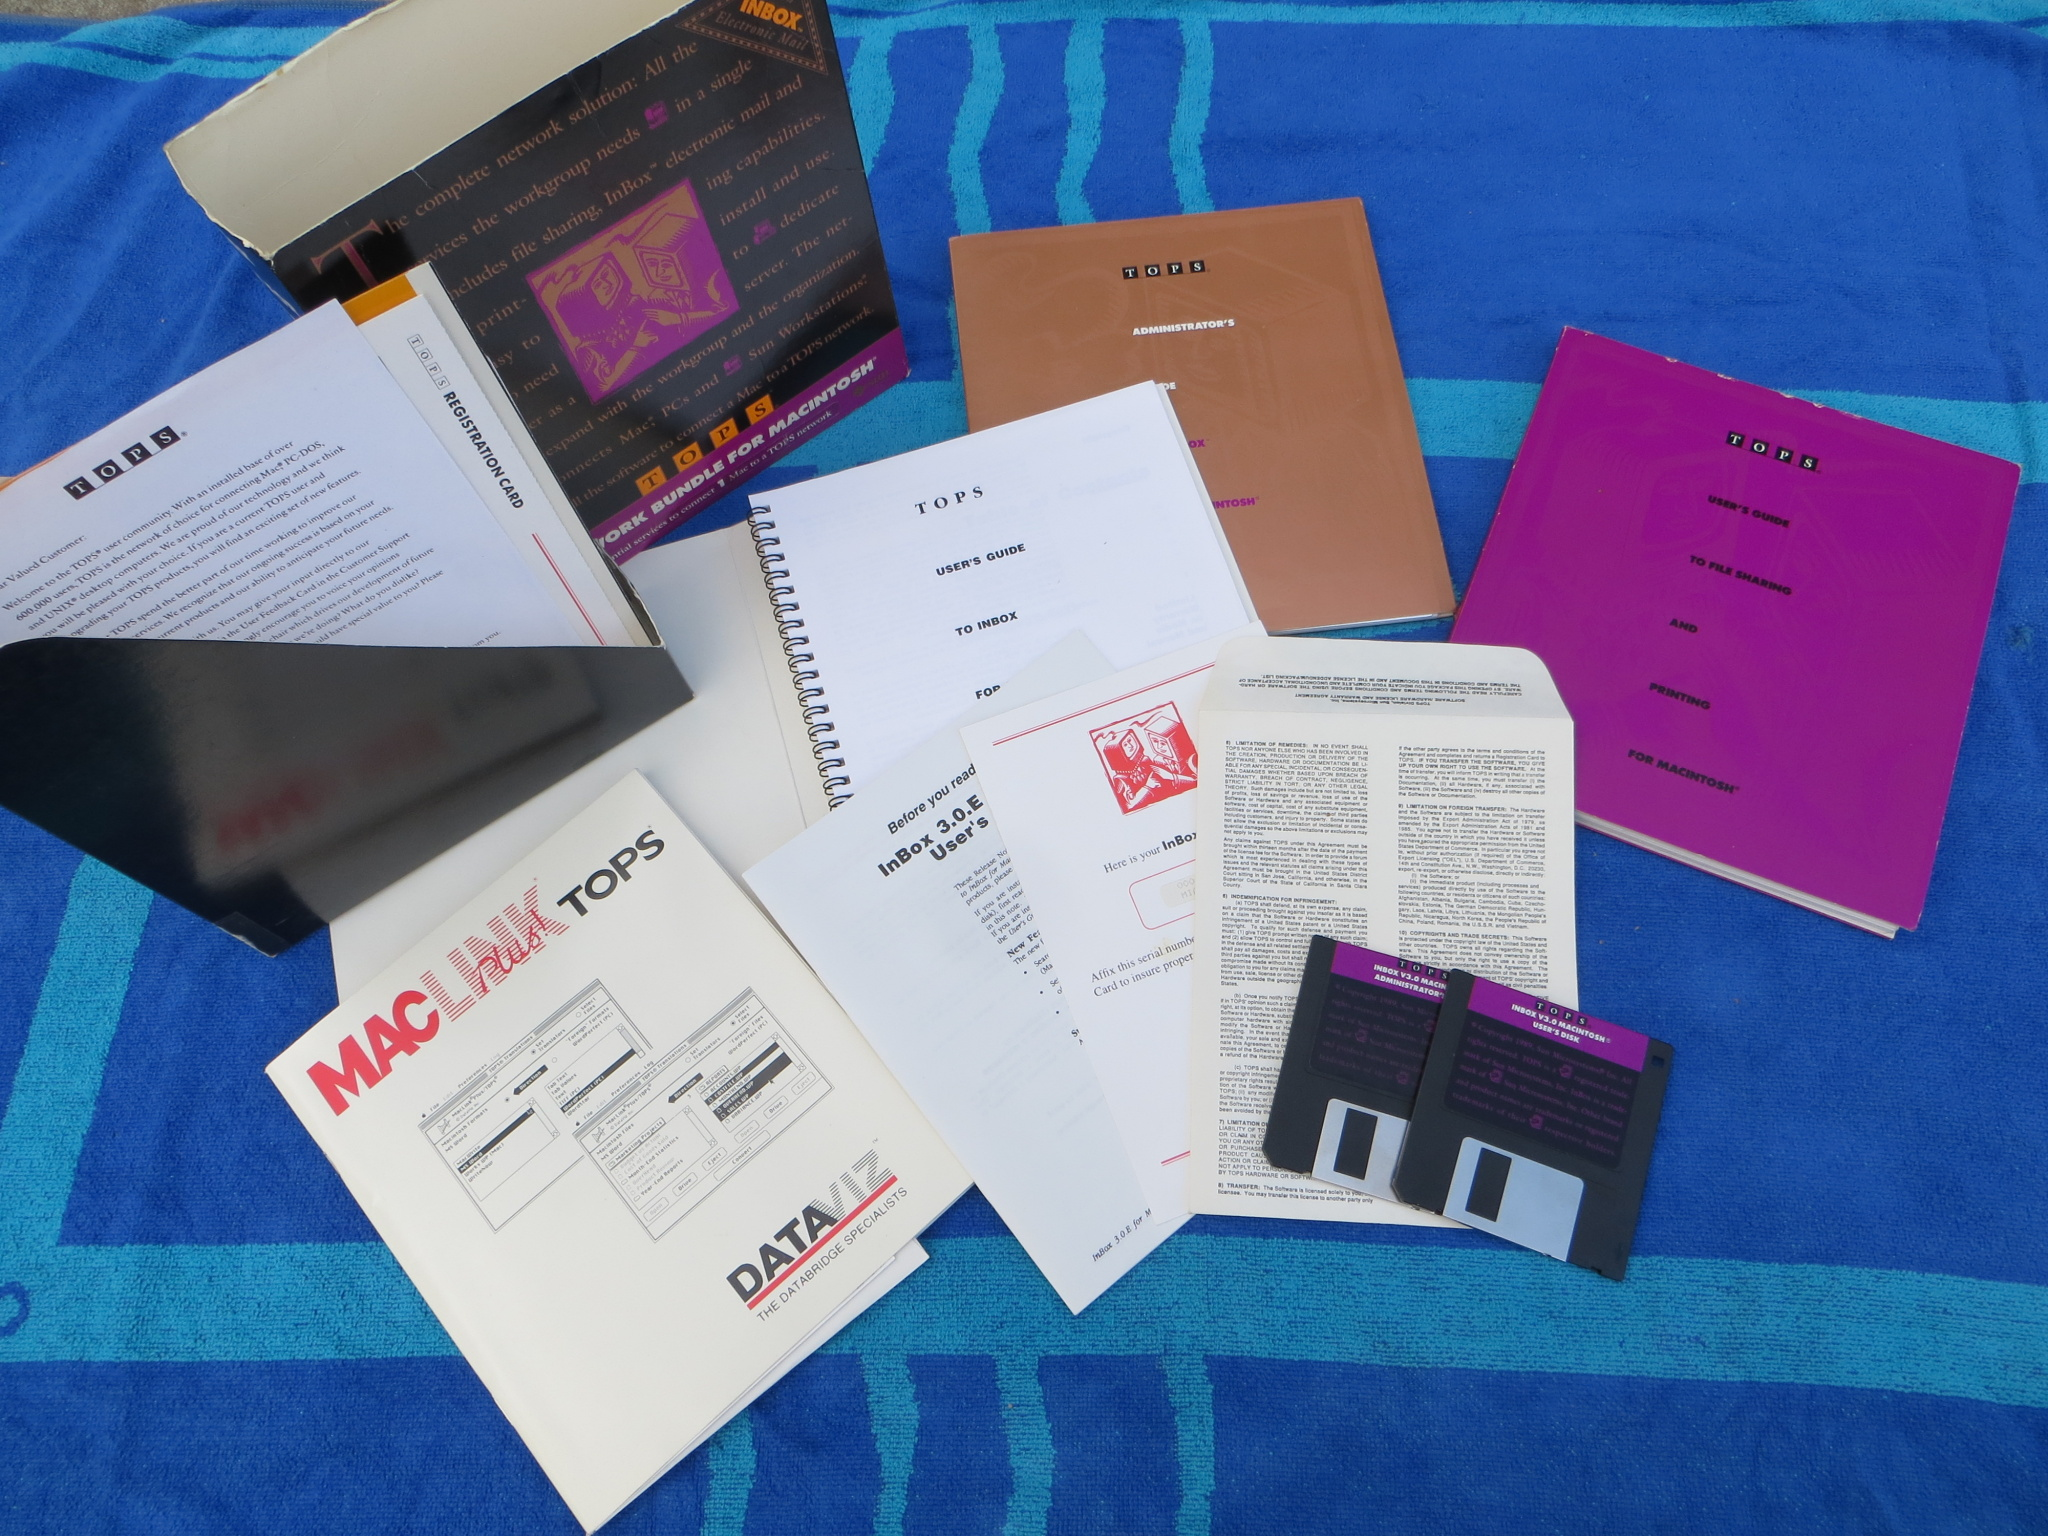
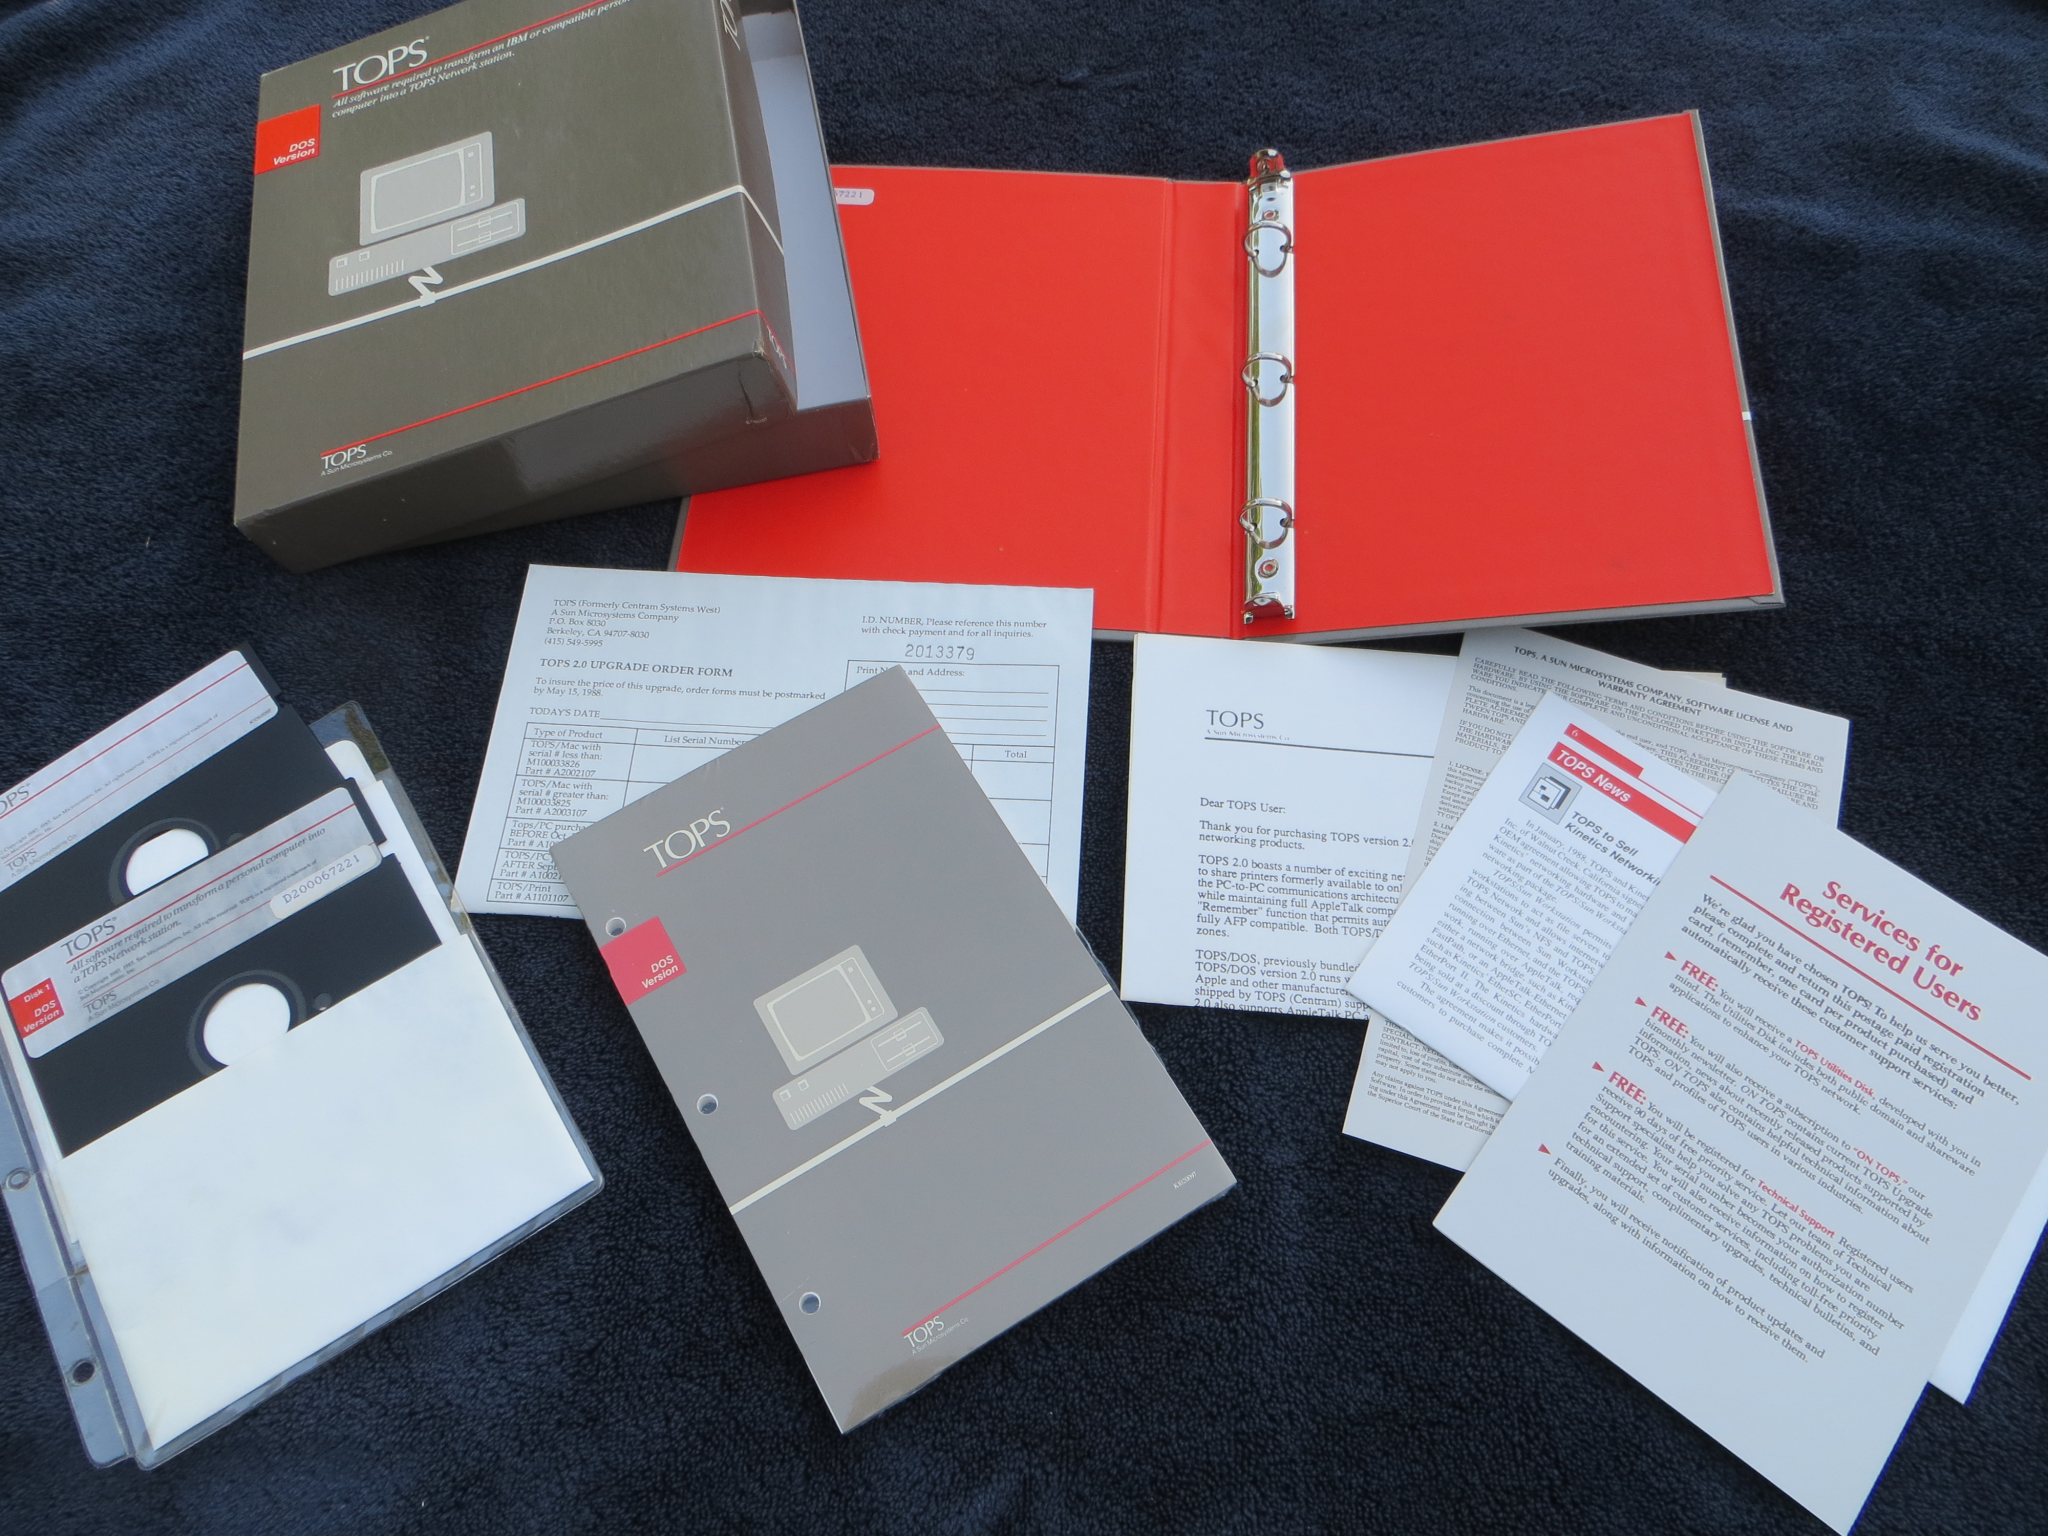
System Software and Bootable Media
| Item | Comments |
| HD20 Startup (System 2.1, Finder 5.0) 400KiB MFS | The first HD20 Startup disk. Included here because it's not as common as it should be. Limited support for HFS: full HFS support came with System 3.0 |
| System Software 2.01 (System 4.1, Finder 5.5) 800KiB HFS | Three BinHexed images: System Tools, Utilities 1 and Utilities 2 |
| System Software 5.1 (System 4.3, Finder 6.0) 800KiB HFS | Two BinHexed images, System Tools 1 and System Tools 2 |
| System 7.1 800KiB, 1.44MB | System 7.1 on Disk Copy 4.2 images. Converted with Disk Copy 6.3.3. Use an emulator to extract the disk images if needed. Not for Macs that require special 7.1, 7.1.1, 7.1.2 or 7.1P versions. Install disk, 800KiB version is not a bootable disk |
| Mac OS 8 on floppy disks 1.44MB | 27 install floppies and two Disk Tools disks. NDIF Read-Only Compressed format, as per the original |
| Disks for a new 512Ke 800KiB HFS | Disks for a new 512Ke computer: System Tools, Guided Tour and Software Sample, all bootable. Audio cassette is still shrinkwrapped, and no cassette player is around, so no archive is possible. Packaging image 1 and image 2. Guided Tour may not be an unmodified image: all were imaged exactly as received |
| System Software 0.3/0.5 Terminal Client Disk400KiB MFS System Software 0.3/0.5 Terminal Client Disk800KiB MFS |
System 2.0/Finder 4.1, MacTerminal 2.2, PackIt 1.0, BinHex 4.0, MockWrite DA, 128K Disk Copy, BootConfigure. Designed for a 128K or 512K, second FDD highly suggested. Finder Info 1.1.1 won't run on a 512K, so it is not included, and the File Tools DA seems to run weird. If you need to change type and creator, use an emulator to unpack, convert, repackage and transmit over the serial ports. BootConfigure may not work on all Macs or System versions |
| System 2.01 Network Access Disk800KiB HFS | System 4.1/Finder 5.5, Flex, RAMDisk+ 2.01, AppleShare WS 1.1, BinHex 4.0, Disk Copy 4.2, PackIt 1.0, MacTerminal 2.2. Desk Accessories: Standard, plus MockWrite, File Tools and Gifwatcher. For a 512Ke, Plus, II or SE with 800KiB drives. MacBinary requires System 6, but it is included in case of an upgrade and most people can figure out a System 6 installation on these machines |
| System 6 Emergency Network Access Disks: 6.0.8 1.44MB 6.0.8L 1.44MB Companion 1.44MB disk Should boot any compatible System 6 capable Mac with a 1.44MB drive. |
System 6.0.8: Install for any Mac, AppleShare WS 3.5, RamDisk+ 2.01, MacPPP 2.0.1, MacTCP 2.1, After Dark 2.0, Desktop Manager, MountImage 1.1B3, AppleTalk 58.1.4 update, File Tools and MockWrite DA. 6.0.8L: Install for any compatible Mac (Classic, Classic II, LC, LC II, PowerBook 100 only), Flex, AppleShare WS 3.5, MacPPP 2.0.1, MacTCP 2.1. Not enough space for other utilities. Companion disk: BinHex 4.0, Compact Pro, Disk Copy 4.2, Fetch 2.1.2 with Help file, MacBinary 1.0.1, Mt. Everything 1.1.1, PackIt 1.0, System Picker 1.1a3, ZTerm 0.9, instructions, TeachText, two CD-ROM tools, Font/DA Mover. Instructions: Insert the primary disk (6.0.8 or 6.0.8L). Start up RAMDisk+, create a RAM disk, copy the boot System Folder to the RAM disk, then hot-swap over. Insert the appropriate Ethernet driver disk, or connect to a LocalTalk network, or insert the Companion disk and use ZTerm or Fetch via PPP to fetch the Ethernet driver. Apply the Ethernet driver to the 6.0.8/6.0.8L boot floppy. From there you can use the boot diskette with Ethernet |
| System 7.5 Network Access DiskDC 4.2 1.44MB System 7.5 Network Access DiskNDIF 1.44MB |
Apple's 7.5 Network Access Disk in Disk Copy 4.2 format (converted with Disk Copy 6.5b13) and NDIF original format. Uploaded here because Apple's Older Software List has expired |
| System 7.5.3 Bootable160MiB .HDA file |
System 7.5.3 for Any Macintosh on a BlueSCSI compatible disk file. Includes network options for FTP, AppleShare, IRTalk and serial options. If you have less than 4MiB of memory, this is not the disk you're looking for. Meant for 68030 and greater machines to as a jumpstart volume, to be copied to a BlueSCSI SD card. Reduced size by removing a number of likely unnecessary elements. Because it hasn't been booted into yet (being a minimally modified System) you may have to rebuild the Desktop file -- this is normal. Change the SCSI ID number (HD40 is SCSI ID 4) to a compatible one if you need to. OT 1.3 and ASC 3.7.4 is included, but not installed |
| Hard Disk Repair Disks: System 6 Bootable Disk 800KiB Repair Disk |
1.44MB version has Lido 7.56, HD SC 7.5.3 patched, Disk First Aid, RamDisk+ 2.01, System 6.0.8 with LocalTalk capabilities, Mt. Everything 1.1.1, Flex, File Tools and MockWrite DA. 800KiB version has Disk First Aid, HD SC 7.5.3 patched, Lido 7.56, Font/DA Mover, Iomega ZIP 4.2 System 6 driver, Mount Everything 1.1.1 and two CD-ROM tools. Not bootable, use this with the System 2.01 NAD |
| System 6 with AS 1.1 and AS 2.0 File Server 40MiB Disk Images | Disk images intended for demonstration/trial purposes using a BlueSCSI or PiSCSI adapter device. One has System 6.0.8 for any Mac with AppleShare File Server 1.1, the other is the same but with AppleShare File Server 2.0. Can also run in the MAME emulation suite. Not compatible with Mini vMac. Computer is called Macintosh in both cases: Admin Key is User |
| A/UX 2.0.0320MiB .HDA file | A/UX 2.0.0 on a 320MB disk image compatible with BlueSCSI or PiSCSI adapter device. Contains a 80MiB Macintosh partition and the rest is UNIX. Because A/UX 2.0.1 was relatively unstable, it is not included, and you only really need it if you want to use A/UX 2.0 on a IIsi. Macintosh volume includes some extras to help out. A/UX 1.1.1 is not supplied here because the commonly available CD is already good enough and nothing really interesting can be done with it. A/UX 3.0 is not included because other places already have emulator or BlueSCSI compatible images. A/UX volume is basically untouched fresh after install. Login is same as default: root and password is blank (null) |
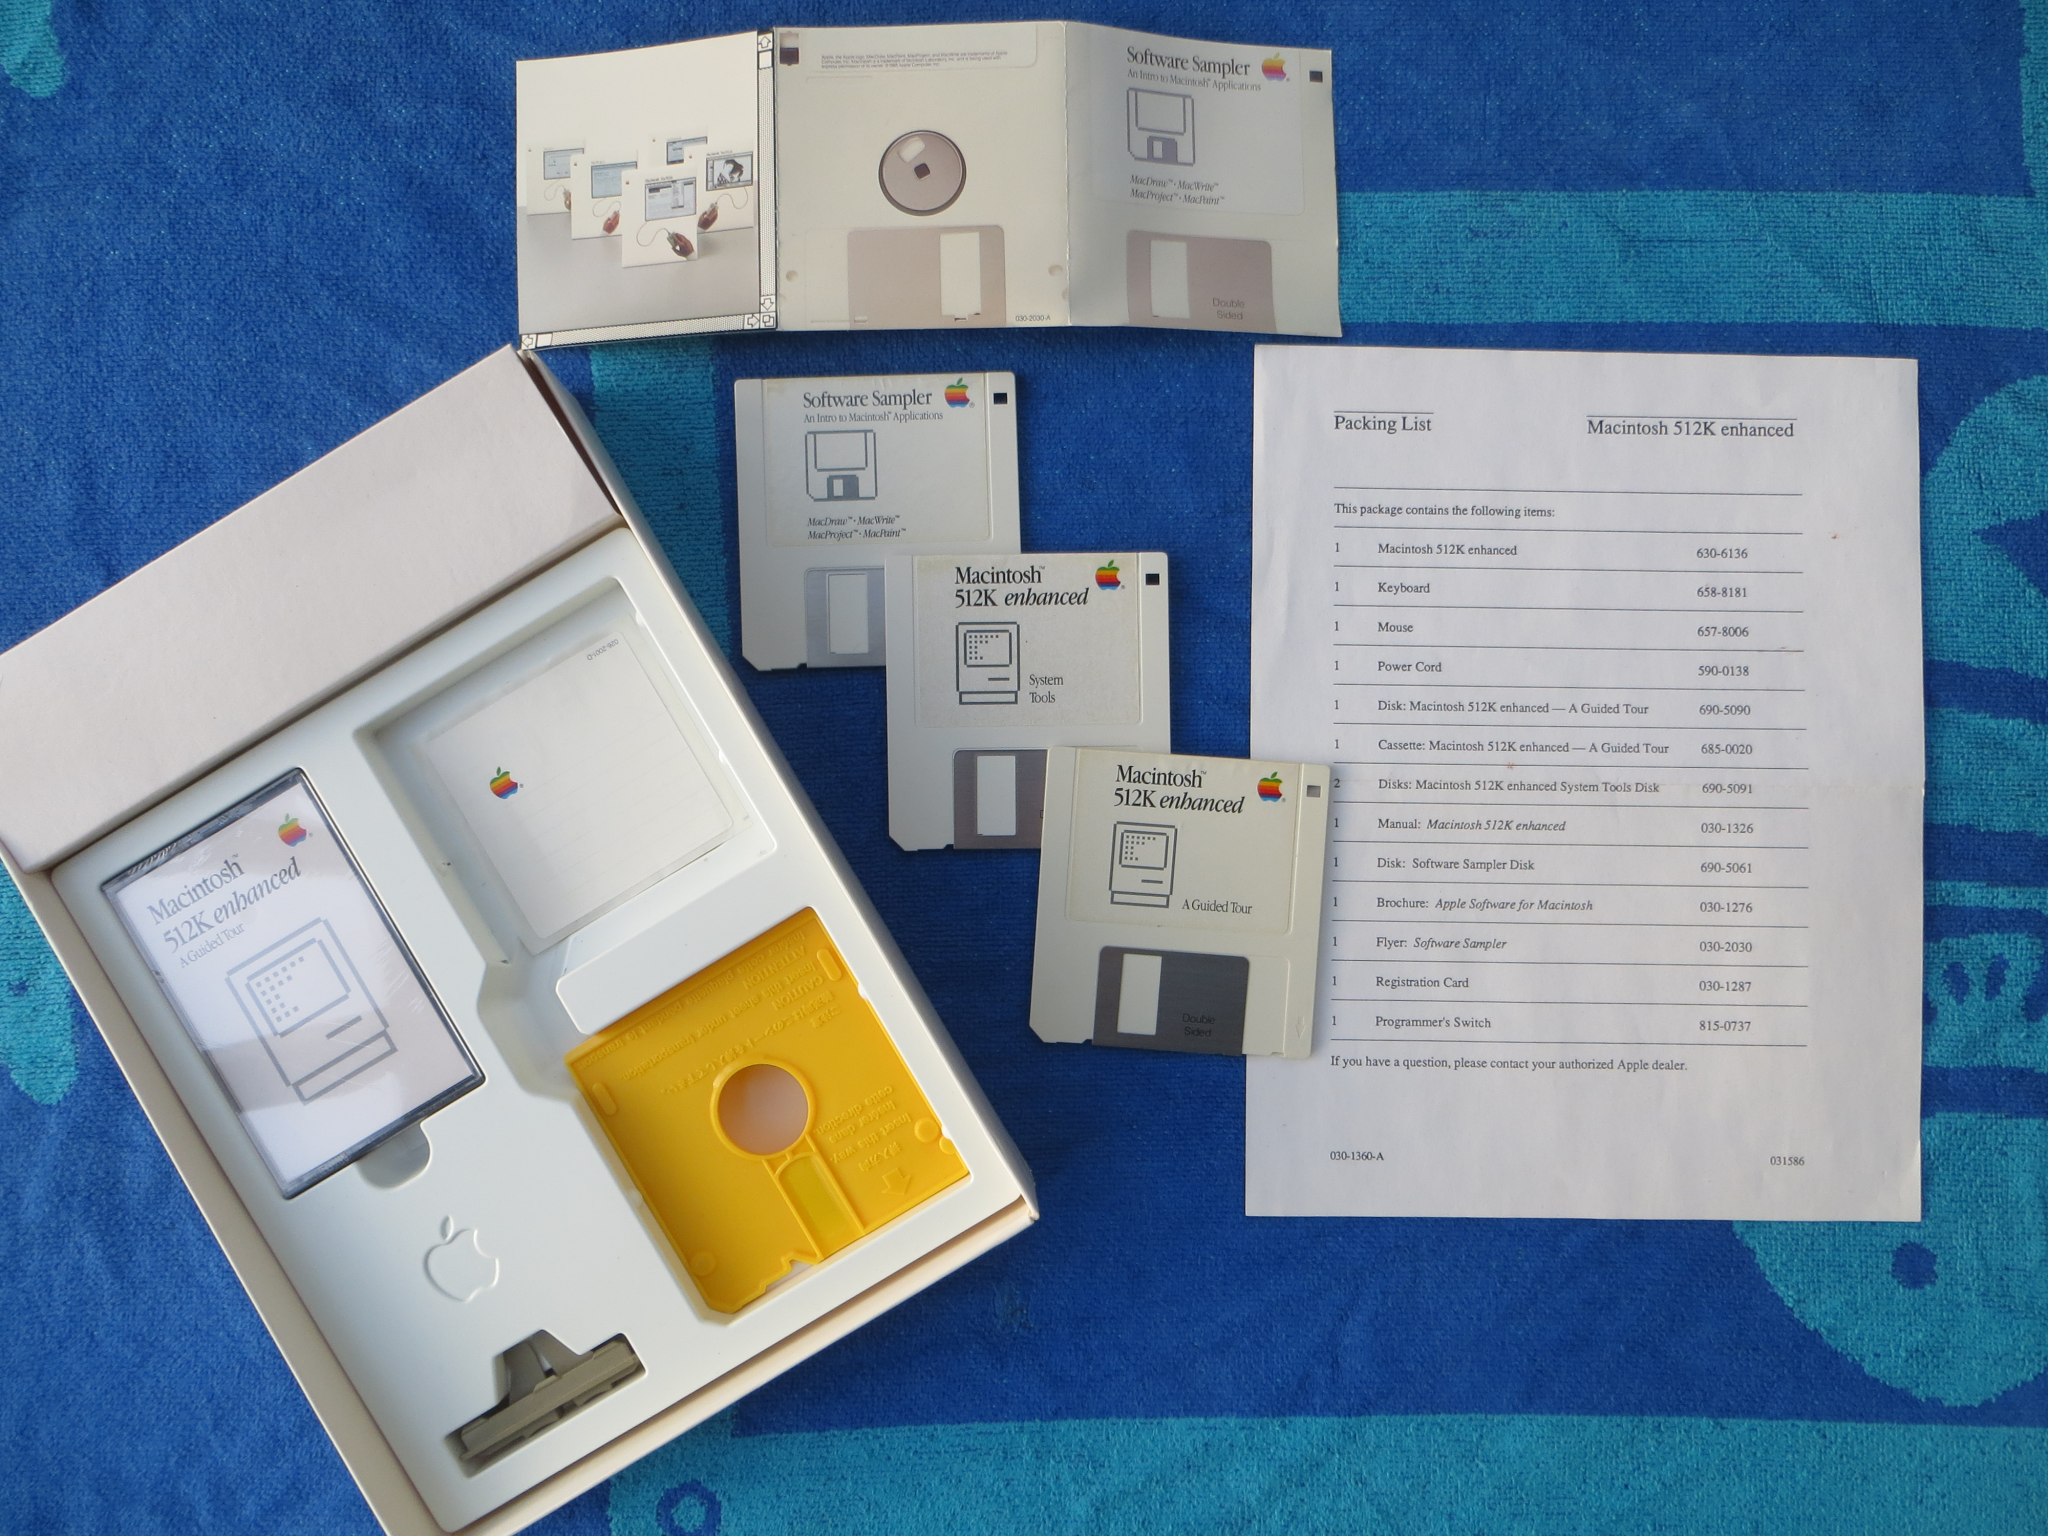
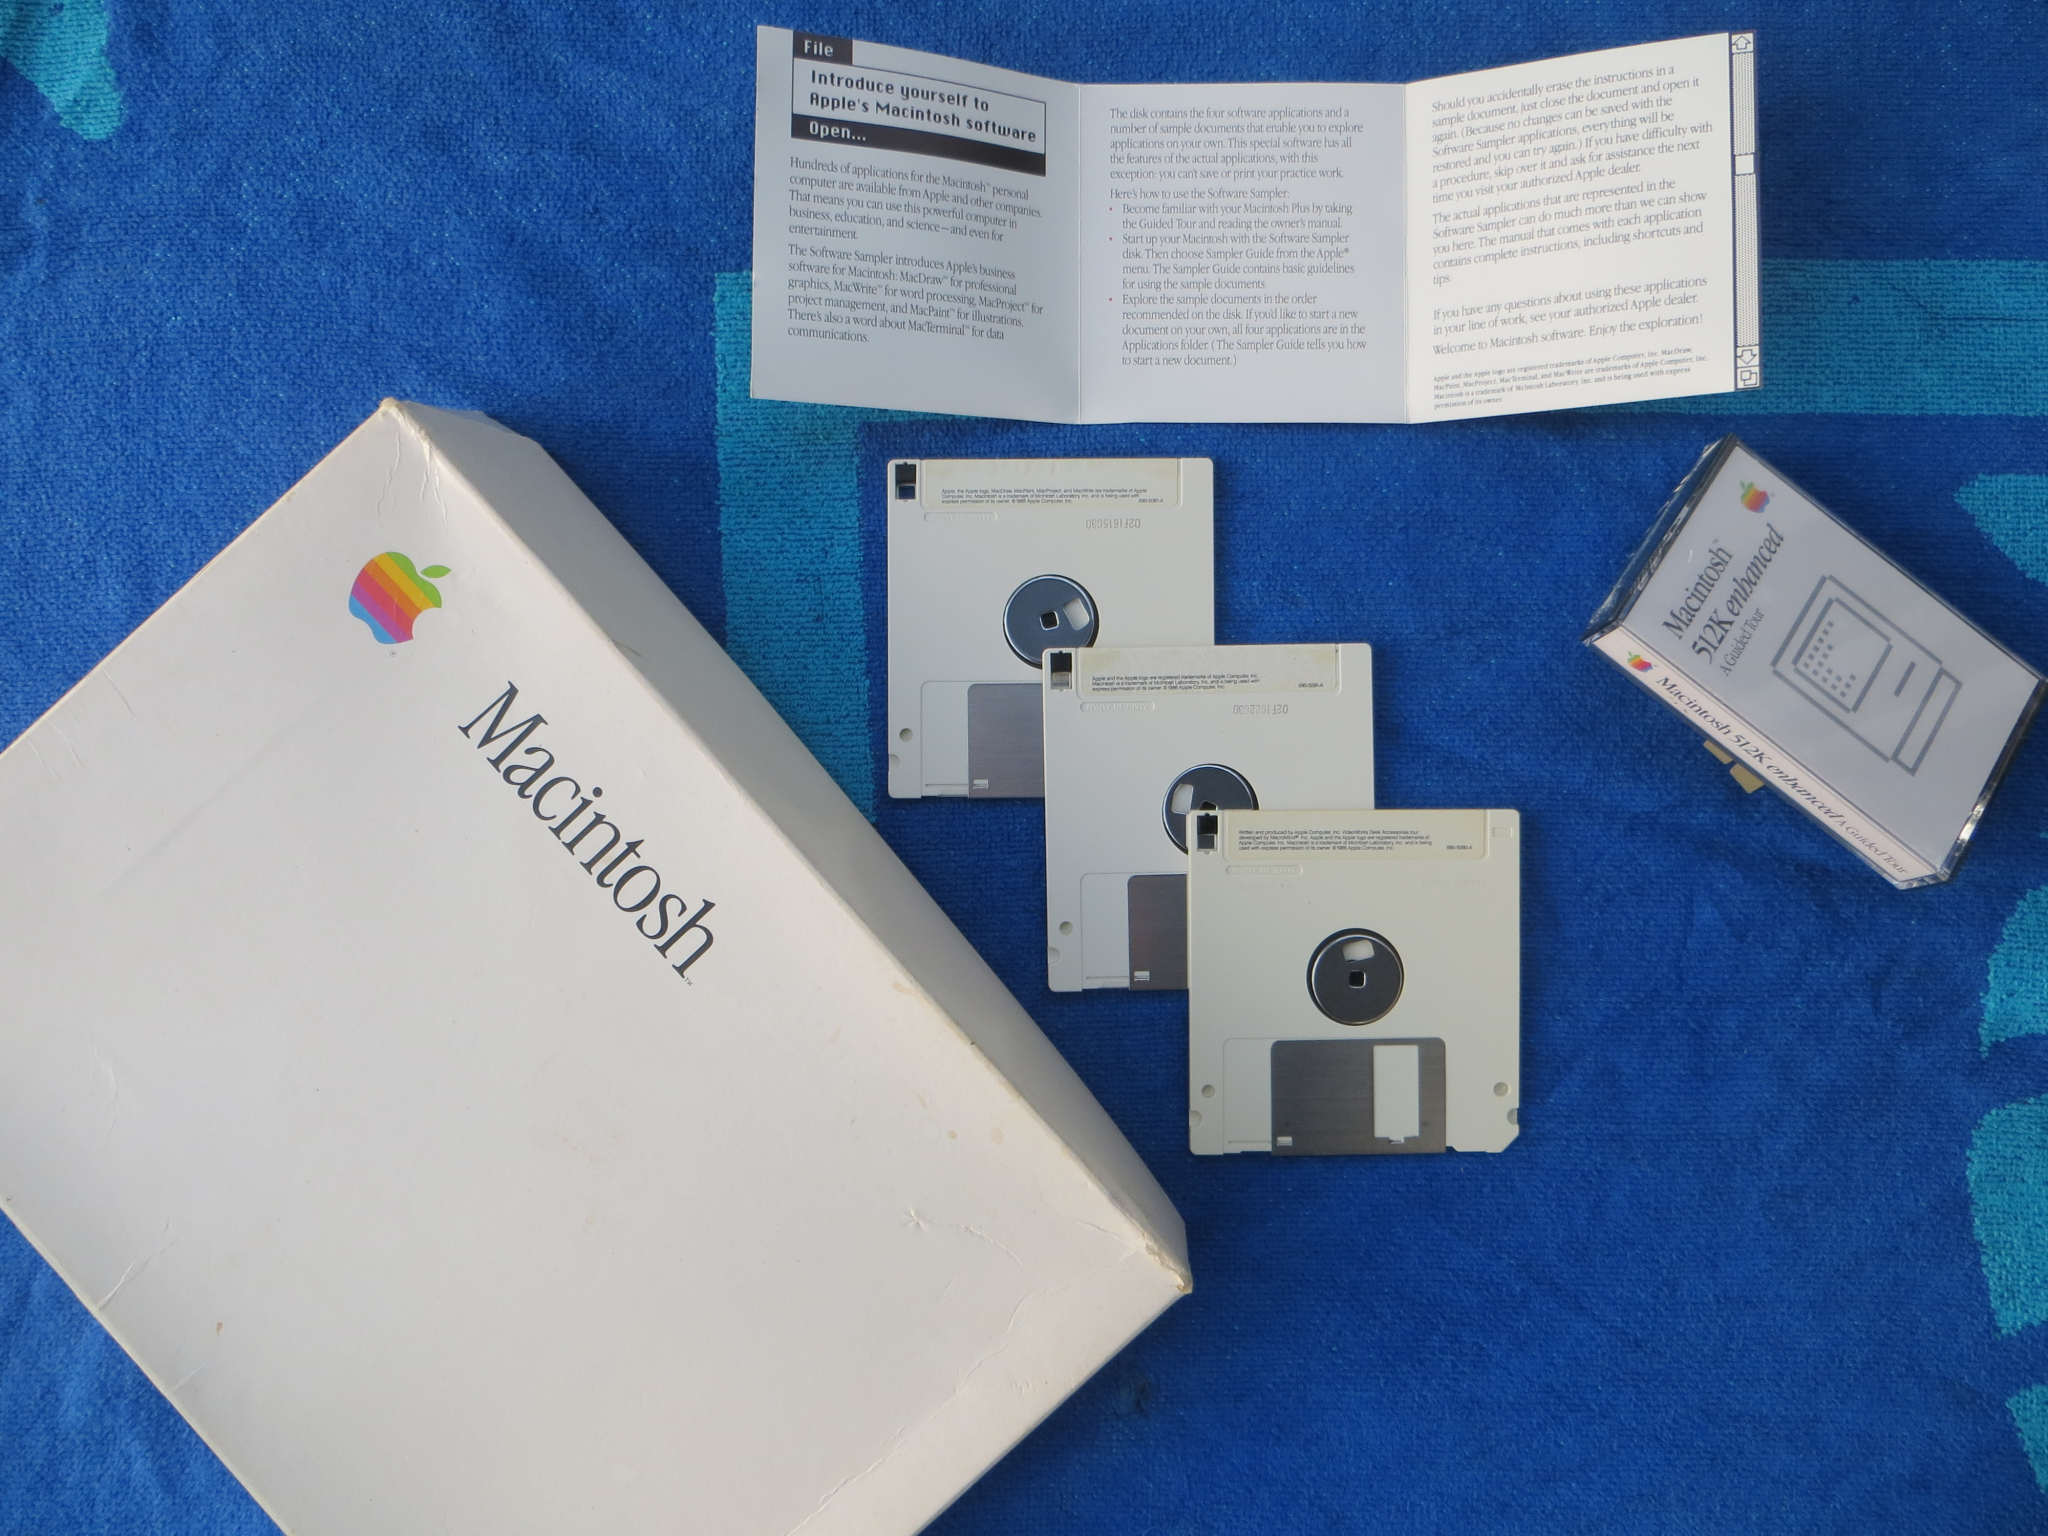
Extra Bits
| Item | Comments |
| Apple Service Parts Database Export | Also available in CSV and Excel format. The latter should open in any Excel 2013, Google Sheets or Libre Office (says 7.3.2.2 in app.xml with an AppVersion of 15). Does not include any of the images, comments or applicable models; for that you'll need the full FileMaker viewable version because the database is difficult to export and what you see is what you get. Mostly meant to identify part numbers: at least you can see if it's in the database. Comes from the Service Source 2.5 CD. Exported by slomacuser at 68kmla.org |
| Combined storage volume 40MiB IMG file | Previous versions of the Guide included Network Extras disks, which can be mounted and shared over the network. They have been condensed down into a single 40MiB DC 6.3.3 disk image with the following items: 1430K free, AppDisk 1.6.1, ResEdit 2.1.3, BinHex 4.0, Bomb Shelter 1.0.1, CD Sunrise for System 6, Compact Pro, CP Undelete, Creator Changer 2.8.4, DART 1.5.3, Desktop Manager (System 6), Disinfectant, Disk Copy 4.2, Disk Copy 6.3.3, Fedit 3.5, Fedit Plus, ResEdit 1.0D7, ResEdit 1.3d1, Boot Configure, DragAnyWindow 4.3, EasyShare 1.21 full and demo version, FaberFinder 4.1.4, Fetch 2.1.2, Finder Info, Flex, Font/DA Mover, MacBinary 1.0.1, MacBinary II+, MacPPP, MacTCP, MacTCP Watcher, MacTest Pro disk images, Minimum System 7 install builder, MODE32 1.2 and 7.5, MountImage 1.1B3, Mt. Everything 1.1.1, NCSA Mosaic 2.0.1 for 68K, NetPresenz 4.1, PC Exchange 1.0.4 with preferences file, Smartcom II 3.3B, Speed Disk, Stuffit Deluxe 4.0, CFM-68K 4.0, Apple CD-ROM Setup 5.3.2, Thread Manager, Macintosh Drag and Drop 1.1, System Picker 1.1a3, NCSA Telnet 2.7b4-68K, TomeViewer 1.3d3, WindowShade 1.2, Iomega Zip 4.2 driver and ZTerm 0.9 |
| DBAN 1.0.71.44MB | A bootable Linux floppy disk with DBAN, a SCSI, IDE and ATA disk wiper. This the last version that was available on a floppy disk and came before the 2012 acquisition by a company. Requires an x86 CPU, either 32 or 64 bit. Will not work on x86 Macintosh computers, at least a Mac mini 2006 didn't work with it. NDIF image format, imaged via $ dd. Note that DBAN doesn't do "Secure Erase" whereby certain protected, restricted or hidden areas of the disk are wiped, so try something else for 100% through disk wiping |
| Samsung SFD-321U/EP USB floppy driver for Windows 98 and up. Alternate driver | Use the "wxpinitialsfd-321" driver for Windows XP and up. May not work past XP |
| Windows 98SE Setup Disk1.44MB | This is the boot floppy used for Windows 98SE system software. It creates a RAM Disk where it stores certain programs like FORMAT.COM. NDIF image format. Created from within the Add/Remove Programs panel from within the Control Panels, imaged with $ dd. MS-DOS version 4.10.2222 |
Good Networking Games
The heyday of the classic Macintoshes simply overflowed with games. Some were good, some where mediocre, some were downright rubbish, but a small few were really good. Let's take a look at some of them that have faded into obscurity, been forgotten, or are left as fond memories of "the old days".
It must be stressed that many of these games are not as visually striking or realistic as modern games. But in the context of the day, they were as modern as it got. While they may be lacking in such areas, they can make up in the overall sense of "casual", "fun-loving", "plain and simplified" rather than "hard-charging", "industrial-strength" or "raw and unfiltered". Most of these games require color, about 8MiB of memory and some can run off a floppy disk.
A few titles are shown here, but a more expansive list is up on the Macintosh Garden called "Macintosh Network Games" as an Excel file, which can be imported into more modern spreadsheet programs. Most of the games around 1995 become a little much for 68030/68040/early PowerPC boxes and realistically work best on a G3 or G4 running Mac OS 9 if that can be done. For posterity's sake, a screen capture of the first 25% or so of the document is here which covers most of the titles relevant to the primary focus of this Guide.
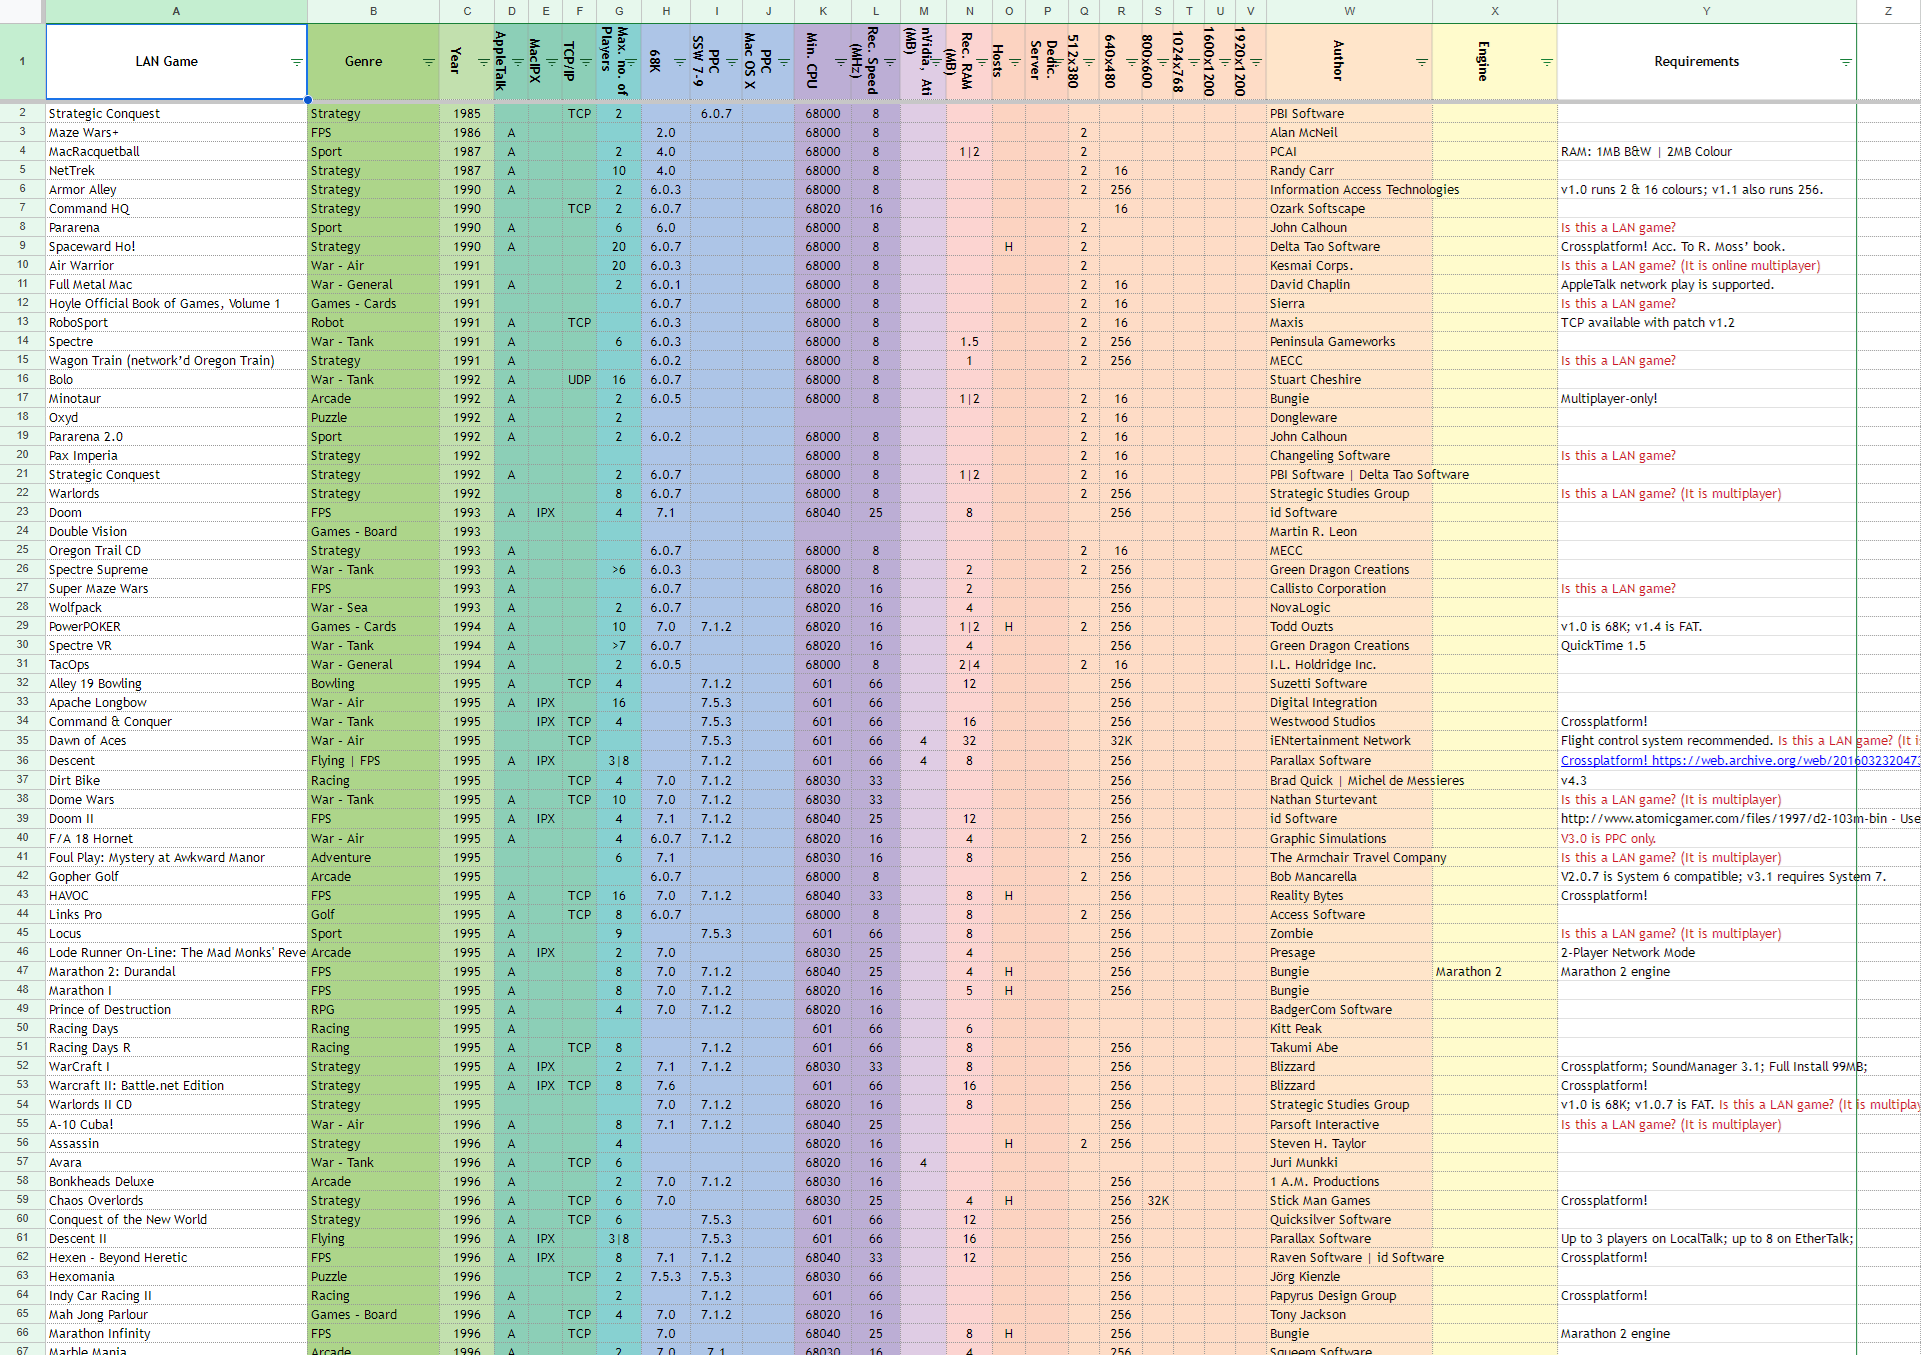
Bolo
The original network strategy tank combat game. Enormously popular back in the day, and can still provide a hard challenge and heart-pounding action today. The game itself is about 252KiB, the sound file is about 522KiB, it should be possible to play it off a 800KiB disk. Each map weighs in between 4KiB and 16KiB, so a single floppy can hold a reasonable stack of maps. Each map is pretty much its own unique playing experience. For instance, the author downloaded Carl Osterwald's map archive (expired domain), which has approximately 3,700 items and adds up to about 25MiB. This means that a friend with a SE FDHD and the original 40MiB hard drive and System 6 and another Mac like a IIci could have enough maps to play ten maps per day for a year and still have some left over. The game can run fine under OS X's Classic Mode, but it's better under genuine Classic OS. The best A.I. foe around is probably aIndy 3.1, which means that a user can run multiple copies of Bolo on one computer, set them |  Bolo running on a SE/30 |
to aIndy control and play on another, or if it is powerful enough, on the same computer. Ally them together for an additional challenge. Networking remotely was originally accomplished via a Bolo Tracker, but the number of games in deployment is so infrequent that it is not worth the time to bother. Better is to hook some friends into the game and play LAN games, with aIndy filling in a couple of slots. A valuable tool for this game is BMAPEdit 4.0, which allows full-blown map editing WYSIWYG style. Color works a lot better on this game for faster detection of hostile pillboxes and enemy bases, identifying allied versus hostile tanks, and so forth. Eye strain is reduced dramatically with color -- and an optical rodent input works much better than a ball-equipped mouse. The game also plays acceptably on emulators, aside from Mini vMac which is a little spotty. According to the ReadMe file, it works on A/UX too.
A note about this game was that it was so popular that it even got its own dedicated newsgroup back in the day: rec.games.bolo. One link for this game is Stuart Chesire's page here: which, as of this update, is still up, although you can be assured pretty much all of the external links are broken, so use the WayBack Machine to search them out. The LGM site host has gone down (use the WayBack Machine), but the game can be obtained from the Macintosh Garden. The Info-Mac archive does have some Bolo content but is not comprehensive. Modern ports such as WinBolo, NuBulo and there might be a Linux clone do not come close to the original (with its bugs like the pill massage trick serving as useful bonuses). Once the beginner robes are discarded and pill-takes are mastered the real heart of the game opens up -- strategy. Certainly a worthy game of the times, being easy to learn and difficult to master.
Super Maze Wars
An enticing title that features 3D graphics, it is a maze-based tank game. Attack enemies either via A.I. or human players. You will want at least four players in the game to get some action going.
Available from the Macintosh Garden, it also has customizable mazes and parameters. May have speed control problems on faster machines or via emulation, as it relies on hardware timers to keep the pace correct. Playable under greyscale but best with color. Make sure to read the manual.
Oxyd
If there was a convenient measure of an individual's competence with a mouse or trackball and puzzle-solving skills, there is one such game that can joust for the title: Oxyd. The original version supported networking via serial ports (two player mode), and the subsequent versions like Per.Oxyd, Oxyd Magnum! and Oxyd Extra added more maps and challenges to warp the brain and test the hand. Requires two colors (black and white) or 16 colors, but 256 color mode works too. Better bet is to use a 640x480 display, as any bigger won't help and color. Black and white and greyscale is hard on the eyes for extended intervals. The original Oxyd version requires that you purchase a rather humorous Oxyd book to obtain the level codes. These books pop up on eBay infrequently. Try checking ebay.de, as Dongleware was a German company. The other version has been cracked and does not need codes. There also may be a certain Oxyd Book that was scanned and uploaded to a certain defunct file sharing site... | 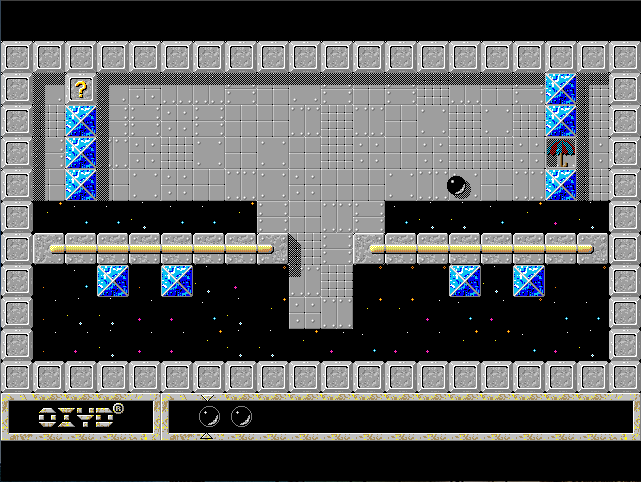 Oxyd 3.9 (SheepShaver) |
The game itself is simple in idea, simple in execution, but sophisticated in the puzzle department. Certainly, a game that can prove its worth. At the Macintosh Garden, Oxyd and Per Oxyd are uncracked, though Magnum and Extra! are. This game is also very difficult to capture screenshots on and doesn't play nice with emulators -- not even the Classic Environment. With Mini vMac, the game won't even run; and under SheepShaver and Basilisk II, the ball control is heavily distorted, making it impossible to control. There are PC versions of each but they have to run under DOS and have a lower graphics quality -- plus it throws a fit if a serial (RS232, not PS/2 or USB!) mouse is not installed -- use Cute Mouse to get around that problem. A Linux clone called Enigma is around, which also has OS X and Windows ports. This is the sort of game for the patient puzzle lovers who are looking for a challenge. There's also a version for the Atari ST and Amiga series. Note that the Oxyd Book is specific for each version -- there's one each for the original, another one for Oxyd Extra!, then yet another one for Oxyd Magnum! and finally the last one for Per.Oxyd. There was also an Oxyd Magnum Gold Edition, which had an additional 20 levels. Then there's Oxyd 2.0. The original Oxyd version and the Per.Oxyd version are the only Mac versions which support "Link-Local" two-player mode via the serial port or AppleTalk; the Magnum and Extra! have a pseudo-two-player mode.
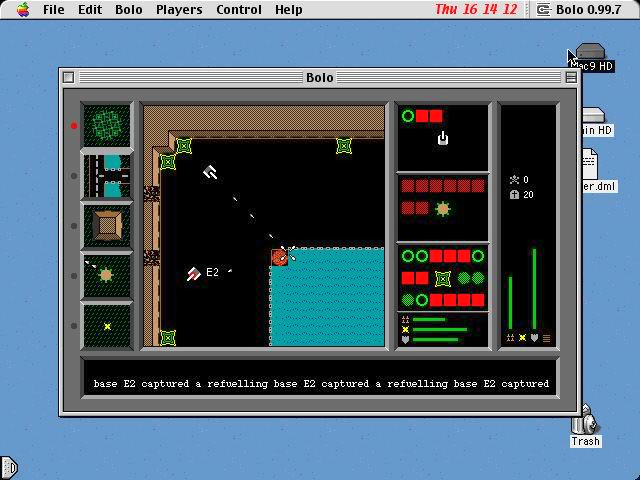 Bolo game in progress (color is better) |
 Super Maze Wars |
 Dogfight City |
 Armor Alley |
Dogfight City
An easy going, simple flight combat simulator. It runs fine on a IIfx, and can run in PPC Native mode on a PowerPC machine. It requires 256 colors to run. While it is not very sophisticated like Microsoft Flight Simulator 4.0, it can make do with some good dogfighting action and doesn't have the complications of modern sims. The forerunner to SkyFighters, it does make for a good entry level flight simulator for younger types. Those who are timid to dogfighting make take solace in knowing the Spitfire is the fastest plane and the one with the highest service ceiling...Expert players who get bored easily can try landing on the sandbar on the north end of the island map, or on one of the pinnacles in the desert map. You can find this antiquated flight sim at the Macintosh Garden. Skyfighters is also available there, and is networkable, but is a mediocre simulator by even older standards (even BF1942 flies better...). |  Dogfight City |
Armor Alley
A solid two dimensional combat game, it runs well under System 6, but under an intense 4-player LAN network, color and a faster machine are better specifications. The campaign is a little challenge that should be a suitable warm up to multiplayer play, but once it gets to the third or fourth level on Armageddon difficulty, it gets a little over the top. It is available from the Macintosh Garden. It supports B&W, 16 greys or colors or 256 greys or colors. Also released for the PC which runs under DOS. This game does some form of serial number checking over the network. Oh, and all those serial numbers with that start with EX will not work...at least not for the Mac version...
Sid Meier's Alpha Centauri
The specs for the Classic Mac binary list a 180MHz 603e as the minimum requirements, but a solid G4 clocked at 800MHz or more or G4 is a better suggestion, with even an Intel Core Duo processor barely keeping up. It is a turn-based futuristic game much like the Civilization series. It starts to become sluggish after awhile on a G4 machine and honestly the best experience is on the x86 version, which is available DRM-free and fully functional (mostly, widescreen and patches suggested) from Good Old Games.
The game is fairly broad in depth, and should the original seven factions be not enough, there is the Alien Crossfire expansion, or various third-party factions. The depth allows individual unit customization, various methods of victory, some interesting scenarios, many ways of empire growth, and so on. Deeper down, it's the kind of game that suits well to micro-managers. Builders fit into this category exceedingly well because there are so many details to be concerned with. But it is a good game because of the extensive depth, replayability, and variety of options in just about everything from politics, economics, warfare, and technology (transcendence). The manual and extensive online articles are essentially a requirement: it's one of those games where players never quite learn it all. |
 Alpha Centauri |
Most players play against the A.I. or by PBEM (Play By Email). IP games are quite infrequent, and the Mac version requires NetSprocket 1.7, which is part of GameSprockets, so thus there is a way to do it in OS 9, but the PC version should be more favorable in the networking department because nobody plays it on Mac anymore. Because it's a turn-based game, PBEM is preferable because other players have to wait while each one executes his turn, which can take a while. The Classic variant requires the CD to be inserted during play, while the OS X Carbon app does not: but the Carbon app won't work under OS 9. Rosetta emulation of this game does work okay but personal experience indicated that the game can crash when trying to load a save game file from within the game -- to get around this, open the save file from the Finder.
External Links of Interest
Apple KB articles
AppleShare LimitationsFile System Specifications and Terms
AppleShare: Platforms and Mac OS Releases Supported
Mac OS X Tiger: Connection error with AFP
System 7.x: Limitations on Use of 400KiB Disks
System 7.1 Compatibilities versus 7.0
Software Downloads: Formats and common error messages
System 7 FAQ
PC Exchange Information
AppleShare IP 5.0 Information
Macintosh Error Codes: 0 to -261
Macintosh Error Codes: 1 to 32767
Floppy disk articles
Disk Copy 4.2 spec: important for 400/800KiB disksSome insight into 400/800KiB disks
Floppy disks into the 21st century
Nerdy articles concerning floppy disks (more links within); see this page too
Audio cassette storage data storage
Unsorted articles and links
Useful System 6 information and downloadsClones, browser tips, The Crack a Mac Story, followed by another article here with more.
A to Z Index of the OS X command lines
Mac System Software FAQ
Apple Macintosh Before System 7
General FAQ by pickle
68K Mac HTTP Disk (System 7+)
Using a Shared OS X Printer
Older Mac Internet Connection Sharing
Older Mac System Software and TCP/IP
Web browsers for antique Macs, home page is here; this page has screen diagnosis.
Macintosh SSW FAQ
Various Peer to Peer networking details
Info-Mac Archive
Early Mac OS details, Pre System 6. Note: Some details are disputed
MacTCP notes (1.4.1)
More MacTCP notes (TidBITS). (Contents)
A good story, and another one here.
More Classic Mac internet links