Introduction
|
Welcome to the fourth major iteration of the Classic Mac Networking Guide. This guide will detail the steps and procedures required to network the former generation of Macintoshes to each other, and to modern computers and networks. Most of this guide was written with the "somewhat computer technical" user in mind, as at this point most people involved in this timeframe of PCs are computer-savvy. Mainly, this guide attempts to be very thorough and cover all the most pertinent options for networking and all the related steps to facilitate networking, and it is hoped that this text will be a useful reference source. This Guide will be primarily focused on networking any Macintosh from the Macintosh 512K up to the last "Beige G3" series that came out just before the first-generation iMac, with either Ethernet or serial data methods like LocalTalk. Some areas of this guide will not be relevant based on hardware or software incompatibilities (i.e. a Plus won't run Mac OS 7.6.1). All the newer computers running Windows or Mac OS X 10.2+ already have networking support over Ethernet, WiFi or other protocols which can be adequately covered elsewhere on the Internet. All images are thumbnails and can be opened in a new tab or window for a larger version. These pages are very simplistic HTML 4.01 source and have no JavaScript, Flash, cookies or other elements like IFRAMEs, and should render fine with Chrome, Edge, Safari 1.0+ and Firefox 3.0+, with complete HTML 4.01 validation. Internet Explorer may be somewhat sketchy because of issues with CSS interpretation, and making a custom CSS for every IE version is not worth it. |
Main Page: Introduction Preliminary Information
|
More Info Page: Purpose Installing System Software
Emergency NADs
Data Transfer Rates Amiga / Apple II Networking Emulators Download Town Network Games External Links |
Legal: No warranty, guarantee of accuracy or completeness of any kind; both this page and the More Info page are for informational purposes only and the reader/user assumes all risk and responsibility, and all content herein are merely suggestions. Archived webpages may have their own JavaScript or embedded elements; and their content is owned by their respective owners/authors, and no ownership of such content is claimed. This author gains nothing from this site and has no commercial intent, but is supplying this content as educational and historical material. Privacy: This page and the More Info page do not collect any information about any individual user. Only the internal features of the server collects information, however this information is not shared with anyone. These two pages do not have any external tracking metrics of any kind. AI content: Never. To start things on a happy note, head here first. (Sooo true....) |
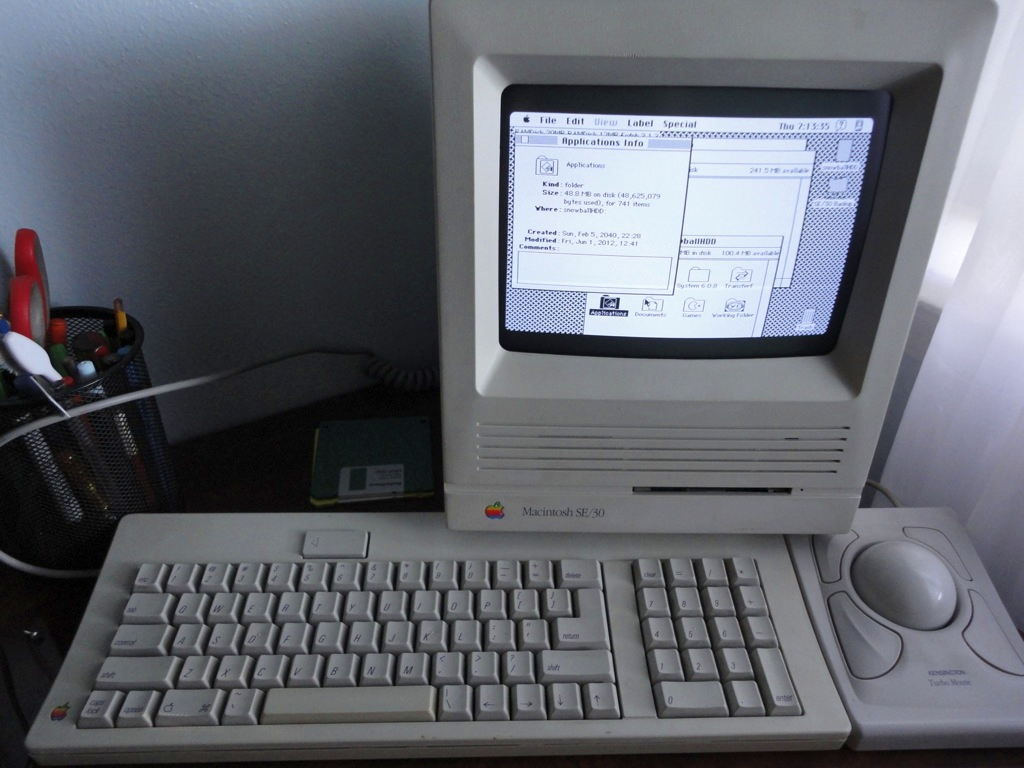 A Macintosh SE/30, the best Compact ever made |
Preliminary Information
First word
Because of the rapid hardware and software "advances" these days it is imperative that a couple of paragraphs about compatibility is presented.
The newer brands of computers, at the time of this writing specifically Apple computers, are making strides towards reducing backwards compatibility. For instance, the newer iMacs do not have onboard Ethernet (that is supplied via a USB > Ethernet adapter, or Thunderbolt > Ethernet) as far as hardware is concerned. In the software department, AFP is not going to be compatible most older machines by default. By the time you read this, the relevant versions of Mac OS X that are desirable for old hardware (like 10.2 Jaguar) are so old and obsolete that obtaining older versions of software for these operating systems can be quite a chore, unlike finding software for Windows 98 or something a bit more mainstream.
Since a number of websites which have been used as a reference or source have expired over time, this site will use local archived versions of the webages. A number of them have effectively disappeared from the Internet and their archival here as primary source material is valued. In addition, every document, file or item referenced has been archived locally, aside from ones that don't need such, such as System Software versions, larger disc images or other content quite readily available. Since the primary purpose of this domain is not to serve as a software repository, certain downloads such as System Software will be referred to other places. While the page width is not necessarily good on modern widescreen displays and devices, the page width was specifically designed to be compatible with 1024x768px (XGA) displays for compatibility reasons.
While the extended page length is a mild inconvenience, it is a lot simpler to keep track of two HTML documents versus a lot of shorter pages. Your browser search function will probably get some good use here. Downloads are accessible via the Directory Listing right here for downloading via HTML links.
Plans for the Guide are simple. This being an interim release, will eventually slip into a Final Release with no further updates. Uptime is expected to be in the decade range.
Networking Interface Chart
Apple Filing Protocol (AFP) is the default for Mac to Mac interconnection, and it went through quite a number of major versions, rendering some incompatible with others. The Chart, as we will call it, will be an attempt to showcase the various compatibility across various software versions. Start by picking a System Software version on the leftmost column and read the row across. Since alternatives to AFP are usually available, those are shown to the right. Further discussion on these other methods are covered further down or on the More Info page.
| System Software | Lowest connectible Mac OS via Apple Filing Protocol | Highest connectible Mac OS via Apple Filing Protocol | Win 2K Server w/SFM; PC MacLAN v9; Netatalk |
Alternatives |
| Macintosh System Software 0.85 (S0.85, F1.0) to SSW 1.1 (S3.2, F5.3). Mac 128K applicable | No AFP client available | No AFP client available | No AFP client available | Pre-AppleShare programs; Pre-MacTCP TCP options; Terminal Software |
| AS 1.0 (S3.3, F5.4; for 512K, 512Ke) up to SSW 5.1 (S4.3, F6.0) with AppleShare WS 1.1 | EasyShare AppleShare File Server (ASFS) 1.1 (see note); System 7 |
10.2; except 10.0 (see note): AppleTalk bridge may be needed AppleShare IP 5 & 6: read only |
Not compatible Partially tested: should work AppleTalk bridge required |
Pre-AppleShare programs; Pre-MacTCP TCP options; SLIP; TOPS Terminal; Terminal Software |
| SSW 6, 7.0, 7.1, 7.5.0 - 7.5.5 Using Classic Networking AppleShare WS 3.5 (see note) |
EasyShare ASFS 1.1 System 7 |
10.2; except 10.0 | Compatible Compatible Compatible |
SLIP; PPP; FTP; NFS; Telnet; SMB1 (7.5); SSH, ARA (System 7+); Terminal Software |
| System Software 7.1 to 7.5.5 Using Open Transport Software ASC 3.7.4, OT 1.3 |
EasyShare ASFS 1.1 System 7 |
10.4 PCI PowerPC w/7.5.3+: 10.5, 10.14 PCI PowerPC Guest only with 10.5+ |
Compatible Compatible Compatible |
PPP; OT/PPP; FTP; NFS; Telnet; SMB1 with 7.5+; SSH; ARA; Terminal Software |
| Mac OS 7.6, 8.0, 8.1, 8.5, 8.6 ASC 3.8.3, OT 1.3 (7.6, 8.0, 8.1) ASC 3.8.8 (8.6, optional) |
EasyShare ASFS 1.1 System 7 |
10.4 PCI PowerPC : 10.5, macOS 10.14 |
Compatible Compatible Compatible |
OT/PPP; FTP; NFS; Telnet; SMB1; SSH; ARA; Terminal Software; this Apple KB |
| Mac OS 9.0, 9.1, 9.2 | EasyShare ASFS 1.1 System 7 |
10.4 PCI PowerPC : 10.5, macOS 10.14 |
Compatible Compatible Compatible |
OT/PPP; FTP; NFS; Telnet; SMB1; SSH; ARA; Terminal Software; this Apple KB |
| OS X 10.0 Cheetah OS X 10.1 Puma OS X 10.2 Jaguar OS X 10.3 Panther |
10.0 only: As per 10.4 Tiger 10.1 and 10.2: System 7 10.3: System 7, with FSE 7.6.2 AppleShare Server 3, 4, IP 5 & 6 |
10.15 | Compatible Compatible; for 10.0, see note Compatible |
SMB1 (except 10.0, unless is 10.0.3 Server distribution); NFS; FTP; SSH; Terminal Software |
| OS X 10.4 Tiger OS X 10.5 Leopard OS X 10.6 Snow Leopard |
Mac OS 9.0 AppleShare Server IP 5 & 6 With ShareWay IP: 7.5.5 |
10.15 | Compatible Not compatible Compatible |
SMB1; NFS; FTP; SSH; Netatalk server; Terminal Software |
| OS X 10.7 Lion OS X 10.8 Mountain Lion OS X 10.9 Mavericks OS X 10.10 Yosemite OS X 10.11 El Capitan macOS 10.12 Sierra macOS 10.13 High Sierra macOS 10.14 Mojave macOS 10.15 Catalina |
OS X 10.0 10.15 Catalina: 10.0 and 10.1 as Guest only |
10.15 | Not compatible Not compatible Compatible |
SMBX (SMB1, 10.7 first to "support" SMB2); NFS; FTP (removed with 10.13+, user installed options required); SSH; Netatalk server; Virtual Machine server; Terminal Software |
| macOS 11 Big Sur and beyond AFP server not equipped: AFP client access only |
OS X. No testing performed; AFP client scheduled for removal sometime after macOS 26 Tahoe | 10.15 | Not compatible Not compatible Compatible if AFP client exists |
SMBX; NFS; user-installed FTP; SSH; Netatalk server; Virtual Machine server; Terminal Software |
| A/UX 1.0, A/UX 2.0, A/UX 3.0 See A/UX comments below |
EasyShare ASFS 1.1 System 7 |
10.2; except 10.0 | Untested: should work Compatible Compatible |
A/UX compatible programs; NFS; FTP; terminal shell accessed programs; Good Luck |
| Mac OS X Server 1.2v3 aka Rhapsody 5.6 (see note) |
Within Blue Box: As per 8.6 OS X: No AFP client |
Within Blue Box: 10.4 OS X: No AFP client |
Within Blue Box: As per 8.6 OS X: No AFP client |
NFS; FTP; rlogin; Telnet; Blue Box compatible programs |
- AppleShare File Server 1.1 and Workstation 1.1: See this More Info section. AppleShare 1.1 (System 3.3, Finder 5.4) up to System 5.1 (S4.3, F6.0) connect only over LocalTalk, unless it's an original Macintosh II with a certain setup. An AppleTalk bridge can be used to allow EtherTalk clients to connect to them though. The name "Workstation" tends to be associated with "client" and two clients cannot communicate with each other. In such case, there must be a server (AppleShare File Server 1.1+ or any System 7+ machine) to provide the files and the clients must use that as centralized storage. AppleShare for clients was called AppleShare Workstation from version 1.0 up to 3.6.5, starting with version 3.7 it was renamed AppleShare Client but they perform the same function.
- Pre-AppleShare programs: There were a few programs that could communicate over serial ports to send files around. Some seem lost to history, like XL/Serve, the remainder are not explored. TOPS, or Transcendental Operating System, was a kind of peer to peer file, print and email system designed to operate on VMS, UNIX, SUN workstations, MS-DOS or Macintosh systems, and was viable with System 4.1 up to System 6. A fair number of people used TOPS back in the day, but it was not designed for System 7. Since VAX/VMS stuff was common back then there was some stuff for that, including DAL compatibility, but that is outside the scope of this Guide.
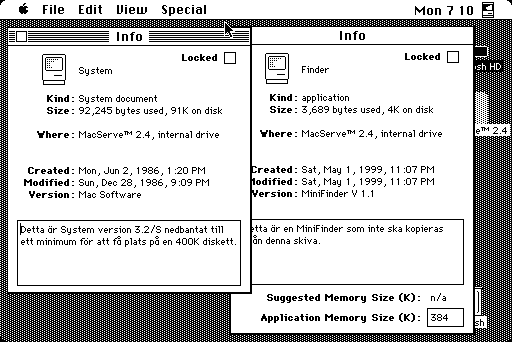
MacServe (an evolution of XL/Serve), published by Infosphere, should work just fine with a 512K. It's more of a "disk server" not a file server. A "disk server" doesn't manage file permissions, sharing specific folders, access rights and other features, instead it's more of an all or nothing server, sharing a whole volume only. It is an AppleTalk file sharing software package, but it isn't going to use the Chooser, but instead uses its own desk accessory. Surprisingly, even though v2.4 comes with System 3.2 and a MiniFinder, it still boots a SE/30, but nothing can be done with it. Additional discussion about some of these products is in the More Info page.
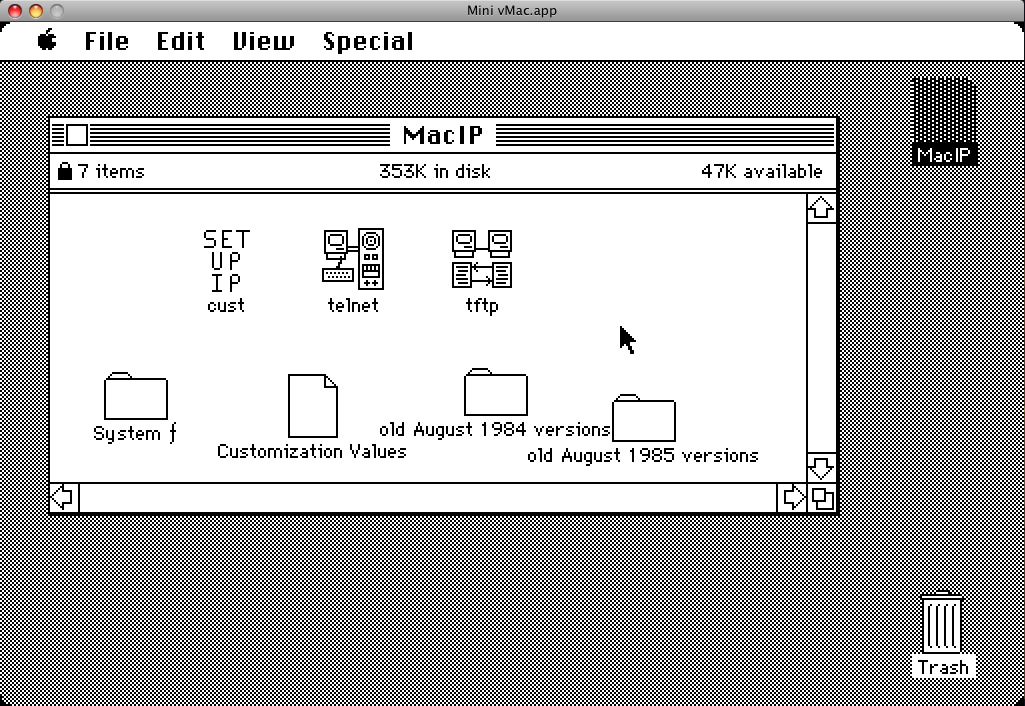
Gamba has prepared an interesting table here that describes some alternative applications that can mimic AFP networking, by doing program to program level communication. Of those, only EasyShare and TOPS are examined. JC Remote is very unstable and can only link up to another computer with JC Remote installed. - Pre-MacTCP TCP options: MacTCP was an evolution of MacIP, which started Kinetics Internet Protocol (KIP), based on the idea of transporting TCP/IP information over AppleTalk via the serial port. Development for MacIP started in late 1984 by a few individuals. Some of these are 128K compatible. An example photo can be found here. May have issues. Two other options was Columbia AppleTalk Package (CAP) and IPTalk, which was acceptable for Cisco routers back in the day to route AppleTalk to WANs. One example of a Cisco router would be the popular 2500 series, a type of rack-mounted platform of multiprotocol routers (other types were available, i.e. router/hub, access server, etc) to handle Ethernet via AUI for 10BASE-5, Token Ring, ISDN, synchronous or asynchronous serial interfacing. First-generation AGS and MGS level stuff is a different story: see this document, PDF page 199, or document page 520-465.
- AppleShare WS 3.5: Not necessarily required in all cases but is worth the effort (AppleShare 2.0 is 44KiB in System 6 versus 76KiB of AppleShare Workstation 3.5, AppleShare 7.0 in System 7 is 72KiB). There is more verbiage about 2GiB volumes further down this page in the Extra Information section. Quick breakdown of issues noted:
- Windows 2K Server SFM: 6.0.8 and AS 2.0 (default) or 7.0.1 with AS 7.0 (default): Bombs or crashes if volume size is greater than 2GiB, less than 2GiB is fine. If AS WS 3.5 is installed, then all volumes over 2GiB are read only. 7.5.3 default (3.6.1RevB) will be fine
- Mac OS X 10.2.8: System 6 with AS 2.0 can't use the Drop Box. Again less than 2GiB volume sizes are a good idea, if it can be done
- Netatalk 2.1.6 and Netatalk 4.0: Functions without issues
Only upgrade to Workstation 3.5 for System 6, 7.0, 7.1 and 7.5. 7.5.1 and 7.5.2 can upgrade to Workstation 3.6.5. In 7.5.3 and 7.5.5, it is possible to upgrade to AppleShare Client 3.7.4 but then Open Transport must be turned on. Do not upgrade to ASC 3.7.4 if classic networking mode is preferred. 7.1 can also use ASC 3.7.4 but then Open Transport is required. AppleShare Client 3.8.6 can be installed on 8.1, but it generally isn't necessary.
- AppleShare IP: A suite of software that has an AFP over TCP/IP service, FTP server, web server, mail service, and other features. Mac OS 7.6+ can run AppleShare IP 5, although it is notorious for being very picky about hardware: this chart and this spec sheet for AppleShare IP 5 can be informative. Additional information about this server software is available on the More Info page.
- ARA: Short for AppleTalk Remote Access, this is a software stack for communicating AppleTalk traffic over modem lines, such as 28.8Kbps analog modems. Rendered mostly obsolete by Open Transport which brought about TCP/IP networking which is more capable. Can also be slow. Going through an extensive archive of Apple Knowledge Base (KB), Technical Articles (TA) and TIL (Technical Information Library) documents, there are quite a few with ARA titles, suggesting that issues with ARA were frequent (such as with the Quadra 660AV and 840AV, TA32623, to name one of many). Can be used for esoteric operations involving emulators and MacIP gateways.
- CD/DVD drive sharing, Flash volumes: For Mac OS systems, HFS or CDFS can be shared over the network to a Classic Mac. For sharing a D: drive under Windows 2000/2003 Server, the type must be CDFS, because Windows can't natively read HFS. Linux testing with Netatalk indicated identical limitations. HFS or HFS+ formatted Flash media should be able to be shared just fine in all operating systems that can read HFS volumes, with Linux probably leveraging hfsutils, but may not need it because Netatalk is quite capable. Some experimentation may be necessary because not all systems can share FAT32 or exFAT volumes.
- Classic Networking: This refers to MacTCP being used for TCP/UDP traffic. OT is shorthand for Open Transport which is a complete overhaul of the networking interface, in general terms this means (depending on the version) the machine can handle AFP tunneled inside TCP packets, beyond that the TCP backend is more robust and capable but the common man won't notice much difference, other than the performance drag and the higher memory requirements. MacTCP cannot handle AFP over TCP traffic: the MacIP setting in MacTCP is for tunneling TCP traffic inside AppleTalk packets, usually over LocalTalk, which is a feature provided by certain types of router or gateway devices which offer a MacIP server.
- DEC equipment: Since a previous mention of Digital Equipment Corporation (DEC) VAX/VMS machines was mentioned, we may as well do a quick follow up before we forget. AlisaShare was an AppleShare file and print server for VAX/VMS hardware, with AlisaTalk doing the AppleTalk work. Accurate information is quite scarce and most of it dates to the late 1980s or very early 1990s when the whole computing landscape was very fluid and changed rapidly. In any case it was bought out by DEC and rolled into a product called PATHWORKS which was available for Macintosh as well. PacerShare, another AppleShare file server option for DEC hardware, is likewise hard to find information on what it worked and looked like. The Apple Multivendor Network Solutions Guide (1990) has a description and pricing for all of these options (and much more) with the exception of PATHWORKS because that came out later. It's also a great info dive and showcases the variety of hardware and software available back then. A sizable amount didn't get very popular, was vaporware, or has not been archived.
- Disk image bridging: This is a practice that works like this: Say a MacBook Pro with 10.8 Mountain Lion needs to get a file to a Mac Plus with System 6. One way is to create a disk image, say 100MiB, but don't mount it. Start up a bridge Mac with preferably OS 9 on it, which then navigates to the location of the disk image, mounts it, then do a Get Info on it and then share that out. The Plus should be able to read it: as long as the MacBook Pro doesn't try to open it until everybody else has closed it.
- Mac OS 7.5 and above: The upper limit appears to be a function of system architecture. All 68020, 68030, 68040 and PowerPC 601 Macs equipped with a NuBus system architecture and ROM combination are limited to Mac OS X 10.4 Tiger out of the box. Machines that came with an LC-PDS bus are going to be lumped in here too.
All 680x0 PowerBooks are going to fall in this category as well, but where the line gets blurred is for systems that author does not have access to anymore. These would be the PowerBook Duo 2300c, PowerBook 1400, 2400, 3400 and 5300 series which don't necessarily use the same system architecture or system bus as the desktops do. According to the PowerBook 2300c Developer Tech note, the 2300c uses a "68030-compatible bus" which is most likely not going to work above 10.4 Tiger. Likewise, the Tech Note for the 5300 and 1400 both describe a custom IC that bridges two subsystems together, a processor and memory subsystem, followed by the Input/Output subsystem. Meanwhile the first 2400 and 3400, with the 2400 being a size-reduced form of the 3400, use a PCI bus according to the 3400 Tech Note, as does the first PowerBook G3 "Kanga". Therefore it would be reasonable to assume that the 3400 family (which includes the 2400 and PowerBook G3) should function just fine with Mac OS X 10.5 Leopard and above. Whether the ROM is involved in this consideration is anybody's guess: if it does, then it will get more complicated because dividing things up by system architecture is easier than disassembling a bunch of ROM files and fishing for the important bits in assembly language. Few people have a Macintosh stash big enough to test every machine deviation. For your convenience, ROM dumps of the 7100/66, 7200/75 and 6205CD are here should you decide to explore this avenue.
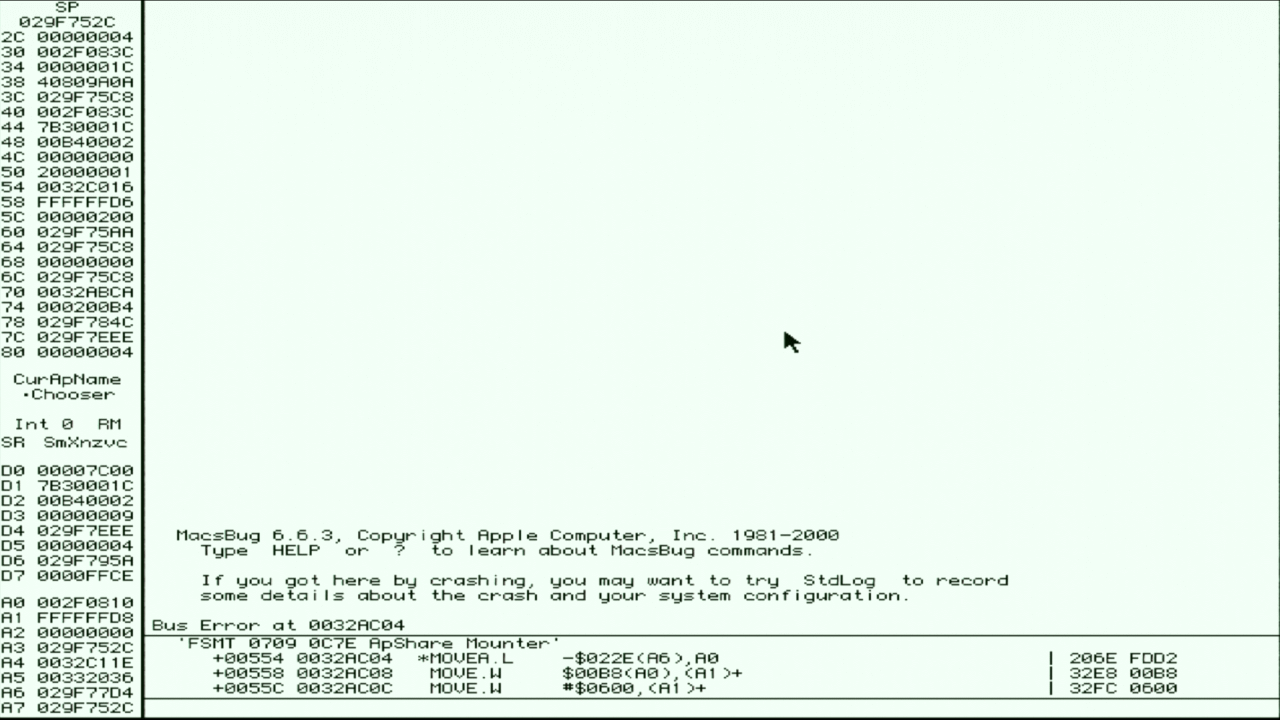
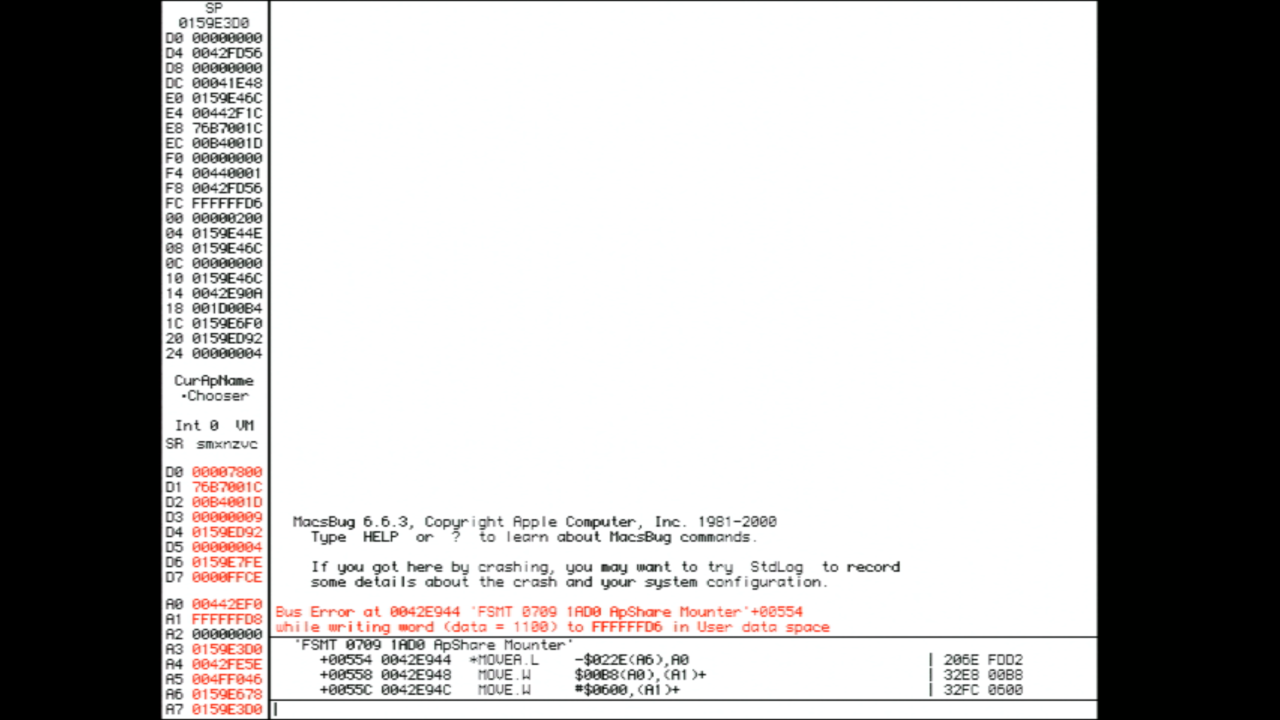
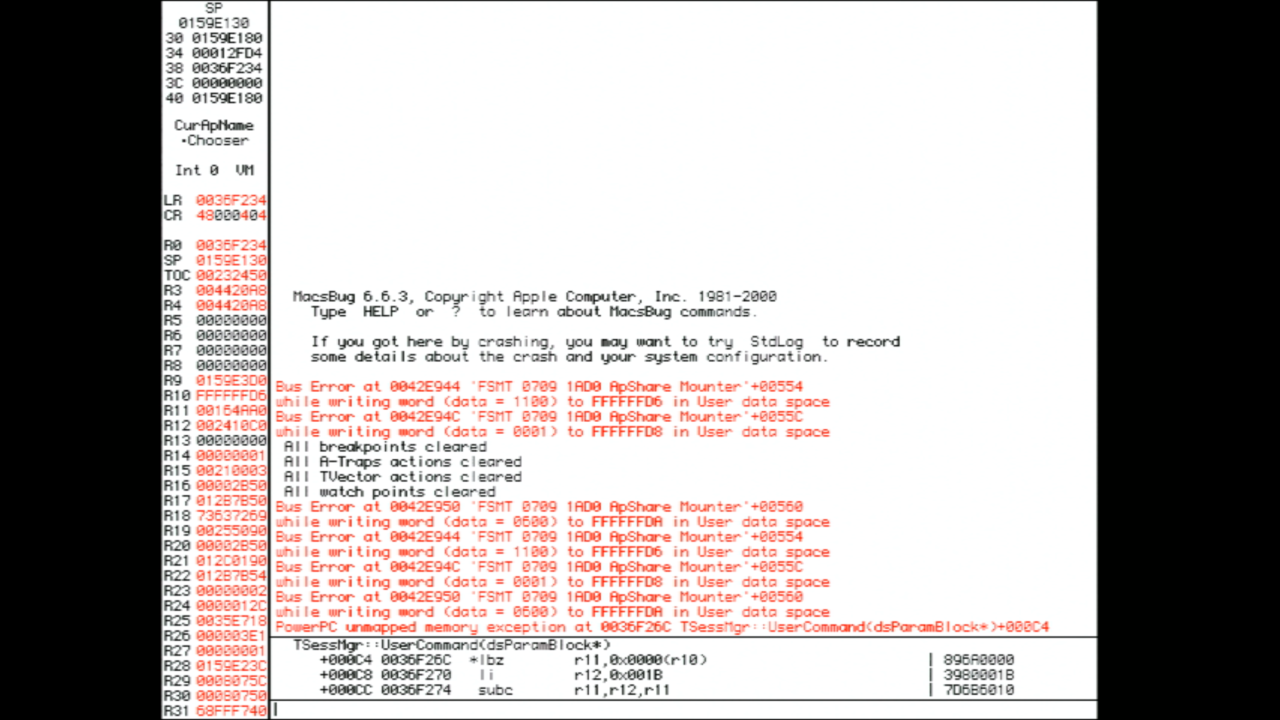
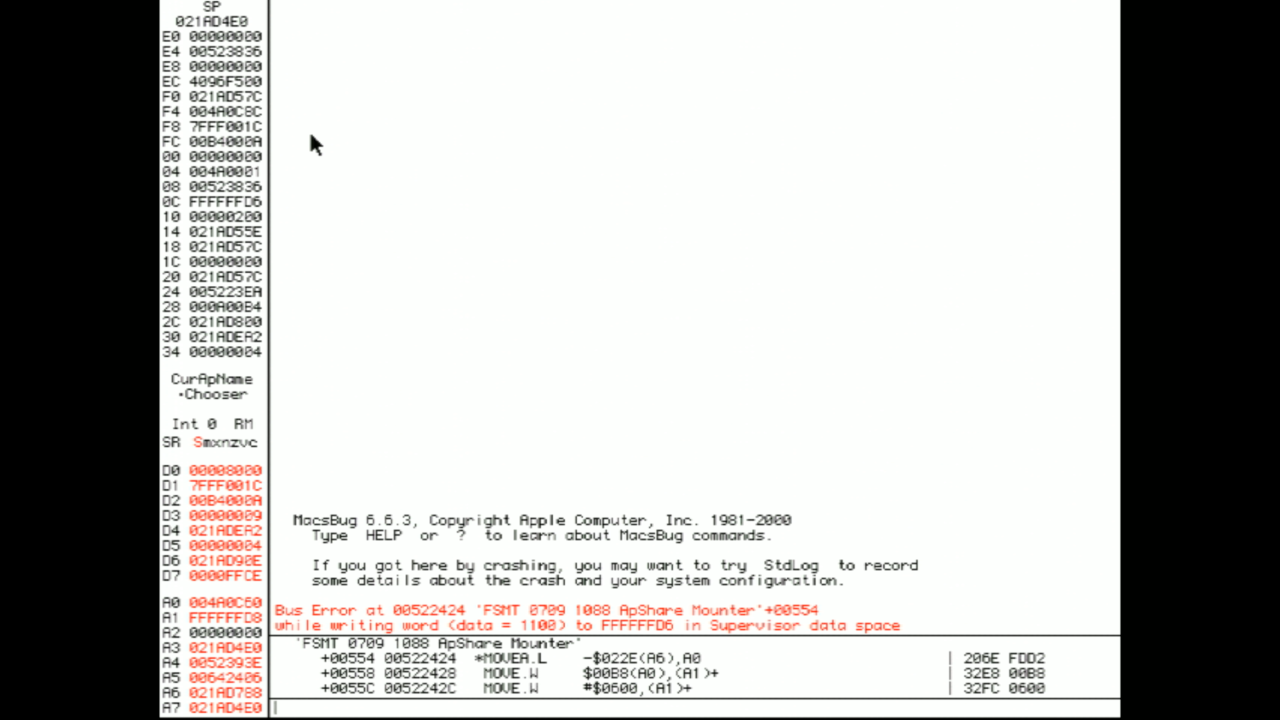
Continuing on the 680x0 lineage for a bit longer, the Chooser program runs into a bus error because something is trying to work with data to an address space that is invalid. Below is the MacsBug report of a Macintosh IIci running a modified version of 8.1, with AppleShare Client 3.8.3 and Open Transport 1.3 (shown with two entries for two attempts) after trying to connect to a 10.5 Leopard server:Bus Error at 0035508C 'FSMT 0709 0E54 ApShare Mounter'+00554 while writing word (data = 1100) to FFFFFFD6 in Supervisor data space Bus Error at 00355094 'FSMT 0709 0E54 ApShare Mounter'+0055C while writing word (data = 0001) to FFFFFFD8 in Supervisor data spaceA Quadra 610 DOS Compatible reports something similar, as does a Performa 6205CD, which uses a 603e microprocessor, but has a LC style bus with an LC-PDS slot and a CommSlot interface connector. A Power Macintosh 7100/66 comes with a NuBus architecture and a PowerPC 601 CPU, but doesn't work with 10.5 Leopard in any version tested including up to Mac OS 9.1, which indicates that the CPU is not a determining factor, and therefore all three are capped at OS X 10.4 Tiger.
The use of AFP Engage! can be used to push 8.0 or 8.1 on one of these examples to 10.5 Leopard and up to 10.14 Mojave, but stability is questionable and you may not have any write access as Guest access is forced, meaning that only the Drop Box is accessible or volumes with read/write/execute access for everybody. Regular file sharing operations should be conducted with other methods like FTP.
 PM 7100/66 clocking out as a no-go |
 Multiple attempts on 8.1 |
 Performa 6205CD also didn't work |
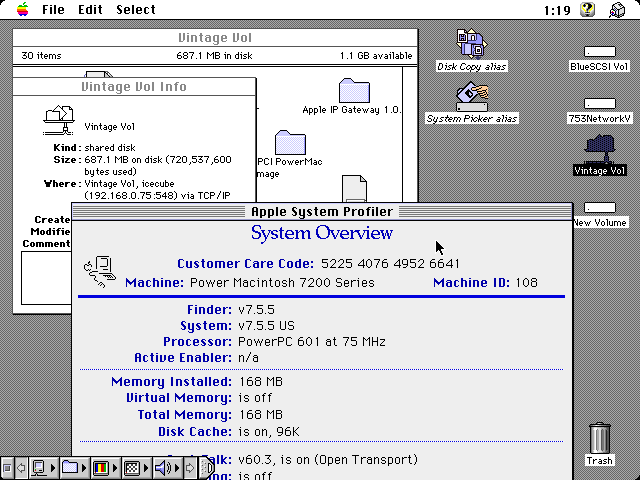
 PM 7200/75 with 7.5.3 and macOS 10.14 |
 System 7.5.5 connected to OS X 10.5 |
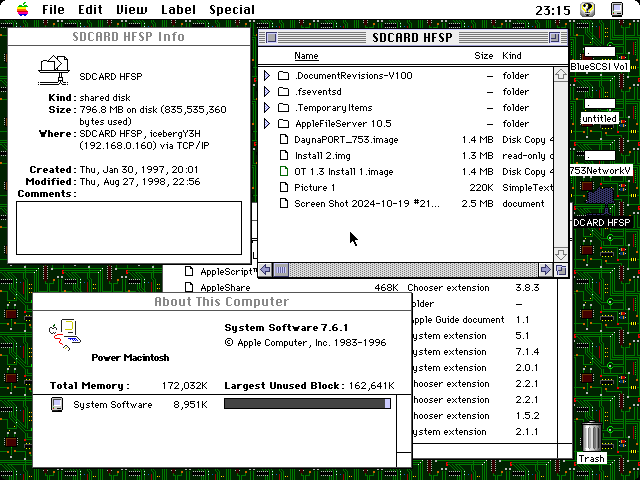 7.6.1 going up to macOS 10.14 |
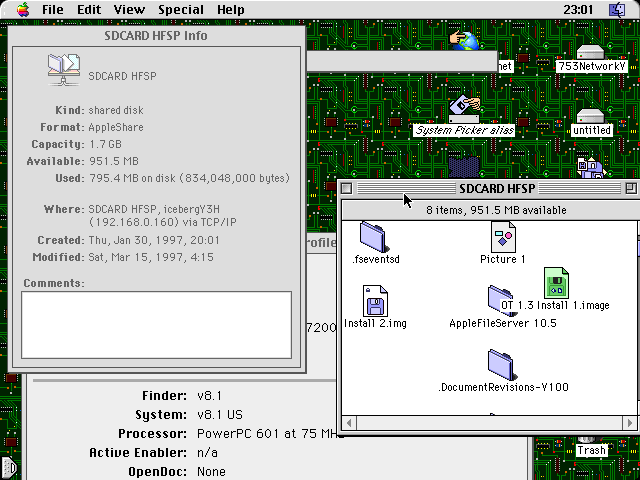 8.1 worked just fine as well |
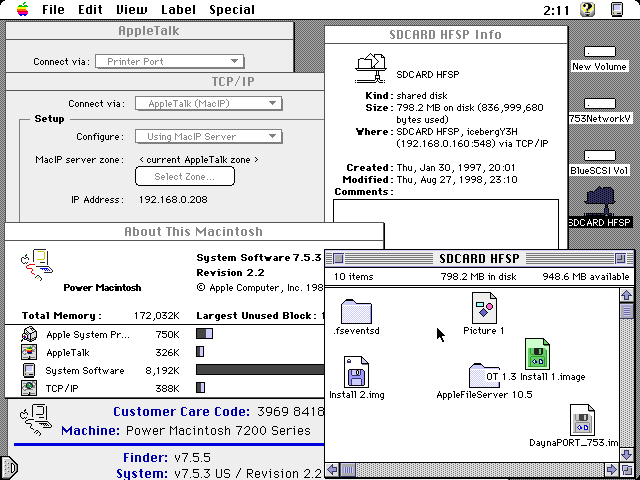 Using Apple IP Gateway and LocalTalk |
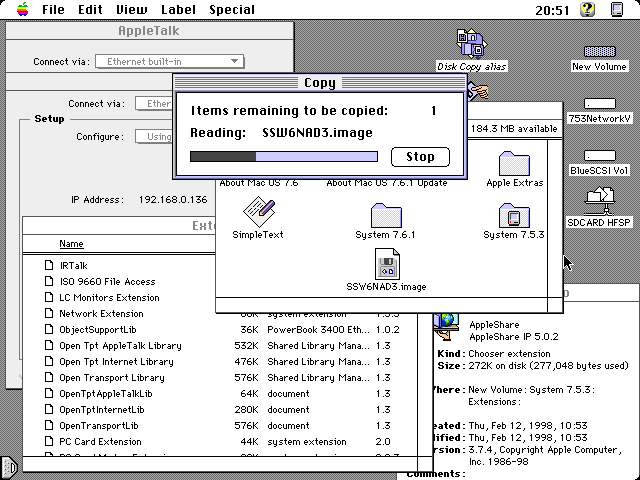
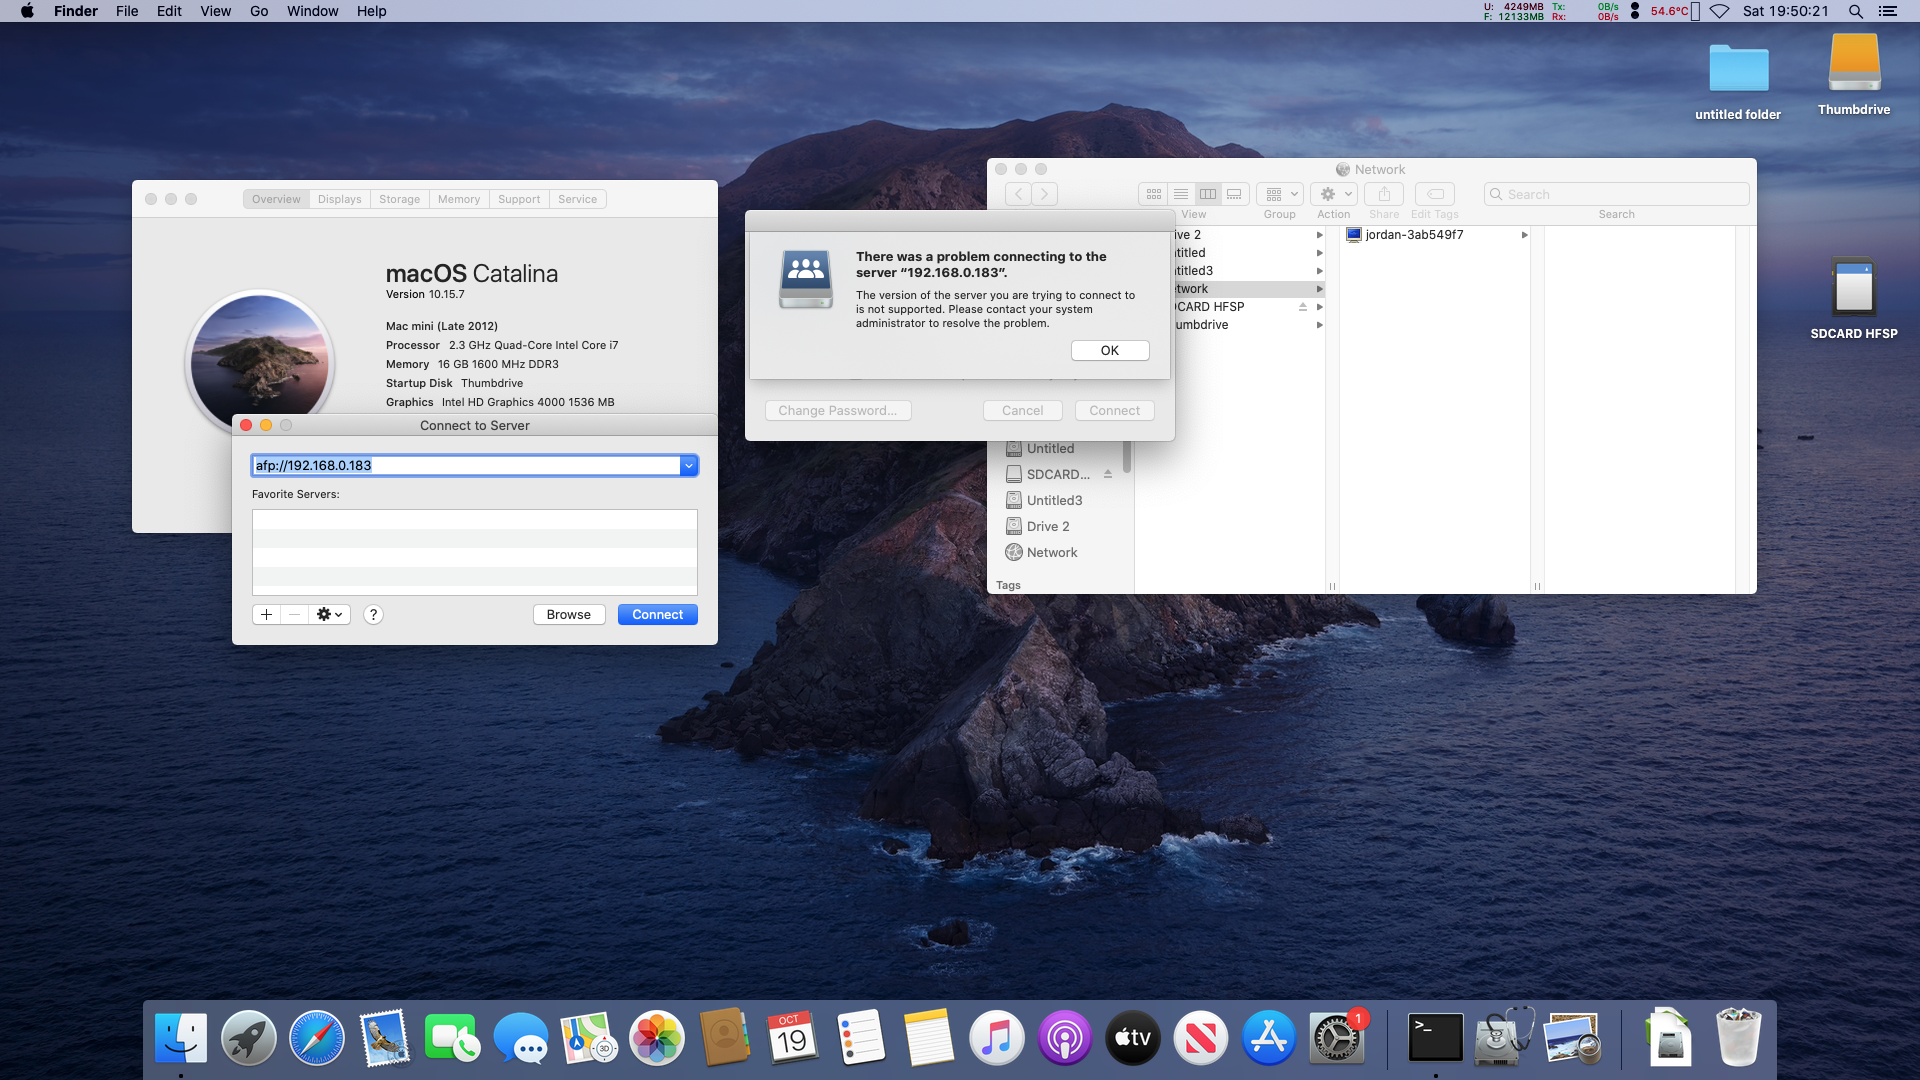
On the contrary, a Power Macintosh 7200/75 is equipped with a PCI system bus and a PowerPC 601 processor. Although it was suffering from a number of sore spots, such as weak capacitors, a dead built-in Ethernet interface (on both RJ45 and AAUI, later fixed with a hot water bath), hard drive which was long gone and a few other minor issues, it did connect up to macOS 10.14 with Mac OS 7.6.1 and 8.1, reading and writing files. Slowly -- because a SE/30 had to function as a MacIP gateway using the serial port interface on the 7200/75, because, like the Performa 6205CD, two different SCSI Ethernet adapters refused to work. As seen in the image gallery, SDCARD HFSP is a 2GB SD card formatted for HFS+ inserted in the SD card slot of a Mac mini 6,2 with the machine name of icebergY3H, which is running macOS 10.14.
As far as System 7.5.3 is concerned, it would only connect as a Guest user to Mac OS X 10.5 Leopard and above because it doesn't have the DHX extension that is supplied by and used by AppleShare Client 3.8.3, which doesn't work on System 7.5.3 or 7.5.5. Volumes that are set up as shares with read/write access for Everyone should work just fine rather than being stuck with Public Folders. Mac OS 7.6 will work the same way as System 7.5.3 or 7.5.5 but has the ability to use AppleShare Client 3.8.3, easing the login authentication barrier, thus not being forced to connect as a Guest user. Both will connect up to macOS 10.14 Mojave at the top end.
According to the Guide to the Macintosh Family Hardware, Second Edition book (page 137, PDF page 176; 1992 publishing), addresses above 0xF100 0000 correspond to NuBus slots on a Macintosh II, IIcx and IIci machines and max out at 0xFFFF FFFF. These are used for addresses used to communicate with NuBus cards. But looking at a hardware reference for the Power Macintosh 6100 series, 0xFF00 0000 thru 0xFFFF FFFF corresponds to a ROM alias (Apple Developer Connection, Reference Library Edition, March 1998) and FSMT is a resource in the AppleShare Client extension. Beyond this point it gets really technical and it is possible that it is attempting something that works fine on a PCI PowerPC machine natively but not earlier computers. Apple's Developer Tech Notes for the later machines do not typically cover address maps either. Fixing it would require a disassembler, some specific programs like MacNosy (a decomplier), MacsBug and a skilled user. Address numbers can change from instance to instance and machine to machine. The SE for instance, has a different addressing scheme than the SE/30 does, and a 68020 works differently than a PowerPC 604e, and so on. Most of this technical interpretation was provided by atax1a off a Discord server, of which the author sends regards.
Basilisk II, which emulates a 68030 (IIci) or 68040 (Quadra 900) was able to connect to 10.14 with as a Quadra 900 and 8.1. This is probably because Basilisk II brings quite a few patches to the Mac OS ROM code.
- Mac OS X 10.0: Stability can be questionable: any hardware that can run this OS can run Jaguar, but on a slow G3 Jaguar is noticeably slower. It still works fine with Netatalk and Windows 2000 Server with SFM, but not with PC MacLAN v9 (but PC MacLAN can be a client to a 10.0 server, so it's not a total loss). Clients connecting to a 10.0 server are fine, but 10.15 Catalina is a little different because it can't mount 10.0 Cheetah and 10.1 Puma as a registered user, only a guest (shown with 10.1). Expect to use AFP IP address to connect to servers in the Network browser. Apple says that 8.6 and earlier cannot be mounted by a 10.0 client, which only uses AFP over TCP/IP, and they state OS 9 and/or AppleShare IP works. But ShareWay IP does work both ways using 7.5.5, which can also be installed on 8.1 and 8.6 to allow AFP file sharing over TCP.
AFP over AppleTalk is not included in 10.0 (only AFP over TCP/IP, there is a use_appletalk field in the NetInfo Manager but it doesn't work) but 10.1 reincorporated it, is fully featured in 10.2, but AFP over AppleTalk was reduced in capability with 10.3, and further reduced to just printers with 10.4. 10.6 gutted it entirely and thus 10.5 is the last to deal with the old classes of printers, mostly Color StyleWriters and LaserWriters. Printing is not a subject of this Guide. - Mac OS X Server: The Server builds of Mac OS X have the same AppleShare access and serving limitations as a normal build, they just have more configuration and server control than a normal distribution build does. Additional information for Mac OS X Server 10.0 up to Mac OS X Server 10.6 is in the More Info page. The only notable difference is that Mac OS X Server 10.0.3 is said to offer a SMB file server feature, which is not available in the standard version until 10.1 Puma.
- NFS: Sometimes used by Linux or UNIX (sometimes combined into *NIX) operating systems. Refer to this section for more information.
- Novell NetWare: A limited evaluation and overview is available in this section.
- Other systems:
- Amiga: See this section for a word about the Amiga platform.
- Android: Android should have SSH and FTP software; Netatalk does not appear to be available. There is a selection of FTP server and client software in the Google Play store.
- Apple II: Apple // machines of the IIGS and IIe Enhanced class should work over LocalTalk; as the IIGS has Mini-DIN-8 ports and the IIe Enhanced can run the Workstation card; alternatively over Ethernet with third-party Ethernet cards. A further note is here. This page covers terminal data transfer with a serial console in regards to OS X, but relevant for other systems.
- A/UX: A gallery of A/UX 2.0 and some thoughts about A/UX can be found on the More Info page. Apple says that EtherTalk Phase 2 driver support in A/UX is left up to the developers, which mostly affects less common cards like Sonic, Dayna or Shiva manufactured cards. A/UX requires Ethernet drivers proprietary to A/UX (the standard NSI distributions are not compatible). A number of network cards that use the National Semiconductor DP83901, DP83902 or DP83932 DMA Ethernet controllers should be compatible, such as the Asante MacCon series and most Farallon cards. If not, you're out of luck. The NSI 1.4.5 disk has an A/UX 2.0.x driver, most likely for the driver chips previously mentioned only, but the standard A/UX builds include it already, and only the kernel needs to be recompiled to recognize ae0 or ao0, internally referred to as ae6. Otherwise, as A/UX 2.0 coexists with System 6, and A/UX 3.0 coexists with System 7, most of the text concerning those particular versions should be relevant, except software compatibility can be a problem. Open Transport, DHCP and AFP over TCP/IP is not available for A/UX, and thus 10.2 Jaguar is the highest they will reach. This A/UX FAQ should cover most bases.
A/UX 1.1.1 only has support for 3 specific printers: LaserWriter, LQ AppleTalk ImageWriter, and AppleTalk ImageWriter. A/UX 1.x does not support EtherTalk, and the Chooser from within A/UX cannot load an AppleShare server because there is no AppleShare WS client included. A/UX 2.0 can be configured to use EtherTalk (see the A/UX Network System Administration book for A/UX 2.0) or the default LocalTalk; both A/UX 2.0 and A/UX 3.0 should detect a compatible Ethernet card when newconfig is ran to compile a new kernel. Other options include ftp via the command line, uucp, B-NET, Kermit, telnet, rcp, rlogin, cu, and NFS -- most of which are handled through a shell prompt. Support, inclusion, or quality can vary between versions: author is not an A/UX or UNIX expert. The A/UX Network System Administration (A/UX 2.0) or A/UX Networking Essentials (A/UX 3.0) books describe how to NFS, B-NET and the others, with the Communications User Guide for A/UX 2.0 describes B-NET and a few others like SLIP.
Shells supported by all systems are BSD C shell (csh), another option is the Bell Labs Korn shell (ksh), and default is the Bell Labs/AT&T Bourne shell (sh); however it does other shells, like mac2 (which is a VT100-compatible shell). Apparently there are only two GUI programs within A/UX 1.1.1 in A/UX mode: term and hfx. Type /etc/toolboxdaemon & to start up the Macintosh Toolbox daemon which emulates some Macintosh Toolbox routines, but no hardware access or sound, and then the programs can be opened and a GUI is available. Somewhat. - iOS: iOS does have a Cydia distro of Netatalk. However it has not been updated and beyond iOS 8 you are out of luck. Considering that there has been progress on building Basilisk II for iOS, if that can reach out, it could be a good option.
If you have iFile (the Cydia sourced file management application which has file system access), it is possible to host a web server which can be accessed from a web browser (like http://192.168.3.102:10000).
iFiles (a document manager on the App Store) has a similar feature and an option to add FTP or SFTP services, but will only work within the application itself (no getting out of the sandbox, like other App Store apps); it does, or did feature AFP in some capacity, but it requires an OS X AFP3 file server and has a strange behavior where it won't work on a LAN without Internet access. The openSSH library from Cydia is another popular choice for system-level access. In Cydia there are a couple of packages for SMB based on the Samba stack for jailbroken devices. - LocalTalk PC: Some LocalTalk PC card info, some other miscellaneous info here and a curious page here. Compatible cards are all ISA or MCA bus. COPSTalk is a type of software available for MS-DOS 3.x for linking to LocalTalk networks: with a later version 2.1 was exclusively for Windows 95. A Linux compatible driver was also developed: compatibility with Netatalk is possible, but not an easy adventure.
- Mac OS X 10.4 and up: There is a MacPorts port of Netatalk, with Fink returning nothing in their repository. The two most common package managers for Mac OS X ports are MacPorts and Homebrew. For these computers, running something like Linux server inside a VM might be a better alternative because past 10.7 Lion the security systems of OS X, particularly with 10.13 High Sierra, become more difficult to work around. OS X does not speak AFP 2.x properly to older machines as the kernel doesn't support it beyond 10.5 or 10.6. Netatalk is not built the same way on Linux as it is on OS X/macOS, however some significant changes are in the pipeline for Netatalk 4.0 that make native system integration viable.
- SUN systems: See this Apple TA article. Author has only seen a SUN system once and cannot comment further. The Macintosh Application Environment, or MAE for short, was a way of running System 7 in a X window system, and at the very least could be mildly interesting. This curious KB article has some interesting comments about CAP and PacerShare which wasn't mentioned earlier. MacX was a X11 window system server for System 6, A/UX and System 7.0/7.1 operating systems, and can provide an interesting time trip to the 1990s. The second version, MacX 2.0, came out a bit later.
- Rhapsody 5.6: Also known as Mac OS X Server 1.2v3. It can be emulated in QEMU or UTM, but it can be highly unstable, networking isn't possible with the built-in QEMU Ethernet driver and has a special installation procedure, not to mention cursor control can be challenging. The use of a real machine to run it is realistically the only option. There are no obvious uses for the serial port(s) on computers equipped with them: with nothing in the Network control panel to suggest it either. Although it does have an AppleTalk router of sorts, there's nothing to indicate that it does anything else other than Ethernet to Ethernet (the Macintosh Server G3 package included a 10/100 NIC card and a SCSI-2 card).
The Rhapsody side only does AFP over TCP/IP as a server up to a limit of what appears to be 10.6 Snow Leopard (10.11 El Capitan couldn't connect to it) at the max and 7.1 with OT 1.3 and ASC 3.7.4 for the low end, and appears to lack an AFP client. UFS volumes cannot be shared. There is a /etc/appletalk.cfg file, but it only has en0:* in it (meaning the AppleTalk zone for the first Ethernet port is "Anything"), and there is nothing in the NetInfo Manager like in Jaguar, of which looks like a Mac OS 8 skinned version of Jaguar's. There's more: the server advertising feature doesn't appear to work, client users can only connect with manually entering the server IP address in the Chooser or via the Go menu in OS X.
Blue Box is an emulation environment for a version of Mac OS 8, depending on which version of Rhapsody is involved. For Rhapsody 5.6, it is a version of 8.6 and it has the usual ability to connect with AppleTalk as a normal system with 8.6 would, and the file server functions normally. Strangely however, it would not connect to any OS X server above 10.4. Servers in both environments are discrete. Some other random musings about this operating system are found in the appropriate More Info section. - Sabina TCP stack: This a project by D. Finnigan, also known as Dog Cow, the owner of Mac GUI. It is designed to be fully compatible with the Macintosh 128K, and for that matter, any Mac with a built-in serial port, and should be compatible all the way back to System 0.85 / Finder 1.0. It is supposed to feature a FTP, Telnet, HTTP download tool and a POP3 email client. Completion date is unknown; at time of publishing, the project is not completed yet. It must be mentioned that this kind of work is not easy, supported only by personal reasons and the number of people who can do this kind of thing today and have the desire to do it is very small in number (think single digits). It requires specialized in-depth knowledge of a number of different technical disciplines, an understanding of low level MC68000 assembly language and operations.
- Samba and SMB: Samba is a open-source networking stack for linking up to Windows systems which normally use the IBM Server Message Block (SMB) protocol. Microsoft made a version of it and called it Common Internet File System (CIFS), and insisted that CIFS is a dialect of SMB. That designation got forgotten about with SMB2 and SMB3. SMB file sharing specific to the topic of this Guide is discussed here.
OS X includes a variant of Samba for Windows compatibility, as does Linux, at least the more popular distros do. Starting in Mac OS X 10.7 Lion the Samba stack was replaced by Apple's implementation of SMB into what is called SMBX, which is "supposed" to be compatible with SMB1 and SMB2 (previous versions of OS X only talked SMB1). It's also known for being troublesome and a number of users have reported stability problems with SMBX. In 10.9 Apple's implementation of SMB2 (which can be forced to connect over SMB1) was updated a bit more. SMBX or Apple's SMB2/SMB3 whatever you call it continues to evolve, and it is outside the scope of this Guide to keep track of these matters, as it is a rather murky subject. - ShareWay IP Personal: This software can allow 7.5.5 or higher systems to serve AFP over TCP/IP. Additional information is further below in the EtherTalk section.
- SneakerNet: Floppy disks are best explained in this section. CDs require extensions or drivers (if not installed by default) and can only read HFS or certain CDFS ISO formats (with extension support, operating system version is a factor), so this is one avenue. Some of the later Power Macintosh G3 series have DVD drives and built-in Zip100 drives. Zip disks are possible as well but are a different journey in themselves. Syquest and other oddball formats like WORM, Magneto-optical, Jaz, or even just a "CD Caddy" CD-ROM drive that takes a carrier to hold the disc are interesting in a historical point of view but Ethernet makes them all obsolete.
Zip disks are good, if they work. Usually however, they are old units and the because of the way that the drive wears out, means that most drive units these days are beyond their normal service life. Heavy cost cutting measures in the mid-1990s onwards produces specimens like these which eventually end up with the fabled "click of death": some were good, some were bad. Assuming it actually works, the Zip drive was popular for a reason: reasonable cost, well supported, reasonably fast and good size for the time, and there's no reason that's not still valid today. Some form of preserving any valuable disks, such as with a disk image utility, is prudent. Use the Desktop Manager INIT for System 6 to stop it from needlessly rebuilding the Desktop File for those who have System 7 onboard with System 6. Nowadays though, with SCSI SD card adapters and stuff like the FloppyEmu, these peripherals are obsolete and are mostly a curiosity. |
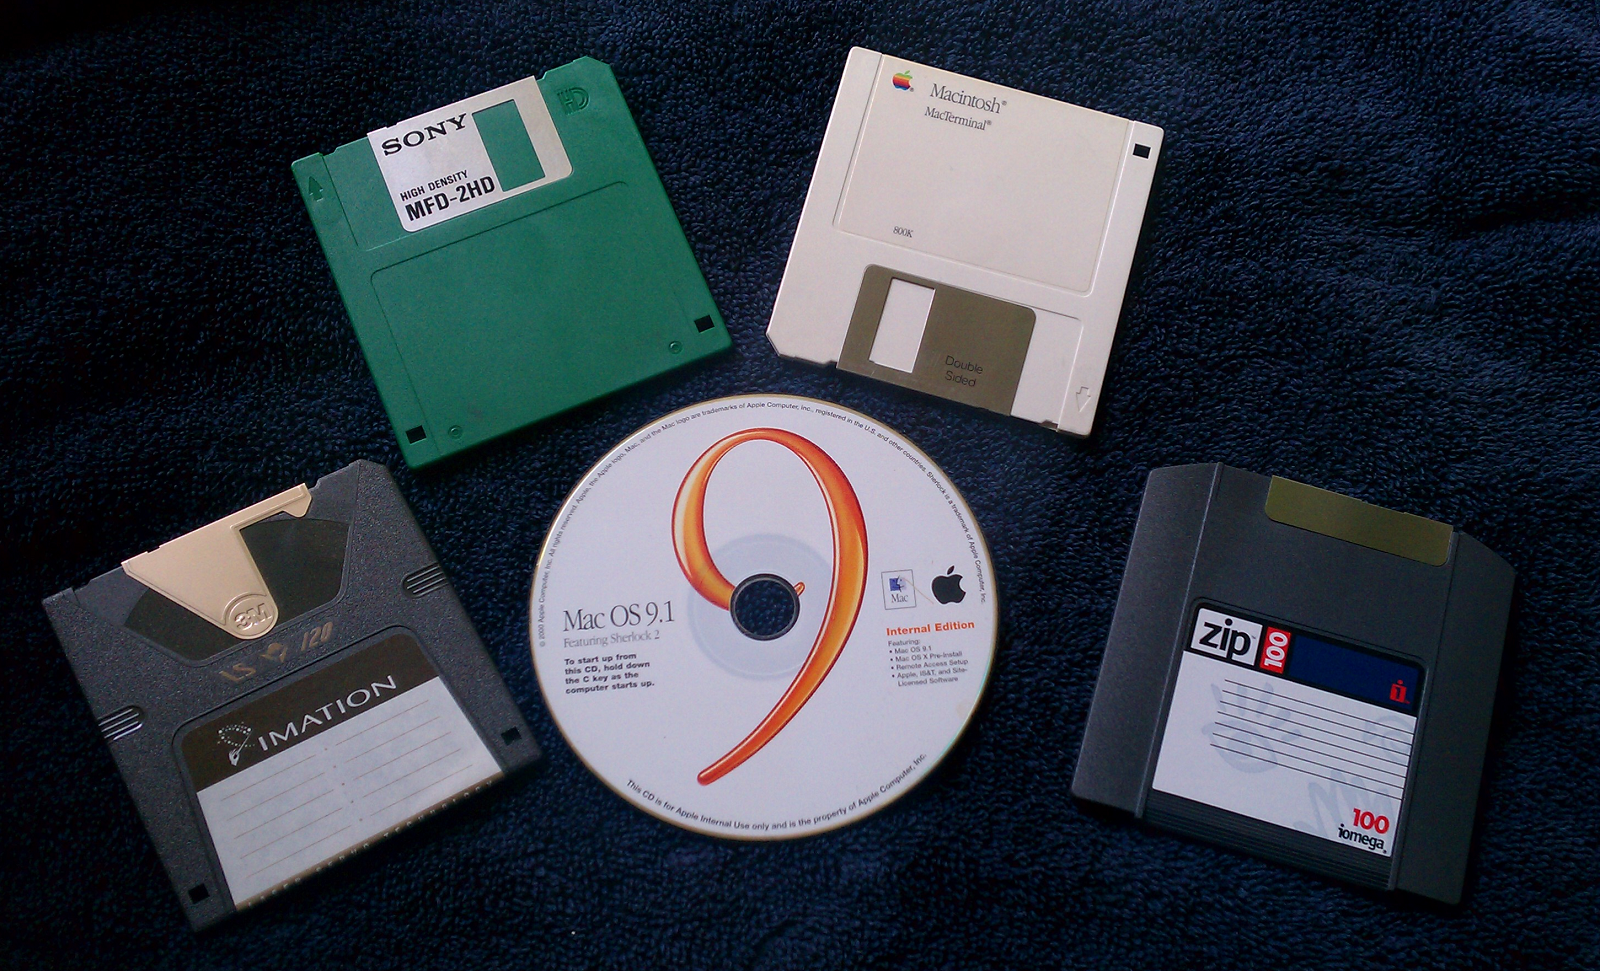 SneakerNet: 1.44MB, 800KiB, SuperDISK LS-120, Zip100 and a...CD |
- Windows: Refer to this section for Windows AFP discussion.
- Versions: The versions of Mac OS specified generally mean the highest sub-version possible (like 6.0.8, 7.5.5, 10.3.9, 10.4.11, 10.5.8, et cetera) but usually the sub-version is not a determining factor. Windows and Linux distribution also assume updates are up to date.
Hardware
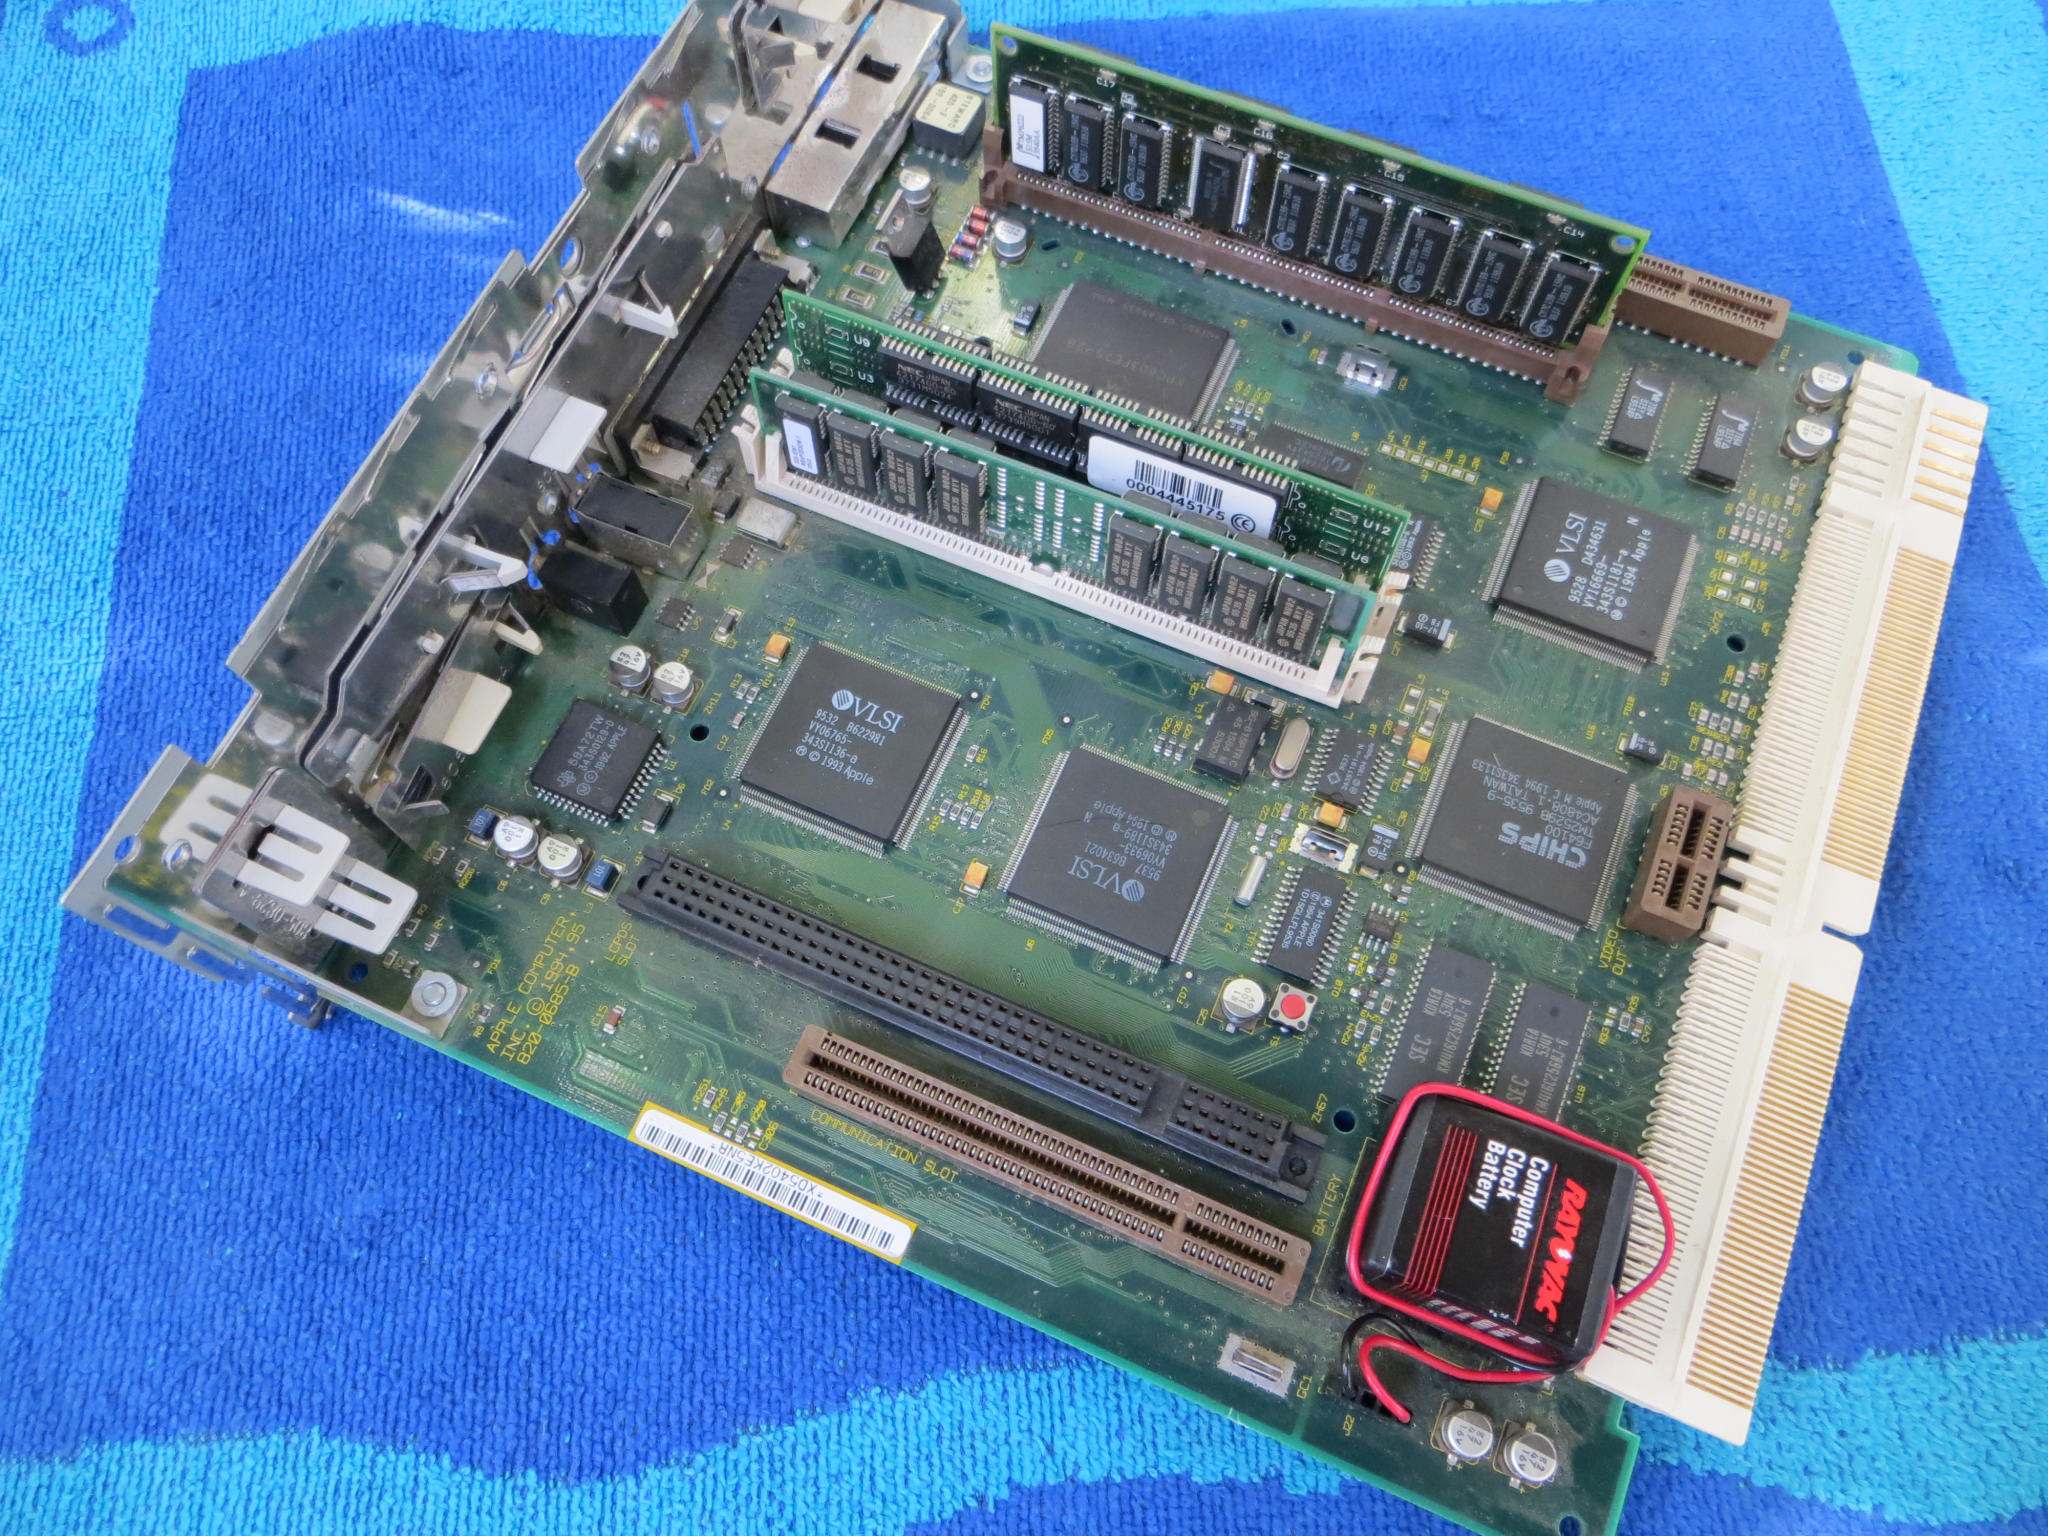
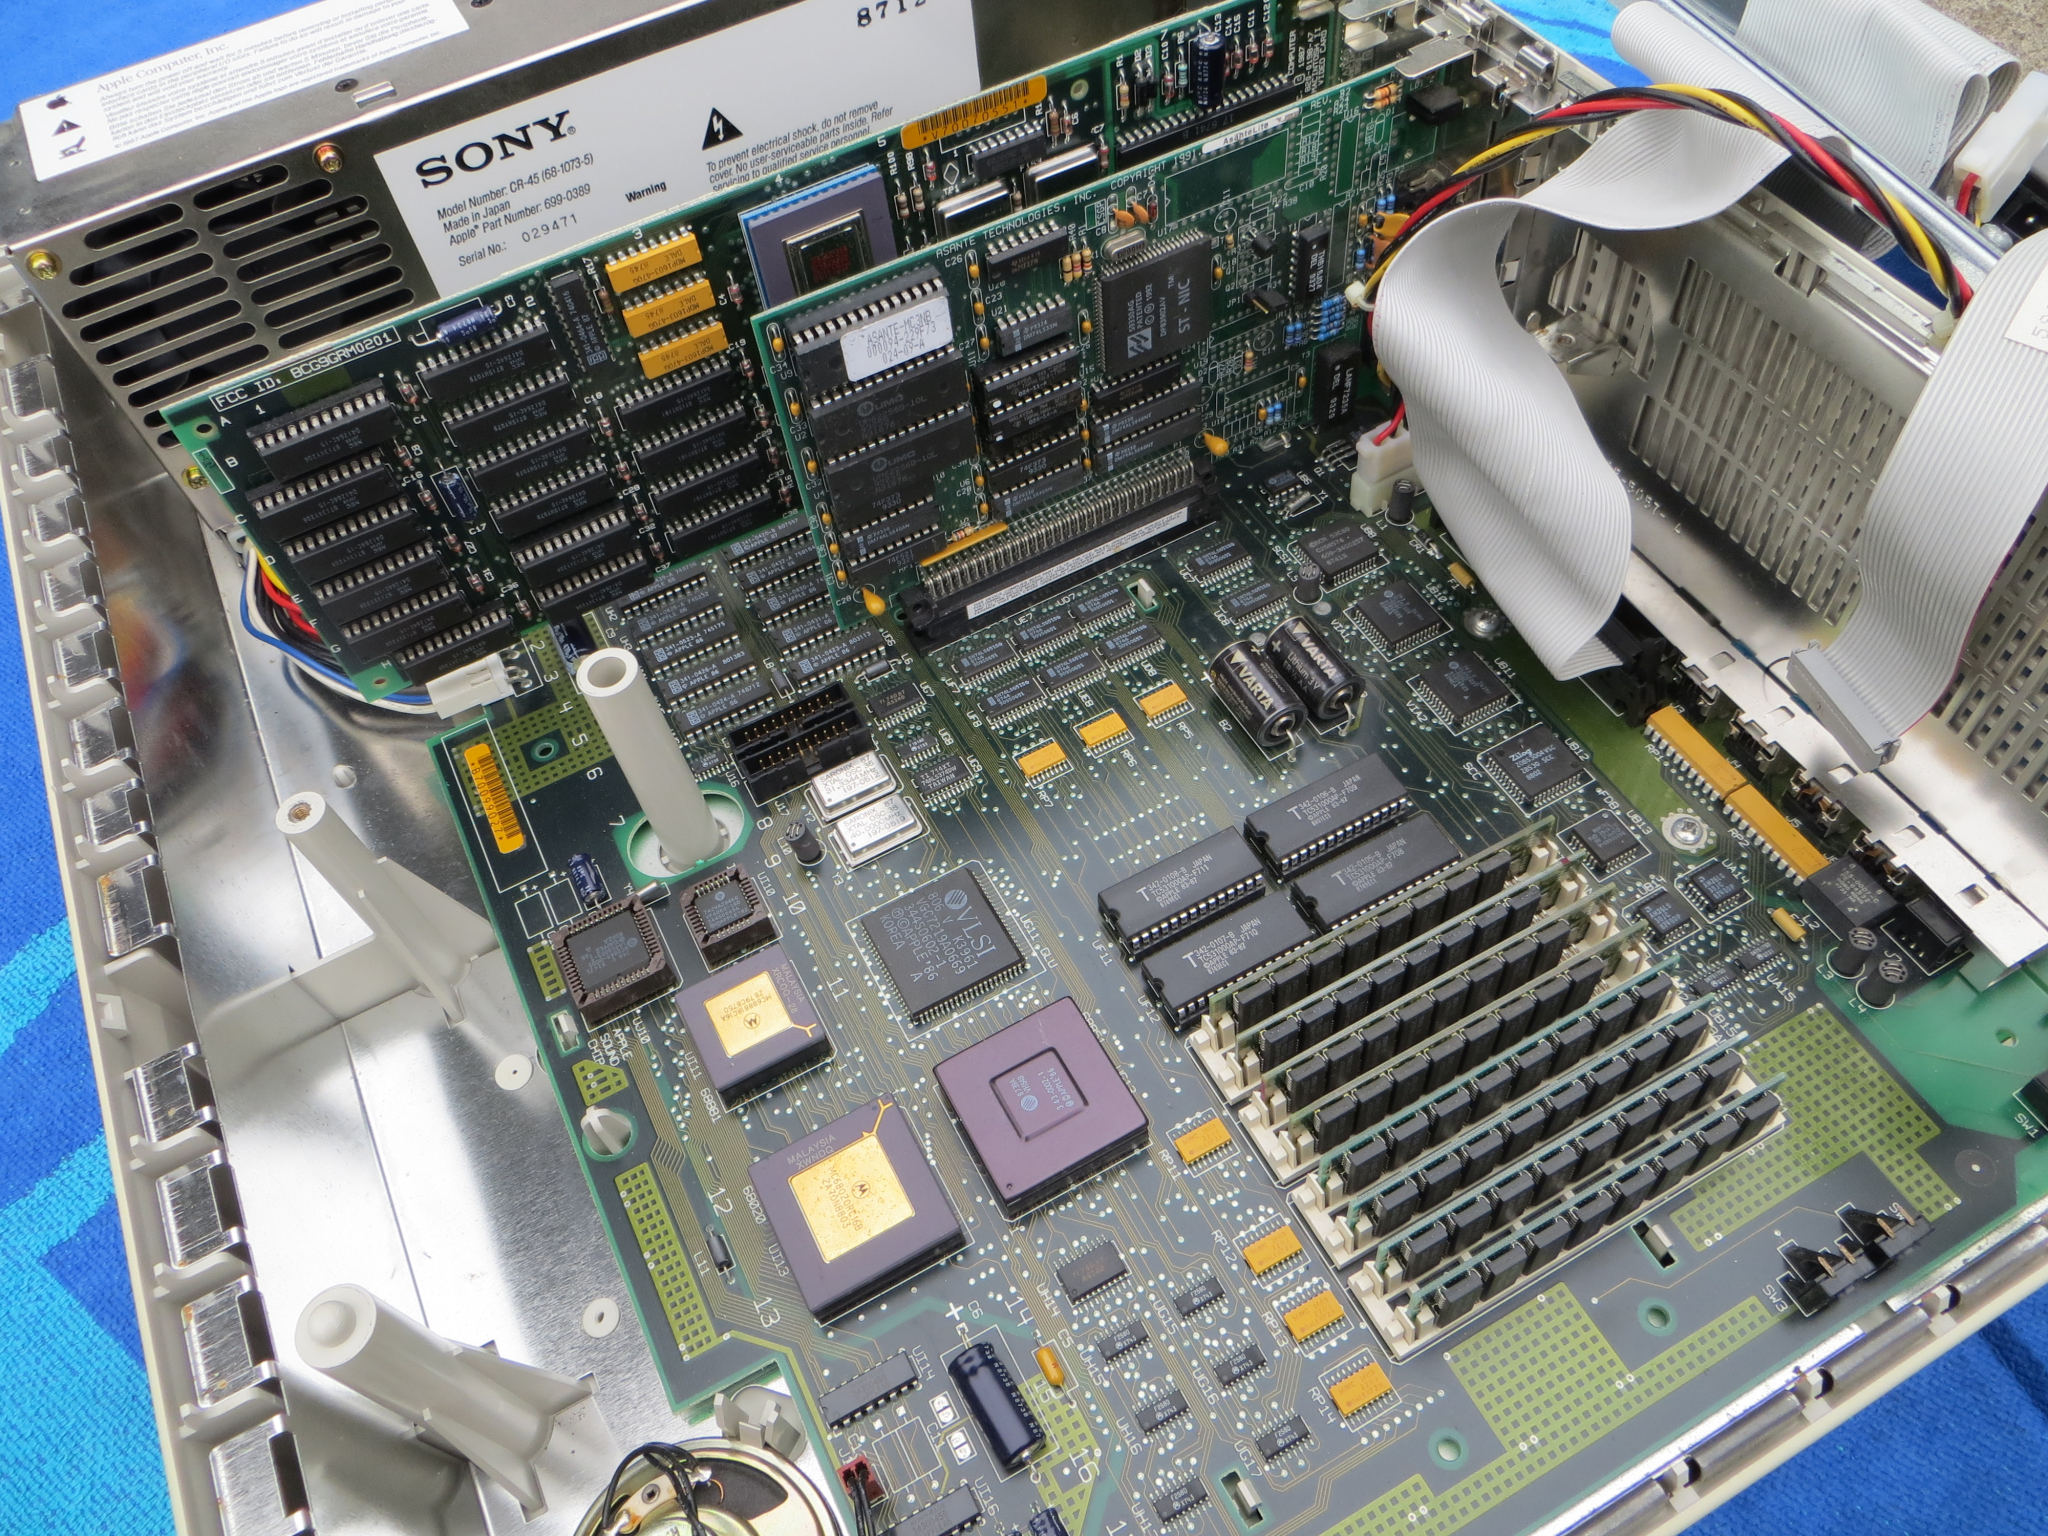
Most electronic hardware of an age in excess of ten years will start to show signs of age. The image to the right shows one example of an increasingly common failure point with old hardware like this -- leaking clock batteries and electrolytic capacitors which have failed and then promptly disgorge caustic and acidic compounds onto the motherboard. Owners of genuinely desirable hardware such as SE/30s with socketed CPU motherboards, Macintosh Portables, the Macintosh IIfx, Quadra 840AV, et cetera should establish these repairs without delay and with extra diligence and care. The SE/30 logic board as shown is a total write-off and it is unfortunate that the heart of the system, the motherboard, is the usual target for these catastrophes. At least the custom ICs should be salvaged for replacement new production boards. Power supplies and analog boards are also vulnerable, and considering the time, nearly every single machine needs attention and a full recap job. Let's move on to the minimum hardware specifications to interact with modern networks: | 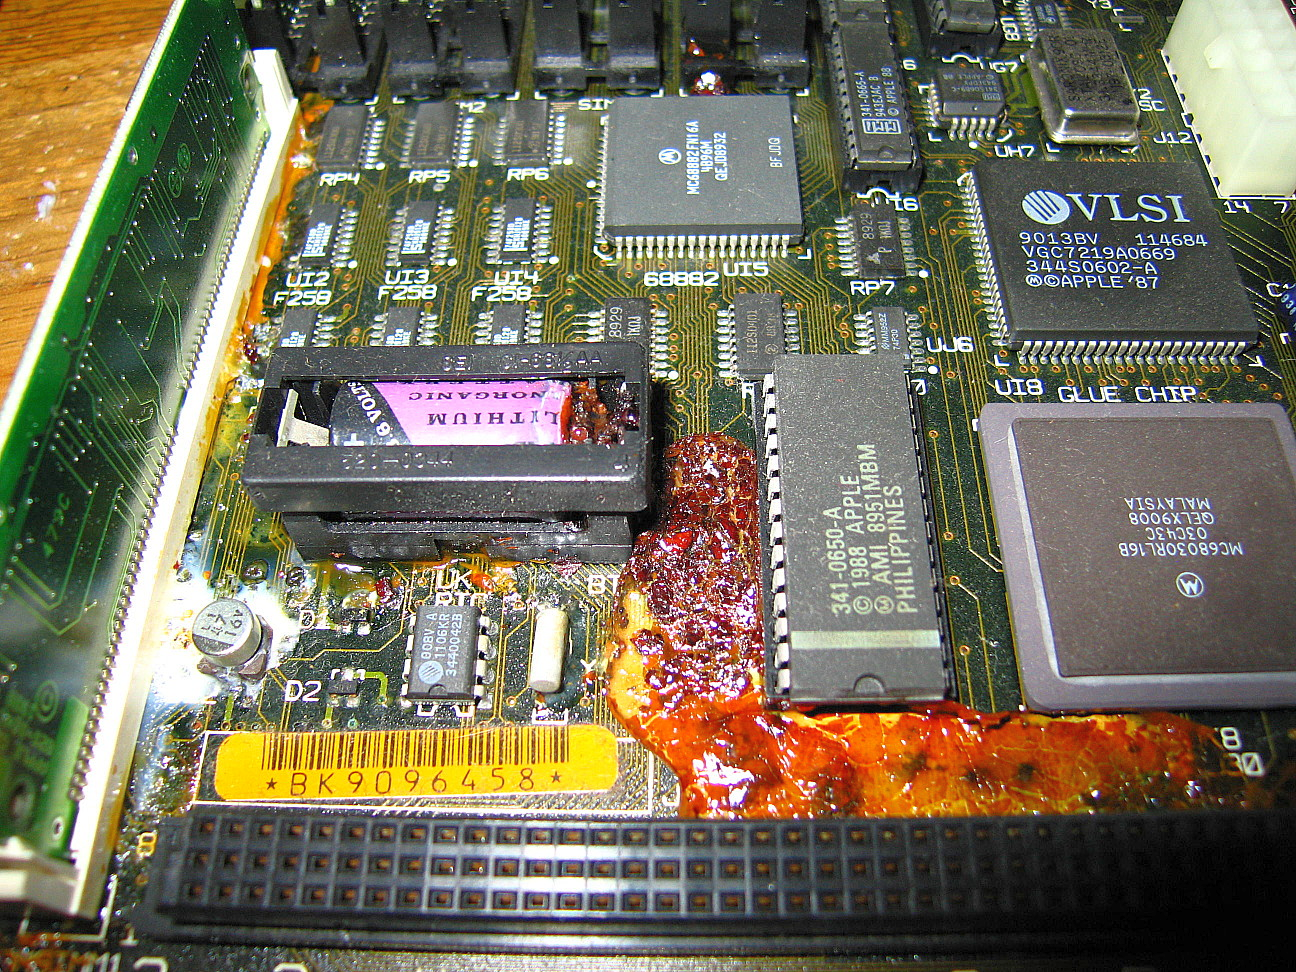 SE/30 logic board with PRAM battery and capacitor damage (via volvo242gt at 68kmla.org) |
- Base Minimum:
- Serial Interlink: Macintosh 128K with MacTerminal 1.1, MacTerminal 2.2 or other 128K-compatible terminal emulators. A second 400KiB external drive is strongly recommended. A 128K does not have enough memory to run any AppleShare networking software; printing, however, is supported on a limited list of compatible printers (i.e. ImageWriter, see here). It also cannot run the HD20 INIT.
- AppleShare as a client: Macintosh 512K with AppleShare WS 1.1, a DE-9 LocalTalk or PhoneNET adapter, and a Mac pre-OS X that can write 400KiB disks: check this section for more.
- AppleShare as a server: Macintosh Plus with AppleShare File Server 1.1, with a LocalTalk or PhoneNET serial interface. The 512Ke can run EasyShare as a file server. Use System 4.1/Finder 5.5. EasyShare is also mentioned in the More Info page.
Although not related to this section, the mythical FileServer (Images) and/or the MultiServer (Images) hardware would be interesting, if only we knew more. - TCP Services: There are some very early MacIP TCP experiments but they are probably not all that great, being mentioned earlier in the footnotes for The Chart. The Sabina TCP stack, if it is completed, should offer FTP, HTTP and email services from a 128K on up.
The 512Ke can run NCSA Telnet 2.5, which has an FTP server and its own TCP stack, and SLIP support, or TOPS Terminal. MacTCP 1.x will run on a 512Ke but then the dearth of TCP software that will run it makes it a very interesting subject (Fetch 2.1.2 returned an error saying it needs KSP or MacTCP even though MacTCP 1.1.1 was already installed). A TCP/IP compatible MacIP gateway will be required. The minimum to use pretty much any TCP program via MacTCP or PPP is a Macintosh Plus 1MB.
Unrelated: KSP refers Kiewit Stream Protocol, a unique AppleTalk compatible transport protocol started by Dartmouth College in Hanover, New Hampshire, USA. Information about KSP isn't well documented and only Fetch refers to it, but there definitely was some kind of unique AppleTalk compatible network and a special TCP gateway of some kind, probably incorporated in Dartmouth's decentralized distributed network (DTSS, or Dartmouth Time Sharing System) at the Kiewit (refers to a large financial donor) computing center. Dartmouth started off strong with a mainframe in the 1960s and changed over time as technology progressed.
- Practical Minimum: Macintosh Plus 1MB. 4 megabytes of memory with a HD20SC or other hard drive solution such as a FloppyEmu, a SCSI to Ethernet adapter, and another bridge Macintosh with a 800KiB compatible floppy drive and an Ethernet port considerably increases usability.
|
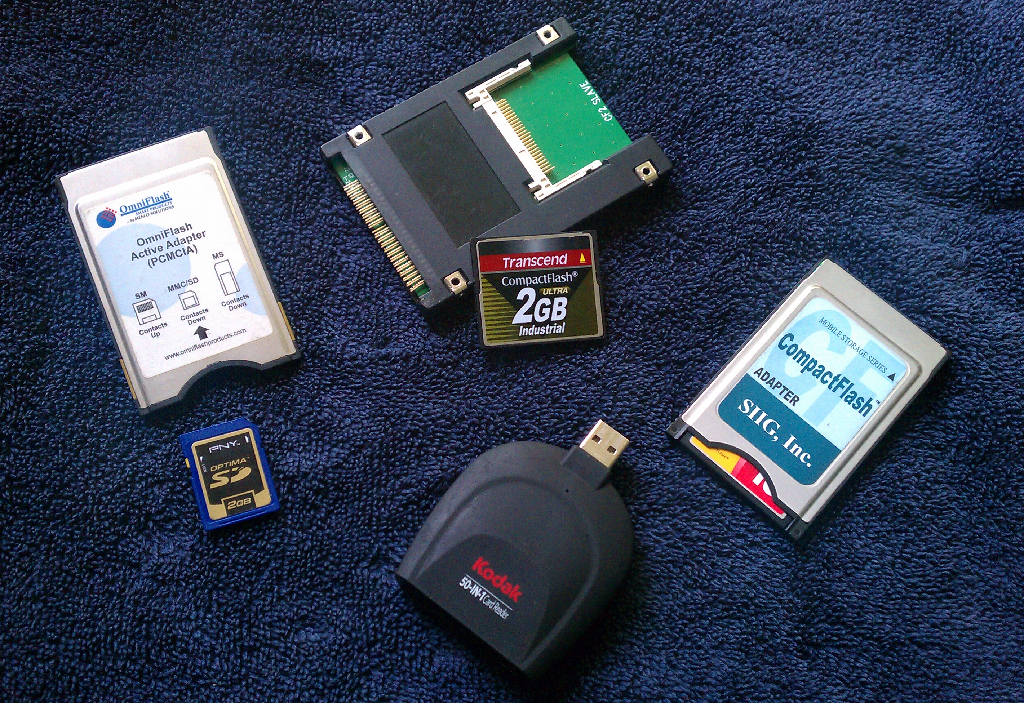 Platinum Deluxe CF setup for a PowerBook with IDE or PCMCIA |
|
that may or may not have issues, such as the "deathwipe" on certain 68040-type machines that corrupts the SD card and requires a full format, however this issue should have been resolved recently (summer 2025) and therefore ZuluSCSI, BlueSCSI, RaSCSI, PiSCSI and similar devices are endorsed and recommended. They have great value for their cost as well. For PCMCIA, the adapter is simply a pass-through device. PCMCIA SD card adapters may or may not work. UDMA and Fixed Disk Mode enabled SD or CompactFlash cards, like the Transcend Industrial series are the best choice because SLC Flash is more robust and the card settings from the factory are set up for doing exactly this.
A machine with a generous memory pool is a good plan. Although the SE/30 or similar machines like the IIsi can address up to 128MiB, 32MiB is sufficient for even the most strenuous uses in this genre, and more memory can dramatically increase the boot up time owing to the startup memory test unless a custom ROM is used which disables it. Other machines like the PM 7600 could probably benefit from maxed memory, but the SE and Plus will probably benefit the most, because 1 or 2MiB is a rather tight squeeze. |
 Ethereal Wireless Service. It's out there! :-) Image Source |
The network adapters in question will vary based on the machine in question and the method of interfacing. As this Guide pertains to Ethernet and serial data methods, the machine itself and the software supported, plus the desired method of connecting to other machines will dictate the hardware available. The best bridge machine is probably a Power Macintosh G3 beige desktop model, because it has serial ports, built-in floppy drive, can boot Mac OS 9 and earlier but still boot OS X, a DVD optical drive, and has IDE and PCI interfaces built in. It also has mediocre build quality, a slow bus and processor and only has 10BASE-T.
Caution: The DB-19 floppy port on compatible Macs (68040 and PPC Macs don't have it) is not compatible with Apple II 5.25" disk drives and doing so can destroy the floppy controller chip. The DB-25 SCSI port is also likewise completely incompatible with RS232 DB-25 serial or DB-25 parallel hardware like printers. There's older versions of Zip100 drives that are PC parallel port versions, and they look very similar to SCSI versions. If the SCSI port having 25 pins seems unusual, it is because it's not standard. The SCSI standard specifies one ground for each signal line, but the Apple implementation merely ties all the ground pins together, contrary to the standard. Another bad mistake would be to plug in a Macintosh display cable to an AUI port, or the other way around.
The Macintosh 512K and 512Ke only support LocalTalk and early terminal emulation software: as mentioned earlier, the 128K or 128Ke lacks sufficient memory to handle networking via AFP; though the MacTerminal 1.1 application runs under System 1.1 and can run from 50bps up to 19200bps, so that should work -- but file transfer is interesting due to the limit of 400KiB disks. The HD20 will not work with the 128K, barring hacks to format it to MFS, along with a hacked driver, but should work fine with the 128Ke. All other Macs up to the iMac support LocalTalk and thus can handle either LocalTalk or serial data transfer methods involving VT100-style terminal emulators. Nearly all of them supported some kind of Ethernet option, although this can vary based on the platform: and Ethernet is vastly superior to the serial methods, in both speed and flexibility.
Ethernet
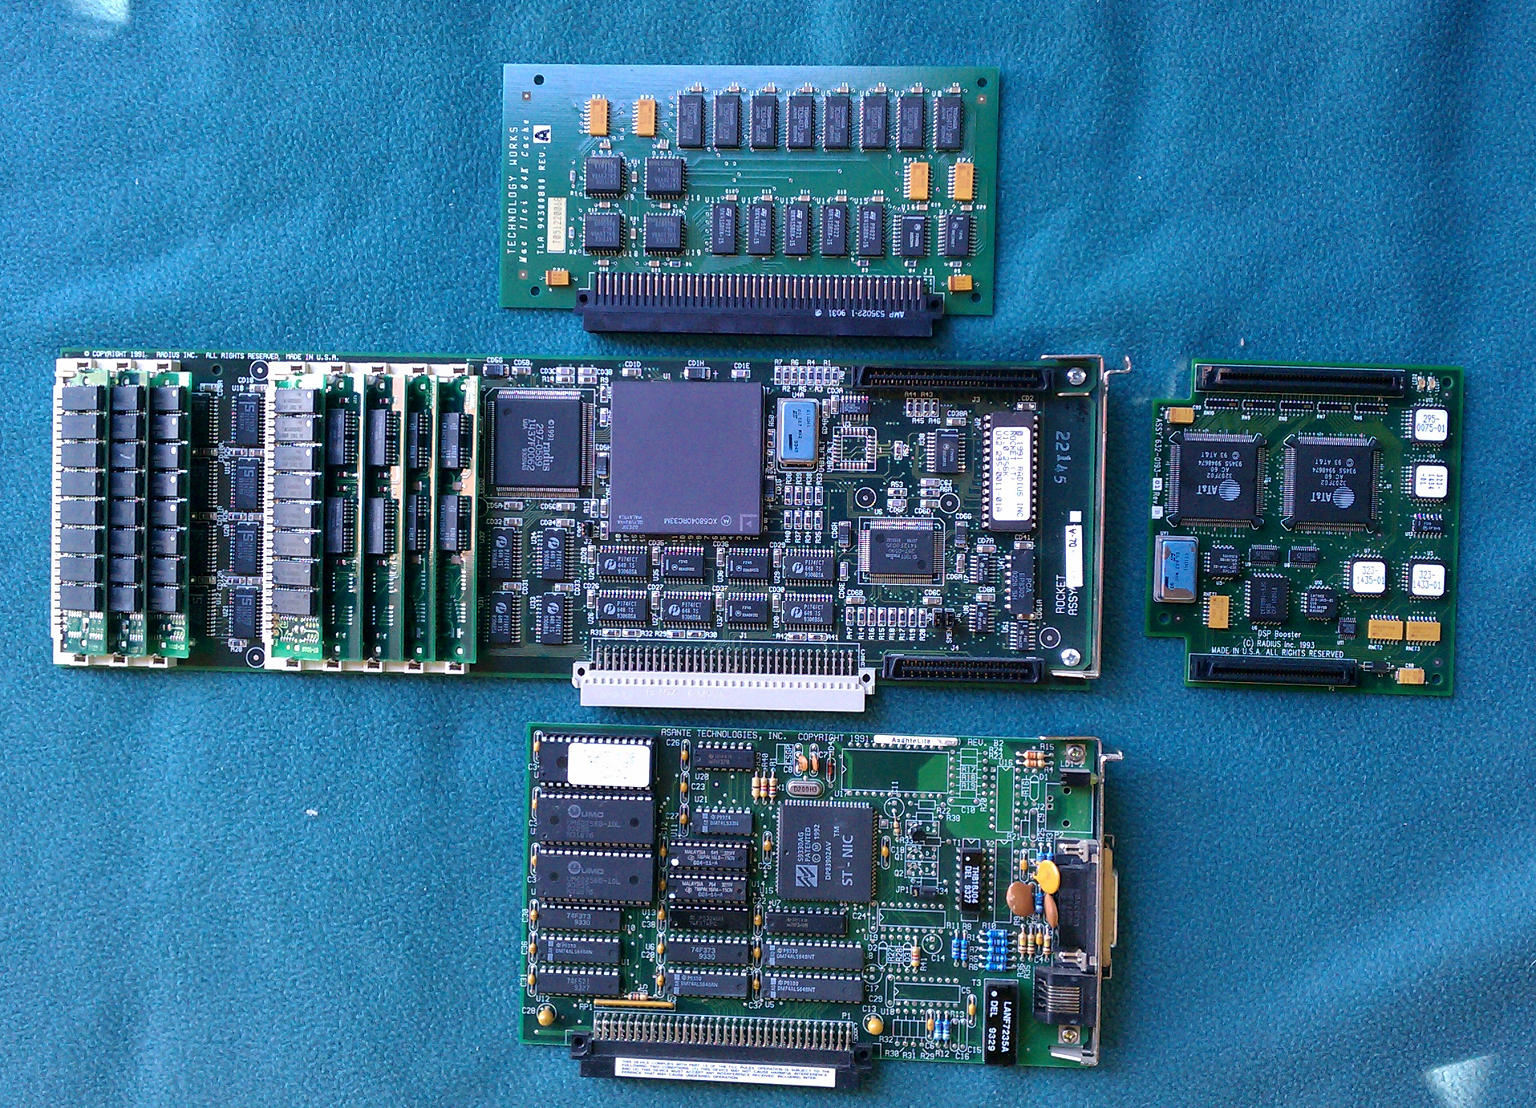
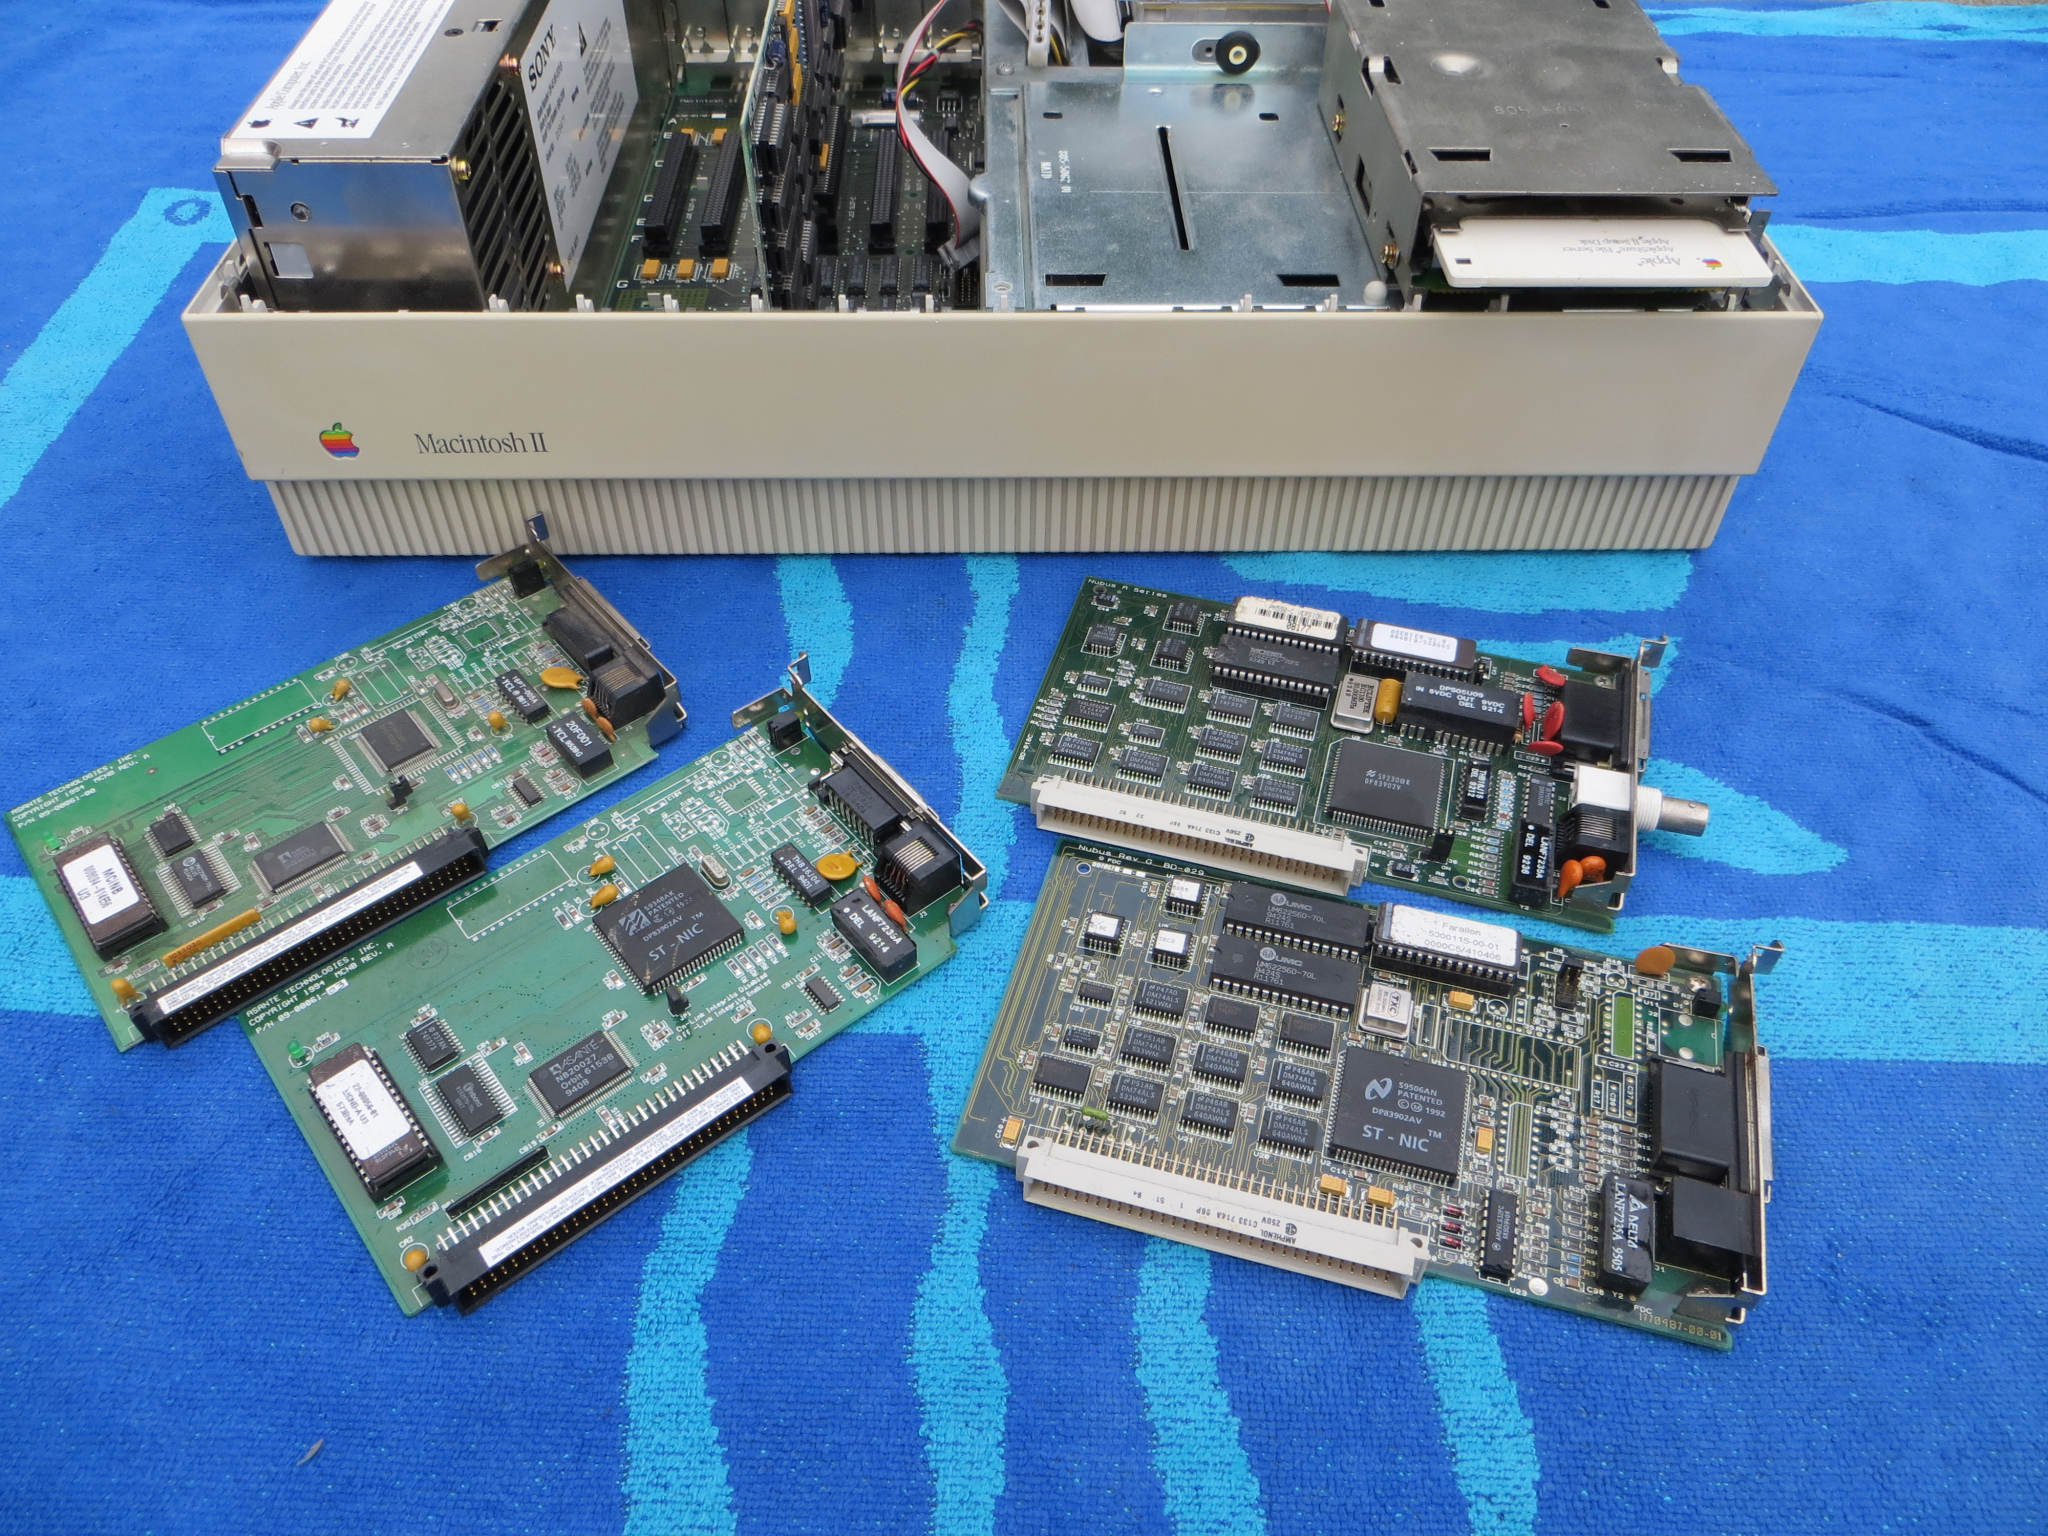
Machines that sported SCSI ports can use SCSI to Ethernet adapters; such as the Macintosh Portable, which lacks any such upgrade cards; generally speaking this SCSI route can be a "last resort" (or use an AppleTalk bridge, or pseudo-PPP dialup). The Classic I and Classic II fall into this category as well, first led by the Macintosh Plus. Other Macintoshes with PDS (Processor Direct Slot) expansion slots like the SE, SE/30 and LC series can use proprietary cards for Ethernet, specific to the model. For machines with AAUI ports like the Quadra 660AV, PowerBook 5300 series and so forth, AAUI to RJ45 adapters are (or were) relatively inexpensive and work fine. For Macs that came with NuBus slots, like the Mac II series (IIsi only with the PDS - NuBus adapter card), Centris 650, IIfx, et cetera then NuBus cards with Ethernet is a practical option. Try to get ones with RJ45 plugs rather than AUI or 10BASE-2. Not all NuBus cards are the same length, just like PCI cards: there are full-length 12-inch (30.5cm) and "half-length" 7-inch (17.8cm) versions. Image shows a IIci cache card, Radius Rocket 33 with DSP daughter card and an Asante NIC. 9-inch (22.9cm) cards were around too, but less common. |
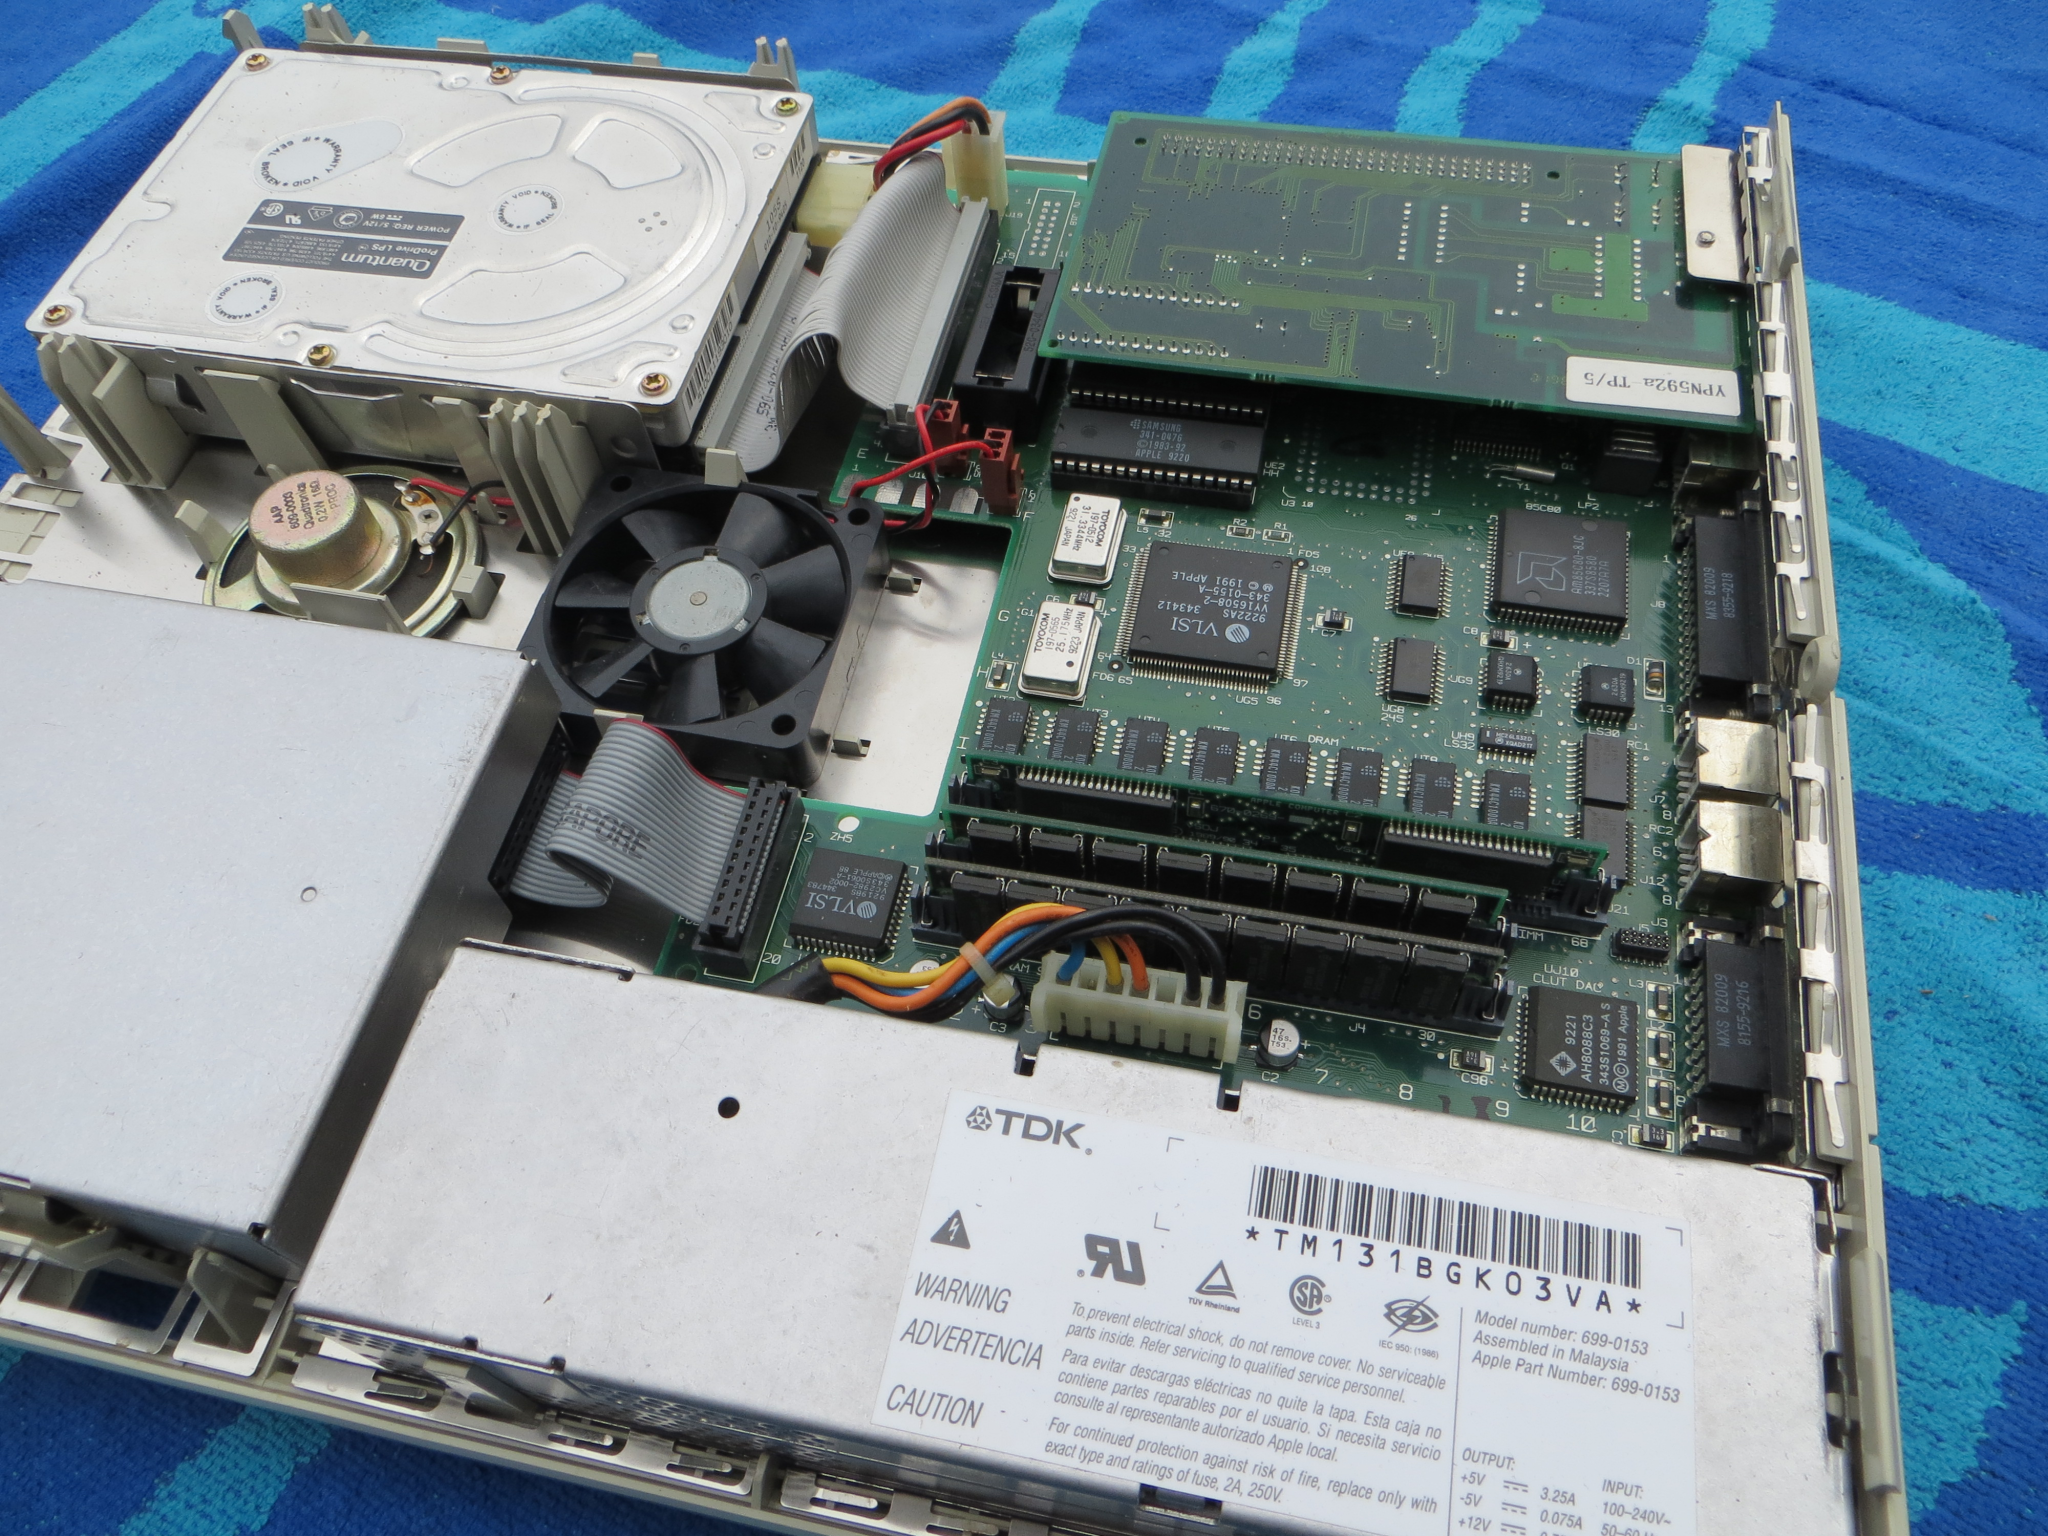
 Performa 6205CD with 114-pin LC PDS and CommSlot interface |
Warning: Always make sure the pins on the NuBus or PDS card which mate to the motherboard slot are not knackered before the card is inserted: they are difficult to repair or replace and are quite vulnerable. Testing an AsanteFAST 10/100 NuBus card as shown nearby indicated that while the link will be over 100BASE-T, the limitations of the older machine hold it back to basically the same as a regular 10BASE-T card. See the More Info page, Data Transfer Rates section for speed tests. (Install NSI software first, then the 10/100 driver if you nab one of these. Although the software indicates that it requires System 7, it'll work in System 6 regardless. Use a Custom Install to install the driver, which is different than a normal Asante driver disk. Archive should be called afnubus1_0.sea.hqx. Would be interesting to compare it to a "NuBus 90" Mac, like a PM 7100/66.) |
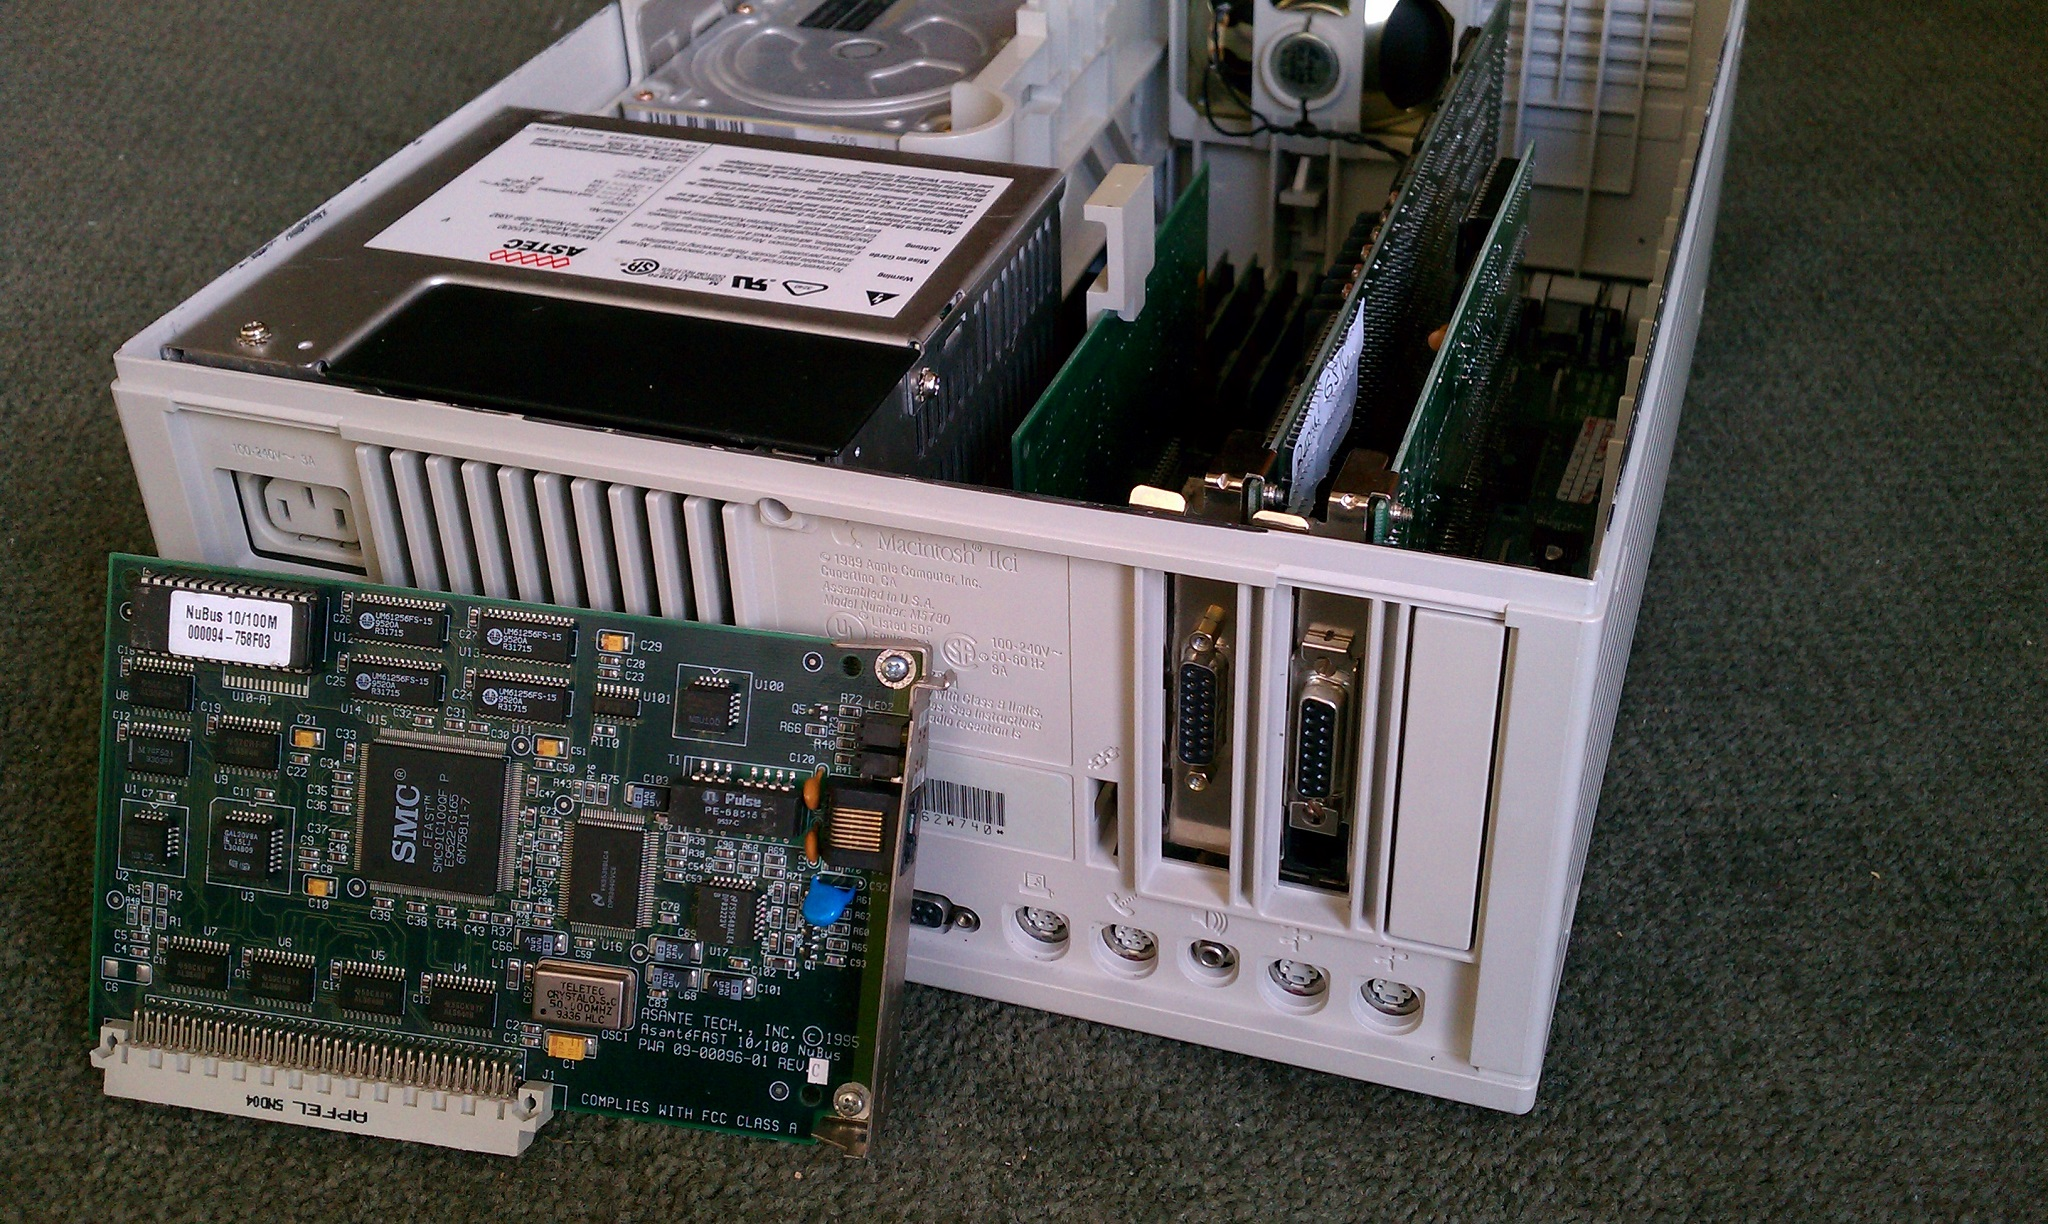 Mac IIci with NuBus Ethernet card and an AsanteFAST 10/100 NuBus card |
Certain Macs like the LC 575, 580, the Power Macintosh 6200/75 and the Performa 5300CD series have Communications Slots on the motherboard for CommSlot Ethernet cards, of which there's CommSlot I and CommSlot II types, which are not compatible with each other. The LC series like the LC II and the Color Classic use the proprietary LC PDS bus which can use LC PDS Ethernet cards. Some Ethernet cards for the LC line may not conform to the height standard of 12.9mm, and may run into interference issues. There's also a difference in the PDS slots, some have 96 pin Euro-DIN connectors and others are of the 114 pin type; the 96 pin variant is a 16-bit bus and the 114 pin is a 32-bit bus. The "extra" 18 pins are merely a "add-on" and 96 pin cards will work fine, because the 68040 class of machines emulate 68030 PDS instructions. The Designing Cards and Drivers for the Macintosh Family book describes this subject in more detail: a PDF is around on the web, hosted by vintageapple.org. |
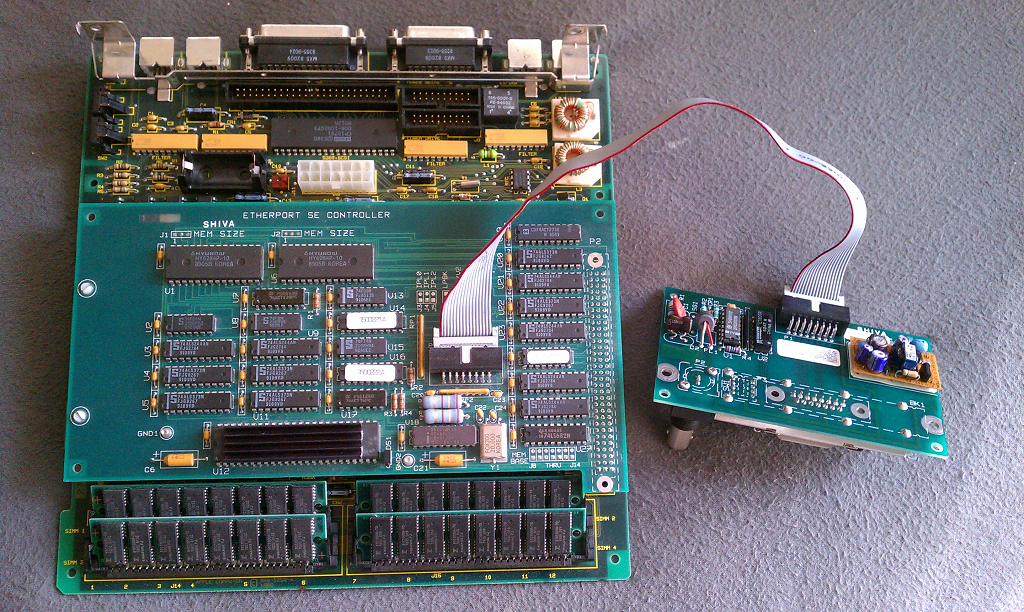 Shiva EtherPort expansion card for the Macintosh SE (AUI, 10BASE-2) |
PowerBook Duos can obtain Ethernet capabilities either through a Duo Dock equipped with an Ethernet option, an EtherDock (the 280 and 2300c are not supported), Asante NetDock, or the ultimate minidock, the Newer Technologies UltraDock 16sce. The eMachines EtherDock is pretty similar to the standard Apple MiniDock but has a RJ-45 plug in place of the RJ14 modem. The problem with PowerBook Duos is that the networking cards or docks tend to be rare and can be expensive: but there is some relief with AppleTalk bridges, though they are slower.
Other PowerBooks like the 1400 series usually have at least one PCMCIA expansion slot available. These present a special concern in that they are not 32-bit CardBus slots. All CardBus PCMCIA cards are 32-bit; otherwise, PCMCIA cards are 16-bit only. 32-bit cards are not supported on any PowerBook except the models listed here: but don't worry, it's not possible to insert a CardBus card all the way into a 16-bit slot, or at least it's not supposed to. The easiest way to identify a CardBus card from a 16-bit card is to look at the end of the card. All CardBus cards have a strip with raised indents on the front edge. Before you buy, make sure that the respective driver is available first. Try to hunt down a model which has drivers that go back to System 7.5 or 7.6, like the Farallon EtherMac PC Card: part number 595, 595a, 895; the first two have a red arrow above "Insert This Side Up" and the latter has a blue arrow. Not all these PCMCIA cards will have all the pins present on the Ethernet jack because they're only 10BASE-T, which may or may not be a problem. Some are wired as crossover, too. |
 LC II with Farallon NIC installed |
Otherwise, there are three nominal kinds of Ethernet adapters that came in the PCMCIA format. The first is a version with the XJACK connector that Megahertz (subsidiary of 3Com) pushed. It is decent but a gentle hand is probably a good idea because excess force could damage the retractable jack. Some versions are missing some pins on the RJ45 jack, but it's generally not an issue because they're usually 10BASE-T cards which only needs 4 pins (TD+, TD-, RD+ and RD-). This adapter variant would be ideal for PowerBooks except they are a gigantic flop for Mac users because the driver situation is a total mess. The second kind, which is the most common, has a tiny connector on the end of the PC card and requires the appropriate dongle, so make sure that comes with the unit. Like the 30-pin Apple docking connector as was used in the early span of iPhone, iPad and iPod units, it is prone to weakening with use. The last version has a built-in extension which has the RJ45 plug but this also makes it vulnerable to being whacked by accident and unintentional application of force. |
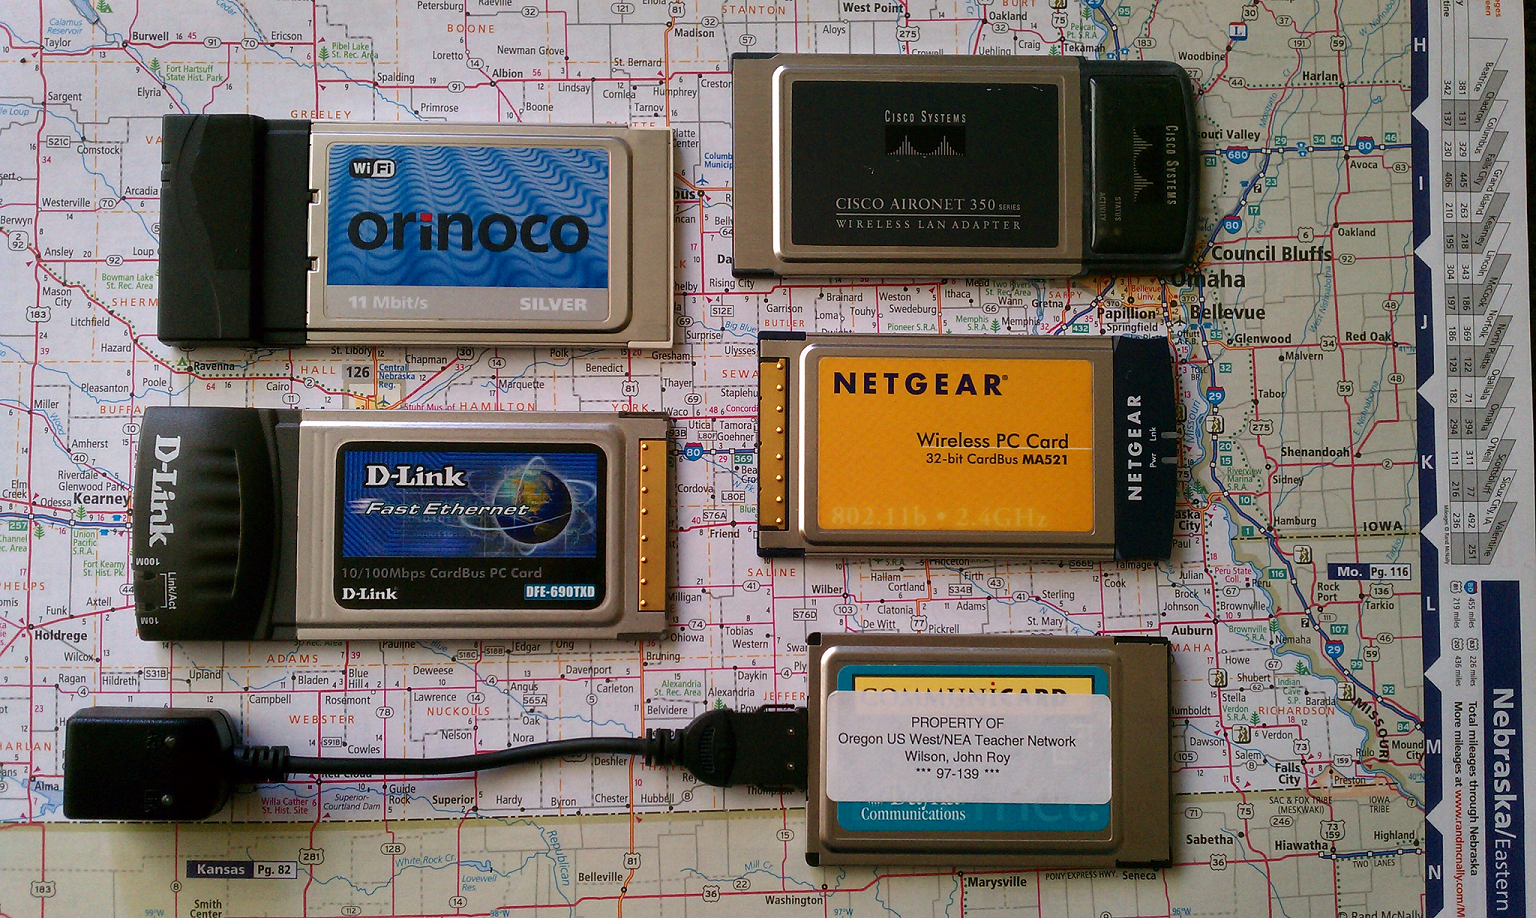 PCMCIA Ethernet and WiFi cards |
Most 10/100 cards are CardBus and thus are only compatible with the later PowerBook G3 and G4 models -- which already have RJ45 Ethernet and some have AirPort cards already, though there are 10/100 16-bit cards. 3COM had a number of different PCMCIA Ethernet cards, which provided quite a bit of a ruckus because drivers and model numbers resembled a circus show. At any rate, the fallback method for all PowerBooks with SCSI can use something like the Asante Micro EN/SC or AAUI adapters if they have AAUI onboard, like the 5300 series, assuming they work. A HDI-30 to DB-25 SCSI adapter may be required for certain SCSI to Ethernet adapters because PowerBooks don't come with ... Apple-sized DB-25 SCSI ports.
 A PowerBook Duo mated to a UltraDock 16sce with Ethernet |
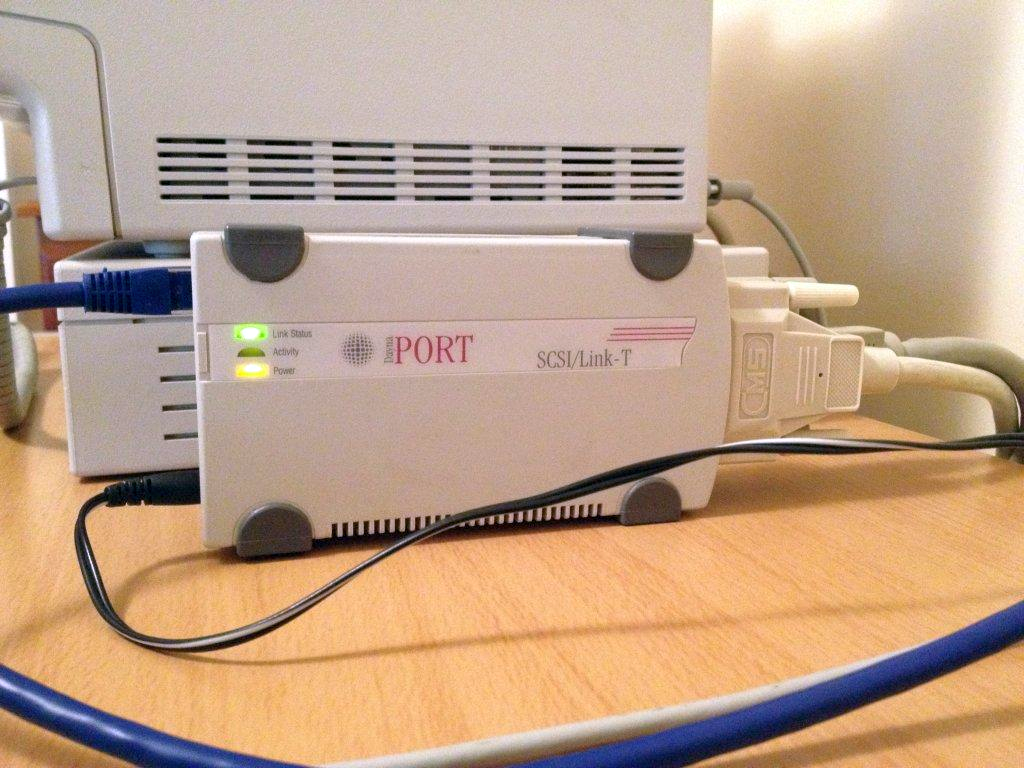 A DaynaPort SCSI/Link-T Ethernet Adapter (courtesy kingchops at 68kmla.org) |
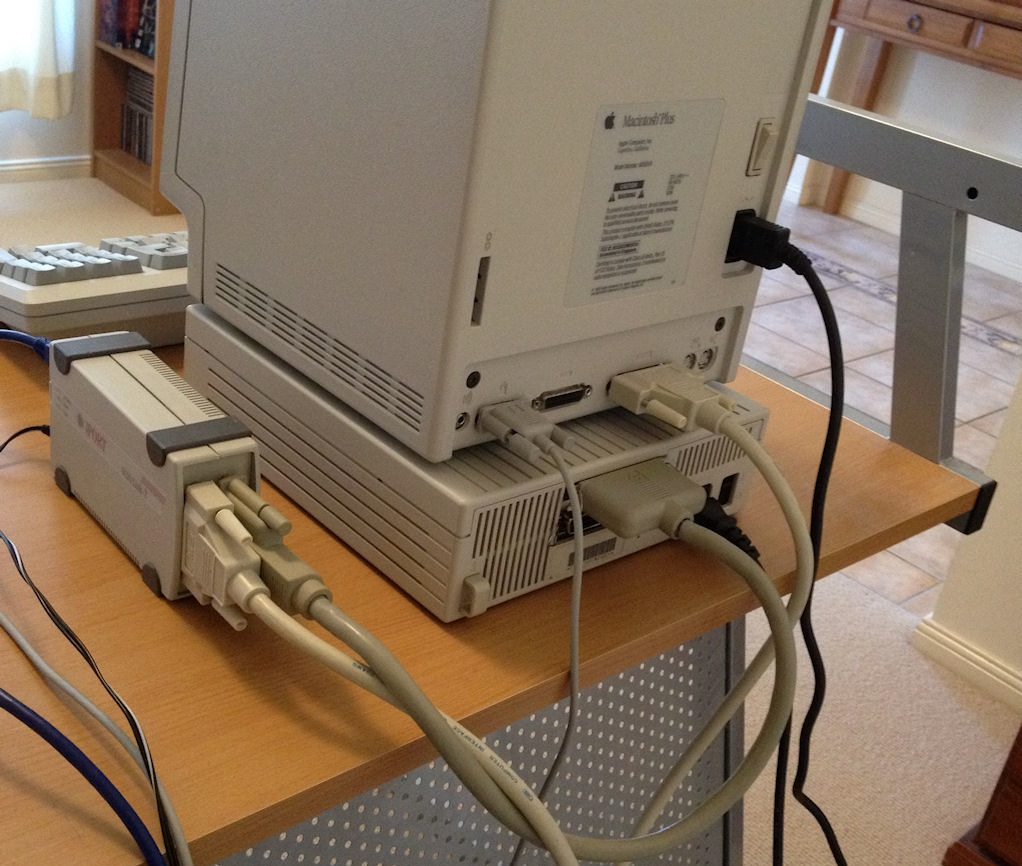 Backside of a Plus with a HD20SC and SCSI Ethernet adapter |
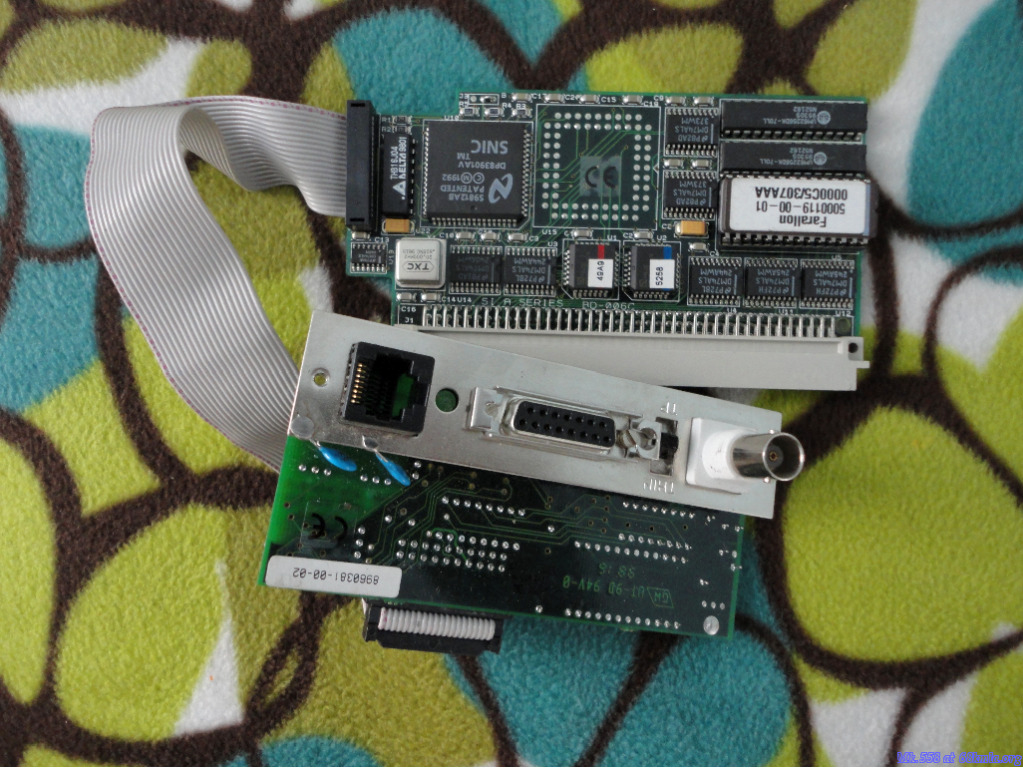 A Farallon EtherMac 030 PDS card for a SE/30 or IIsi |
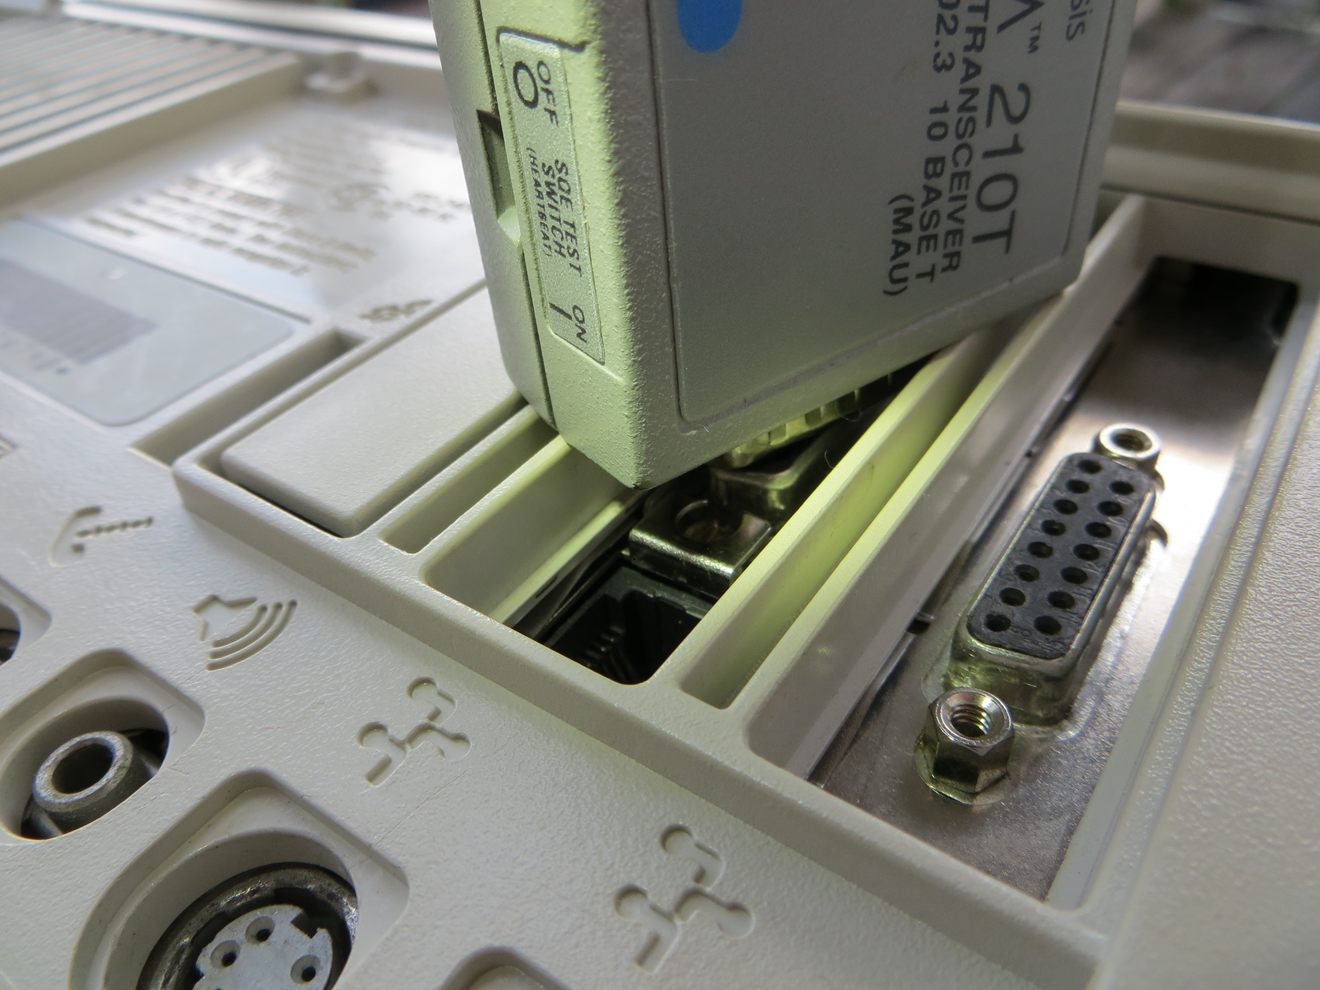
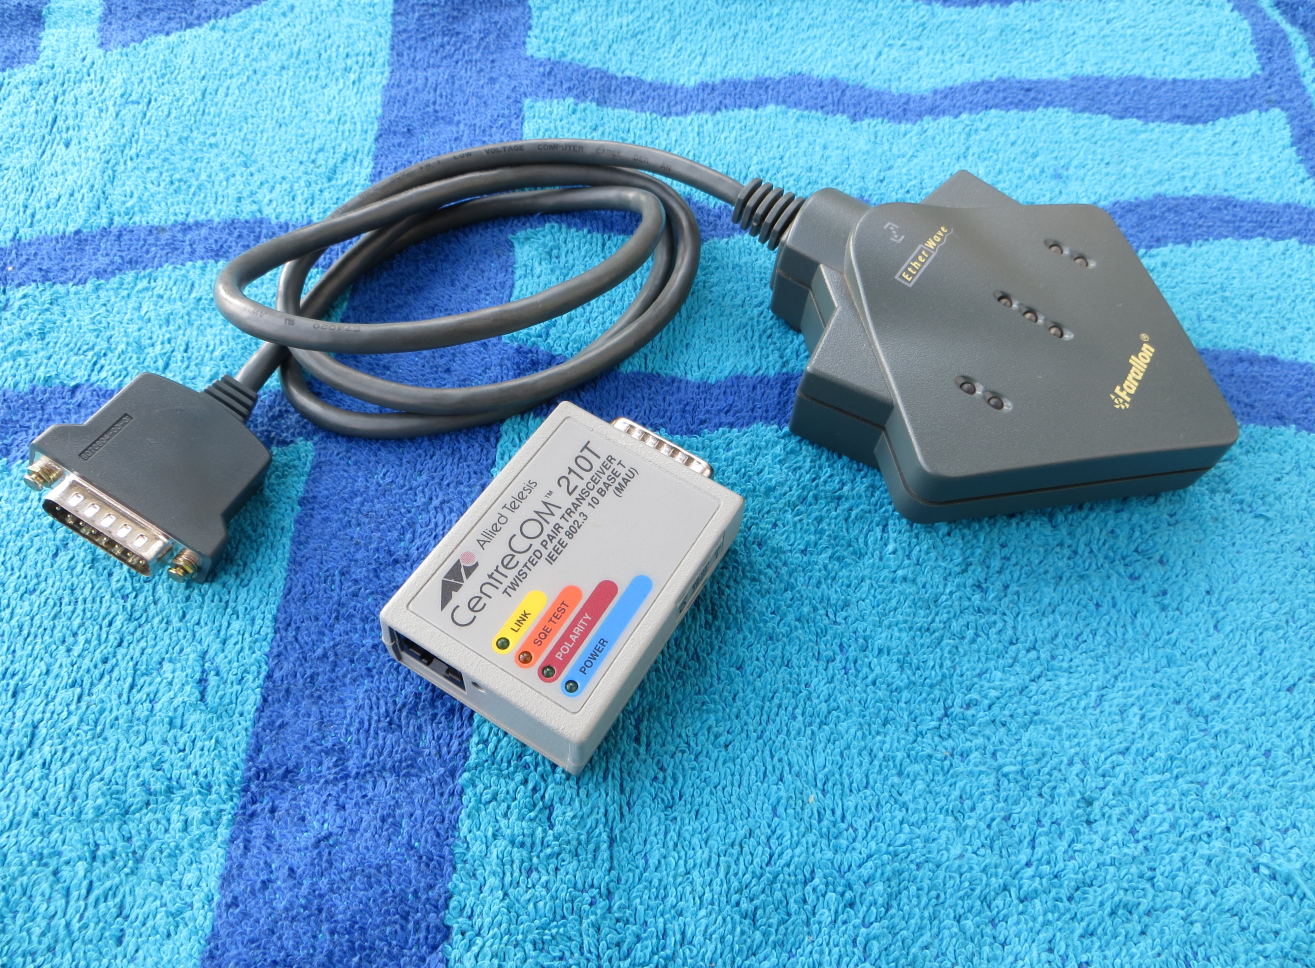
Notice how the Ethernet card pictured above, for the SE/30 has three ports: the first from the left is 10BASE-T in a 8P8C RJ-45 connector, the middle one is AUI, which is known as Attachment Unit Interface and can either be used for 10BASE-5, 10BASE-2 or 10BASE-T adapters, and finally 10BASE-2 in a BNC coax port. Some old NuBus cards and the like will only provide an AUI port, an additional dongle adapter is required to hook up with RJ45 based wiring, such as the pair of devices shown below. 10BASE-2 Ethernet waned after the increasing adoption of twisted-pair Ethernet; it is also known as ThinNet, and other names and is simply Ethernet on coaxial cable with T connections for pass-through daisy chaining or vampire taps as needed. (Image to the right shows a Farallon NIC, Dayna BD-030 NIC with what looks like a FPU socket, a Micro Conversions 1724PD 24-bit graphics card for the LC III and above, and an E-Machines SuperMac SimplyTV display out card, for which C11 has broken off.) |
 LC II with a selection of cards |
AUI was common on network interface cards (NIC) back then because most people were using 10BASE-5 or 10BASE-2 and it was not unusual for one place to have one interface like 10BASE-5 and another might have something else like 10BASE-2 (which was more common, being thinner coax cable much like SDI, which is still used today); an adapter converted the interface to coax, fiber, or twisted pair as necessary to the application. There was also other standards to contend with, like TokenRing, but those usually had their own cards and hardware. Ofttimes there's a switch on the back of Farallon and some Asante cards to toggle between Twisted Pair (TP), ThickNet (10BASE-5) or ThinNet (10BASE-2, sometimes called Cheapernet). The manual provides a description for each switch position. Most of the time, AUI was used with AUI DA15 drop cables which hooked up to the 10BASE-5 interface adapter if a 10BASE-2 coax jack wasn't used, or AUI - 10BASE-T MAUs (Medium Attachment Units). A very courageous individual named Matt Millman revisited the horrors of 10BASE-5 which can be seen here. The absurdity of 10mm thick 10BASE-5 coax cable is probably rivaled by IBM System/360 Bus and Tag cables, where each wire is a tiny shielded coax cable, with the connector by itself is roughly 10cm across.
Otherwise, AUI adapters should work fine on network interface cards that only have an AUI connection. The only caveat is that most likely you will need an AUI drop cable, sometimes called an AUI transceiver cable, to connect the MAU adapter to the network card because the adapter is too big to connect directly (IIci shown, SE/30 has the same problem). Since AUI drop cables are no longer in fashion, and have not been for more than 20 years, these can be expensive. An alternative is to just use a straight DA15 cable. Many retailers may list DA15 "DB15" VGA cables in the same listing, but AUI cables are just straight through cables. A higher risk move is to use a DA15 gender changer to extend out the network card backplane just out far enough that the MAU can connect directly to it. Warning: Do not plug in a Macintosh display connector into an AUI socket, or a AUI unit into the Macintosh display interface connector. They look the same but they are electrically incompatible and damage can result.
Certain SCSI to Ethernet adapters, like the Asante Desktop EN/SC, can have problems with proper operation unless something else is on the chain to terminate the SCSI bus properly. This adapter has a unique termination scheme so it can cause the Mac's SCSI bus to go haywire. Therefore, the SCSI chain should run like this: Mac -- Ethernet adapter -- SCSI device with internal termination or terminator on it. Since not all Macs provide termination power, this can be a problem. A useful SCSI device to have on hand is a Zip100 drive - it's not that big, it has a termination switch already on it, the drives and diskettes are usually very inexpensive and is a useful storage supplement - or can even be used as a primary boot device. SCSI CD-ROM drives are usually pretty slow, about 4x tops and honestly it's better to just access it over the Ethernet network with CD/DVD drive sharing, although only a Mac can share HFS format CDs. Do be warned that most people can confuse SCSI Zip drives with parallel port (used by the PC world, also uses a DB25 interface connector) Zip drives: they are not compatible. A newer development is the scuznet project originally started by saybur of 68kmla.org, but also modified by other individuals, but doesn't seem to be a commonly available item, which offers both Ethernet and a SD card for storage on a single SCSI connection. These kind of external SD adapters, such as the BlueSCSI external DB-25 version benefit from having a DB25 male to female cable, as some machines like the IIvx family type of machines have a lip on the case that prevents the unit from attaching to the SCSI port.
Although there were multiple SCSI to Ethernet vendors back in the day, including but not limited to: Asante, Dayna, Farallon (EtherMac MicroSCSI), Compatible Systems, Dove, Nuvotech and Adaptec, it seems like only the first two brands seemed to survive with some examples today, as they're the most commonly found. Asante, for example, has the early EN/SC model with two SCSI ports, the Mini and Desktop EN/SC variants with just one, and the Micro EN/SC with a PowerBook sized direct connection SCSI interface and a ADB power vampire tap. Ideally, all should have some way to set the SCSI ID, and make sure it has 10BASE-T or at the very least, AUI; however not all the Asante models have a SCSI mode select (like the Desktop EN/SC). These kinds of Ethernet solutions will be slower than PDS or NuBus options, assuming they even work, but they're still better than nothing. Check June of 1990 MacUser for a review of four examples (starts on PDF page 161) along with some other contemporary models.
AAUI was featured on a number of machines, starting in the days of the Quadra 700 and is simply Apple's re-implementation of AUI into a smaller port (the cases of the NIH Syndrome were common back then, and still are today with Apple). The Quadra 610 DOS Compatible shown below has two adapters pictured: one is a simple RJ45 adapter and the other is a four-port hub meant for Workgroup purposes. For most individuals, an adapter alone should suffice as the 10T/5 Workgroup Hub is rare, and a hub has no place attached to a router. Fortunately 10BASE-T started showing up in later Macs and the AAUI connector was dropped. Incidentally enough IBM made some Ethernet cards that had AAUI, 10-BASE-T and 10BASE-2 on the same card for the PS/2 line. These had MCA bus connectors on full-length, full-height cards which look like ISA and PCI based cards. IBM called it "Mini AUI" rather than AAUI.
Otherwise, nobody really had intentions of adopting Apple's AAUI other than firms like Farallon which made AAUI FriendlyNet cards and a few types of AAUI to RJ45 10BASE-T adapters, though there were some 10BASE-2 coax adapters. Dayna made a few as well. Adapters were about 40-60$ USD, about the same price for PCI RJ45 cards, and a LC PDS card cost about 95$, based on a 1999 online ordering list from www.warehouse.com. Memory was also shockingly expensive -- a 128MiB PC100 SDRAM 100MHz module cost about 700$ (1200$ for a 256MiB variant), and a 4MiB 30-pin 80ns SIMM still cost about 80$ in 1999, and double the price there for a 16MiB module. Back in the early '90s, 16MiB modules cost about 500$ each, compared to about 200$ for a 4MiB 70ns non-parity SIMM, not accounting for inflation. |
 Two Asante and two Farallon cards |
Certain 1995 and 1996 era Macintoshes, like the Power Macintosh 7200/75, 7600/120 and so on have two Ethernet ports on the back of the machine, AAUI and RJ45. Both are connected to one Ethernet controller, with the RJ45 interface having higher priority than AAUI if both are plugged in at once. This means that if both are plugged in, the RJ45 connection will be the only one active: disconnecting it enables AAUI. Likewise, if AAUI is in use, and a RJ45 cable is plugged in, the AAUI will be dropped and the RJ45 will become active. In order to use two or more Ethernet interfaces at the same time, the user would have to install a PCI Ethernet card. A lot of Performas did not come with Ethernet at all, being merely an option, despite being sometimes barely cost or performance competitive with the main Power Macintosh line, even the later ones like the Performa 6400 series. Even though they had IDE interfaces and the option of TV, CommSlot Ethernet, video input plus PCI slots (if they weren't using LC PDS expansion), not everybody used all those capabilities. Examples that survive today mostly have either a CommSlot Ethernet card or a LC PDS Ethernet card and nothing else, if any cards are installed at all. |
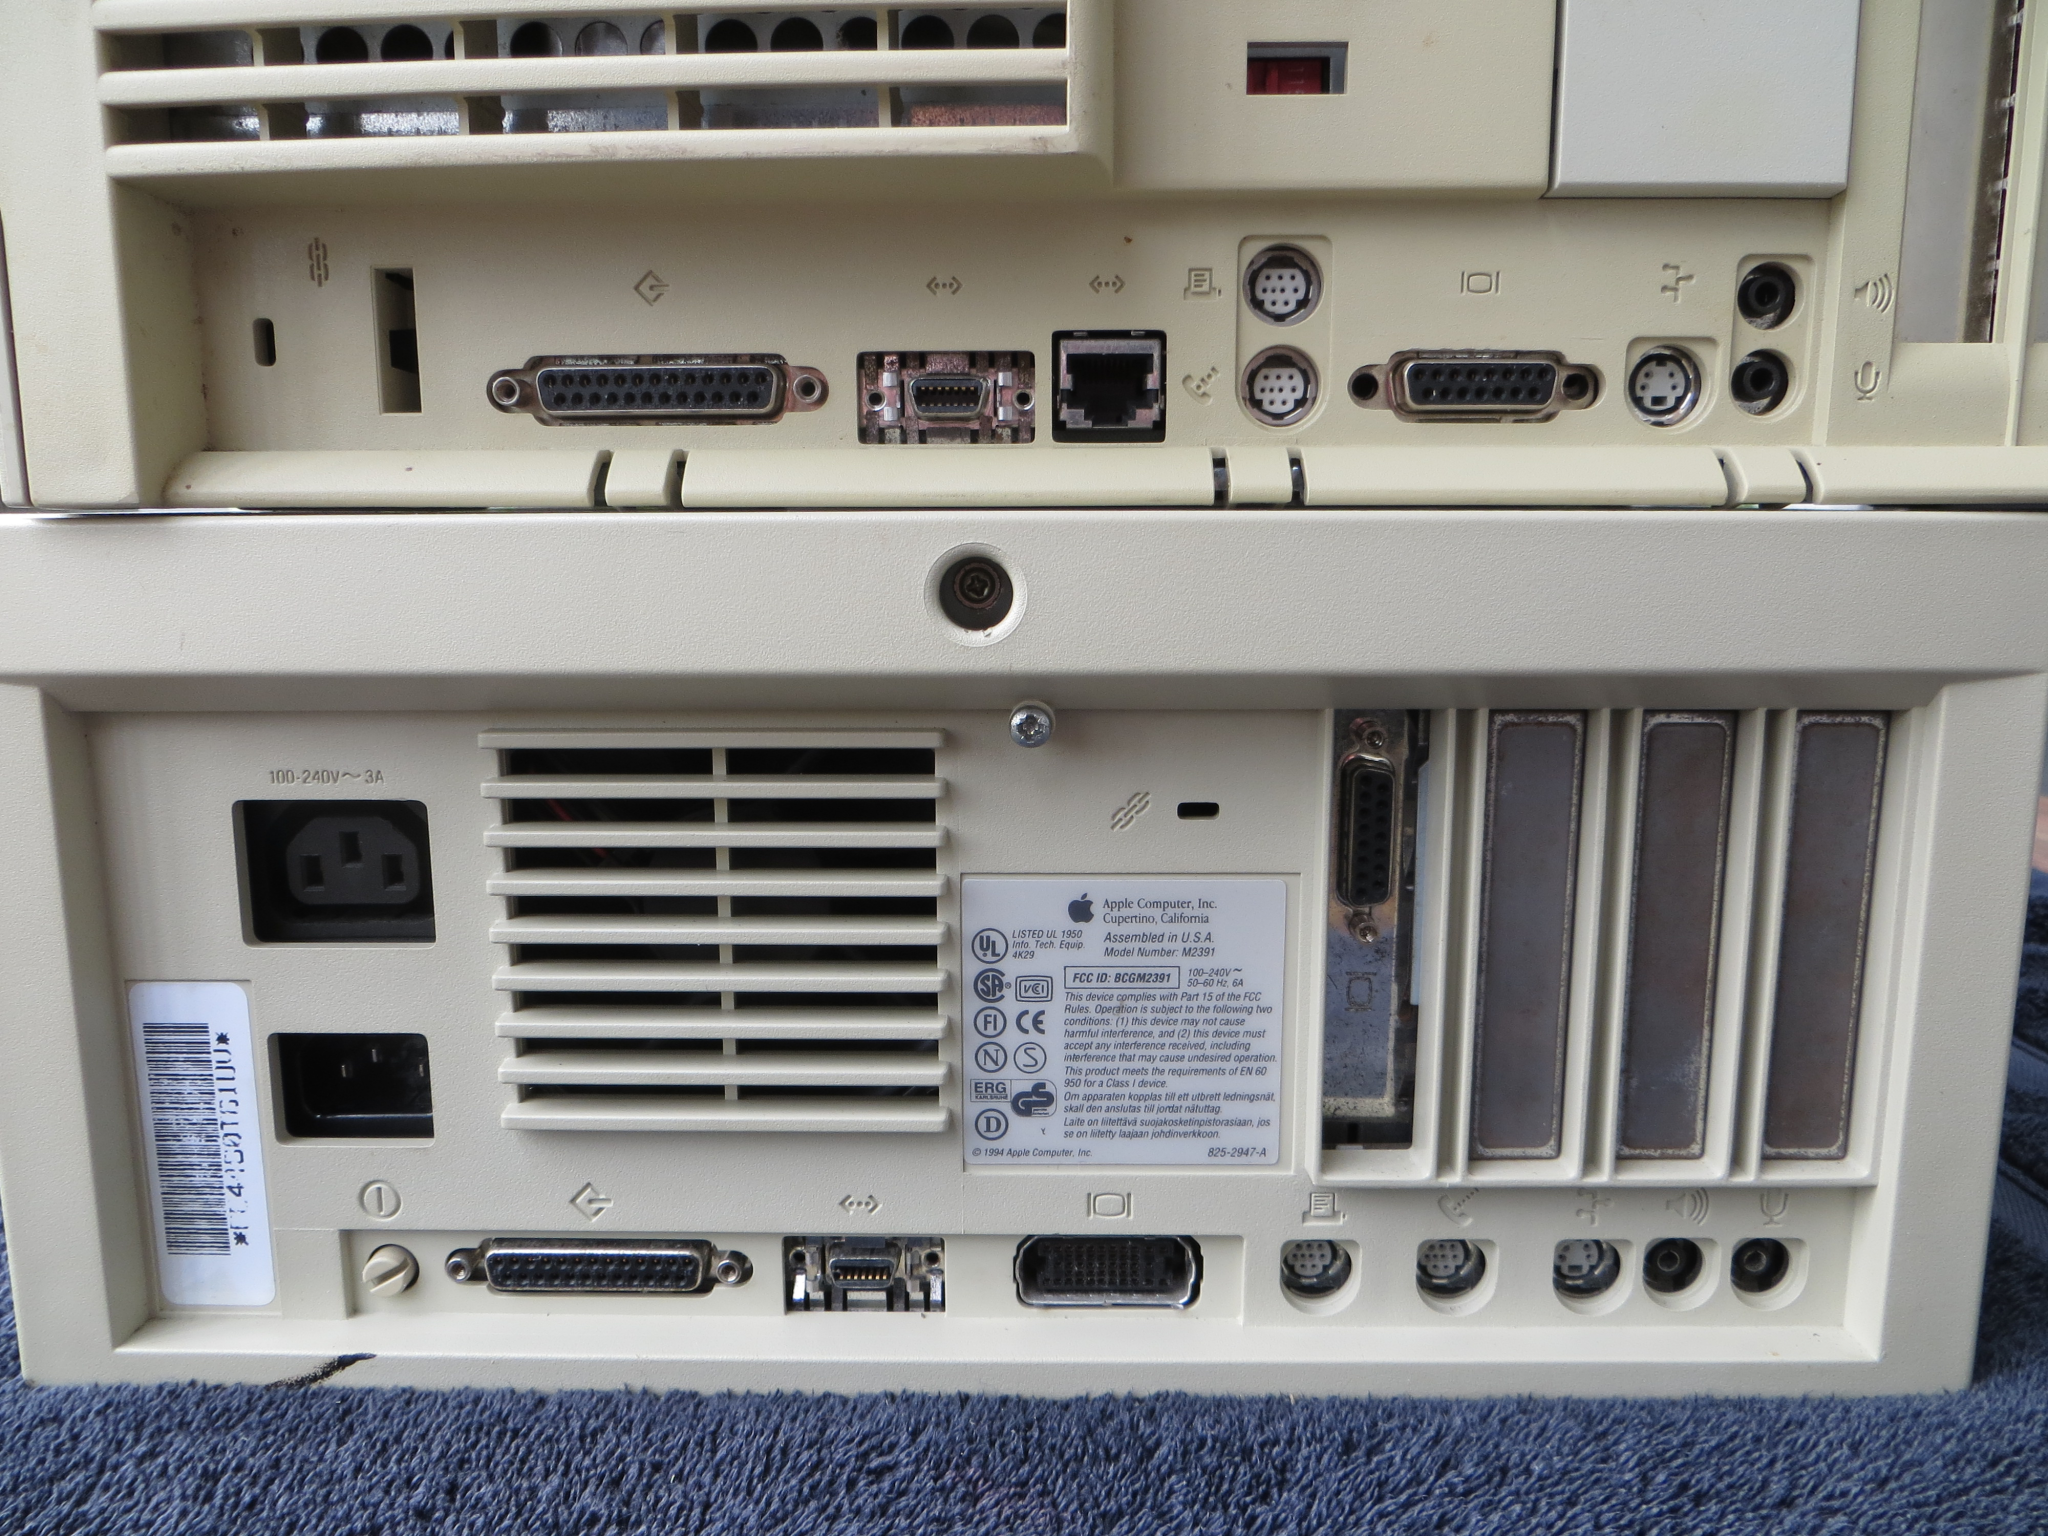 PM 7200/75 top with two interfaces, PM 7100/66 bottom |
 A pair of AUI Ethernet adapters |
 A Farallon StarConnector AUI adapter for StarControllers |
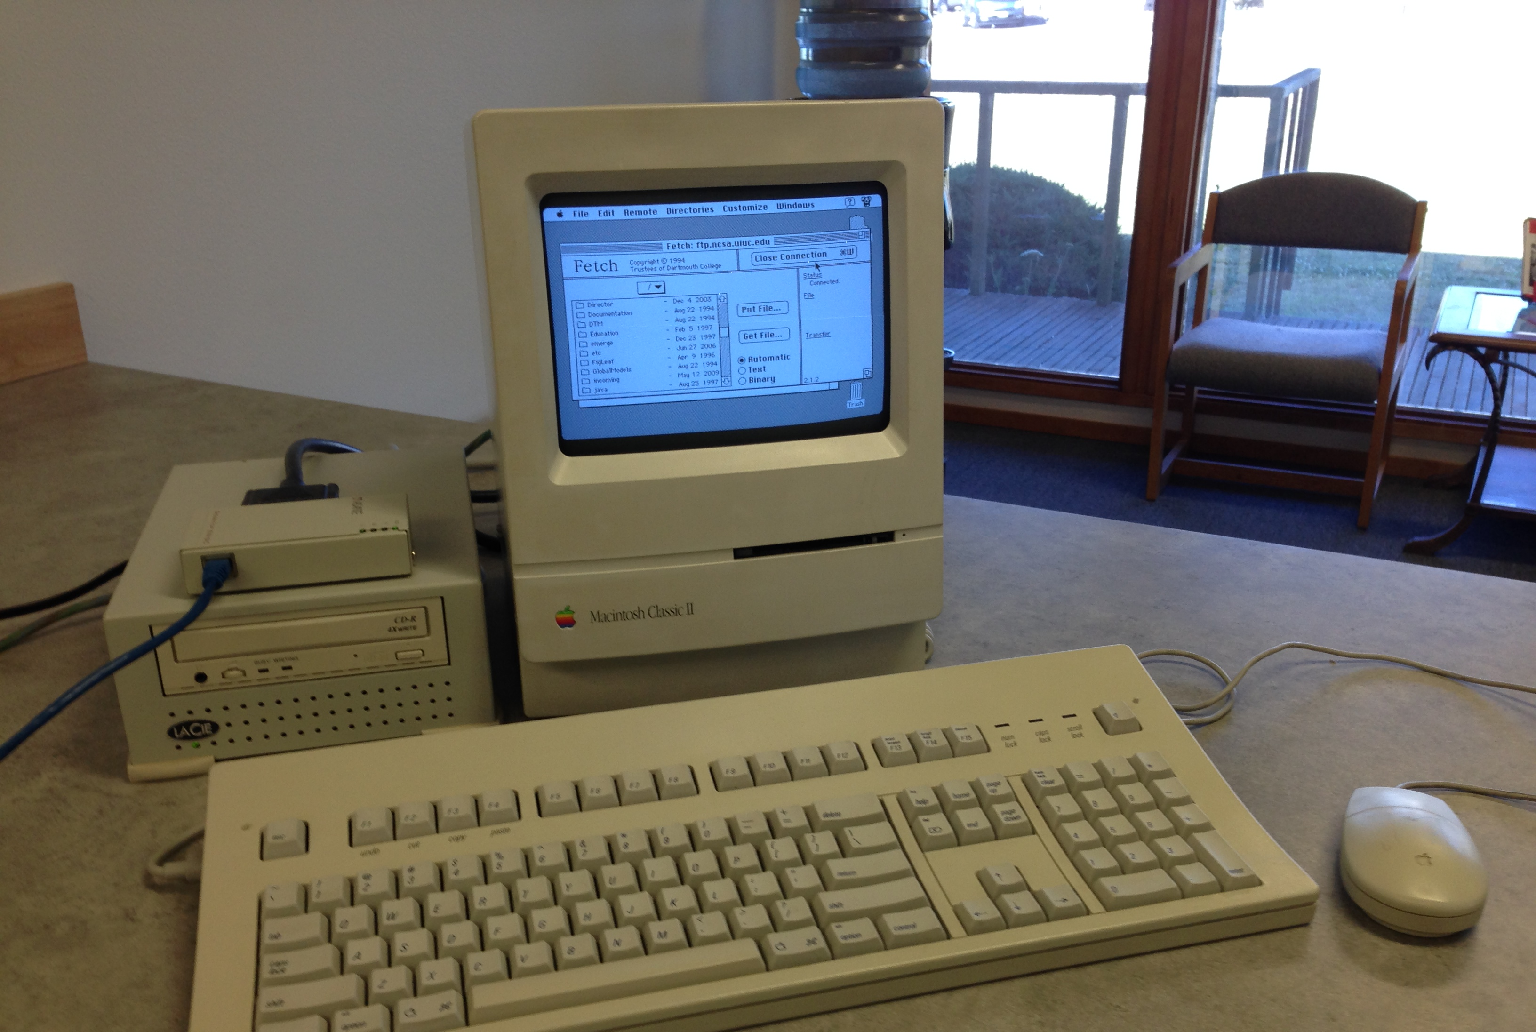 Classic II with Asante Desktop EN/SC and LaCie CD-ROM drive |
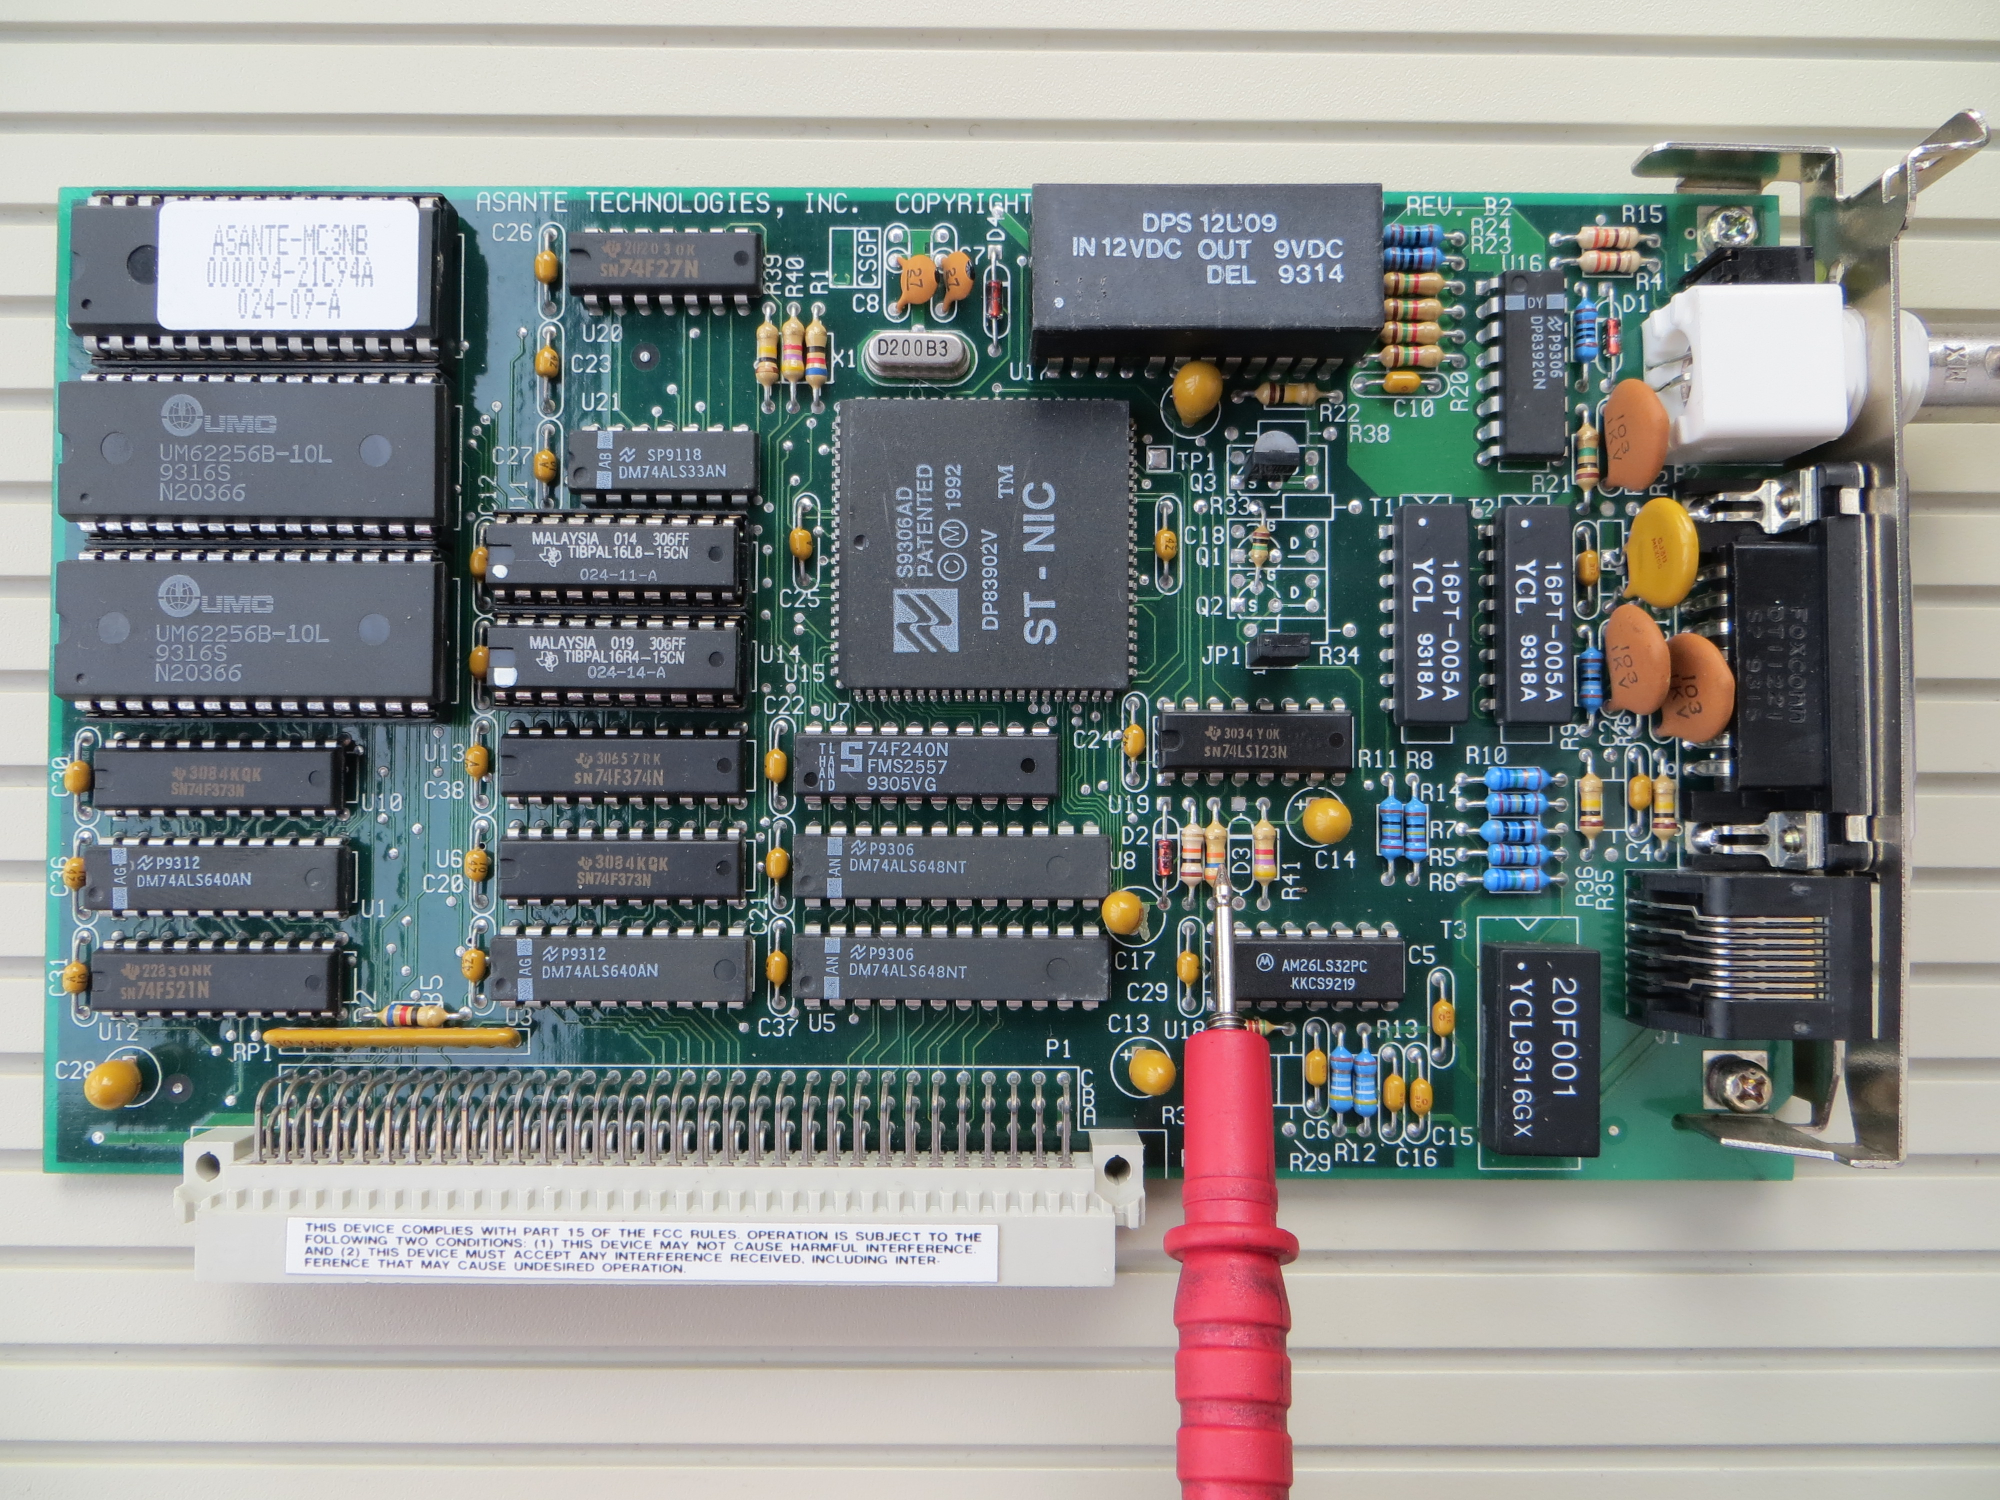
 AsanteLite MC3NB installed in an original Macintosh II |
 Quadra 610 DOS Compatible with AAUI (courtesy mcdermd at 68kmla.org) |
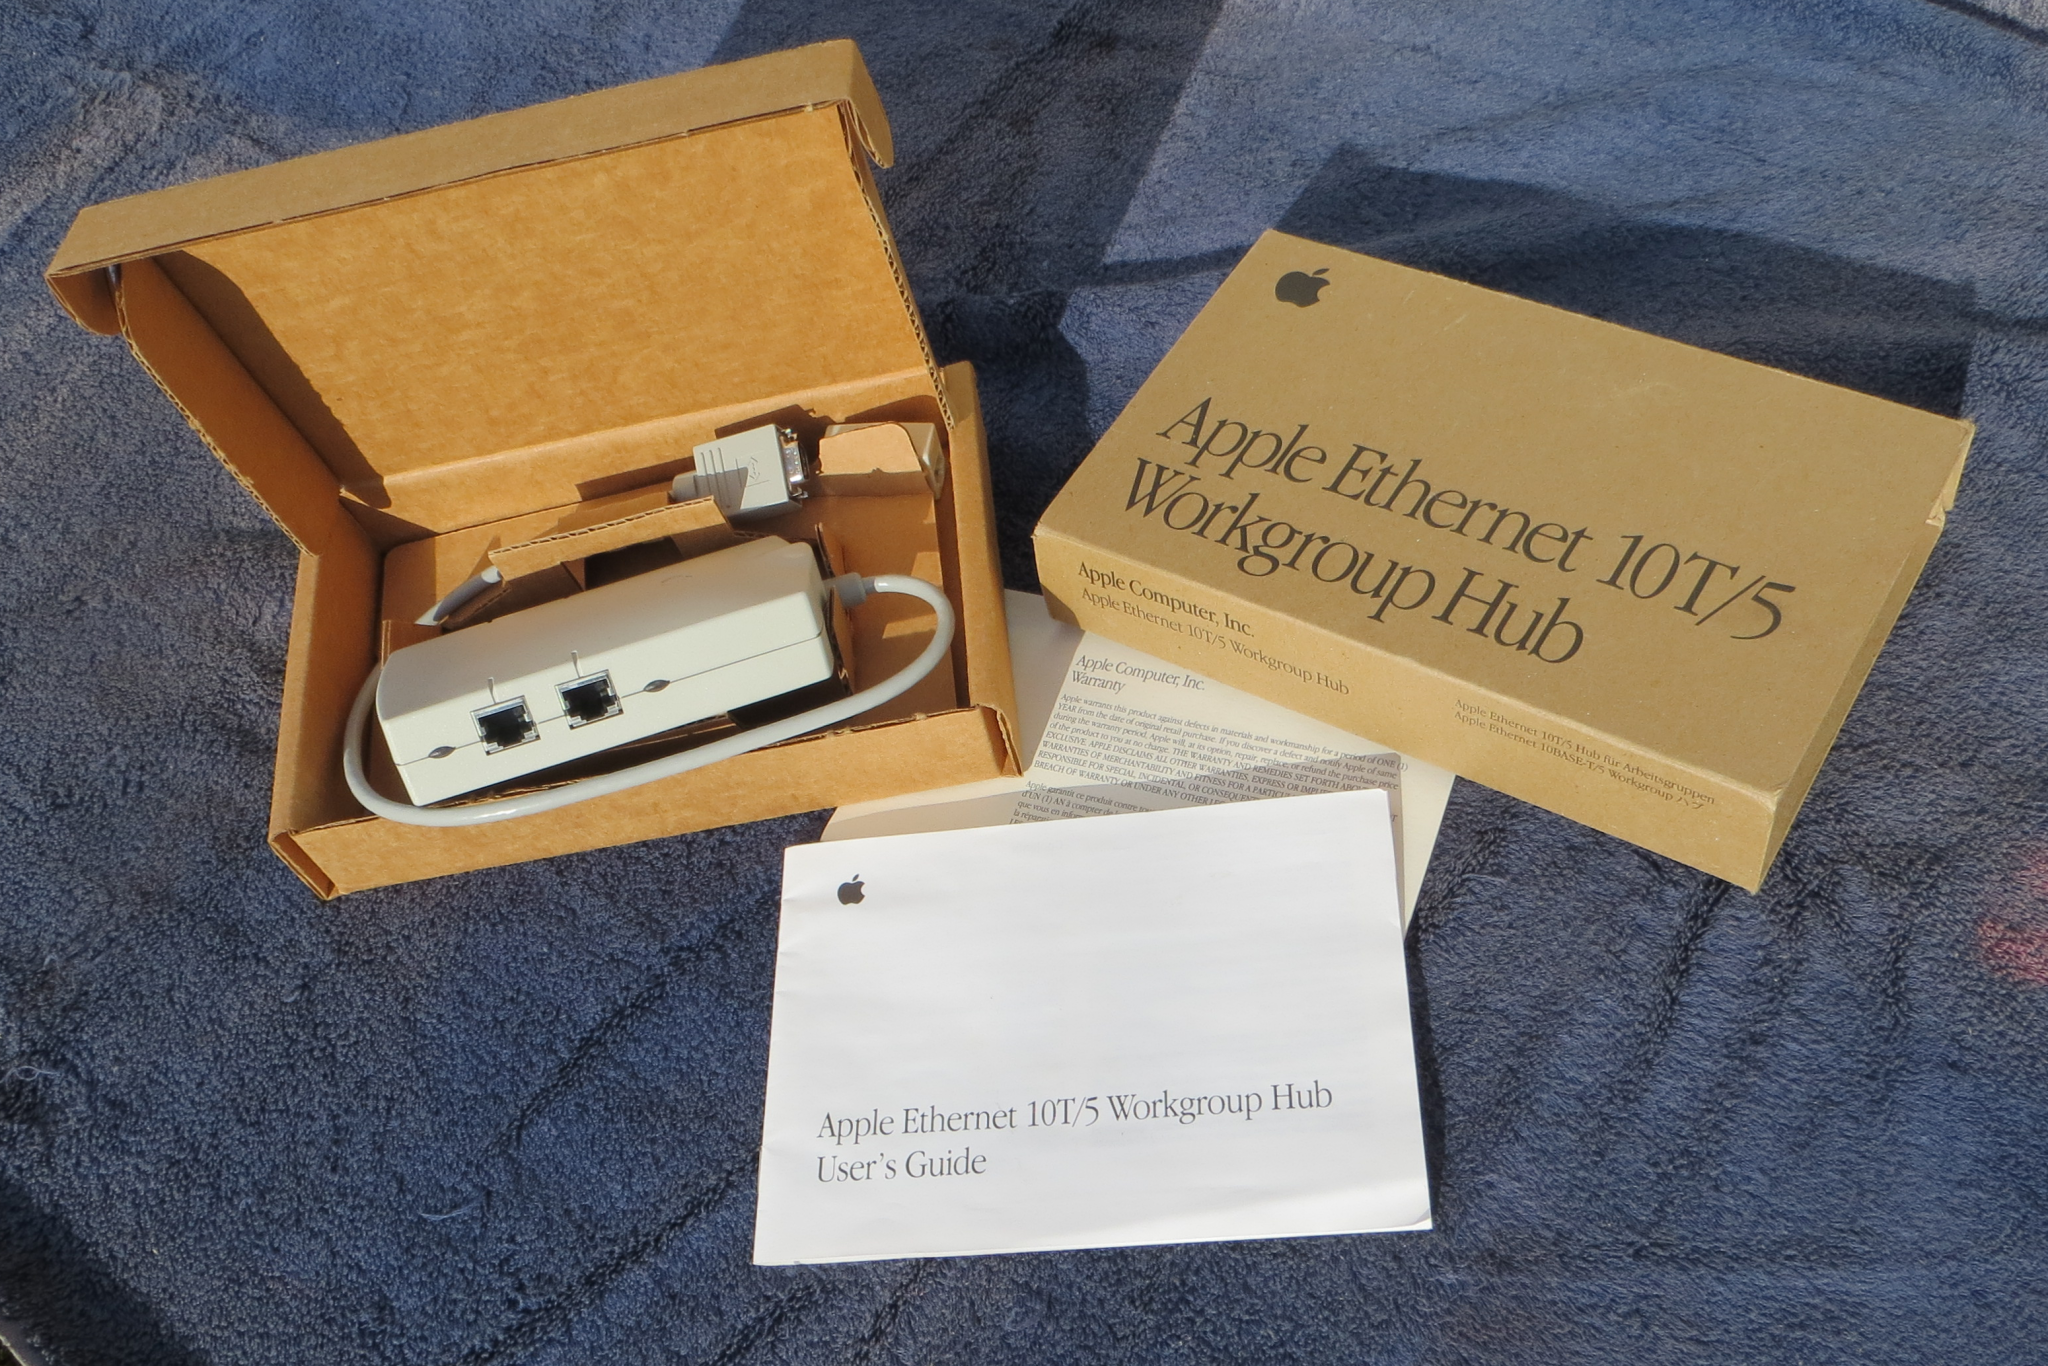 AAUI 10BASE-T Workgroup Hub |
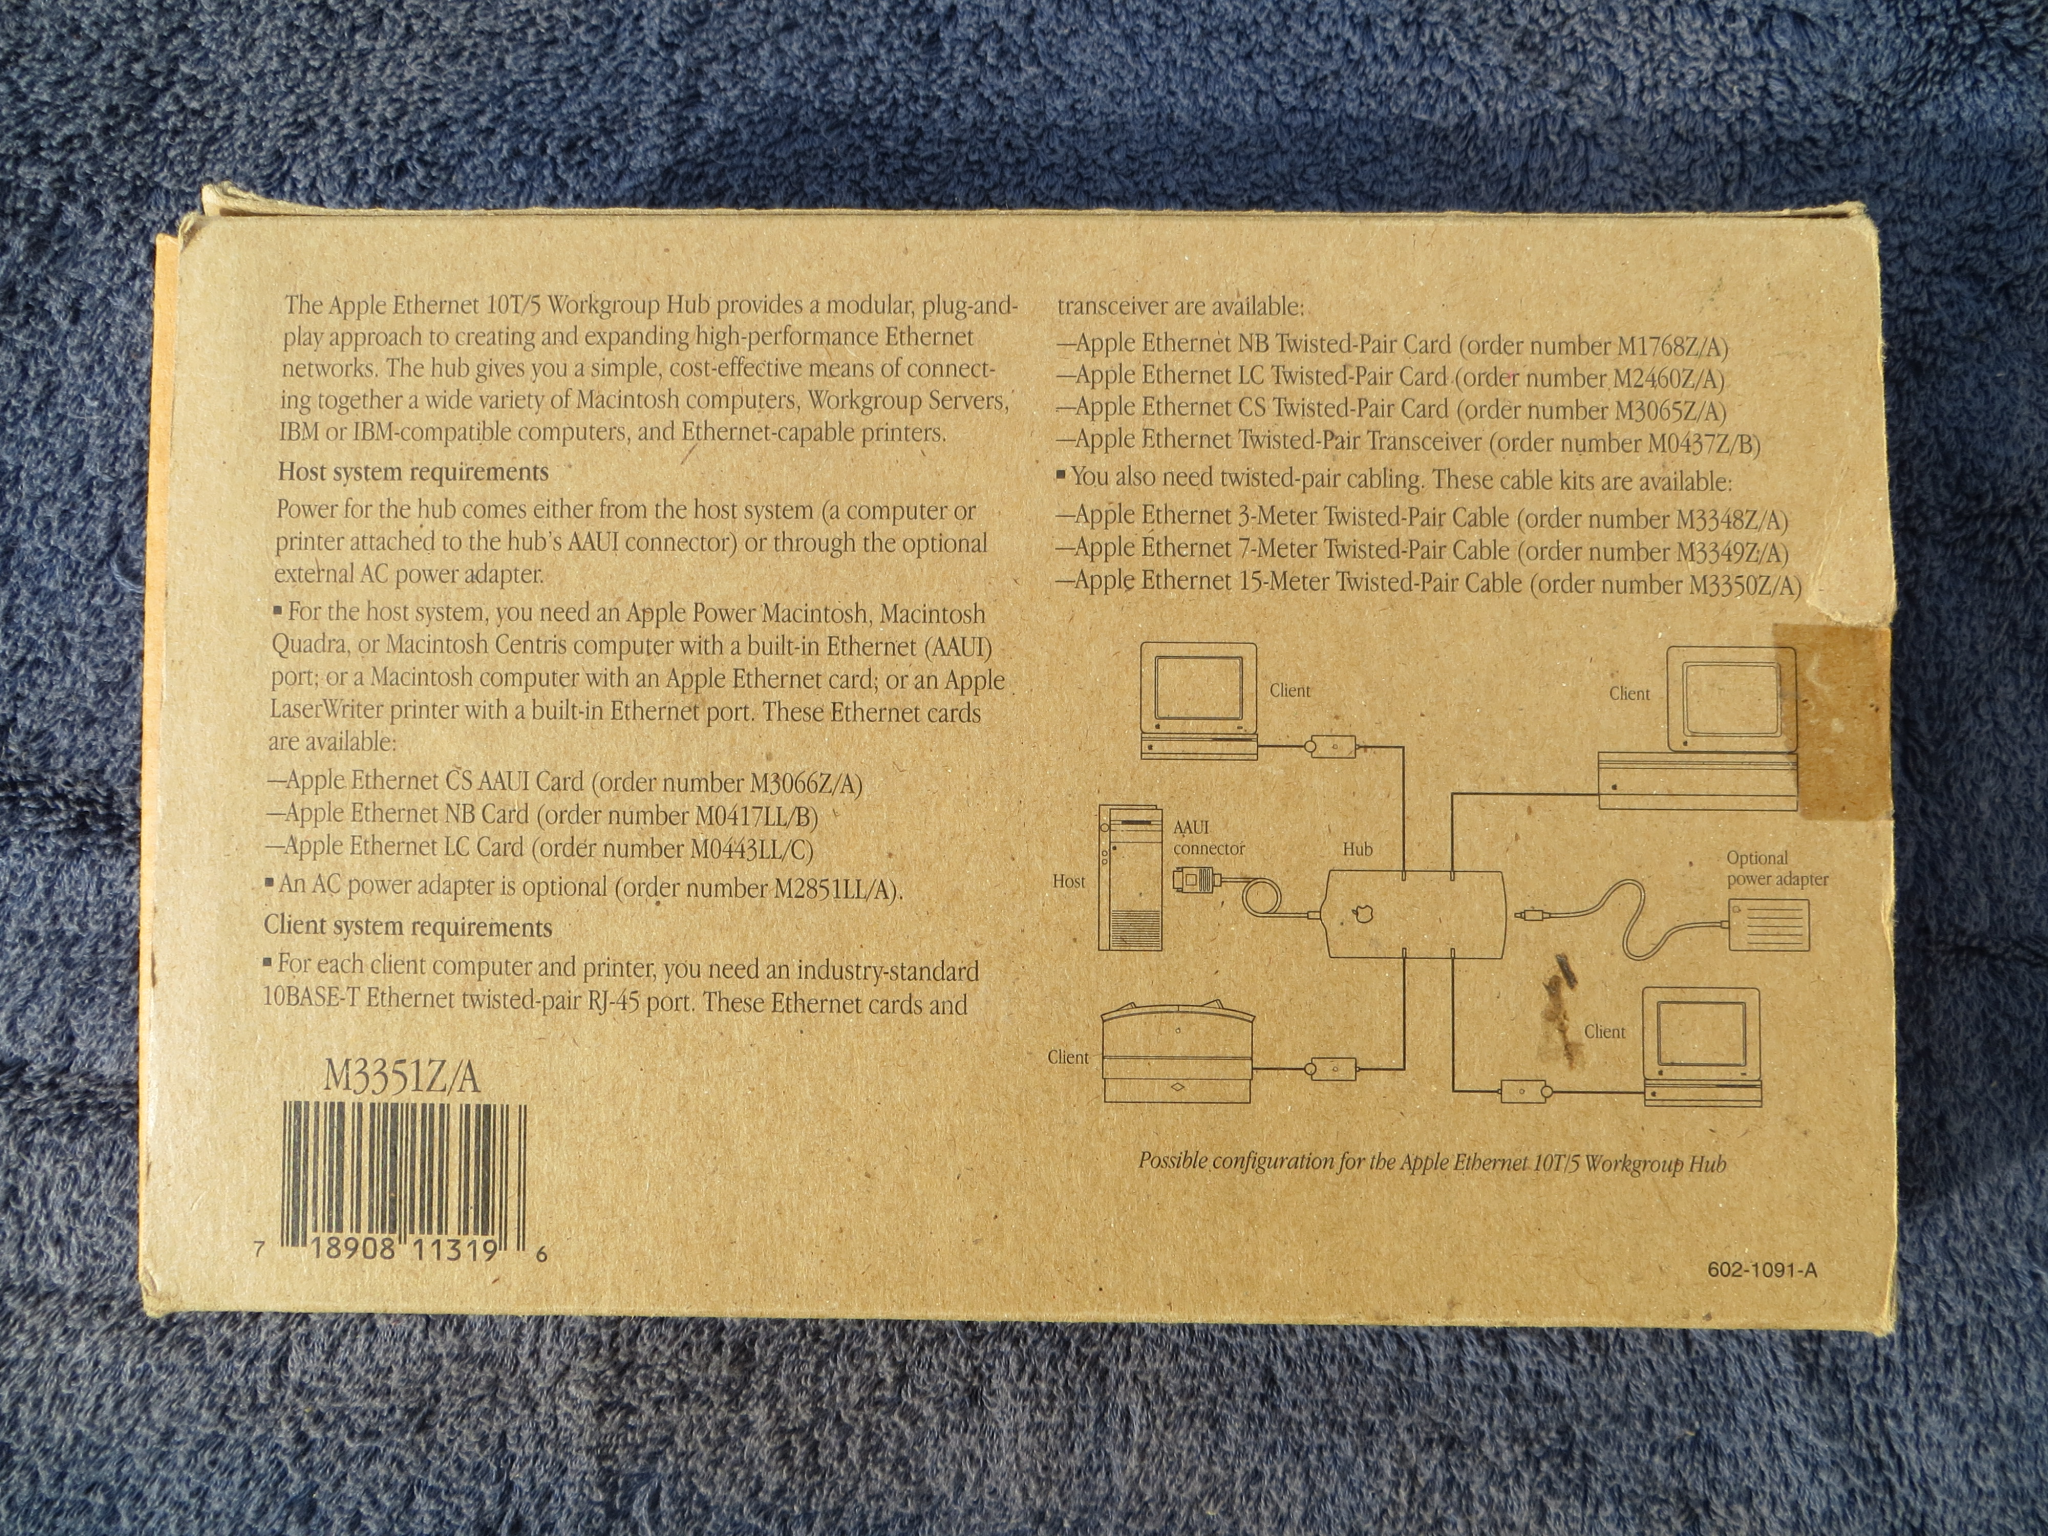 Bottom of box |
 CommSlot Ethernet adapter |
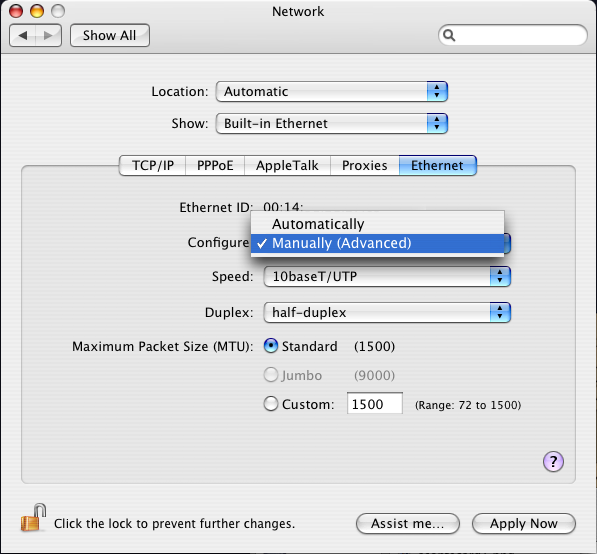
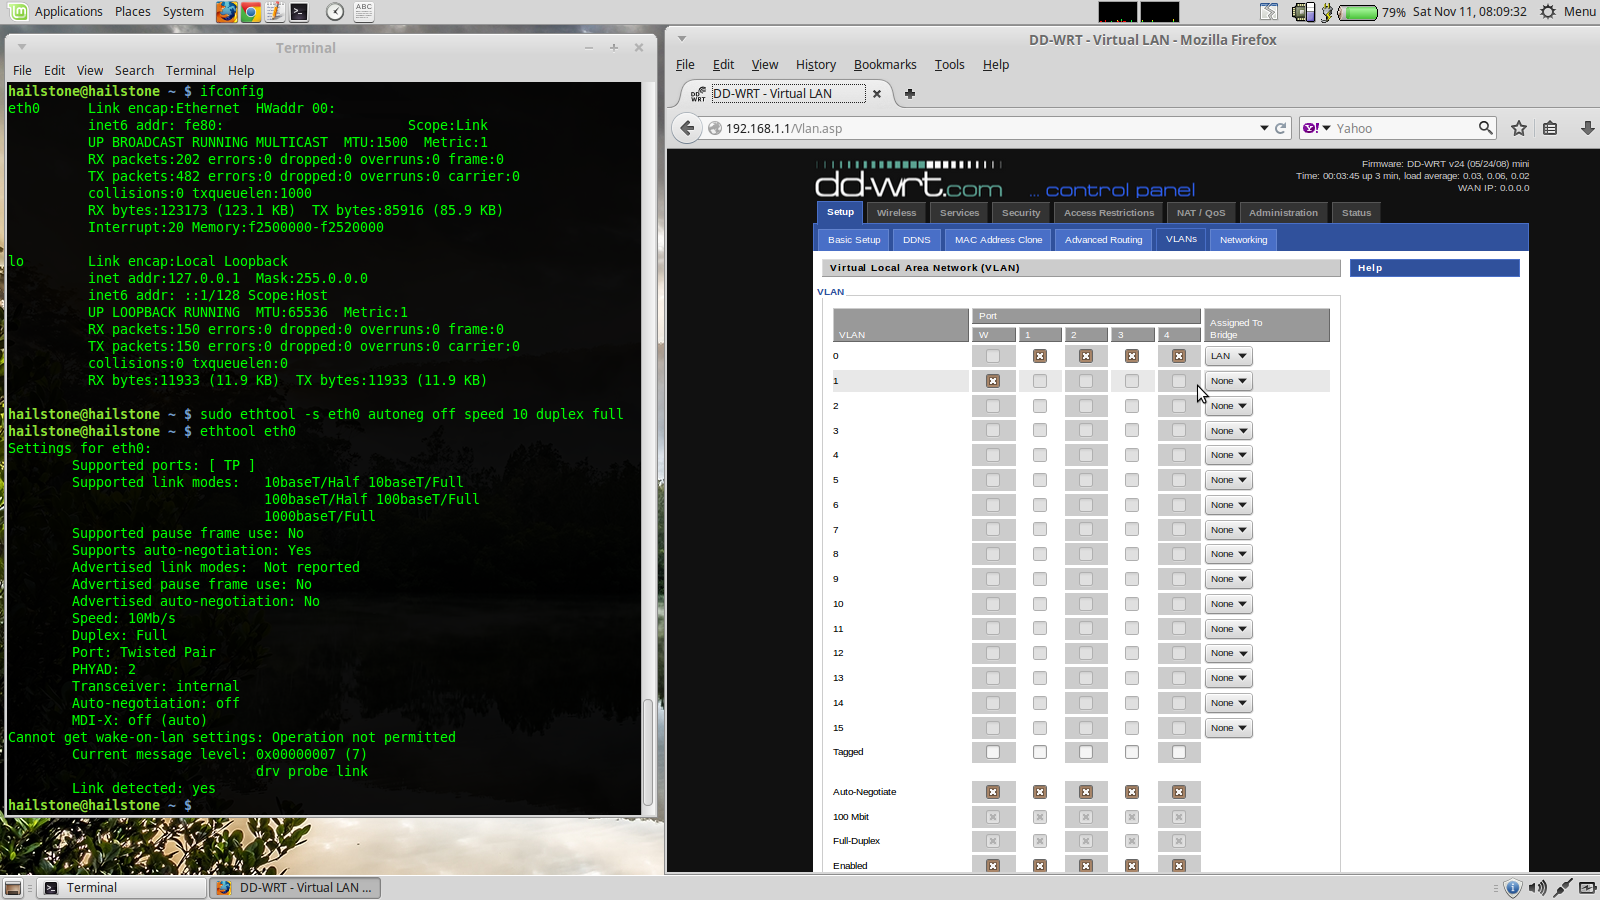
A number of modern routers do not handle the 10BASE-T 10Mbps interface that older network interface cards use. Both a Farallon iPrint LT, a UltraDock 16sce, and an Asante MacCon 30ie were identified in a router control window as using 10Mbps half-duplex mode. Older machines like these usually cannot handle 10BASE-T full duplex as they're not powerful enough. Solutions include searching out ones that are compatible, using a 10Mbps hub or switch between them, and direct computer to computer connections. Another complication is what is known as Auto-MDI (Medium Dependent Interface) or Auto-MDI-X, with the latter adding the ability to automatically use a straight Ethernet cable as a cross-over. This is a low level protocol system (Layer 1) that negotiates the connection speed between the network interface devices. 100BASE-T cards came out around 1995 and this wasn't a problem before then but once they did there needed to be some way for devices to agree on a common link speed and duplex configuration. Macs with Gigabit Ethernet interfaces already have Auto-MDI-X and don't need crossover cables. For a direct computer to computer connection, Mac OS X can set the link speed and duplex. Windows is supposed to have some way to do this too but most drivers can't talk down that low to the NIC and thus it may not work. Linux has to use ethtool to manually configure the ethernet port. An example of using this utility to configure the link speed is shown below (comment text for each line shown in red):
Some cards like the Asante MacCon MC3NB NuBus have an issue (which makes the green LINK light flash continuously) which can be fixed by replacing R28 on the board from 36K ohms to something like 220K ohms which delays the startup of the custom link detection pulse of the board to a point where Auto-MDI doesn't go bananas and instead settles down for 10BASE-T half duplex. (Credit for this information goes to Glenn Anderson of the Tinker Different forums.)
When installing the Ethernet card or dongle, ensure the machine is off to avoid any gotchas or electrical problems, and discharging any static electricity is very good idea. A casual jolt of 400 volts is enough to cook ICs. For a compact like the SE/30, remove the four screws on the back of the SE/30 using a long (15 to 20cm shaft length) T-15 Torx: a dedicated screwdriver works better than a hobble-job of adapters that may not fit the holes near the carry handle. Do not use a hex Allen driver on these Torx screws. Compacts can vary in their difficulty of opening the case, so you may have to remove all the screws, invert the unit over something like a couch or a bed and shake the rear cover off. Install the 030 PDS card and replace the cover. Most other machines should be just simple plug-in affairs aside from NuBus cards, which are pretty much the same thing as installing PCI cards.
Once the hardware has been installed, the Ethernet wiring should be fairly straightforward. A cross-over cable is required for direct computer to computer connections (much like a null modem cable) and AppleTalk bridges, but a straight cable is required for a router or switch. Follow the directions from the modem, router or switch for configuration if any are in use, as this Guide will assume that these hardware units have already been configured beforehand. The Mac Driver Museum used to have a healthy stock of drivers for a variety of hardware devices. A mirror along with a terrific stock of BYTE magazines, MacUser magazines and so on is at Vintage Apple. The MacGUI website might also have some variants as well, depending on how well the website stays up, otherwise searching around the open Internet might be your only option.
Serial Port Options
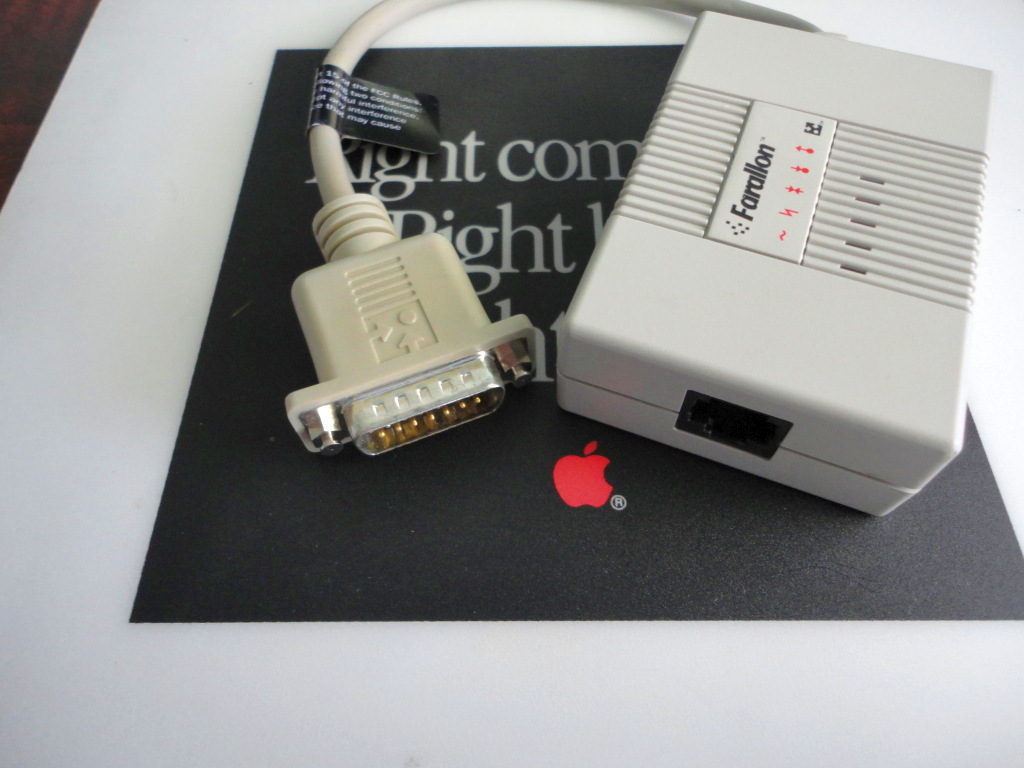
The serial ports on the older Macs are divided into the Printer and the Modem port. Later laptops incorporated both into a "Modem/Printer Port" and the last generation of machines with this interface had GeoPorts which have an additional pin to supply 5V at 350mA max, pulled off the ADB power rail. LocalTalk hardware mainly consists of either Mini-DIN-8 cables for direct connection, LocalTalk splitter boxes with Mini-DIN-3 cables, or PhoneNET hardware. In addition, a variety of LocalTalk to Ethernet bridges were produced "back in the day". These include models like the AsanteTalk series, the Farallon EtherMac iPrint LT (the SL model is apparently only for StyleWriter printers) and other models such as Dayna products; the Farallon units work directly with PhoneNET so they are more desirable whereas the Asante boxes require a Mini-DIN-8 cable. They are fairly common and are a good tool to have around, but they only work with AFP over AppleTalk (not AFP over TCP/IP) and will not work with terminal applications like MacTerminal or ZTerm, nor TCP/IP services like FTP or WWW protocols without some kind of MacIP gateway system. More information concerning this subject is found in the LocalTalk Networks section. |
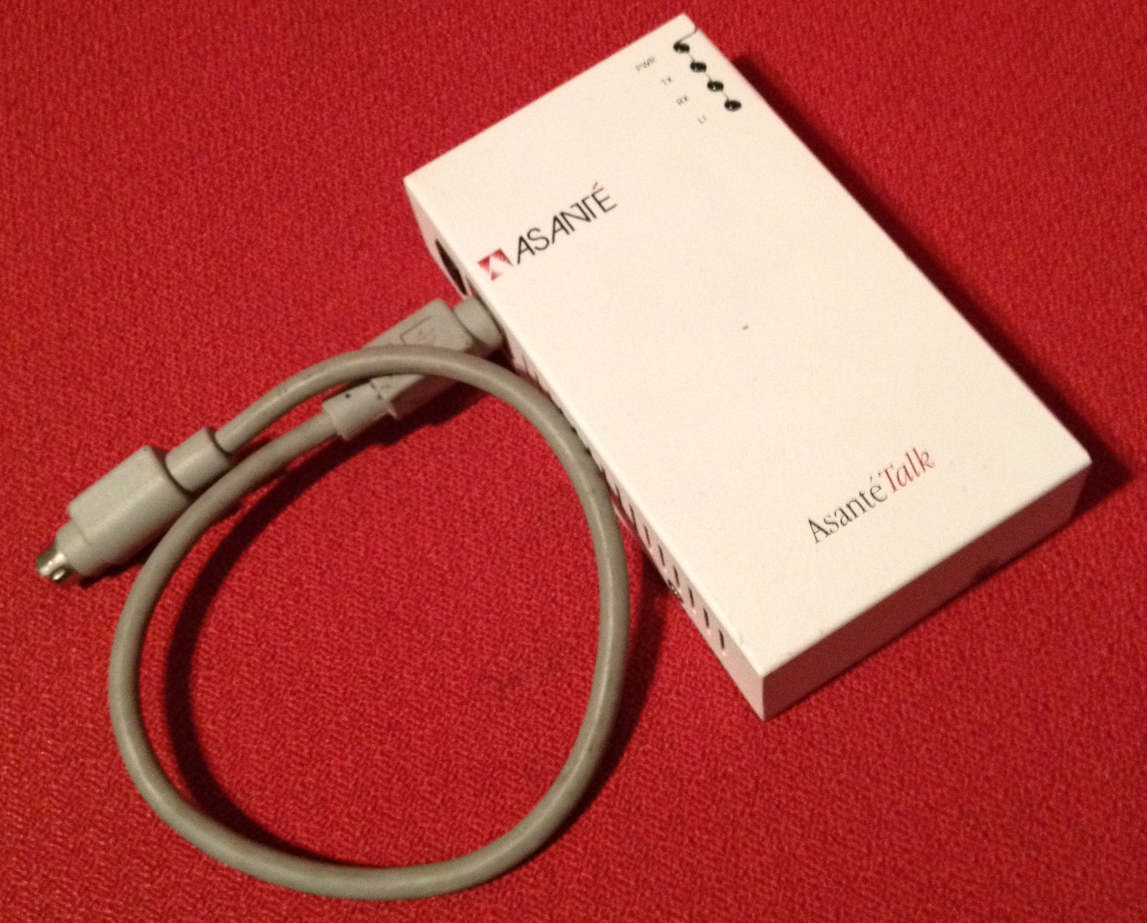 AsanteTalk AppleTalk bridge (courtesy thatsteve at 68kmla.org) |
The GeoPorts were originally intended to be used with GeoPort Mini-DIN-9 compatible modems. Other than the extra power supply pin, GeoPorts have the same identical pinout as a regular Mini-DIN-8 RS422 port found in every Mac from the Mac Plus forward (well, the chipset that controls the port is quite a bit different, but that's not a detail that is important right now) and can use all the same serial AppleTalk bridges, PhoneNET adapters, et cetera that a normal Mini-DIN-8 port can use. There wasn't much stuff made for GeoPorts besides the GeoPort Telecom Modem, which capped out at 33.6Kbps (with an update) with the later V.34 standard, except it gets worse. Nobody liked them, they had slower speeds on Quadra models versus Power Macintosh units, the Power Macintosh G3 series couldn't handle them either, they started to have issues with Mac OS 8.5 and they weren't supported in Mac OS 9 at all. |
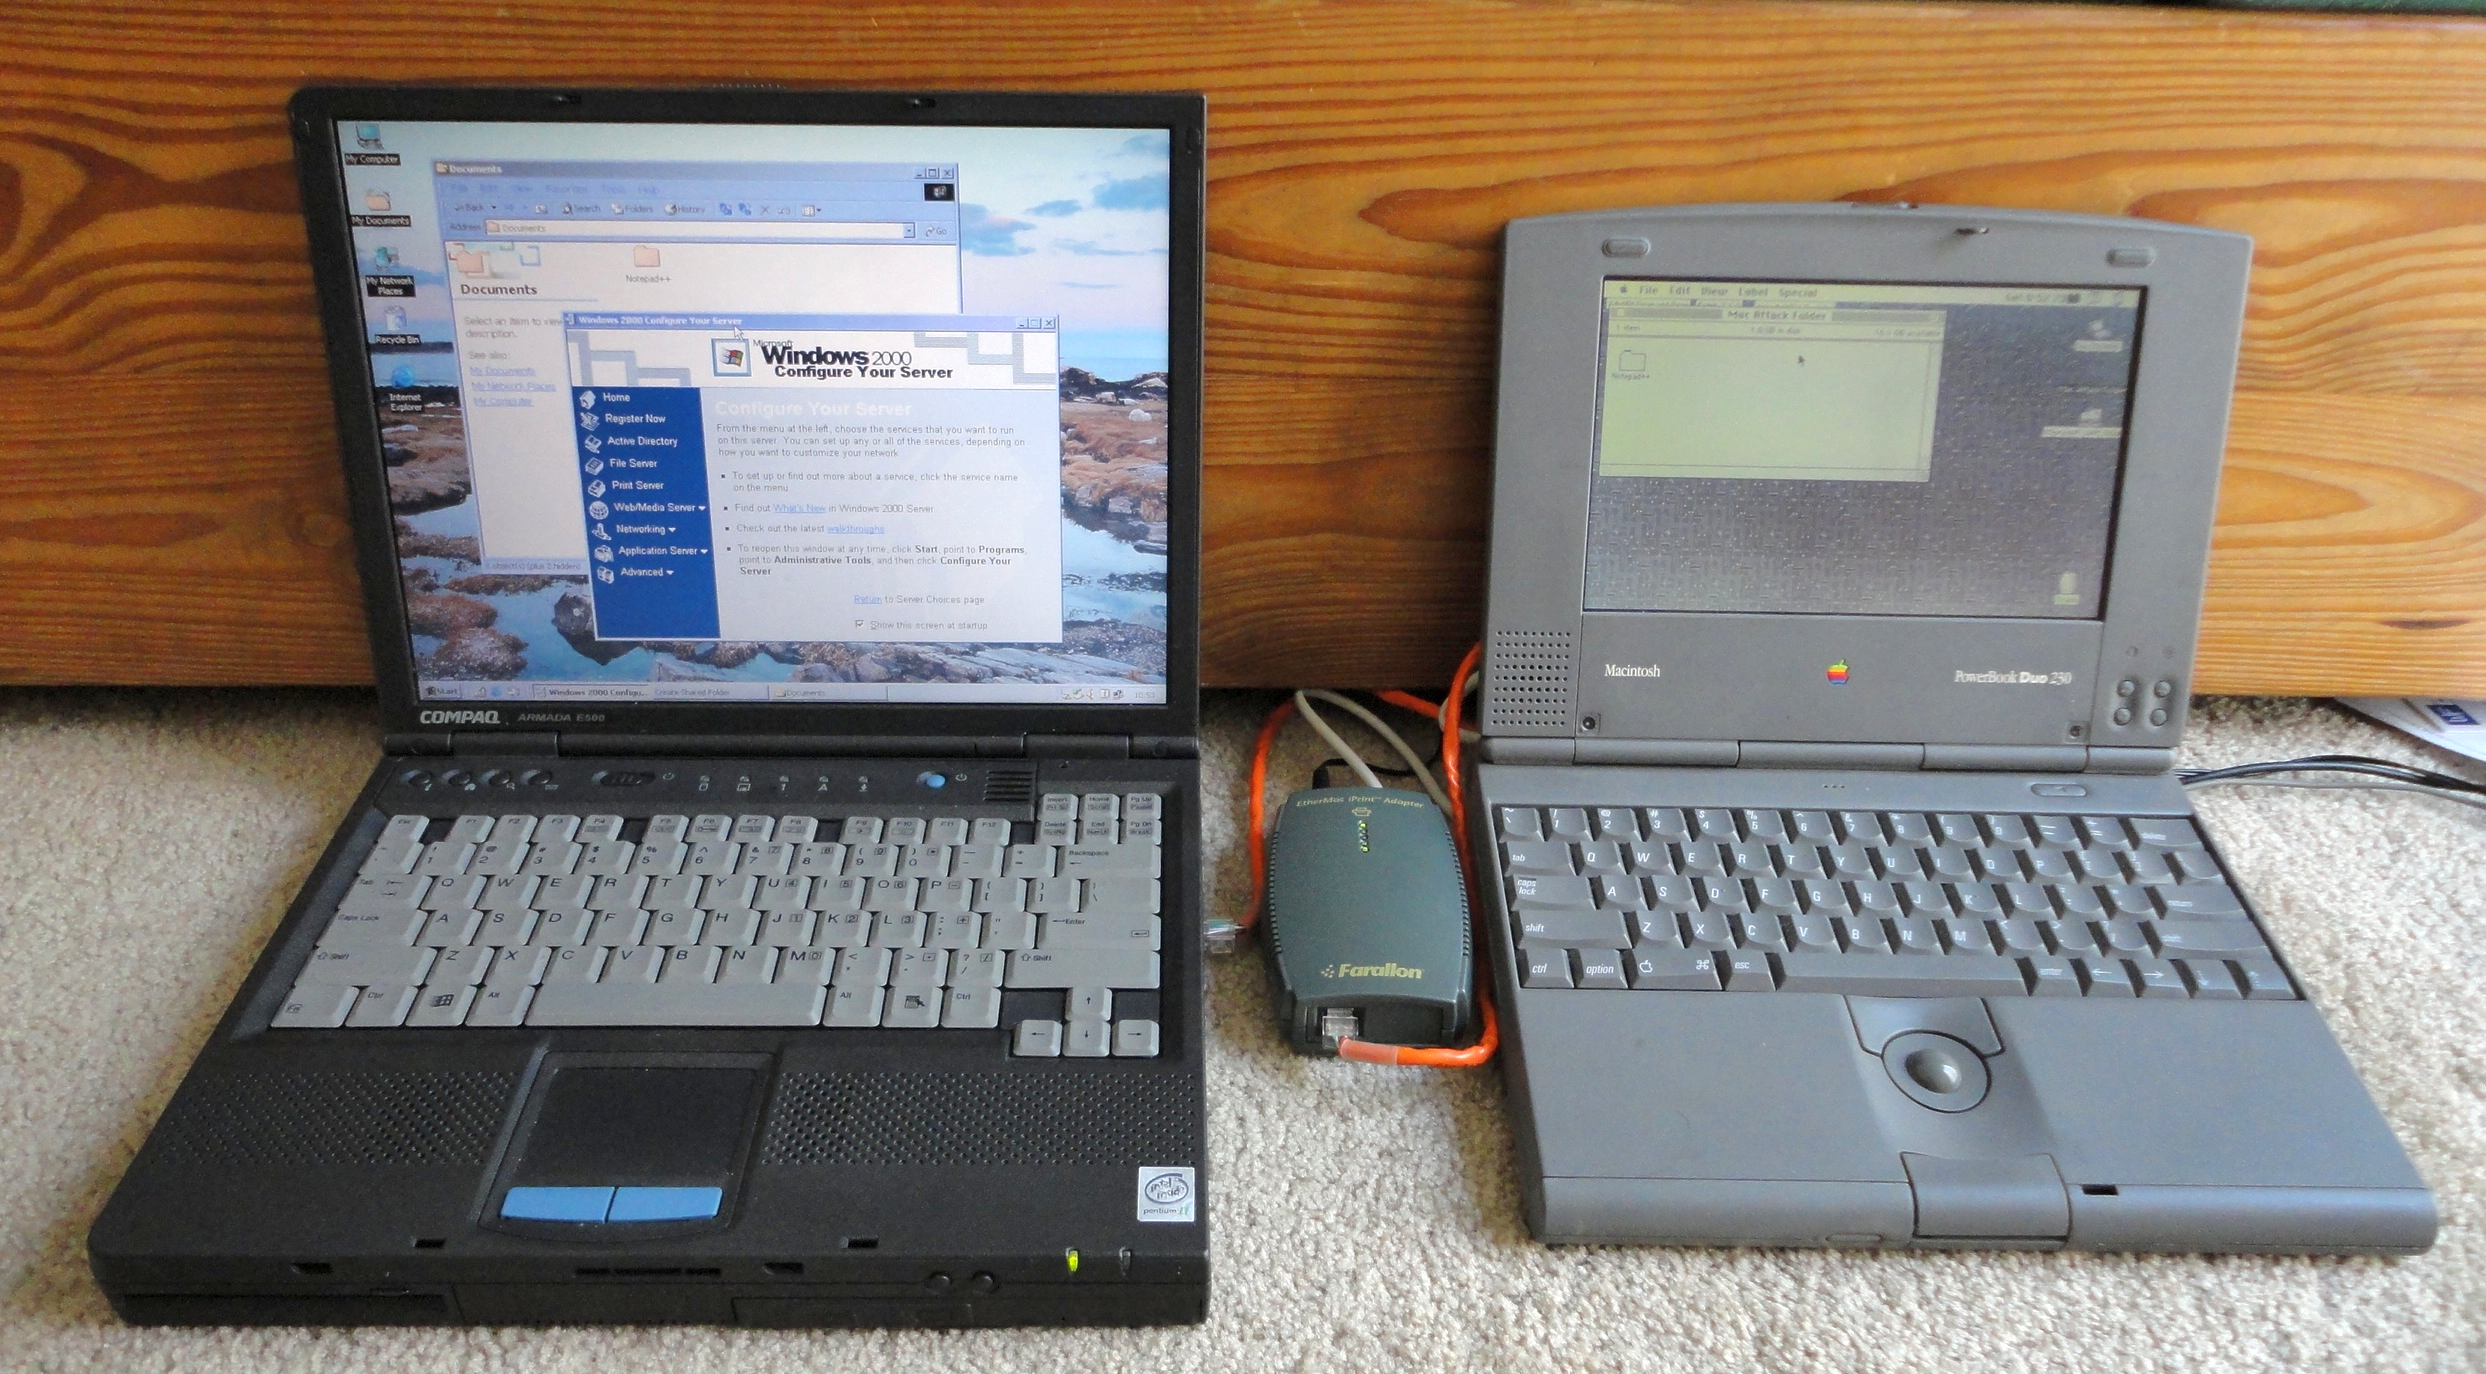 A Duo 230/100 to a Compaq E500 over an AppleTalk bridge (Win 2K) |
While using the DSP processor on 68040 Macs with AV cards or the PowerPC chip is novel, nobody else really bothered besides SAGEM who made a Planet ISDN 128Kbps GeoPort adapter. Earlier they released a NuBus version, with a USB version last, but all three probably didn't sell very well since seller auctions don't list them very often. Most people wouldn't be able to afford two lines and the service for 64Kbps per line for a total of 128Kbps unless it was a business, who instead could afford a T1 network connection at 1.544Mbps or 2.048Mbps for E1 European network line. In the early 2000s, having a T1 connection was considered "posh" and was expensive.
The Macintosh 128K and the 512K/Ke are given DE-9 RS422 ports, these require a different adapter for PhoneNET and Apple official LocalTalk adapters, along with a different adapter for old RS232 DB-25 modems, as was used back in the day.
There are a couple of Ethernet bridges that communicate over the LocalTalk port which can route TCP/IP traffic, known as hardware MacIP gateways or routers depending on the definition and timeframe. Sample models would be like the Cayman Systems GatorBox, Farallon StarRouter, the Shiva FastPath 5, Hayes InterBridge, the Farallon EtherWave Mac/PB adapter (has the same form factor as the AUI and AAUI devices), and a few other odd ones; the EtherWave Mac/PB adapter can also overclock the serial port. The GatorBox also requires pre-Open Transport OSs to configure it, like System 7 or 7.1. Some hardware MacIP gateways may not work with System 6, or have other quirks.
For serial data transfer options involving terminals, this Guide will be tailored to connecting to newer computers because LocalTalk can work directly between the older Macs. For machines without RS232 ports, a proper USB to RS232 adapter is the first requirement, even though both the DE-9 ports on the 128K and 512K series, and the Mini-DIN-8 ports on all other Macs are of the RS422 specification. Apparently some cheap junk RS232 adapters do not supply the proper +12V (logical 0) and -12V (logical 1, may vary depending on hardware design) required by proper RS232 devices, may have inactive pins (like DCD) or counterfeit driver chips which won't work with certain hardware but for our purposes, they might work but if there's a problem that would be the first place to go to. The cheap ones just convert USB into +5V/0V or -5V hoping to capitalize on the wide signal-high and signal-low tolerance of RS232. Technically, the standard specifies at least +3V and at least -3V however. |
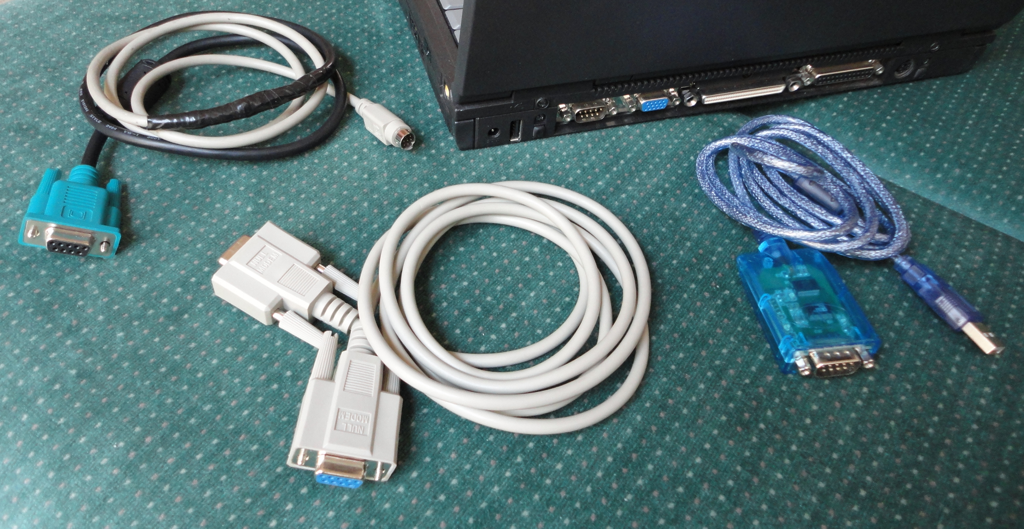 RS232 serial hardware |
The next step is a straight DE-9 RS232 cable or null modem cable/adapter and a Mini-DIN-8 adapter. This subject will be expanded on in the Serial Data Interlinks section.
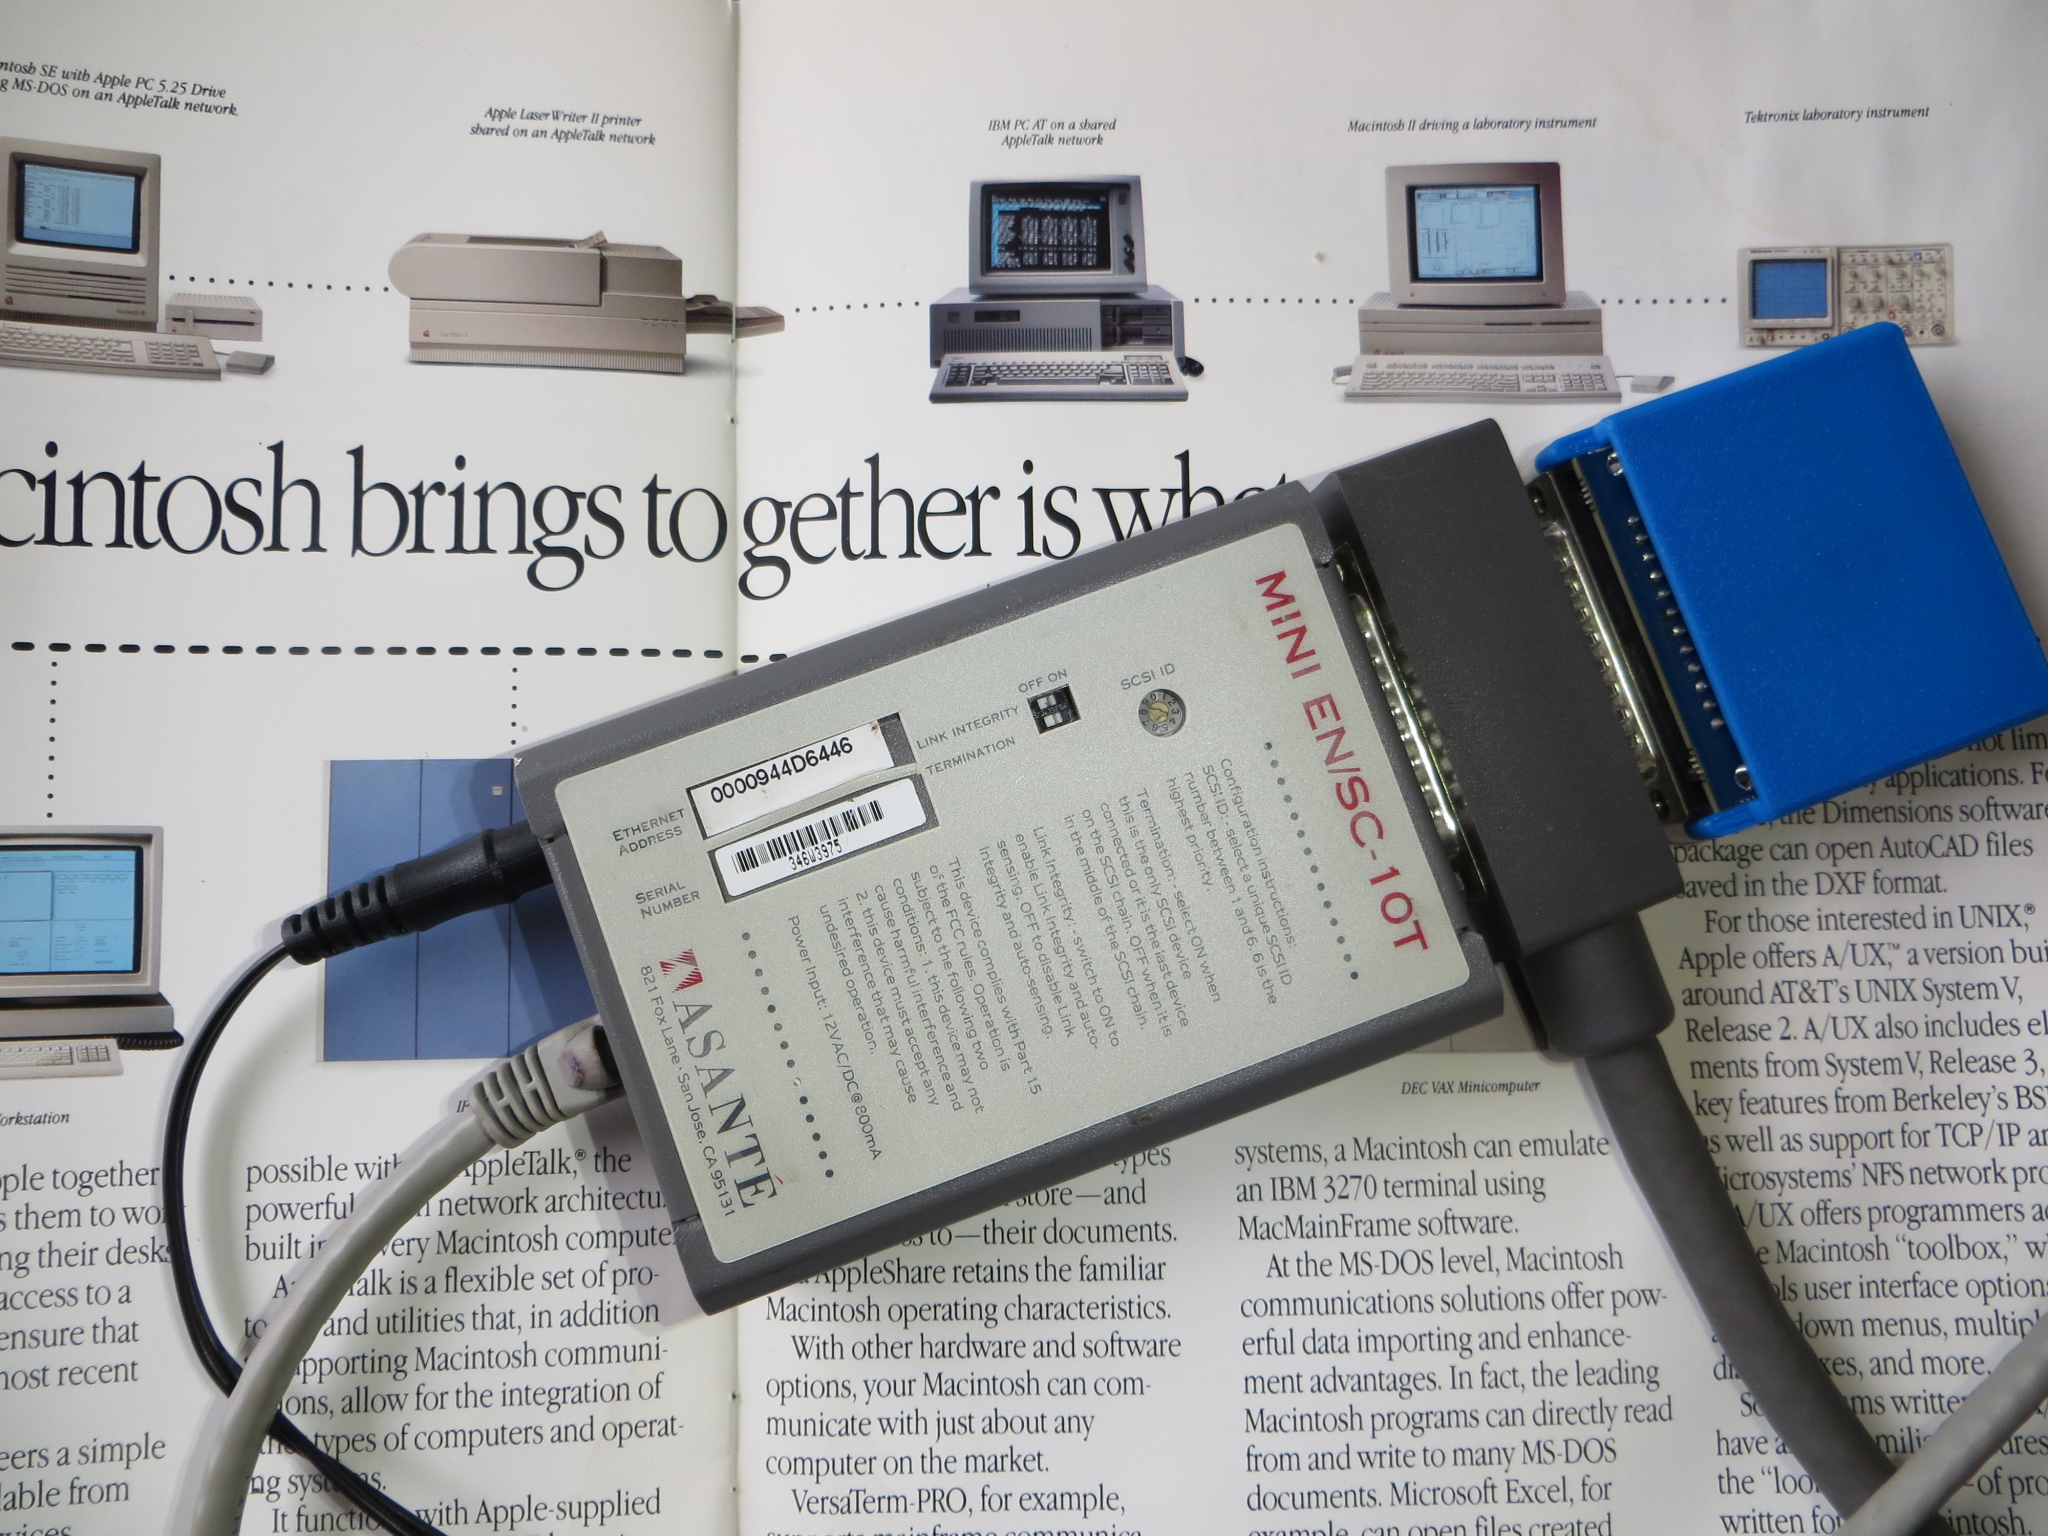
Asante Mini EN/SC 10T
As mentioned in the June of 1990 MacUser magazine, SCSI Ethernet adapters are going to be slower than PDS, NuBus or PCI Ethernet cards. But they were still somewhat popular for PowerBooks and certain machines that struggle in the expansion department, like the Macintosh Plus, Classic, Portable or even just the SE if the expansion slot is occupied by something else. For this section we'll take a closer look at an Asante Mini EN/SC, which appears to have all the advantages of the larger SCSI Ethernet bridges, which feature termination power, SCSI ID selection and daisy-chain capability, but is also relatively compact, with nice indicator lights. Meanwhile the even more compact Asante Micro EN/SC is specifically built for PowerBooks, with a fixed HDI-30 SCSI interface, internally terminated and has a fixed SCSI ID of 6. Since PowerBooks were usually not connected to larger SCSI arrays, this wasn't usually a problem: if it was, HDI-30 to DB-25 adapters were as common as dirt, and then the physically larger SCSI Ethernet bridges maintain their value.
The equivalent product from Dayna would be the Dayna Pocket SCSI/Link-T, which has a similar feature set as this model. These days, supply has dried up considerably and fewer of these examples are left, so we can't be as choosey as we used to be. Anyways, this example takes power from a wall transformer (a 2.5mm, center terminal positive, 12VDC 1.5A wall-wart was supplied, but the label on the back says 12VAC/DC), but the Dayna Pocket takes power from ADB, and has both HDI-30 and DB-25 interfaces. Both are easy to set up in the hardware side, the software side is relatively easy too. Once the unit is connected, the respective Installer can pick up the device and install the correct driver. Most "good" SCSI peripherals had some kind of termination switch on them, otherwise the user would need to put a terminator on the open port or have something else that does have termination capabilities at the end of the SCSI chain, with the Ethernet adapter in the middle somewhere between the computer and the last device on the chain. Termination is a tricky subject, and it doesn't help that Asante has four primary models all in the EN/SC naming system.
The first original EN/SC sported a white slim rectangular box with two DB-25 ports on the back has no termination power or setting, and uses a 12V Alternating Current power supply with 1.25 amp rating. A few deviations are possible, with some having 10BASE-T only, and others having additional interfaces, and a PowerBook model which appears to be terminated internally. Interestingly, the manual states the following (page 1-3, PDF page 11):
The Mini EN/SC doesn't have this same text mentioned in the manual which has the Mini and Micros, so it's probably exempt, unless there's a firmware difference or a driver update involved. The IIfx probably gets tossed in that list because of its unique termination scheme, which was definitely a hot button topic of the day and probably a good target of urban legend and fuddlore, which is interesting because a IIfx terminator when taken apart isn't really anything special. The Centris 610 and Centris 650s could be pinched slightly, particularly the 610, because Centris machines didn't always come with AAUI ports and the 610 only has one 040 PDS expansion slot. In any case, the Quadra machines besides the IIfx also have their own termination ordeal too.
The next one is the Mini EN/SC as demonstrated here, with a small grey rectangular box and one DB-25 interface, with the only deviations being one that has 10BASE-T and the other has that as well as 10BASE-2, and power specs were mentioned in the earlier paragraph. Then we can move on to the Micro EN/SC, which also has the same deviation choice as the Mini EN/SC but as mentioned earlier in the first paragraph, is really only usable on PowerBooks that didn't come with AAUI or 10BASE-T interfaces, which also nixes the PowerBook Duos since those have nothing besides a power input, serial port, optional modem and of course the Duo Dock interface connector. People who used PowerBook Duos for awhile eventually got a Duo MiniDock or something at some point, some of which offer conventional sized SCSI ports and truth be told the full-sized Duo Dock was rather large. Finally to wrap up this discussion before it gets too long, the last type of adapters were the two Desktop EN/SC models, which have a similar form factor as the AsanteTalk LocalTalk bridge device. Like the Micro EN/SC it is internally terminated, but if you want to attach something else in addition to the Desktop EN/SC you need a different cable and the Desktop EN/SC goes at the end of the chain.
To take it apart, remove the back label. Use care because it can tear and the thin strip by the serial number will probably break. Given the age, the adhesive will probably give you problems, and the ink for the red text will probably be left behind. Use something like 3M Super 77 spray adhesive in a light coat when affixing the label back on; spray on the label, not the unit. Under the label are 5 screws, with the 6th hidden under the MAC address label. Only 4 need to be removed. Inside are three electrolytic radial capacitors, with C20 being 25v 1000uF and C22 plus C23 are 16v 470uF. (U23 under the inductor by the power input jack, is a Motorola MC34163PXXAA9238, U3 is marked AMPAL18P8AJC333F7SR from the looks of it, and U14 maps to a Microchip 27C256-15L 9248CEA.)
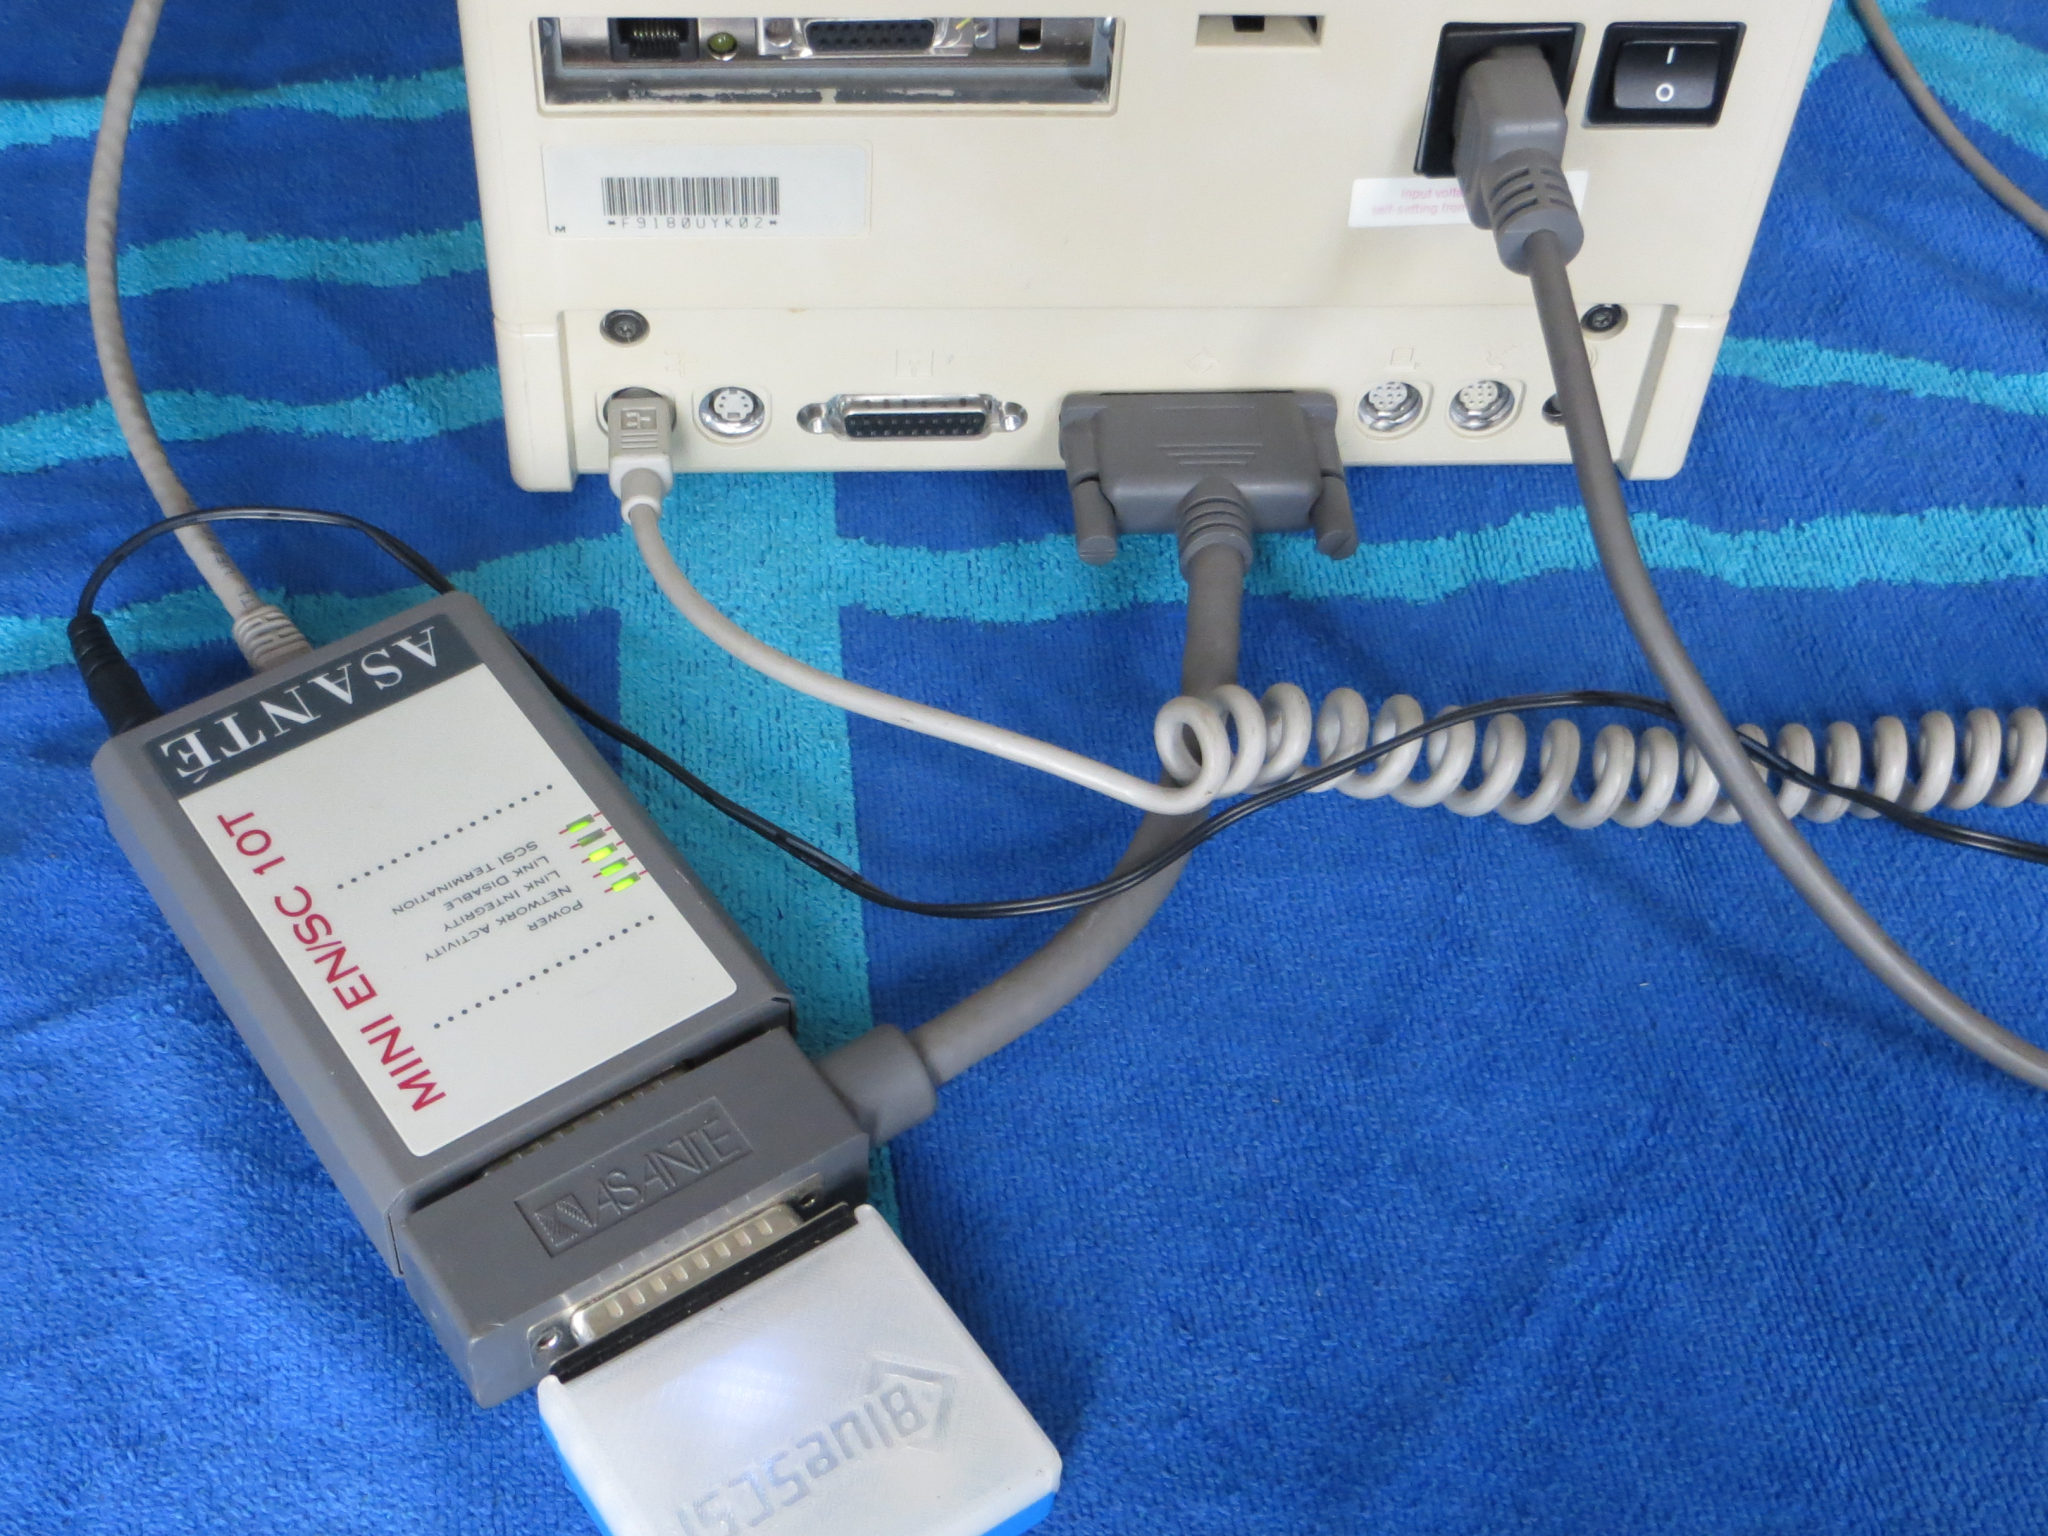 Mini EN/SC in use (SE/30) |
 Backside of unit |
 Top of board, bottom of box |
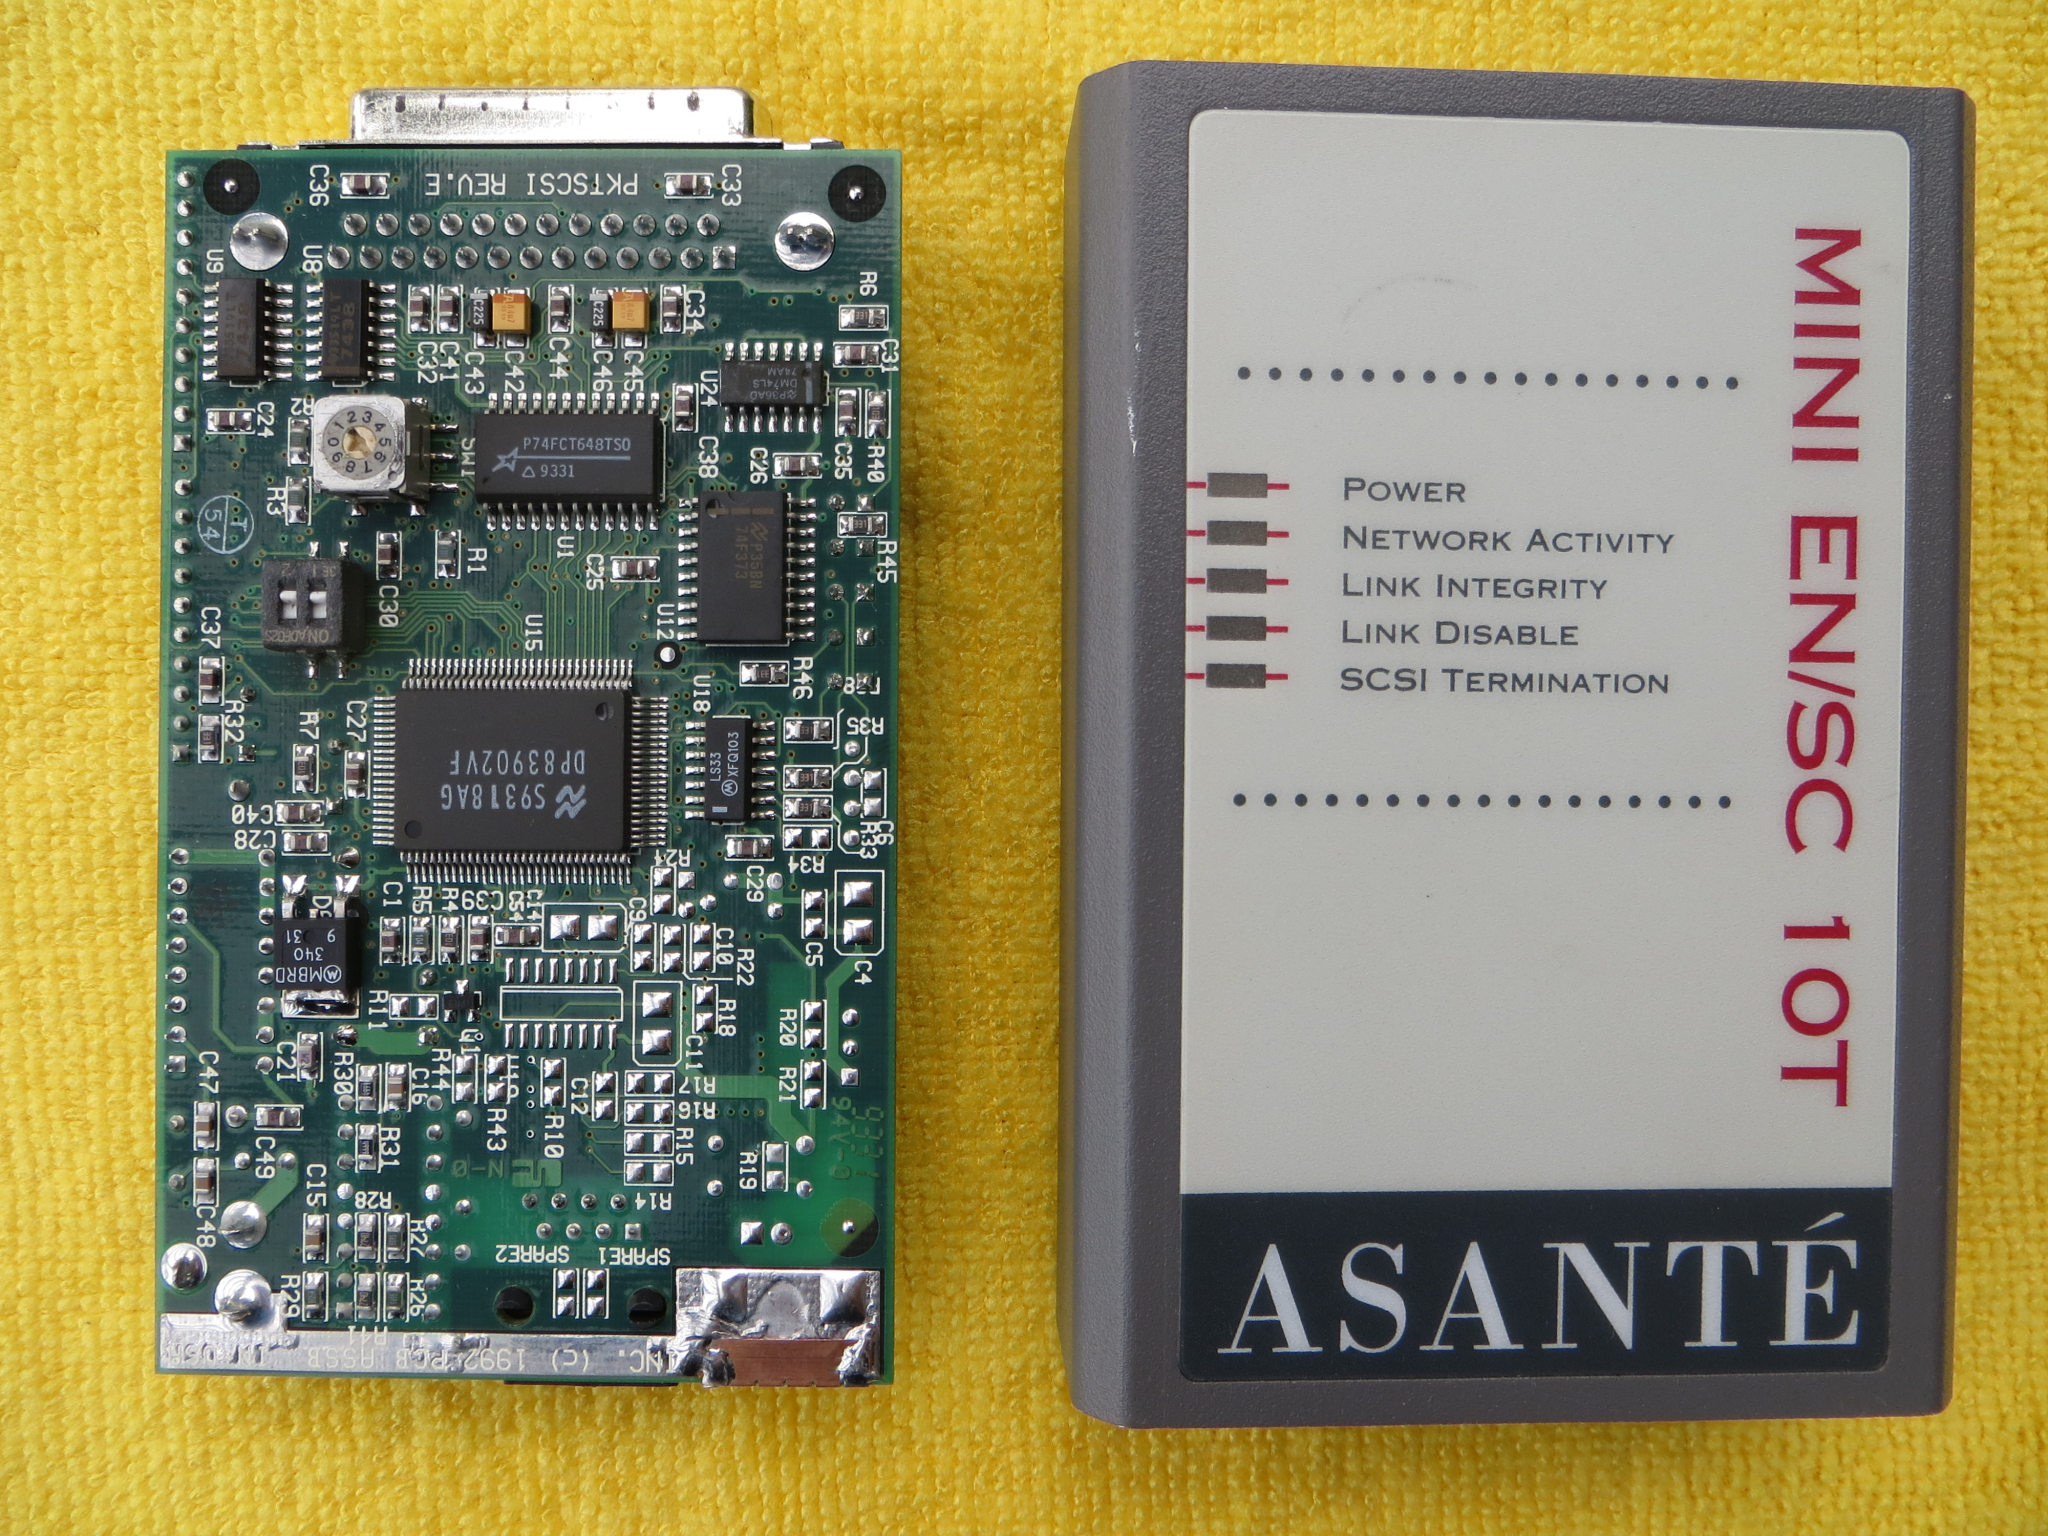 Back of board, top of box |
Back to the original topic, the device is relatively easy to use, and because of the aforementioned advantages, makes it useful for avoiding the potential issues as we've seen. With the power off for everything, wire everything up. Set the termination, which on our example here, used ON for a BlueSCSI attached and BlueSCSI not attached. Pick a SCSI ID that is not in use by something else: 0 and 7 are typically already reserved with 7 for the Macintosh and 0 for an internal SCSI drive. 8 and 9 are not valid numbers either. The rotary switch on the back has a small slot with a V arrow that points to the selected number. Plug in the power, then driver comes next. It's pretty straightforward, and should be detected by the Installer and a quick reboot afterwards to update things. In the Network control panel, chose EtherTalk Alternate in System 7 or EtherTalk Alternative in System 6, and then afterwards the device functions just like a normal Ethernet device. It masquerades as an Ethernet device, so MacTCP should be set to Ethernet like usual (ignore the EtherTalk (A) selection) and Open Transport systems will just set both AppleTalk and TCP/IP control panels to the "Alternate Ethernet" choice.
Throughput speed is going to be lower because nobody complimented the NCR SCSI chipset on any Macintosh, and even the later SCSI equipped machines like the Power Macintosh G3 also aren't really worth writing home about, other than "it has SCSI". Granted, it worked fine for what most people did, but if they were serious, they'd be looking at something like the fabled FWB JackHammer. A speed test of the model demonstrated here can be found in the Data Transfer Rates section. Don't get your hopes up too much: that was on a somewhat favorable system configuration. A SE/30 with 7.5.5 with OT got somewhere around 60-65KiB/sec, with an accelerator and an internal BlueSCSI drive, which is faster than a typical HDD is.
Overall? Well it's faster than LocalTalk, and if it's the best you got, then it's the best you got. Like the Farallon EtherWave Mac/PB adapter, it can be temperamental. If a DB-25F to DB-25M cable is attached to bundled T-cable as an "extender", then it won't work at all with no indication of what's wrong. Only use the supplied T-cable. The termination might have to be fiddled with depending on the installation, and it prefers to be the only network interface on the system, although it can get along with others, but that doesn't mean it will. Try powering down the system, power-cycling the adapter and restarting the system, or switching interfaces in software and back again if something isn't working right. Another system on the network as an AFP file server is nice because a quick peek in the Chooser can tell you if it's working or not.
If a NuBus card is installed at the same time as the EN/SC is plugged in, then the Installer won't detect both at the same time, but a Custom install can pick out what is needed. Since the Installer has a lot of options to choose from, review the Custom install options in case you need something there too. If you need to use TroubleShooter, assuming it works, make sure to reboot with all extensions disabled otherwise it won't work. ADLS should work, but both could also conveniently not work when you can't figure out what's wrong with it, which can make it difficult to diagnose. If there is a NuBus or PDS Ethernet card installed, that will have to be removed because then TroubleShooter and ADLS won't pick up the SCSI adapter. In addition, like the EtherWave, it hasn't really found its way into the hands of the experienced Mac cloners or hardware gurus to either replicate or make a more modern version, at least right now, because the demand for something like this isn't high enough to warrant it. |
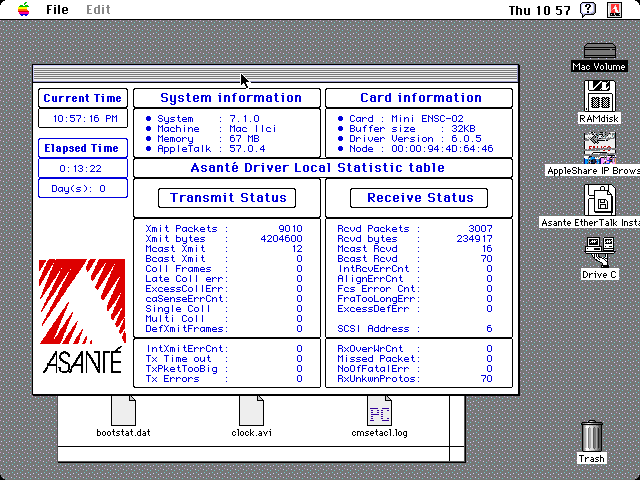 ADLS program in use |
Despite this, if it works, the advantages are still relevant. Perhaps some day in the future a more modern equivalent can pop up as Ethernet cards are starting to get kind of thin on supply, but given such ventures are enthusiast projects and hardly break even on costs, it's somewhat unlikely. The scuznet project is interesting, but isn't fully matured like the BlueSCSI, and some kind of thing can be cooked out of a PiSCSI, but it's not fully ready at the time of writing.
Dayna Pocket SCSI/Link-T
Similar in size and form factor as the previous Asante model, this was an alternative and is one of the other small form factor SCSI Ethernet bridges that is still quite capable. Unlike the Asante device mentioned above, this one came with almost everything except the wall transformer (5V DC, 2.1mm barrel jack, center terminal positive, 1 Amp output) and the Ethernet cable. One reason for procuring this device was finding out what it looks like inside, and the other was for finding out if the DaynaPORT drivers used by the BlueSCSI are really any good, because multiple users have reported issues with the DaynaPORT driver situation. The PiSCSI is around too, and uses the same drivers. The SCSI/Link-M is a less common deviation which has a 10BASE-2 Thinnet coax interface connector in addition to the 10BASE-T jack.
Since the device was intended to be used for PowerBooks, it has a HDI-30 SCSI connector as the primary input. PowerBooks would use a HDI-30 to HDI-30 cable and be done: the other not-PowerBooks would use the included DB-25 to HDI-30 adapter cable. If you don't have this cable, then that could be a problem, and thus another SCSI accessory may have to be installed so this unit can go at the end of the chain. One popular accessory towards the late 1990s was the SCSI Zip100 drive. It has two female DB-25 ports on the back, which is easily confused for the PC parallel port version: if it doesn't have the SCSI ID 5 or 6 selector and the termination switch, it's probably a parallel port unit. In any event the Zip SCSI cable is a male to male DB-25 cable, which would be acceptable here. The problem is the manual doesn't seem to indicate that using the DB-25 interface on the Pocket itself is acceptable unless it's the last device in the chain, and using a direct male to male DB-25 cable to the unit to the Macintosh is probably not going to work.
Close examination of the SCSI ID switch reveals that the top part of the numbers is for IDs with termination and the lower half of numbers are unterminated ones. It would have been nicer to indent the text better so it is more obvious because the manual doesn't really explain it very well either, and folks with poor eyesight probably won't see the arrow mark on the rotary switch inside, which points towards the desired SCSI ID. As for power, it came with an ADB power vampire, which has a pass-through to allow other devices to use the ADB port, which makes sense because a lot of machines like the LC II and even Power Macintoshes only have one ADB port; PowerBooks typically only came with one. Granted, Power Macintoshes don't need this device, or shouldn't, but it's probably better to use the wall transformer rather than the ADB vampire. Of that, the cable examined was undergoing a case of dry rot and the rubber compound was disintegrating. At least the device itself isn't suffering from "stickyness" that a lot of late 1990s and early 2000s stuff was plagued with. | 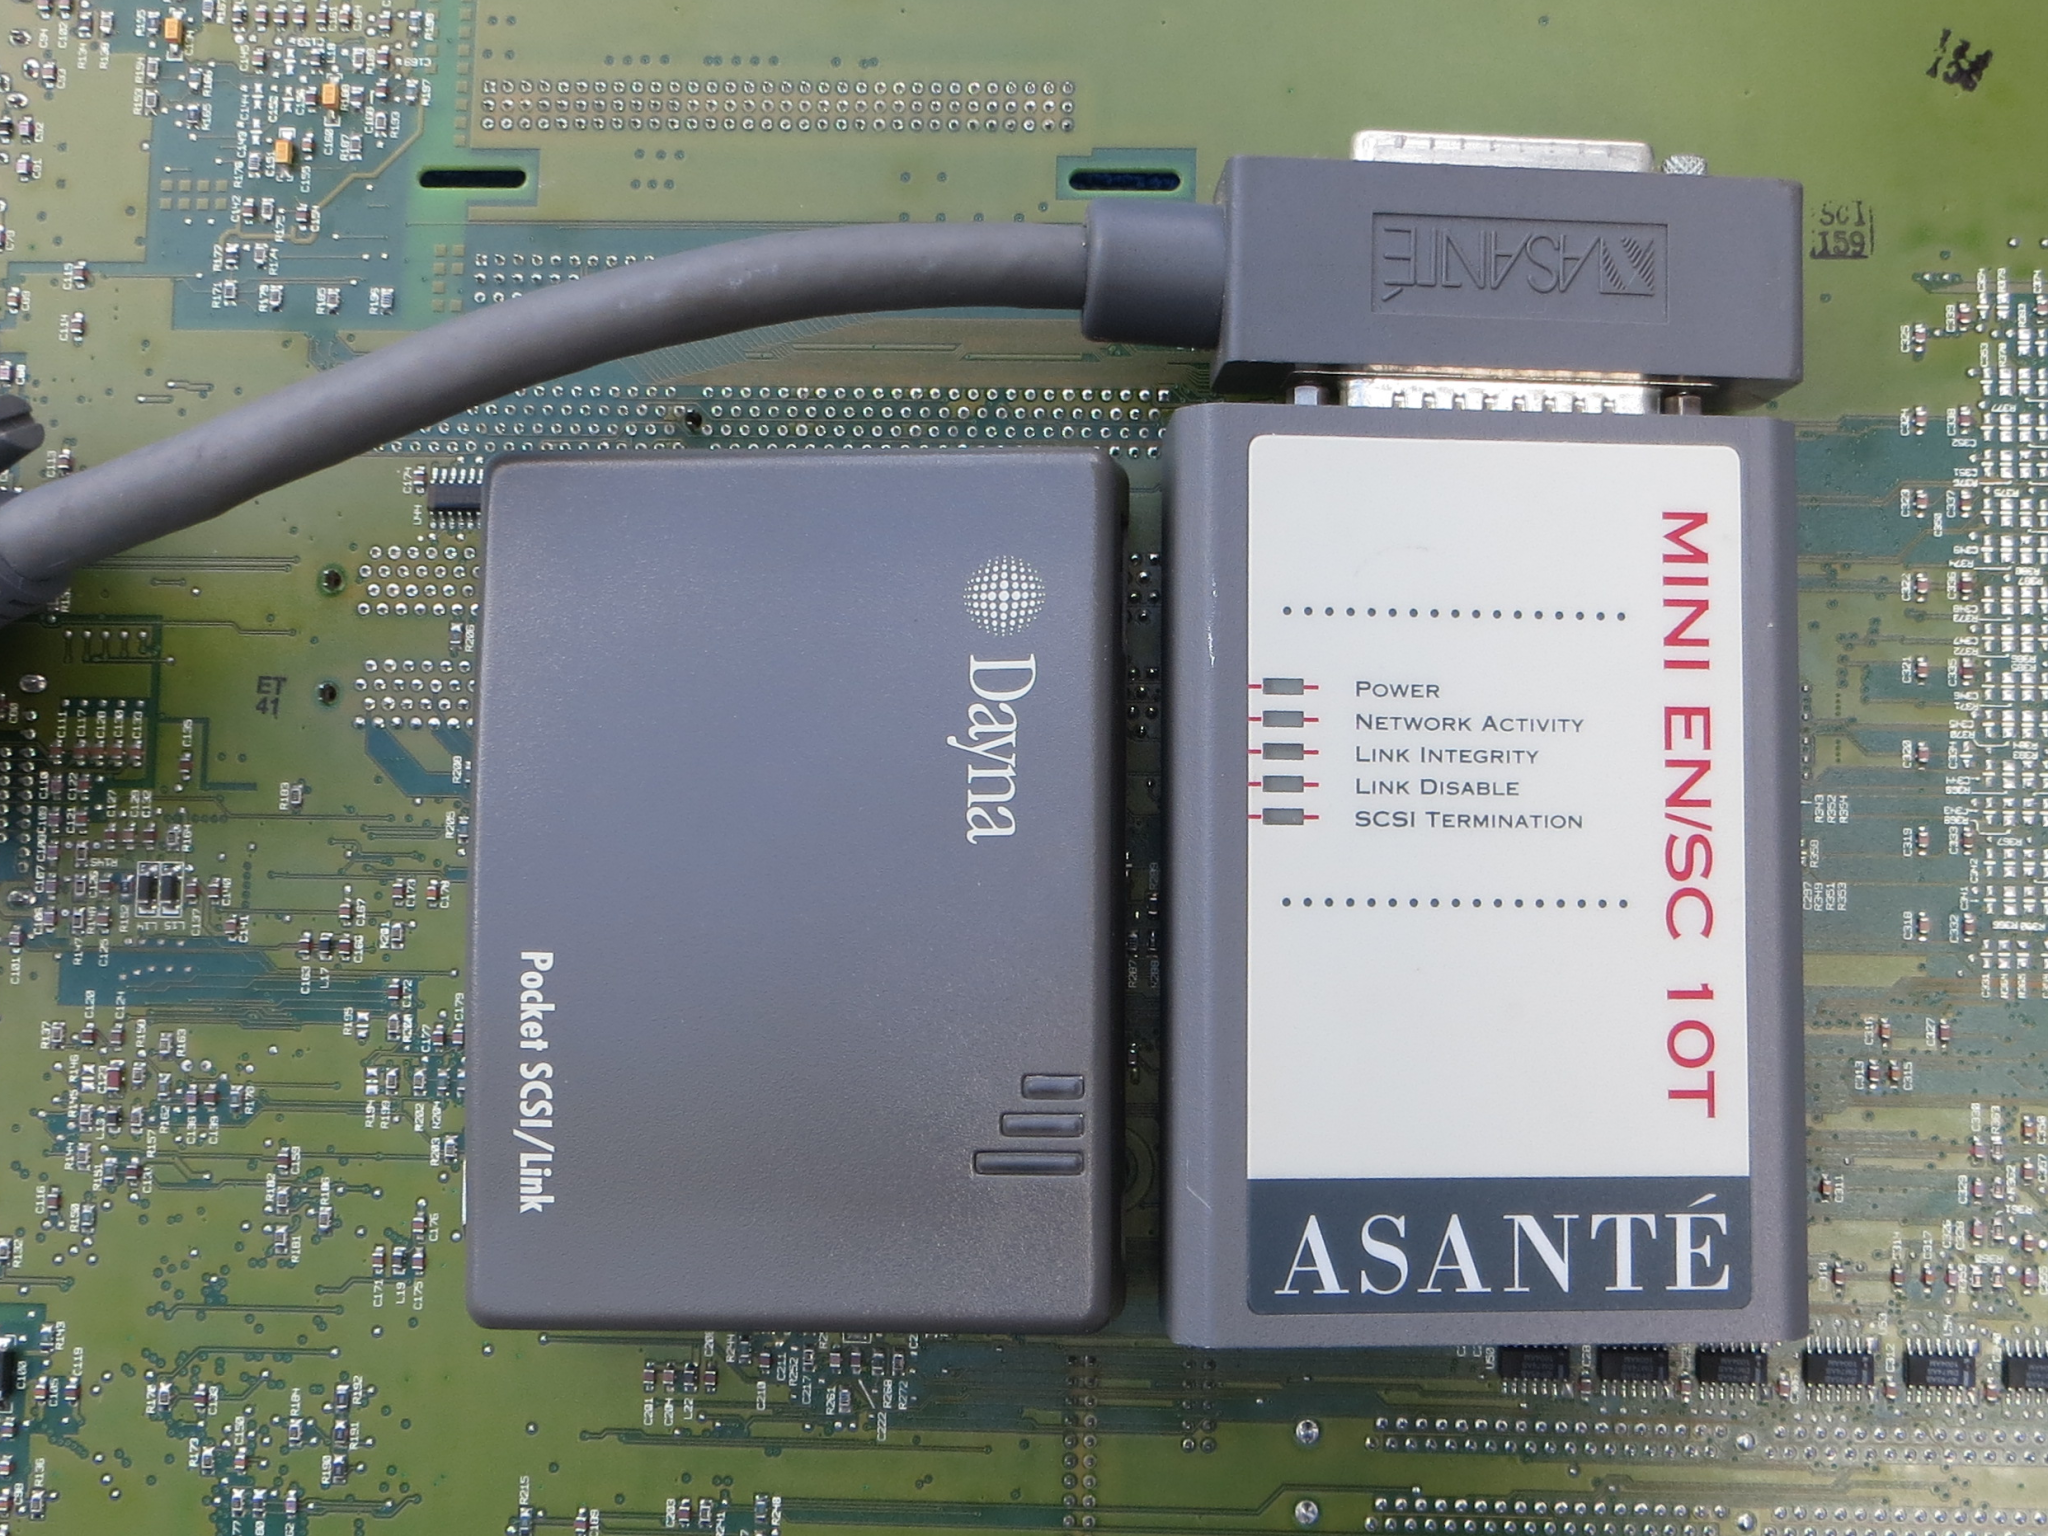 Size comparison with Asante Mini |
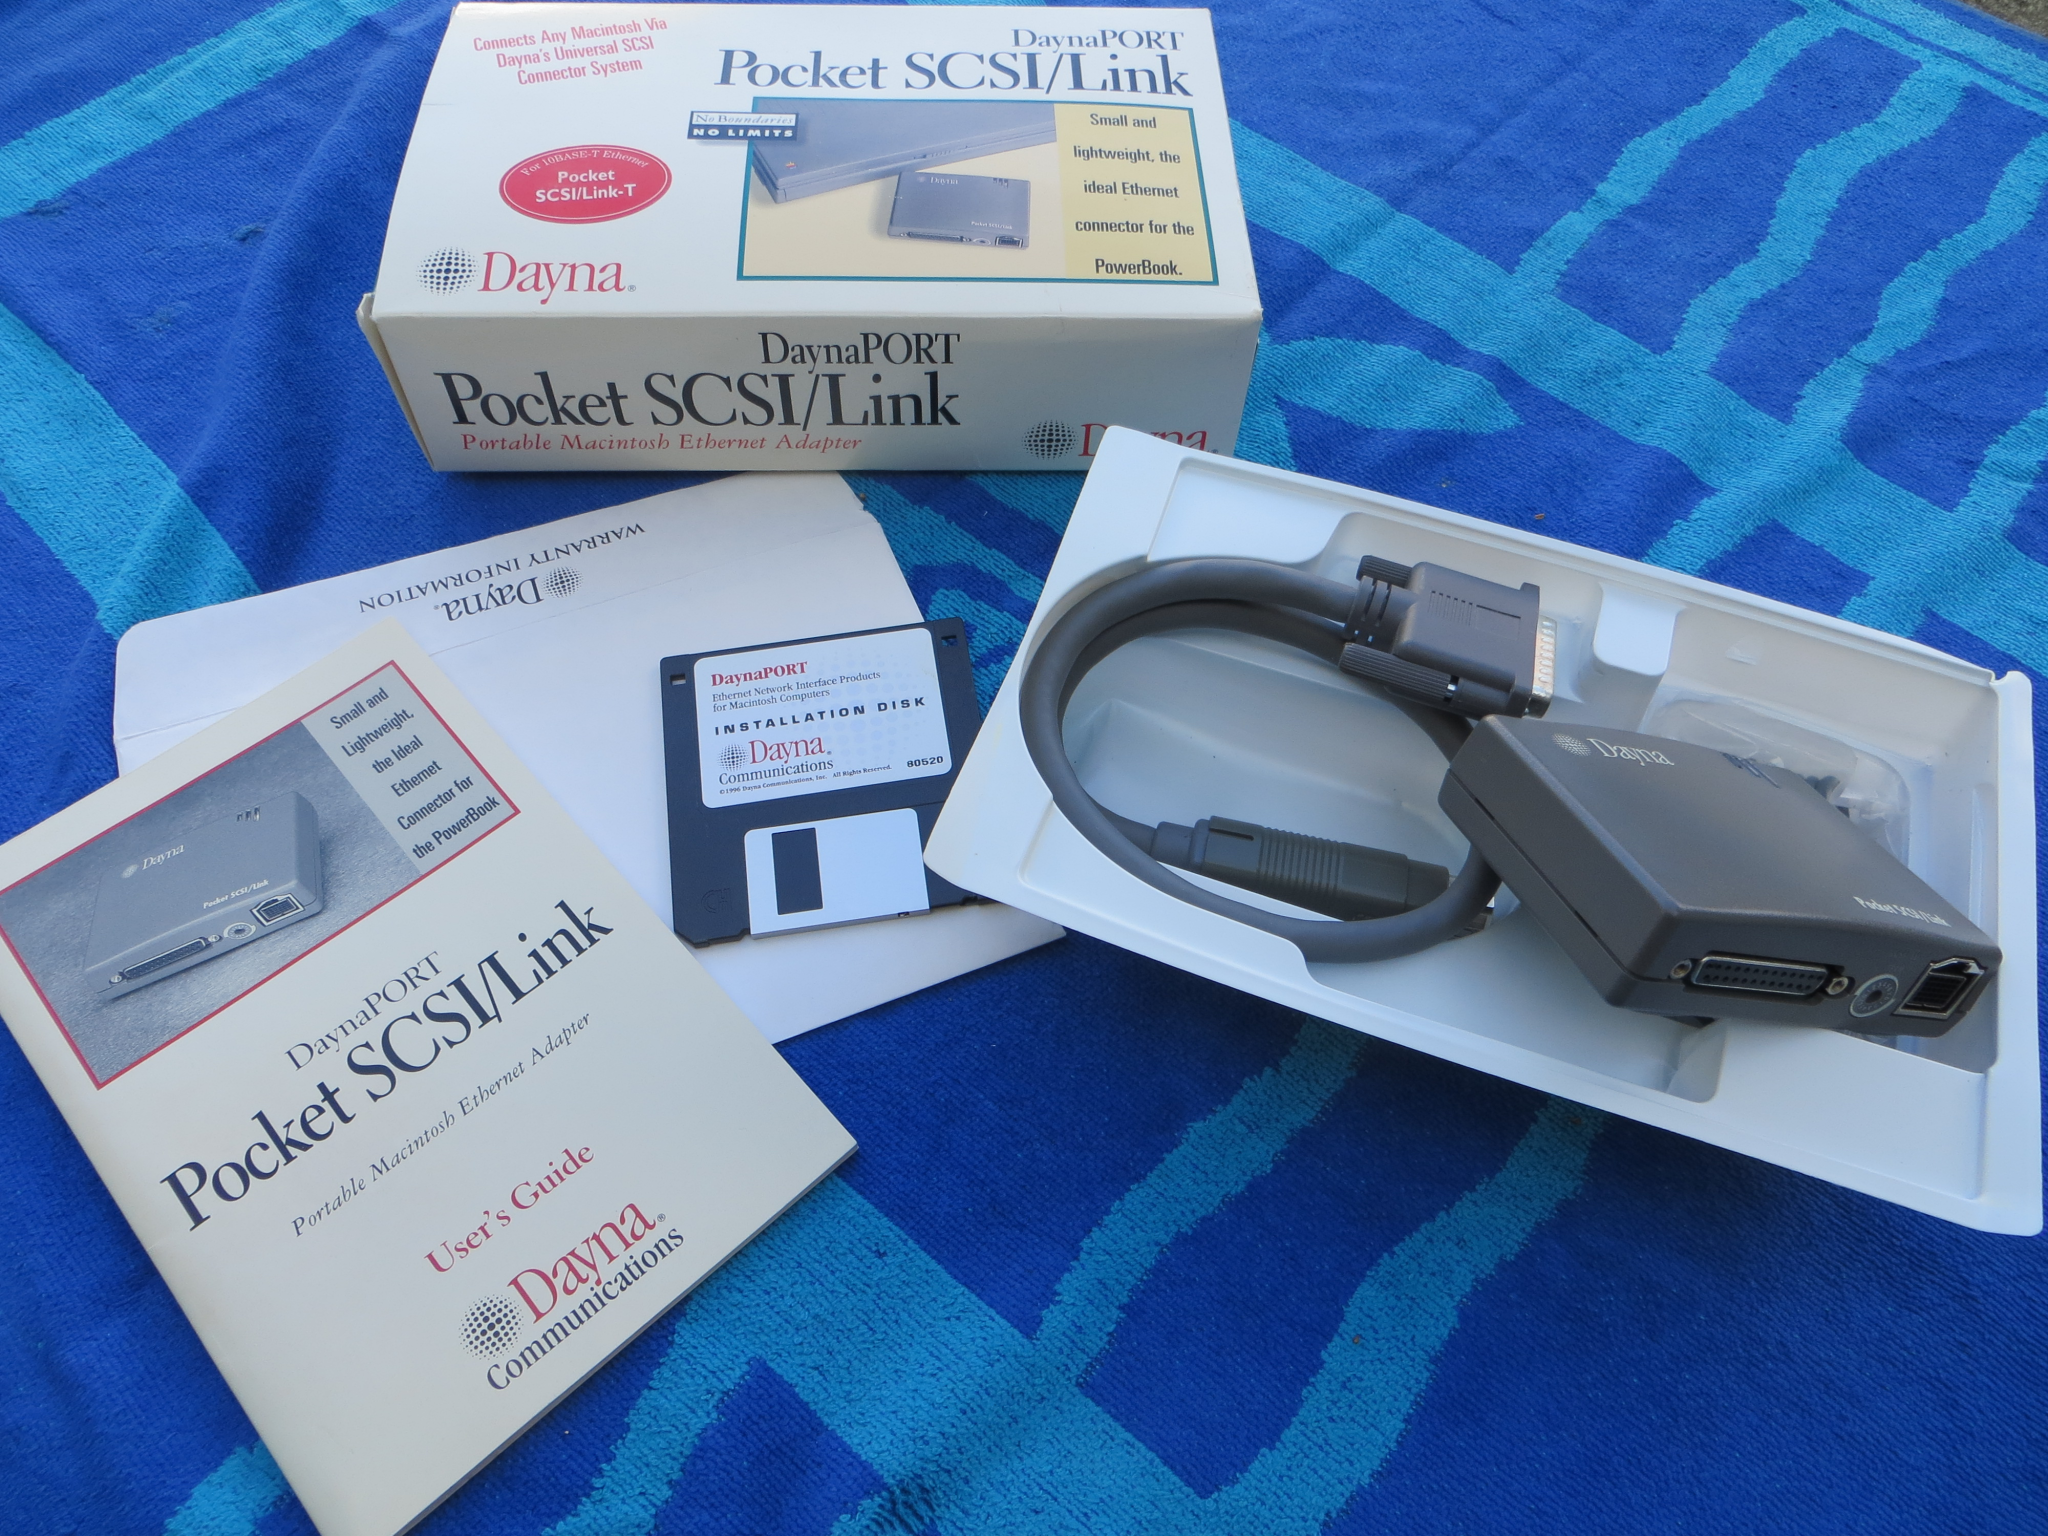 All kit in one image |
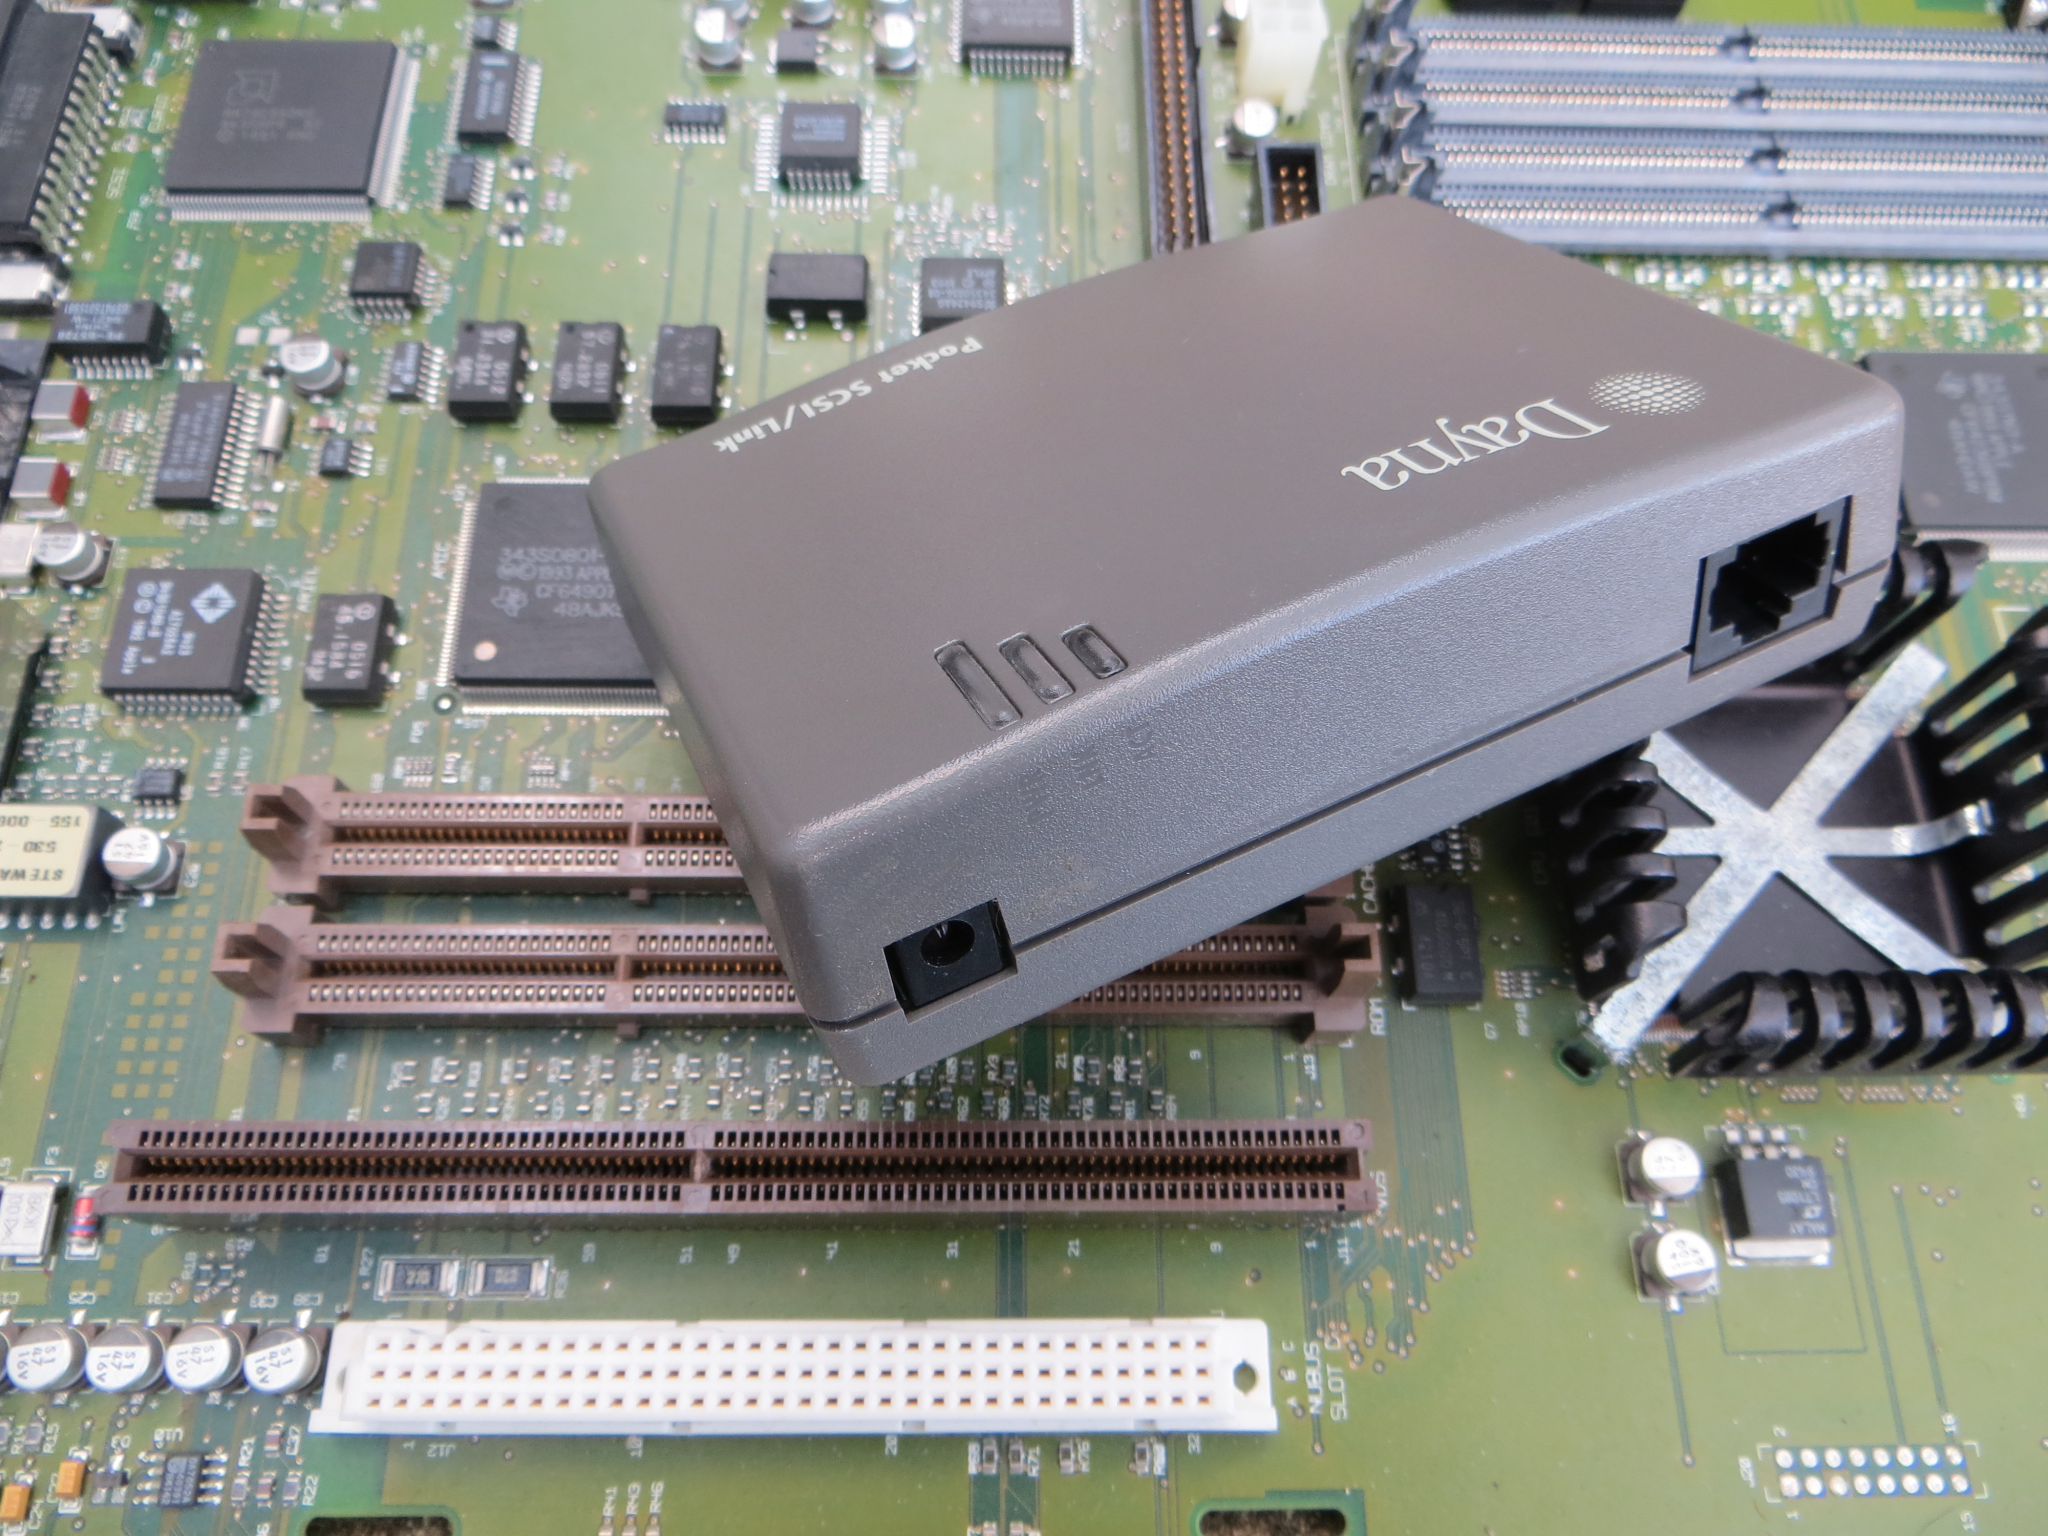 Power and Ethernet side |
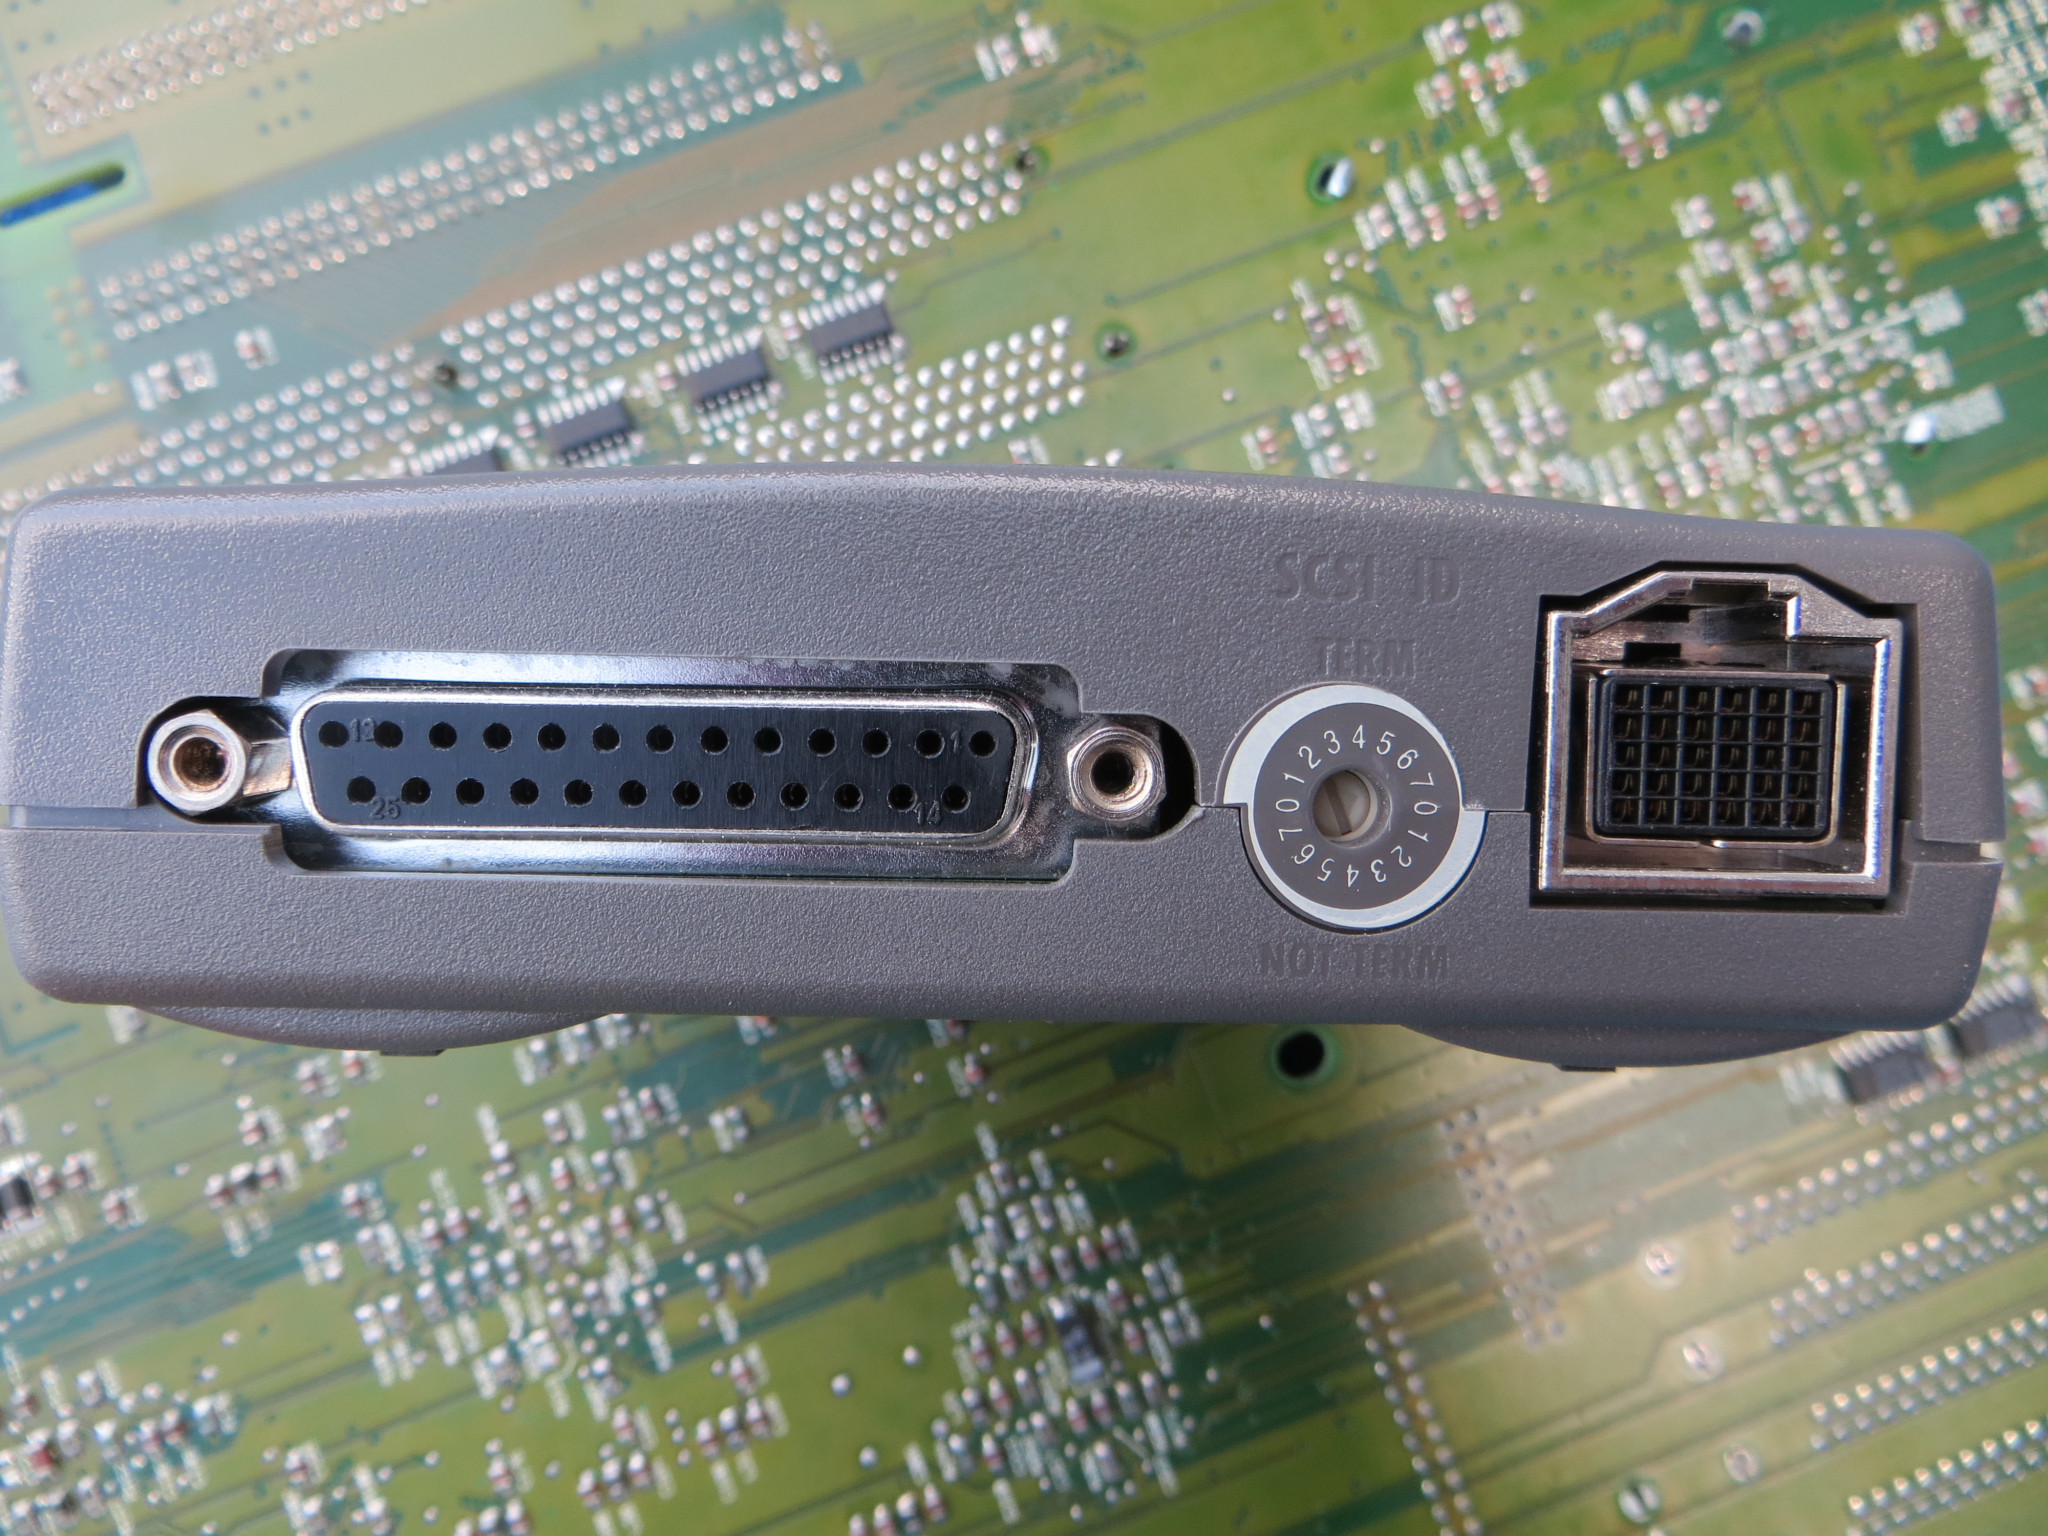 SCSI side (note termination text) |
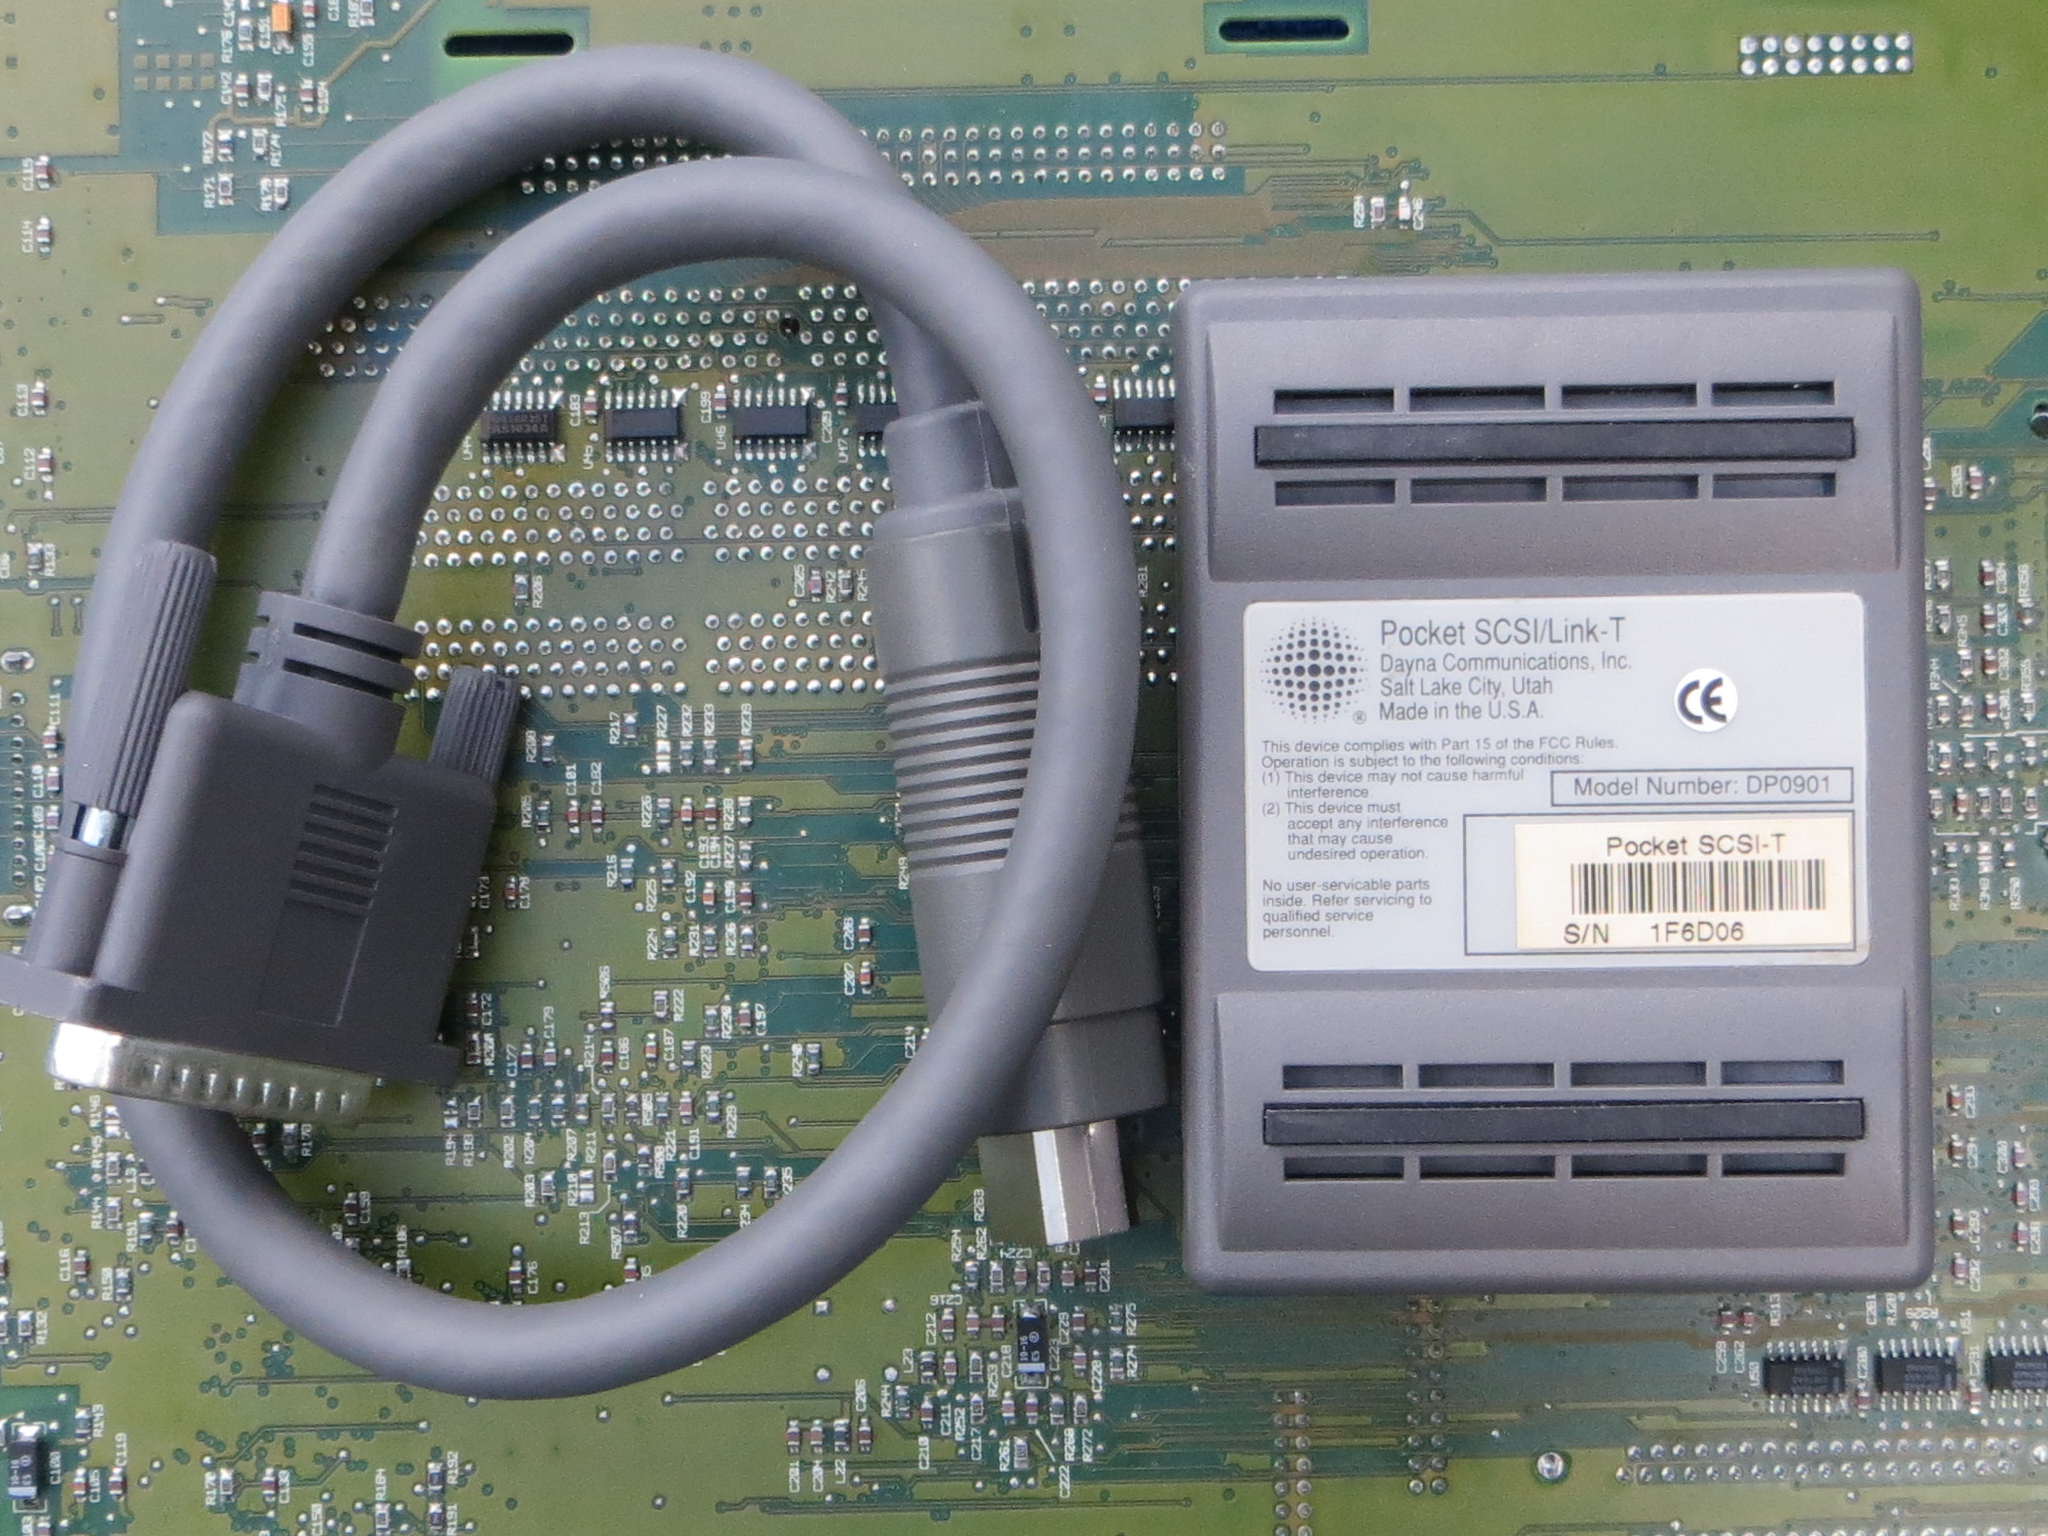 Back of unit |
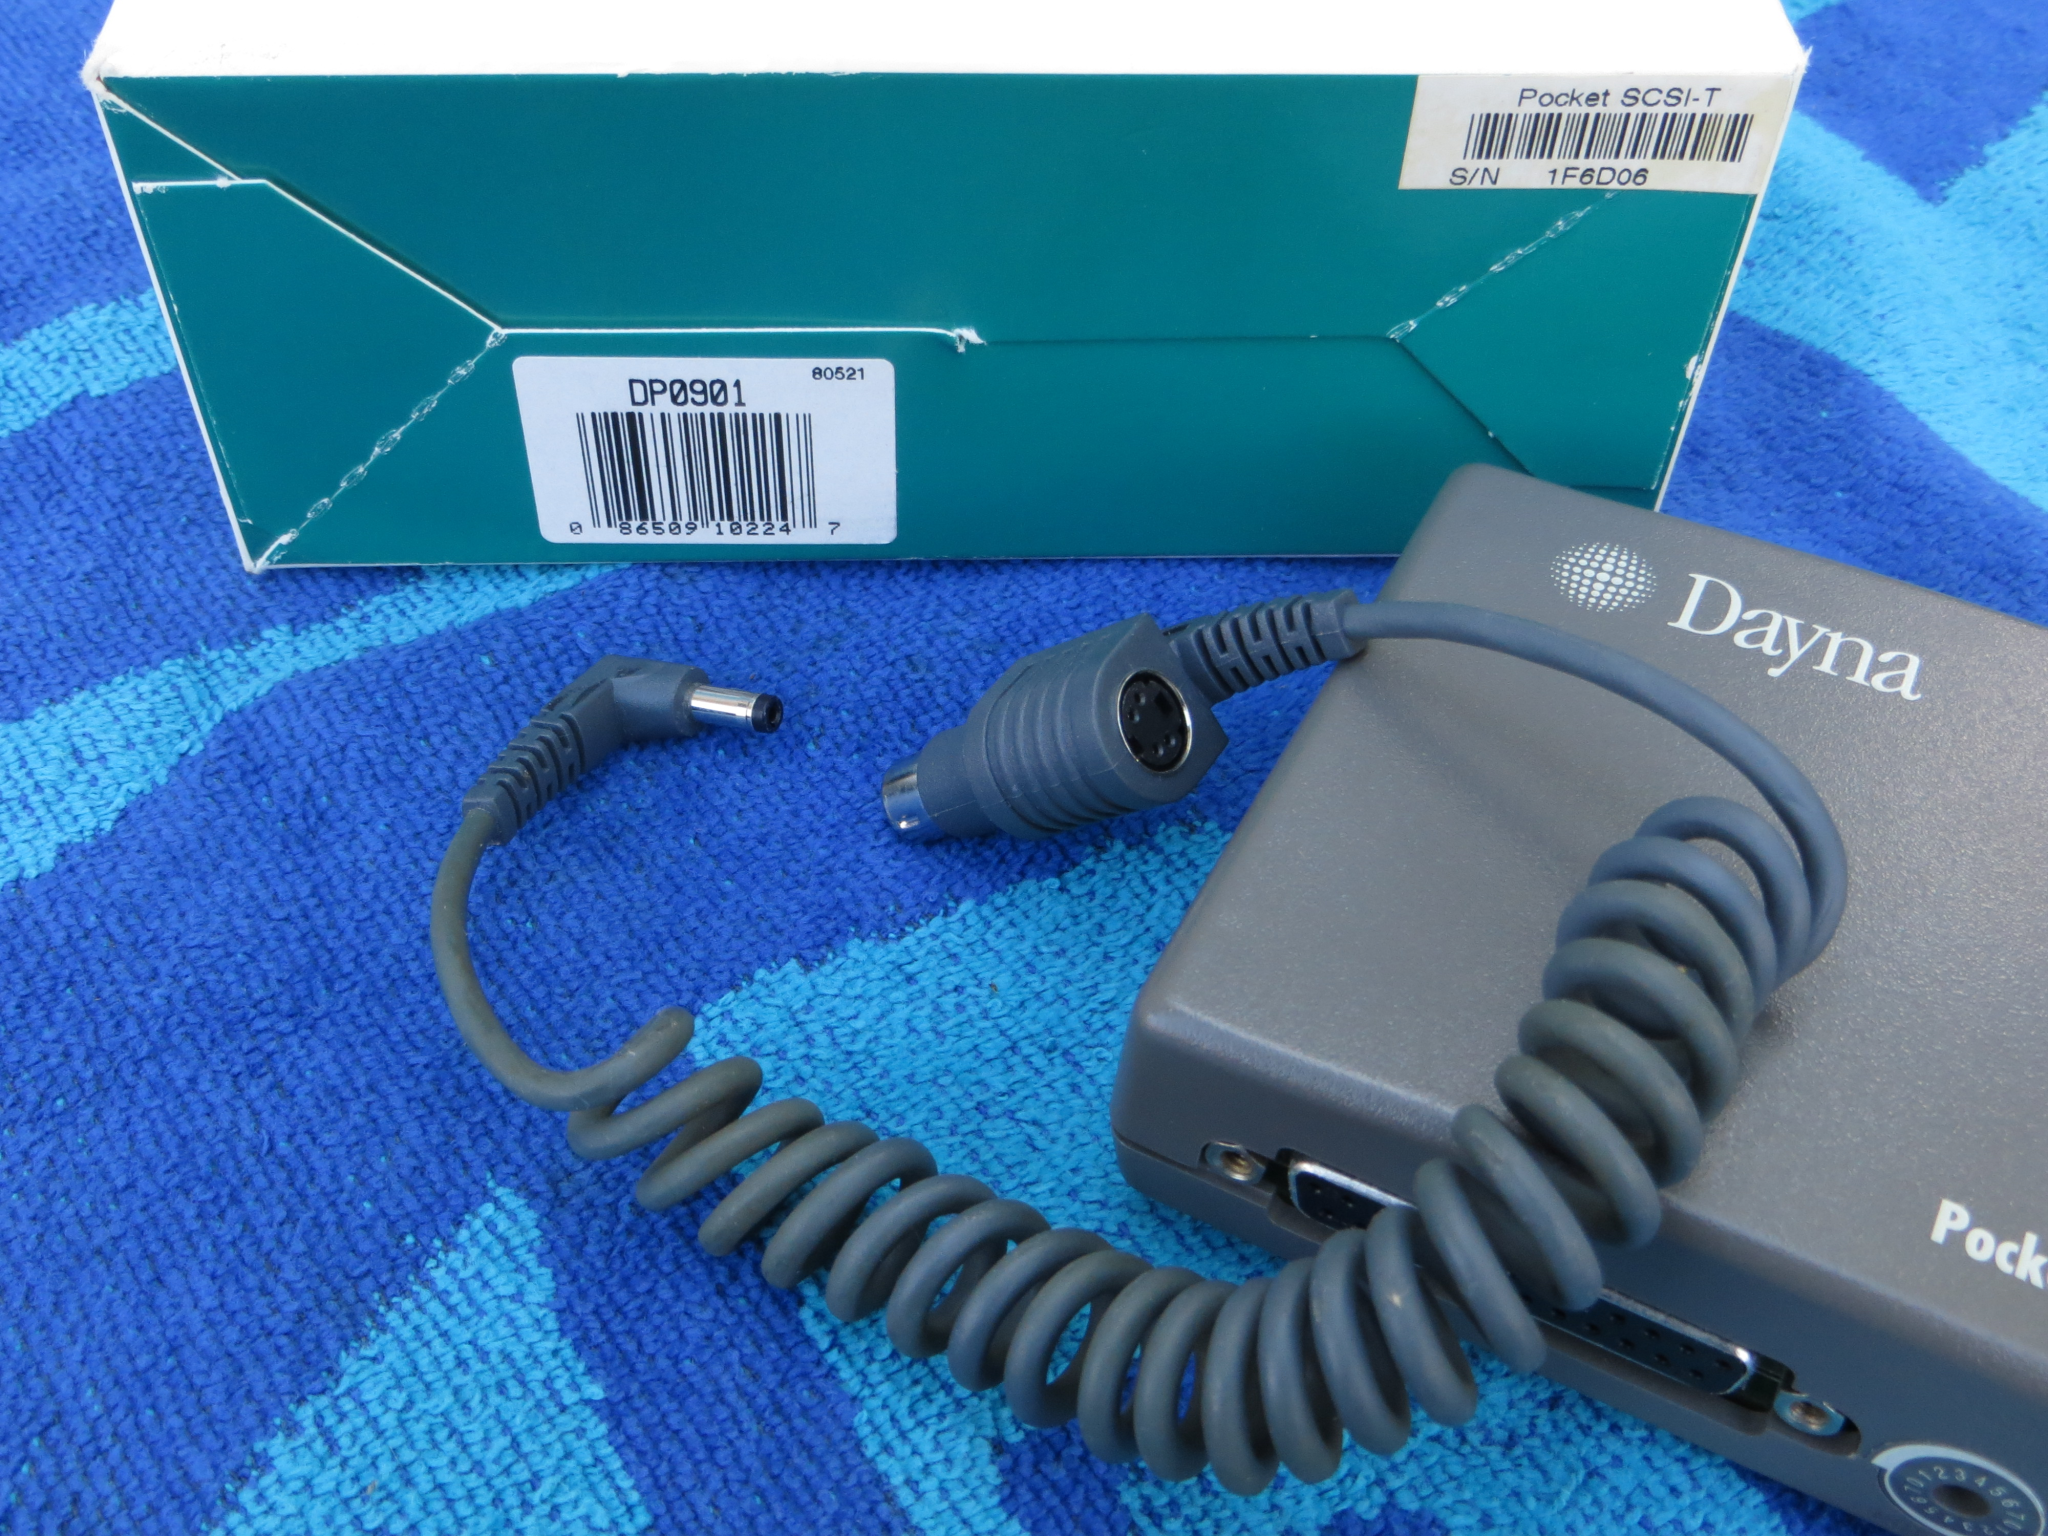 ADB vampire cable |
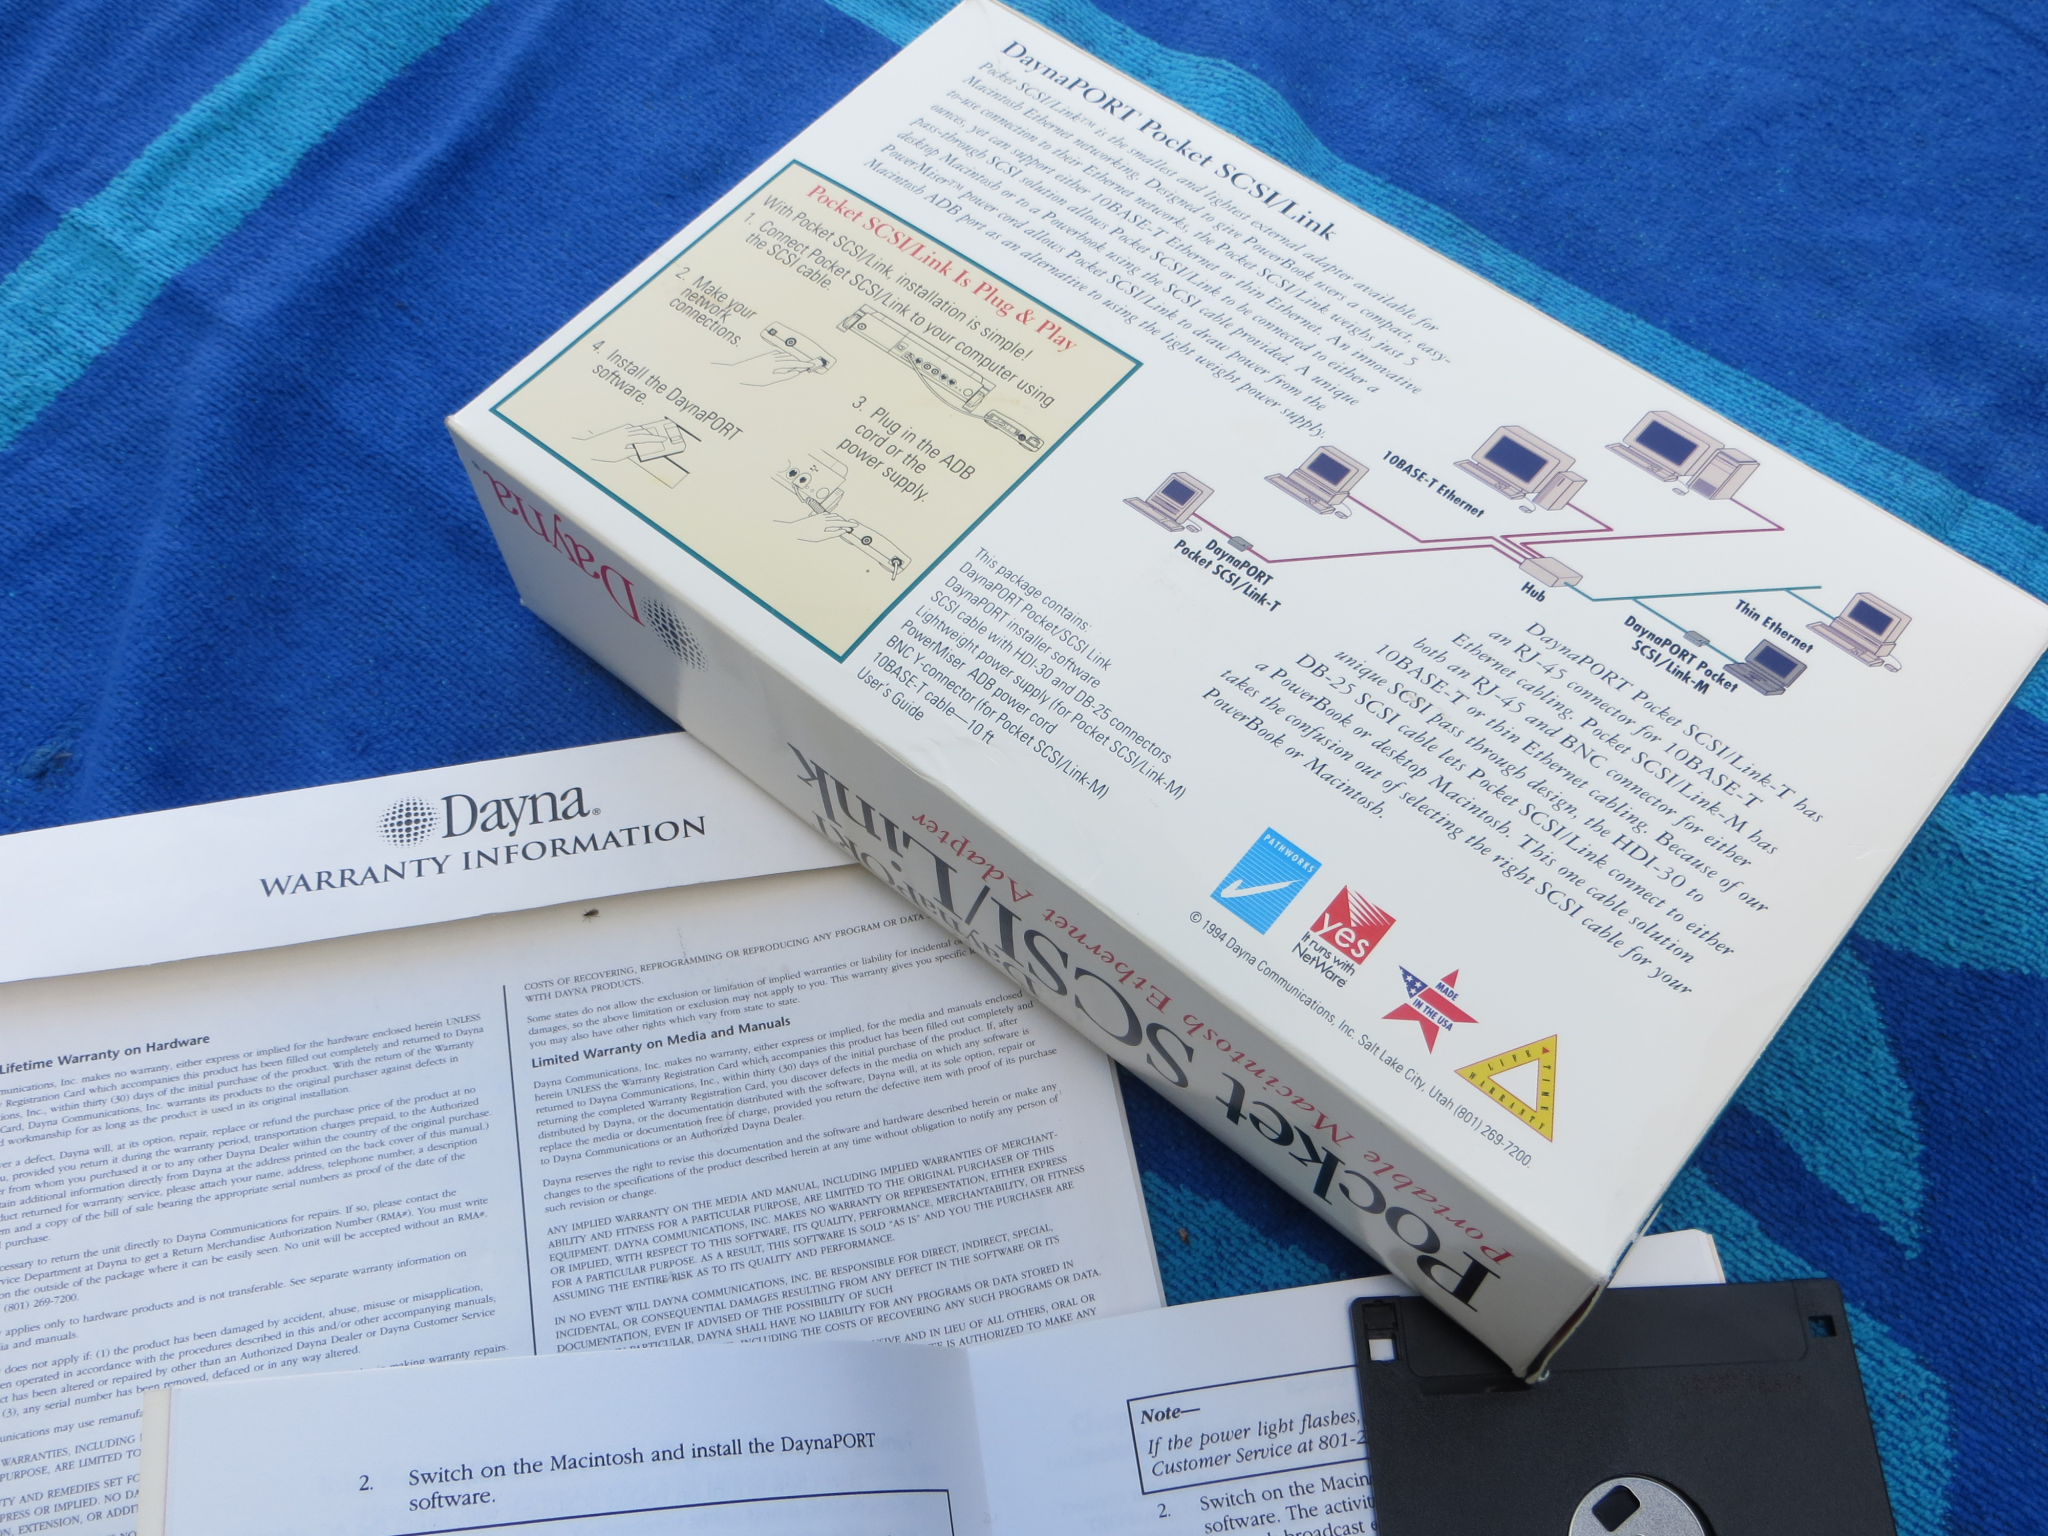 Reverse side of box |
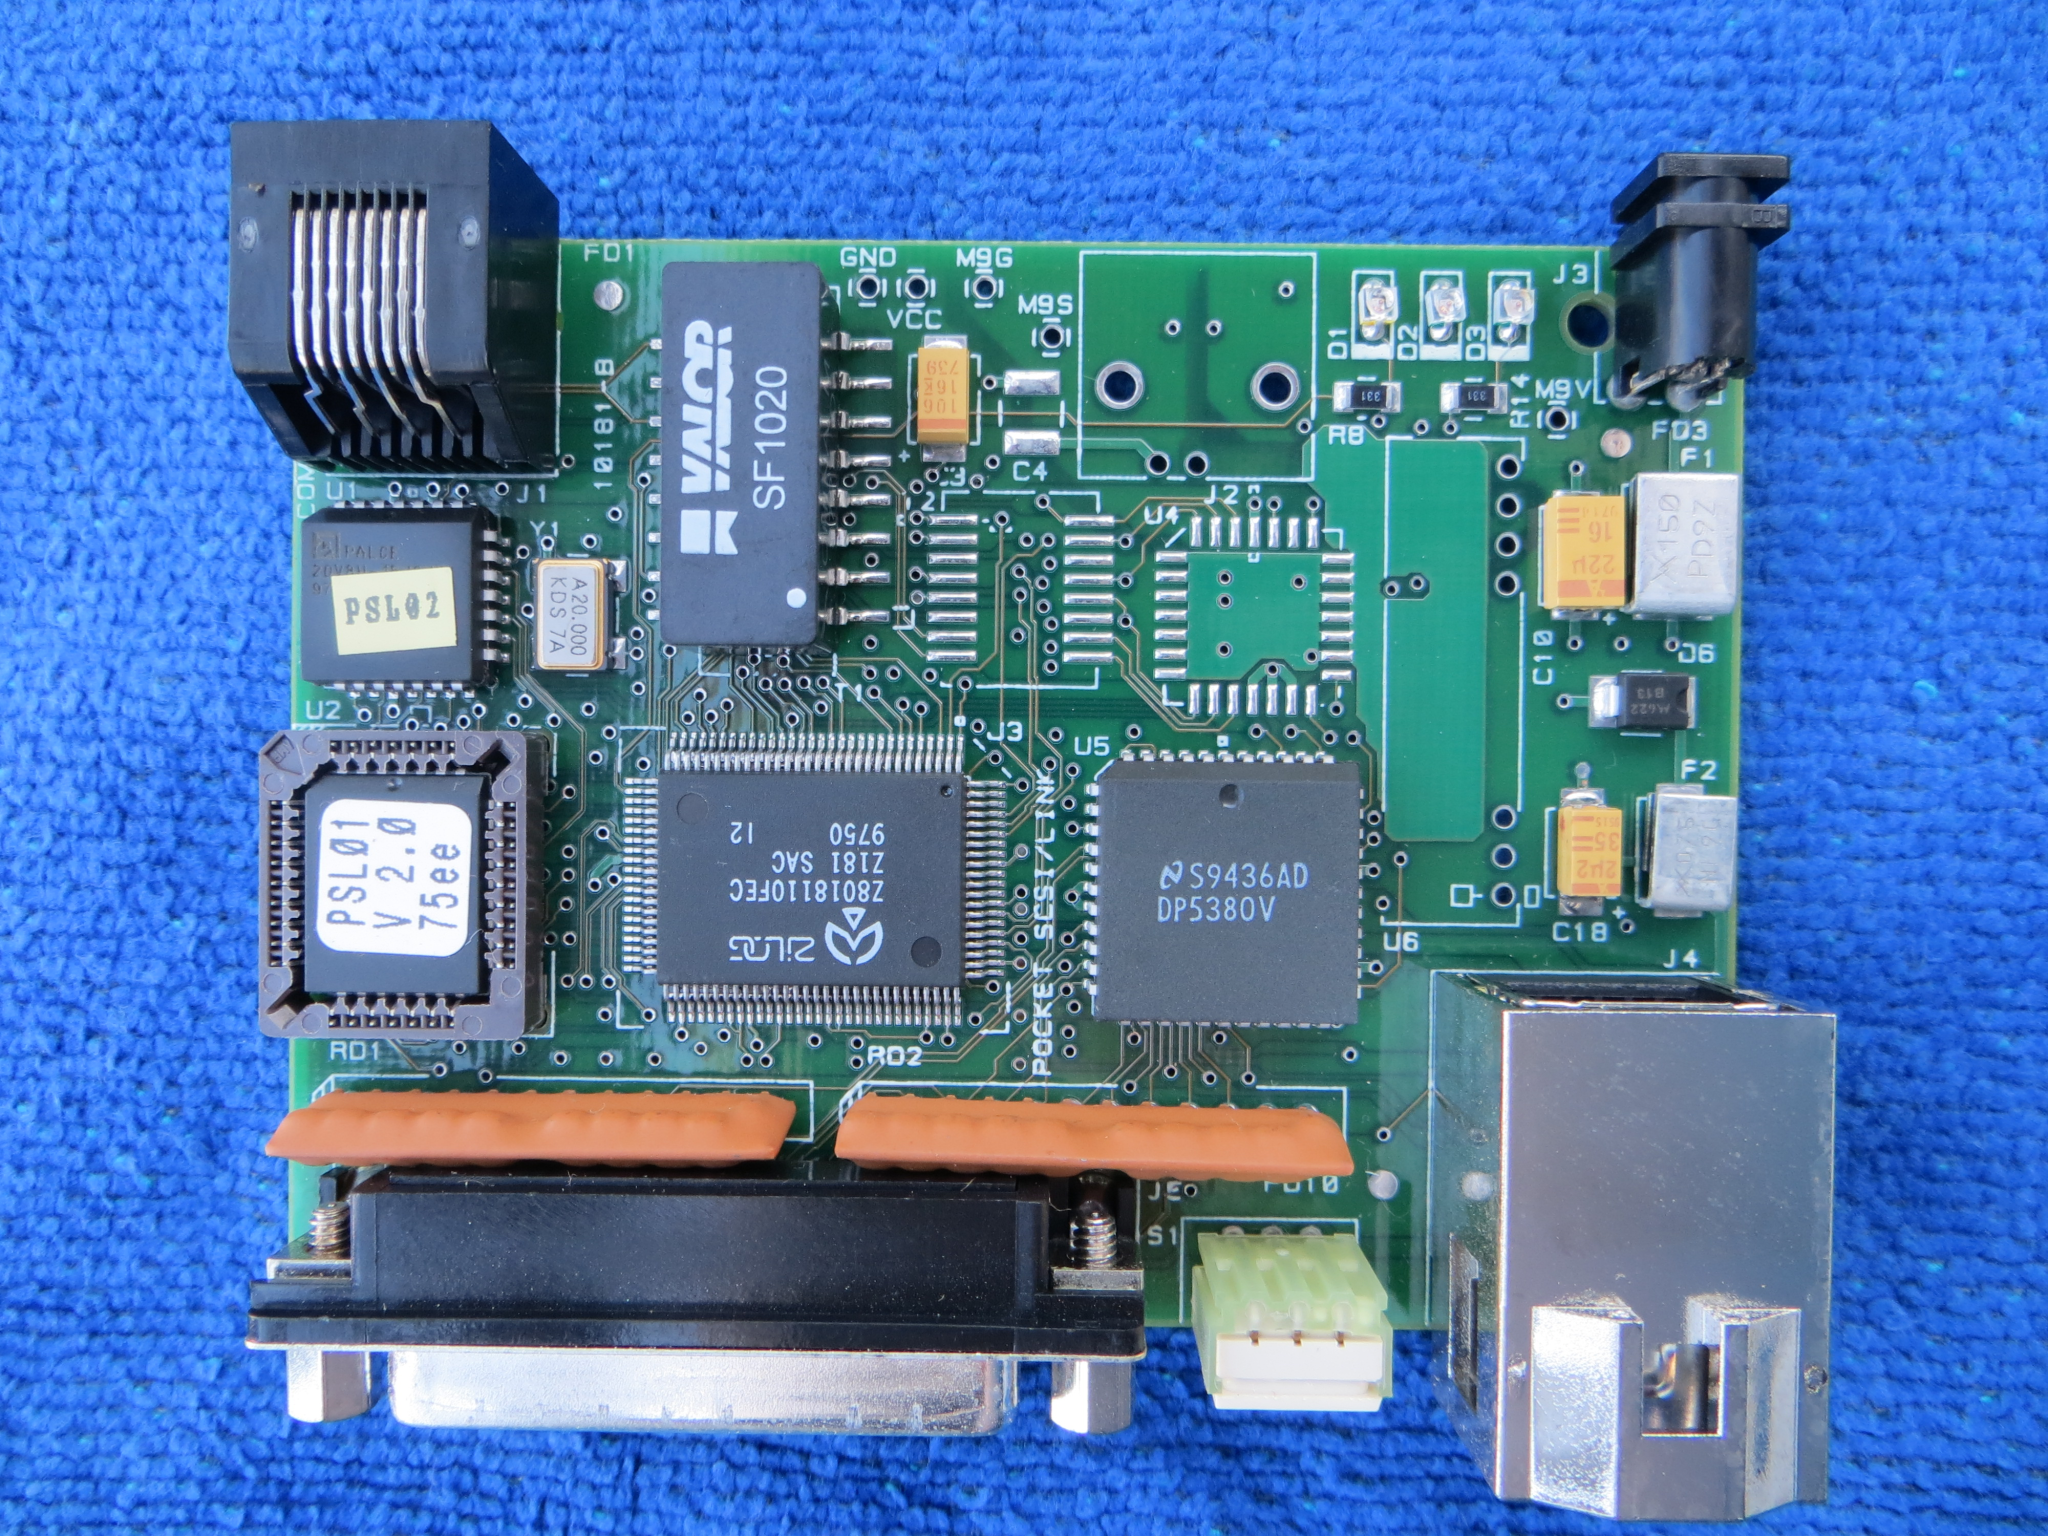 Top of board (another view) |
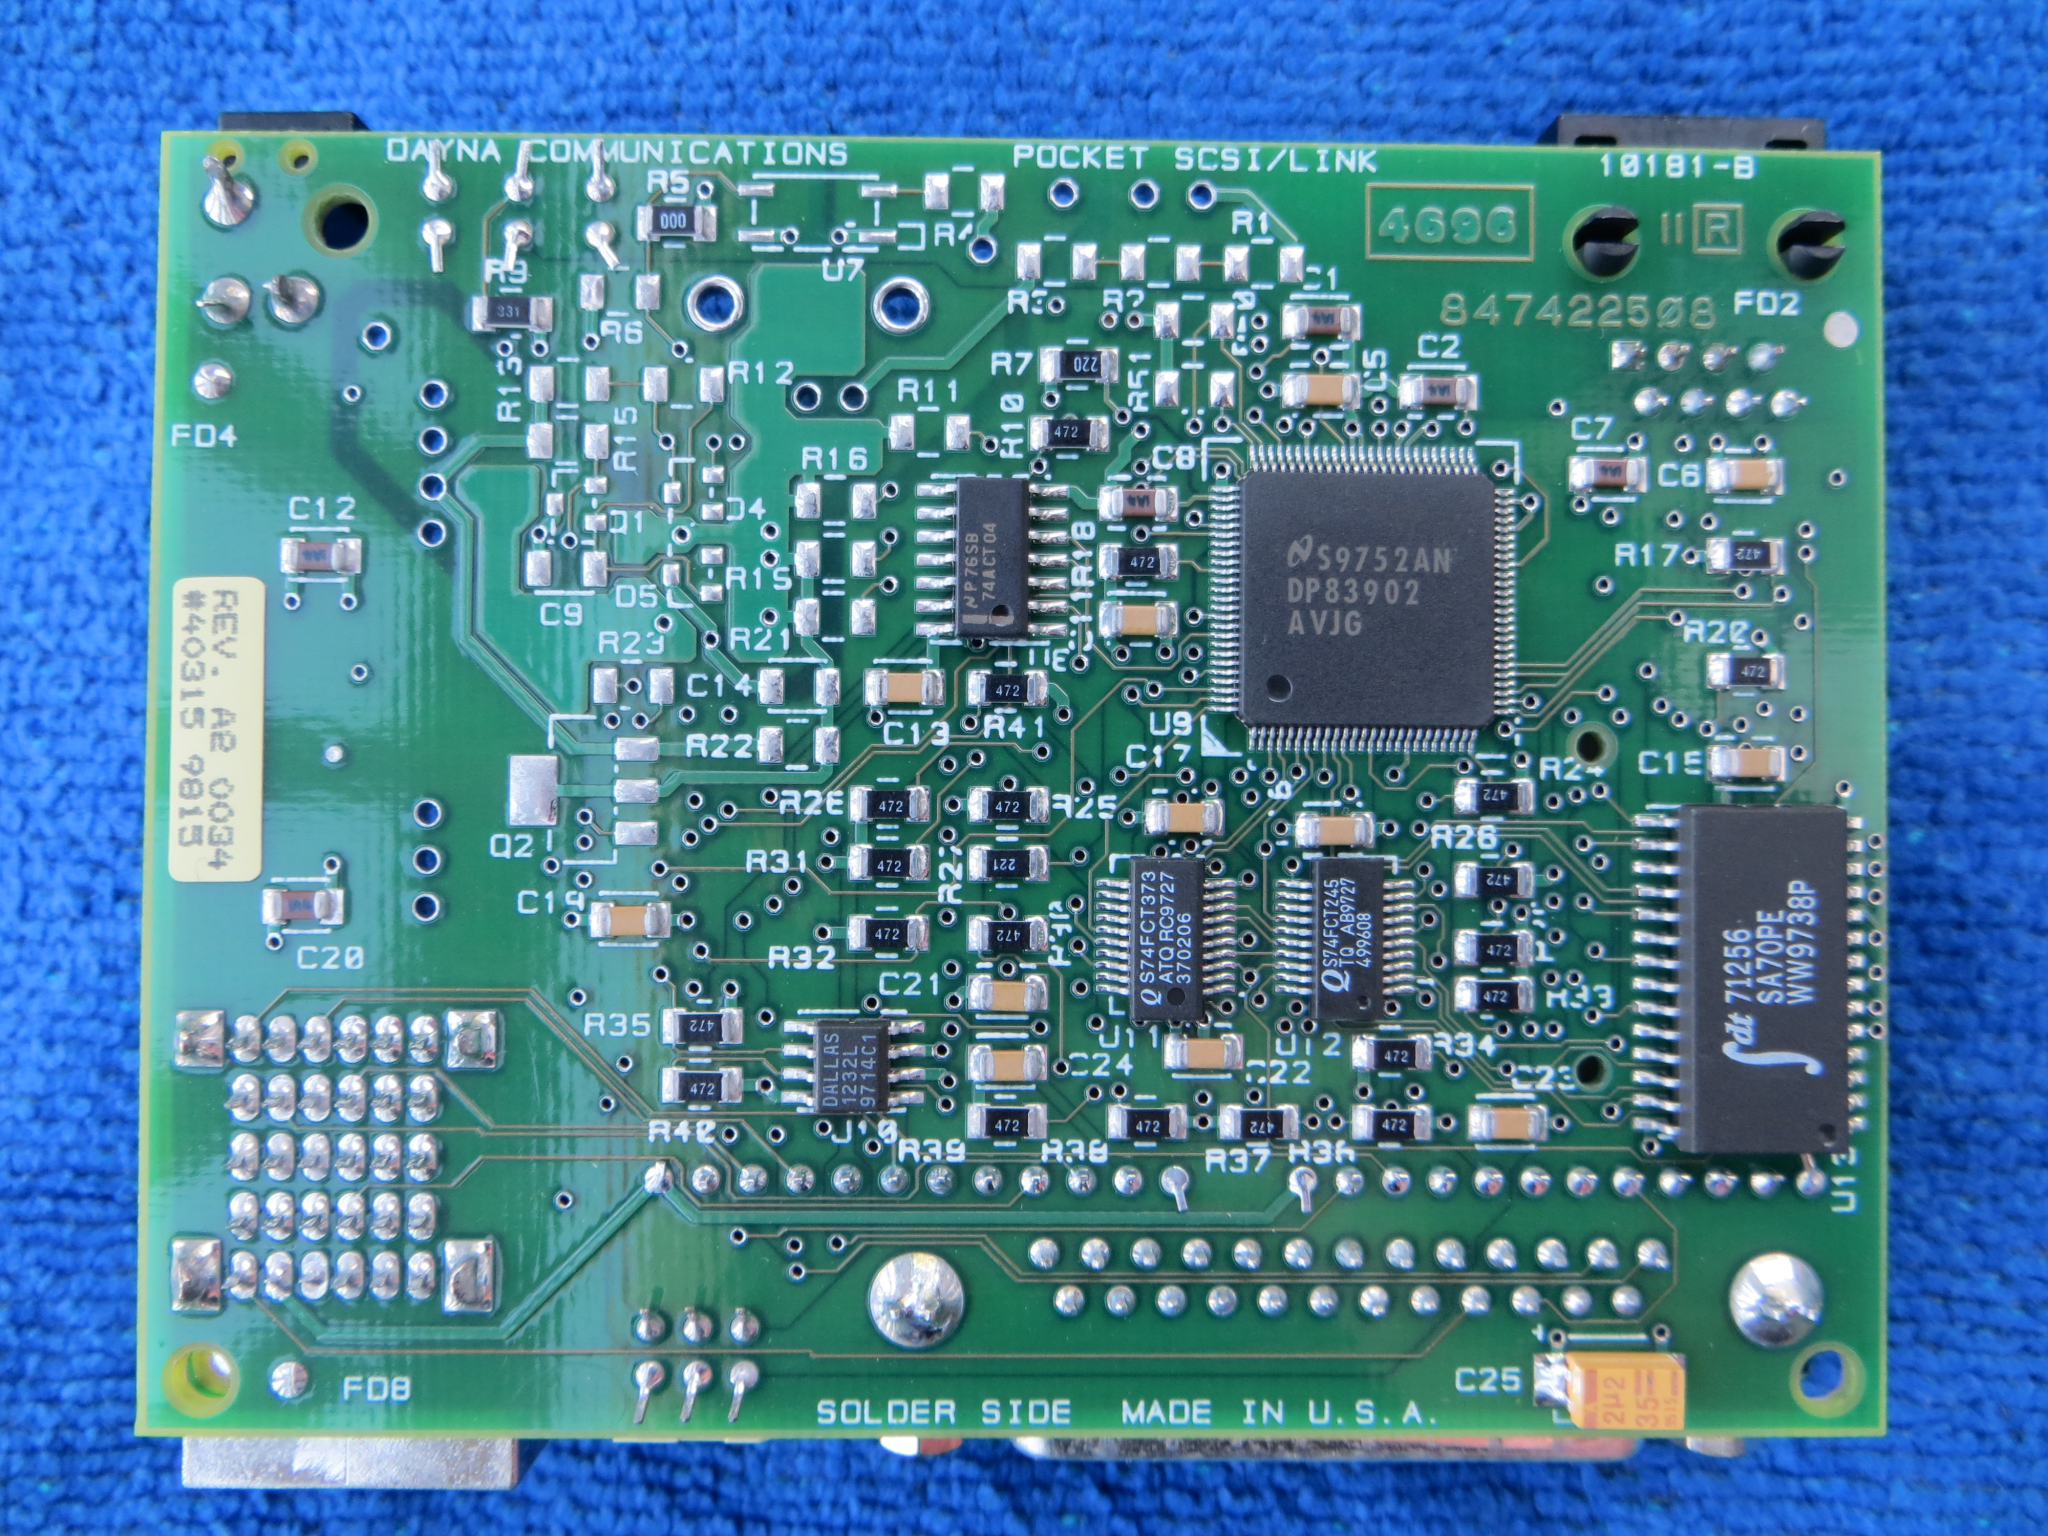 Bottom of board (zoomed out) |
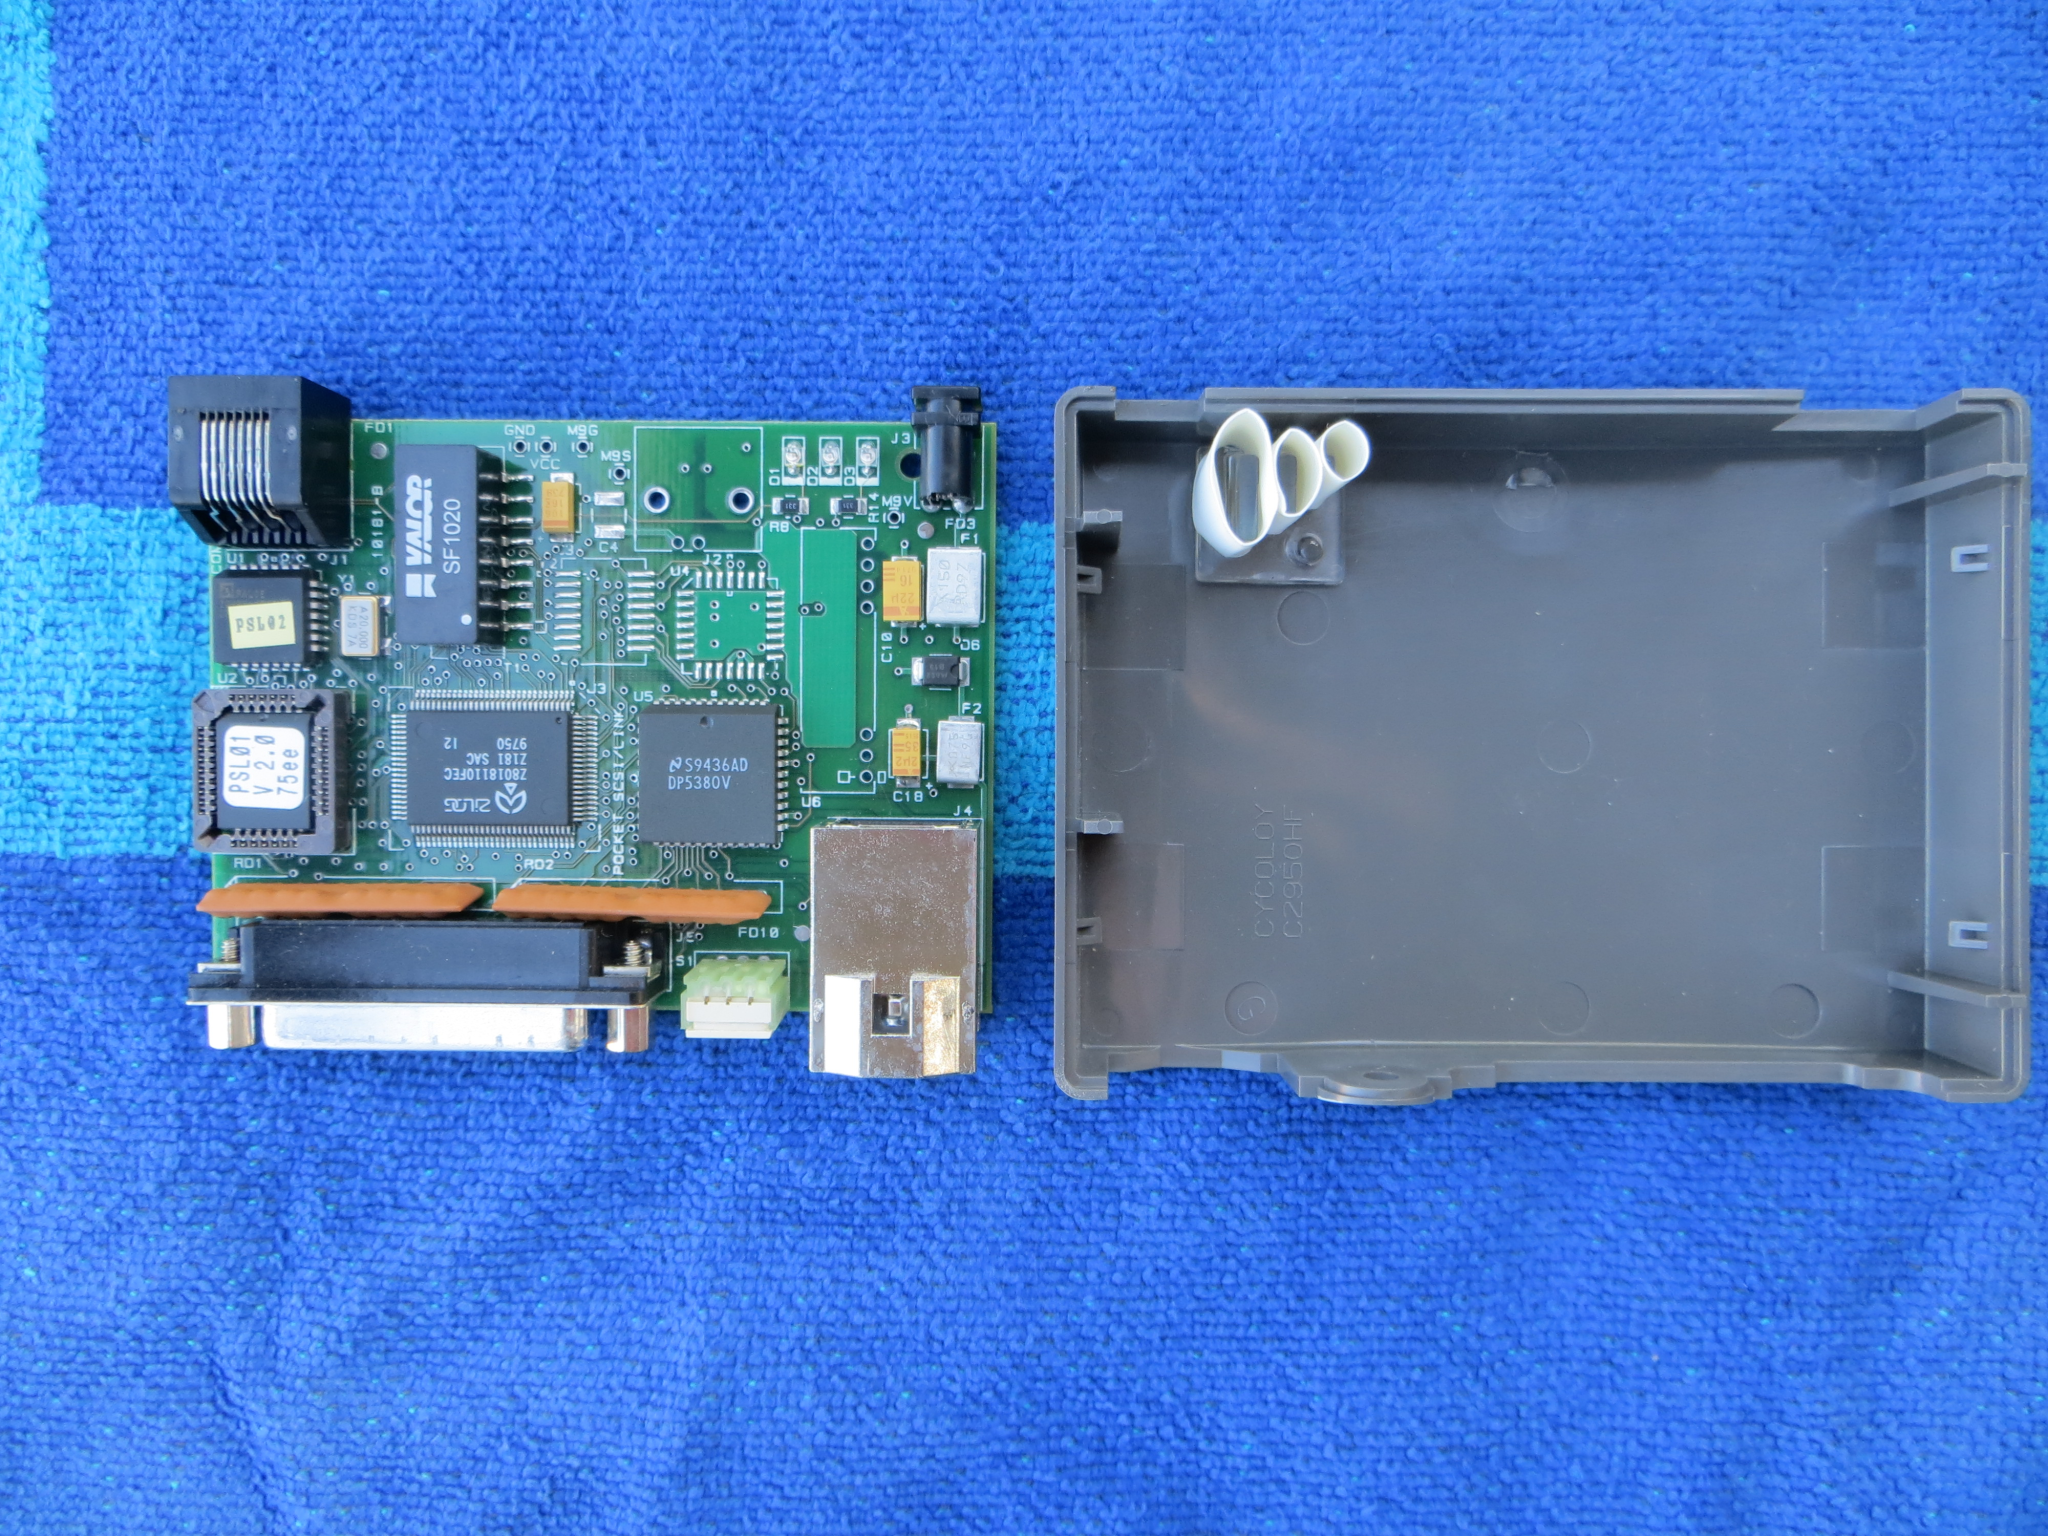
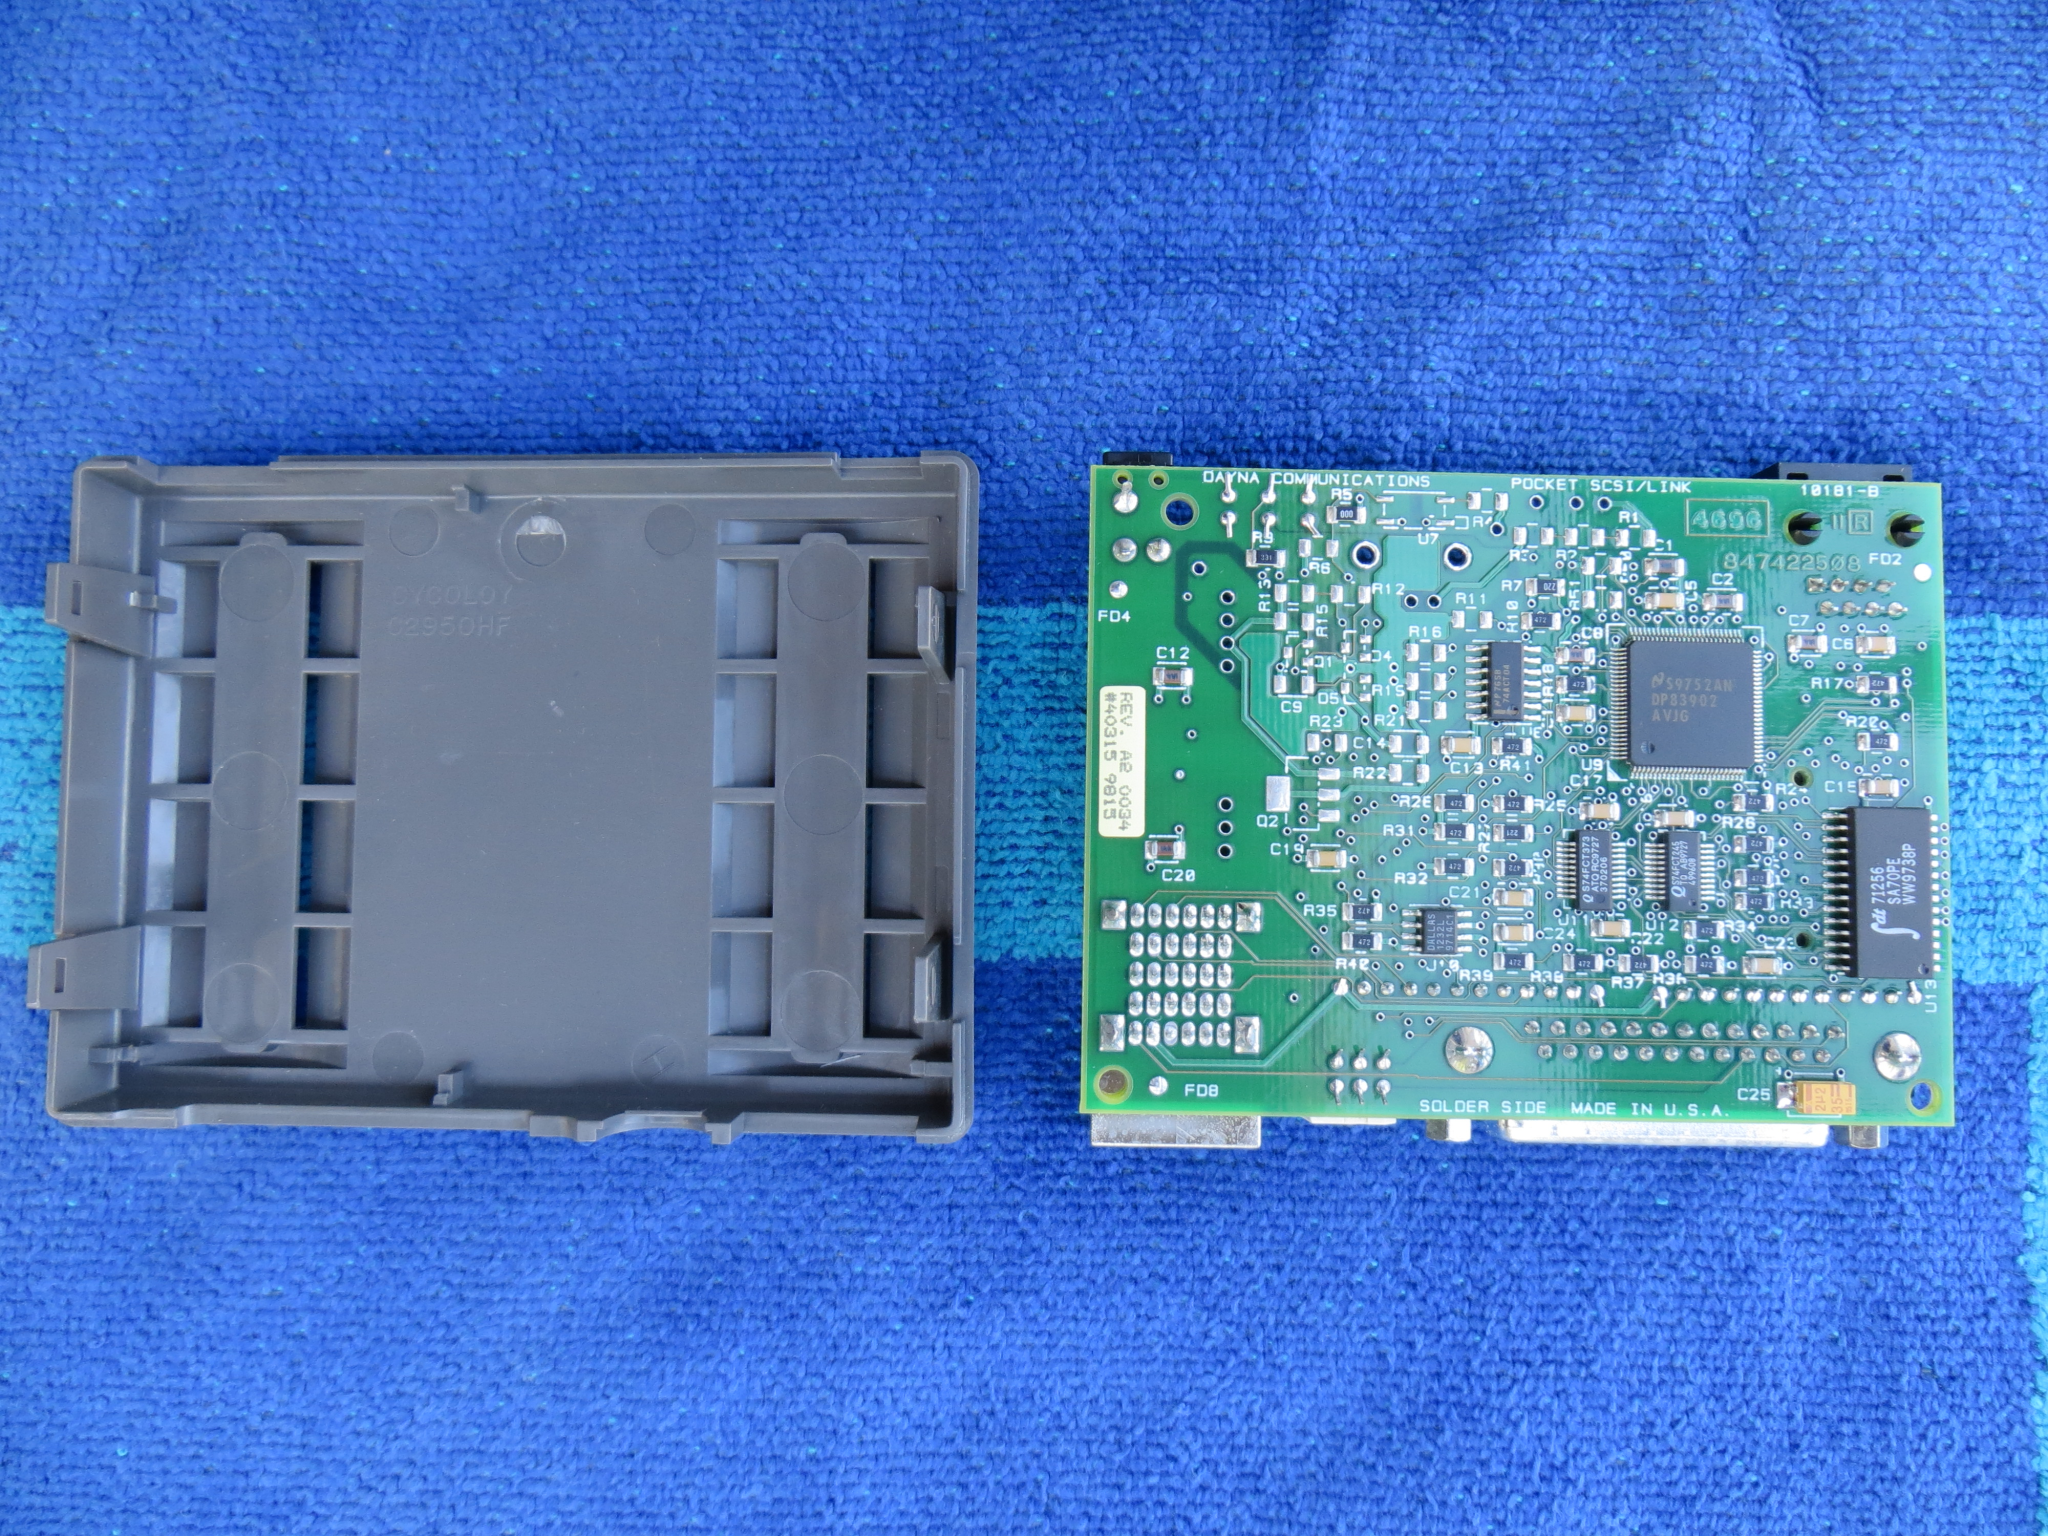
Inside, the device is rather unremarkable, with a Zilog Z80 CPU and a DP8309 family Ethernet controller on the back side. An AMD PAL20V8 chip near the Ethernet jack and a firmware chip in a socket rounds out the special chips, with a National Semiconductor DP5380 SCSI chip handling the SCSI workload. Unlike the Asante there are no electrolytic capacitors to worry about and the design seems cleaner. Taking it apart is easy: a small bladed screwdriver can be inserted in the four slots on the side of the case, pushing in to release the tabs and slowly pull it apart. Considering the age of these devices and the plastic that was typical of this era, expect it to break.
As for installation, all that has to be done is start the DaynaPORT driver disk and hope the Installer picks up the device. In System 6 it may have to be done with a Custom install: generally, you're better off installing the Network Software Installer package first before one of these SCSI devices. It says to install AppleTalk v58.0 in the Read-Me, whether this is different from a regular AppleTalk v58.0 Phase 2 driver isn't clear yet, but it should work with later AppleTalk versions. For the most part, there's two DynaPORT drivers in circulation, relevant for this product timeframe: version 7.5.3 and version 7.7.2. Later drivers for 10/100 devices and PCMCIA cards were different. In any case 7.7.2 will have a Read-Me file that says for version 7.7.1 but looking at the version of the Installer Script it says 7.7.2. | 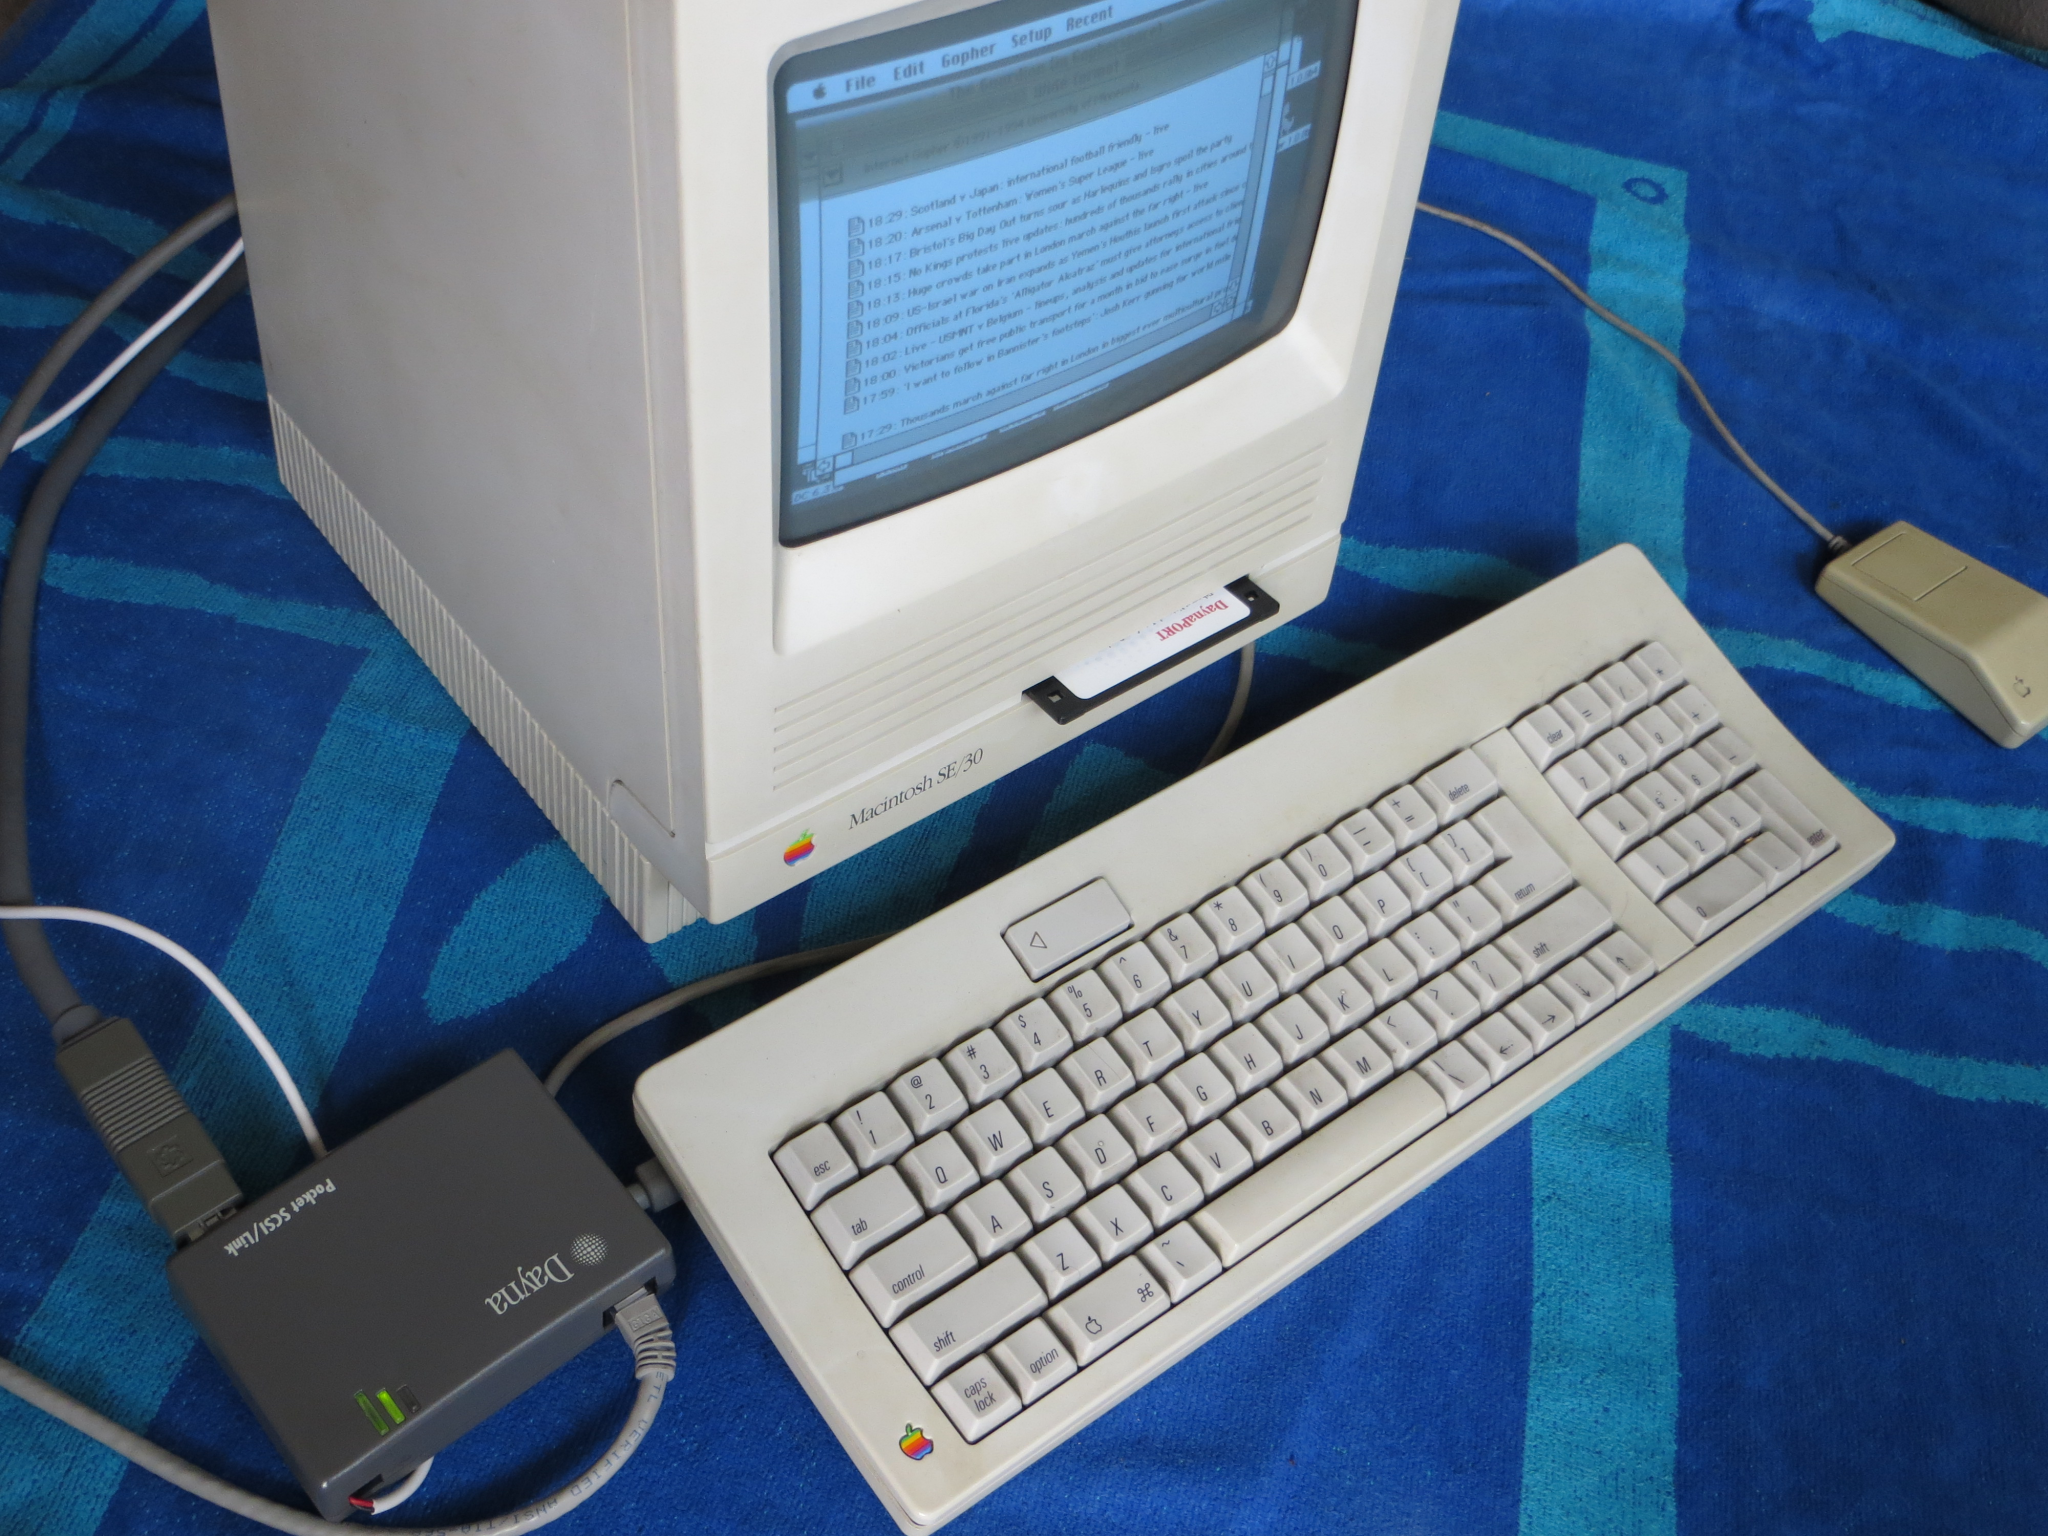 Dayna adapter demonstration |
Although 7.7.2 makes references to System 6, it seems to have the most problems. Hanging on the splash screen after pressing the Continue button, failing to detect the device, or a System bomb after the Welcome to Macintosh boot message with a bus error were typical System 6 experiences. In System 7.1 with a IIci, the busy cursor (spinning watch) would cycle endlessly after hitting the Continue button after the splash screen, on a SE/30 it would lock up with a gray screen, get a bus error or otherwise freeze up if it didn't detect the device. Generally the best one to use is 7.5.3. The difference as far as this subsection is concerned is that driver package 7.5.3 installs SCSI/Link v1.2.2, whereas the later package 7.7.2 has v1.2.5 and was probably meant for Dayna's later offerings with later operating systems which, aside from PowerBooks, don't really need this adapter device, and if they did, the PCMCIA offerings are probably better. The other difference is that 7.5.3 actually worked. Expect to use a Custom install to manually install the SCSI/Link driver. If it can't detect it, other NICs may have to be removed, particularly if they're the same brand as Dayna. After installation, go to the Network control pane or panel and choose EtherTalk Alternative. As far as TCP is concerned, the selection for Ethernet Built-In should work just fine. It may also be called Ethernet Alternate.
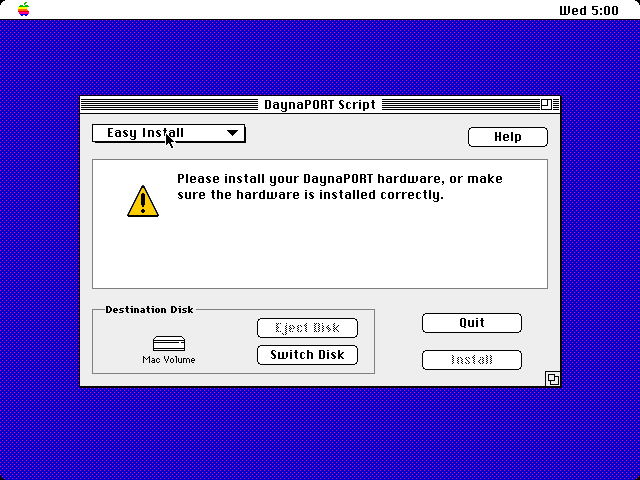 Detection error: use manual install |
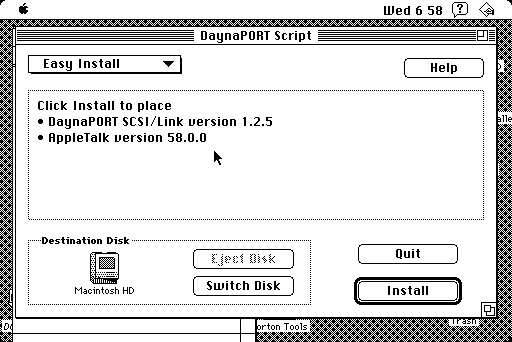 Correctly detected |
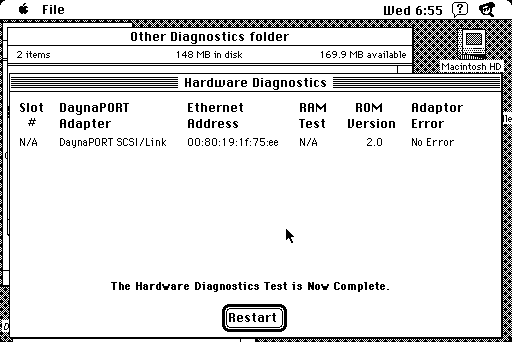 Hardware diagnostics program |
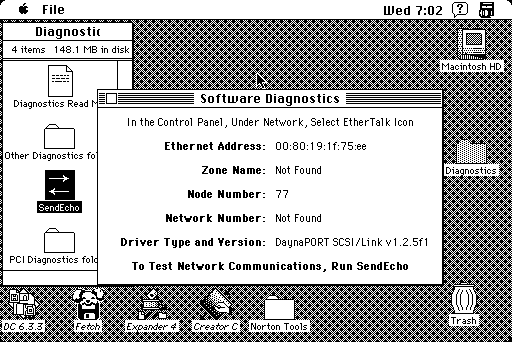 Software diagnostics utility |
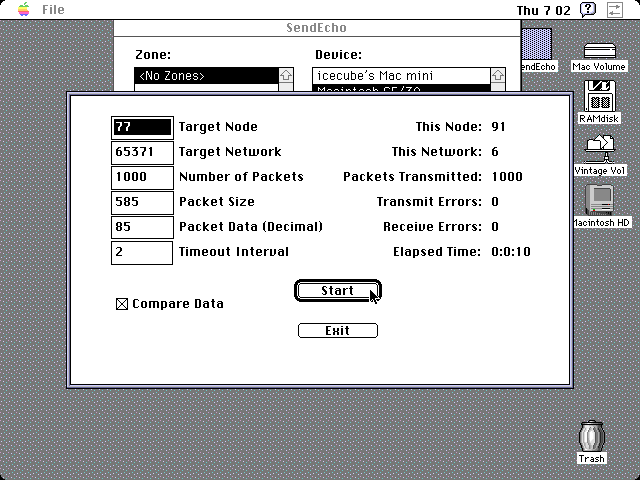 SendEcho network tool |
Author's example had a bad power input jack. It's not a common form factor either, so finding a replacement could be tricky because neither Mouser or Digikey had viable replacements because the footprint is different. But once that was bypassed by manually wiring in 5V DC power, it worked, including the diagnostic programs, which can't really do much more than detect the presence of the adapter. It automatically turns off the Power, Link and Activity LEDs when the host computer turns off when it's set as the active network interface, but it's still awake and will, or should reactivate once the computer passes the POST test. According to a Kill-A-Watt power meter, it uses more power when in this standby mode than when it is being used.
Other issues? Well on a Power Macintosh 7100/66 with Open Transport and AppleShare Client 3.7.4, the 7.7.2 driver was fine, but it didn't like to connect over AppleTalk to a remote server: it would error out to the desktop with a type 1 error. Using the IP address allowed it to go through, and while it is true that it was faster in 7.5.3 with Open Transport than the IIci was with 7.1 and Classic Networking, it wasn't a big difference despite the SCSI chipset in the Power Macintosh being faster, which is a big let down. If you have a BlueSCSI storage solution, then that could cause a conflict with the BlueSCSI implementation. According to the BlueSCSI maintainers, the Dayna drivers were chosen mostly out of convenience, which isn't a bad route to go because Asante and Farallon NICs were generally more common than Dayna ones were, leaving less opportunity for a conflict, which in this case the Asante EN/SC is probably better because the BlueSCSI devices are good value. But the complaints that people have had about the BlueSCSI implementation could be pointed at the Dayna driver itself, if not the Installer, despite the issues with the latter.
As for which one is better, the Asante or this thing, well it kind of comes down to personal preference. It's easy to pick the Asante for now because the case isn't made of plastic and there is a slight chance that the extra PALs and chips were made for a better product, but the reliability of the Asante is debatable. The Asante didn't have driver installer headaches but was less stable in the limited time that both these adapters were tinkered with. Given that the Asante wasn't recapped, that could be a factor. Although the Dayna was slightly faster in the performance test (see the More Info section), it's not really significant because, as mentioned with the Asante section, the SCSI chipset on any Macintosh didn't win any worthy awards, the inefficiency of the Finder and the networking stack isn't very well written. Both are very close in size, width and height, although the Dayna has the edge when it comes to PowerBook compatibility, but Asante can fire back with the Micro EN/SC which is even smaller. Even if the user only has a HDI-30 interface and uses something like the Asante Desktop models, which just have a DB-25 interface, then the fact that HDI-30 to DB-25 adapters were as common as dirt in the mid to late 1990s means the problem is moot. Both use a special cable, which are quite liable to get lost and can significantly effect the usability of the respective products.
So, are these devices worth anything? Well, it's no big secret that we're all using devices running on borrowed time and it's only a matter of time before the sun, which has already set, disappears from the horizon, and eventually everything will have a marker on the side of the road this hobby goes of its passing. If you need it, you need it, but assuming it actually works, the Farallon EtherWave Mac/PB adapter is probably the better choice. Of course that doesn't work with Open Transport, and these SCSI adapters do, and it doesn't like GeoPorts or I/O Serial ports either, and this doesn't need to worry about the hardware so much, but they're not as fast as one might otherwise expect. In addition, these devices are not easy to diagnose without a special SCSI analyzer device, which are uncommon, backed with an oscilloscope for support. Both of which require someone with technical expertise and familiarity with the subject to resolve, should something go wrong. And given the number of different variations that were pushed out in the early 1990s, from different manufacturers, each had their own way of implementing it in hardware and software, which makes things much more complicated because there was no formal standard for doing it. Well-heeled enthusiasts familiar with the technical side of the Macintosh who can write drivers and design hardware for something like this aren't rushing to make a competitor, but that could change in the future. Under ideal circumstances the reliability of the devices to function would be a priority: on a Power Macintosh 7200/75 and a Performa 6205CD, latter of which didn't have any Ethernet options included, both devices discussed failed to work: they would refuse to switch to the SCSI interface. Maybe the SCSI chipsets were too new or used mechanics that weren't well developed or iterated on much.
On a completely unrelated note, in the Dayna driver Installer program is a selection for Ethernet cards with a St. label. See this page for an explanation of what that means.
Wireless Access
There are a certain number of RJ-45 Ethernet to 802.11 WiFi bridges like the NetGear WNCE2001, or routers with custom firmware like "tomato" or DD-WRT to enable a "Wireless Ethernet Bridge" feature, and these ought to work fine. Use a modern computer with a good browser to configure them because they have "bloated" configuration panels that are accessed via a browser, like most routers and modems are these days (suppose it beats DIP switches and modem INIT strings).
A SCSI to SD card adapter called the BlueSCSI has a variant which features a WiFi module on board which works off the DynaPORT SCSI Ethernet driver. A number of people have complained about performance of the Raspberry Pi Pico's WiFi module strapped to the BlueSCSI, and as of right now it is still considered experimental. It uses the DaynaPORT SCSI Ethernet drivers and can work. It can also not work and shouldn't be the primary connection interface without some kind of backup wired system. Some users may encounter difficulties installing the driver under System 6: consider using a Custom install to manually install the SCSI/Link driver.
Of primary concern is that most WiFi routers do not handle AppleTalk packets correctly. This has to do with the packet handling/processing of AppleTalk packets that WiFi routers don't typically handle correctly aside from early AirPort base stations or other specific routers. All standard WiFi routers will work fine with AFP over TCP/IP, but otherwise, most suffer from bad handling of EtherTalk Phase 2 packets (specifically, the AARP data and SNAP frames). Basically unless you have a bridge that can handle the AARP packets correctly it won't work: this might take some hands-on testing with WireShark or other packet sniffing tools to find out if the router is working correctly. A recommendation sheet for a standard to tunnel the packets summarizes the problem in technical terms:
MSDU means MAC Service Data Unit, with MAC standing for Media Access Control. In laymans terms a MSDU is taking a clump of Ethernet data and putting it in a bag with a different label on it to be sent somewhere else, the bag opened by the destination and the Ethernet data distributed to where it needs to go; except when the bag is emptied it isn't retaining the original form of the data. Things get technical very quickly in this subject area.
Continuing with our topic, for PowerBooks with PCMCIA cards, this feature hinges (apparently) on a small number of compatible cards and the whole process is best explained on these following links below. Some were dumped via the WayBack Machine of archive.org, and the depth is effectively zero:
- powerbookwireless.com page by Ken Vann
- Complete and Utter Guide to PC Cards and more by Remy Davison (Part 2 is here)
- Wireless Networking by Derek K. Miller
According to a "lost to data failure" 68kmla.org thread, the PowerBook 500 series with the PCMCIA Rev. C "Card Cage" could use certain PCMCIA cards in 7.1.1; this is probably referencing the ORiNOCO WiFi cards and leveraging the fact that 7.1 can usually use most of the stuff that requires 7.5, which likely involves the WaveLAN drivers or the earlier ORiNOCO drivers. Archives of older drivers can be found in the Restricted Files folder.
AirPort cards were an option on some of the later PowerBooks, iBooks, and iMacs, and they only support 802.11b at 11Mbps data rate, using unencrypted, WEP, or WPA-TKIP networks. AirPort Extreme cards are required for the 802.11g at 54Mbps rated speed and WPA2 encryption, and they are not interchangable. Don't bother getting 802.11b CardBus cards: 802.11b can only handle 11Mbps, which is not even faster than USB 1.1 in high-speed mode. Instead, track down a 802.11b/g CardBus for Macs with CardBus, and for those with just PCMCIA 16-bit slots, a card which has drivers that will work with 7.5 or 7.6. Those can be hard to find. Cards compatible with OS X can be on shaky ground, as most drivers are kernel level, once they get unstable, they usually take the whole system down with them. It all depends on the driver.
A Lucent Technologies ORiNOCO Silver 802.11b card was examined and tested with a 1400cs in Mac OS 7.6.1. It requires a reboot if the WiFi Access Point is changed from one to another, as it's entered into a text field, there's no list of accessible APs: make sure it gets entered correctly. The control panel is rather crude in appearance. Encryption was not tested. As far as drivers go, the one named "WaveLAN Installer Disk" (download name is apt6041i.hqx, which could be a mislabeled .sit file) will be compatible with 7.5.2+ and either MacTCP or Open Transport. Read the Read-Me file for instructions.
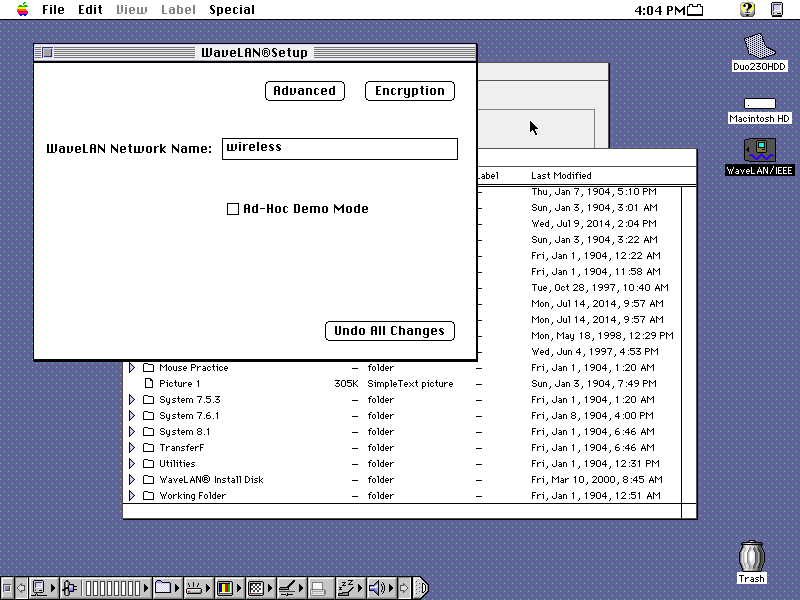
The other drivers in circulation that were tested are the ORiNOCO 7.2 and 6.3 drivers. Version 7.2 won't work with 7.5.3, it will probably require 8.5 since it complains about the lack of "AppearenceLib" with OT on and "OTUtilityLib" with it off. Then in Mac OS 8.1 it says it can't find "ControlsLib"...so much for their spec sheet. On the other hand version 6.3 said it wants 8.5.1 or later. It's still a good card to have though, because it's on the Newton WiFi card list (assuming the custom driver) and because of its compatibility with 7.5.3, plus they're not that difficult to get. Early iBooks and AirPort base stations (the UFO shaped first generation ones) equipped with AirPort were usually just using relabeled ORiNOCO cards.
Ad-hoc direct WiFi computer to computer networks can be functionally unreliable. Avoid using them to interface with these older systems.
Software
The software side of the networking side is generally more straightforward. Usually the only problem is getting it to the target computer in question intact. Should the computer not already have a functional operating system, then an Emergency Network Access Disk (discussed in the More Info page) is probably in order. These days where there is a number of options concerning SCSI devices that can accept SD cards. Other machines with functional CD drives can use bootable CD discs.
If possible, the Legacy Recovery CD which is a 7.6.1 bootable CD is chock full of useful disk images and software versions like the System 7.1 binary for the Macintosh TV. It is immensely helpful aside from the fact that it has all the disk images stored as NDIF Read-Only Compressed format. Only Disk Copy 6.1.2 or higher can process them, so use an emulator to convert them to NDIF Read-Only or Disk Copy 4.2 format if required with Disk Copy 6.3.3 or similar. There are other mirrors and sources for software, when this Guide references software available, it usually can be found at the Macintosh Garden or other various similar sources. Since Apple's Legacy Software Downloads page has long expired, a dump should suffice for most use cases. More information relating to the install procedures can be found in the More Info section. This package of MacTest Pro has some helpful Emergency bootable disks for troublesome systems.
- Pre-System 6: These are only distributed on 800KiB HFS or 400KiB MFS disks, which are really only suitable for the 128K, 128Ke (not a real machine), 512K and 512Ke. Only compatible machines that have internal floppy drives can write them. Since the installer disks are almost always bootable, there's usually no complications with them, and installing is usually a drag and drop affair. AppleShare Workstation 1.1 and File Server 1.1 is elaborated on further in the More Info section.
MacTCP is not intended to be used on pre-System 6 software. The oldest known version of MacTCP, version 1.0, requires System 6.0.3 (or 6.0.5). MacTCP 1.0 was difficult to find but was eventually located on a developer CD (Volume V, October of 1990, Night of the Living Disc) which has a 512Ke Installer script. In real testing, the Asante Ethernet installer disk version 5.6.1 has MacTCP 1.1.1 on it, and it will work with a 512Ke (being interpreted as, "it didn't bomb the system"). MacTCP 2.x will not run on a 512Ke because it throws a Memory Manager bomb on startup, likewise with MacPPP 2.0.1. Additional information concerning MacTCP 1.0 can be found in the Download Town section, with specific instructions for the 512Ke, which wasn't supposed to use System 6. - System 6: The oldest system to boot System 6 is a 512Ke (mostly), via the Minimal Install for a Macintosh Plus, but memory is very scarce and realistically the Macintosh Plus and the Macintosh SE without the FDHD (aka SuperDrive) upgrade are the lowest practical systems to run it. A complete install would have the base system, AppleShare Workstation 3.5 upgrade, Network Software Installer 1.4.5, and finally device specific drivers if required. MacTCP v2.0.6 or v.2.1 is simply a drag and drop affair. A prefix attached to an Apple installer or program like
ZM-AppleShare WS 3.5 is because ZM stands for International English, compared to B for British English, N for Dutch, E for Spanish and so on.
There is an EtherTalk 1.2 (EtherTalk Phase 1) install option on the AppleShare File Server 2 diskettes, although it will likely only work with official cards like the Apple Ethernet NB card for the Mac II series (there's no list of compatible cards for the extension) or other cards that use the National Semiconductor DP83901, DP83902 or DP83932 DMA Ethernet controller chips. You may safely ignore it unless you are looking into specifics concerning EtherTalk Phase 1. - System 7 and 7.1: Noticably slower on older machines (especially the Plus and SE) but has much more utility. The standard install would be System 7.0.1, Network Software Installer 1.5.1, AppleShare Workstation 3.5, and following up with any required device drivers. Note that System 7 requires a Mac with 2MiB or more of memory.
There have been rumors on various places which say that System 7.0 or 7.1 need the File Sharing Extension from 7.5.3 to link to OS X. It is not technically correct, but it does permit an OS X 10.3 Panther system to mount a System 7 or 7.1 server. Installing OT 1.1.2 onto 7.0.1 renders both Open Transport unusable and MacTCP classic networking unworkable as both control panels are disabled.
7.1 is very similar to 7.0.1 but can run Open Transport and a few other things such as the 7.1.3 Scriptable Finder, which comes off the System 7.1 Pro disks. Open Transport requires at least a 68030 processor, and OT 1.1.1 specifies at least 5MiB of RAM, but increases to 8MiB for PowerPC machines. For systems that do not run Open Transport, the installation requirements are the same as 7.0.1.
Installing AppleShare Client 3.7.4 and Open Transport 1.3 is the same as any other system, except OT 1.3 is installed first, then ASC 3.7.4 is simply copied over to the Extensions folder, as the Installer will not accept 7.1 as a valid target system. All other scenarios where AppleShare WS or Client are installed should use the Installer. See the More Info page for additional notes. - System 7.5.3: The minimum system for a lot of PowerPC boxes, it consists of the base System installation and the 7.5.5 Update, followed by any device drivers. 7.5.x is the only system to make use of Network Software Selector to switch between classic networking with MacTCP, or Open Transport for TCP services. To use Open Transport, install Open Transport 1.3 and AppleShare Client 3.7.4. ASC 3.7.4 will not run under Classic Networking mode as it requires Open Transport services; see the image below.
Although 7.5.5 can be installed on a Macintosh Plus or SE, they become unbearably slow and the benefits of 7.5 cannot be fully appreciated, not to mention the memory problem. System 7 or 7.1 is a better choice for those systems. 8 megabytes of memory or more along with a capable 68030 or higher is recommended, as 7.5.5 with OT on in an idle state occupies about 3,868KiB by itself on a SE/30. - System 7.6 and above: These are usually a little trickier to work with since they were distributed mainly as CDs, which aren't as common as they were in the mid 2000s, and most computers don't even have optical drives these days. 7.6 was available on floppy disks but OS 8 and above are only distributed via a CD (unless Mac OS 8 on 27 floppies from an expired Apple dev FTP server counts). 7.6 will need Open Transport 1.3 and AppleShare Client 3.8.3, along with the 7.6.1 update. Mac OS 8 is much of the same story, but OT 1.3 is included by default in 8.0 and thus the only things to really do is upgrade the AppleShare Client version and maybe device drivers. Mac OS 8.5 and above is pretty much good to go unmodified. Certain Macs require machine-specific (gray) discs that are unique to a particular machine model, such as the iBook G3 800/900MHz and the iMac G4 700/800MHz computers. These have system extensions and drivers that are required to permit them to operate correctly with display controllers, sound drivers and so on.
Depending on the specific software setup in question, the standard NSI installations may not work for that hardware. For instance, the Newer Technologies UltraDock products require proprietary software drivers, as do most less common NICs such as Shiva EtherPort or Dayna products. However the NSI software should be installed before the driver software because it will install the Network control panel and AppleTalk control panel, if not installed with a default install of System 7. Technically MacTCP isn't required for local EtherTalk communication but it's a really good idea to install it for WWW, FTP and other services. Additionally, it was found that the default install of EtherTalk software from System 7.0.1 worked with two separate Farallon NICs and an Asante NuBus card, because they use National Semiconductor chipsets, but installing the latest drivers is still suggested. | 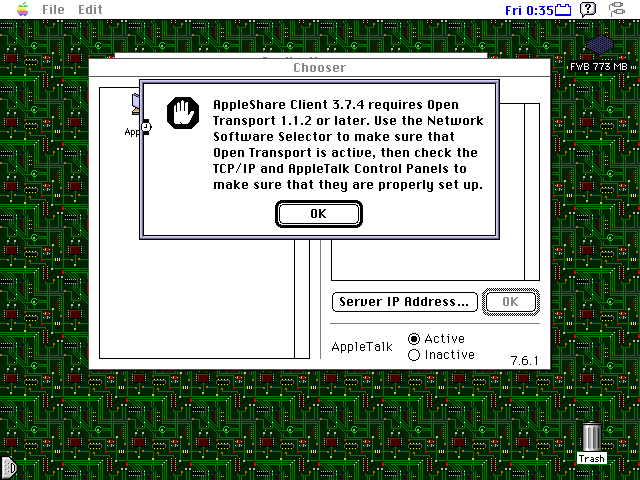 MacTCP incompatibility (7.5.3) |
Extra Information
In the former days when cathode-ray tubes (CRT) were dominate, screensavers were commonly used to provide insurance against burn-in. Burn-in is a concept where an image that gets too much continuous exposure on the display becomes "highlighted" against the display. The effect was not as pronounced in the later Trinitrons and other monitors made in the late 1990s and early 2000s but by that time TFT displays were starting to get cheap enough that CRTs, with their bulk and power disadvantages, were regulated to the dumpster bins. Among the vulnerable classes are Compacts because their 1-bit displays spend a lot of time drawing a white menu bar. Bad cases will have visible "ghosting" when the unit is off and really bad examples will have ghosting artifacts visible when the unit is on. The damage is permanent and cannot be repaired. LCD displays do not need screensavers, although they were sometimes used for aesthetic purposes. This also dates back in the golden years of After Dark with numerous creative modules, some were games (like Lunatic Fringe), others were iconic (like Starry Night and Flying Toasters), some were artistic with geometric and arithmetically inspired graphics, and so on. |
 Good old Starry Night |
Common screensaver utilities included After Dark, Flex, Pyro!, Basic Black and other programs. Some were simple and lightweight affairs meant to minimize space on disk. There are very few screensaver programs or DAs meant for the 128K series, so you'll just have to crank the brightness all the way down or use something like this.
While we're discussing displays, passive matrix displays were often used on early notebook computers because of trade wars on active matrix displays on Japan, plus they were cheaper. Commonly identified by their sluggish refresh rates, ghosting and weird lines projecting from objects. Contrast had to be adjusted on a semi-frequent basis (depending on the image on the display, color depth, the desktop background, environment, lighting, et cetera) but fortunately they usually had hardware based adjustment methods. Color passive matrix displays are even trickier to adjust the contrast to balance out the color elements to minimize artifacts but the panel on the 1400cs is noticeably better in grayscale than the Duo 230's. Not recommended for precision color work...Also the viewing angles, contrast ratios, color balance, et cetera were all rubbish by modern standards. Still, you won't see an equivalent of the 640x400 electro-luminescent yellow-on-black display of a Dynamac or the cool red gas plasma display of a Compaq Portable III and later Portable 386 as well on a modern computer. |
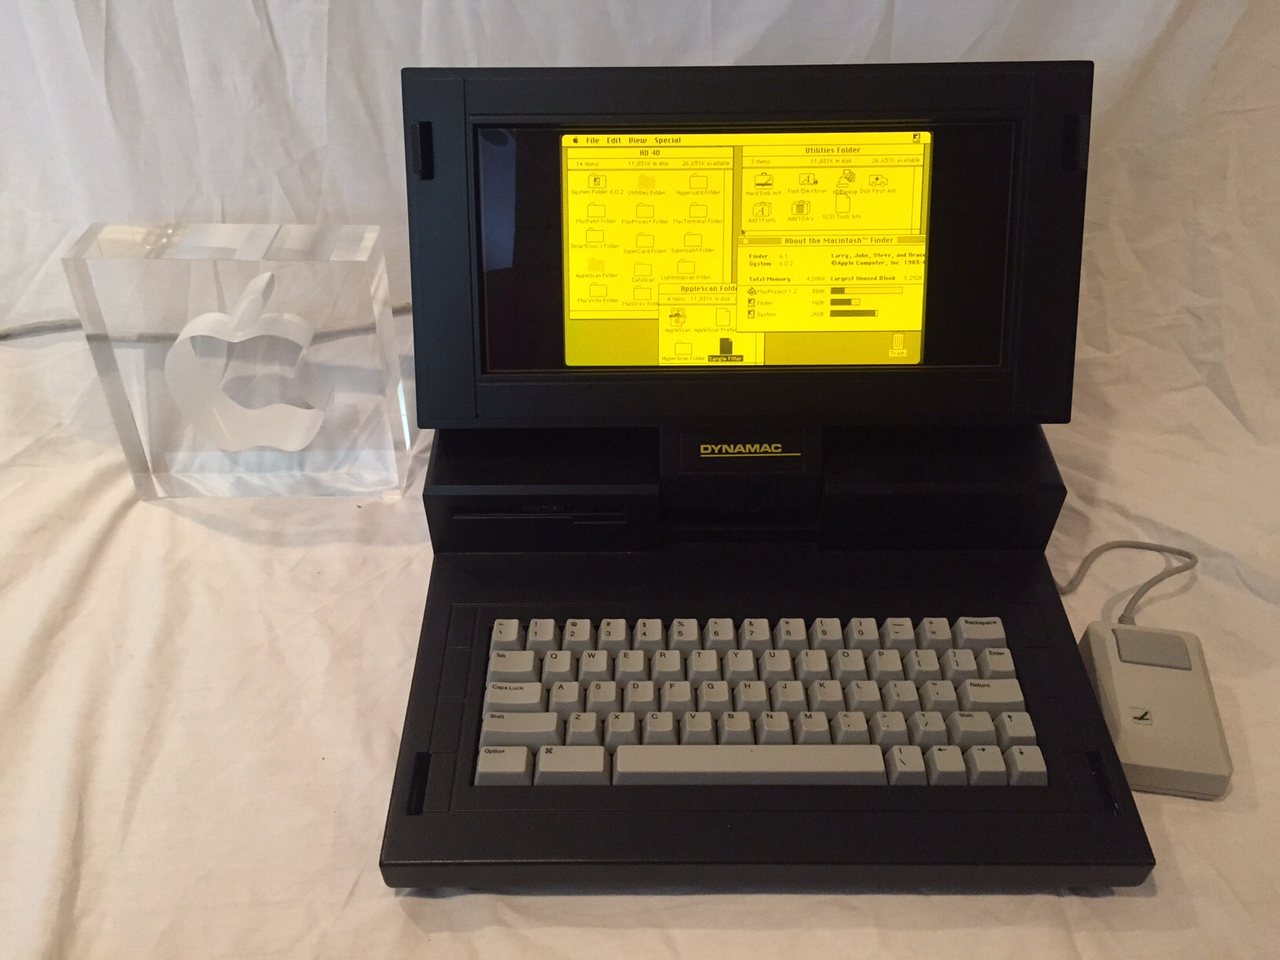 A rare Dynamac machine |
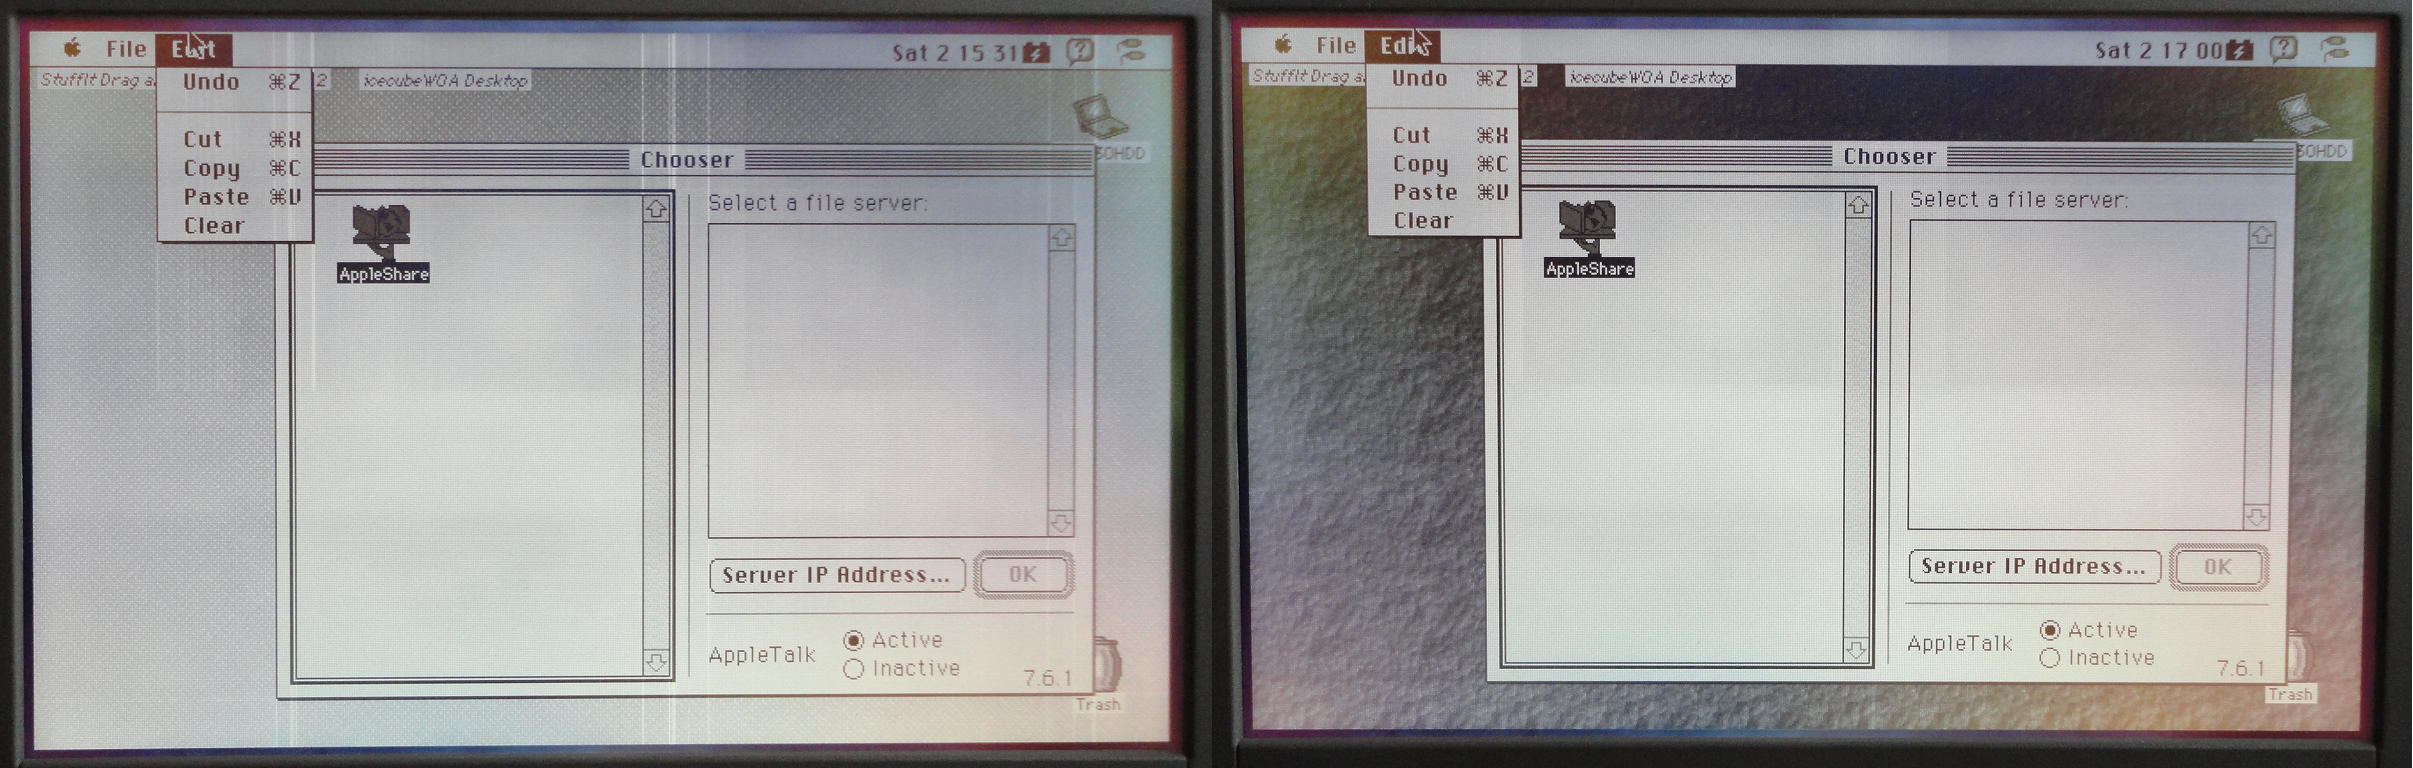
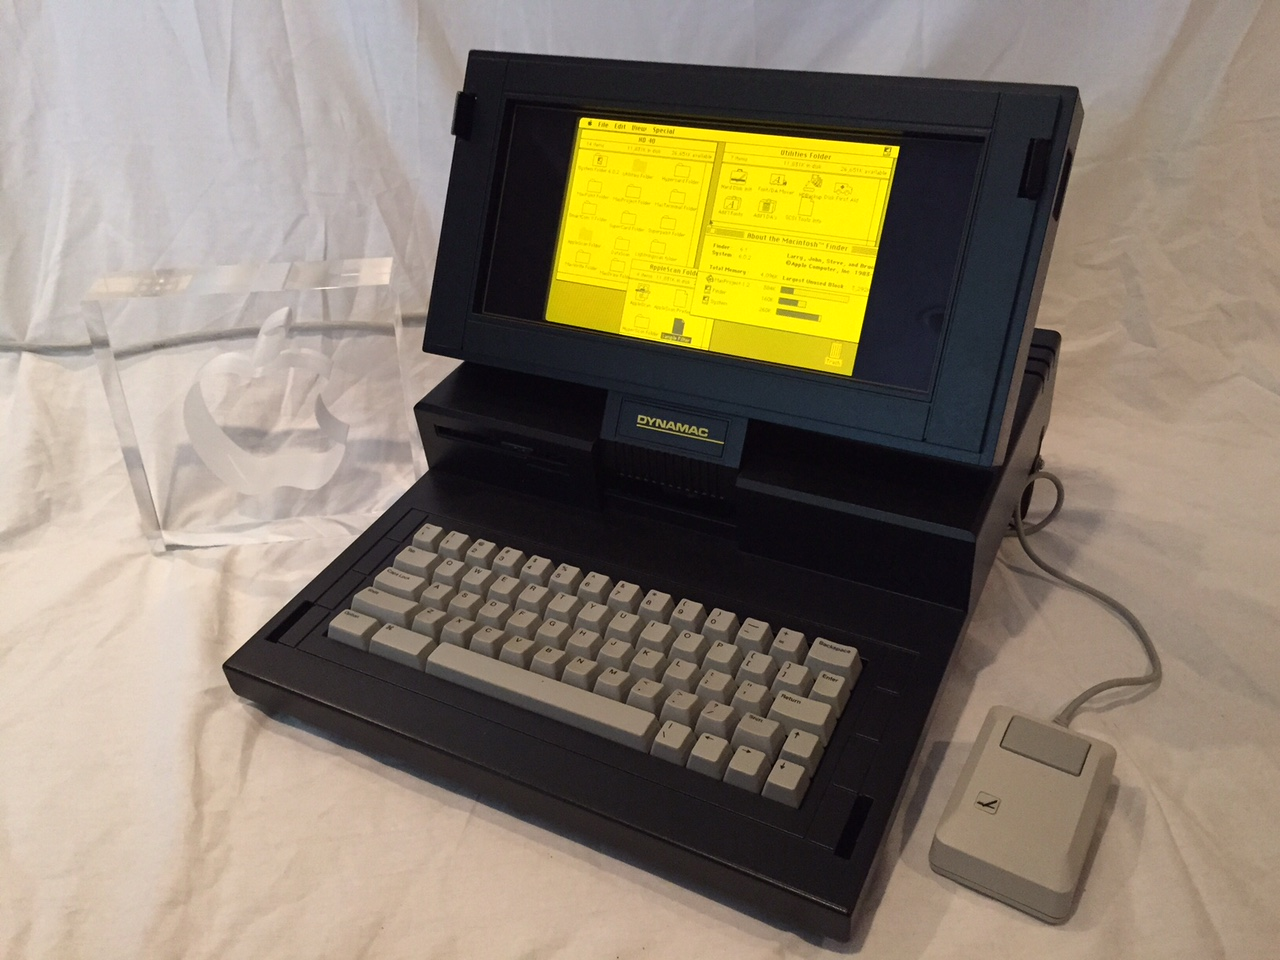 Dynamac with a 10-Year Apple Award (for Apple employees) |
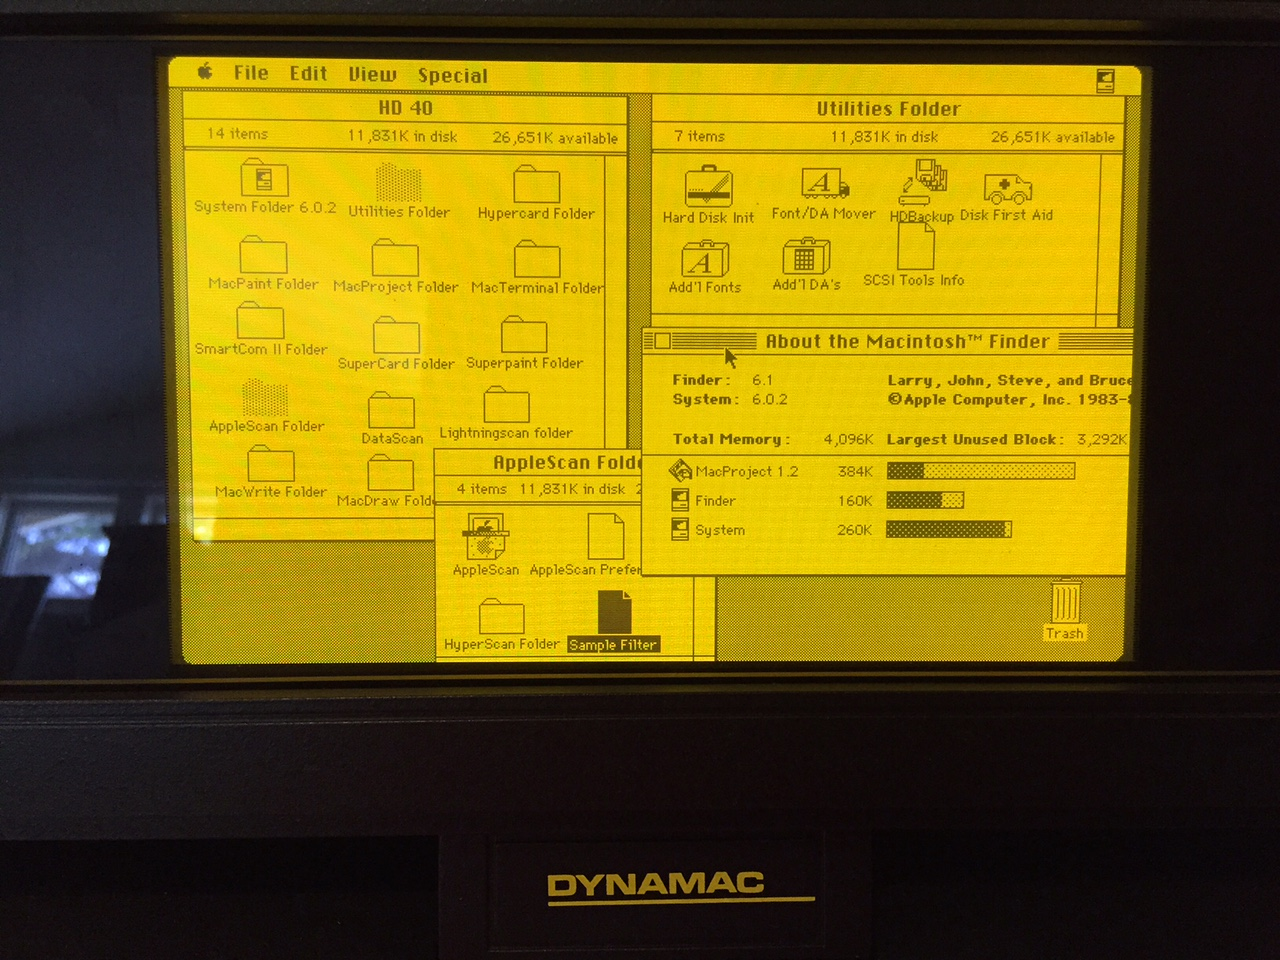 Electro-luminescent display close-up view |
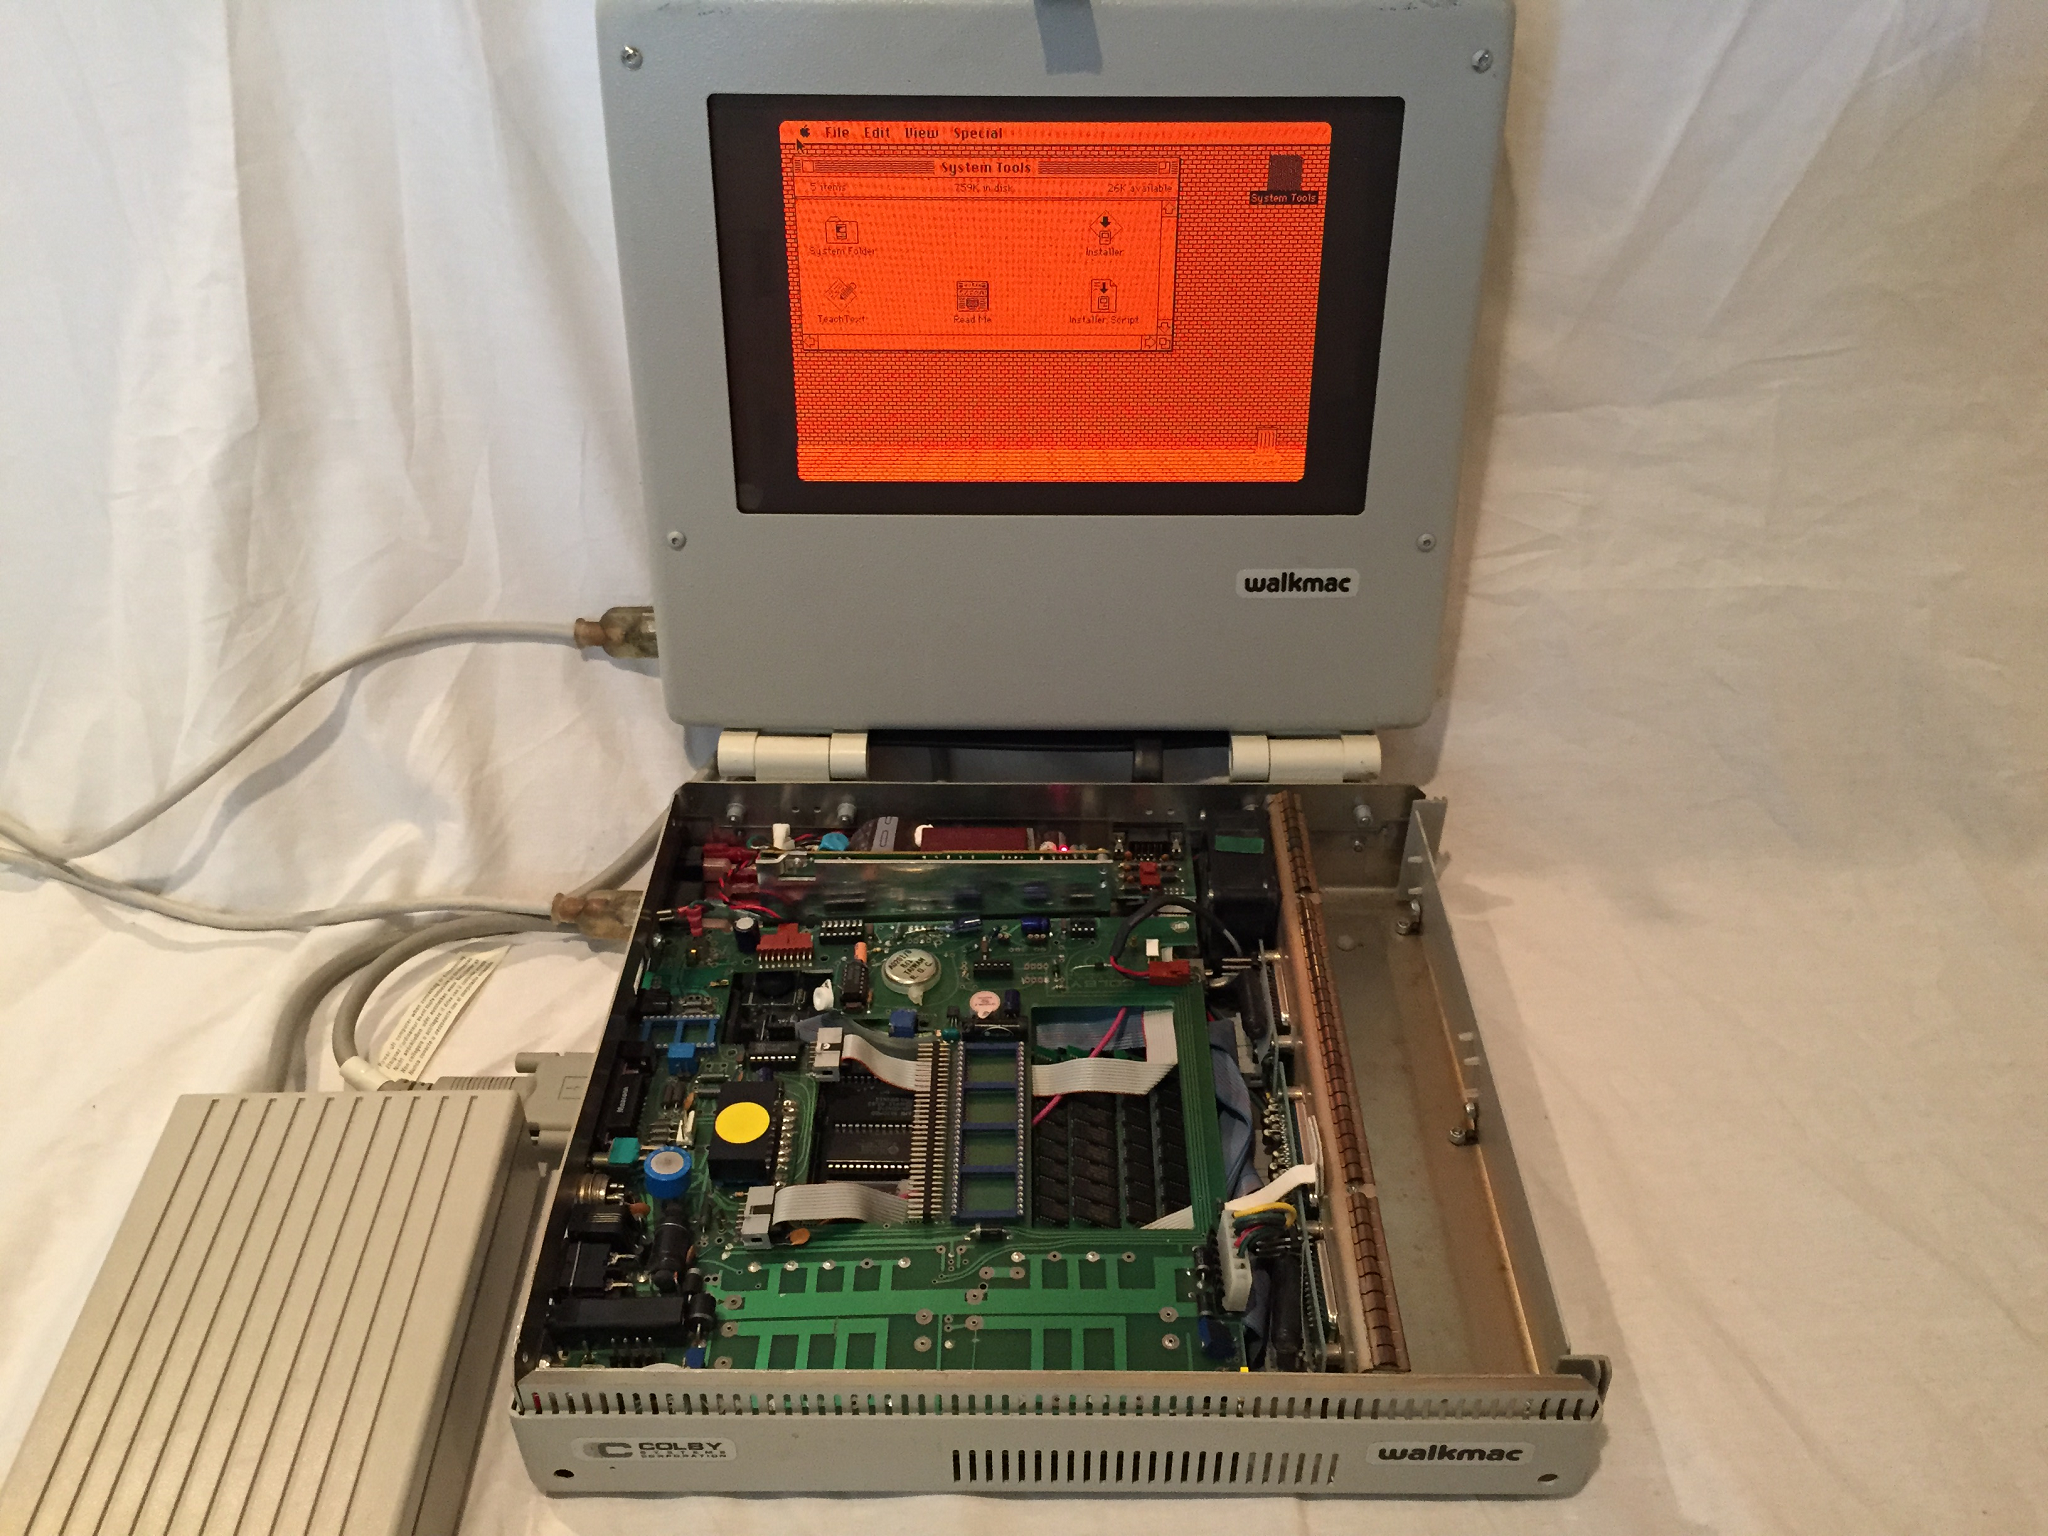 A prototype Colby Systems Walkmac |
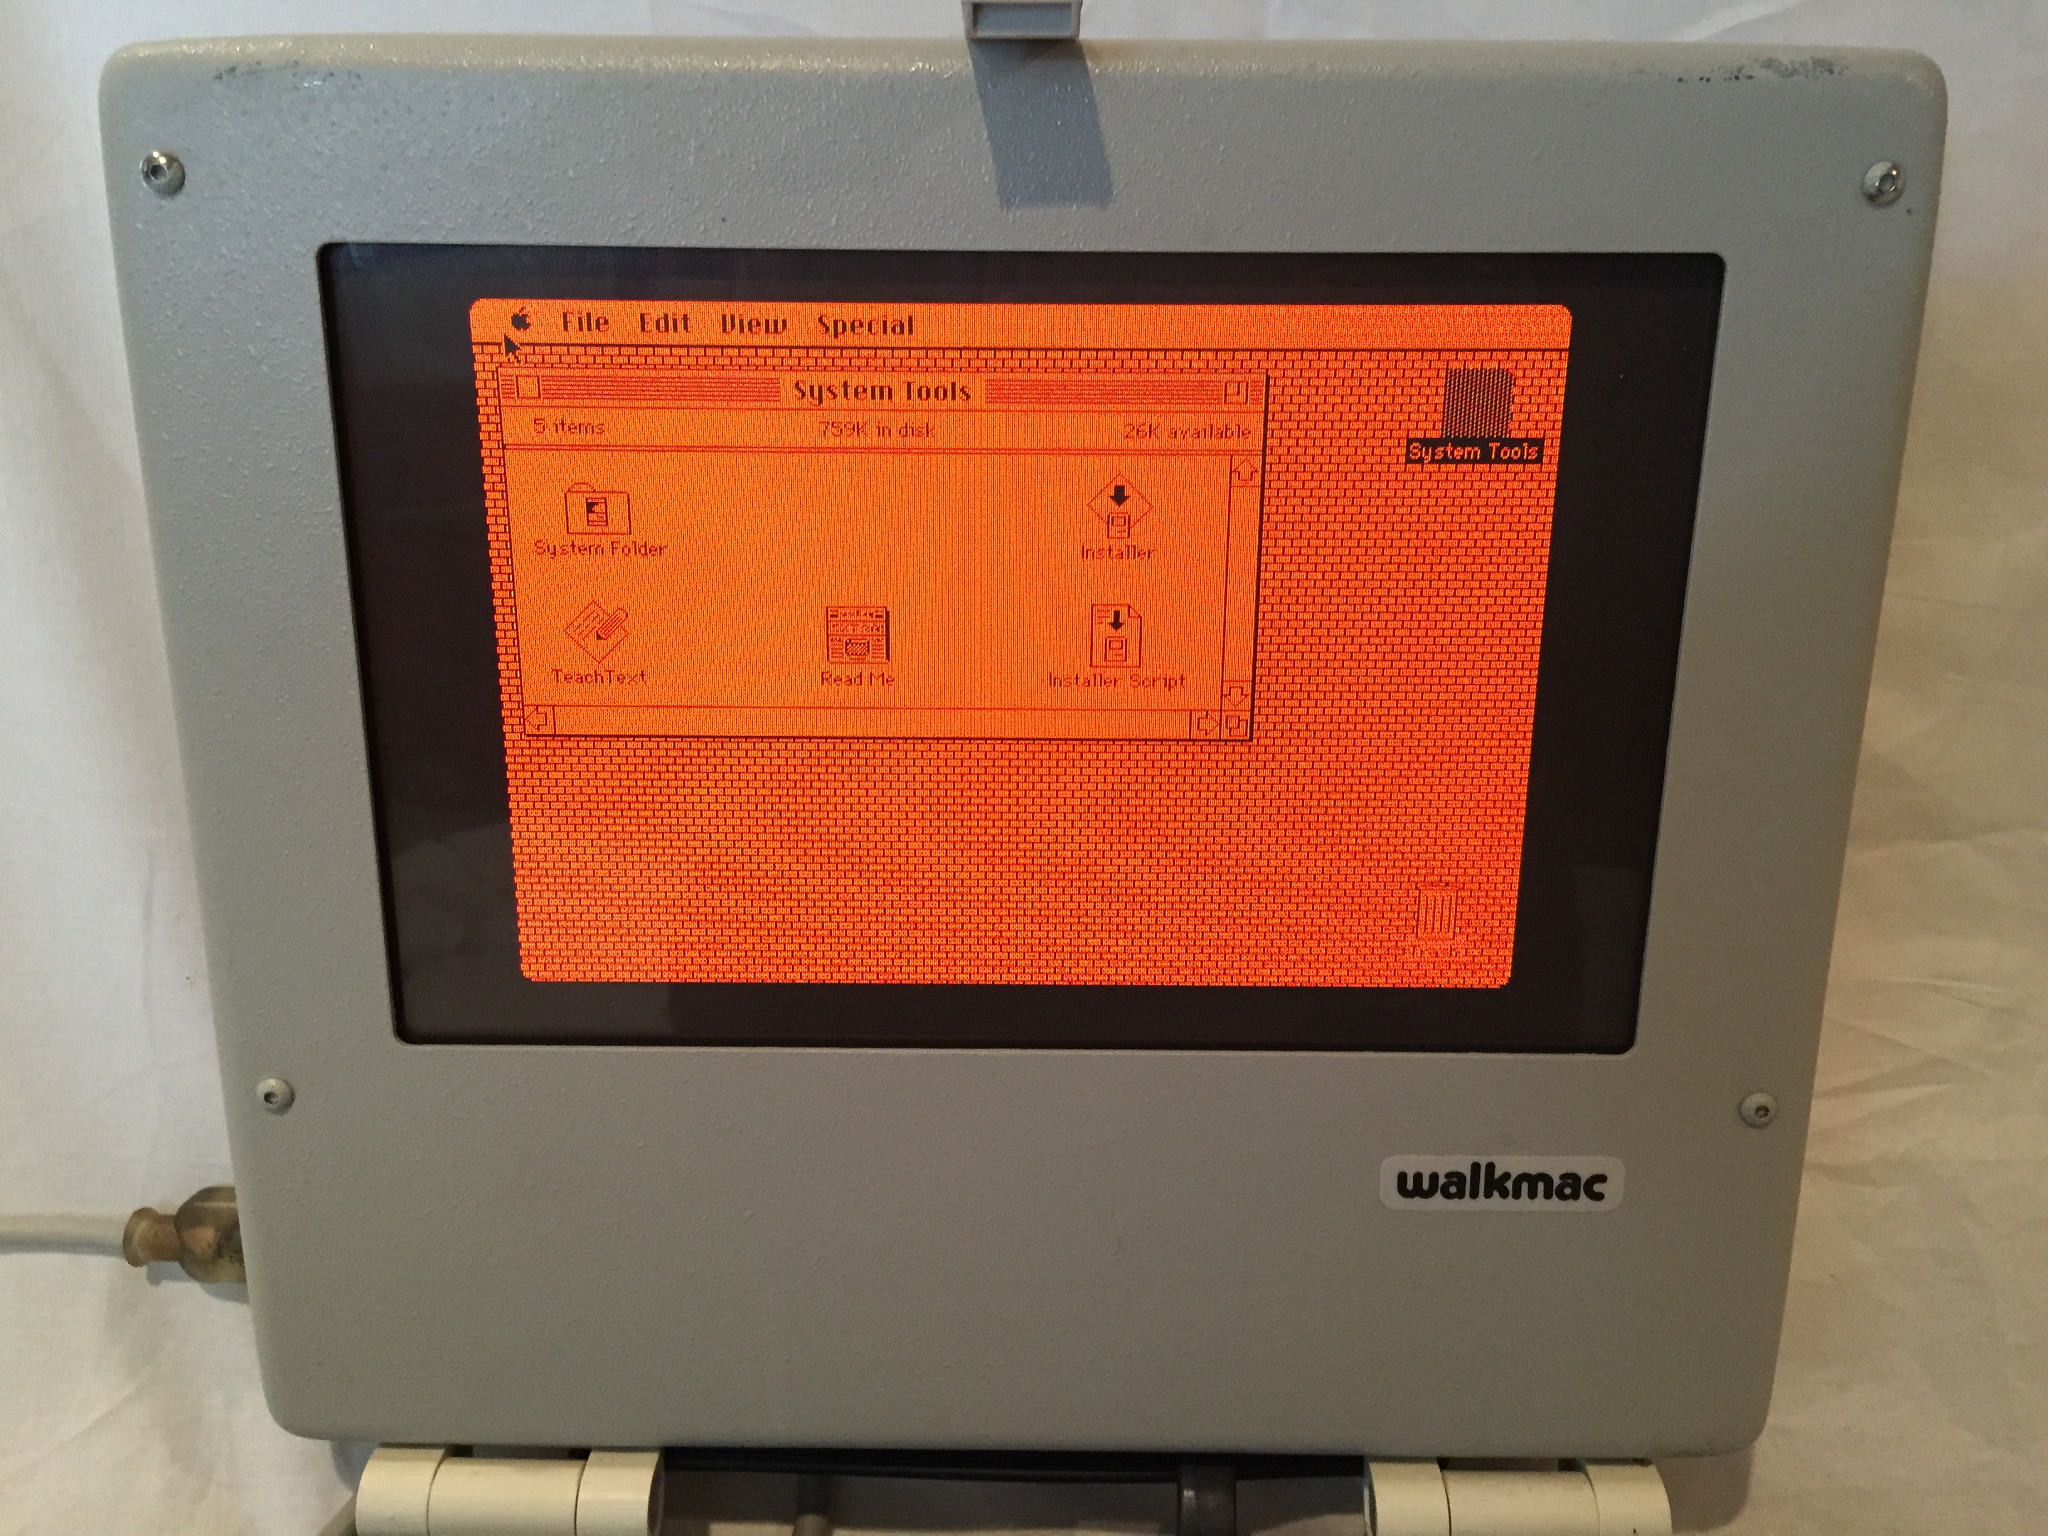 Gas plasma display |
This particular Dynamac is owned by haplain at 68kmla.org, as part of his collection. Few are known to exist, much less with the original box. It's based on a Macintosh Plus, not the rumored version based on a Macintosh SE, and features 4MiB of RAM and the original 40MiB hard drive, with a mouse just like it would have come from Dynamac Computer Products. Around 1988 when this came out, this unit as configured would have cost over 6,490$, and that was with 1MiB of RAM and a 40MiB hard drive: adding more memory would have stacked the price tag even more. Memory was around 150$ per mebibyte back then. The Infoworld review (August 8th, 1988 publication, Volume 10 Issue 32) of this model doesn't say the memory capacity of the unit they tested. Another Chicago Tribune article says a Dynamac with 4MiB of RAM and a 40MiB hard drive could have been acquired for an eye-popping 8,000$, which could have been saved for a really nice upgraded SE/30 just six months later and which weighed just a little bit more. More of Haplain's personal collection can be found at his gallery. The clear backlit Macintosh Portable M5126 in his hands is certainly a thing of beauty, for sure.
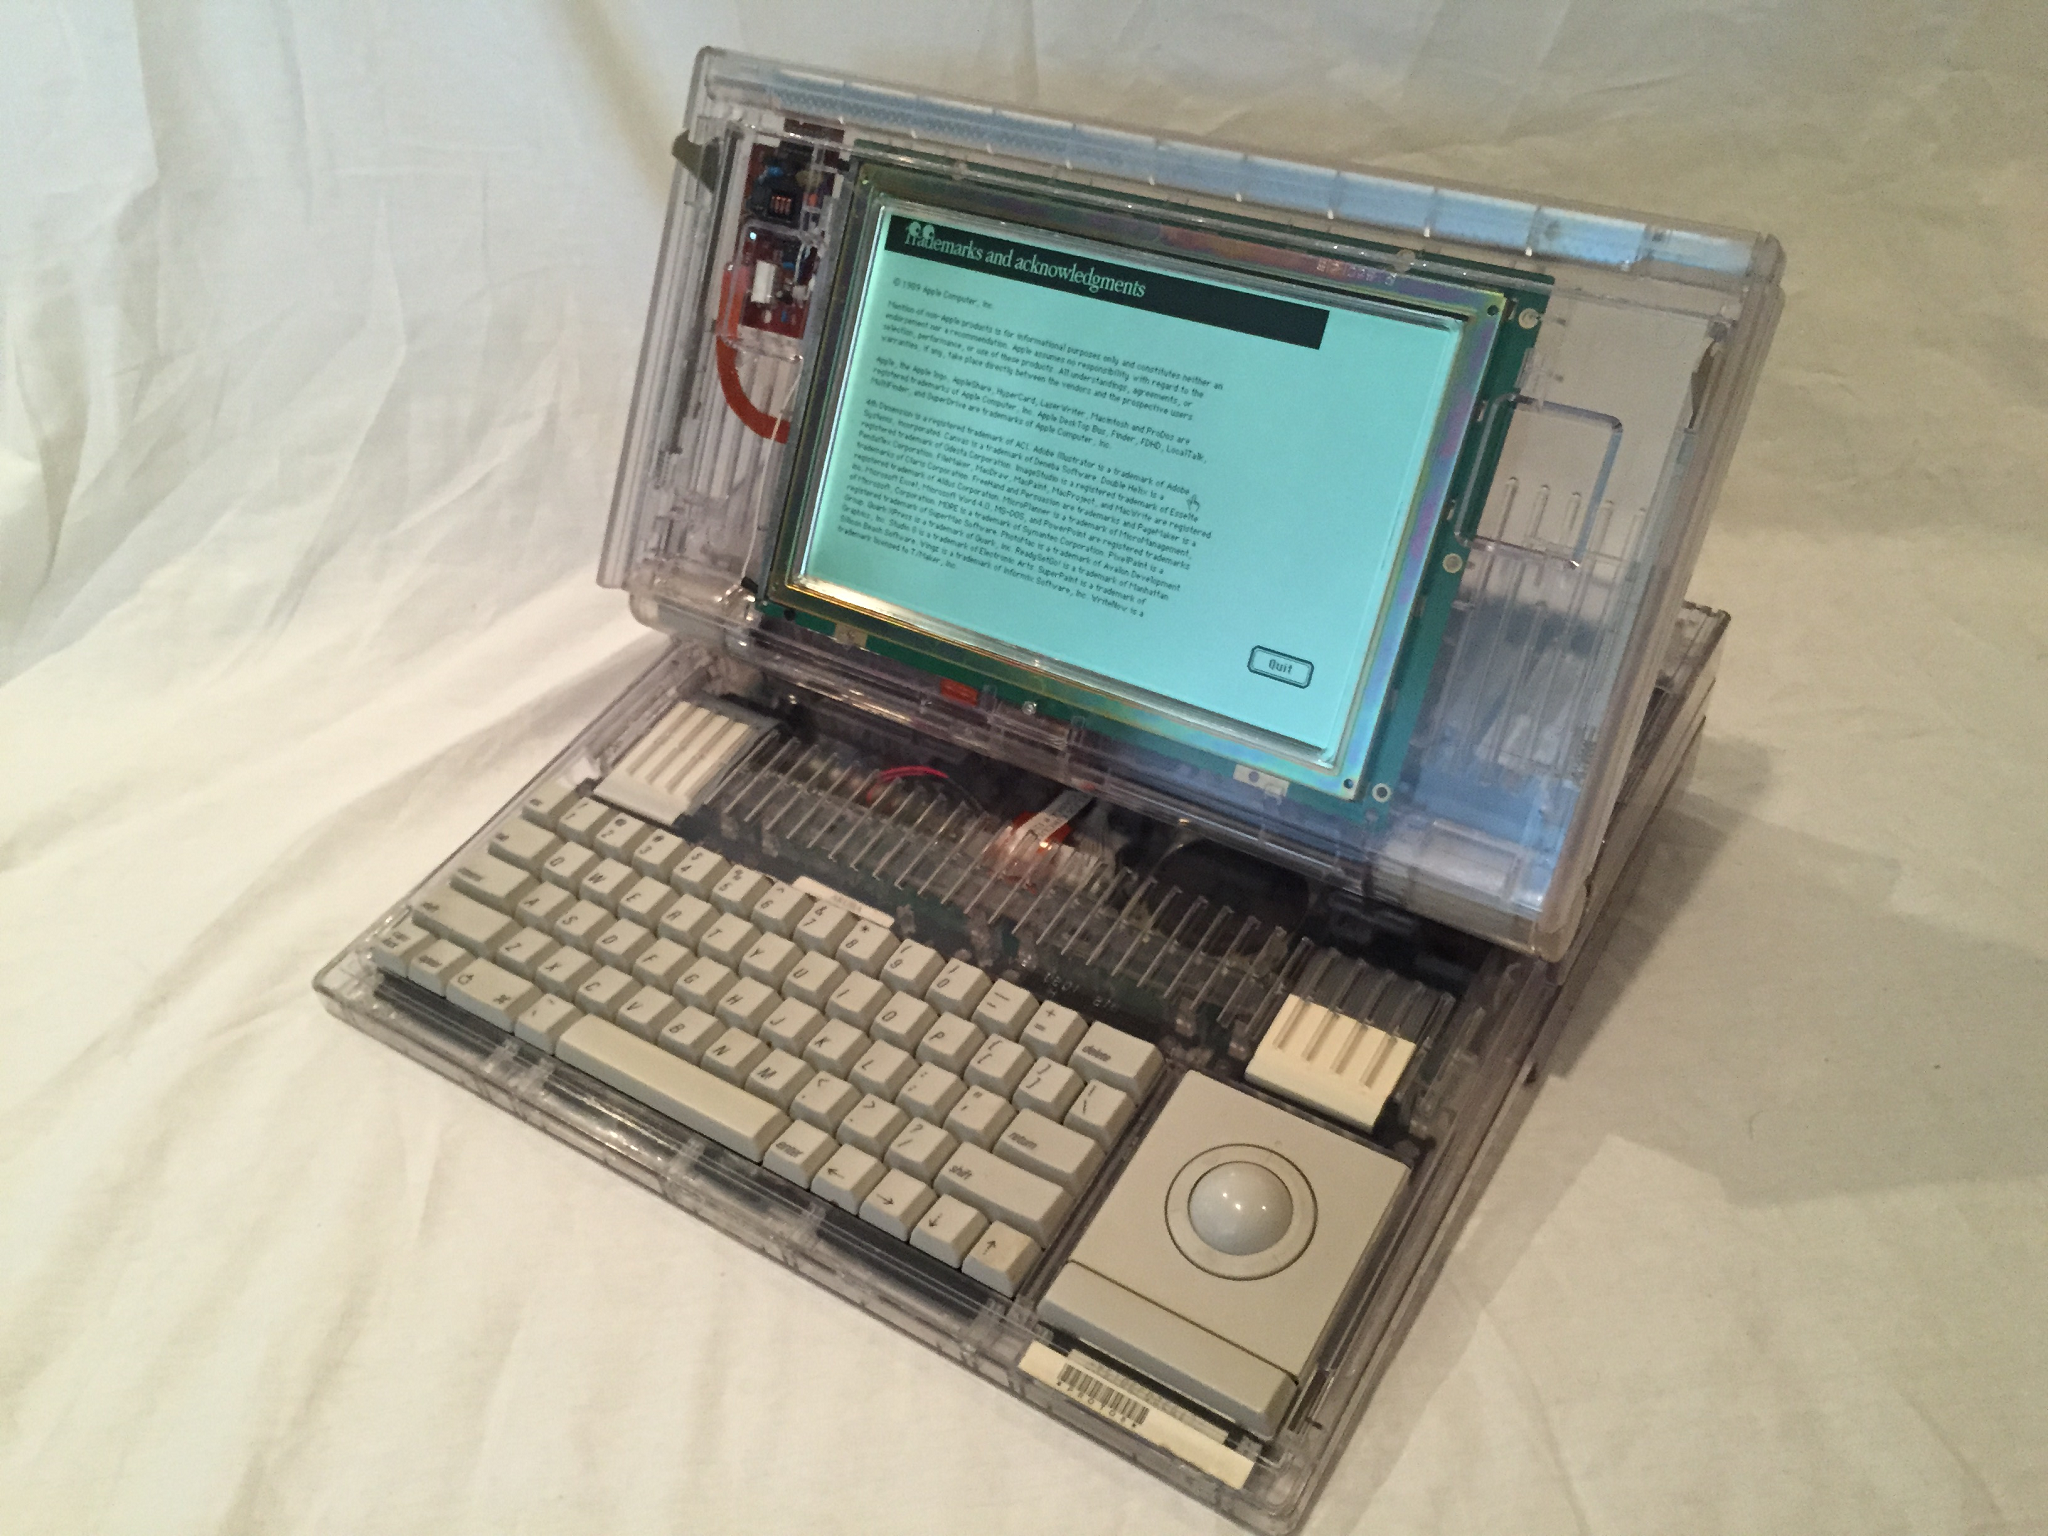
In the event that a program has frozen the computer, activating the programmer's interrupt and typing G Finder can sometimes work. If Macsbug is installed, striking the interrupt switch calls up Macsbug. Typing es attempts to quit back to the Finder. Saving any important work and restarting the computer promptly is a highly recommended procedure because the memory is usually in a unstable fragmented state. An alternative technique is to use the ExitToShell trap. Some Macs do not have physical interrupt/reset buttons, like PowerBooks. Use the Command + Control + Power button reset (reboot) the machine: Command + Power is the same thing as the interrupt feature.
It has come to light that Mac OS 8 and later will unbless older Systems like System 6 if they are mounted, like a floppy disk. Make sure to have an extra bootable floppy or lock the disk to insure against this occurrence. The principle of "blessing" is designating a folder as bootable, and this is usually indicated by a tiny image of a Compact Mac inside the folder icon. A folder must have certain minimal elements to be bootable, two being System and Finder. Opening the folder and then closing it should update it. For emergency purposes, a Disk Tools disk can help, or the 7.5 Network Access disk, a bootable CD, or in extreme cases, imaging the disk, blessing the System Folder in an emulator, then writing it back out again. The OS X terminal command bless is mainly for OS 9 situations: the man page provides more information about it.
At Ease was an Apple product that was basically the Launcher control panel (System 7.5+) made into a Finder substitute. It would be easy to conclude that it was meant for setups like kiosk computers, library computers, and other reduced or simplified computing arrangements. There is a way to add a network share onto the list of applications/documents on inside At Ease, but the shares don't seem to be capable of browsing, but with proper permissions (and likely At Ease 2.0.x and up rather than At Ease 1.0) users can use the Open dialog inside applications to open documents inside remote servers.
According to the At Ease 2.0 documentation, file sharing is disabled under the At Ease environment, so other computers won't be able to access the At Ease enabled machine. The Chooser can be added to the Apple menu of course, but the remote share won't be navigable, so it's pretty much a waste of time. At Ease for Workgroups is supposed to have greater emphasis on multi-user situations with At Ease, and it is supposed to be slightly better in the remote share department, but the author couldn't quite figure out the process for actually navigating a remote share like the regular Finder. There are other versions of At Ease, which are not shown here.
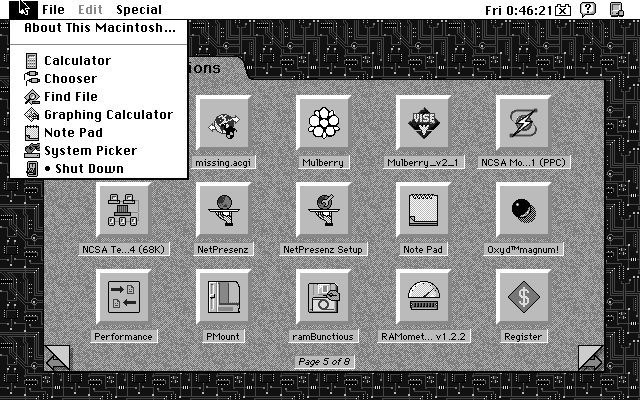 At Ease 1.0 (2.0 and 3.0 similar) |
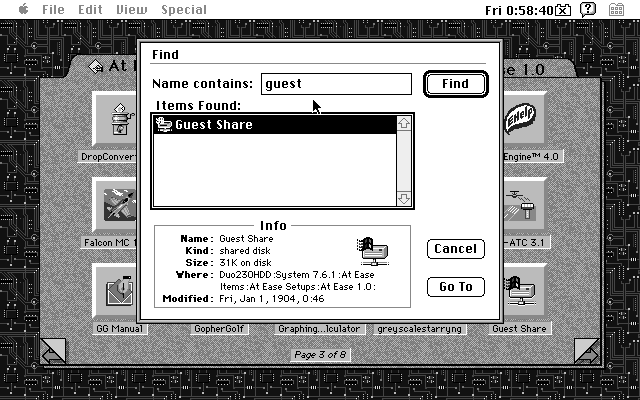 Best that could be done (At Ease 1.0) |
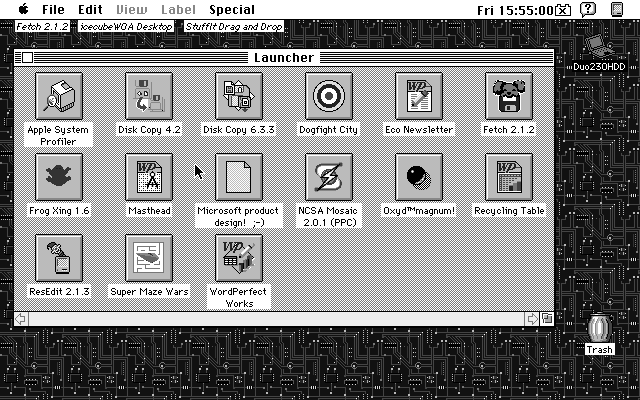 Launcher (7.6.1) |
When a device has driver support for "Mac OS 8" that usually applies to Mac OS 8.6, because that is when USB support came into fruition. Also when most people mention "Carbon" programs for Mac OS 8, that essentially suggests 8.6, although 8.1 can also run some Carbonized applications.
On System versions before 7.5, try to avoid handling volumes that are larger than 2GiB (2,097,152KiB, 2048MiB) because HFS in these versions cannot address more than 2GiB volumes. 7.5 has support for 4GiB volumes, and 7.5.2 (which was mostly for PowerPC machines, most people won't see it) supports up to 2TiB. See this link for more on this. It's not so much that they can't download from servers with larger disks, but uploading to them can sometimes be troublesome because the client computer thinks the disk is full on the server.
Note that these older file systems used the "classical" interpretation of MB and KB where 1KB is 1024 bytes and 1MB is 1024KB (or 1024 x 1024 bytes), not the modern IEC-approved idea which says that 1KB is 1000 bytes and 1MB is 1000KB (or 1000 x 1000 bytes). The "modern" translation of the "classic" 1024 definition is the KiB, MiB, or GiB; this Guide will use the modern definition. (Obligatory comic here) The exception will be with 1.44MB floppies, because while they are actually 1,474,560 bytes, the math was calculated to mean 1474560 divided by 1024 and divided again by 1000 to produce a result of 1.44MB. So while this author would prefer to use 1.40MiB, convention will prevail for the sake of conformity. Plain and simple, 1KB is 1000 bytes, 1MB is 1000 KB, and 1GB is 1000MB; 1KiB is 1024 bytes, 1MiB is 1024KiB and 1GiB is 1024MiB.
A cheat for Windows 2K Server which seemed to have the most issues concerning this brick wall is to format an SD card or USB thumbdrive as NTFS (Windows XP can't do it, but Windows 2000 can, and only NTFS volumes can be shared with the SFM service: or use something like gParted in Linux) and put a share on that volume if it's less than 2GiB. Or, use Netatalk inside a VM. Certain Macs can create RAM disks through the Memory control panel, which then can be easily shared as long as it is 2MiB or greater in size. Jaguar can format a Flash volume, e.g. USB thumbdrive as HFS Standard but 10.3 Panther and above won't do it.
And one last thing. Avoid using composite memory modules in Macs. They are easily identified as far as 30-pin SIMMs go because a regular SIMM has eight chips per SIMM, nine if it is a parity RAM module which most Macs won't even use the parity function. A composite SIMM has typically two chips per SIMM or three if it is a parity module. Unexplained crashes, freezes and other unusual events, if they are not related to bad traces, dying hard drives, shot capacitors or other common hardware issues, could point to the RAM modules. Some Macs like the IIsi don't mind them much or can use odd-sized RAM modules such as 2MiB sticks which other Macs do not like at all. (Increasing the RAM cache of the IIsi to above 1MiB can speed up the machine by pushing the shared VRAM off the on-board RAM and onto the faster slotted RAM.)
Definitions
The terms router, switch, hub, gateway and bridge are used frequently in this Guide, and what follows is a layman's language interpretation of what each of these do: some have changed definitions over time. There is a notable amount of crossover between some of them, as some have extended their capabilities over time. These are not textbook or dictionary worthy descriptions.
- Bridge: Usually a hardware unit that allows two different network types to be combined into one larger network so that they can speak to each other. AppleTalk bridges, like the Farallon iPrint LT, are one of a few different types of bridges, in this case allowing LocalTalk serial networks to be linked with Ethernet networks, and vice-versa.
- Hub: A box that connects multiple computers, and rebroadcasts all traffic to all ports, like a repeater. A repeater is designed to rebroadcast input traffic so it can be carried a longer distance, like an extender. Hubs are basically obsolete.
- Switch: Think of this as a bridge with multiple ports. More sophisticated than a hub because it can interpret what traffic goes to what computer.
- Router: A device that works to bridge networks and decide what traffic goes to which computer. Unlike a switch, bridge or hub which mostly extend a single network into a larger network, it's usually used to join one network to another, most commonly a Wide Area Network (WAN, basically a term for a network created by a large number of Local Area Networks) to a LAN.
- Gateway: This is a device that joins networks that use different protocols, and translates between them so they can talk to each other. An example is a MacIP gateway that allows TCP traffic, such as FTP file transfer traffic, to be tunneled over an AppleTalk network, where TCP packets are tucked inside AppleTalk packets. Another example of a gateway would be something that connects NFS networks and AppleTalk networks together, translating between them so both look like native servers to the respective systems. The NFS package option for the GatorBox is a good example of this.
Apple Filing Protocol Networks
In this chapter, all the primary interfaces for connecting via AppleShare are discussed, starting with LocalTalk.
LocalTalk
The simplest network for interfacing Classic Macs is LocalTalk, although it is a bit lacking in areas, mainly the fact that it is "aged" and secondly is slow. While it did do its purpose just fine in its time, the reality is that Ethernet is much more useful. LocalTalk was originally called AppleBus, with a 1985 publication going over the concept available off bitsavers.org.
LocalTalk networks are basic. They consist of the interface devices such as computers, printers, and so on; then there are LocalTalk splitters and cabling. The simplest LocalTalk network is simply a serial Mini-DIN-8 cable from the printer port of one Mac to the printer port of the other. Beyond this, a LocalTalk splitter is required, which permits daisy-chaining the devices together. Apple LocalTalk splitters are self-terminating.
Sometime in the mid or late 1980s some people or someone had an idea: why can't we just use standard (in the US) telephone RJ14 wire? LocalTalk is simply a serial protocol not unlike many other networking protocols. The individual's name was Reese Jones, and he formed Farallon to market the concept along with other ideas, although he probably did not invent it personally but definitely had a say in it at the least. He also was the person to patent and produce it, being quite active in the Berkeley Macintosh User's Group. The product was successful and there were a good handful of clones as well, plus an amateur twist or two on the concept. Apparently, even Apple thought it was a pretty good idea, as it was recognized that the Mini-DIN-3 LocalTalk cables as so forth were pretty silly and expensive, could not run cables as far as PhoneNET could, and PhoneNET could be integrated in the existing phone interlink wiring in the building. Generally when people talk about rigging up a LocalTalk network they usually mean a PhoneNET network. It didn't help that LocalTalk adapters were about double the price of PhoneNET adapters, and then there was the question of dealing with the cables which weren't cheap to begin with. According to Mac SECRETS 2nd Edition, Apple used PhoneNET in their internal networks.
The Fall of 1985 BMUG Newsletter is a great time trip. It's found on the BMUG PD-ROM Volume I, but the quality of the archive is debatable. BMUGNET as it was called then can be read about in this converted PDF, on PDF page 82 but there's some other AppleTalk and cabling articles too. The original format is a MacWrite document, which was imported into Word 5.1, then imported into Word 2004 and saved as a PDF via the Print dialog. Finally Acrobat X was used to trim blank pages (it has a lot of page breaks) and condense it all into a single PDF. Not a great preservation, but more readable on modern equipment than the original. Images are stacked towards the end of the PDF (because without a reference, it's the best that could be done), some of which ... well, people wanted to have fun. Anyways, Farallon took the product to market and ran with it.
PhoneNET is just converting RS422 full duplex to RS485 half duplex. Internally, the yellow and black wires, assuming a standard color arrangement, are merely differential pairs and are interchangeable with each other: meaning that it's not like a cross-over arrangement. This has to do because of the way that RXD+ and RXD- are tied together in one pair, and TXD+ and TXD- are wired together in the other pair. It is fully reversible and the wires could even be crossed over, as in yellow > black and black > yellow and it will still work. Idiot proof if there was ever an example of such. LocalTalk Mini-DIN-3 cables are the same except they have a dedicated signal ground wire.
Farallon also made PhoneNET-branded Ethernet cards, like for the SE/30 and such, but they are not PhoneNET serial cards despite sharing the same PhoneNET label. In the process of exploring PhoneNET, you may run across references to "PhoneNET" versus "PhoneNET PLUS". There doesn't seem to be any documentation on what the difference is between the two: although the most likely answer is revisions to the small circuit board in the PhoneNET connectors, which changed slightly in the early BMUGNET configurations and the later ones. PhoneNET appears to be first mentioned in a MacWrite document buried in the BMUG PD-ROM Volume I disc, dated for May of 1986. PhoneNET PLUS seems to be mentioned first around December of 1987 in a HyperCard stack.
There are different models of PhoneNET splitters and adapters. There are Mini-DIN-8 to 4-pin RJ14 adapters and splitters; and DE-9 to RJ-14 splitters, used for the Macintosh 128K to the 512Ke, which used DE-9 ports instead of Mini-DIN-8 for printer and modem connections, though the 128K can't use AppleTalk networks. Farallon expanded the concept with the PhoneNET StarController, which works like a router, and there was a repeater too, but realistically if people were serious about large PhoneNET networks, the speed of Ethernet was more attractive in the long run.
Some internal networks, like the University of Melbourne, ran asynchronous networks with serial cabling, and this required special software to allow AppleTalk data through by means of a program on a UNIX server. One such candidate, which wasn't tested, is called Atalk 1.0. A copy can be found here (Stuffit Deluxe 4.0 archive, plain desk accessory), with a complete dump also backed up locally. The same University also in some way supported IPTalk, IPTnnl, Columbia AppleTalk Package (CAP) along with some other miscellaneous stuff like ARNS (A Remote Network Server, providing tunneled AppleTalk inside IP) which was available for UNIX systems or Mac. Some of it relates to LocalTalk but most of it has to do with UNIX machines using EtherTalk gateways between Macs, or stuff like Macintosh UAR, a routing service thing. Fascinating.
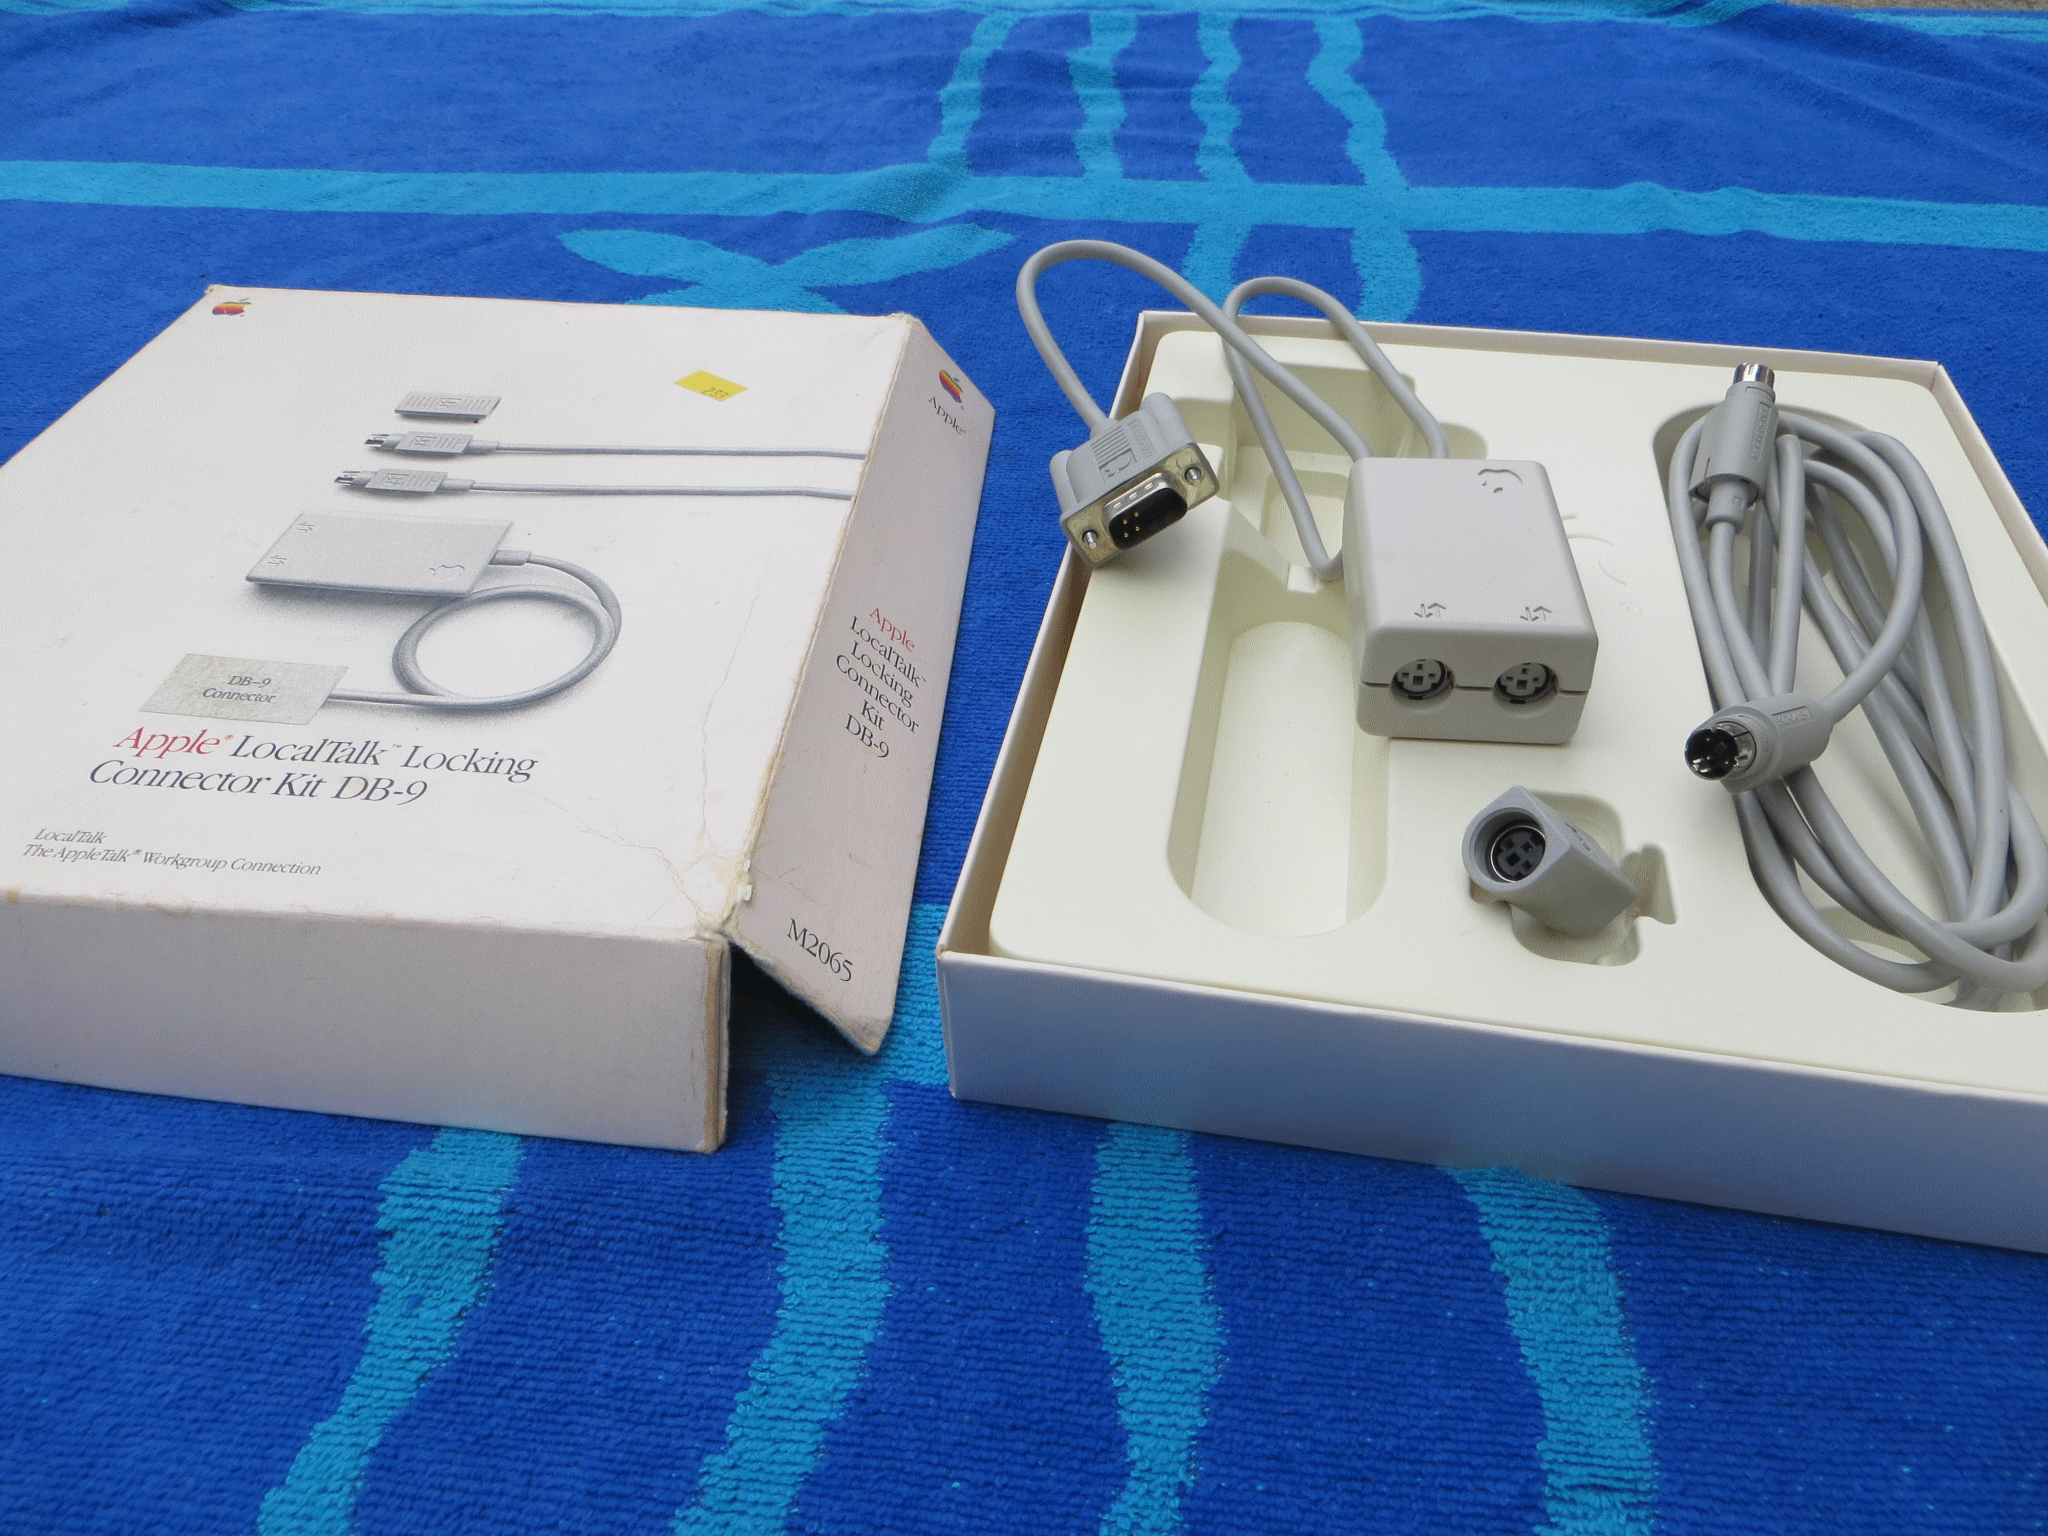 An Apple LocalTalk DE-9 kit |
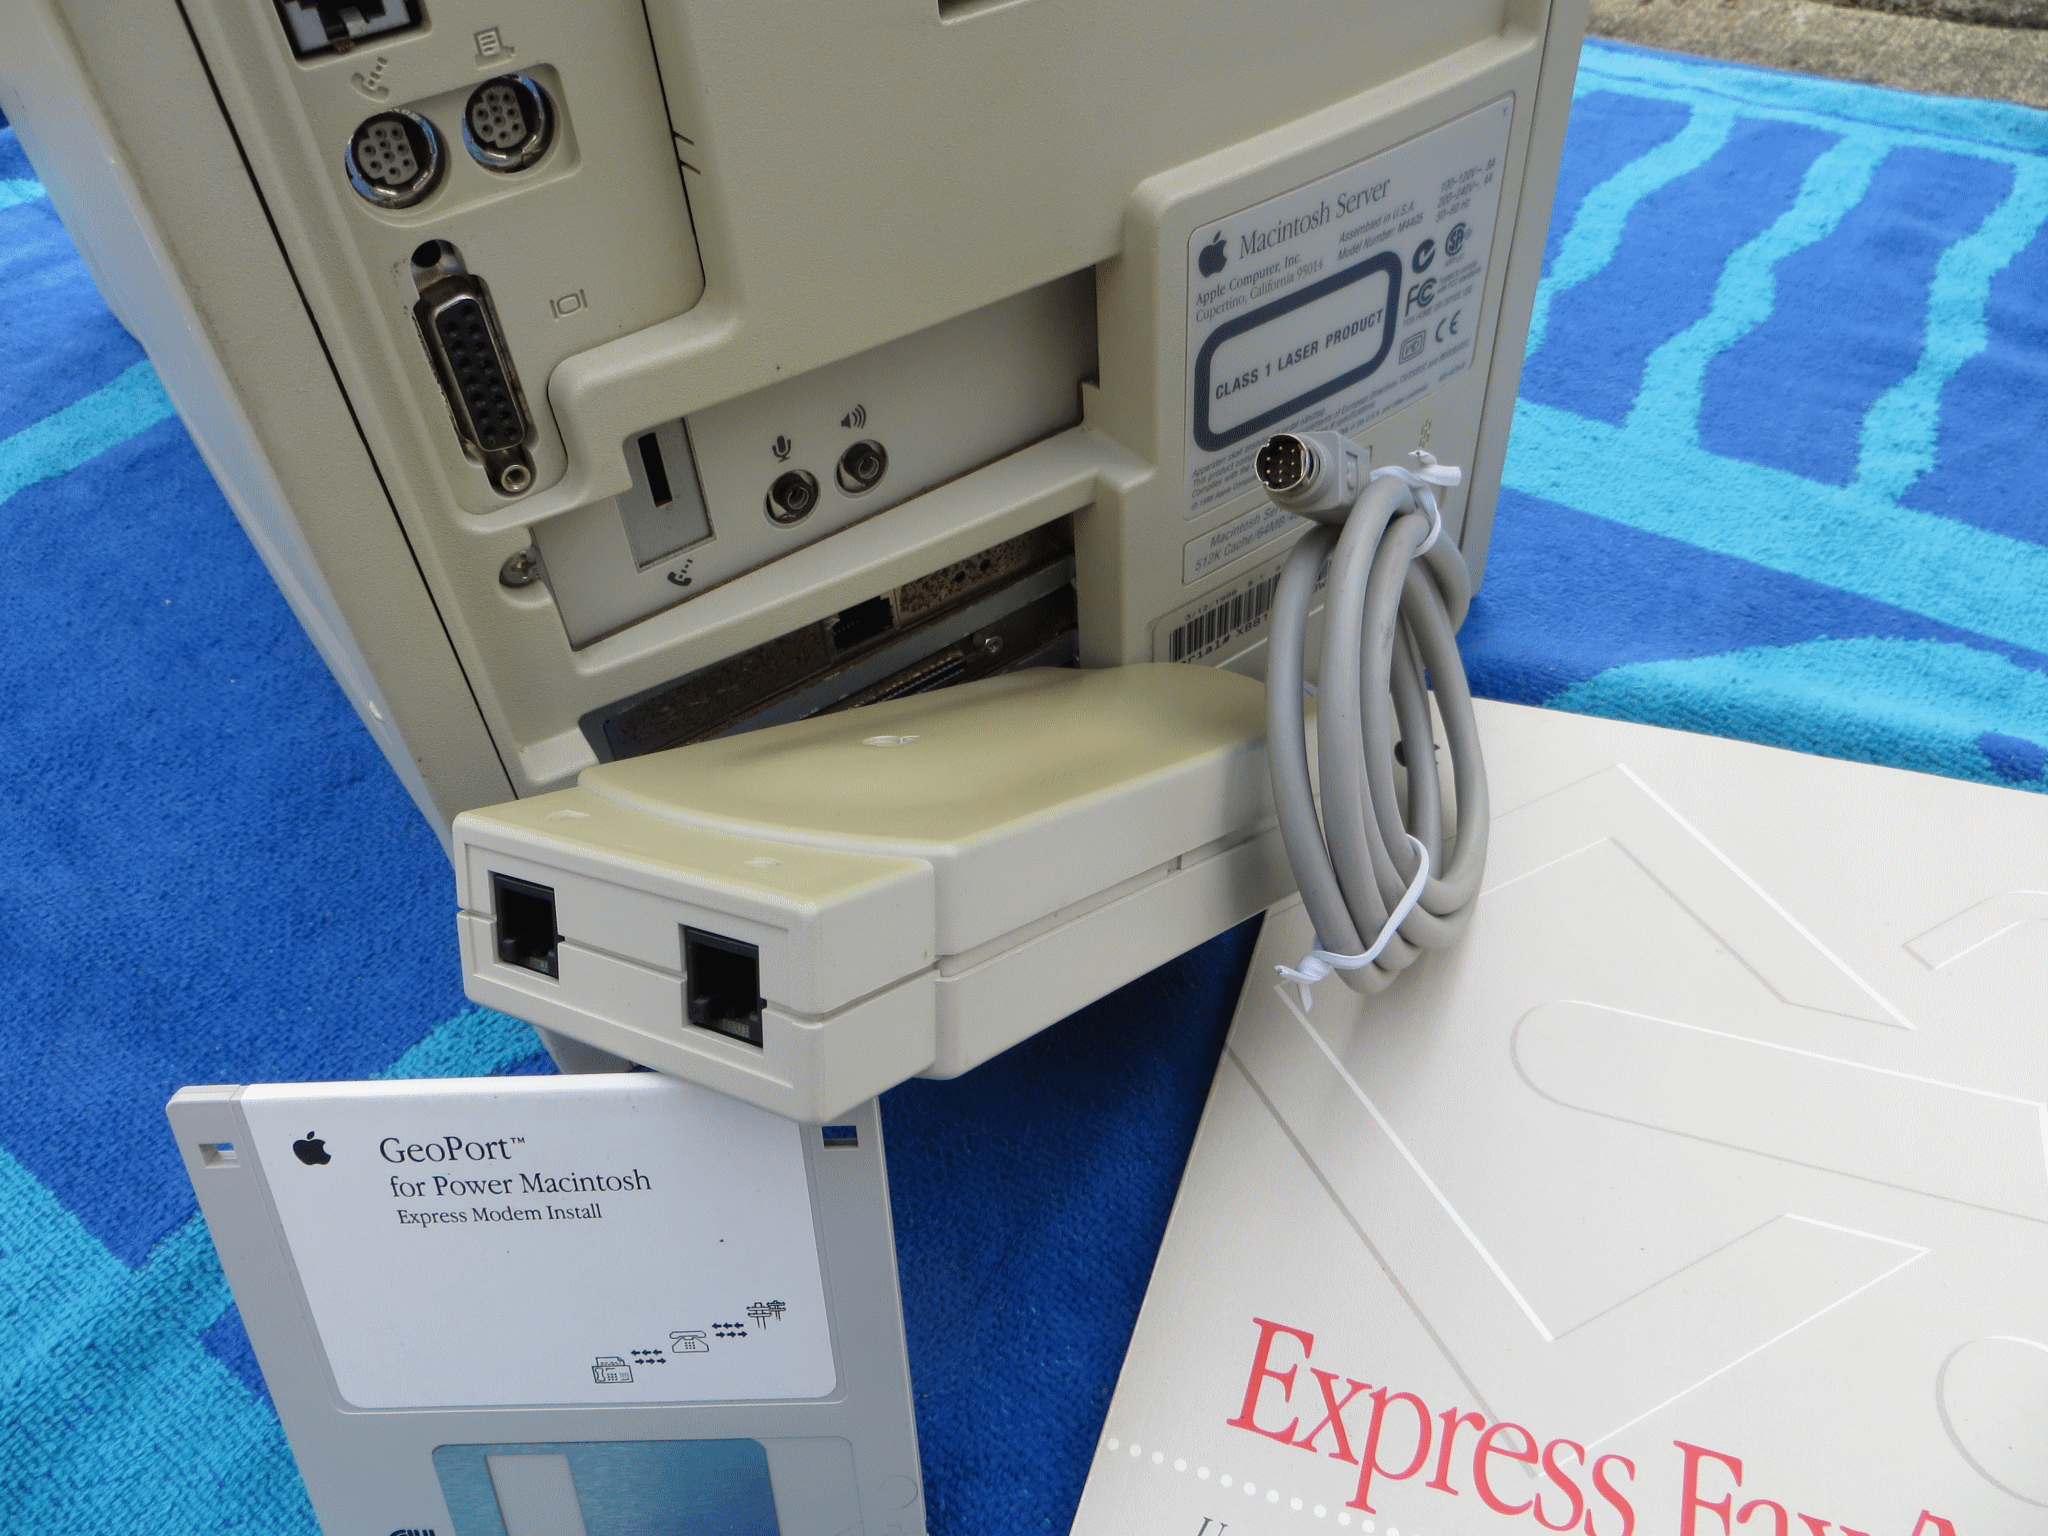 Server G3 with GeoPort and modem |
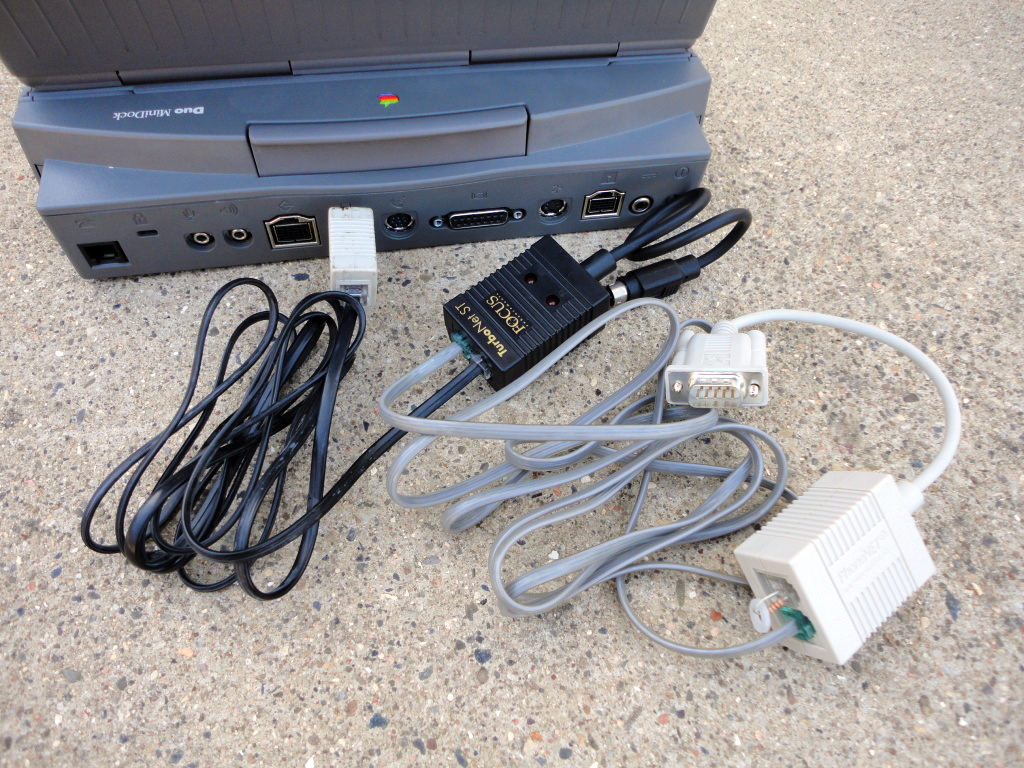 PowerBook Duo MiniDock with various PhoneNET adapters |
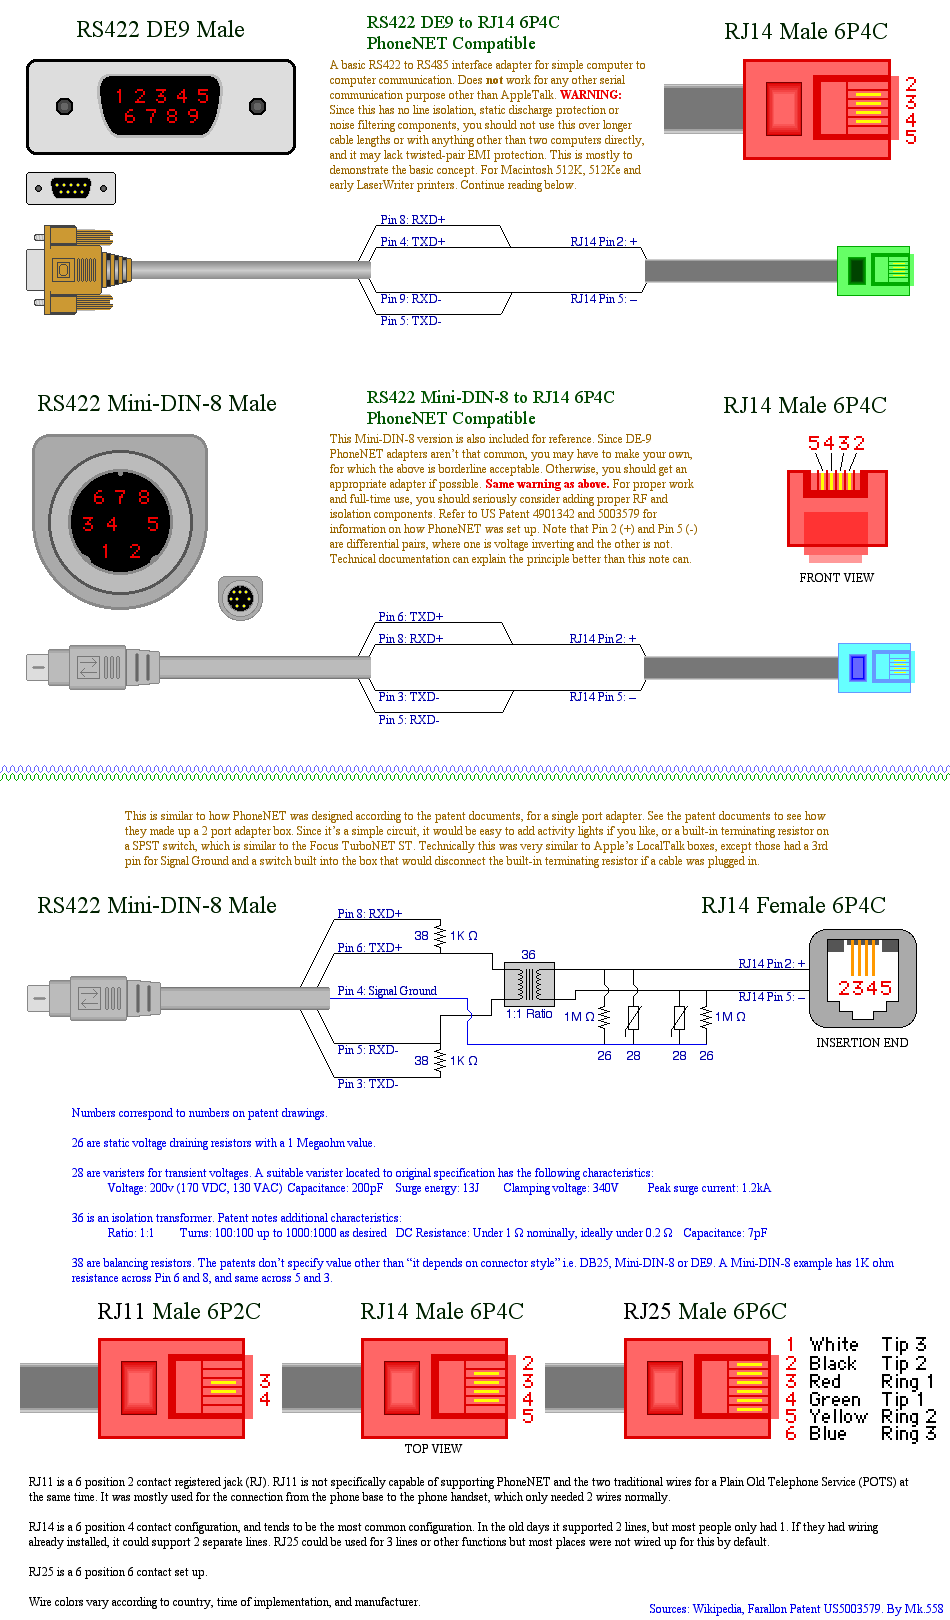 The wiring topology of a PhoneNET adapter device |
Regarding overclocking, the maximum a conventional "fast serial port" can be clocked is 921600bps, a GeoPort tops out at 2Mbps, but the fastest a terminal client can communicate in pre-OS X is typically 230400bps. Black Night for example, came out around 1995 and only supports up to 57600bps, with ZTerm 1.1 being capable of 230400bps. And although GeoPorts are cited by Apple for being capable of 2Mbps, no hardware for achieving this has ever surfaced. See this article along with another one for other info.
Pushing RS232 serial ports beyond 230400bps starts to run into the limits of the hardware (CPU bottlenecks, FIFO buffers being too small, cable lengths, voltage levels, slew rates, other various reasons) and realistically even today the only way to really push the limits is by stretching the RFC standards: which wasn't unusual back in the day either. Synchronous chipsets and differential pairs with lower voltage levels (it is harder to switch from +12V to -12V rather than +3V to -3V) work better for that stuff but while that stuff was known back then, it wasn't considered all that important, because the existing stuff was adequate and was cheap.
While overclocking hardware for LocalTalk (rather than other serial protocols) is sometimes brought up on various forums or email groups, the reality is almost nobody has one of these units. In the author's years of involvement in this hobby, only one unit besides the Farallon EtherWave Mac/PB adapter has shown up anywhere with overclocking capabilities. Part of the reason is that most places used PhoneNET because it was cheaper, worked well enough and could be integrated into existing wiring depending on the setup. Another possible reason is that full Mini-DIN-8 cabling had to be used, because PhoneNET cannot support hardware handshaking which is required for higher speed traffic, and neither does Apple's LocalTalk cables; which only uses two wires, according to Inside AppleTalk, 1st Edition. (The same book is the only one with a pinout description of the Mini-DIN-3 plug.) It is possible that faster speeds are supported on just the TXD and RXD pairs, but without research in this area it's hard to say beyond a reasonable doubt.
As far as overclocking on the hardware side is concerned, it does differ slightly from Interrupt, I/O Serial or Direct Memory Access serial ports. I/O Serial ports should be able to be pushed to 900Kbps because of the custom IC for handling the serial overhead, featured on the IIfx and Quadra 900/950 models, but like the 2Mbps claim on the DMA serial ports (most 68040s and GeoPorts, and all PowerPC equipped computers), nobody has actually formally documented this and tested it with actual hardware, as of this writing. Prototype testing was most likely conducted back in the day, but besides the Farallon EtherWave Mac/PB adapter, the TOPS FlashBox and the DaynaTALK devices, latter of which are very elusive with almost nobody even claiming to have one, we don't know more. On MacGUI's Usenet search, only five results even show up for a DaynaTALK device, which are mostly casual conversation or a product announcement; searching for overclock mostly returns results talking about the Apple IIGS. There is a slight chance that some serial printers did overclocking, but which ones remain unclear as that isn't documented anywhere.
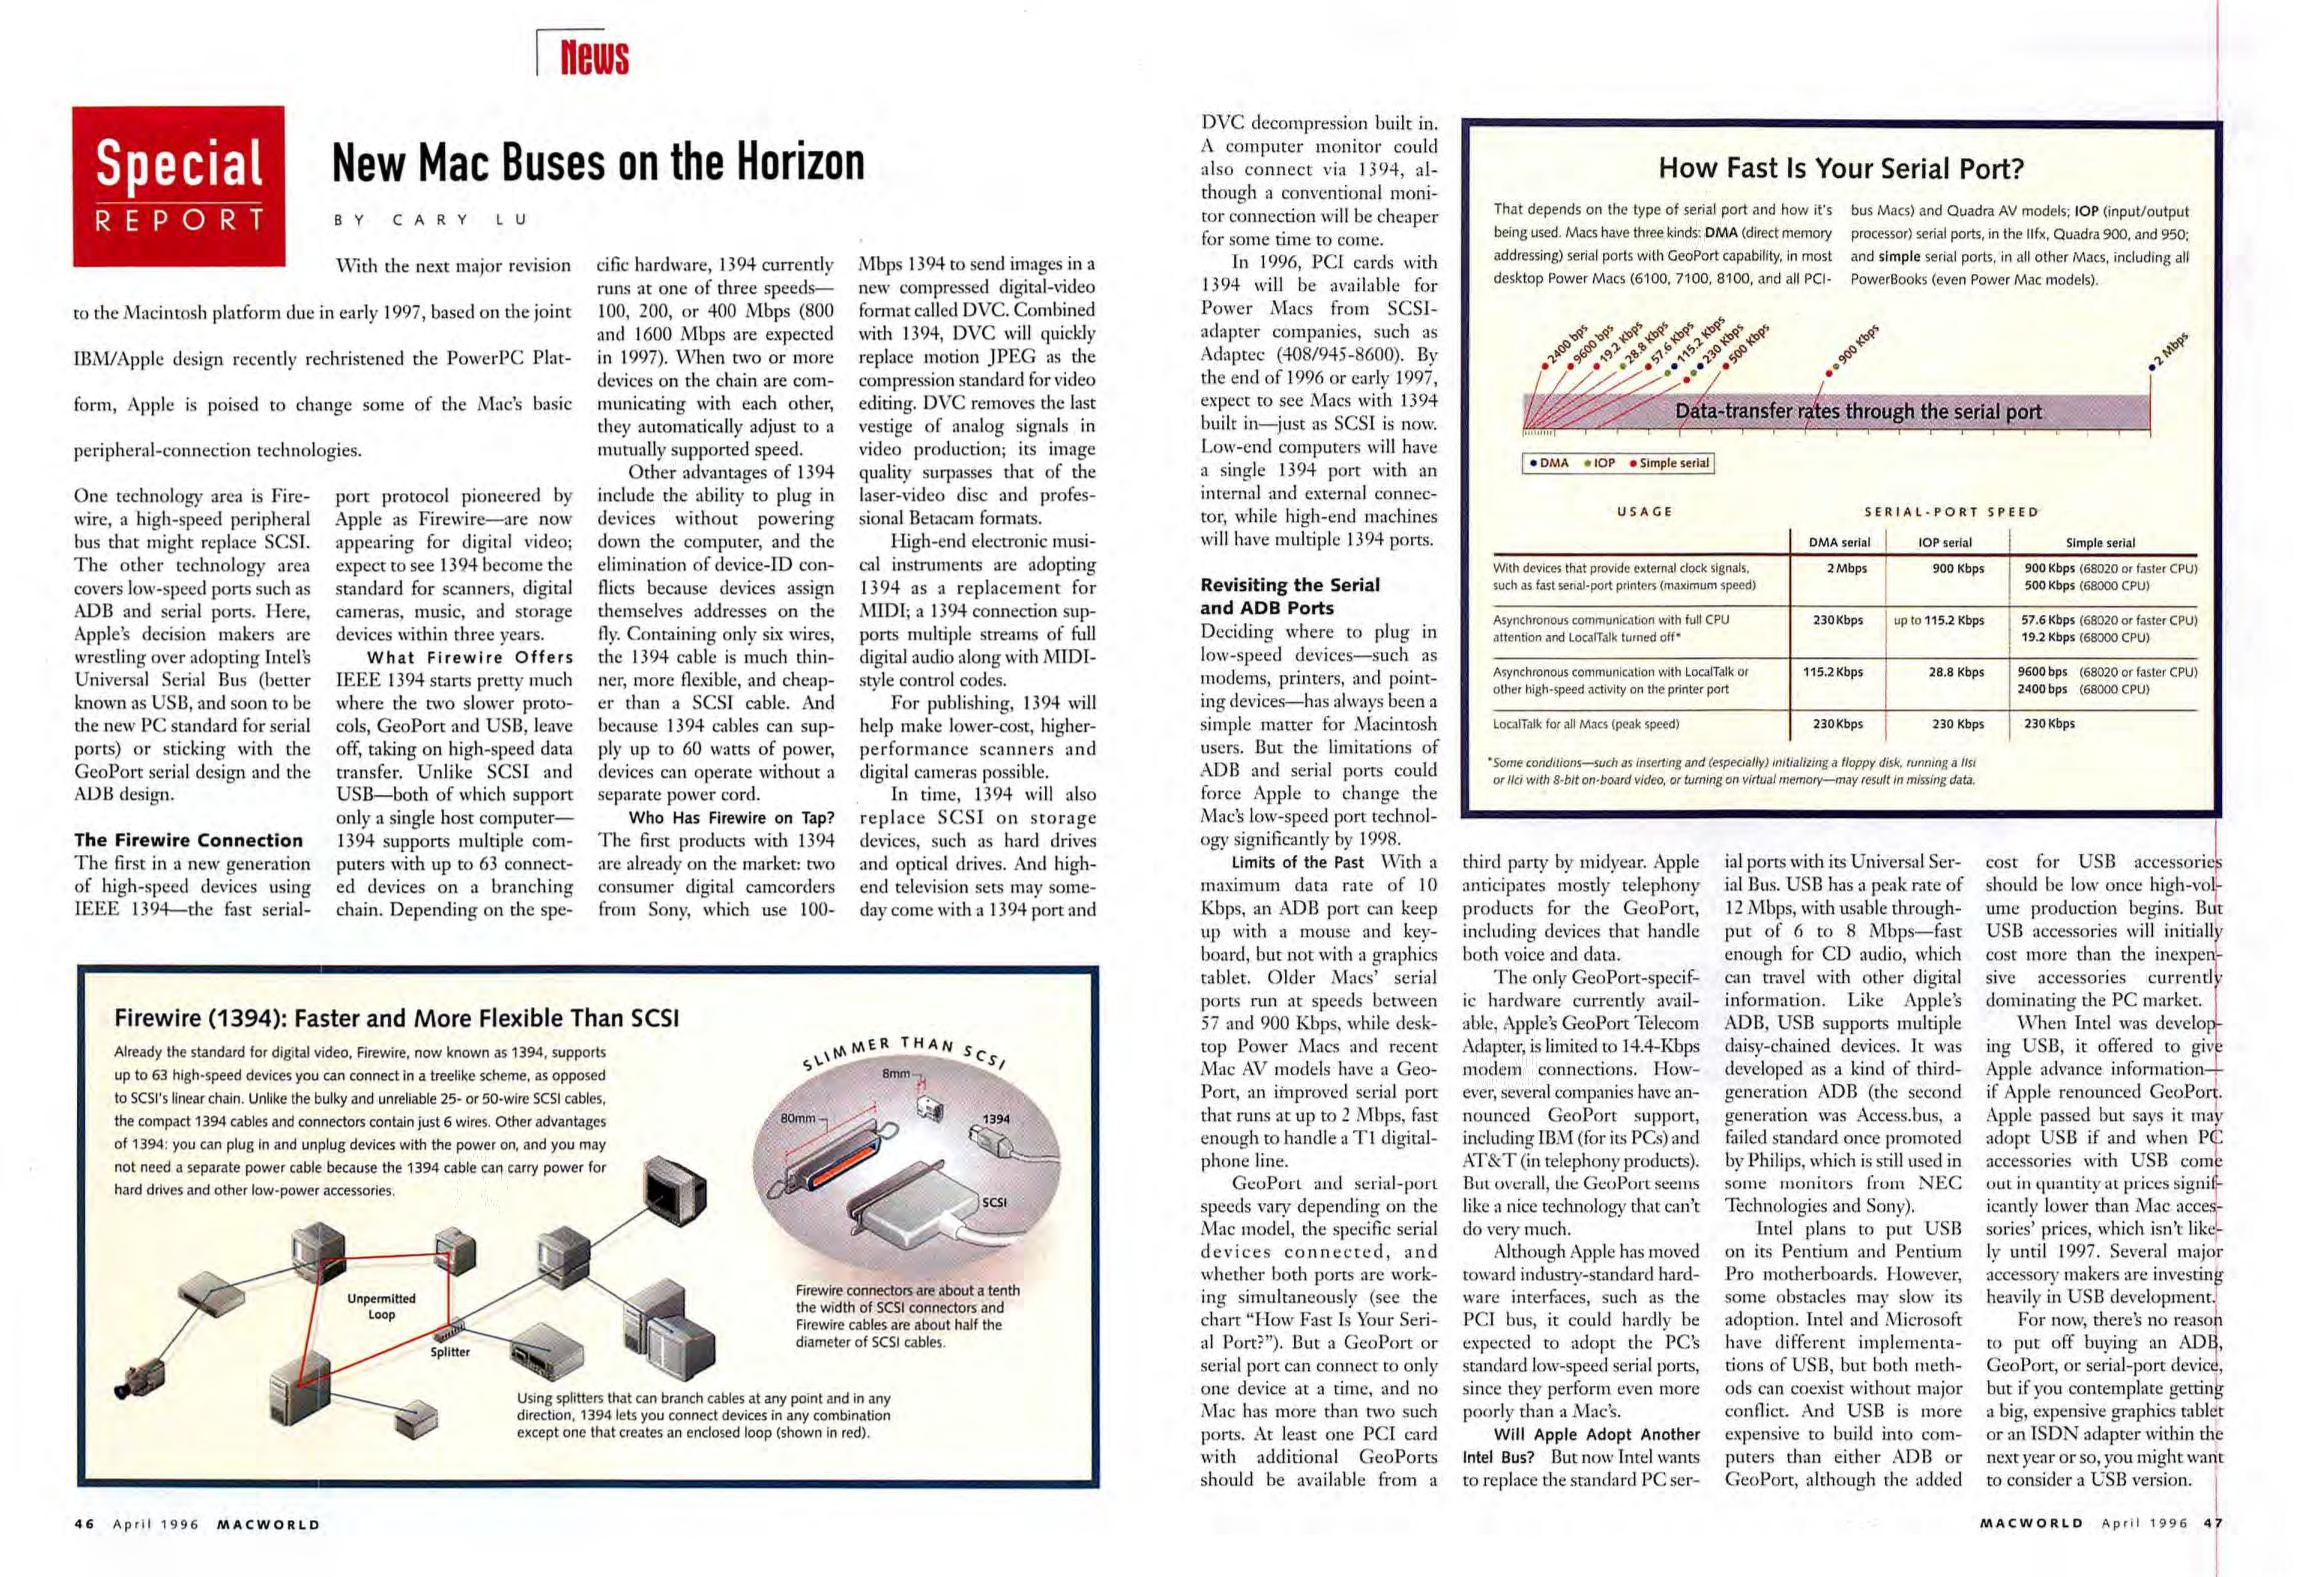
LocalTalk networks are simple to set up. Aside from a hub, repeater, router or the like, no special software installation is required. Plug the adapters into the respective ports, set up the wiring, and install terminators if necessary. If you don't have any terminators, they can be made with a blank RJ-14 plug (6P4C type, meaning 6 pins, 4 contacts), a 1/4W 120ohm resistor and a special crimping tool to crimp the wires into the jack. The resistor connects the outer pins together which are used by LocalTalk, in this context Tip 2 and Ring 2. They are the "unused" wires on a standard telephone single line setup: the two inner ones were used in a standard single line phone setup, being Tip 1 and Ring 1, making it easy to rig up LocalTalk and a telephone without too much work. When wiring up the network, note that LocalTalk is not a "ring" or "loop" topology, but a daisy-chain with terminators to close the chain. Using a ring topology without a hub is not advisable.
The preferred port to use for LocalTalk is the printer port, but the modem port can be used also if the computer has Open Transport active and installed. The involved computers should be off when all the wiring and connectors are rigged up. In the case of a simple network of two machines, then hook up the adapters to both printer ports. Once the computers involved have been connected correctly, the next step is to configure them. A PowerBook Duo with the built-in serial port tends to use Modem, but one computer can be using Modem and the other one can use Printer and they'll still get along fine. Only Macs that need to share out data need to turn on file sharing -- clients don't need to turn on their respective file sharing services to access other machines. Adjusting the color depth, turning off background processes, quitting unused applications and so forth can speed up LocalTalk, however nothing changes the inherent 230.4Kbps speed limit without external clocking.
LocalTalk works well mainly for simple and casual networks. For additional flexibility, Ethernet should be seriously looked at. More information can be found with this PhoneNET manual for useful tips about setting up daisy-chain networks, proper termination at wall connectors, and more. German readers may appreciate this source. For the TurboNET ST and PhoneNET adapter box images below, on the TurboNET ST, R1, R2 and R3 are 120 ohms, R4 (just to the right of R3) is 1M ohms.
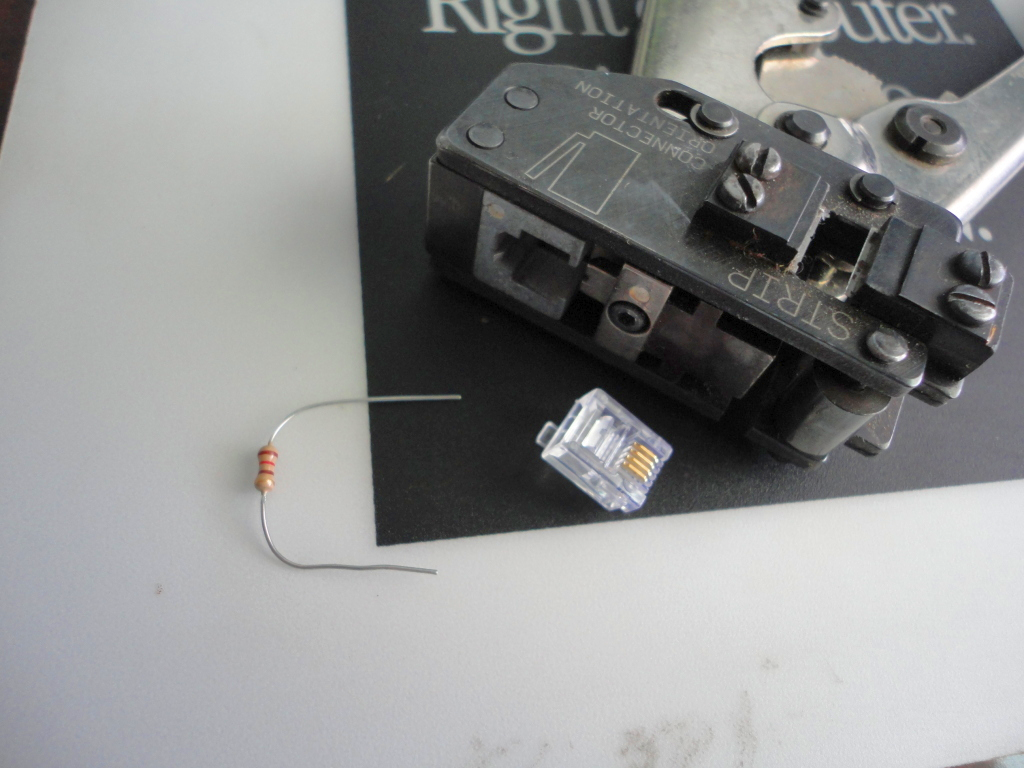 Components for constructing a terminator |
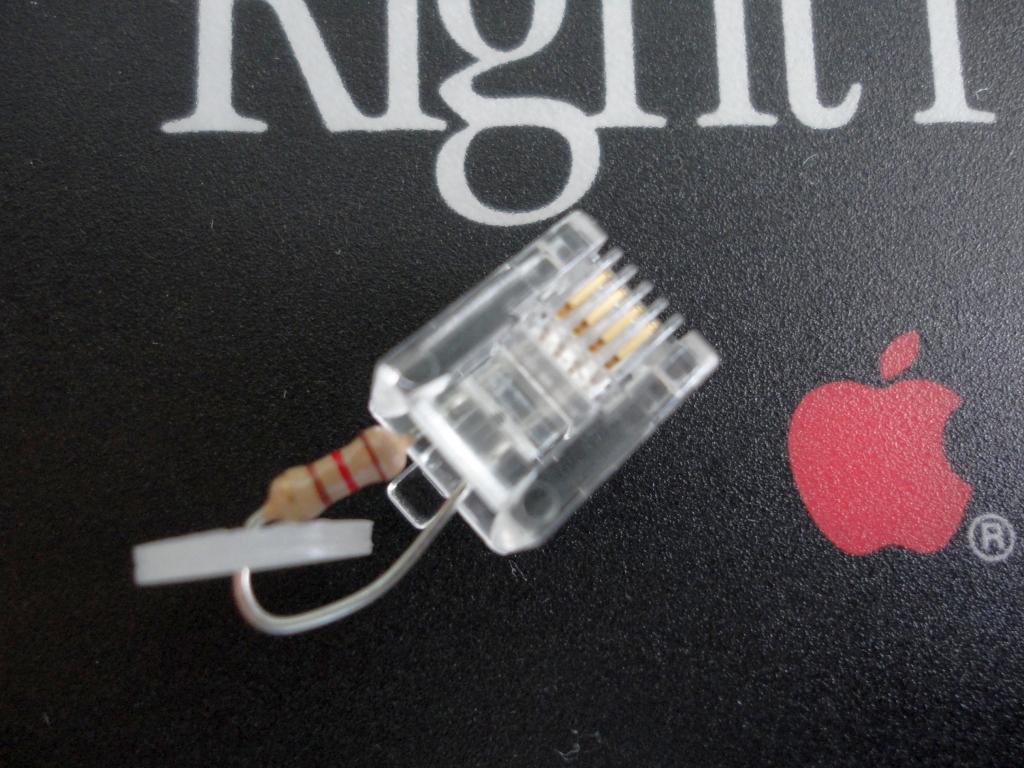 A terminator |
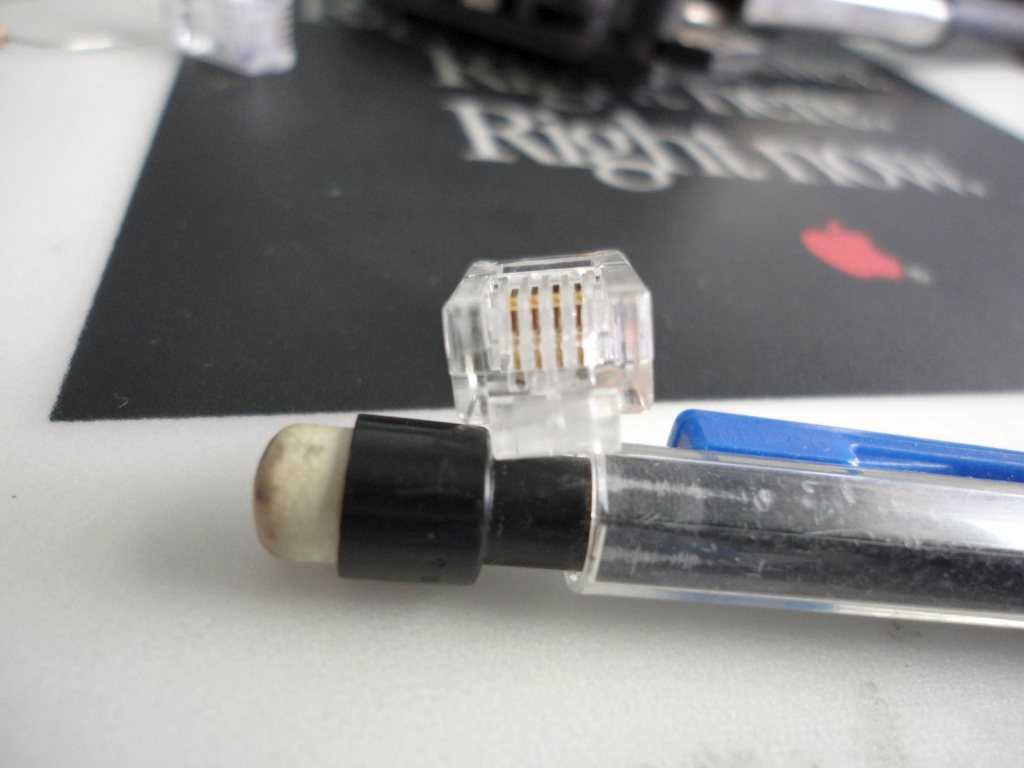 Male end of plug |
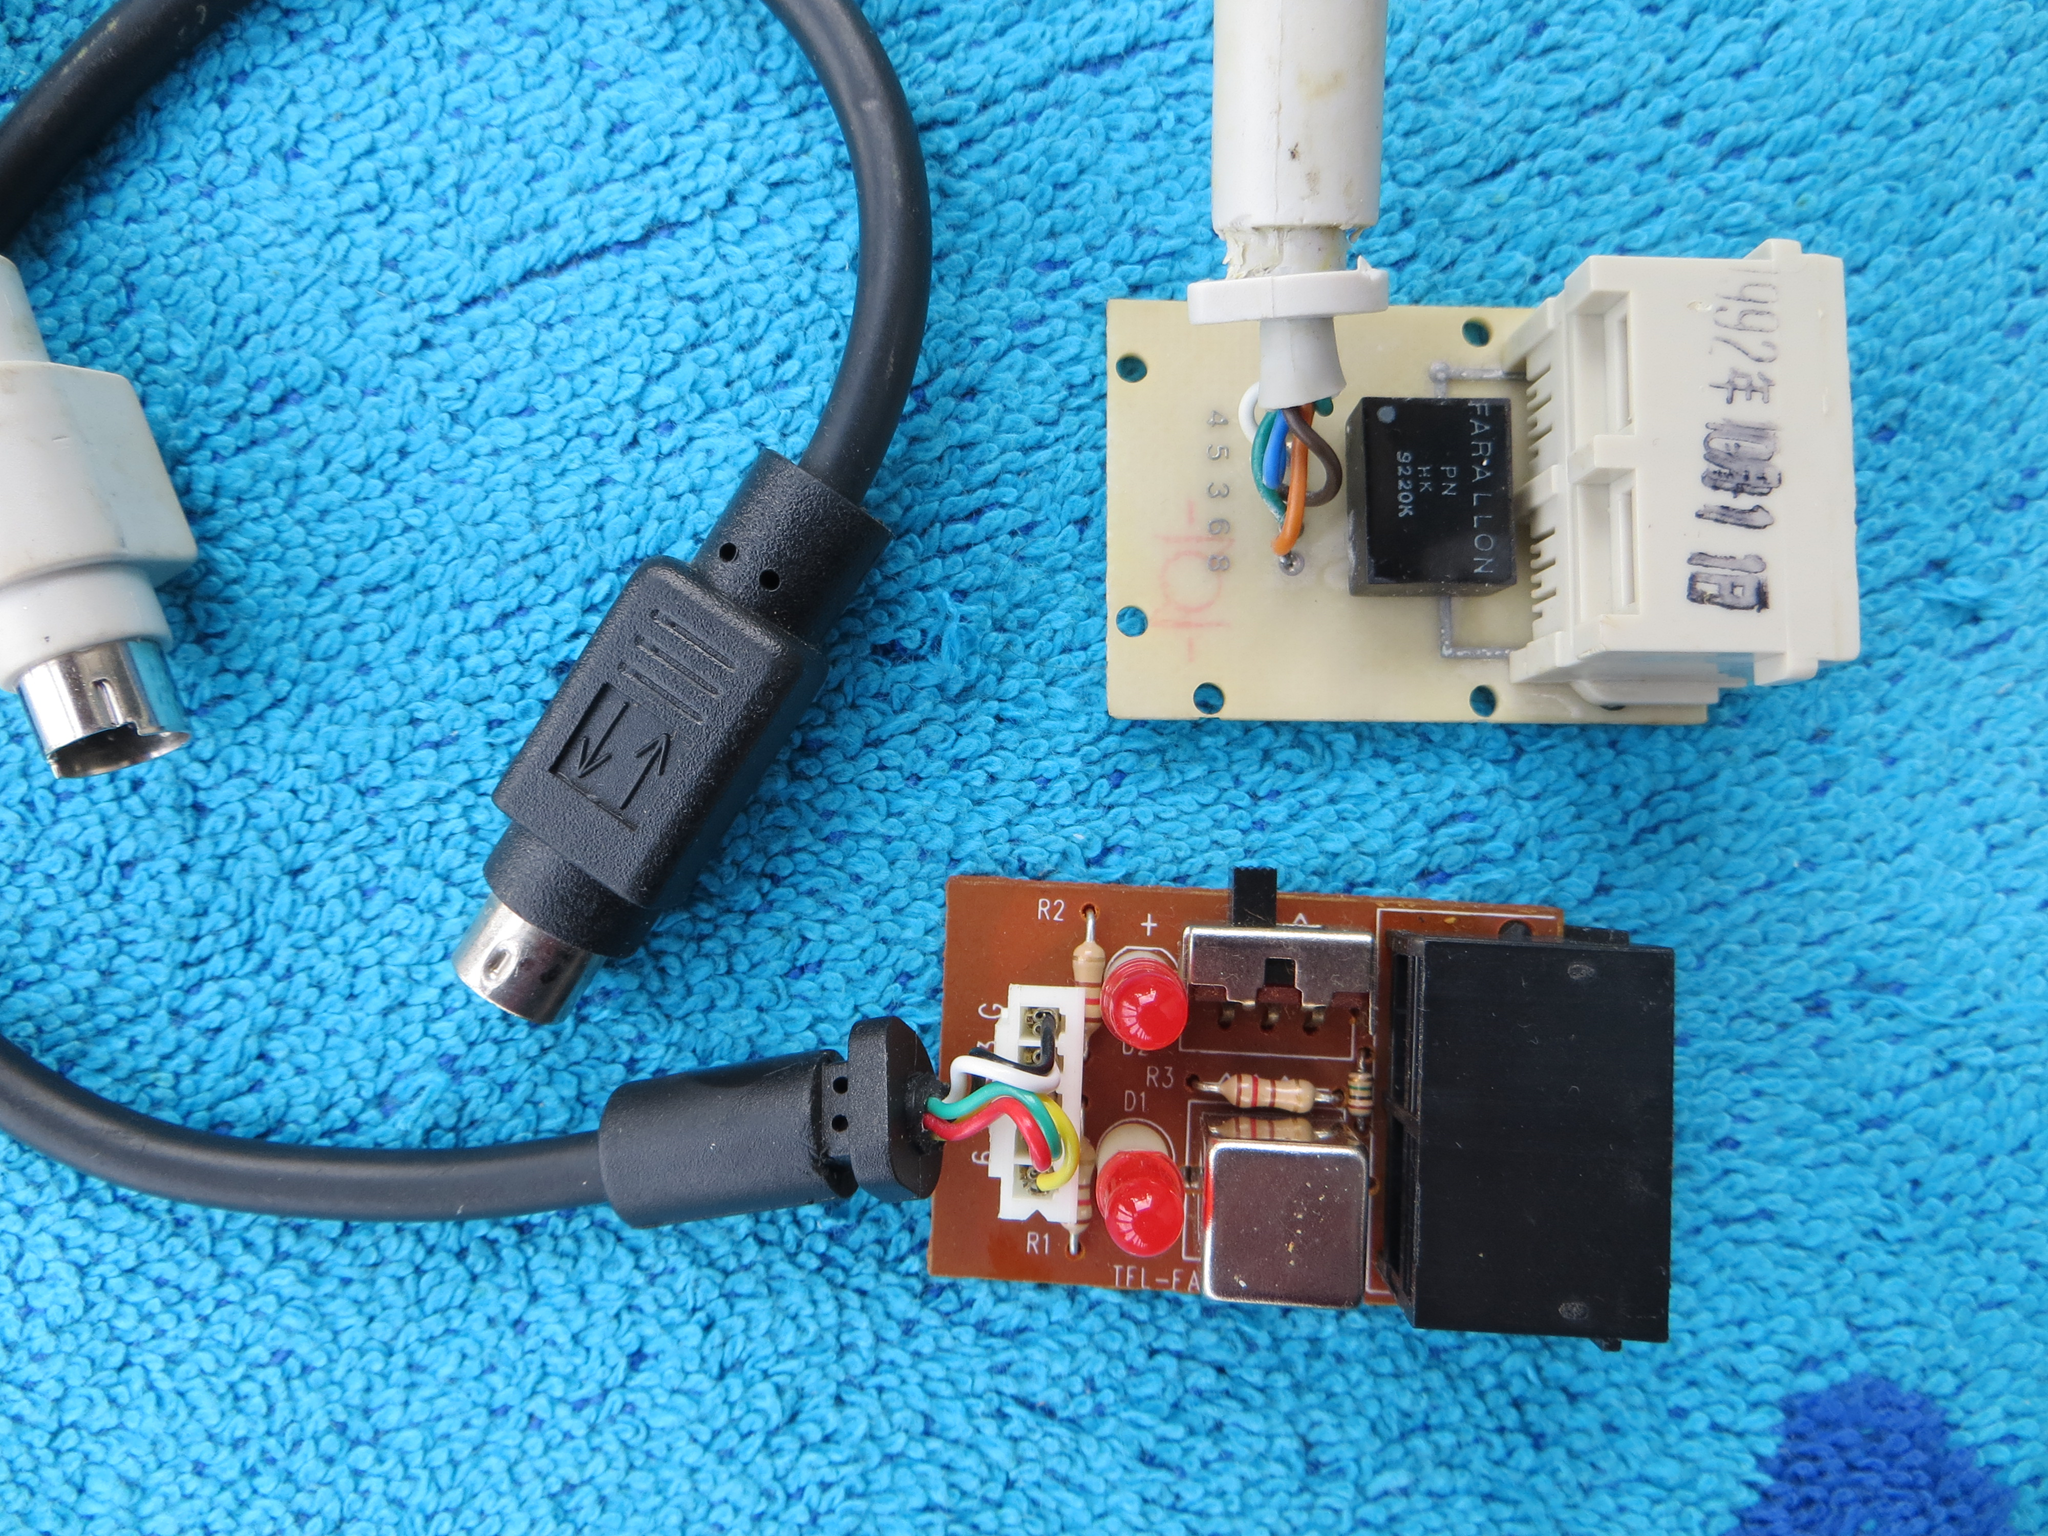 Top view of a Focus TurboNET ST and PhoneNET splitter |
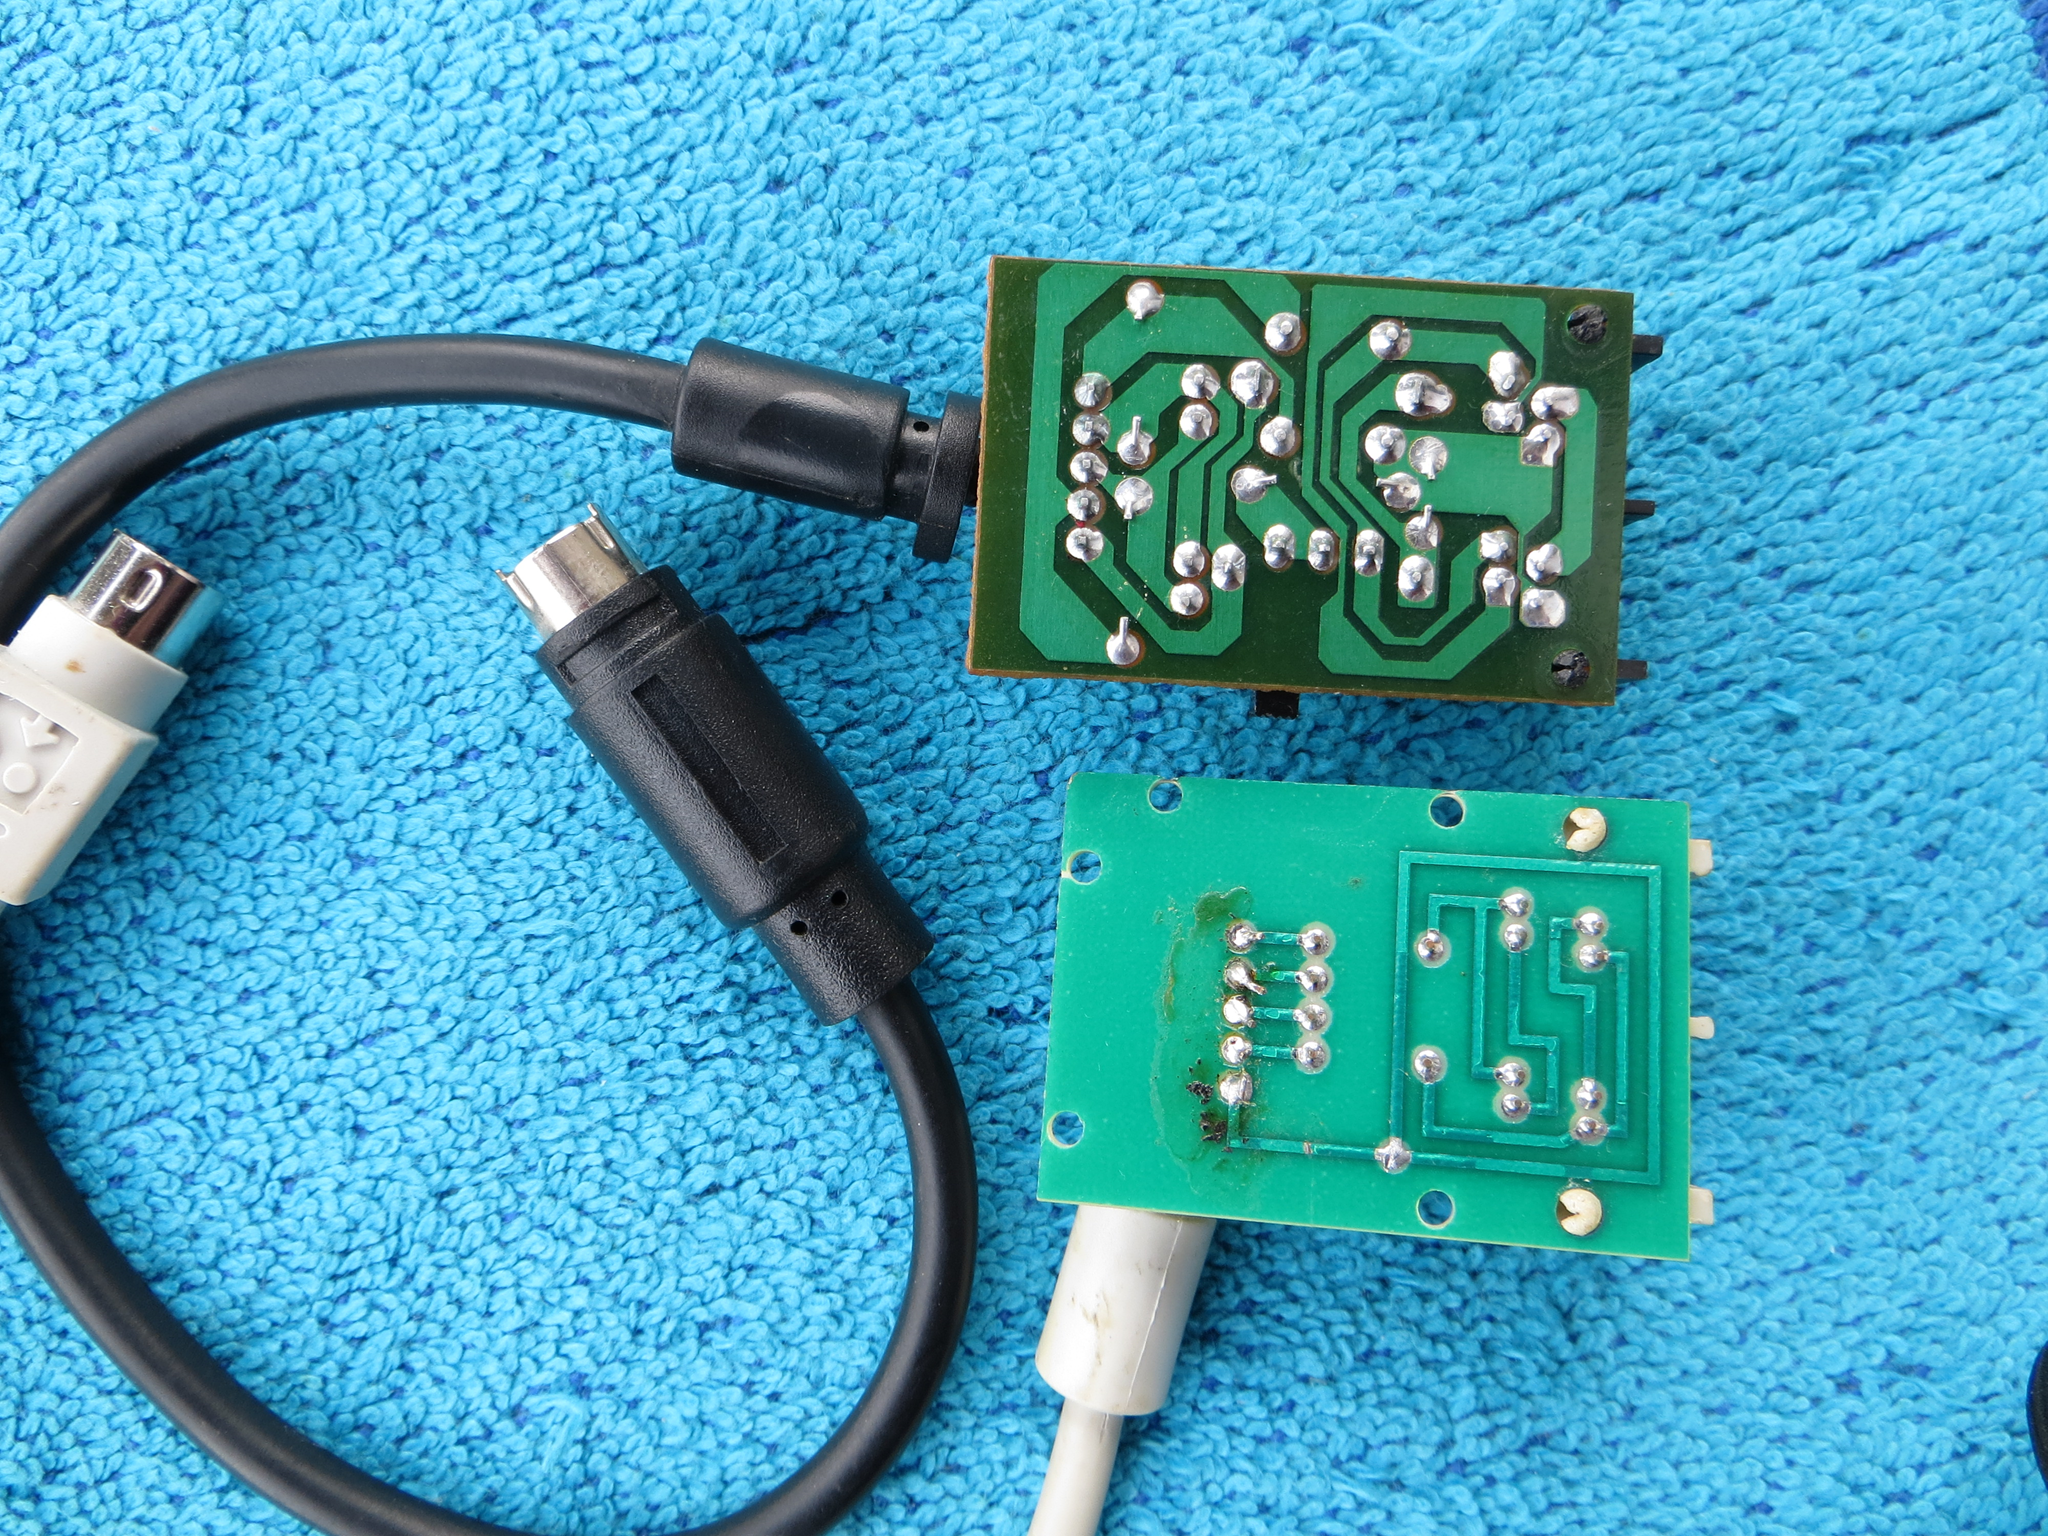 Bottom view showing traces (see note for values) |
One book does recommend against the TurboNET ST though, writing:
While the signal dampening is equivalent to conventional termination in many typical LocalTalk configurations, it doesn't work well in other configurations. Since the purpose of a self-terminating connector is to free the network manager from the worry of termination, and since the ST can't effectively eliminate that worry because it doesn't work in all configurations, we don't consider it a worthwhile alternative to the standard connectors. The regular TurboNET connector, however, is on a par with the PhoneNET connector.
(Kurt VanderSluis and Amr Eissa, Troubleshooting Macintosh Networks, M&T Books, 1993. Page 94, PDF page 106. Available on vintageapple.org repository)
Although this text is likely valid (author's is not clear cased) it shouldn't be a problem for short cable lengths where the amplitude may or may not undergo attenuation significant enough to cause a problem. On longer cable lengths where termination characteristics is much more important, it could be an issue. In particular the traffic activity LEDs are of considerable value when there is a problem with the network. Farallon didn't particularly approve of the Focus TurboNET ST, but you must also consider that Marketing of both firms has a say in this stuff too. Realistically today, we could use very low power consumption LEDs with some kind of small circuit to negate the power consideration of the LEDs, with the small circuit providing isolation from the signaling considerations while also providing uniform brightness.
System 3.3 up to System 6
Open the Chooser, and turn on AppleTalk if it has not been done before. Click the AppleShare icon to see any discoverable servers, click on the server, click OK to connect to it, enter any login information required, and proceed from there. The server is then mounted on the desktop. System 6 has the option of using EtherTalk or TokenTalk, as long as LocalTalk is selected in the Network pane in the Control Panel DA, then it's the same as these earlier systems.
Since these System versions don't have a server feature, which didn't come along until System 7, something else will have to provide a server service. AppleShare Server 1.1 and 2.0.1 are candidates for System 6 file servers, but those lock down the whole Finder and the machine isn't really usable for anything else. The only exception would be EasyShare, which Mac OS X cannot connect to. This information is discussed in detail in the More Info page.
System 7, 7.1 without Open Transport and 7.5 with Classic Networking
Open the Control Panels. Open Network. Select LocalTalk, if Ethernet was already selected. Close and open the Chooser. Any available servers are visible once the AppleShare icon has been selected, which shows available machines or shares to the right pane, which can then be signed into and mounted on the desktop.
To start the built-in file server, open Sharing Setup, enter in your username, a password (something is usually better than nothing), and a machine name. Start File Sharing, wait for it to start up, then go to the Finder and select the volume or folder that the prospective clients should be able to access. From the File menu, find the Sharing... selection and enable sharing as desired. Other machines can then open the Chooser, select the machine of choice, login, and the volumes or shares that are selected will appear on the desktop. Guest access will require enabling the Guest user in the Users & Groups control panel and allowing "Everyone" boxes to be marked in the folder sharing preferences.
Although it's probably possible, it is very difficult to make a System 7 file sharing server disk. Since Apple says a minimum of 360KiB must be free on every potential volume that could be shared, this makes the boot floppy a tough project. The size of the System file, Finder and the File Sharing extensions push it to about 1170-1300KiB, which is too much. In any event the Macintosh User's Guide for System 7 says floppy disks can't be shared, but perhaps something else could be shared, like a RAM disk. Even if it's possible, LocalTalk will have to be used because EtherTalk resources take up too much space.
System 7.1 and 7.5 with Open Transport, 7.6 up to Mac OS 9
Open the AppleTalk control panel. Select the either the Modem or the Printer port depending on which one is desired. Connect to another server through the Chooser just like the previous versions of Mac OS. Depending on the AppleShare Client version, the option to connect over TCP/IP may be available, this will require configuring Open Transport through the TCP/IP control panel. This is discussed later in this Guide.
Using the built-in file server is easy: open Sharing Setup (known as File Sharing in Mac OS 8 and above), fill out a username and password, set the machine name and click Start File Sharing. Wait for it to fire up, then go to the Finder and select the volume or folder that the prospective clients should be able to access. From the File menu, find the "Sharing..." selection (later Macs get it from a Get Info tab) and enable sharing as desired. Other machines can then open the Chooser, select the machine of choice, login, and the volumes or shares that are selected will appear on the desktop. The Guest login is enabled by finding the Guest user in the Users and Groups control panel and activating it by double-clicking on the user account to open a config window. Otherwise, users login by entering the account details of a Registered User, which can either be the administrator or a custom profiled user which is created in the same control panel. File Sharing enables sharing of all volumes 2MiB and larger. This may prevent them from being removed or ejected, like Zip disks. Turn off File Sharing first. For OS X, just use lsof in the command line.
The MacIP selection in the TCP/IP control panel is for hardware MacIP gateways like the quintessential Gatorbox or using software gateways like IPNetRouter. It is not important for LocalTalk only file transferring. Delayed starts on File Sharing is not unusual, and Apple did issue a few TIL articles about File Sharing issues, see these below:
- TA45283: About File Sharing in System 7 Through Mac OS 9
- TA21564: Personal Sharing: File Sharing Can't Be Enabled Message
- TA46946: System 7: Sharing CD-ROM Discs & Other Removable Media
- TA32442: System 7.1: Troubleshooting Common Issues
- TA32820: System 7.5: Long Startup Times
- TA32820: AppleShare: Why is there Activity When Opening Local Folders?
- TA40236: Mac OS 9: IP File Sharing Delay (referenced SLP document here)
Because of the work of Realitystorm on 68kmla, all these KB (Knowledge Base) and TIL (Technical Information Library) articles are readily searchable, with some 90+ articles were found by his work and were used for this Guide, and other sections with lists like this were likewise made possible. Extraction and conversion was done to make them all compatible with Acrobat 5.0 (PDF version 1.4) for legacy reasons. Most articles are relatively accurate, but anybody who has gone deep into stuff like Inside Macintosh knows that errors persisted in documentation through Apple's history. One example is this article which states that MacIP doesn't work in OS 9 which is incorrect (TA38958). This Macintosh Server G3 233MHz model is running 9.1 and using MacIP off a serial port with a Farallon EtherMac iPrint Adapter with a Macintosh SE/30 running Apple IP Gateway. Of course some machines don't have RS422 serial ports, like this Pismo. Otherwise most are fairly accurate.
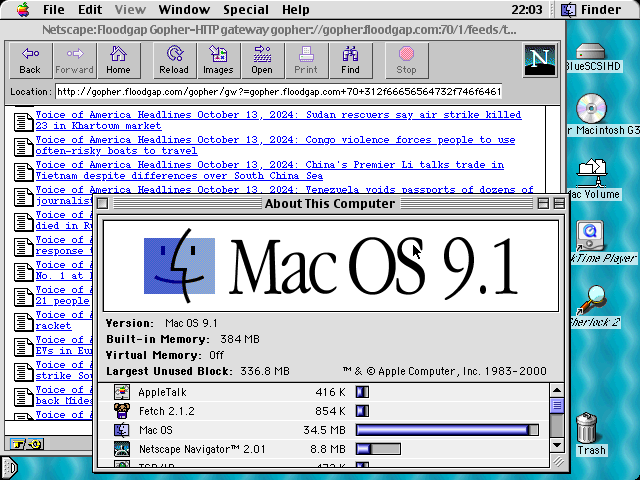
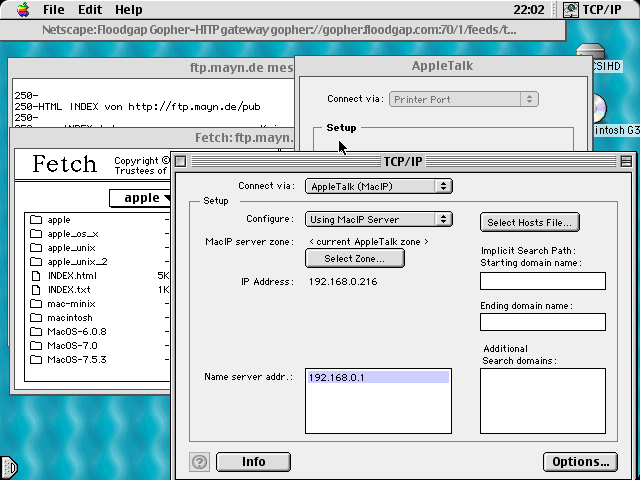
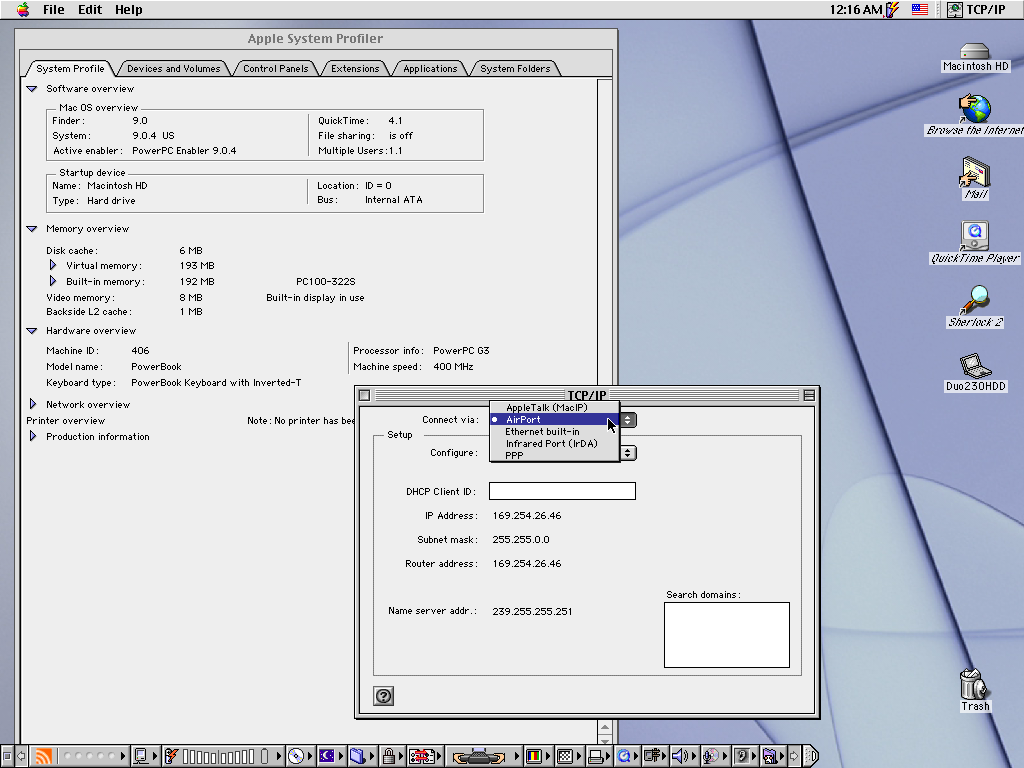
In Mac OS 7 thru 9.2.2, Program Linking is an option available in the Sharing Setup control panel (also known as File Sharing starting with Mac OS 8). Program Linking is for certain applications which can be linked over a network in certain ways. See this Apple KB for more on this. Generally, it is not required and is not needed to play network games, either. Remember that the application must be enabled as well in the File/Get Info menu (or File/Sharing...), and also should be compatible; i.e. SimpleText is not compatible, but WordPerfect 3.0 is.
Macs without serial ports
The iMac G3 and higher do not have serial Mini-DIN 8 or DE-9 RS422 ports. A USB to RS422 adapter will not work because the LocalTalk protocol won't work over USB without bit-banging and a RS422 transceiver of sorts, like the TashTalk which uses a PIC microcontroller. OS X does not support LocalTalk either, so 9.2.2 is going to be last system version to support LocalTalk off serial ports, if they are the computer, such as the "Beige G3" series, though the serial ports are still accessible within OS X for other purposes. An AppleTalk bridge is the only hardware device that will allow these computers to access LocalTalk networks. Also in case this has not been inferred earlier, the regular DE-9 or DB-25 serial ports on PCs is incapable of working with LocalTalk traffic. Use a LocalTalk PC card (usually were ISA bus cards) or an AppleTalk bridge.
TOPS FlashBox
Besides the Farallon EtherWave Mac/PB adapter, this is the only device that has been found that supports overclocking. There weren't too many of these types of gadgets back in the day: BYTE Magazine conducted a review of a DaynaTALK and a TOPS FlashBox in a November of 1989 issue (titled LAN Aid: Mac Booster Modules, page 219, PDF page 259) which boasted of speeds of up to 850Kbps and 768Kbps respectively. MacWorld also did a checkup, in a December of 1989 episode (page 169, PDF page 175). Those devices are difficult to find today, and getting one in good working order for a reasonable price is likely going to be quite remote because judging from quite sparse listings for them, they probably didn't sell very well. Could be worse: Neunet out of the United Kingdom (Neutral Ltd) was supposed to offer a NuBus card for 2.5Mbps, but that doesn't seem to have ever materialized, much less any of the normal Neunet wall interface adapters and drop cable hardware. Even information about Neunet at all is a forlorn landscape: check February of 1989 BYTE Magazine, PDF page 120 for an advertisement. It was supposed to be some kind of PhoneNET style system integrated into the house wiring. Dayna got close by suggesting 1.7Mbps was possible (credit: bitsavers.org) but only on PC compatibles.
|
This FlashBox came in a plain, generic TOPS box that was missing the "outer box" which held both box halves together, but was otherwise complete. The whole box includes a wall adapter for 9v DC (center terminal positive, 2.1mm barrel jack), a 800KiB floppy disk, a PS/2 style Mini-DIN-6 to Mini-DIN-8 cable for the computer to the device (the network side is a Mini-DIN-8 port for a full 8-pin serial cable), and the unit itself. It's not a very big unit, about 8.5x7.5x3cm, and the inside is just a dual layer PCB with some discrete components like resistors, diodes, a few capacitors (C3 is 16v 47uF 85deg C), ferrite beads, a 6.144MHz crystal oscillator, a red activity LED, a PAL chip which someone might dump someday and a Texas Instruments SN75176A RS422 bus transceiver chip. Most of the overhead is going to be done by the driver sitting on the host computer. Like the DaynaTALK device, in order for this to work properly every single machine will need one of these. There is no manual included and there is no documentation included on the floppy disk. Any text at all is hard to find: all that could be found was just a Product Guide. No test was performed because BYTE Magazine already did one and buying another one of these to make two would probably have left out other people would could have cloned it, which these days would be quite easy once the PAL chip gets dumped. Furthermore the author only uses Ethernet, only using LocalTalk for edge cases where Ethernet isn't quite ready yet and forking out another 75USD can't really be justified, although this may be regretted at some point in the future. A pinout of the cable required for the computer end is shown to the right. A DE-9 version was "planned" but the odds of one of those showing up is even slimmer than the normal Mini-DIN-8 variant, and it would probably be nothing more than a different cable. |
|
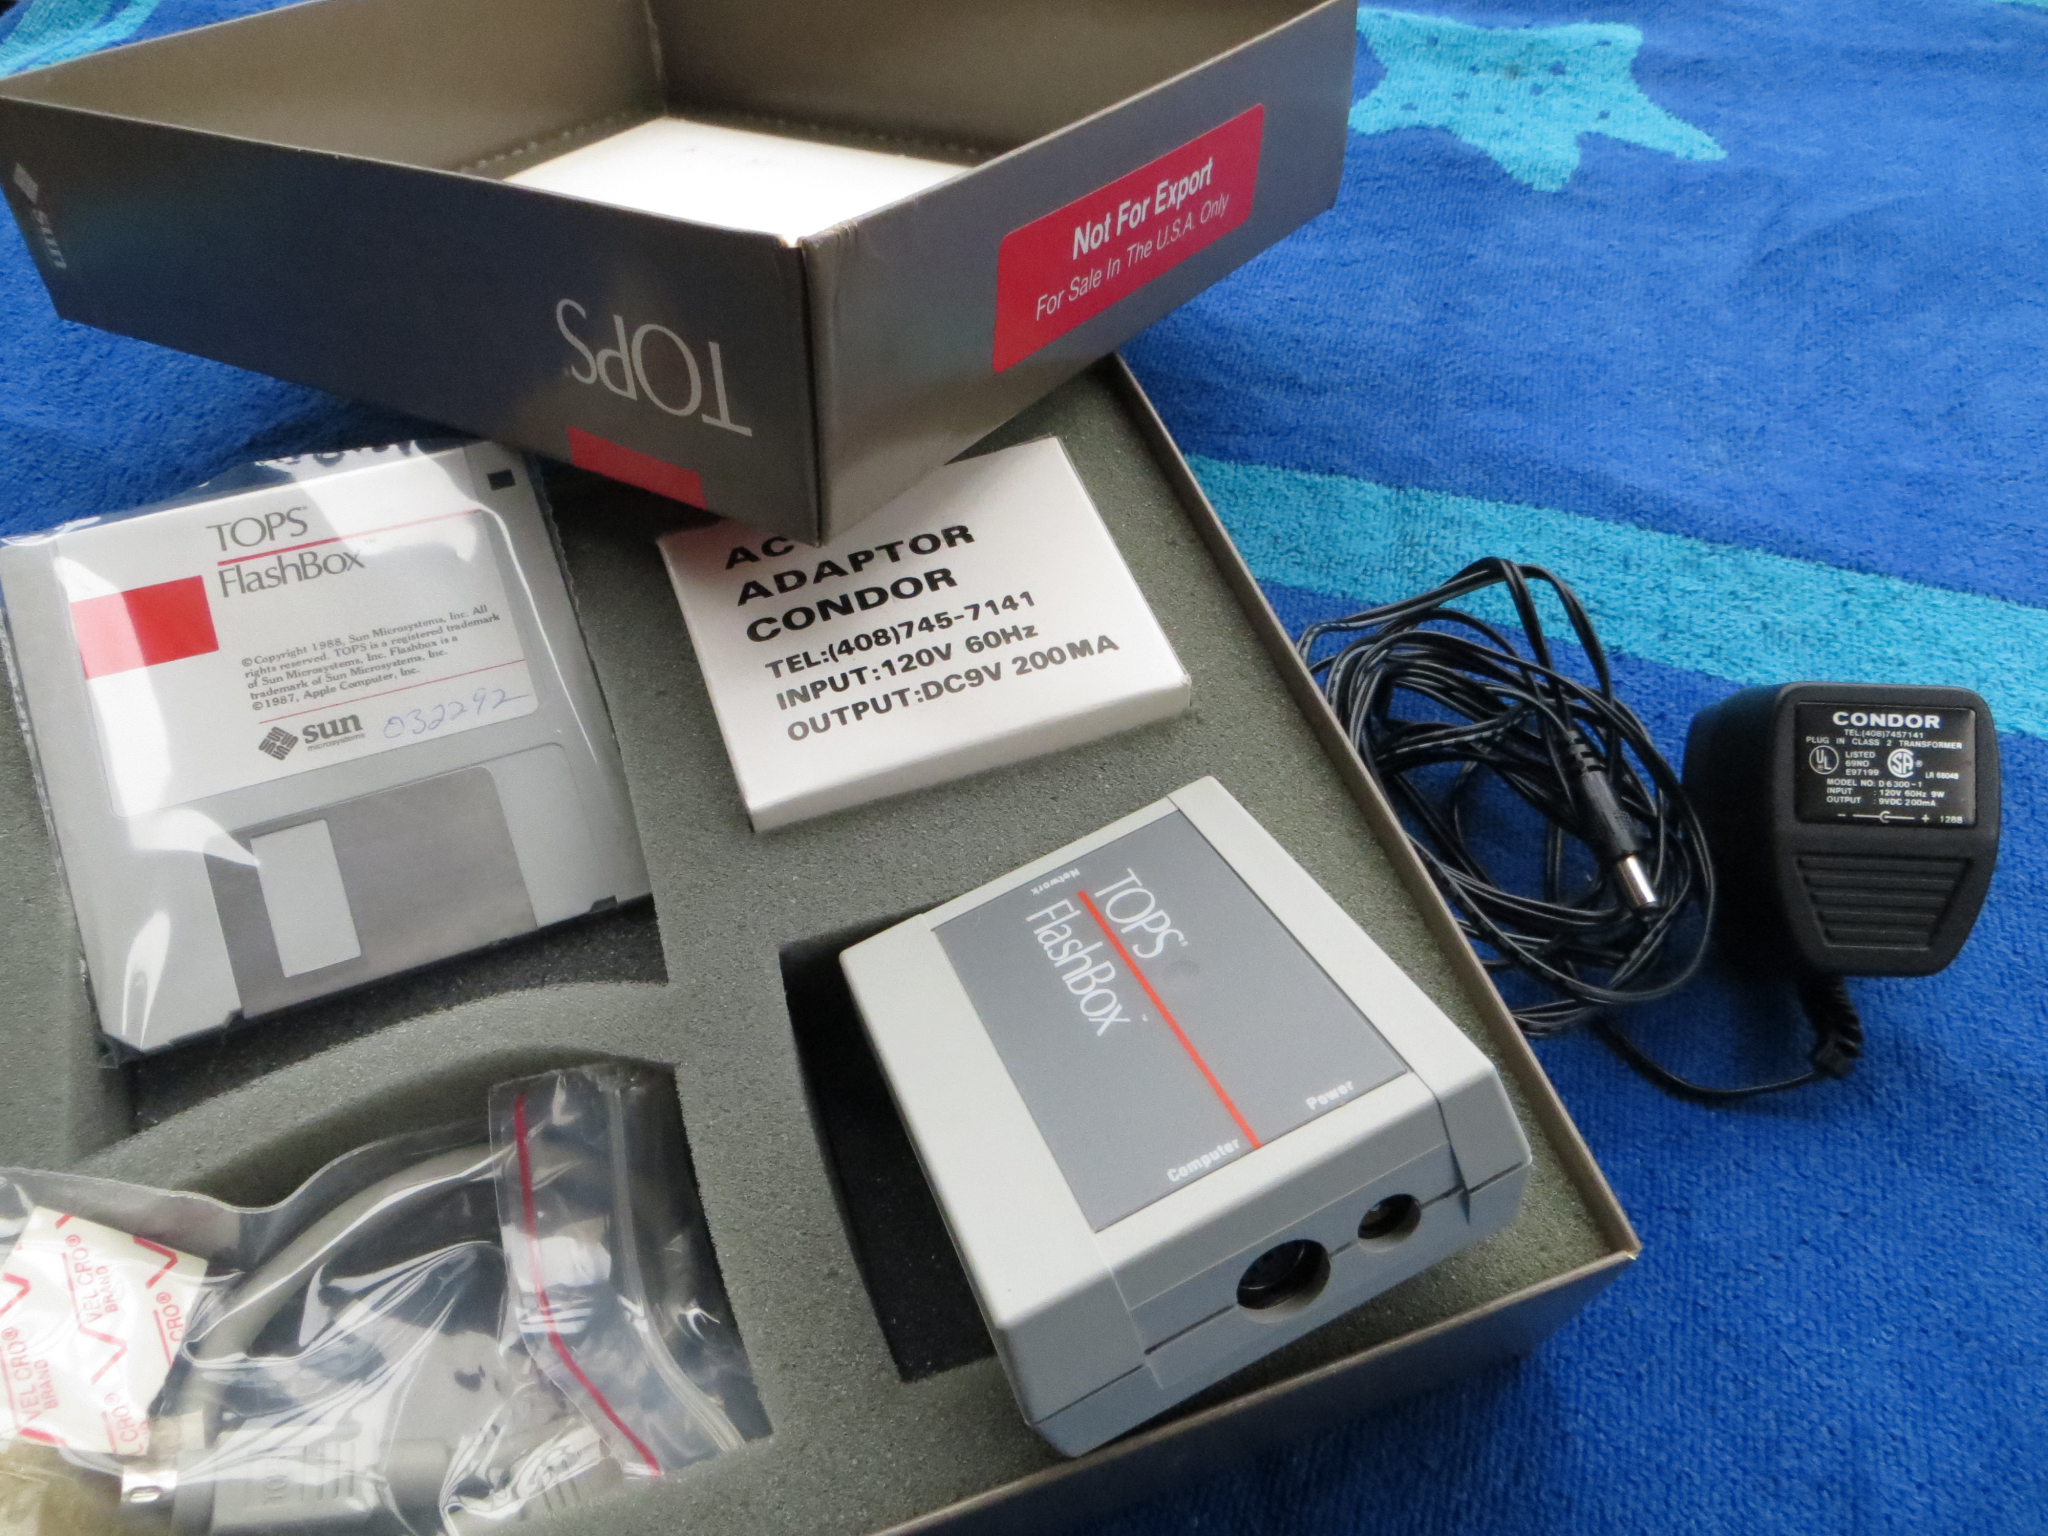 Box contents |
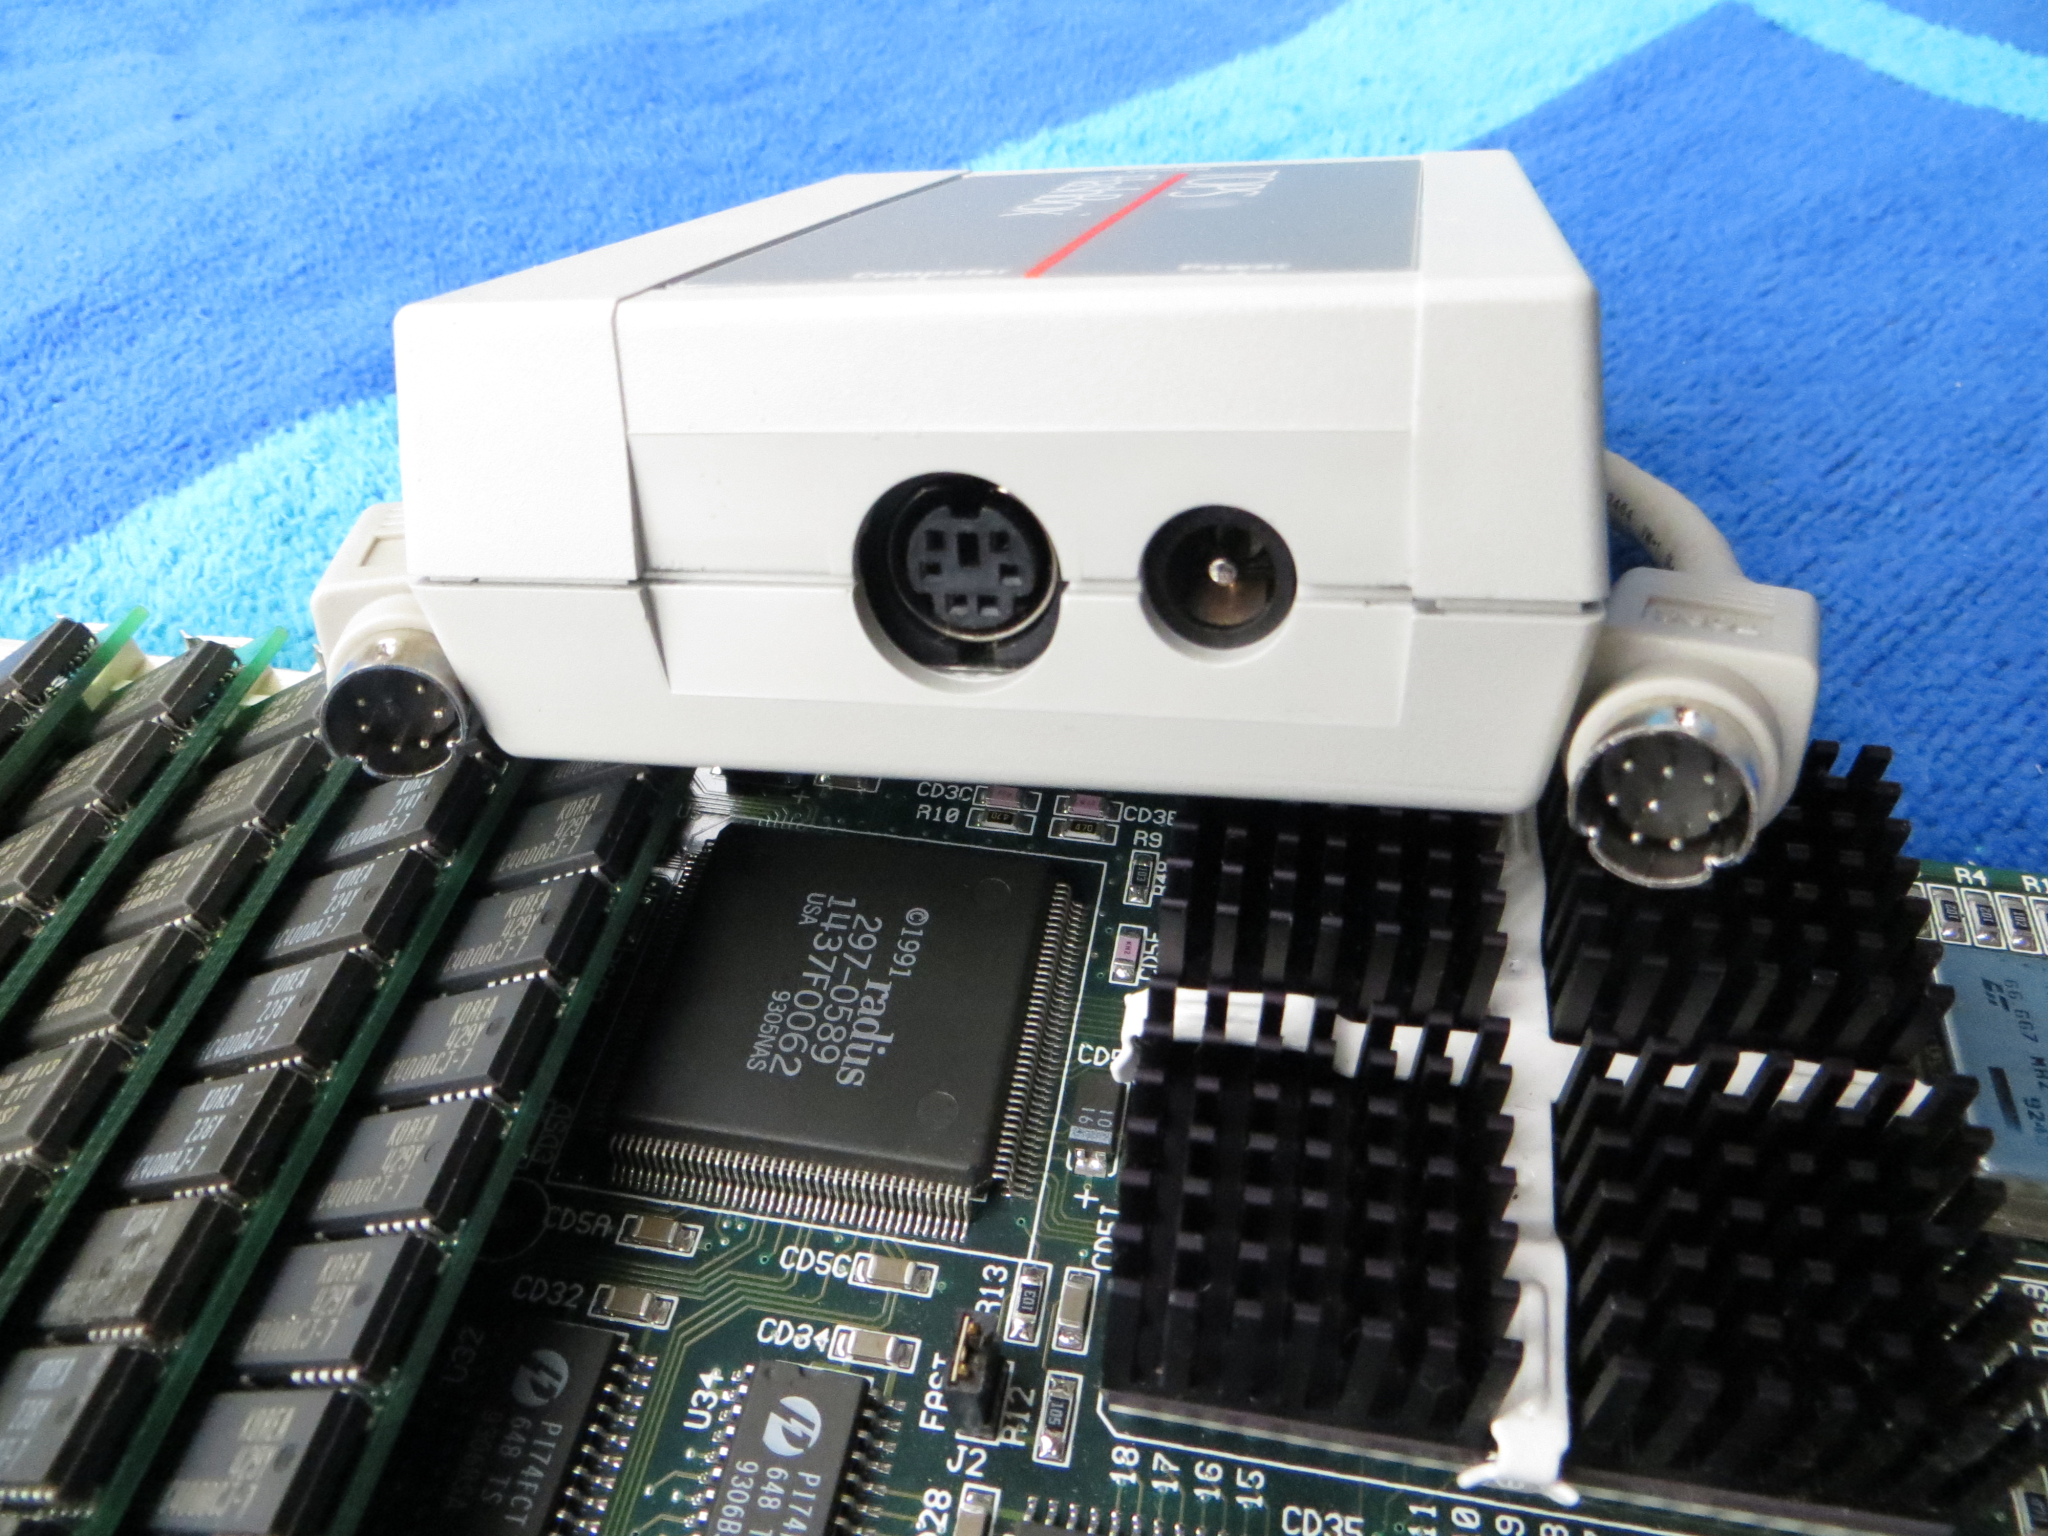 Computer-side interfaces |
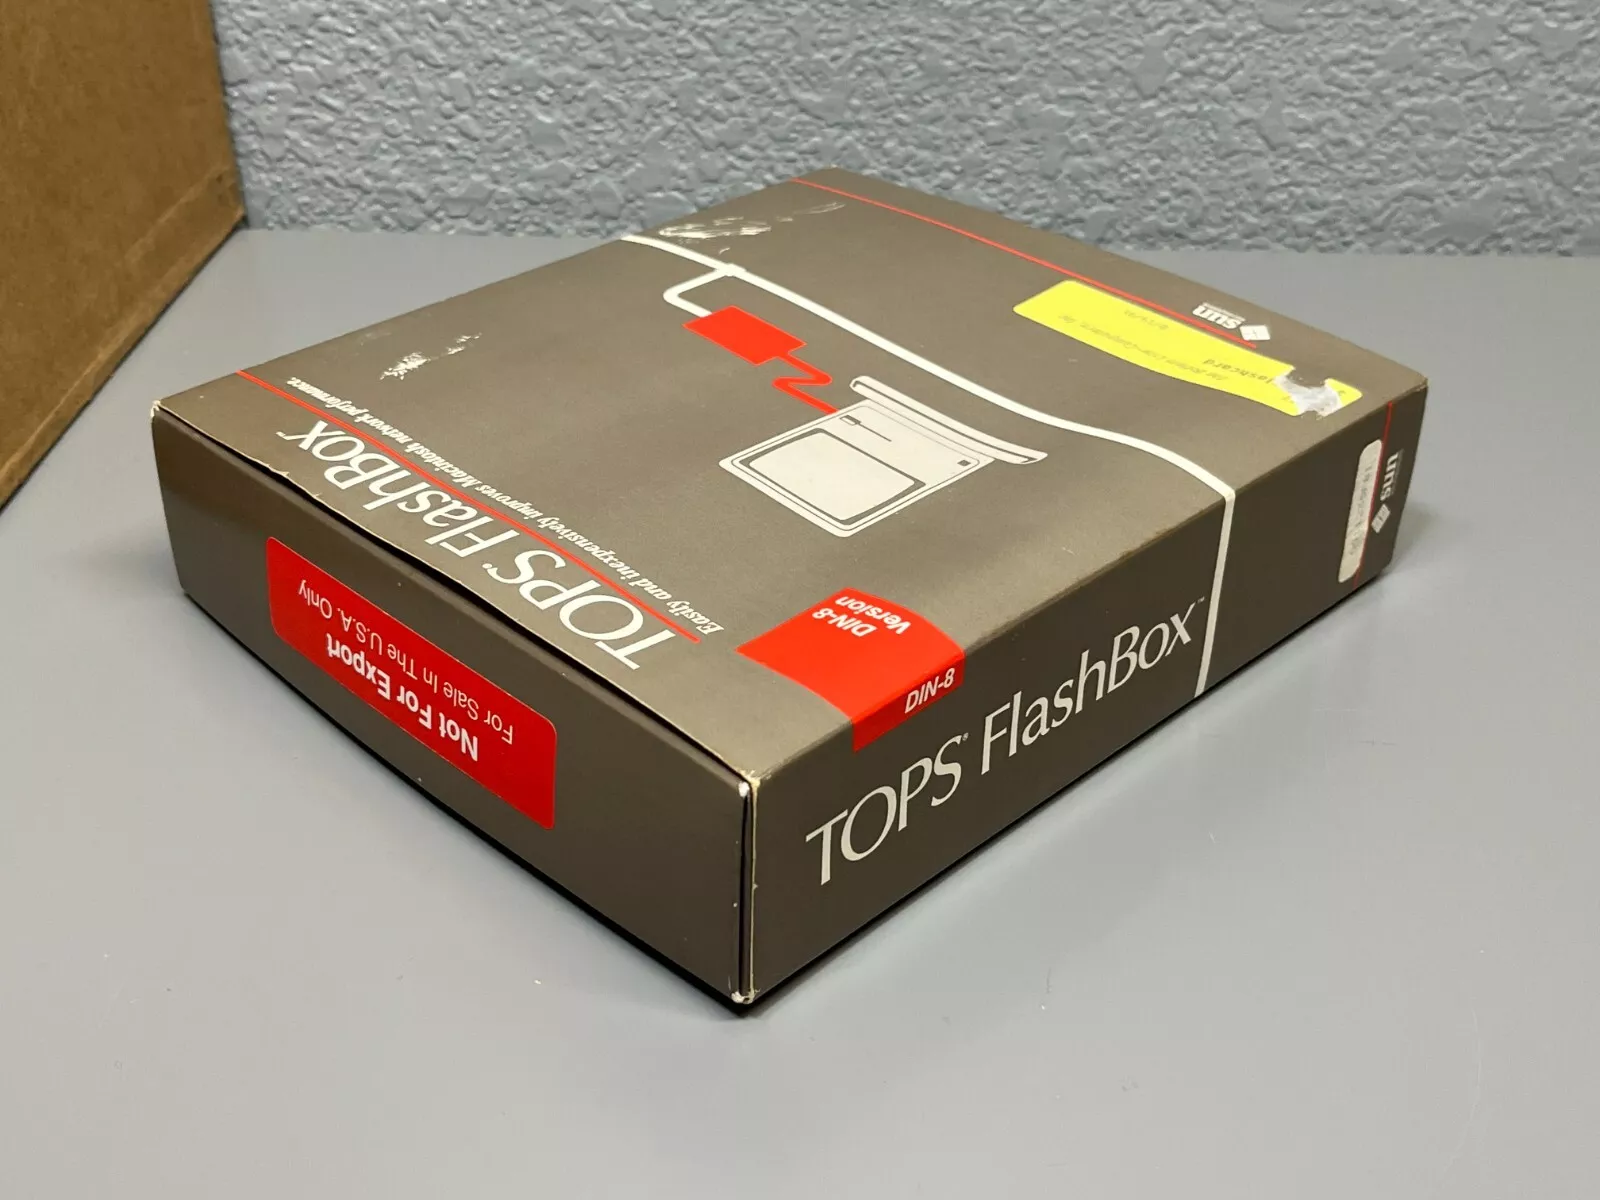 Outer box cover Credit: rc-cpr from eBay |
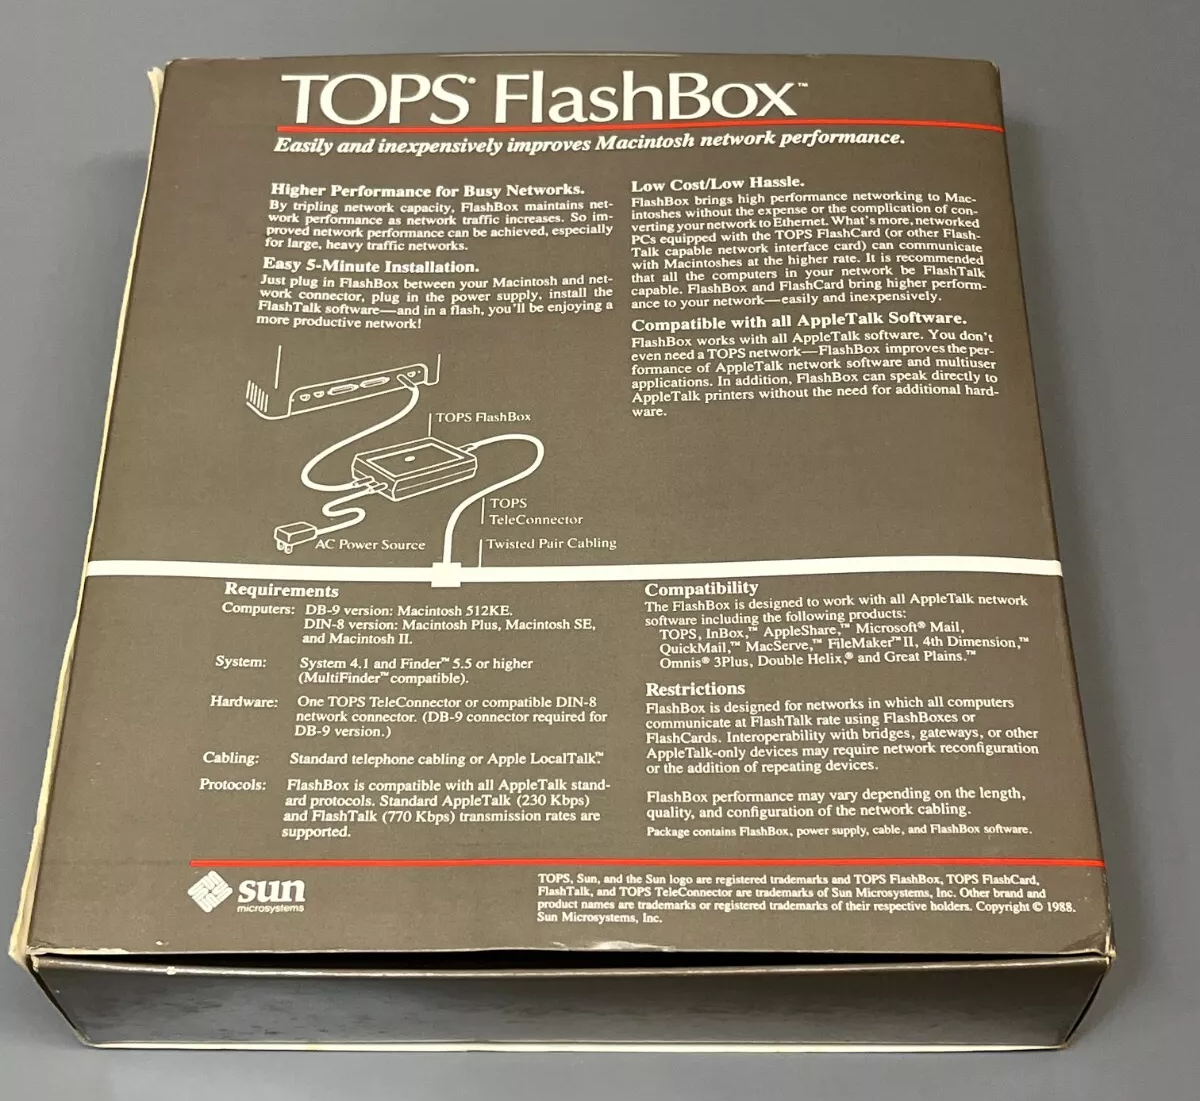 Back of box cover (via rc-cpr) |
 Main PCB (label on PAL chip removed) |
 Back of main PCB |
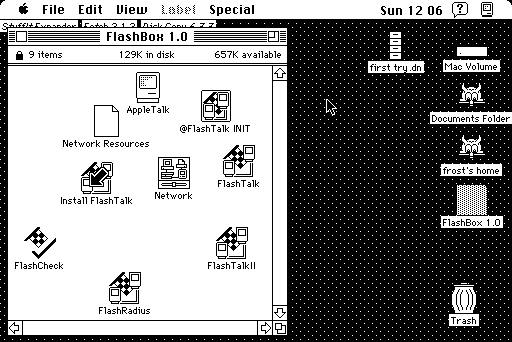 30+ year old floppy works |
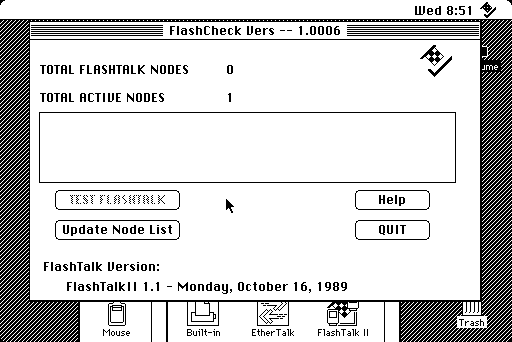 FlashCheck program |
The FlashCheck program is a crude little thing that is designed to test FlashBoxes and search for them on the network. All the other items in the disk are system extensions besides the Installer program. There's no control panel either, and the Network control panel is modified. Going off the random orientation of icons in the floppy disk, it does look rushed. The FlashCheck program makes two references to a manual (once upon startup if drivers are not installed, the other in the Help window) but the seller indicated that he checked the other boxes of FlashBoxes that were for sale and none of them had a manual in them. But Bitsavers managed to find a manual for one of these: where this came from can be considered one of the Wonders of the Universe.
According to the TOPS/Macintosh manual, the FlashTalk is compatible with the TOPS peer to peer file sharing software, along with the FlashCard for PC compatibles like the PS/2 Model 30, AT and XT lineage with at least DOS 3.1. The FlashCard was an 8-bit ISA card with a DE-9 interface connector and came with a 5.25" floppy disk for the driver, somewhat similar to the LocalTalk card also produced by Centram Systems West, who got bought out by SUN and renamed into the TOPS family. The card supported 230Kbps for AppleTalk compatible systems and 768Kbps on FlashTalk enabled hardware. Finding information about this package is difficult because FlashCard sounds a lot like a paper flashcard used for educational or learning purposes, or as as an alternative label for a SD Flash card or CompactFlash memory module. It also didn't seem to be very popular with search results coming up short on places where some knowledge of it should linger, like the Vintage Computer Federation Forums. Only one thread on 68kmla.org mentioned it, and the post at the end is interesting, but that relates to the FlashTalk. But the FlashCard will be similar on the data link layer.
At any rate, the TOPS Teleconnector was supposed to be used with the FlashCard, but there is no information on what it actually looks like or was wired like. Certain sources have indicated it used standard RJ14 phone wire, but doesn't go beyond that. Other places to poke around for information include a Mac GUI page, the Macintosh Multivendor Network Solutions Guide (1990 publishing) from bitsavers.org, and a short history of AppleTalk with some discussion about TOPS. A complete FlashCard package popped up on eBay recently, but a polite request to include the images here was denied.
Using AppleTalk bridges
Sometimes these are also called LocalTalk to Ethernet bridges, but the title of AppleTalk bridge is more accurate because all but a few can only bridge AFP data (that is, AppleShare via the Chooser or other AppleTalk data, not TCP data like FTP or HTTP traffic). Recall that a bridge combines two networks into one larger network.
Basic bridges
An AFP LocalTalk to Ethernet bridge is a very useful tool in the toolbox. These bridges allow LocalTalk-only machines to access Ethernet networks, including over common routers, but they only work with AFP over AppleTalk. The limitation of course is the slow transfer rate of these units because normally LocalTalk is capped at 230Kbps. Some users have noted that the AsanteTalk adapters can be somewhat quirky: try reading some official documentation on those.
A Ethernet cross-over cable is the proper cable to use with these boxes, although this is applicable to one model at hand for testing (Farallon iPrint LT). The cabling is pretty simple to route up and connect so there won't be much elaboration here. For software configuration, the Ethernet side gets configured as shown in the AFP Ethernet Networks section, and the LocalTalk side is configured as shown in this section. A basic bridge like the Asante boxes cannot route TCP/IP traffic (or use OS X's shared Internet feature). Only routers like the Cayman Systems GatorBox will do TCP/IP routing, but Apple's IP Gateway program or Netatalk's macipgw feature can seed Ethernet networks with MacIP datagrams which can then be picked up client machines through the bridge. Since all of these bridges will use 10BASE-T half-duplex, they may have compatibility problems with certain newer routers that don't like 10BASE-T equipment very much. | 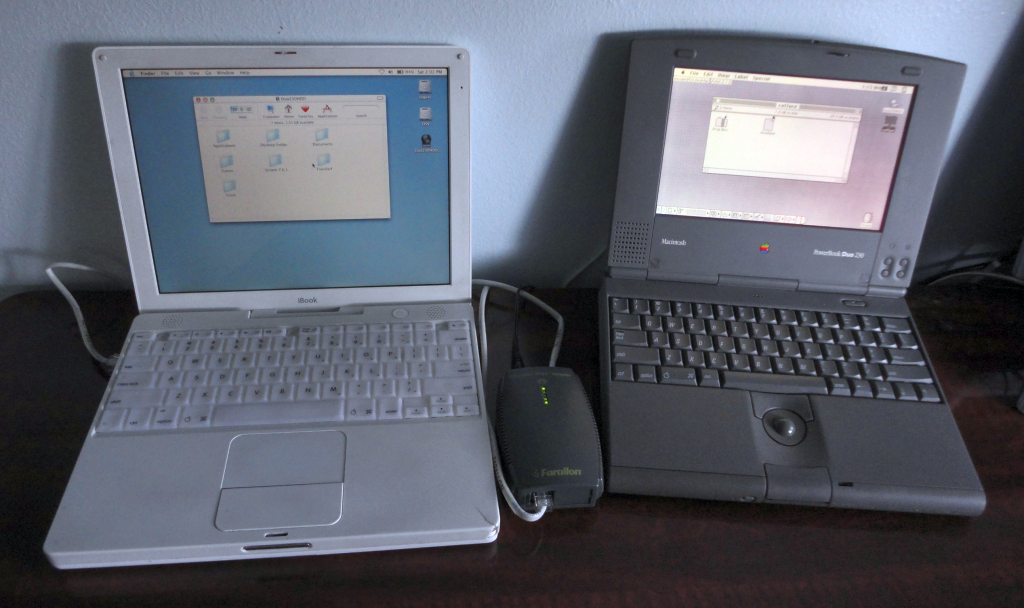 An AppleTalk bridge in operation (Farallon EtherMac iPrint LT) |
Example bridges include the Farallon EtherMac iPrint LT, Asante AsanteTalk series, Dayna EtherPrint, and others. The Farallon and the Asante models are the most common. The iPrint LT is a good model because it has PhoneNET built in and is a reliable bridge; the AsanteTalk has been known to be flakey from time to time. An uncommon variant of the iPrint adapter is the EtherMac MultiPrinter Adapter which is similar to the iPrint LT but also has a 10BASE-2 coax jack. One of the more obscure bridges is the Dayna Pathfinder, which is interesting because it has 10BASE-T, 10BASE-2 and AUI for 10BASE-5, which the other bridges typically didn't have all three. Information and resources concerning this model are almost zero. Images of an example and an archive of the setup program are available in the Restricted Files section.
Farallon EtherWave Mac/PB adapter
As it turns out, this is a rather peculiar adapter, in more ways than one. They are not that common, but they tend to get passed around from enthusiast to enthusiast, or from those who have absolutely no idea what it is to those who know exactly what it is for. Slang terms include "the stingray" and "manta ray" because of the way it looks. It is a useful adapter, but is not without its downsides. There's another one called the EtherWave Printer Adapter which is kind of the same thing, it has "Printer Compatibility Mode" pre-enabled but can do the same TCP routing. Also "EtherWave" was used by a number of Farallon networking products: for example there was a EtherWave networking card that did a similar thing as this adapter does, where it could be daisy-chained to other like adapters, up to a limit. According to a 1995 press article, it retailed back in the day for roughly 289$. Should you spy one, buy it without a second thought, in case it actually works. |  PowerBook 170 using a EtherWave Mac/PB adapter with TCP (7.1) |
Let's start with the power. There was a model where it was designed to run off ADB power, called the PN840-ADB, but most are fed power from a
wall transformer. There are about three models which fall under the classification of this section, all identified via part numbers, which is strange because the part numbers aren't printed on the devices (at least the ones used didn't). PN842 is probably the most common and runs off a wall power adapter (2.5mm plug, 12V DC, 500 to 800mA, usual center terminal positive) and is one of the models used in this section. PN840-ADB is similar but has a ADB Mini-DIN-4 type plug to leech power off the ADB bus. There is the EtherMac Multi Adapter (PN558C, and PN848) but other than being listed on the old Farallon website, there is a great dearth of information about it. The EtherMac Printer Adapter (PN552C) and PB550C-ADB all help to contribute to a general state of confusion. These part numbers are based on the archived pages of Farallon's website on archive.org: there is a chance of some inaccuracy in the exact part numbers. | 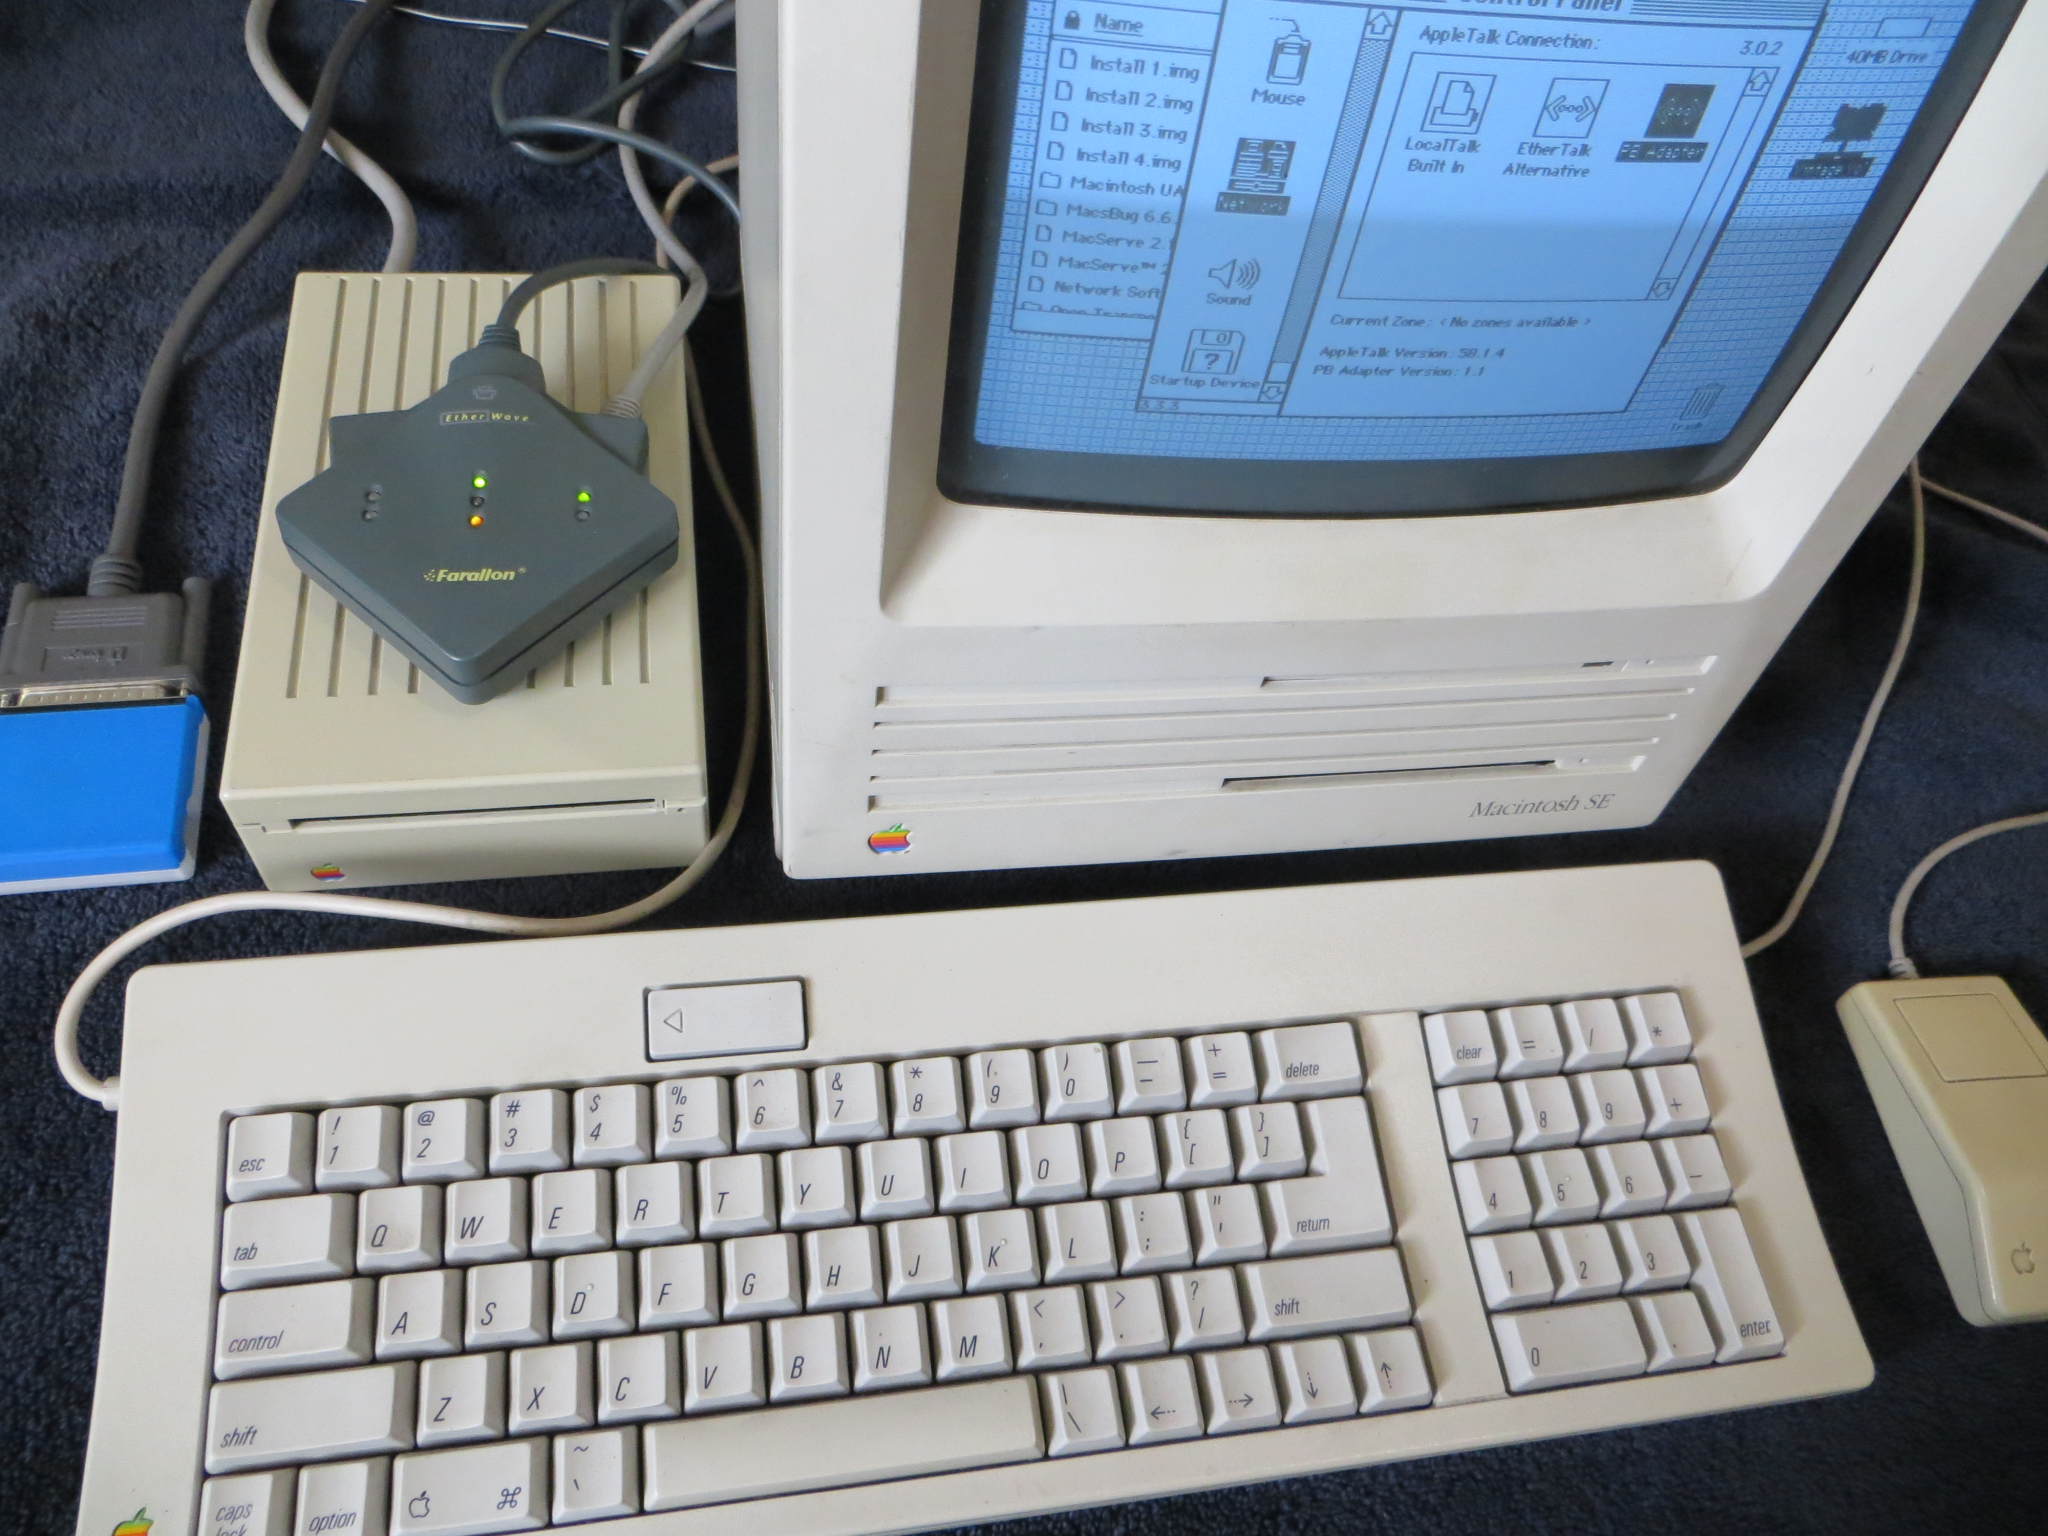 Macintosh SE using a Mac/PB |
As for the EtherMac versus EtherWave, the EtherMac has a brick-shaped body with one serial interface and one or two Ethernet connections. The one serial port is usually a Mini-DIN-8 cable, the Ethernet jacks are either 10BASE-2 or 10BASE-T, but usually had both. The EtherMac iPrint LT is just a bridge, but the other EtherMac adapters don't appear to be so, and likely function more like the EtherWave Mac/PB adapter except they have both 10BASE-2 and 10BASE-T. The EtherWave series are the ones that are either AUI, AAUI or serial adapters to Ethernet with two 10BASE-T interfaces. Browse around the old 1998 era archives of Farallon's website on archive.org if you're curious.
Interestingly, the Printer Adapter has the power input as part of the Mini-DIN-8 cable, rather than a jack in the body of the adapter itself. This is because all the "Mac/PB" labeled articles use an ADB vampire lead for power, but the other ones were shipped with a wall transformer instead. A generic straight Ethernet cable was used for this section, although a cross-over cable worked too. In basic terms the device clocks the HSKi line off the serial port at 1.25MHz and then has custom driver to process TCP traffic and other things. (The GPi pin 7 is not used for higher speed serial connections. Very little information is out there on what the GPi pin was actually used for, aside for being used as a DCD, aka Data Carrier Detect input from modems.)
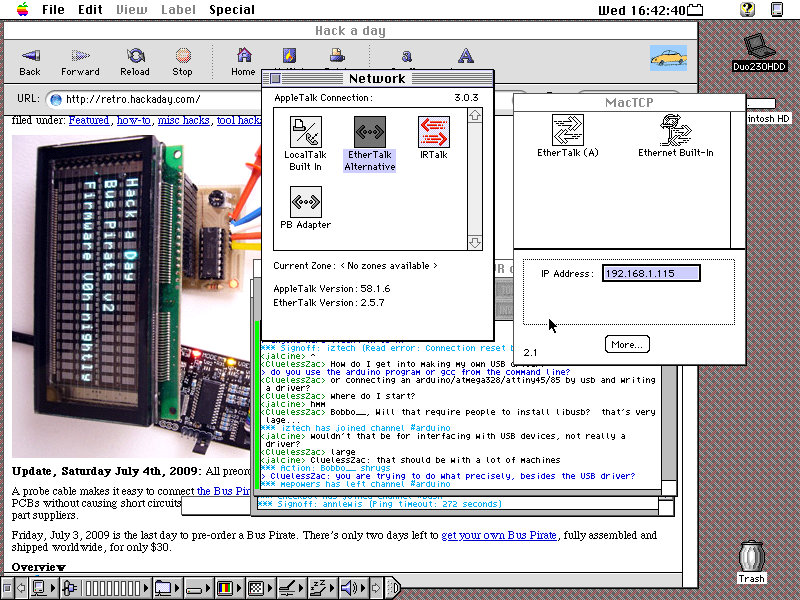 EtherTalk Alternative driver and TCP services (1400cs, 7.5.3) |
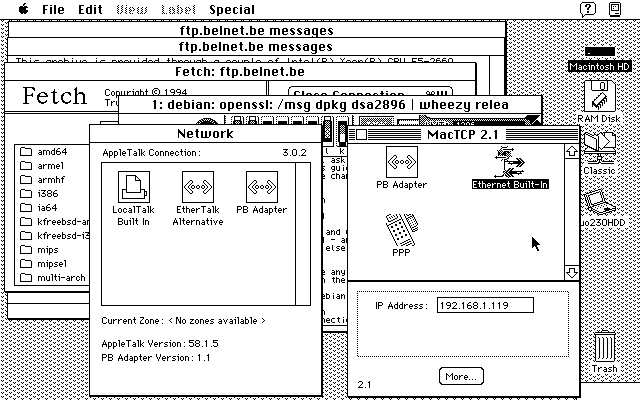 Network and MacTCP control panels |
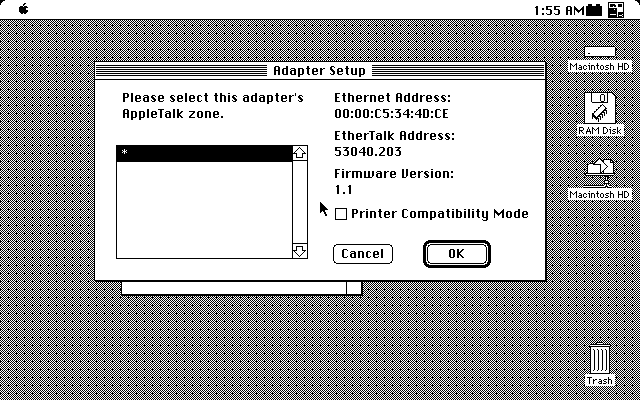 Adapter Setup Utility (System 6.0.7.1J, PowerBook 170) |
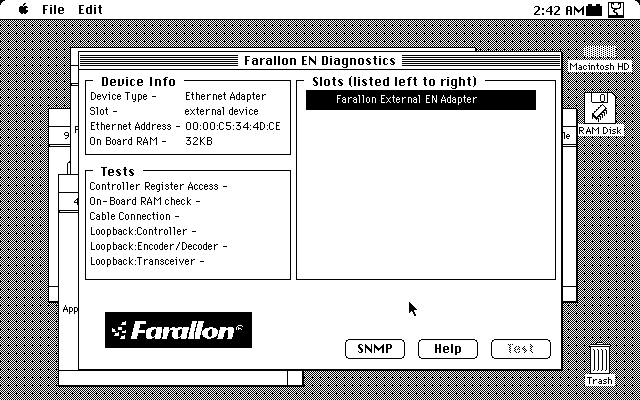 Farallon EN Diagnostic Utility |
Benefits: overclocking capability, pass-through secondary port for daisy-chaining and TCP/IP routing. At the very least, it operates like a conventional LocalTalk to EtherTalk bridge but with two Ethernet jacks instead of the usual single port. The second port allows traffic from one Ethernet interface to the other, while both are accessible at the same time to the computer using the serial interface, and it will pass Ethernet traffic through both ports even if the serial cord is disconnected. The downsides are enough to warrant a list:
| 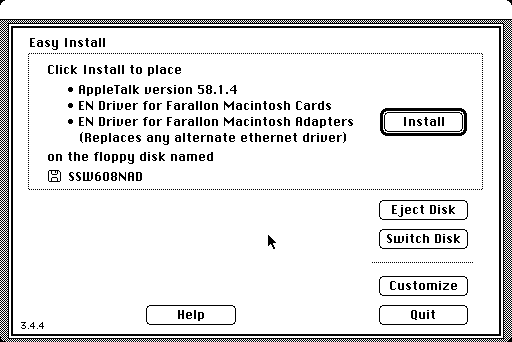 Adapter correctly detected (SE/30) |
- Compatibility: These devices are not compatible with Open Transport (on the serial host) unless the device is set to the Printer Compatibility Mode and the LocalTalk driver is used (which disables TCP routing and overclocking). The Farallon Diagnostic Utility cannot perform any tests on this device.
- Drivers: While the drivers can get along with another NIC on the same system, it's better if it was the only NIC driver installed. Speaking of that, from time to time the device may not be properly recognized by the host system, and when the Installer is used, it just offers to update the AppleTalk version to v58.1.4. If you see EN Driver for Farallon Macintosh Cards and EN Driver for Farallon Macintosh Adapters you should be OK. EtherTalk Software Update might also be required, depending on whether the Network Software Installer was ran first: if not, this can do it fine.
Although not referred to in many places, EN typically refers to Ethernet, which gets busy really quickly when talking about the .ENET and .ENET0 drivers stashed in the System file. .ENET would be the one stashed in the System file, hidden away from the user, whereas the driver in the System Folder (System 6) or Extensions folder (System 7+) is visible by the user. Both are used. - PowerBook models equipped with IrDA: The "PB Adapter" driver in the Network control panel cannot be used if the PowerBook supports IrDA or IRTalk (AppleTalk over IrDA).
Installation and setup is very easy. Assuming a fresh OS, just install the Farallon EN Installer 2.2.1 or 2.2.2 software. It should automatically detect the device when it's plugged into the Printer port and install the proper software, as long as the Printer Compatibility Mode checkbox is not ticked. After the computer reboots, go into the Network control pane (System 6) or Network control panel (System 7+). "LocalTalk Built In" makes the device act like a regular non-TCP capable AppleTalk bridge: just plain EtherTalk traffic, capped at the usual 230.4Kbps. "PB Adapter" is where the real juice comes out and "EtherTalk Alternative" is for machines that have trouble with the PB Adapter mode. Finally go into the MacTCP control panel (version 2.1 suggested, version 2.0.6 may not work) and configure it according to the section for MacTCP. | 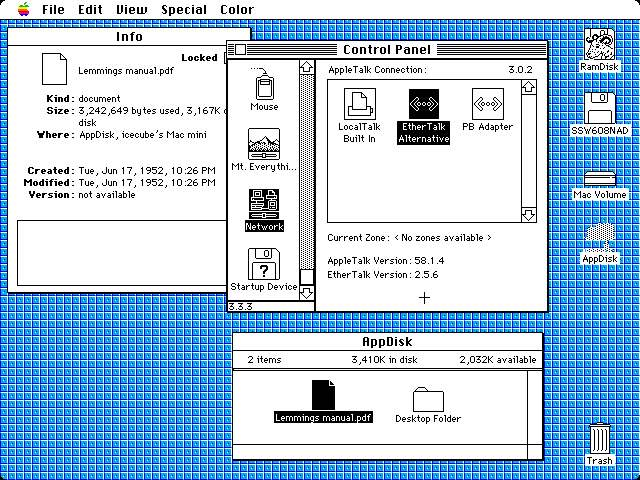 Mac/PB adapter in use (IIsi) |
When the Printer Compatibility Mode is enabled in the Adapter Setup program, the unit disables TCP routing and will only function as a AppleTalk bridge. When the unit is configured with the PB Adapter or EtherTalk Alternative driver, and then moved to another computer without the driver active, the unit may not respond or function as a AppleTalk bridge. Open the Adapter Setup program and enable the Printer Compatibility Mode, then power cycle the unit.
Other fun tidbits: Under 7.5.3 on a PB1400cs under Classic Networking, uploading via AFP would stall or even lock up the computer (bomb with error code 10), and this occurred with both Linux, Windows 2000 Server and Mac OS 9. Downloading a file was fine: a record of 80.1KiB/sec (0.641Mbps) was captured with Windows 2000 Server using Services for Macintosh as a file server. TCP services behaved normally, mostly. For example, Fetch 2.1.2 transferred a 754KiB file in 21.3 seconds, for a rate of 35.4KiB/sec or 0.283Mbps, which is slow. Uploading took 2:09.5 seconds and includes seven "soft resets". Perhaps it is confused by the Modem/Printer port that a lot of the later model PowerBooks started using. Surely, it wouldn't be the first hardware or software device to go nuts about the combination serial port. It would be a perfect adapter for a PowerBook Duo because without a dock, pseudo-PPP dialup or something unusual like a direct modem connection, Duos are stranded. The PowerBook Duo 2300c would be left in the dark because it cannot run 7.1. Worst case scenario, it behaves just like a regular AppleTalk bridge when the Network control panel has been set to LocalTalk Built-In. See the Data Transfer Rates section of the More Info page for a speed test on this device in overclocked mode with a proper upload and download attempts with other machines.
It seems that the maximum speed rate depends on the hardware, or if it works at all. Because I/O Serial and DMA based serial ports function differently than the "traditional" interrupt based serial port, there are quite a lot of Macs for which this adapter would be suitable, but because of hardware reasons it is not appropriate for the job. Both a IIci and a Quadra 700, 68030 and 68040 respectively, attained a similar speed rating. It didn't work with a Rocket 33: accelerators which don't change the processor generation usually function with fewer hardware issues. Macs with GeoPorts will not work: a trial run was conducted with a 7100/66 and nothing worked with EtherTalk Alternative or PB Adapter. It'll still work as an AppleTalk bridge though, capped at 230.4Kbps and no TCP routing. The 80.1KiB/sec bitrate that the 1400cs produced is enviable, yet this device does have a number of shortcomings, as this subsection has discussed. Still, when it works, if it does, it is a neat little device.
The Macintosh IIfx warrants its own paragraph and image gallery. The IIfx was the first machine to offer an "I/O Serial" port and doesn't work like a normal machine, and that's not the only thing special about the IIfx. For example, the SE/30 can push memory around at about 5MiB/sec: the spec says 15.67MiB/s, compared to a IIfx, which specs 60.69MiB/s. To switch between a faster serial port and a more compatible one, you need the Serial Switch CDEV installed in the System Folder. In this scenario the Mac/PB adapter will not work with the serial port set to "Faster" mode (and cannot be detected by the Installer or Adapter Setup program): only on "Compatible" will it work. If it is switched while connected, it will stop working and it will have to swapped to another machine to put it on Printer Compatibility Mode. The same goes for other machines that use the "I/O Serial" serial communications chipset. However the Macintosh IIfx came back and set the highest recorded speed at just over 100KiB/sec download speed. A comparison of other machines is in the Data Transfer Rates section of the More Info page.
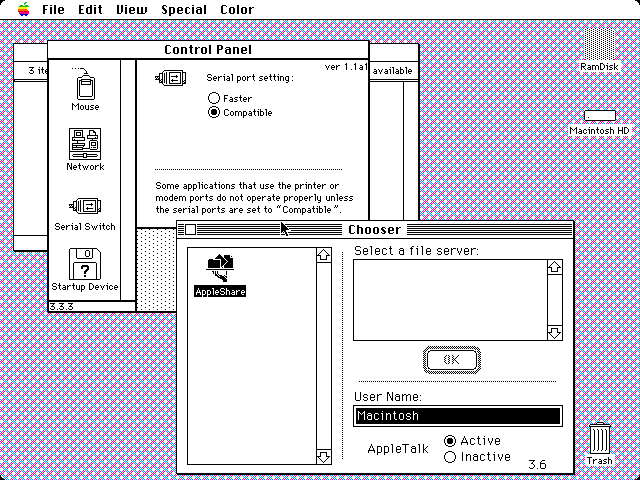 Incompatible with Faster mode |
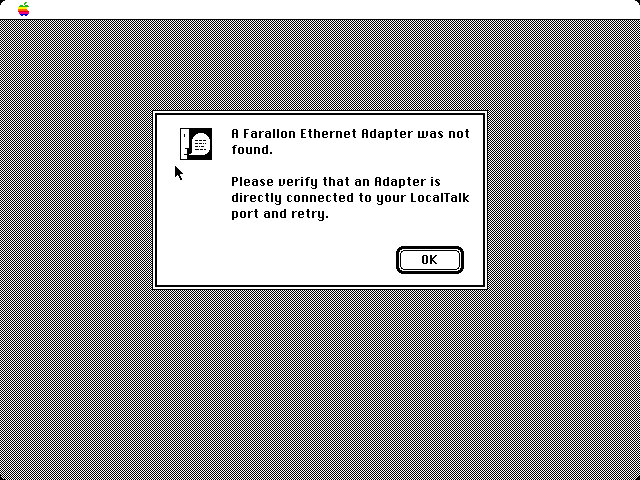 Incompatible with Adapter Setup when in Faster mode |
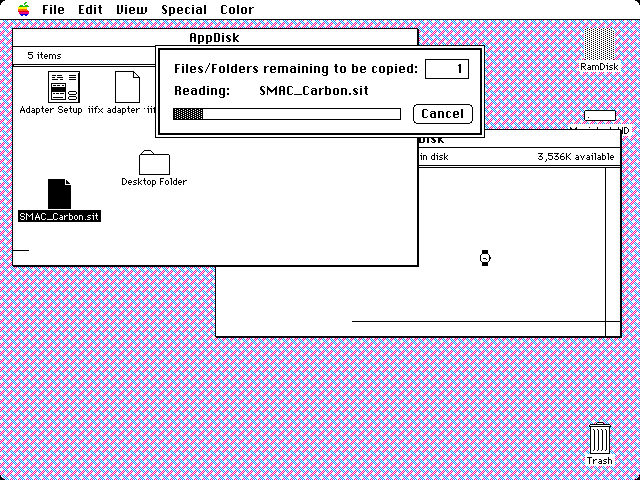 Stopwatch testing speed (IIfx) |
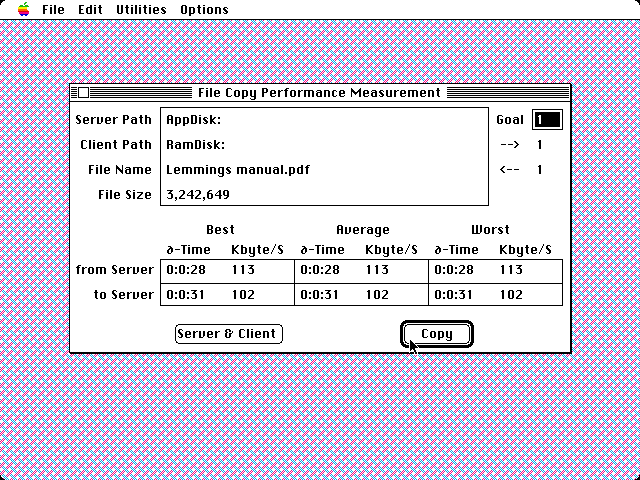 Using the Performance program to check speed rates |
Recapping the device is relatively easy. Underneath the rubber foot near the cable connection are two screws. Remove them and the device should be carefully pried open. The capacitors are fairly straightforward but the only thing to worry about is the fine traces near the indicator LEDs which run very close to the capacitor connections. Refer to this image for the capacitor values and polarities. The heat sink on one of the center chips is important: it gets very hot.
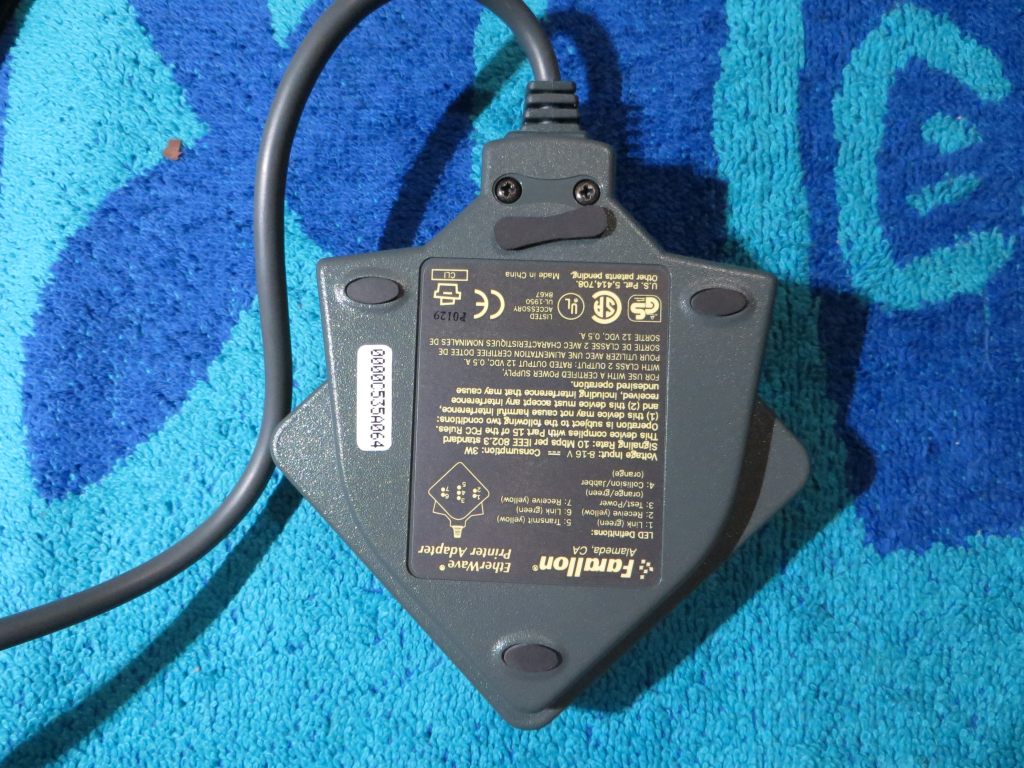
This subsection was made possible in part through the kind loan offered by mbaran at 68kmla.org, and volvo242gt who permitted the use of his IIfx.
Cayman Systems GatorBox
Of the hardware MacIP gateways, the GatorBox is the most well known, along with the Shiva FastPath 5. The Farallon StarRouter is a little less common. Because a FastPath box is not on hand for investigation, it is hoped that this directory will satisfy any inquiries.
Back in the heyday of the GatorBox, the MSRP is slapped down at 2795$ US. Want GatorShare to bridge between AFP and NFS for your UNIX system? No problem -- just hand over another 1995$. Still, the GatorBox was somewhat popular, because it allowed multiple computers to share one connection to the Internet, being pretty infantile at that time. Individual Network Interface Cards for each machine, for an establishment like a workplace, school, institution, research center, government office or something along those lines would have been cost prohibitive.
Basic details
Principally, there are two nominal variants of the GatorBox out there. The first is the one which will be discussed here, model 10100. The other is the GatorBox CS. They use different versions of GatorSystem and GatorInstaller, among other things, such as power. The original model takes a 16VAC (Alternating Current, not Direct Current) input, 1 Amp current with a 2.5mm barrel jack plug. Obtain a proper AC to AC wall adapter first, then you may need a 2.1mm female to 2.5mm male adapter to finish off the power supply problem. The GatorBox CS merely accepts a standard "386A" style power cord.
There are four connections on the back of a GatorBox. They are namely, LocalTalk, Serial, BNC 10BASE-2, AUI and and power. The LocalTalk port is used to initially configure the unit, Serial is for some kind of backdoor and AUI just needs a 10BASE-T transceiver slapped on it. As for indicators, the CS has power, LocalTalk and Ethernet lights on the front, but the original one just has one green LED for power and one multifunction cryptic network activity red LED. Initial setup merely consists of plugging a PhoneNET adapter or LocalTalk adapter into the LocalTalk port, attaching a 10BASE-T transceiver and plugging in the power. The Serial port will be discussed later. As part of the hardware phase, most GatorBoxes are over twenty years old now and will need a capacitor replacement operation and a new PRAM battery. Unlike Macs where they can be easily diagnosed by a number of telltale signs, GatorBoxes are more like "black boxes" and it can be difficult to diagnose hardware issues. Also because GatorBoxes are somewhat valuable, these operations should be conducted without delay to prevent or limit the scope of damage.
Starting up the GatorBox
Assuming that the GatorBox is running off a plain slate, start by running GatorInstaller for GatorBox CS owners and GatorKeeper for original GatorBoxes. Users with the GatorBox CS can now divert to this page for the respective instructions, as the remainder of this section will be devoted exclusively to the original Model 10100 GatorBox. There are quite a few similarities, however.
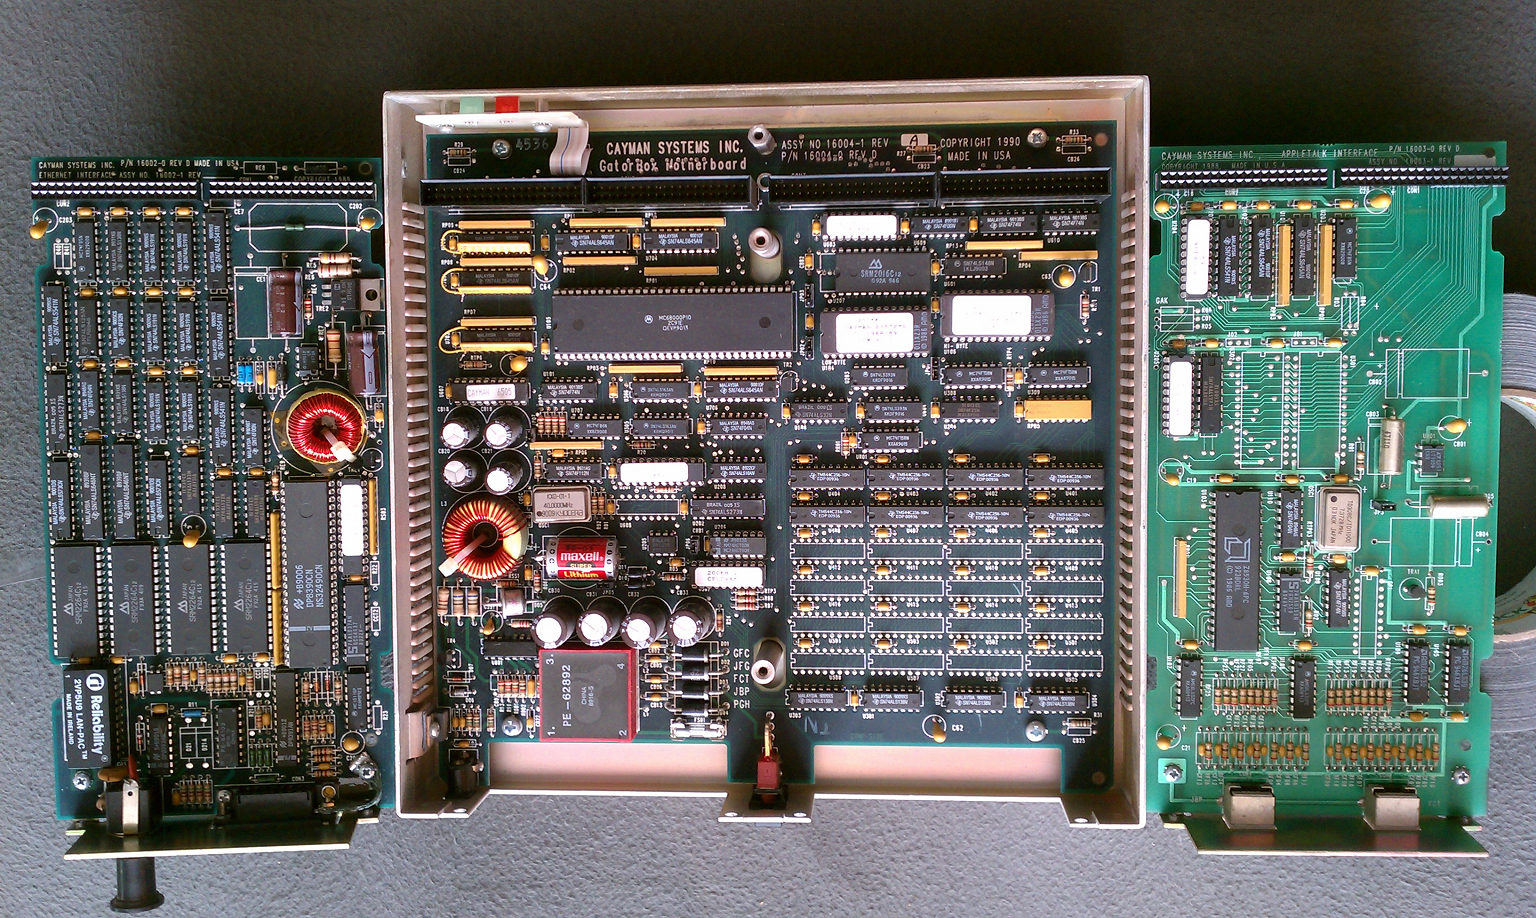 The innards of an original GatorBox |
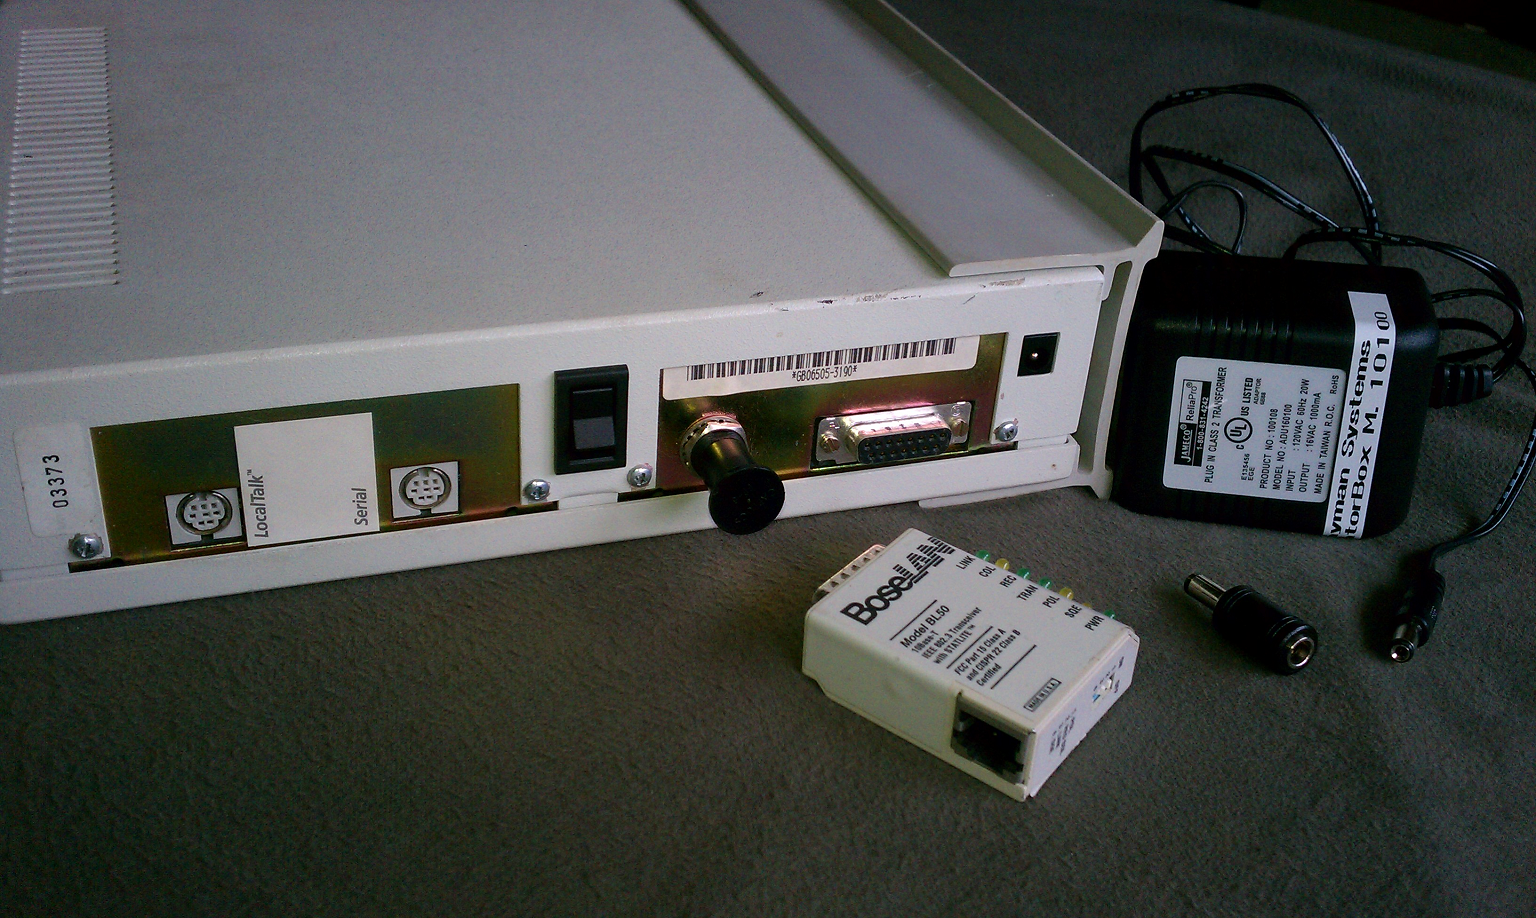 Backside of a GatorBox |
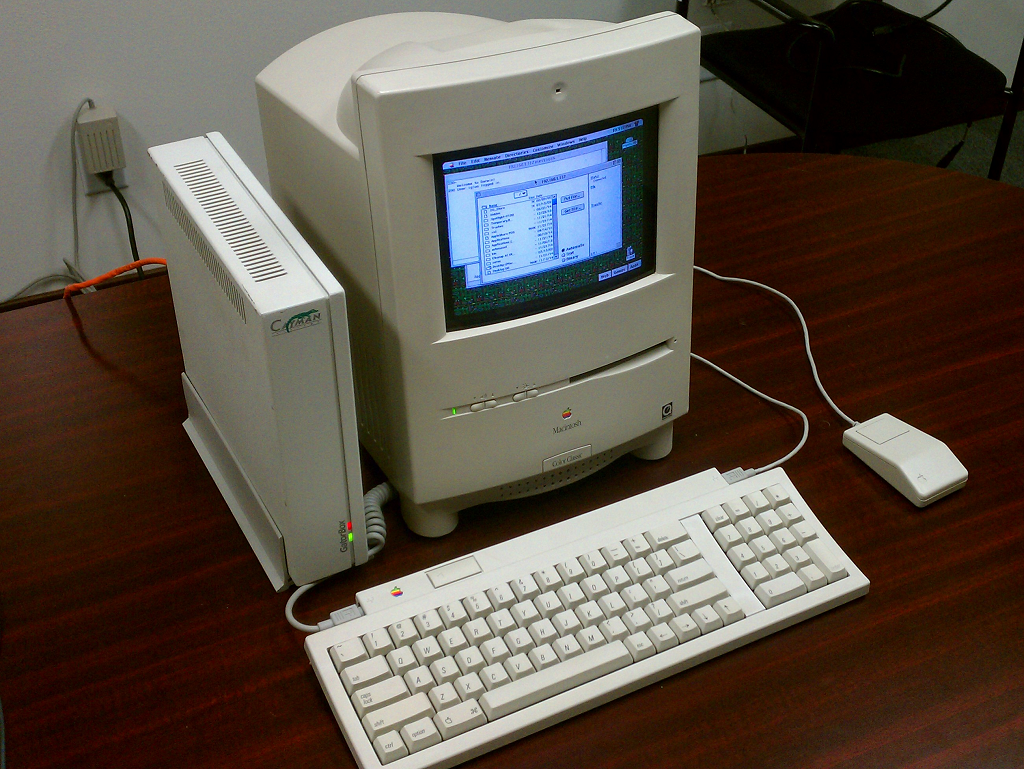 A Color Classic Mystic using a GatorBox (Mac OS 8.1) |
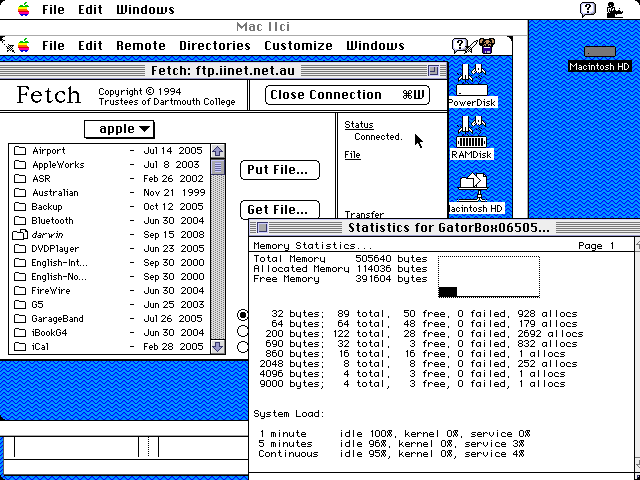 Rocket with RocketShare using FTP service via the GatorBox |
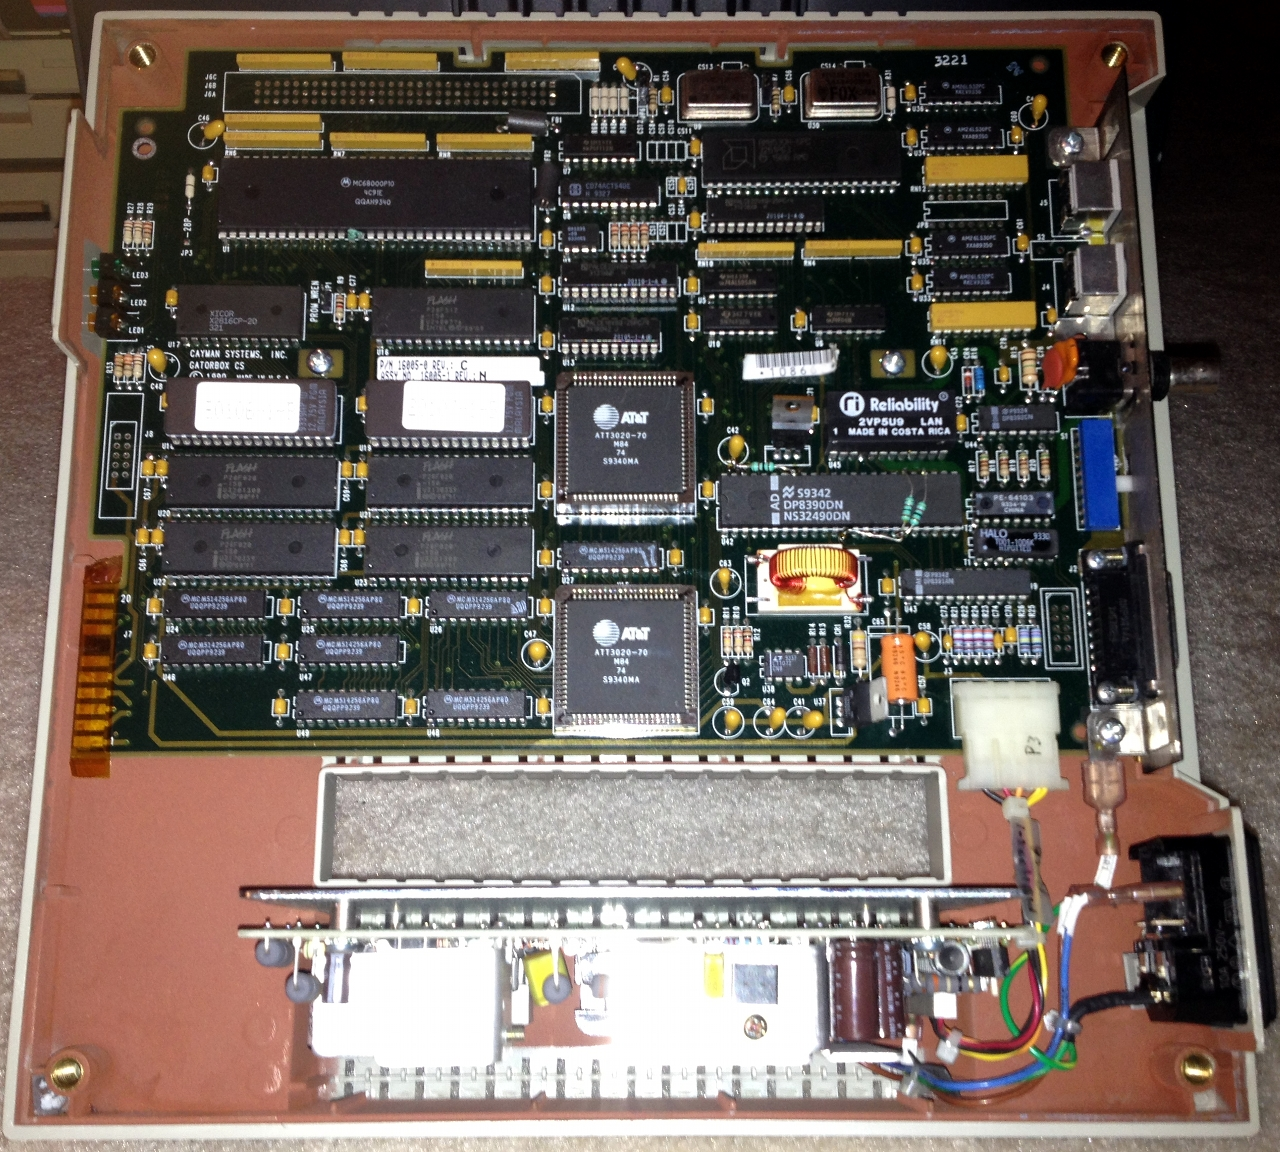 GatorBox CS inside (credit: nex at vintage-computer.com forums) |
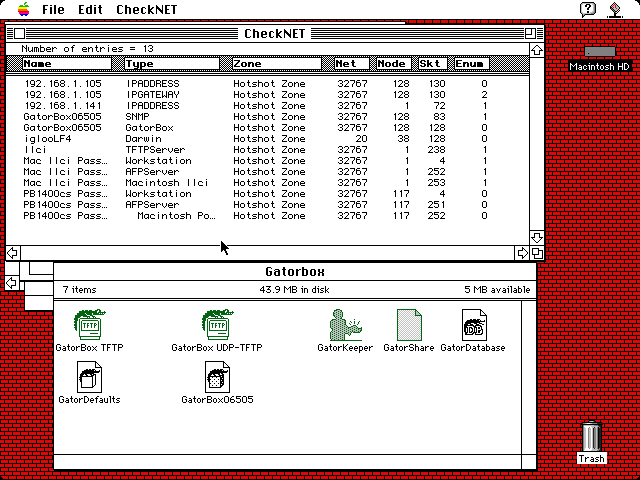 GatorBox profile viewed from CheckNET |
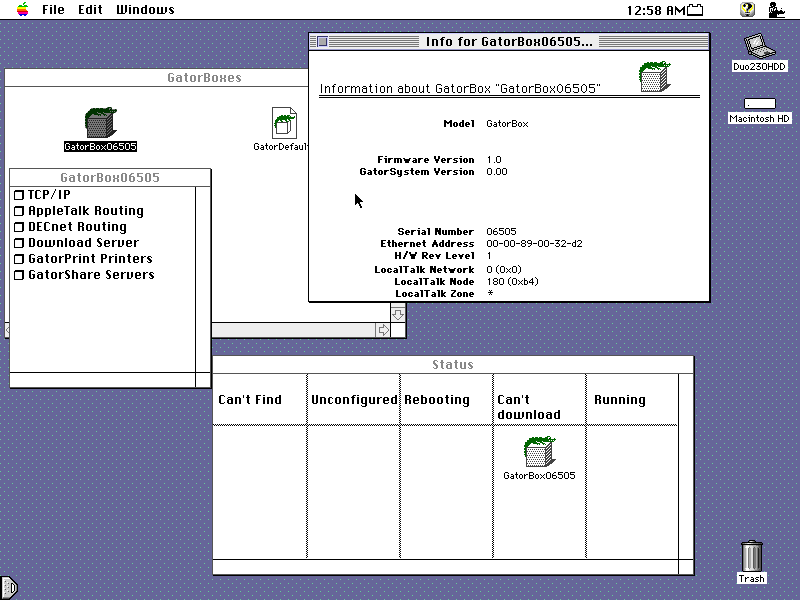 Incompatible system, or hardware issues |
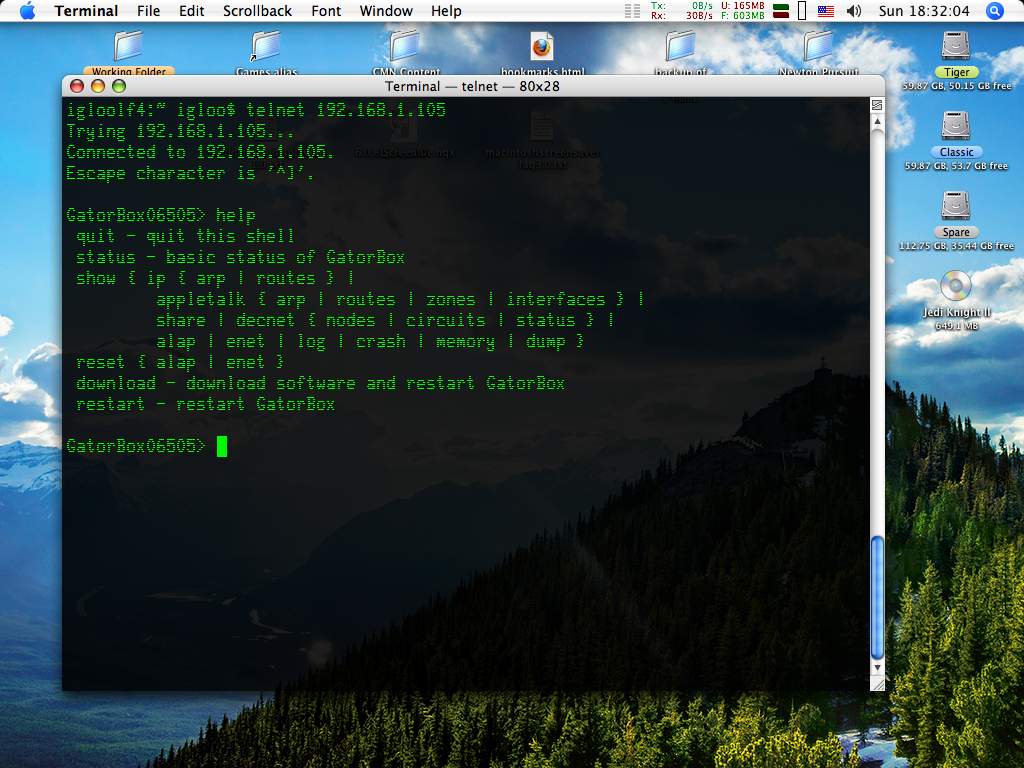 Telnetting into a GatorBox |
While we're still at the setup phase, here are some important points: An AppleTalk bridge cannot be used to contact the GatorBox in lieu of using serial ports with GatorKeeper, and calling it up through Ethernet won't work either (there is a TFTP extension for older Macs to upload the config to the GatorBox over Ethernet, but this was not tested). Macs with Open Transport enabled can contact the GatorBox, but cannot upload configuration data to it. The word goes that OT doesn't work entirely but a IIci with 7.1 and OT 1.3 did work (but not 7.5.3) to upload data to the GatorBox and get it set up. The ideal System version is System 6 through 7.1. 7.5 will do the job as long as it is set to Classic Networking. Another interesting tidbit is that a 1400cs could not work with the GatorBox at all to get it started, so it's probably safe to say that a 680x0 processor machine is a requirement.
Let's start by making a typical setup that should handle up to 8 Macs with a LocalTalk bridge and TCP/IP forwarding. Because LocalTalk doesn't work very well with more than 6 or 8 computers as it's very "chatty", this scenario should be applicable to most users' future needs. Assuming that the GatorBox has power, an AUI transceiver, PhoneNET already wired up and the power switch flipped, let's look at the software front. Begin by loading the GatorBox Configuration and GatorShare Application disks. The Network Applications disk just has a modified version of NCSA Telnet 2.4 which isn't needed for what we're doing here. GatorShare is the software stack that gets uploaded to the GatorBox each time it boots up, because unlike the GatorBox CS with Flash memory, the GatorBox has to load it all into RAM before it is usable.
Copy the GatorKeeper program to a folder on a hard drive or other suitable volume. Copy the GatorShare document too, because GatorSystem, the base software that comes with a GatorBox, is not used. GatorShare adds on to it. GatorPrint, DECnet and the AFP to NFS bridging feature of GatorShare are not discussed in this section. Start up the GatorKeeper application, which if it has not been run before, will ask to create some configuration files. Let it do its thing, and afterwards the main GatorBox window is drawn up, which shows all the GatorBoxes in the current zone. Most users reading this won't have zones, but because this unit can create zones, it warrants some coverage of that which will be done later. In our example here, the unit named GatorBox06505 which is the default name (syntax: GatorBox##### with # being part of the serial number). GatorBoxes can be renamed, or just left as-is. Examining this window, a GatorBox with a dimmed icon means it's not accessible at the present moment. If nothing shows up when your GatorBox is turned on and connected, then there's a problem with the GatorBox. Powering up a GatorBox after the GatorKeeper program is started means that there is about a one to two minute delay before it comes online.
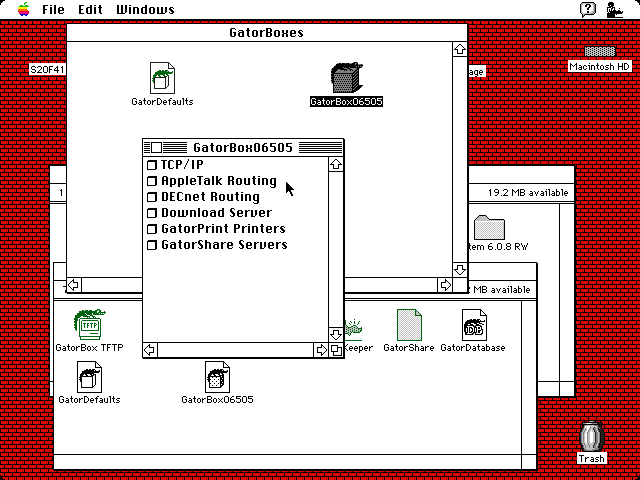 Main GatorKeeper window |
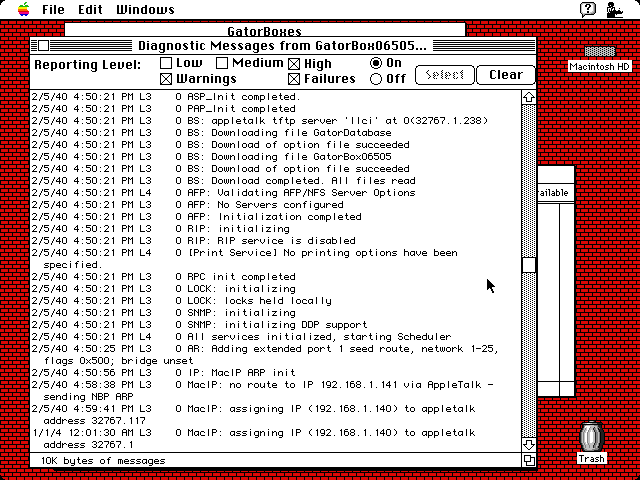 Diagnostics window |
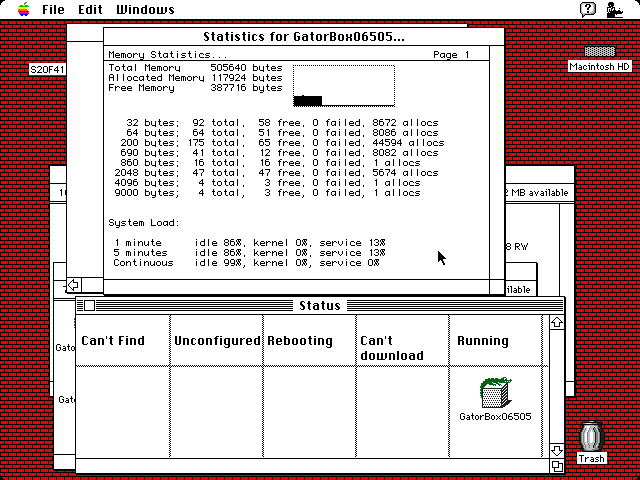 Statistics pg.1, status |
 Statistics pg.2, unit info |
Select the GatorBox profile. Head to the Special menu and select "Status...". The selected GatorBox will have an icon that is associated with a particular status column (which sometimes doesn't auto-refresh):
- Can't Find: The selected GatorBox can't be found, most likely because it is not connected.
- Unconfigured: A configuration profile for this GatorBox hasn't been created yet for it, or it hasn't had any data uploaded to it.
- Rebooting: The GatorBox is in the process of rebooting and downloading the data over LocalTalk. It takes about a minute and a half to reboot a GatorBox.
- Can't Download: Commonly happens with systems incompatible with the GatorBox, such as too high of a Mac OS version or using Open Transport. (This state would also be present when the test GatorBox was in need of a capacitor replacement job and a new PRAM battery.)
- Running: The GatorBox is active and in service.
Keep this window open to keep an awareness of what is going on. The Diagnostics window has a lower-level view of what is happening, the Info window is for general information about the unit and the Statistics window gives the viewer an idea of how much load and traffic the box gets. An astute observer would probably look at some of the manual documentation and the Statistics window and thus conclude that the GatorBox is running some kind of a UNIX type operating system.
Go back to the main GatorBoxes window. Double-click the GatorBox profile, in our case here it is GatorBox06505. For now, all that will be demonstrated is the AppleTalk bridge and TCP/IP routing feature. To start the AppleTalk bridge feature, double click the AppleTalk Routing entry. Enable the AppleTalk routing by clicking the On button in the dialog box. Under "LocalTalk Network" choose Soft Seed Port. Now the GatorBox must have at least one zone, so we're going to have to create one. For the Number field, just pick any five digit number that doesn't get too high, like 42281. (The User's Guide says a number from 1 to 65366. The author used 32767 in honor of the famous 32768 bug.) Next, pick a zone name. Look a little further down for the EtherTalk Phase 2 area. Enable it by clicking the check box. Select Soft Seed Port, and for the Network Range, put 1 for the first field and 8 for the second one. Click the Zone List button. Remember the name of the zone you entered earlier? Type the same name in the text entry field, then click the Add button. More zones can be added from here but only one is sufficient. Click OK, then OK to close the AppleTalk Routing dialog. Let's move on to MacIP routing.
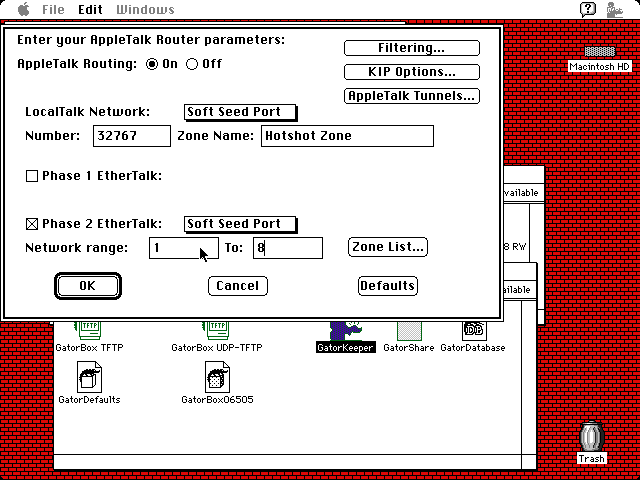 AppleTalk Routing |
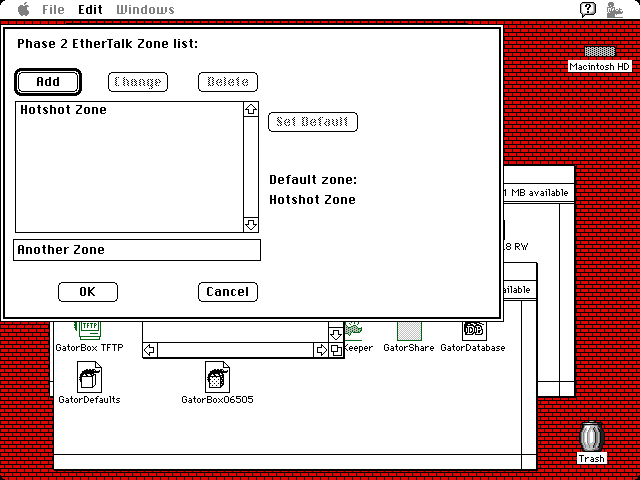 Creating the first zone |
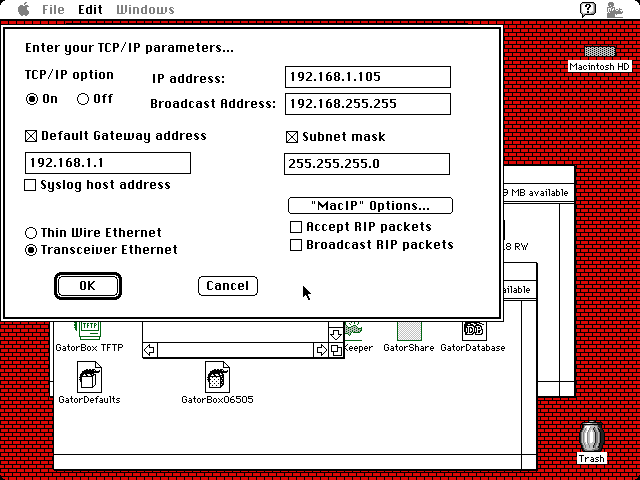 TCP/IP bridging dialog |
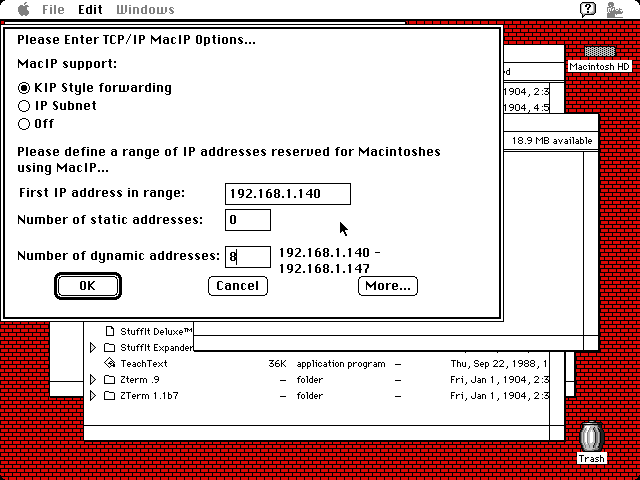 MacIP options |
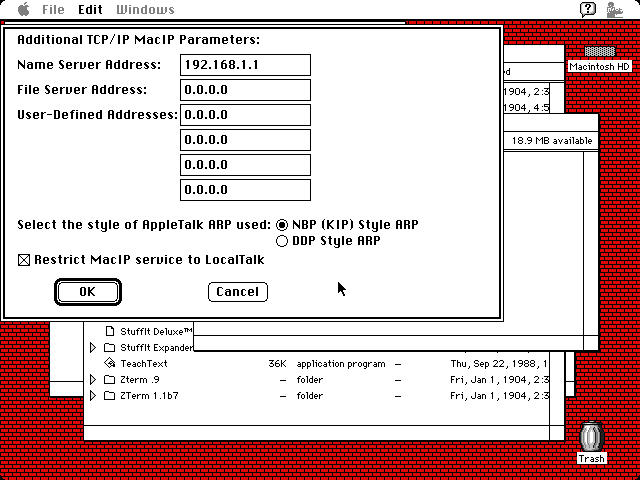 Extra options for MacIP |
Double click the TCP/IP entry. Here, it gets a little more interesting. Turn on the TCP/IP radio button to begin. Assuming you're using a router, which has been assigned an IP address of 192.168.1.1 and assigns IP numbers to a number ranging 192.168.1.100 to 192.168.1.149, pick a number that hasn't been assigned to another client hooked up to the router. For now, we'll choose 192.168.1.105. The "IP address" field is for the IP address of the GatorBox itself. (This is how a user can telnet into the GatorBox, among other things.) For the Broadcast Address field, just put 192.168.255.255 (refer to the Network Reference manual, page 3-6 for clarification). Click the "Default Gateway address" button, and put the IP address of the router, which based on the presumed scenario is 192.168.1.1. Then click the "Subnet mask" checkbox, and put in 255.255.255.0.
Since most people doing this will be using twisted pair Ethernet, click the Transceiver Ethernet (in which case the AUI port is used, obviously for a AUI to 10BASE-T adapter) radio button at the bottom. Conversely, users who have 10BASE-2 coax wired up as Ethernet would leave it at Thin Wire Ethernet which points the GatorBox to the 10BASE-2 coax jack on the back. Now click the "MacIP Options..." button. Unlike IPNetRouter the nodes which the GatorBox is routing don't have to live on a different subnet. So we won't use the "IP Subnet" selection, instead choose "KIP Style forwarding". (Kinetics Internet Protocol was eventually repackaged as MacIP.) For the "First IP address in range" field, this is the starting address reservation that the GatorBox will preserve for clients. Let's put in 192.168.1.140, leave the static addressing set to 0 and put 8 for the dynamic addressing entry box. Click the "More..." button and put 192.168.1.1 for the DNS server address. If the radio button selection is not "NBP (KIP) Style ARP" then change it so it is. Enable the last checkbox at the bottom, then OK through the two dialogs and then finally go to the Special menu and choose "Download & Restart..." from the Special menu to upload the new configuration data to the GatorBox.
Users who don't run a router, but instead use a cross-over Ethernet cable to connect directly to another computer won't need the "Default Gateway address" filled out. It's still better to run a router, even if it only has two computers attached to it, for purposes of future expansion and stability.
Clients
When a GatorBox is rebooted, it is not unusual for a message on the client computers to come up saying the AppleTalk network has been disconnected. This is because of the fact that the GatorBox assigns a working zone, or zones. Normally in the progression of this Guide there has not been any zones involved, so the zone was more or less "null" or just "*" meaning anything.
For all computers with MacTCP in service, the Network control panel should have already been set to LocalTalk. As mentioned much earlier, the Network control panel just determines what interface AFP should use, otherwise it has no influence on TCP traffic. Back to MacTCP, set the mode to LocalTalk. The zone which the GatorBox is using should be shown just below the icon. See below for more coverage about multiple zones. Click the "More..." button. There are two ways of going about this: manual addressing and automatic. Automatic is the easiest and works -- just set the mode to Server, put a full stop (a period ".") and then the address of the router (not the GatorBox) under the Domain Name Server area.
Back when we set up the GatorBox, we chose dynamic addresses rather than static ones. Dynamic means that clients choose from a pool of available IP addresses, and static means that clients pick one reserved for them. Smaller networks are fine with dynamic addressing because as soon as one address is no longer in use by one computer, it can be reassigned to another. How does this relate to MacTCP? Well, manual addressing in MacTCP is probably the better configuration for static addressing. From within MacTCP, for 2.0.6, change the Class to C. Put the GatorBox's address (in this example, 192.168.1.105) in the Gateway Address. To grease the rails, put the address of the router in one of the Domain Name Server fields. When finished, enter the address for the computer in use in the main MacTCP window. Since MacTCP 2.1 is desirable for a number of reasons, it should be used instead of earlier MacTCP builds unless authenticity is a priority. Refer to the image gallery for how it should be set up, assuming identical parameters as used here.
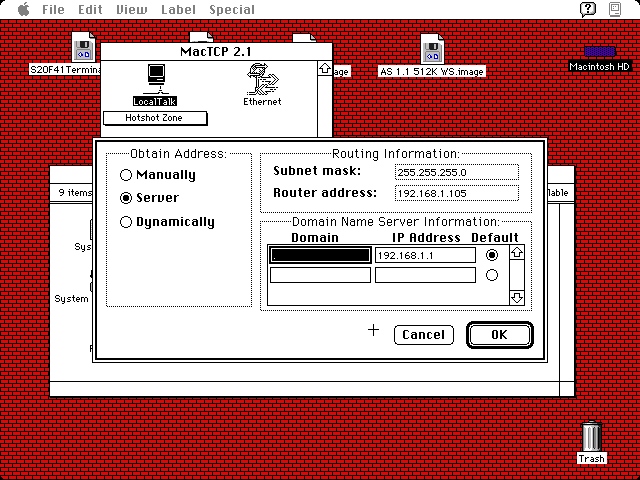 MacTCP Server mode |
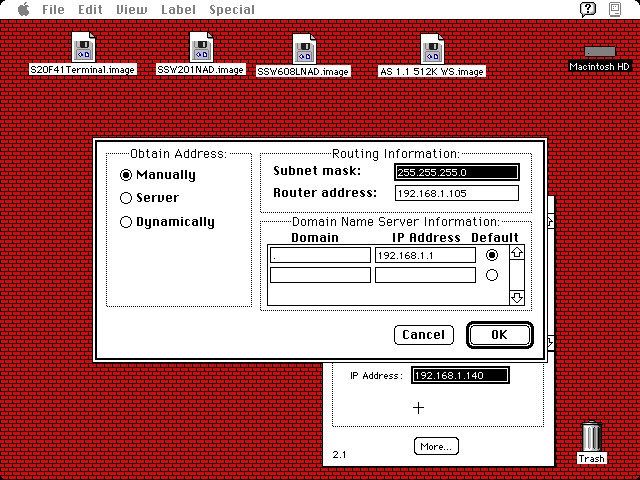 MacTCP Manual mode |
 Open Transport automatic state |
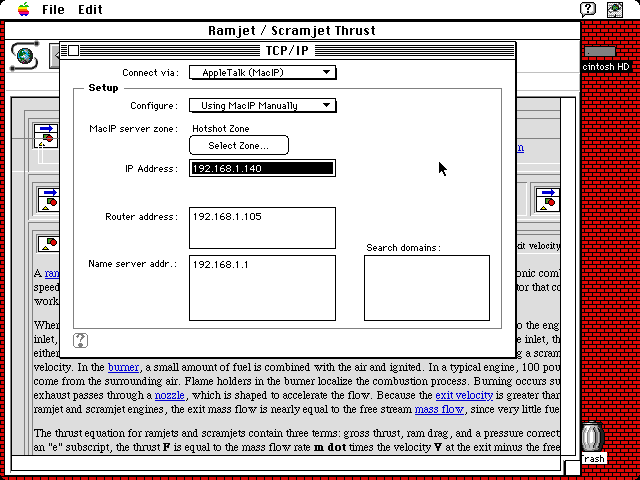 Open Transport manual profile |
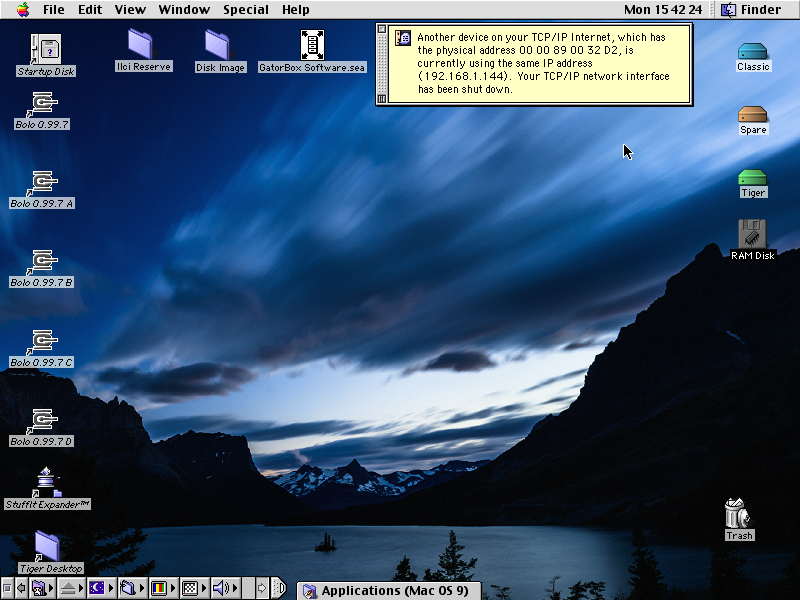 IP address conflict |
Open Transport clients are similar. The automatic method is just MacIP Server from the TCP/IP control panel. Nice and easy. Otherwise, use MacIP Manually. Assign the Mac an IP address that is within the reserved block that the GatorBox sets aside, like as used here, 192.168.1.140. Put the address of the GatorBox in the Router Address field and then the address of the router in the last block.
Other features and information
There is a RS422 serial port which sits next to the LocalTalk Mini-DIN-8 plug on the back of GatorBoxes. Apparently a user is supposed to hook up a cable and use a terminal program like MacTerminal or the many equivalents, set it up for 9600 8N1 and access some special features of the GatorBox. All attempts by the author to investigate this feature failed. It could be that the serial port was intended for Cayman internal diagnostic or testing purposes, as the Setting up your GatorBox booklet explains (emphasis as per the original):
The GatorBox CS has a switch on the back of the unit to enable a TEST mode. The point about a terminal login to this interface probably applies only to the CS model, which is what the source omitted which spoke of accessing the device via a 9600 8N1 terminal.
EtherTalk Phase 1 networks are present with Macintosh II computers using the EtherTalk 1.2 driver and possibly a few other older network devices. EtherTalk Phase 2 improved the routing capabilities of EtherTalk traffic, added zones, support for more nodes (computers or devices like the GatorBox) on one network, and a few other things. A lot of routers will not like EtherTalk Phase 1 traffic which makes the GatorBox relevant because it can route Phase 1 traffic to and from Phase 2 networks, but nobody uses Phase 1 anyways. The GatorBox was among the early class of devices that could use EtherTalk Phase 1 but by the time Ethernet became popular, EtherTalk Phase 2 was already out. Read the GatorBox User's Guide and the Network Reference for further details. The More Info section also has a section which elaborates further on this topic.
The GatorBox diskettes included a modified version of NCSA Telnet 2.4. This was made to Telnet into the GatorBox, and was not tested here. The telnet access attempts included Nifty Telnet (couldn't work right) and the Terminal within OS X 10.4. TFTP likewise was not tested because a compatible Mac is required to set up the GatorBox first, which in turn would probably be the machine which would be a bridge client -- rendering TFTP unnecessary in the first place.
Do not hook up an AppleTalk bridge on the LocalTalk network attached to the GatorBox. Testing proved that the AppleTalk bridge went into a soft-reset loop and the GatorBox went wild, enough that the unit has to be powered down and configuration information reuploaded to it.
More about AppleTalk zones
AppleTalk zones are a subject of some interest here mainly because nobody really talks about them elsewhere on the Internet. The GatorBox makes creating zones really easy but for users with less than 12 active connected Macs on one network, it's rather pointless and in fact can make things a slight hassle. A zone is a method of dividing up servers into manageable areas, generally used with big networks, because then traffic in each zone stays in each zone so the whole network doesn't get bogged down so much. It makes things more efficient so that only when someone needs to go outside their zone will they use the main network.
For instance, a newspaper company may have a number of zones, such as Management, Research, Printing Department, Public Relations and so on. Computers were assigned into a specific zone based on their intended purpose. Zones are created in two nominal ways: software or hardware, and only EtherTalk networks can have zones. If a LocalTalk device is on a EtherTalk zone, then it is fixed to only the zone it currently resides in, and can't go outside that zone. A *NIX system with Netatalk using the atalkd daemon, Windows Server with Services for Macintosh or a few other server or routing software are examples of software configured zones. They can be created in hardware with routers like the Cayman Systems GatorBox, Cisco routing devices, and of course old EtherTalk bridges like the Shiva FastPath. While obtaining proper reading material which adequately discusses the subject is hard to find, it is fortunate that most users will never have to approach the subject, especially these days because few will make an AppleTalk network big enough to warrant zoning. A computer network with more than twenty computers is probably eligible, though. In TCP parlance, a AppleTalk zone is the same principle as a large network with different subnets for a multitude of smaller networks. In SMB vernacular a zone is the same concept as a Workgroup.
As for the Gatorbox, it has to be in at least one zone. Usually when the GatorBox is rebooted it causes all the nodes to pop up a dialog saying the network has gone down, and then back up again. This default zone in the EtherTalk Phase 2 configuration, and the TCP/IP routing window are of interest. All the LocalTalk nodes are stuck with the zone defined in the AppleTalk Router dialog under the "Zone Name" field and cannot change themselves to some other zone. The only time a user can change which zone he is associated with is when his node is on the EtherTalk side, that is, not attached to the GatorBox's LocalTalk network. This occurs because the Ethernet side is not stuck in the GatorBox's primary area of control. Only one zone can be used for MacIP routing, selected by the "Default Zone" in the Zone List dialog: this is because LocalTalk networks do not support multiple zones.
Practically, zones make sense for a network with a different topology than most home or hobbyist users will be found using these days. Such a description would be something like one LocalTalk network of "Ground Floor" with a GatorBox, which has Ethernet hooked up to a gateway, which also has another GatorBox on it with Ethernet going to it for "First Floor" whereby the Ethernet would be hooked up to the T1 connection or something like that. In this manner the Ground Floor would be in one zone and the First Floor would be in another zone. Printers and file servers can both be divided accordingly into the appropriate zone based on the design of the network and the network administrator.
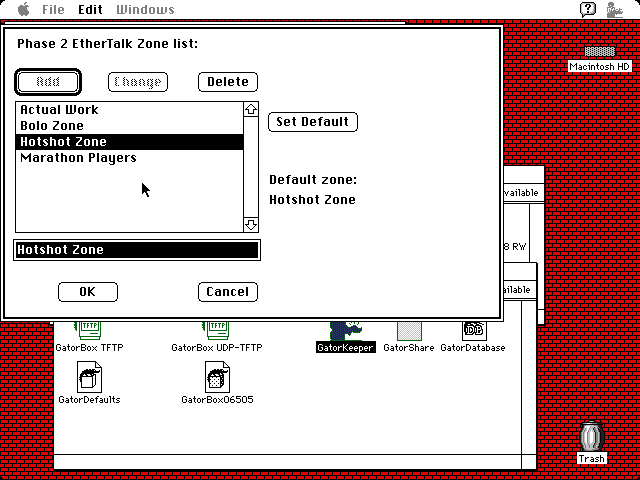 GatorBox with four zones |
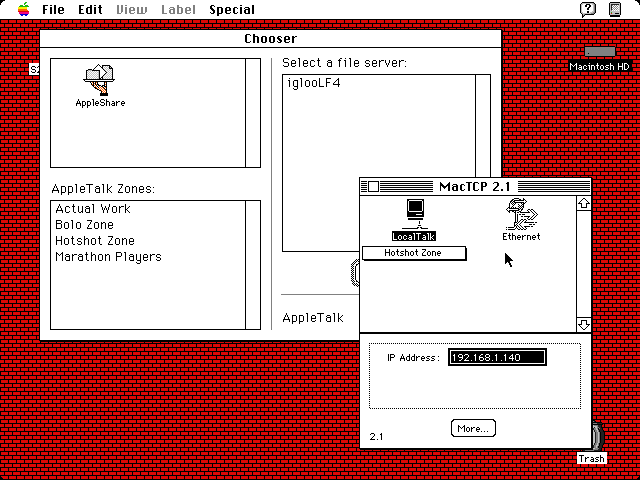 Chooser and MacTCP with multiple zones |
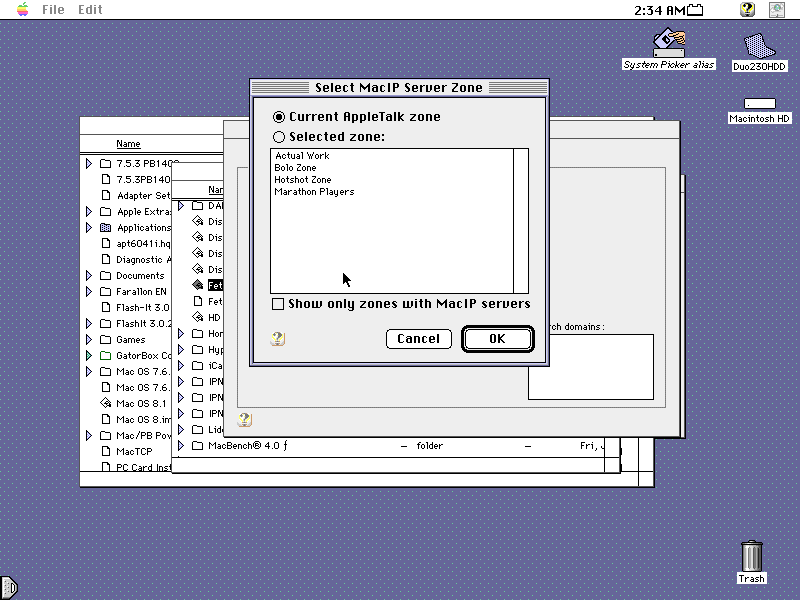 List of zones... |
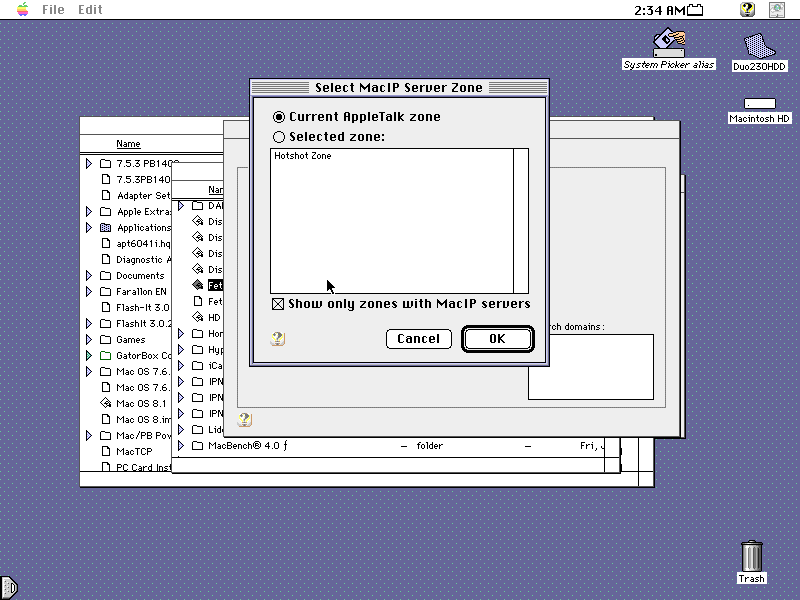 ...but only one with MacIP |
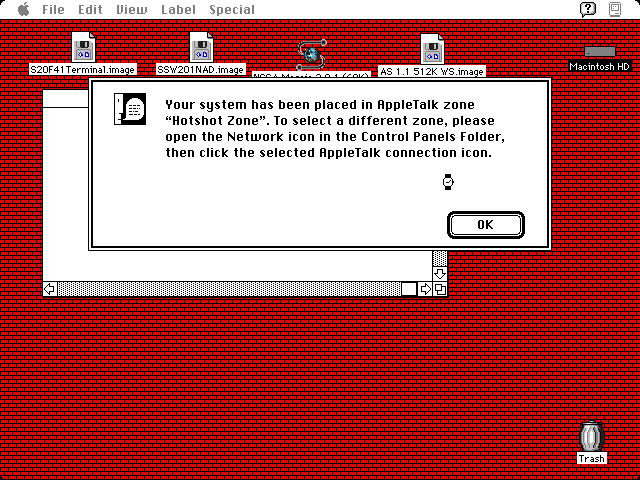 New zone dialog |
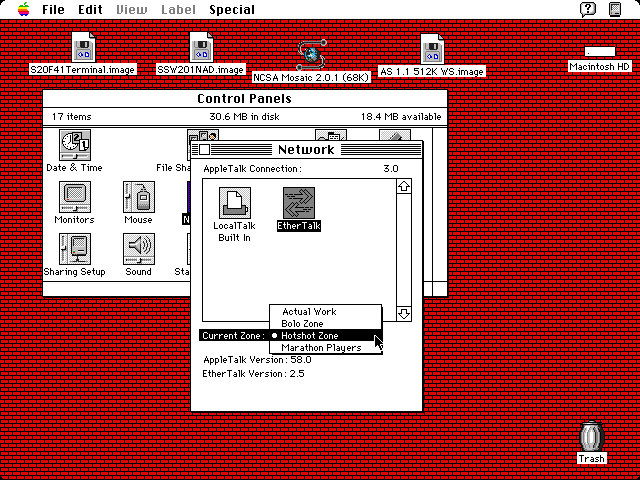 Changing zone |
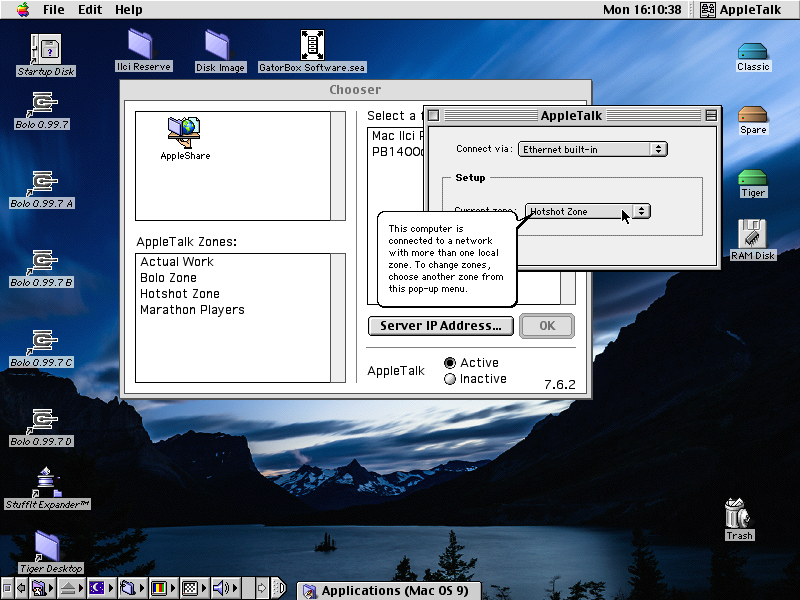 Open Transport zone choices |
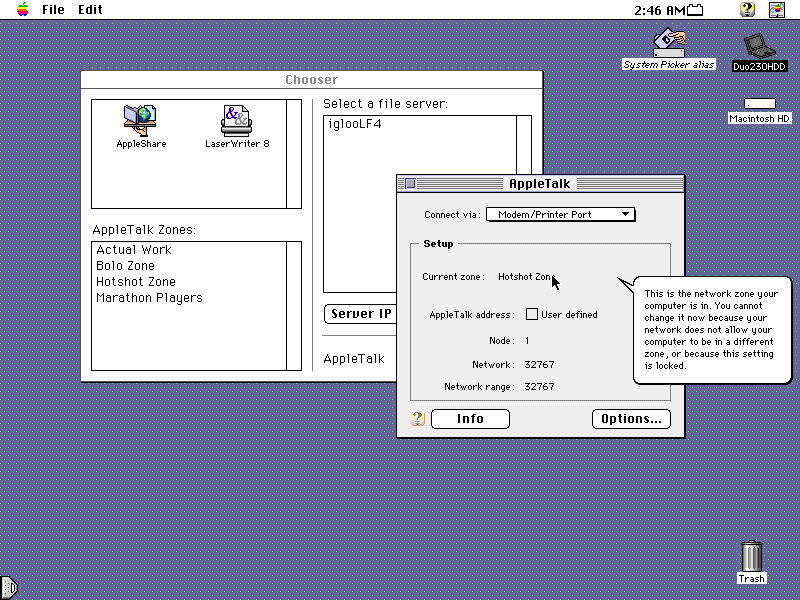 Zone config blocked |
Zones are selected in the Network control panel (AppleTalk for Open Transport equipped systems): if a drop-down selector doesn't exist, then double-click the EtherTalk icon to chose the zone to associate the computer with. LocalTalk systems cannot chose their zone they reside in, but they can browse other zones in the Chooser. As far as TCP is concerned, MacTCP is capable of selecting which AppleTalk zone to look for a MacIP server, even without NSI software. Systems using Open Transport use the TCP/IP control panel and pick the zone from there that has the desired MacIP server. Nothing too remarkable.
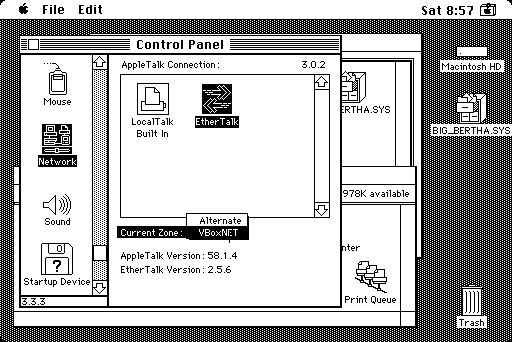
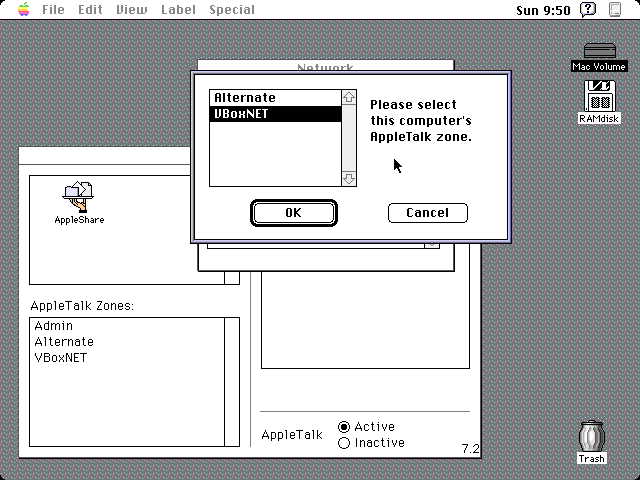
Using the LocalTalk Bridge Software
This is a control panel (CDEV) that is unofficially supported but was distributed by Apple, and is kind of a spinoff of the obsolete LaserWriter Bridge software. It requires System 7.1 or later for it to run along with a 68020 or higher, with at least one interface to share through the LocalTalk port: it can be either Ethernet, WiFi or IRTalk. The ReadMe is actually quite comprehensive and should cover most questions about the software.
Once it has been downloaded, mount the image and copy the control panel to your System Folder. Use the radio button to turn the software on. After restarting, open the control panel once again. The network privacy option simply blocks non-LocalTalk machines (Ethernet) from accessing the LocalTalk side when it is enabled but still allows the LocalTalk side to contact the non-LocalTalk side (Ethernet). 68K machines may suffer a significant speed reduction when traffic is active through the bridge service to the point of being barely usable, just like other router/gateway software discussed below. A 68040 or ideally PowerPC machine is a more sensible specification for serious use of this software where the bridge machine is being used as a normal machine while also doing bridge duty.
The bridge software still restricts the LocalTalk machine to its normal limitations on the maximum OS supported. This means that a Plus won't be able to connect to a 10.6 Snow Leopard machine, as it's just basically behaving like a software version of an AppleTalk bridge. But one option in such a case is use one Mac as a bridge to mount Snow Leopard, then the Plus could mount the bridge Mac. It does not route TCP or UDP traffic by itself, only AppleTalk data, and despite reports of the contrary, it has no ability to set up MacIP addresses or forwarding and thus cannot serve as a MacIP gateway. But it can pass MacIP datagrams through from something else like Apple IP Gateway or macipgw to seed the Ethernet side with MacIP data, which can be picked up by a client through the bridge software and that does allow TCP and AFP over TCP to work, although it is slow. |
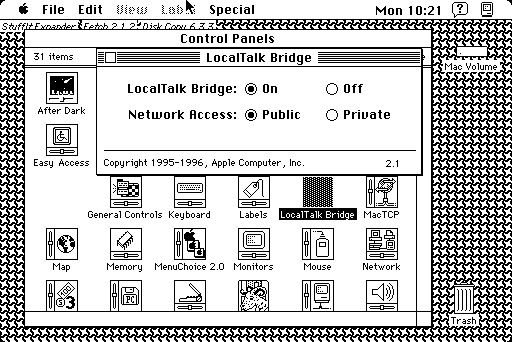 LocalTalk Bridge in use (SE/30) |
Technical and diagnostic information is limited for LocalTalk Bridge. Most of the archived TIL and KB articles have to do with the obsolete LaserWriter Bridge program. But hopefully this dump below should suffice:
- TA33576: Apple LocalTalk Bridge: Troubleshooting
- TA33582: Apple LocalTalk Bridge: Devices on LocalTalk Segment
- TA37427: LocalTalk Bridge: Network Number Conflicts
- TA38719: Mac OS 8.5: LocalTalk Bridge 2.1 Compatibility
A similar product is called Farallon LocalPath. It ran under System 6 and early System 7. If it is not available through the usual channels, one place to get it (along with a bunch of other stuff) is the so-called Eagle's Nest BBS dump from archive.org. Also called the Buzzard's Nest, it a large trove of interesting "Stuff" from the old times, such as control panels, programs, games, audio and movie clips, et cetera. Caution: Viruses and non-PG13 content may be present on the discs. Explore with caution. A $ ls -lR dump of the disc contents in text files can be found here (along with a MacGUI file list dump in the main /files/ directory). In addition, there was also "Liaison GW" for routing Microsoft Mail via some kind of dial-up thing, also found in Disc 1 of the Eagle's Nest trove, but it wasn't the same thing as the Liaison Internet Router software mentioned further below. |
 Farallon LocalPath demo |
Disc 1 also has an archive called AppFiSharTls which has AppleShareSetup for tweaking the System 7 file server, Remote Control and Server Controller (more or less meant for AppleShare Server 3) and UnmounIt. AppTGatTools has some curious stuff for AppleTalk-DECNet, LAT, AppleTalk-LAT and AppleTalk-LAT Gateway. LAT means Local Area Transport, designed for DEC servers and terminals. Odds are extremely low anybody can use it today.
Besides the Eagle's Nest BBS discs, another interesting source is the BBS in a Box discs (list of contents here). Some are missing but it's probably not that big of a deal since the only the first 5 or so discs were actually unique, followed by the final two or so. The later discs just added on additional content to the previous disc. One interesting trinket on Disc 8 of the Eagle's Nest is an ADSP tool under the SeriusComm program folder. AppleTalk Data Stream Protocol wasn't meant for file sharing but instead as a method for program to program communication. It probably didn't really get anywhere because by the time it came out, TCP was mature enough, mostly from the influence of the UNIX world. SUN Workstations and EtherTalk gateways like a GatorBox were common file servers for more established settings, like larger universities. However ADSP was meant for a different purpose than file sharing, and instead designed for stuff like SNMP.
Apple Internet Router
The first release of this software was version 2. Available from the Macintosh Garden, it is a curious thing because it runs under System 6. Designed to interconnect EtherTalk, TokenTalk and LocalTalk networks into an "internet" it should not be confused with a TCP/IP router or a MacIP gateway and it cannot route TCP/IP traffic (i.e. FTP, SSH, Telnet, WWW, ...), but this is not to say something else could provide a DDP/IP server. One interesting trivia bit can be found in an obscure TIL article, concerning the ability to manage more than one zone on a LocalTalk port, which didn't make it to the production release. But anyways, it is essentially working like an expanded version of LocalTalk Bridge. The manual provides a good description of what Router means in this context:
The software is limited to 8 networks to join together, runs as a desk accessory instead of a normal program and comes with a Phase 2 Upgrade disk to upgrade from AppleTalk Phase 1 to Phase 2. The installation disk is rather full (only has 5KiB free), being packaged with System 6.0.3 for the Plus, II, SE and SE/30 computers on a 800KiB diskette. There is very little information at all about this product: it is only through our heroes at bitsavers.org that we even have a manual for it (check the /pdf/apple/mac/developer/Networking/developer/ path). Note: Apple Internet Router 2 does not support Network Software Installer (NSI) 1.4.5 drivers: it will refuse to start or have some other kind of problem. Try using NSI 1.4.3, available from the Legacy Recovery CD or perhaps other places as it installs AppleTalk 58.1.2 rather than AppleTalk 58.1.4 that NSI 1.4.5 installs. (The normal install of AppleTalk supplied with the AIR disk is v53.0.) Additionally, if using AppleShare File Server 2.0.1 is desired as well, see the manual for instructions.
 Contents of the Router Installer |
 Phase 2 Upgrade Utility disk |
 Installer selections |
 Router error with NSI 1.4.5 (see note) |
Installation is easy. Open the Installer and select AppleTalk Internet Router. System 6.0.3 is available for select systems: otherwise, there is nothing else to do. Afterwards, a reboot is probably a good step. Since most people will need Ethernet drivers or the like, install those after the installation of the Router software. Assuming this is for a Ethernet to LocalTalk bridge functionality, switch the bridge machine to EtherTalk in the Network control panel. Next, open the Router desk accessory from the Apple menu. From the Router menu, a quick help is available in the About the Router... selection, Router Setup is the starting window for initial setup, Port Statistics and Network Information are other windows for info with the latter being the default if it is opened after initial configuration.
 Installer infohelp on AIR |
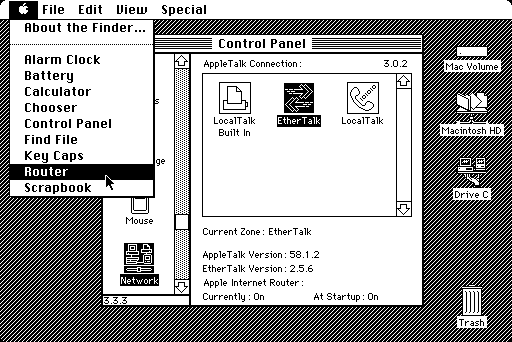 Router in the Apple menu |
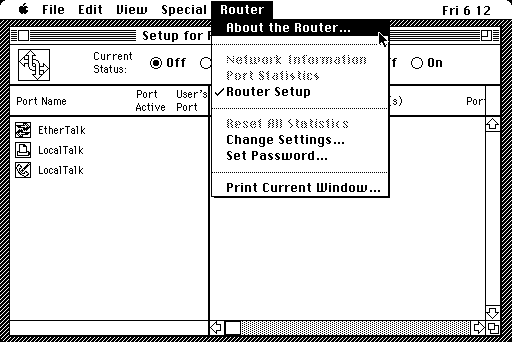 Router menu |
 Router About box |
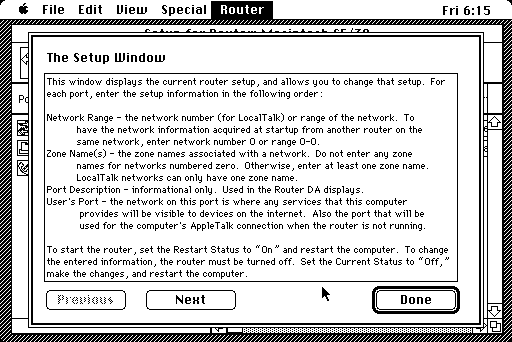 One of the help screens |
Begin by setting a network range for EtherTalk, this is a range of node numbers that can be assigned to client computers. For instance, a network range of 4 to 5 supports 253 + 253 = 506 client machines. This is way more than LocalTalk can actually handle, which is why LocalTalk can only support one "network range", so it only gets one value and it must be different than the network numbers assigned to other networks. Add the names for the respective LocalTalk zones (available for the printer port and modem port separately, if desired) and EtherTalk zones, then switch the radio button under Restart Status to On. The "User's Port" is the interface that the host machine uses as its primary AppleTalk connection but also the primary port that services are provided to. Reboot the machine, and then the Router does some work to set up the zones and so forth, and then it is ready to use. Like LocalTalk Bridge and all other software router/gateways in this section, even under System 6, expect a significant performance drop while the router is processing traffic.
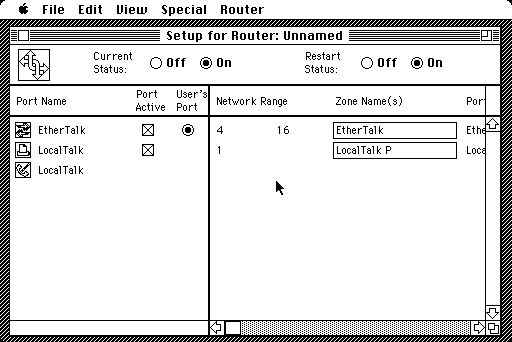 Initial setup |
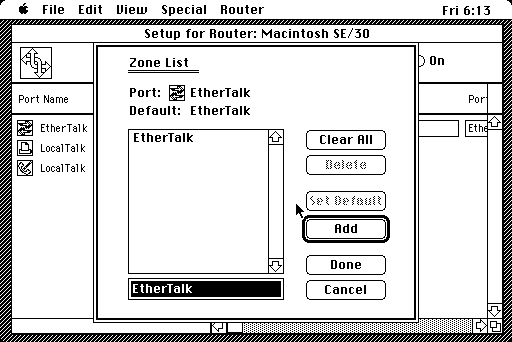 Creating a zone |
Setup complete, router active |
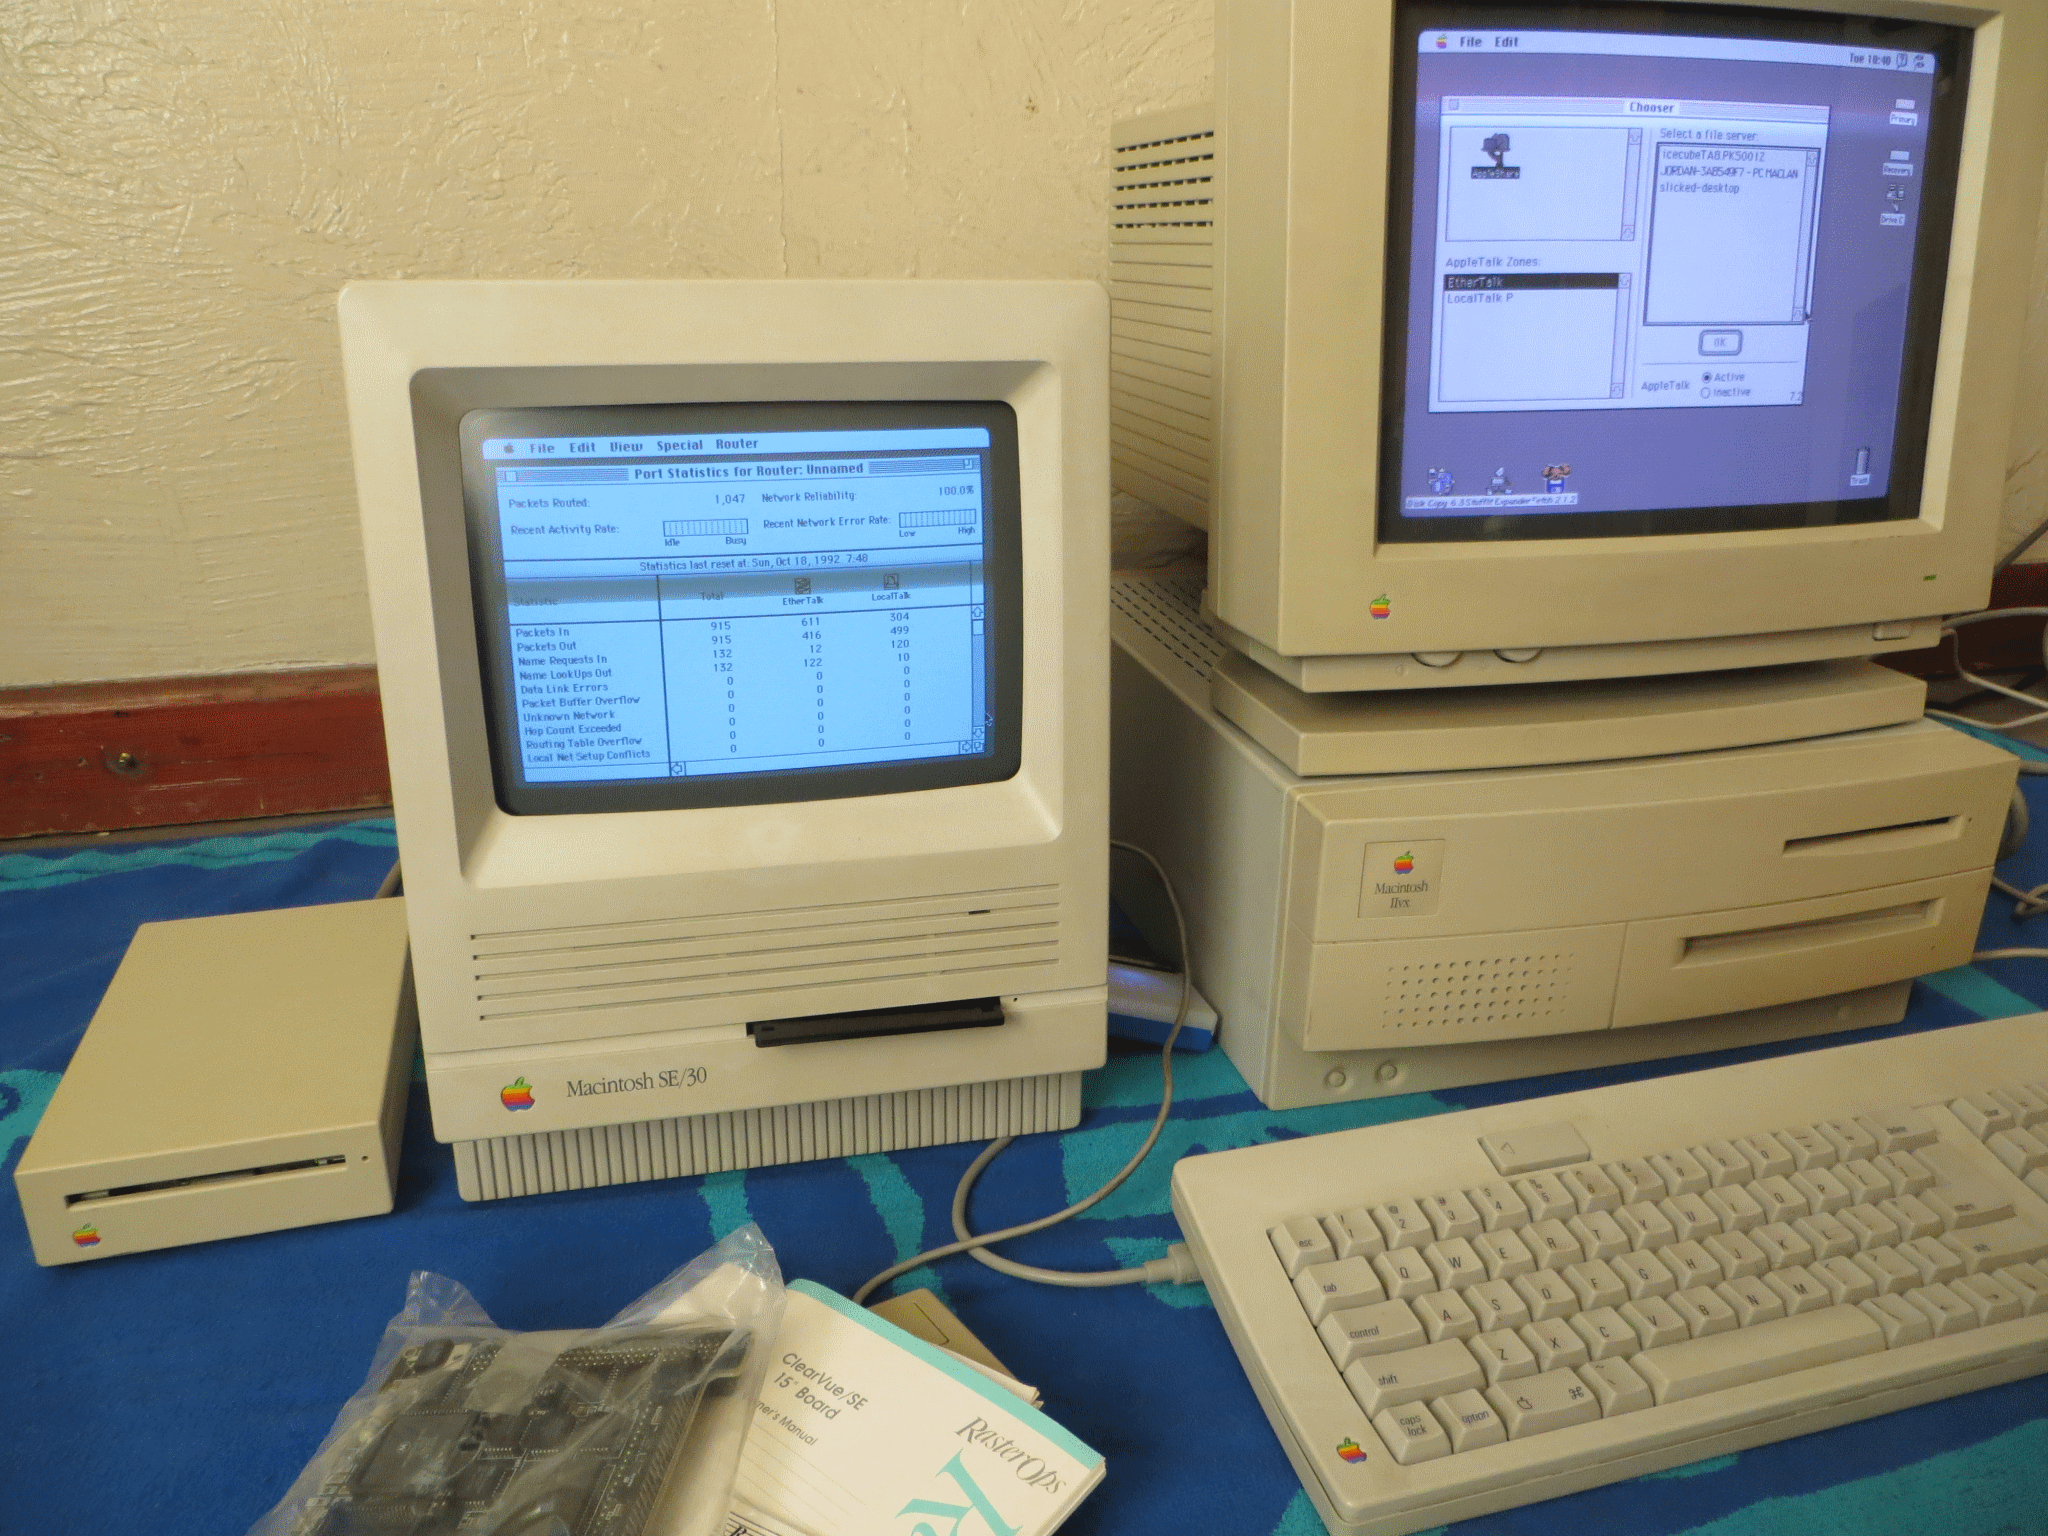 SE/30 as a router to a Mac IIvx |
The next major version is version 3. For the most part it works like version 2. It is not compatible with Open Transport but it does interconnect with Open Transport clients just fine. Since it was mostly designed for System 7.0 and 7.1, it could bomb the system on 7.5 though (make sure it gets the v.3.0.1 update). It comes on three 800KiB disks normally (the Basic Connectivity Package), but there was extra extension stuff available separately. The first is the "AppleTalk/IP Wide Area Extension", which we'll talk about in a minute, and the other two are the "AppleTalk/X.25 Wide Area Extension" and "MacX25 Router Extension". Any information about the last two is lacking, and only the Apple Internet Router product data sheets give us much of an idea of what they were. The manual is not representative of the original, but check the Download Town for a better one. A dump of relevant Apple KB/TIL articles to AIR follows below:
- TA21725: Apple Products: Multihoming and Multinode Support
- TA30721: Apple Internet Router 3.0: GeoPort Compatibility
- TA32501: Apple Internet Router 3.0.1 and Power Macintosh
- TA35243: Apple Internet Router 3.0.1 and System 7.5.3 Issue
- TA36553: Apple Internet Router and TCP/IP
- TIL11485: AIR: Comparing TCP/IP Tunneling with DECnet Tunneling
- TIL11487: AIR: TCP/IP Tunneling, Tunnel Port Configuration
- TIL11488: Apple Internet Router: WAN Network Options
- TIL11489: Apple Internet Router: Tunneling Definitions and Concepts
- TIL11545: Apple Internet Router: AURP Q&A
- TIL11763: Apple Internet Router 3.0.x and Apple Remote Access
- TIL11777: Apple Internet Router 3.0, IP Extension, & Public Zone
- TIL14027: Apple Internet Router 3.0 and X.25 Wide Area Extension
There are three 800KiB disks, and are probably shipped to you today as 800KiB Disk Copy 6.3.3 Read-Only Compressed images. Assuming 7.0 or 7.1 (7.1 should use version 3.0.1 of AIR: check the version of the Router extension in the Extensions folder), start up the Installer to begin the installation process. Do not install the Network Management features - they will probably interfere with Apple IP Gateway if that is desired later on, more on that in a moment. Only the Basic Connectivity package is actually necessary. Make sure the Router package is installed before the NSI or any other Ethernet drivers are installed. Otherwise AppleTalk resources could be overwritten by Router. After installation, a reboot is required to complete the process. Open Router Manager to begin the port config: it's much the same as AIR 2 except with a slightly different interface. The Network control panel should already have the desired primary interface for the host machine's AppleTalk operations, in this example it is set to EtherTalk, but clients using the Router should be set to LocalTalk.
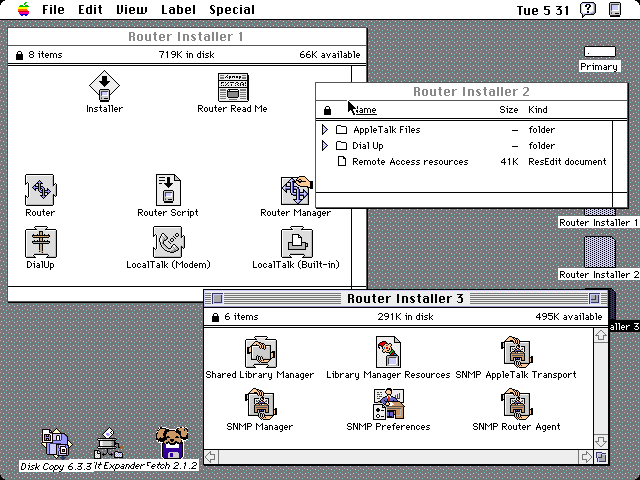 Contents of installer disks |
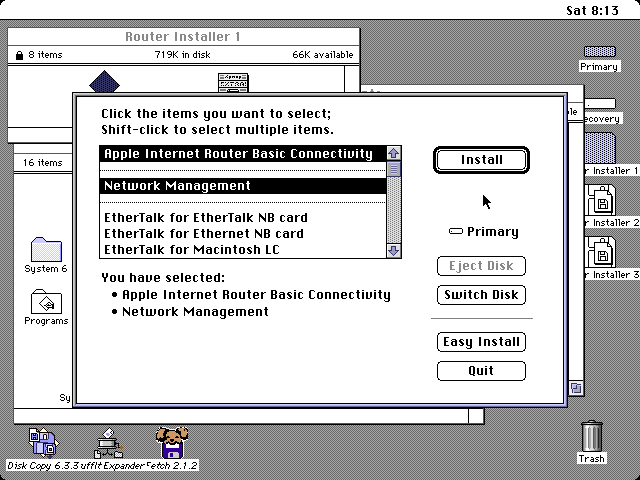 Installer process (see note) |
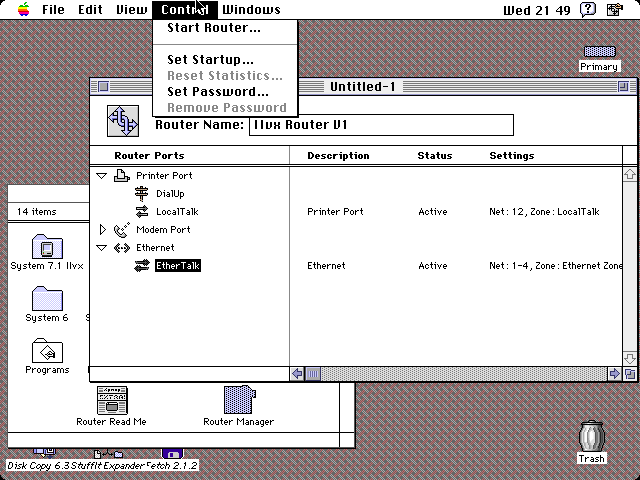 Control menu |
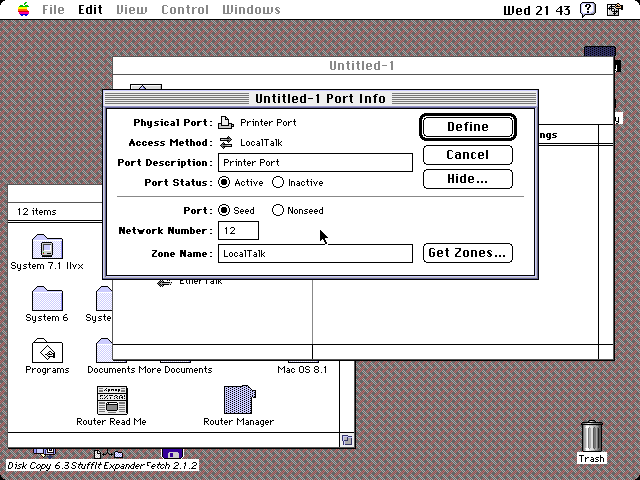 LocalTalk printer port setup |
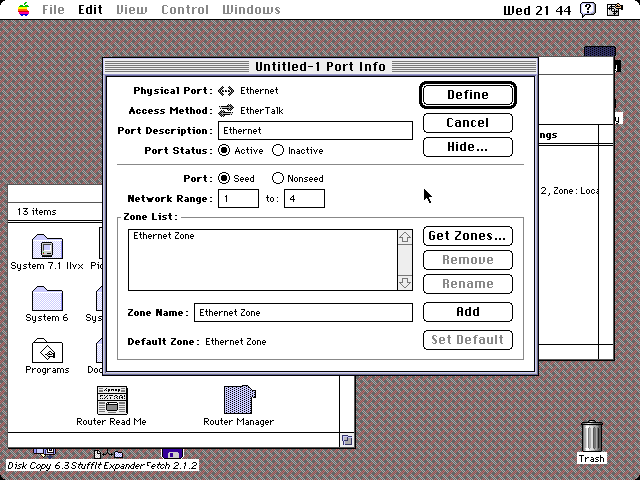 Ethernet zone finished |
Double click the LocalTalk printer port entry. Enter a zone name, a network number that isn't in use or in the range of a "network range" of other network numbers reserved, click Seed Port, make sure Active is also enabled. If the zones are assigned by another router then the "Get zones..." button can be used to check for existing ones. Repeat the same process for the EtherTalk/TokenTalk/FDDITalk interface: except these support a network range, as in, a span of network numbers where each number supports 253 nodes (computers or clients). Afterwards, save the configuration file, then select Start Router from the Control menu. Other clients may need to be rebooted to update their zone information. Also, automatic startup of the Router is possible from the Set Startup option in the Control menu, which also permits tweaking of the zone table and routing table counts.
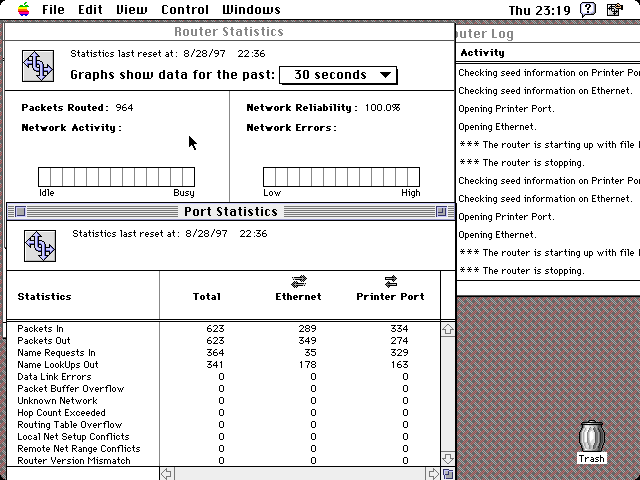 Status windows |
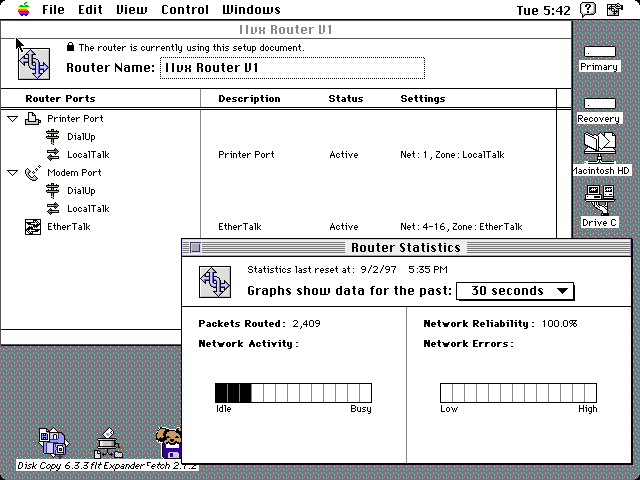 Router in use (Mac IIvx) |
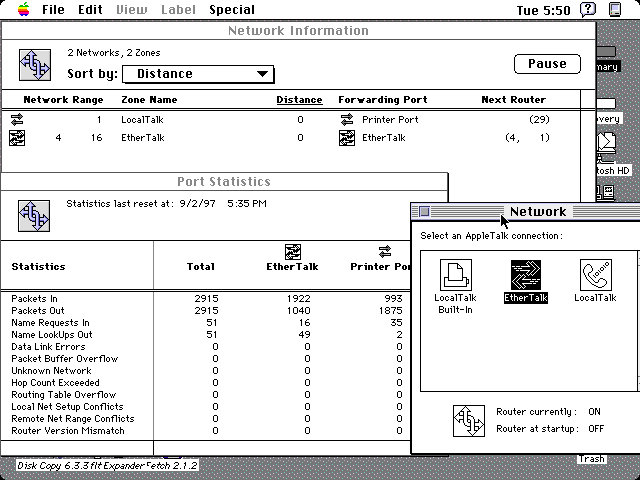 Network control panel |
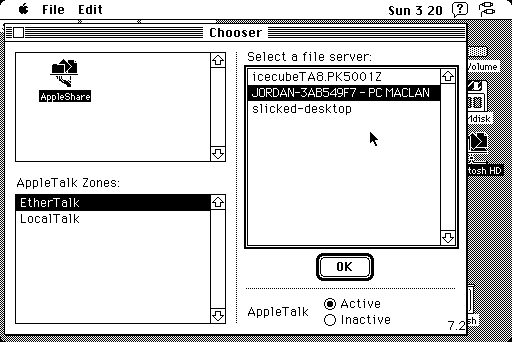 Client machine view (SE/30) |
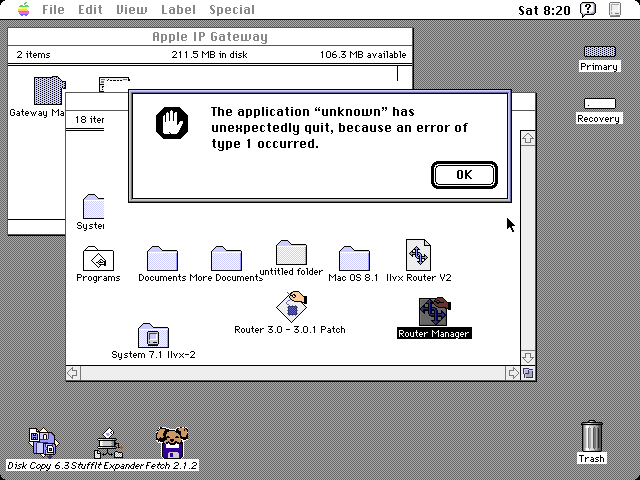 AIG SLM error (see below) |
So how does it work? It works okay. The problem is LocalTalk Bridge does what this does already for what most people need, and both slow down the bridge/router machine severely, but performance on a PowerPC box should be better. Most PowerPC boxes don't support 7.1 though unless they're the early PowerPC 601s, and even then they're not working at optimum efficiency since there isn't a lot of PowerPC native code in 7.1, that didn't really happen in earnest until 7.6, which brought a lot of 7.5 bloat along with it.
What is notable for AIR 3 is the ability to use the Wide Area Extension which installs the IP Tunnel extension. (Note that the disk image floating around of WAE is a Disk Copy 4.2 disk image.) What this does is allow one Apple Internet Router instance to hook up to another Apple Internet Router instance somewhere else and join the two over TCP/IP. This is great for the GlobalTalk service where people are bridging their AppleTalk networks into a pseudo-WAN. Along with a rebooting of the System 7 Today forums in a 68K compatible format, let's say times have been good recently. Otherwise, if you don't need to bridge to another AIR instance, the Wide Area Extension is not necessary. If so, your router (not AppleTalk Internet Router) will have to allow Port 387 for AURP (AppleTalk Update-based Routing Protocol) UDP traffic to pass through, which amazingly enough, is still acknowledged by the IANA. (The IANA port assignment registry also lists TCP for the same port number, both being assigned to an individual from Novell, Inc. Weird.) |
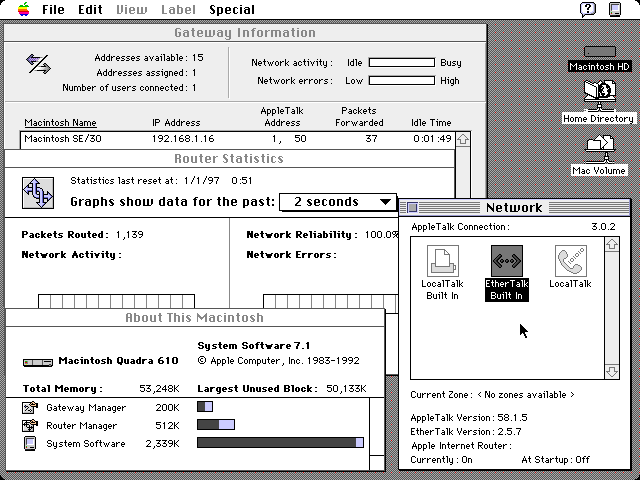 Testing out AIR and AIG (Q610) |
Since the IP/Wide Area Extension comes with MacTCP 1.1.1, this may or may not be necessary for AIR over TCP/IP. If you are curious about AURP, check the KB list further up for information, it can be a little fascinating from a historical perspective.
Compatibility with Apple IP Gateway is suspect. Both don't seem to get along very well: they have different versions of the Shared Library Manager and a few other potential conflicts and hangs can occur. Apple does seem to suggest that both running concurrently is doable: but remember that one came out later than the other (AIR 3 files are dated for Dec 1992, while 1994 is cited as a release date for AIG), and a discount was offered for AIG if AIR was purchased. By the summer of 1998 (Mac OS 8.5) Apple was done with AIR and Apple IP Gateway which only supported Classic Networking only, which 7.6 and above do not handle. From then on they only recommended IPNetRouter, Vicom Internet Gateway, DHCP Server and SoftRouter products.
Otherwise, to install AIR and AIG at the same time, a clean virgin install of 7.1 is recommended, leaving out the EtherTalk/TokenTalk selections in the Installer. Apply System Update 3.0, then install Apple IP Gateway. Do not install the Network Management stuff: use a Custom install to install AIG, AppleTalk 58.1.5 and the Ethernet driver if supported with the default installer. Following up with Apple Internet Router with the v3.0.1 patch (same affair with Network Management: skip it, only install the Basic Connectivity Package), and then top it off with NSI 1.5.1 if necessary. Launching AIR then AIG was workable, but performance on a 68030 machine will be lackluster with a 68040 being "vaguely tolerable" if the same machine is also used for other tasks. See the next subsection.
Apple IP Gateway
This is another software DDP/IP gateway product much like IPNetRouter or Vicom Internet Gateway, but simpler. Like Apple Internet Router this software package does not work with Open Transport and was not designed for it, saying specifically in the 1.0.1 patch Read Me "Apple IP Gateway 1.0.1 cannot be installed on a machine running Open Transport." IPNetRouter and Vicom Internet Gatway were specifically recommended by Apple in various TIL articles for routing MacIP traffic to LocalTalk equipped machines once Open Transport came out. There does not appear to be any attempt by Apple to make their own OT compatible equivalent. Let's see what this one is on about.
The software comes on two 800KiB disks, points towards NSI 1.5.1 for updating the network drivers first (a recommended step) and then a 1.0.1 updater thrown in. It requires 7.1 and 4MiB of RAM or more, and requires an Ethernet device. If that is not possible for any one particular reason then Vicom Internet Gateway is probably the better option because it can route off a PPP serial port or other interfaces. Installation is simple and straightforward, as long as the source disks are not corrupted: the ones used were not. At the present moment the best place to get it along with a few other interesting toys is the September 2000 Application Recovery CD (check Macintosh Garden), which has been reported to have some bad images here and there. A copy of the manual is available here, and below is a collection of Apple TIL articles about IP Gateway:
- TA38364: IP Gateway: Third-party Ethernet Drivers
- TA33468: Apple IP Gateway: Incompatible with Some Ethernet Cards
- TA35413: Apple IP Gateway 1.0.1: Setting Up Multiple Gateways
- TA33351: Apple IP Gateway: -344 Error
- TA40281: AppleTalk Internet Router: Doesn't Translate DDP-to-IP
- TA40034: MacTCP: Recommended DDP-IP Gateways
- TIL13909: MacTCP: More Than One IP Gateway and AppleTalk Zones
The source for the disks appears to have already applied the 1.0.1 update, but if it is needed, all it does is ask to update two items in the Extensions folder and one in the program directory. Speaking of the program directory there's only two ways of interfacing with the Gateway, the first is to use the Gateway Manager program and the other is some minor settings via ResEdit. The latter will be mentioned first: it was advised in the manual that certain things could be adjusted with ResEdit, and after some digging, this document was found and extracted for your convenience. Let's get to the Gateway Manager program.
The Gateway Manager program is extremely simple to use, which probably makes it less useful these days because the other choices below, like IPNetRouter, have more flexibility. The Control menu has everything it needs: Start Gateway does what it says, Reset Statistics is also clear on what that does, Set Password allows control of the program to be restricted unless a password is entered, Set up Gateway does the basic configuration of the gateway service, and Set up MacTCP just pulls up the MacTCP control panel. In the Gateway settings, Addressing Preference determines which section to use on the right half; if you use Automatically assigned, then the client machines will use the MacIP Server in the TCP/IP control panel (Open Transport) or Server (in MacTCP with Classic Networking) to have the server machine handle all the IP assignments, which are configurable in a certain range.
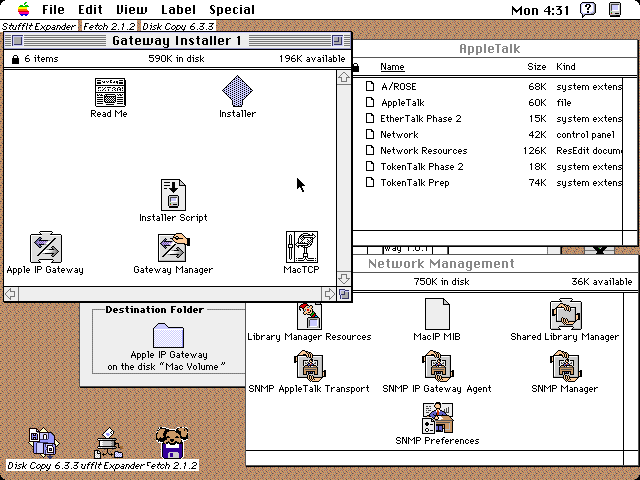 Contents of both Installer disks |
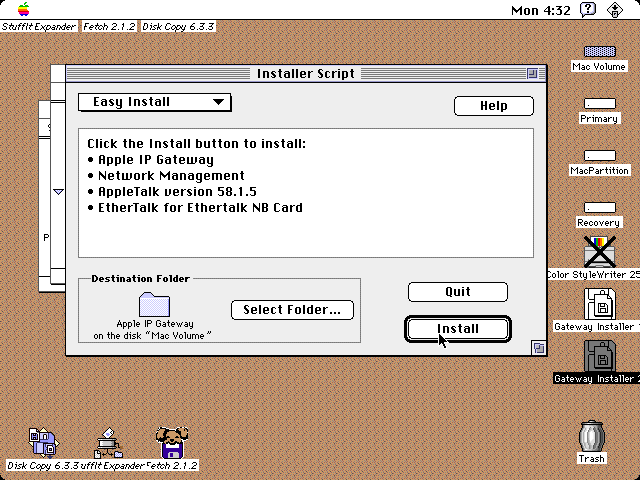 Default installation selections |
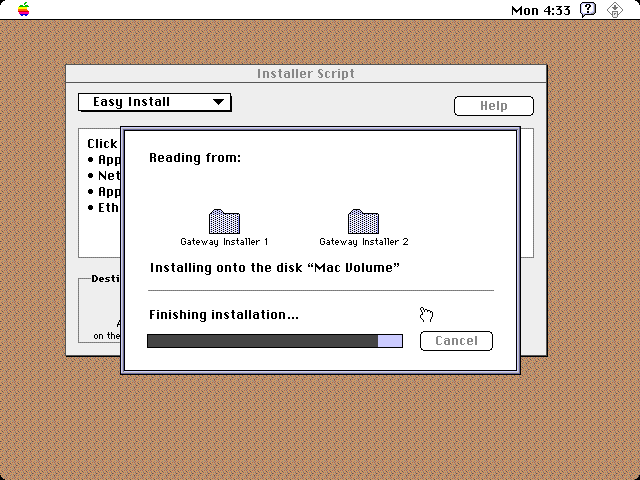 Installation wrapping up |
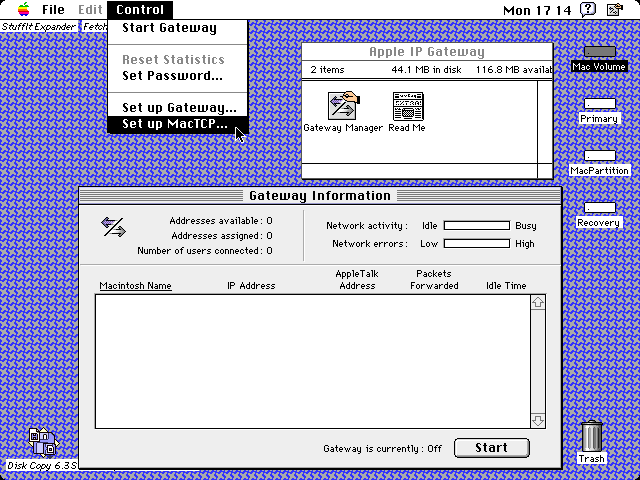 First launch |
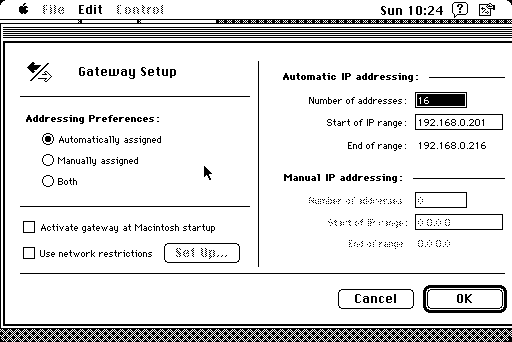 Gateway settings |
Unlike the other MacIP capable gateways reviewed here, this one is a little bit different. Since the host machine must choose Ethernet in the MacTCP control panel, and the Network control panel must chose EtherTalk to reach other AppleTalk services and provide the same, this program can only provide MacIP gateway functions over an Ethernet network, in essence, re-seeding Ethernet networks with MacIP packets. Then a bridge like an AsanteTalk, EtherMac iPrint LT, Dayna EtherPrint or the like can bridge Ethernet to LocalTalk client machines, which can then use the gateway service. An alternative is to use a software bridge like Farallon LocalPath, Apple LocalTalk Bridge, a software router like Apple Internet Router, or even using Apple Remote Access for another machine to dial into the Ethernet network. By itself, Apple IP Gateway does not route to a LocalTalk port or any other interface such as TokenTalk or FDDITalk, it requires something else to bridge the MacIP datagrams.
Assuming a normal home router scenario, most people will have a router address of 192.168.0.1 (or something else like 10.0.0.1, or even 172.16.0.1) that is the direct address of the router. Normal router control panels allow a user to adjust the range that a router provides addresses to client computers (nodes). For instance, a default router assignment may assign an address from a range from 192.168.0.2 up to 192.168.0.254. What we want to do for AIG is create a subnetwork: basically dividing the assigned network range in two. To do this is very simple: in your router control panel (example shown: router information/control screens vary considerably) adjust the start of the addressing range or the ending of the addressing range to allow space for AIG to assign addresses to MacIP clients.
For instance, change the assignment range to start at 192.168.0.2 up to 192.168.0.199, which leaves up to 56 addresses for AIG to assign to clients, starting at say, 192.168.0.200 and capping out at 192.168.0.254. Leave 192.168.0.255 untouched as that is considered a broadcast address, which means that whatever is broadcasted on that address is picked up by everybody in the subnet 192.168.0.xxx. Or, for example, change the starting range from 192.168.0.100 to ending at 192.168.0.254, or whatever you like, which divides the subnet 0 into two blocks, leaving the bottom range from 192.168.0.2 to 192.168.0.99 range available for AIG. If this process is not done, then AIG can hang because it may try to assign a client an IP address in a range that the router has control over: if it is assigned addresses in a different subnet like Vicom Internet Gateway and IPNetRouter do, then nothing will happen because it will be trying to provide MacIP services to a subnet that the host computer isn't on. Sometimes all this number work, octets and binary can be confusing: see this page for helpful information.
Once the router (in this scenario) has been assigned its block of addresses under its control, and the Apple IP Gateway has taken the other part of addresses (see the last image in the previous image gallery for an example), the next step is to simply start the service. As mentioned earlier, use a bridge or software router like Apple Internet Router to allow LocalTalk clients to use the DDP/IP server feature. If the service is running on a software router like Apple Internet Router, then clients will want to find out which zone the MacIP service is being provided from in the MacTCP or TCP/IP control panels, which is usually in an Ethernet zone. This is easier with Open Transport because the TCP/IP control panel allows a user to filter out zones that don't have DDP/IP servers up.
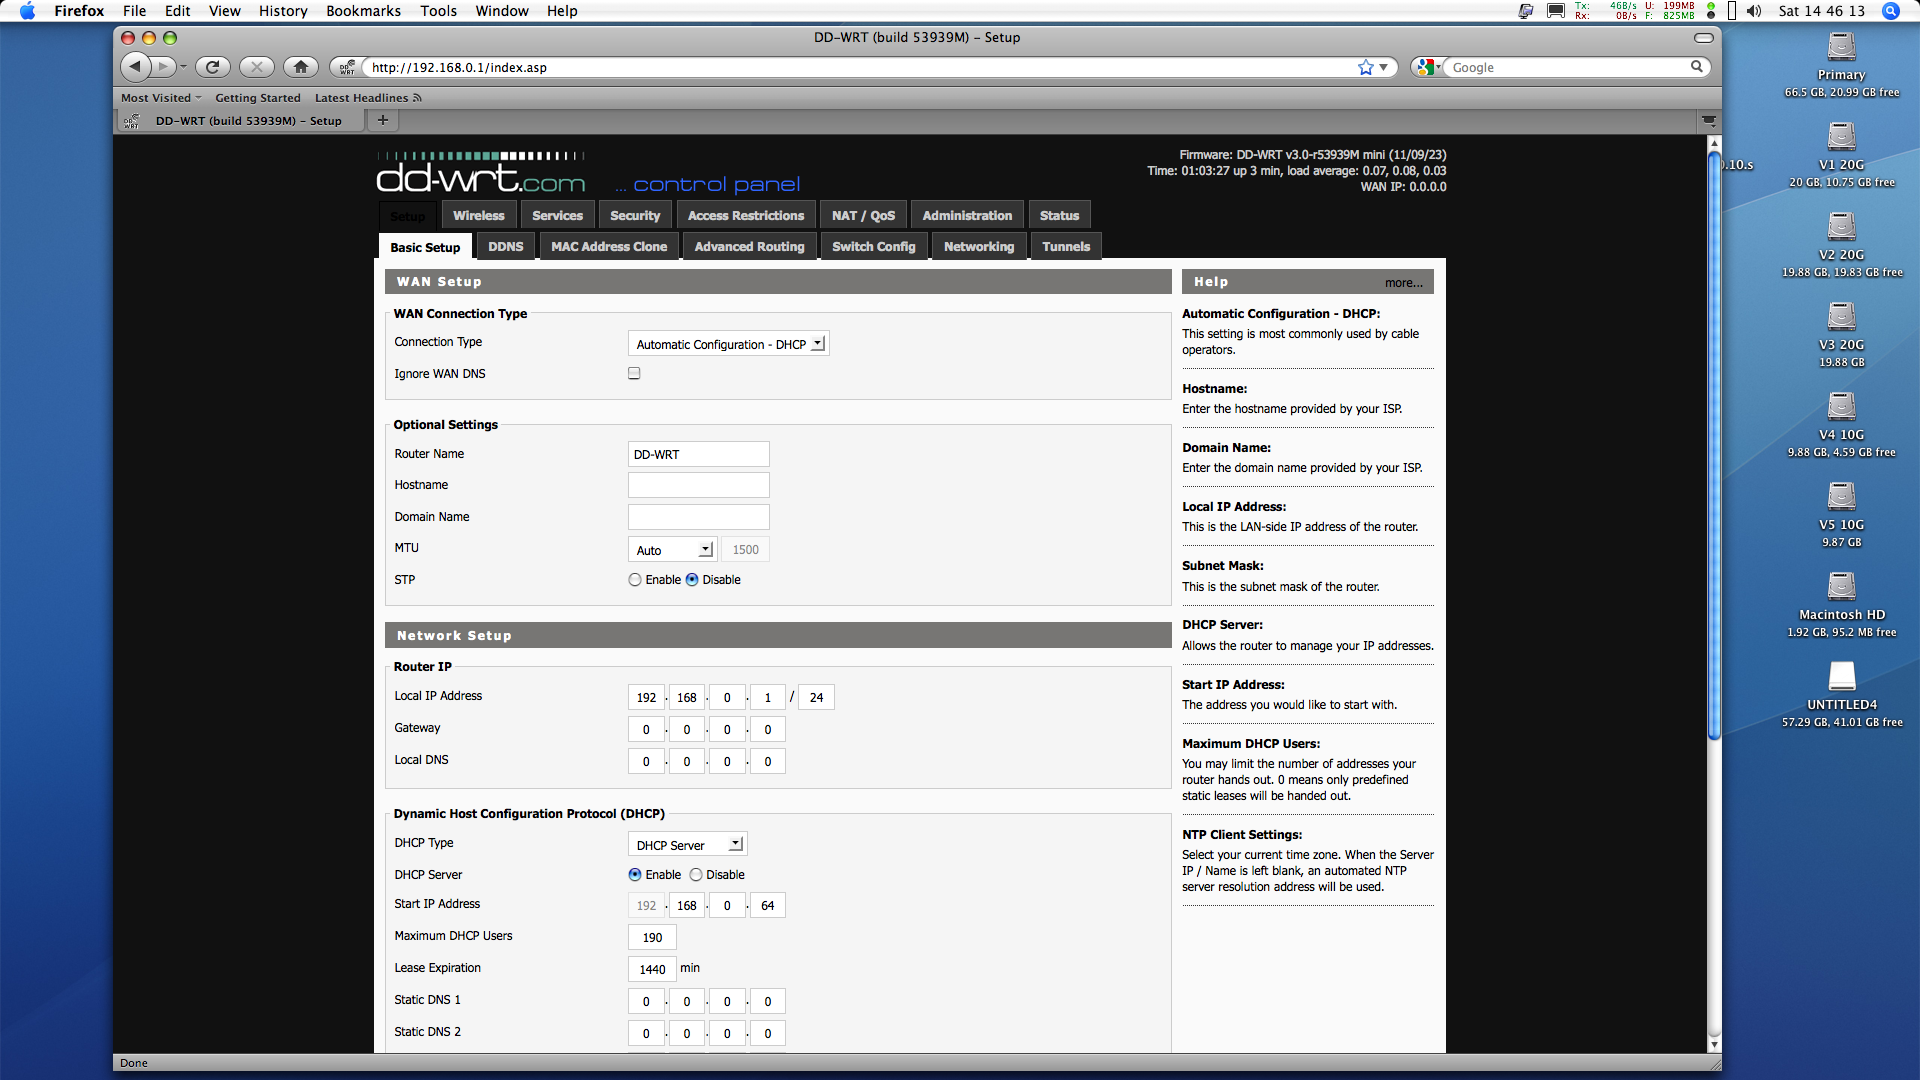 A router control panel showing addressing range (WRT54G) |
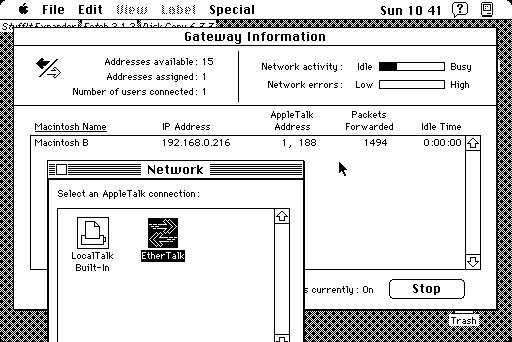 Gateway service in use without AIR or LocalTalk Bridge (SE/30) |
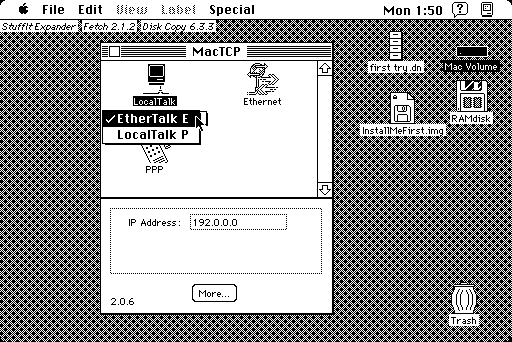 Selecting the MacIP server zone as a client (AIR in use) |
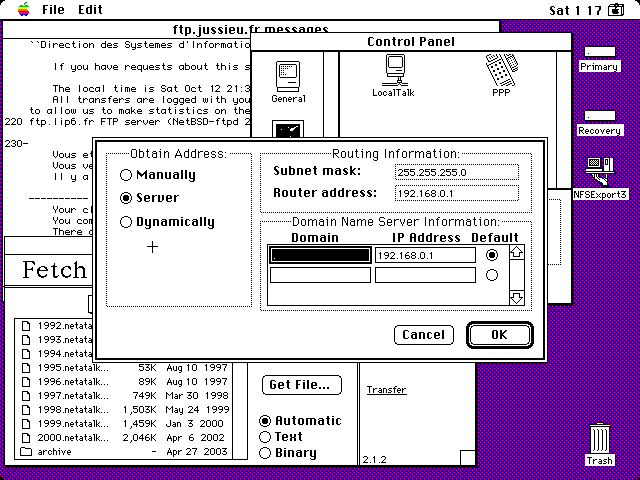 Client MacTCP 2.1 config (LC II) |
 Only works with EtherTalk setting |
Overall -- does it work? Yes, once the whole subnet thing was figured out, thanks to atariorbit of the Tinker Different forums. Because of the way that it works, it could find a niche with Basilisk II serving as a MacIP server. Other users have commented on the software, mostly in less than favorable terms (probably mostly in regards to the MacIP protocol). It does what it says on the tin, and keeps things very simple. Unfortunately the manual, while being reasonably well suited to the product, also has a terrible troubleshooting section, doesn't explain the way it works very well, running AIR and AIG together can be annoying to deal with and the product overall is kind of too simple for its own good. It also runs out of steam very quickly because it doesn't run on Open Transport systems, which make better MacIP servers because they're not as bogged down by the overhead, as 68040 and PowerPC 601 machines are better bridge boxes. Not only do they have faster CPUs but they are sometimes also equipped with faster serial ports that don't clog up the CPU as much compared to something like a Macintosh IIcx. |
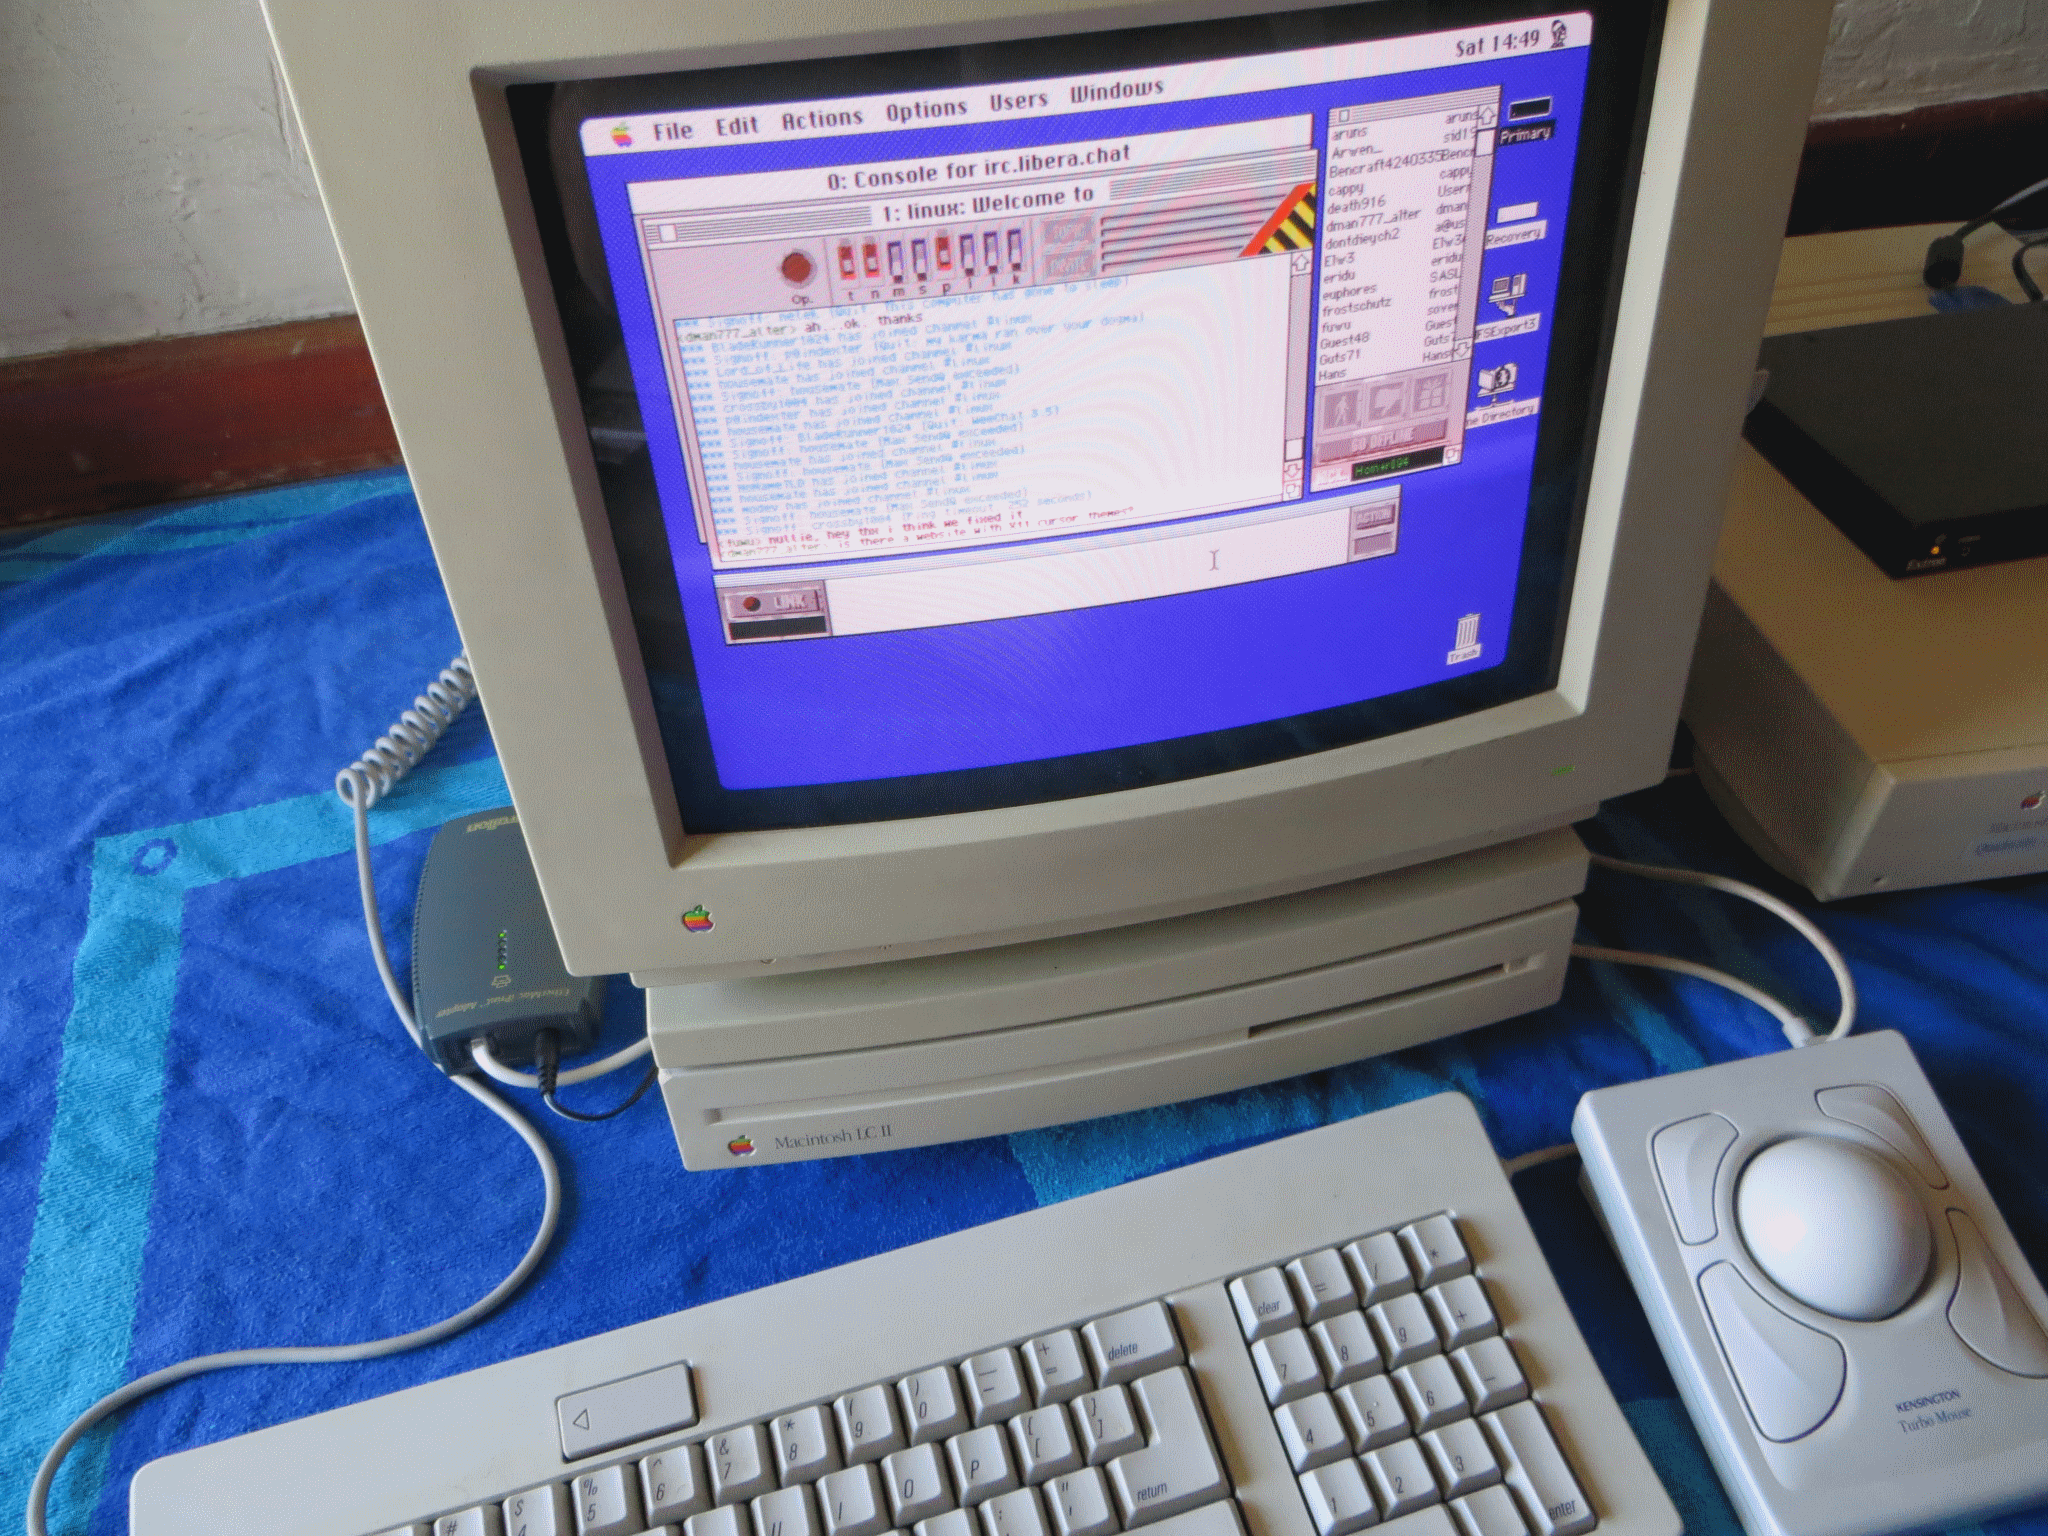 LC II using an AppleTalk bridge with AIG for TCP services (6.0.8L) |
In spite of this it does have a niche which no other program can lay claim to, and probably fits neatly in someone's home setup somewhere, so credit where credit is due. Because it doesn't monopolize the serial port like IPNetRouter does, there is something to be said for that, and the ability to seed Ethernet networks with MacIP datagrams is something the other gateways don't do.
Farallon Liaison
This product is a little bit different than the others, and for more reasons than one. It didn't seem to be particularly popular because archives of it are very scarce indeed, and it is only via 68kmla user cheesestraws that we have a reasonable archive of it. Based on the retail box images, it went for about 395$ US. Unlike the other software routers shown in this section it is designed to operate within the Chooser and has some other interesting characteristics. There's a strong likelihood that it was originally developed by Infosphere, which was bought out by Farallon.
The important thing to get out of the way first is that it is not a TCP/IP gateway and cannot function as a MacIP server like IPNetRouter does, but you could experiment with creative use of zones and something like macipgw. Instead it is designed to allow AppleTalk networks to be accessed over modems (like Apple Remote Access) or as a EtherTalk, TokenTalk, or LocalTalk bridge where it can bridge AppleTalk traffic between any of those. The only use case that will be demonstrated here is as an EtherTalk to LocalTalk bridge -- just like what Apple's LocalTalk Bridge control panel does, but with a few interesting features. The manual provides a helpful amount of information for each of the five ways this software was designed to work for, and it is through cheesestraws that this information is available and without it, this section wouldn't be possible. (The scanned manual was permitted for distribution: additional processing was performed by the author here.)
The software comes on two 800KiB disks. The first is the Support Tools disk. It has a basic 6.0.7 installation with Liaisonet on it and a small program called TinyTerm which is a lightweight VT52 terminal emulator with no HSK support. Then the installation disk (called Software Router on the label) has an installer for AppleTalk 58 (for System 6 and 7), with CheckNET packed away in a self extracting archive, some modem scripts for Liaison, the Serial Switch CDEV for the IIfx and the Quadra 900/950 models and finally the program stuffed in a folder. In that folder is Liaison which is the service host (think of it as server), Liaisonet which works kind of like a client, a Network Tuner extension and a lightweight text editor called Foreground Edit which looks a lot like a stripped down TeachText version (it was included so the user could open it over a network and read log files). The latter isn't really necessary for anything so let's focus on the other three items, which require manual installation. Since the software is kind of rare at the moment, it bears mentioning that the manual states that only one serialized Liaison "gateway" can exist on a network, for more than one, you'll need another serial number. Make sure that the AppleTalk version active is recent enough: if you already installed NSI 1.4.5 for instance, then there is nothing additional to do as the included AppleTalk version will be older.
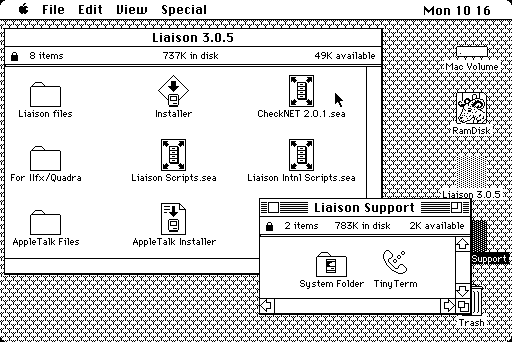 Contents of Installer and Support Tools disks |
 Network control panel (SE/30) |
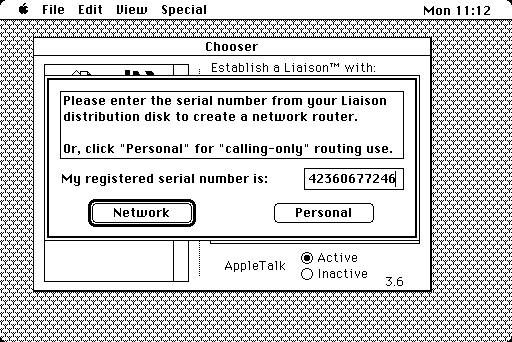 Entering registration info |
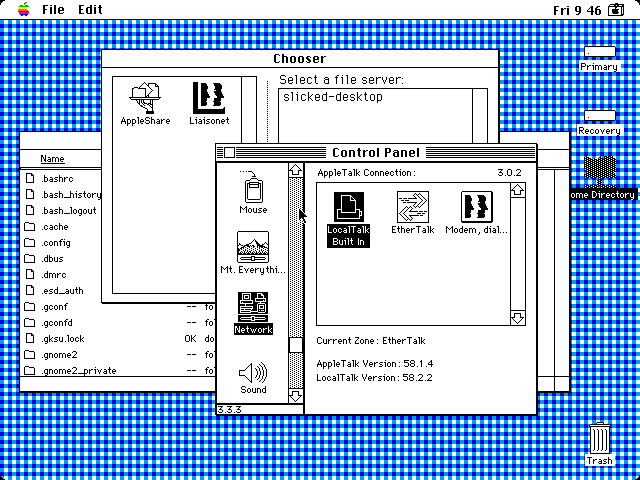 IIci connected through Liaison bridge to a Netatalk file server |
As the use case demonstrated here does not involve dialing in remotely, as it is unnecessary, the Liaisonet "client" Chooser item is not needed. The Network Tuner extension is for other machines on the same network as the Liaison "server": considering the age of the software, if machines newer than System 7 are on the network, it'd be probably best to think about whether the Network Tuner extension should be added. Anyways, since all we're doing here is doing a EtherTalk to LocalTalk bridge, just drag the Liaison extension to the System Folder (System 6) or Extensions folder (System 7). Reboot, then go to the Network control panel. Select EtherTalk if it's not already chosen, then close and go into the Chooser. Liaison will ask for a serial number, Liaisonet will not as it's merely a "client". If a number is not provided, then it switches into "Liaisonet mode": this can be reverted by trashing the preferences file.
From the Configure drop down menu, choose Preferences. LocalTalk should already be pre-selected, otherwise select it. Add the other network interface(s) to bridge, in our example, just EtherTalk2; then hit Save. (The service can also bridge EtherTalk Phase 1 and Phase 2: see the manual.) Most people shouldn't need to set up network ID, node and AppleTalk zone information, so reboot to allow it to automatically assign numbers for those fields, or it can be done manually. Once that is done, the service is basically ready to use. Head to the Chooser and from the Configure drop down menu, choose "About Liaison...": it should say "Active as a local router." in the text box on the left side. Prospective clients do not need to install anything: they can go into AppleShare in the Chooser and mount AFP servers or print as if they were on the same network. In the Network control panel, other icons are visible (with clipped names) of outgoing services such as "Modem, dial...". These are for Liaison use and do not require user interaction.
Since the software does offer ways to connect over dial-up, this could possibly be used to substitute for AppleTalk Remote Access on certain emulators that can emulate the serial port, such as MAME or PCE by Hampa Hug. Given it that it can go as low as a 512Ke with System 4.2/Finder 6.0, that could be attractive. The manual is reasonably decent and should be appropriate for the other intended uses of the software.
IPNetRouter
This is an application that brings DDP/IP server capability to Open Transport systems, allowing them to share Ethernet TCP/IP traffic out to the LocalTalk ports. There's also an OS X version, called IPNetRouterX: reports indicate that it does not support AFP over AppleTalk. It is basically the same concept as a hardware MacIP gateway such as Shiva FastPath 5 or a GatorBox. There was a promotion for this product awhile back at http://www.sustworks.com/site/news_promo.html, using the WayBack Machine to look up the archived page versions could be useful, if slightly unethical...although the software apparently can't be purchased anymore...
Client systems won't be able to access AFP servers through IPNetRouter because it does not pass AFP traffic through. It may not play along nicely with LocalTalk Bridge at least in basic testing, because LocalTalk Bridge kicks an error saying the serial port is already in use. Creative use of bridges or AppleTalk routers can probably go around that though, or using Open Transport on the client which allows AppleTalk over the modem port. Another product for...free is IPNetMonitor, which has the usual lookup, whois, traceroute utilities. It produced an error saying something concerning ICAp;InternetConfigLib, so that's probably a clue to install Internet Config...
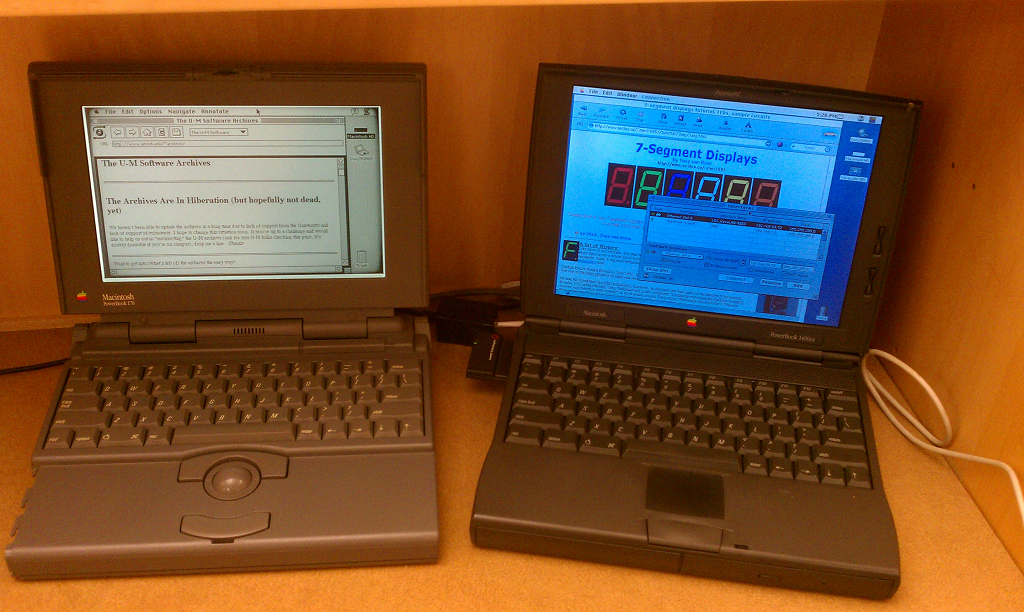 A PowerBook 1400cs (7.6.1) providing MacIP routing to a PowerBook 170 |
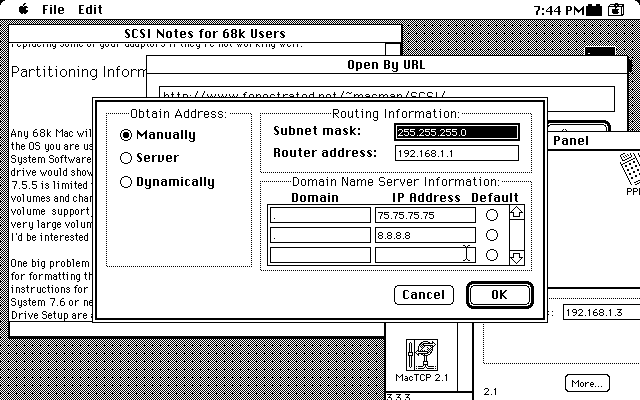 Suggested MacTCP settings for MacTCP 2.1 |
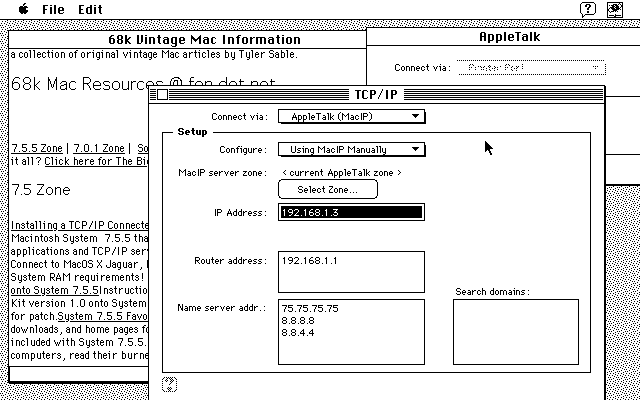 Using Open Transport on the client |
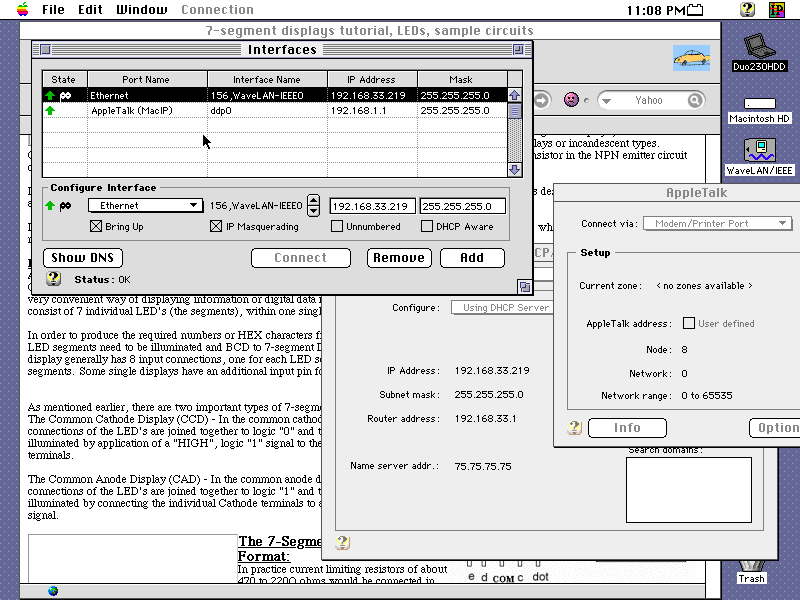 IPNetRouter example configuration |
Download the software. Enter in the registration details when the opportunity presents itself: it will quit without the proper information. The computer will have to also be online because the program must authenticate the registration information with SustWorks' servers, depending how long that lasts. Then the main Interfaces window is drawn up. This window is used for setting up the interfaces to use.
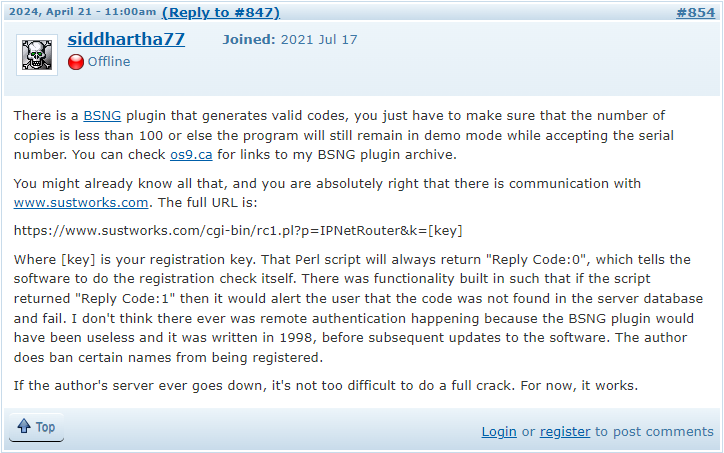
Assuming the bridge machine has Ethernet or WiFi and the goal is to route the traffic to LocalTalk, modeled in the second image on the online help page, it's not that difficult. Make sure that no other program, like LocalTalk Bridge or ZTerm is using the Printer port or Printer/Modem on Macs that only have one. In a completely odd twist, the author noted that a standard direct printer cable (RS422 male to male, cross-over) did not work with IPNetRouter, yet PhoneNET did. None of the tutorials on setting up IPNetRouter elsewhere mentioned this, so it could be just a local anomaly. The cable works just fine with LocalTalk between two machines normally. But PhoneNET is way better anyways, since it permits painless daisy-chaining.
Make sure that the TCP/IP control panel is already set up with a proper manual or DHCP Server configuration and that the AppleTalk control panel is set for either Printer or Printer/Modem for Macs with only one serial port. Back to IPNetRouter, when it starts up it usually automatically locates a Ethernet interface to use. If DHCP Server is selected in the TCP/IP control panel and the relevant IP addresses haven't been assigned yet, it could have trouble getting started. Use manual addressing if DCHP Server isn't working right, or go into the Advanced User Mode and then turn on TCP mode to always on. The program also tries to automatically fill in the Ethernet interface fields for the IP Address and Subnet Mask.
If the Ethernet or wireless interface was not automatically discovered, then click the first field, look down at the Configure Interface area and select Ethernet. If DHCP Server is in use it might fill out the fields; if not then it must be discovered somehow (it's not always shown in the TCP/IP control panel, even if Internet access is active), one way is to fire up NetPresenz and look at the log. Put 255.255.255.0 in the subnet mask, turn on IP Masquerading then click Add, which also works like a "update" button if something is changed. Make sure the "Bring Up" checkbox is enabled. IP Masquerading is required, otherwise the routing function won't work.
Now for the ddp0 interface, which is for LocalTalk. Select the second field, and then from the Configure Interface area, select ddp0 from the selection menu nearby. Pick an IP address that is not in the same subnet as the previous interface: if 192.168.1.118 is the assigned IP for the bridge computer, pick 192.168.2.1 for the ddp0 assigned IP. As before, put 255.255.255.0 in the subnet mask, make sure the Bring Up checkbox has an X inside it, then click Add. There are quite a few ways to configure IPNetRouter to do many different things (port mapping, DHCP server, ...) but the previous example is probably going to be the most likely one people might use this software for these days.
Finally, assuming that the PhoneNET or LocalTalk cables have already been wired up, go into MacTCP. Set the "Obtain Address" to Manually, the Class to C for 2.0.6 and earlier, the Router Address or Gateway Address to 192.168.2.1 (for example), fill in the DNS fields with proper DNS IP addresses, and then set the subnet mask for 255.255.255.0 if MacTCP 2.1 is used. Close the dialog box, click the LocalTalk interface, which is the MacIP driver through the printer port. Set the IP address field at the bottom to 192.168.2.2.
For the TCP/IP control panel on Open Transport systems, set the "Connect via:" drop down menu to "AppleTalk (MacIP)". Set the IP address field to 192.168.2.2, the Router Address to 192.168.2.1 (this last one is the IPNetRouter assigned IP) and put the DNS information in the "Name server addr." box. A reboot may be required for any client systems after the setup is complete. The system should now be ready to access FTP servers, WWW servers, IRC or any normal TCP service. It's perfectly possible to string five old Macs on a single PhoneNET computer and have IPNetRouter serve them all at the same time, as long as they are assigned different nodes (i.e. 192.168.2.1, 192.168.2.2, 192.168.2.3 for a three computer arrangement). MacTCP 2.0.6 may be unreliable, even over a local LAN network: try using MacTCP 2.1 instead. Sometimes IPNetRouter has a hard time initializing the ddp0 interface: try rebooting or starting a new configuration file.
Vicom Internet Gateway
Vicomsoft as a company started out in the early 1990s, then went through the usual tech-bubble phase of the early 2000s, followed by near or total collapse, and a casual browse of its homepage past 2002 shows signs of chaos (including a relationship with BVRP Software). Its product lineage seems to most consistently offer an FTP client, the Internet Gateway product we'll be talking about here, DHCP server, content blocking/firewall type stuff which was a pool that a number of other companies were also swimming in back then, and then some relatively uninteresting software that we won't talk about like SurfDoubler or SpamBolt. A related product called SoftRouter was available for both PC and Mac. Beyond 2002 or thereabouts they stopping selling VIG and it disappeared from their webpage. Most of their products aren't readily available in archive places which suggests they weren't commonplace or popular.
There are two versions of VIG readily available, both from Macintosh Garden. The first is version 3.5.3, which comes with a [k] patch, which means that it probably disables the DEMO timeout period but still uses the DEMO registration key: but there's a BSNG plugin for Vicom Technologies (enter the GWK-EU-350-00000 entry into it, set the users to 999, then mash the Calculate button, enter the result into VIG).
Then there is version 3.8.3, available off the AppleShare IP 5.0 Companion CD: check the supplied PDF for registration information. A reasonable amount of internet digging was unable to procure any other version: there is a registration key floating around that starts with claa-fpjboogb but that is for version 3.2.2, which isn't available anywhere. Version 3.8.3 is probably the best one to use, it has some updates to improve performance/operation and is a newer version. Documentation is also included. It's not a particularly difficult program to use but it is also not the most intuitive program either. The PDF documentation is of reasonable quality and should help with any specific inquiries.
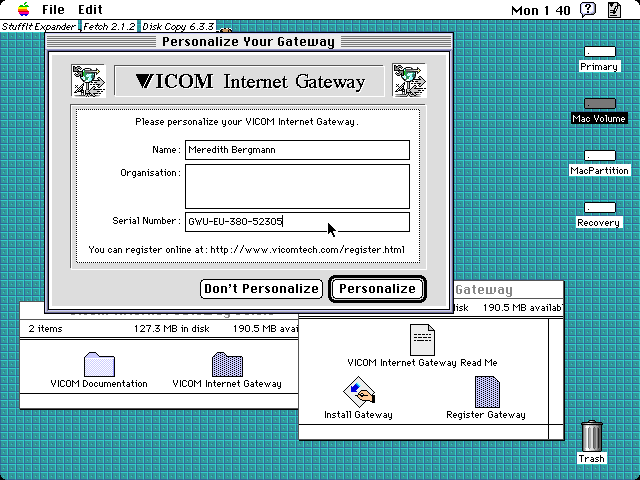 Personalizing first (IIci, 7.1) |
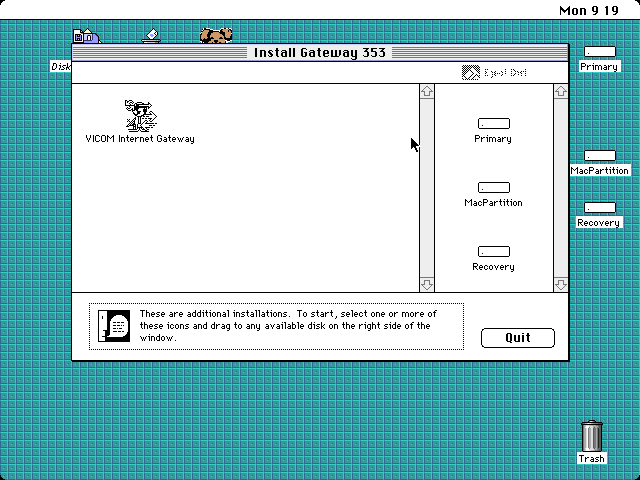 Installation program (3.5.3 shown, 3.8.3 similar) |
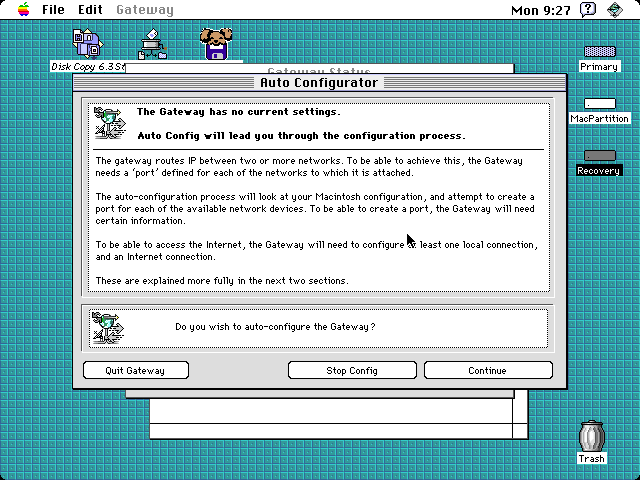 First run, autoconfig helper |
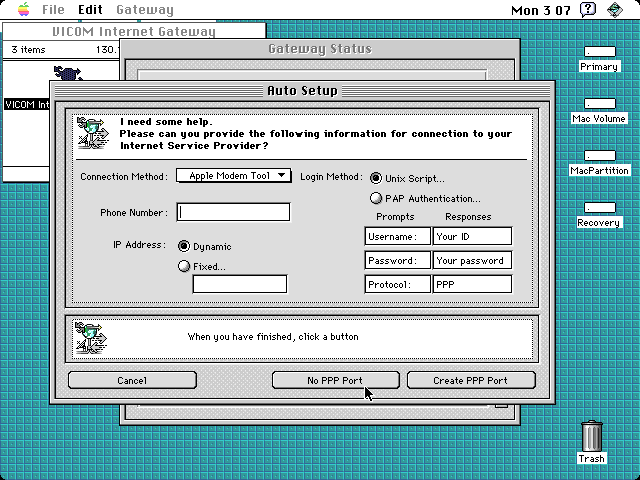 PPP info window (not demoed here) |
Like IPNetRouter it does not forward AFP packets: use LocalTalk Bridge to allow client machines to access AppleShare servers on the Ethernet side via AppleTalk (AFP over TCP is possible without LocalTalk Bridge). Unlike IPNetRouter it does not require Open Transport: it is supposed to be compatible with MacTCP and System 7. It has two practical design purposes: A) To forward TCP packets from a PPP Internet connection, or B) Forward TCP packets from a Ethernet or ISDN connection. Since most people don't have PPP Internet connections anymore, and ISDN collapsed once ASDL became popular, this walkthrough will assume a scenario where one Mac is used as a gateway machine to bridge Ethernet TCP traffic to MacIP traffic over LocalTalk, which is the most likely scenario these days. It can also bridge to SLIP, PPP or via ARA, which is a useful bonus.
Using v3.8.3, start by launching the Register Gateway program. This asks for a name and a serial number to personalize the Gateway program. Then launch the Gateway Installer. Read the instructions if you are installing on a PowerPC machine that is using MacTCP: otherwise, drag the Gateway icon to the intended destination drive. After installation finishes, launch the VIG program, which then asks for another serial number. After that is completed, the program offers to assist the setup process by detecting hardware and software configurations. Manual set up is possible just fine but the wizard is probably better (and easier) because it sets up the MacIP mirror to allow the host machine to also use TCP traffic. If you desire to reset the program back to a clean slate, just trash the preferences file in the System Folder. |
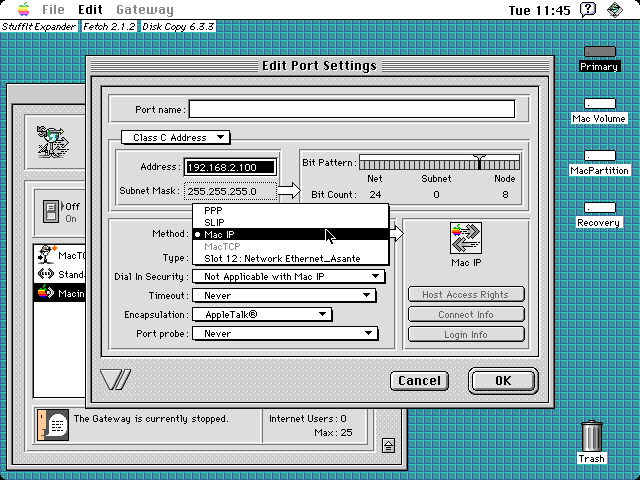 Advanced User Mode with PPP/SLIP |
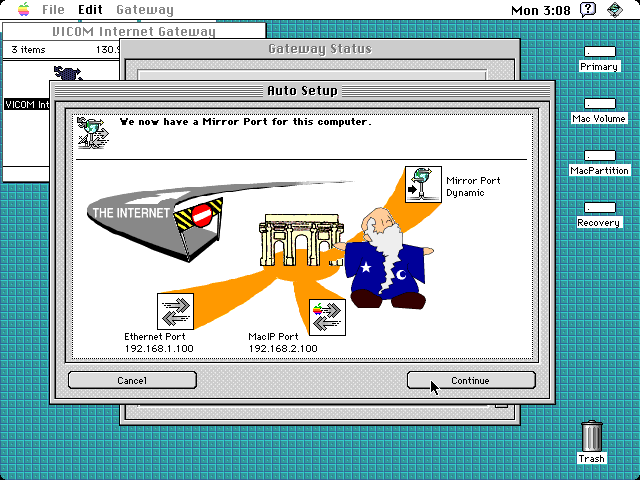 Autoconfig helper done |
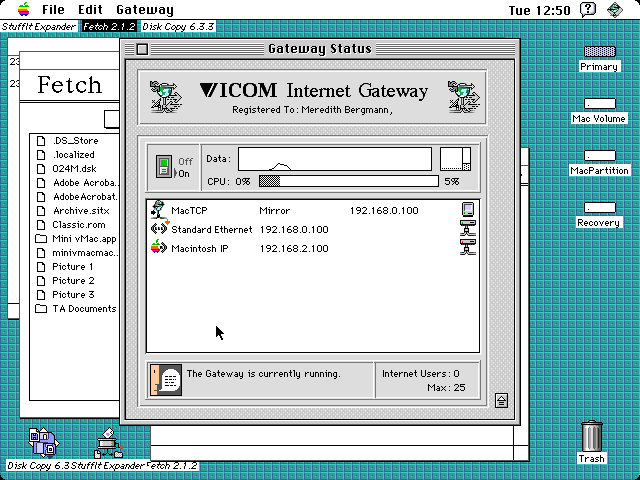 Gateway ready |
 Enabling DNS |
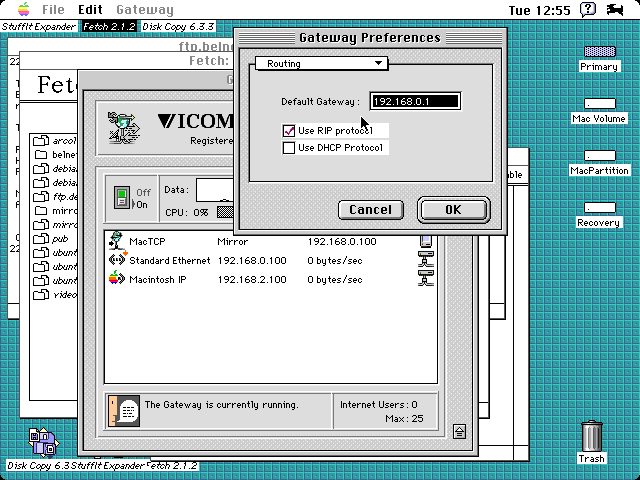 Default router required |
The autoconfig helper can be either automatic or step-by-step. The latter is probably desirable on the first time to get an idea of how it works. If you don't use PPP over a modem port, skip that window, then it will work to detect a Ethernet or ISDN card, and then go from there. The autoconfig helper can sometimes put the internal IP address on a different subnet: in the images above, the proper desired manual IP address is 192.168.0.100 but after the autoconfig helper was done it decided to set it to 192.168.1.100 which won't work. It is recommended to enable the DNS and default router settings (shown above) to allow it to work. When all is done here, turn the Gateway on with the switch on the main screen. For Ethernet to LocalTalk gateway bridging, make sure the Ethernet port is set as a mirror port (shown with an orange arrow) and configure the port settings for Ethernet to be "Internet Proxy - Directly Attached" under the "Type:" line. For clients, the "Macintosh IP" address shown in the main program window is what goes in the "Router address" field of MacTCP or Open Transport manual configuration (i.e. 192.168.1.1), followed with a user-chosen IP address within the same subnet (i.e. 192.168.1.3) that the client would assign to itself. However normally the program works just fine as a MacIP server and the MacIP client computer settings can be simply set to Server followed by the DNS information.
Other options are available, such as the DHCP server, routing tables, and more. More advanced configuration is possible by changing the User Mode in the Edit menu. After all configuration work is done, the next step is to set up client machines. These are set up the same way as they are for IPNetRouter or Gatorbox MacIP clients, where MacTCP is set to LocalTalk and either Manually or Server mode depending on what is desired, and much the same for Open Transport systems. If the host machine is running AppleShare IP, there is an Apple TIL article about crashes when VIG is ran. When the program is installed and set up, the MacTCP window looks like the image to the right: even though it shows VICOM Gateway and PPP, it's actually using Ethernet, and this does not indicate a problem. For your convenience the User's Guide is available here. |
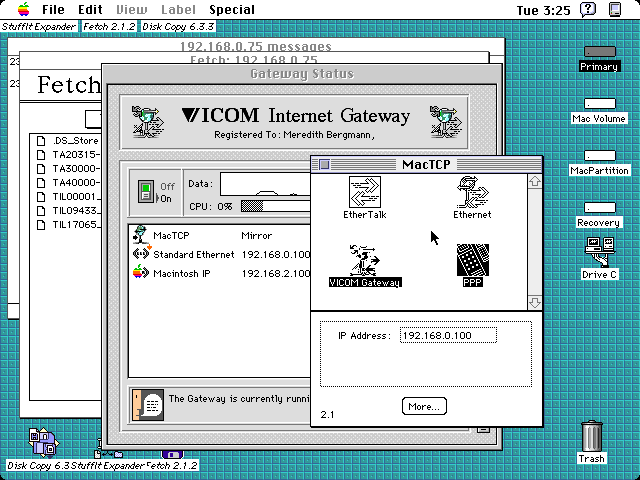 MacTCP window with VIG (7.1) |
Analysis: Unstable. Testing on 7.1 with MacTCP, 7.1 with Open Transport, 7.5.5 with Open Transport, and 8.1 was generally unfavorable. Version 3.5.3 would usually work for the bridge machine, but not client machines connecting through via MacIP. System hangs when a MacIP client initiated a connection, bombs (usually bad F-line instruction error) or plain non-operation despite everything set up correctly was unfortunately common. A IIci was thus off the table attempting both 3.5.3 and 3.8.3 of VIG and only a Quadra 610 DOS Compatible with Mac OS 8.1 and version 3.8.3 of VIG was workable, sometimes. This program would be handy for some scenarios because it was designed to be compatible with MacTCP on host machines, which IPNetRouter is not. However IPNetRouter generally works all the time and this program, was not the case. Hopefully your experience will be positive should you explore this program: considering that it was in active circulation and development for roughly 10 years, it should be reliable. |
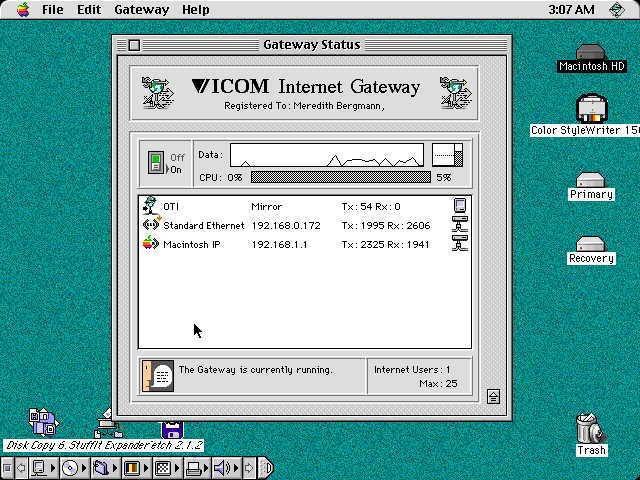 Gateway in use (Quadra 610) |
 AppleTalk control panel (7.1) |
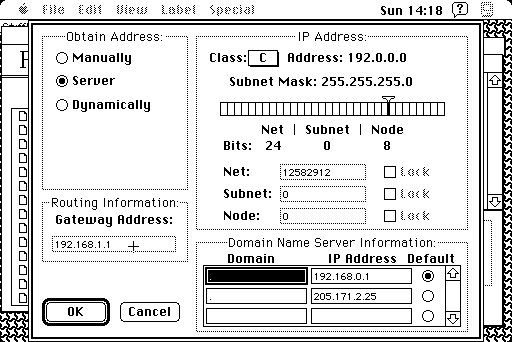 MacTCP 2.0.6 on the client (SE/30) |
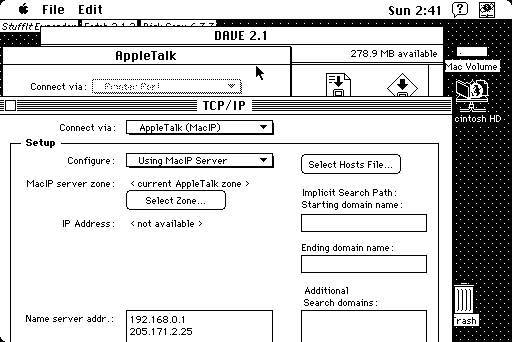 10.4 Tiger server connected via AFP over TCP with OT 1.3 |
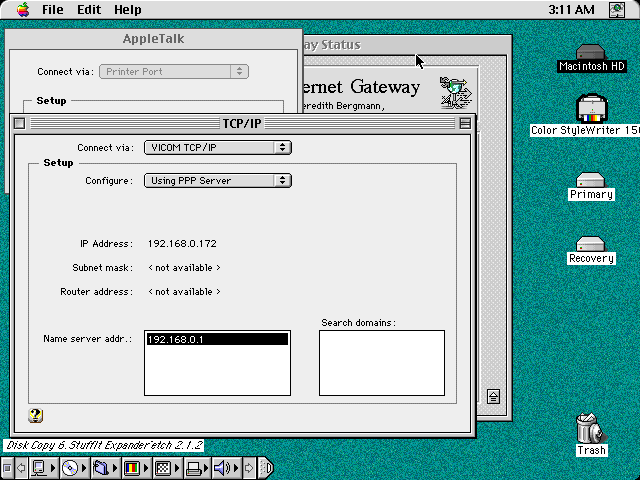 Bridge machine settings (8.1) |
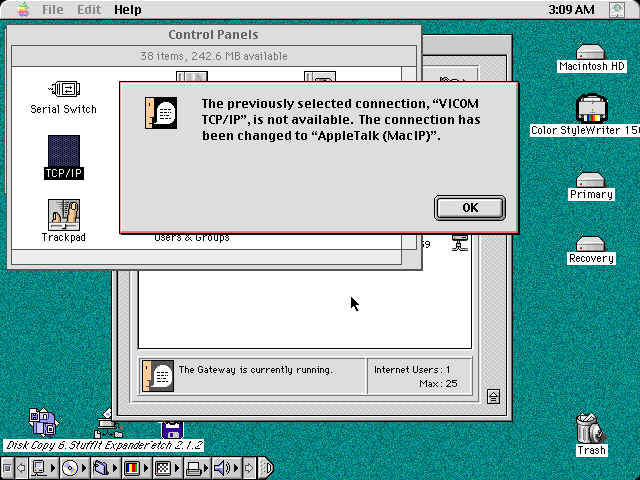 Another instability event |
Other newer developments
As long as a conventional AppleTalk bridge is in use, another option for routing TCP traffic is to use the services of the MacIP project. There are options for installing onto a Raspberry Pi, a virtual machine or a tiny Linux package meant for repurposing old x86 boxes. The kernel may be a bit dated, and may lack a GUI interface, and you may have edit a number of configuration files if you are not happy with the username/password scheme, but at the very least it has a lot of features and is a good inspiration.
Another project in development at the time of writing is the TashTalk line of projects by 68kmla user tashtari. These include TashRouter (an attempt on a MacIP router written in Python), the TashTalk (a single chip PIC microcontroller LocalTalk interface for other platforms), the USB2LT TashTalk (a project to have a USB to LocalTalk adapter, which involves dealing with the depreciation of LocalTalk code in the Linux kernel), and there's probably more. There's AirTalk, a project announced by 68kmla user daanvdl, which is a plug and play dongle for extending a LocalTalk network over WiFi, and includes work by tashtari and cheesestraws. There may be other projects which may or may not be completed before or after this version of Guide is put out to press, so let's just say there has been some exciting developments recently by some spirited individuals, and you'll have to poke around to see what is available.
TokenTalk and FDDI
This section is going to be brief. Token Ring was a competing standard for Ethernet but once twisted pair unshielded cable on Ethernet became popular all the animals left the barn and didn't come back. Not to mention there's Media Access Unit (MAU also meant Multistation Access Unit) hardware and proprietary cables for TokenRing: granted, there was the same affair with Ethernet hardware (and Ethernet hardware wasn't cheap back then either) but Ethernet seemed to catch on better once twisted-pair cabling became common, and by the time TokenRing twisted-pair became available it was too late.
There are four Apple Token Ring cards known: the "TokenTalk NB Interface Card" and the "Token Ring 4/16 NB Card", the later of which supported 4Mbps and 16Mbps connections, and the last one is the Token Ring NB/c card which is a 7 inch (17.78cm) card for certain machines like the Quadra 660AV. Asante also made a few Token Ring cards as well. The last is a Token Ring PCI card. Unfortunately very little information is out there about the actual historical usage of Token Ring cards and interfaces for the Macintosh lineage. Both of the first two cards offered a DE-9 interface connector to hook up to Token Ring Media Access Units with IBM Type 1 cabling (and a Token Ring Adapter may be needed). If, by chance, all this hardware is available to you in good working order, then AppleTalk can be sent over Token Ring networks, and should function much the same as an Ethernet network.
Another somewhat obtuse and hard to find card is the Apple Serial NB card, with either the 4-port DB25 RS232C "Hydra" cable or the V.35 cable, which had one V.35 interface and one RS232C connector. The Apple Coax/Twinax Card for IBM 3270 terminals is also a rarely seen card. Another dated interface is FDDI which was a fiber optic system, which apparently, there is FDDITalk for that. Finally, there was also a way to pipe AppleTalk over X.25. As for FDDI, well, there's a chapter on it in June of 1995 MacUser (page 80, PDF page 52) which paints a rather dim view of it. Maybe it worked better elsewhere. Check vintageapple.org for a scan of the magazine.
A/ROSE was an implementation of a real-time operating system into certain Apple products such as the Ethernet NB card and the aforementioned TokenTalk NB card which had a dedicated 68000 processor and RAM to offload some of the networking workload so the CPU wouldn't have to keep servicing interrupts to handle the packets. As for whether this leads to a tangible benefit, the answer is "yes, but nobody else copied the idea for a reason". Most of the machine-specific cards were also DMA cards, like most of the SONIC series and the ubiquitous National Semiconductor DP83902 family chipsets, which is definitely something we don't do these days and they were generally fast enough for the time, but also cheaper. But because the onboard 68000 CPU handles all the network I/O and can then just hand over the data, it frees up the CPU quite a bit so networking doesn't bog down the computer as much, with a somewhat similar affair with the Serial NB card which also used the same setup. The problem is that the Mac OS wasn't really capable of multi-tasking all that well, as it wasn't until Mac OS 8 that the Finder could be copying a file while the user could perform another Finder operation at the same time. That said, System 7 does allow the Finder to copy a file while another program is in use, rather than System 6 and earlier which don't allow anything else to happen at the same time.
The LocalTalk PC card and the Apple II Workstation Card for the Apple IIe Enhanced used a 65C02 processor instead, and was fitted with a DE-9 serial port interface just like a 512K/512Ke. Speed was not very high -- it appears to be more focused towards printers not file sharing.
In any event, it would be nice to elaborate a bit on Token Ring here, and FDDI, but Apple compatible hardware is not common to find today. There wasn't any real incentive to keep it, so most of the cards that existed have probably already been binned, and anything that is left is going to be found by collectors or in forgotten attics. Then the hardware required for these interfaces isn't readily available, plus the cabling has to be sourced too. Resources even talking (Images) about Token Ring as it relates to the Macintosh are sparse, and that was more common than FDDI was because of IBM.
EtherTalk
Flexibility with networking is dramatically increased with the use of the Ethernet interface. As of right now, Ethernet does not appear to be going away anytime soon, at least not in in a hurry, so it's a good interface to use compared to something weird that came out of the early 1980s that nobody else really used or died a short life (like IrDA) with the only notable issue being the locking tabs on the RJ45 plugs breaking off or recessed NIC backplanes making it difficult to remove the connector (i.e. SE/30 NICs).
Classic Networking refers to the use of MacTCP for external communication over TCP networks. The Network control panel (Classic Networking) or AppleTalk control panel (Open Transport) is for selecting the interface for AFP to use and has nothing to do with TCP services except when AFP over TCP is used. LocalTalk could be used over the Printer port for instance, yet have TCP services going out through an Ethernet interface. Later versions of AppleShare Client try to default to AFP over TCP when possible. Setting up MacTCP and Open Transport will explained more in the Transmission Control Protocol section.
Pre-System 6
Outside of AppleTalk bridges or really obscure hardware, there is no connectivity options for pre-System 6 software machines, and this mostly applies to the 128K, 128Ke (not a real Apple machine), 512K and 512Ke. Only the original Macintosh II with the Apple EtherTalk NB card supported Ethernet on System 4.1/Finder 5.5, but also System 5.0 and 5.1. Discussion about this specific topic is in the More Info section. In this case the procedure is the same as System 6. Later machines like the IIx, IIcx and SE/30 cannot load System versions earlier than 6.0.3. The SE without the FDHD upgrade is different, because it can load System versions older than System 6.
System 6 up to 7.5 with Classic Networking
In System 6, open the Control Panel. Click Network. Select EtherTalk, or whatever is not "LocalTalk Built-In", such as EtherTalk Alternative: having multiple drivers on the same system can mean there's different options. From the Apple menu, select Chooser, then AppleShare. Select the target machine name and press OK to commence login. If you want to login with full owner privileges, then enter the target computer's Owner username and password, then press Okay. If you login as a different user, then enter in those details and continue. Multiple volumes can be mounted at the same time with by using the Shift key to select multiple mountable volumes, or re-logging in again.
System 7, 7.1 and 7.5 are very similar. The Network control panel in the Control Panels is used to switch AppleTalk from LocalTalk to other interfaces. Everything else is the same. Starting the built-in file server is easy. Open Sharing Setup (called File Sharing in later Mac OS versions), enter in a username and password for the Owner, and then start file sharing. Additional users can be added from the Users & Groups control panel, and additional folders can be shared or unshared from the File menu (Sharing...) or a Get Info window (later versions of Mac OS).
MacTCP, used to configure TCP before Open Transport became the default, cannot be used for EtherTalk using AFP over TCP, although there is one exception, see further below.
Responder in System 6 is an extension that sends out some information about the machine to network queries. It uses the SIP (System Information Protocol) to advertise itself on the network and reply to queries about what system it is, which would be seen with something like Inter-Poll or CheckNET. Since System 6 does not include a built in file server element, only AppleShare File Server 2.0 has that feature, it's kind of redundant on System 6 normally and you don't need it, plus a lot of stuff isn't compatible or show up correctly (see this NBP list). Responder will ask for a machine name the first time the Responder extension is loaded: afterwards the machine name can be modified in the Chooser control panel and rebooting to update it. (Before this time, it was done with the Namer program.) Starting with System 7 the Responder feature was incorporated into the system more closely. See this thread on 68kmla further details (and with System 7, the machine name is set in Sharing Setup, not the Chooser).
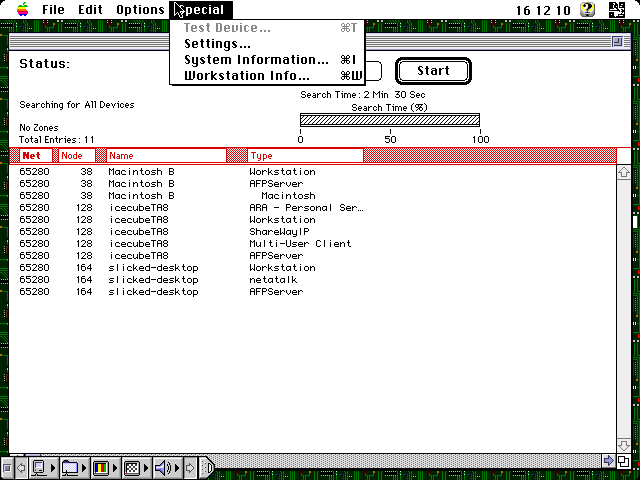
CheckNET is a utility developed by some Farallon developers to help diagnose AppleTalk networks, and it came as a DA for System 6 and a standalone program for System 7. It will report both EtherTalk (AFP over Ethernet) and LocalTalk traffic, but it has very limited usefulness. For instance, only a certain select few computers will be compatible with it, the rest will kick an error dialog saying that it can only query "Responder-compliant sockets". The nearby image shows what it looks like with Windows 2000 Server, Netatalk with Apple II services and a CD share, OS X 10.2.8 Jaguar and a Macintosh LC over LocalTalk. Of those systems, only the LC could provide any system information whatsoever, and a test with Mac OS 9 wouldn't respond to the system information query. Mac OS 9 does have a few additional entries, like "ARA - Personal...", "SharewayIP" and "Multi-User Cli...", but other than those it looks the same. |
 CheckNET with various systems connected (System 7.0.1) |
The utility comes on on a Compact Pro self-extracting archive on a Farallon EN Installer disk in the Utilities folder. It could probably be useful for really big AppleTalk networks but it won't be applicable to smaller ones like what most folks are going to be using these days. Under System 6 (and earlier systems with AppleShare WS 1.1) user privileges can be seen with the Access Privileges desk accessory in the Apple menu. It is not present in System 7+ and only works when the computer is connected to another server. Other folder or volume permissions can be examined with the "View Another" button. (System 4.1, Finder 5.4 with AppleShare 1.1 shown, all others identical.) |
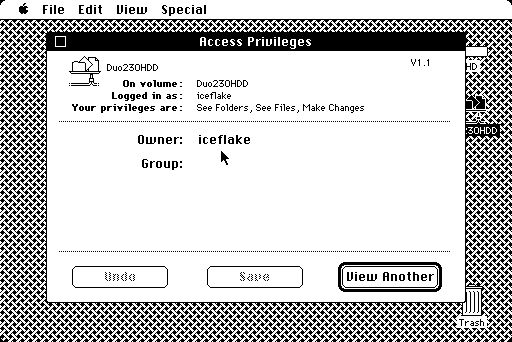 Access Privileges |
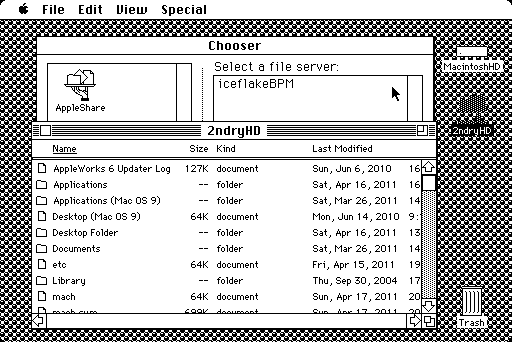 System 6 connected to Mac OS 9.2.2 |
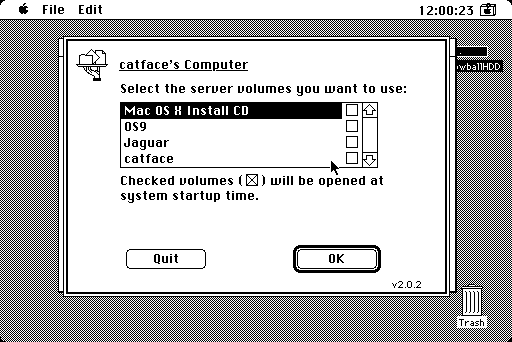 Accessing a CD volume in SSW6 |
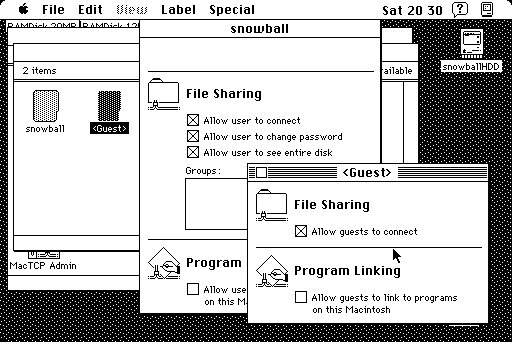 Users and Groups (System 7+) |
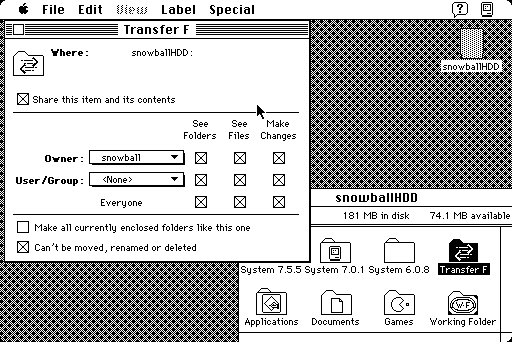 Sharing "Transfer F" (System 7) |
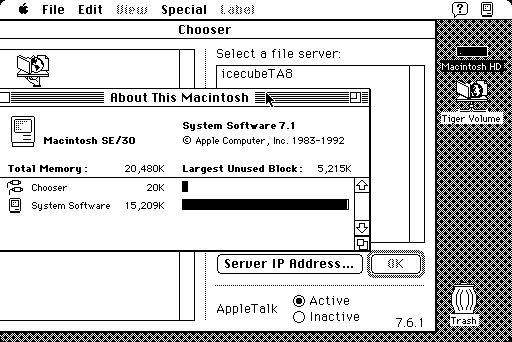 System 7.1 with OT 1.3 connected to 10.4 |
CD volumes, tape drives, Zip disks and other types can be accessed as well as long as they are HFS formatted or compatible ISO formats. ISO formats supported change with the system software versions installed and the extensions for them.
System 7.1 with Open Transport up to Mac OS 9Open Transport changes a few things but not too much. The AppleTalk control panel is used to switch from the serial port(s) or something else like IrDA to Ethernet. Once that is done, the Chooser in the Apple menu is used to find local servers and connect to them. If the server or client are required to connect over TCP (AFP over TCP) then the TCP/IP control panel is used to set up the IP settings, which can be either manually or dynamically adjusted. Refer to this section for how to set up Open Transport for connectivity with Mac OS X. In AppleShare Client 3.7.4 and greater, hold the Option key whilst double-clicking a server to force an AppleTalk connection. Versions of AppleShare Client 3.8 tend to default to AFP over TCP rather than normal AppleTalk when possible. | 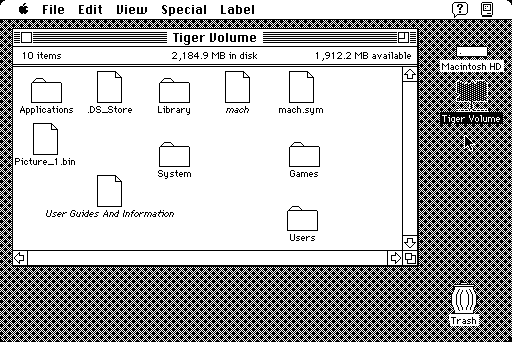 7.1 volume size conflict (10.4 host) |
Because Mac OS file systems before 7.5 cannot readily work with volumes greater than 2GiB, 7.1 with OT 1.3 may have issues with larger disks common these days. On the image to the upper right, the actual size of the disk in OS X is 18.14GiB in disk and 21.87GiB available out of a 40GiB drive, and 7.1 seemed to report different values each time it was connected. This is because of the limitations of the file system in pre-7.5 operating systems. Additionally file copies can "pause" near the end of the copy process: clicking Stop will complete the copy process (or cancel the copy operation), but this is likely not related to the volume size reporting issue as the image to the lower right shows a file copy operation to a volume that is under 2GiB. (A System bomb occurred right after the copy process finished via the Stop button on the right.) | 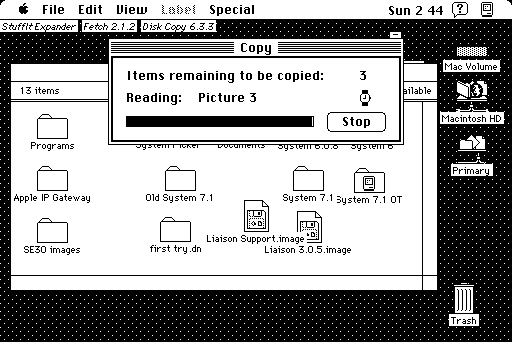 File copy abnormality (7.1) |
Under rare cases, EtherTalk cannot be selected. This article goes over the potential culprits and offers possible solutions. For one, AAUI adapters for machines that were equipped with AAUI ports like the Quadra 700 must be connected first with the Ethernet cable before EtherTalk can be selected, it isn't like other network interface cards (NIC) that can be selected without a cable being plugged in.
ShareWay IP
This suite of software by Open Door Networks, Inc is mildly interesting. There are, or were five different versions available. The first is built into Mac OS 9 and was a licensed derivative of Personal Edition. The second is an upgrade from Mac OS 9's built in ShareWay IP extension to the Standard version. The Personal Edition is pretty limited, and appears to be much the same as Mac OS 9's limited version, but for older Mac OS versions. The fourth is the Standard Edition, which will be shown here, which adds the ability to forward another AppleTalk share as if it had AFP over TCP and user access control. The final kind is the Professional Edition which is like Personal but can share more than one AppleShare server.
The software is easy to install, setup and use, and the documentation is of reasonable quality. It will not install on 7.1 and demands 7.5.5 with Open Transport 1.1 at the lowest. That's easy to get. What is not easy to get is the software itself: the download page doesn't work on their website anymore, the download links are broken and they apparently don't take credit cards anymore. Part of the problem is their website, opendoor.biz, has links to opendoor.com, which is some kind of housing real estate website or something; according to peeking through the WayBack Machine's captures, the issue has been that way since sometime around late 2014 or 2015, so apparently it's not a very pressing issue...
Anyways. Assuming 7.5.5 and OT 1.3 or later, the Installer will copy over two programs and two Read-Me files. The first program shows a status view and allows white listing or blacklisting of users and turning Guest access on or off, and has a log feature (which gets saved in the /System Folder/Preferences/ directory). As long as TCP/IP and AppleTalk control panels are set up, with the built-in file sharing feature started up from the Sharing Setup control panel, then all that needs to be done to share the computer's share is click the Start button. Clients may be required to use TCP/IP addresses to connect because the SLP advertising feature wasn't apparently available until 8.5 or Mac OS 9, and requires the Professional Edition anyways. The documentation should answer any further inquiries about what this software does. On the first time the service is started or stopped it may appear to freeze the machine for about 30 seconds, but this is normal.
A number of users have reported slow transfer rates with this software. A couple of test downloads and uploads was done on a Mac mini with 10.5.6 and a IIci with 7.5.5. Typical download speeds (with the IIci as server) varied somewhere between 60 and 80KiB/sec with uploads a little bit slower, around 50 to 60KiB per second. Compared to the normal AFP transfer rates of this machine, that is pretty bad (around 300KiB/sec for 7.5.5 with OT to a 10.4 server). In addition the host machine can be sometimes sluggish while this service is running, although it's probably not much of an issue on a PowerPC machine with a 603e or 604e. But it does work. Speed is not an issue with most G3 or G4 machines running OS 9 which also uses ShareWay IP Personal.
Otherwise, this software does allow the maximum of 10.6 Snow Leopard to connect down a vintage server as a client. 10.7 Lion will not work because it requires AFP3 servers which means OS X. In most cases Mac OS 8 and 9 don't really need this software because Mac OS 8.5+ can already mount servers up to macOS 10.14 Mojave as long as the client computer has a PCI bus. However the ability to share another AppleShare server over AFP probably has some esoteric value somewhere. An image gallery follows below of what the Standard Edition looks like in testing.
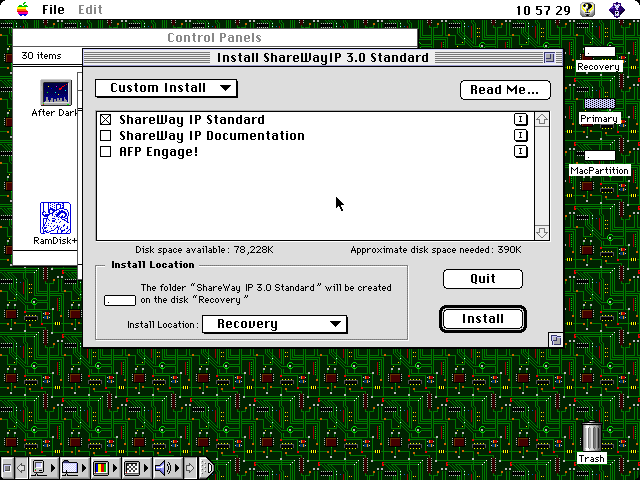 Installing the software (7.5.5, Macintosh IIci) |
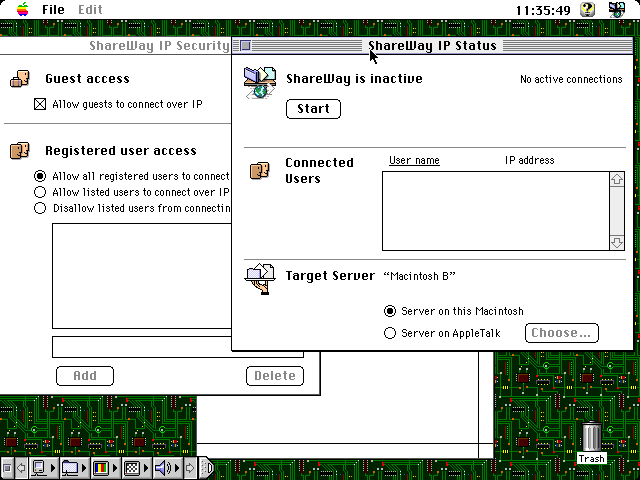 Setup phase before starting the service |
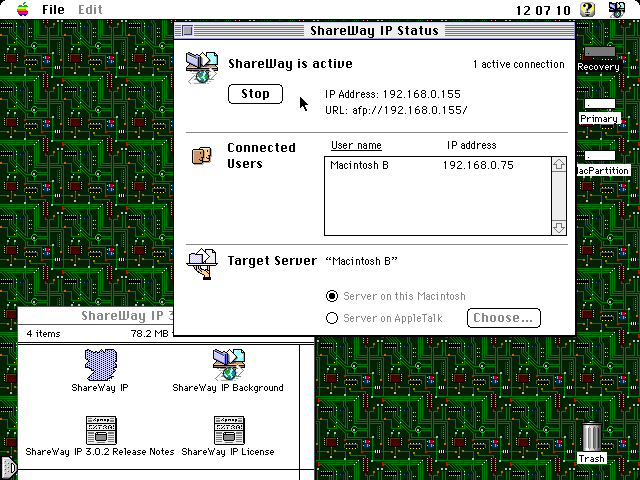 Status display with client connected (10.5) |
 Client view of service running |
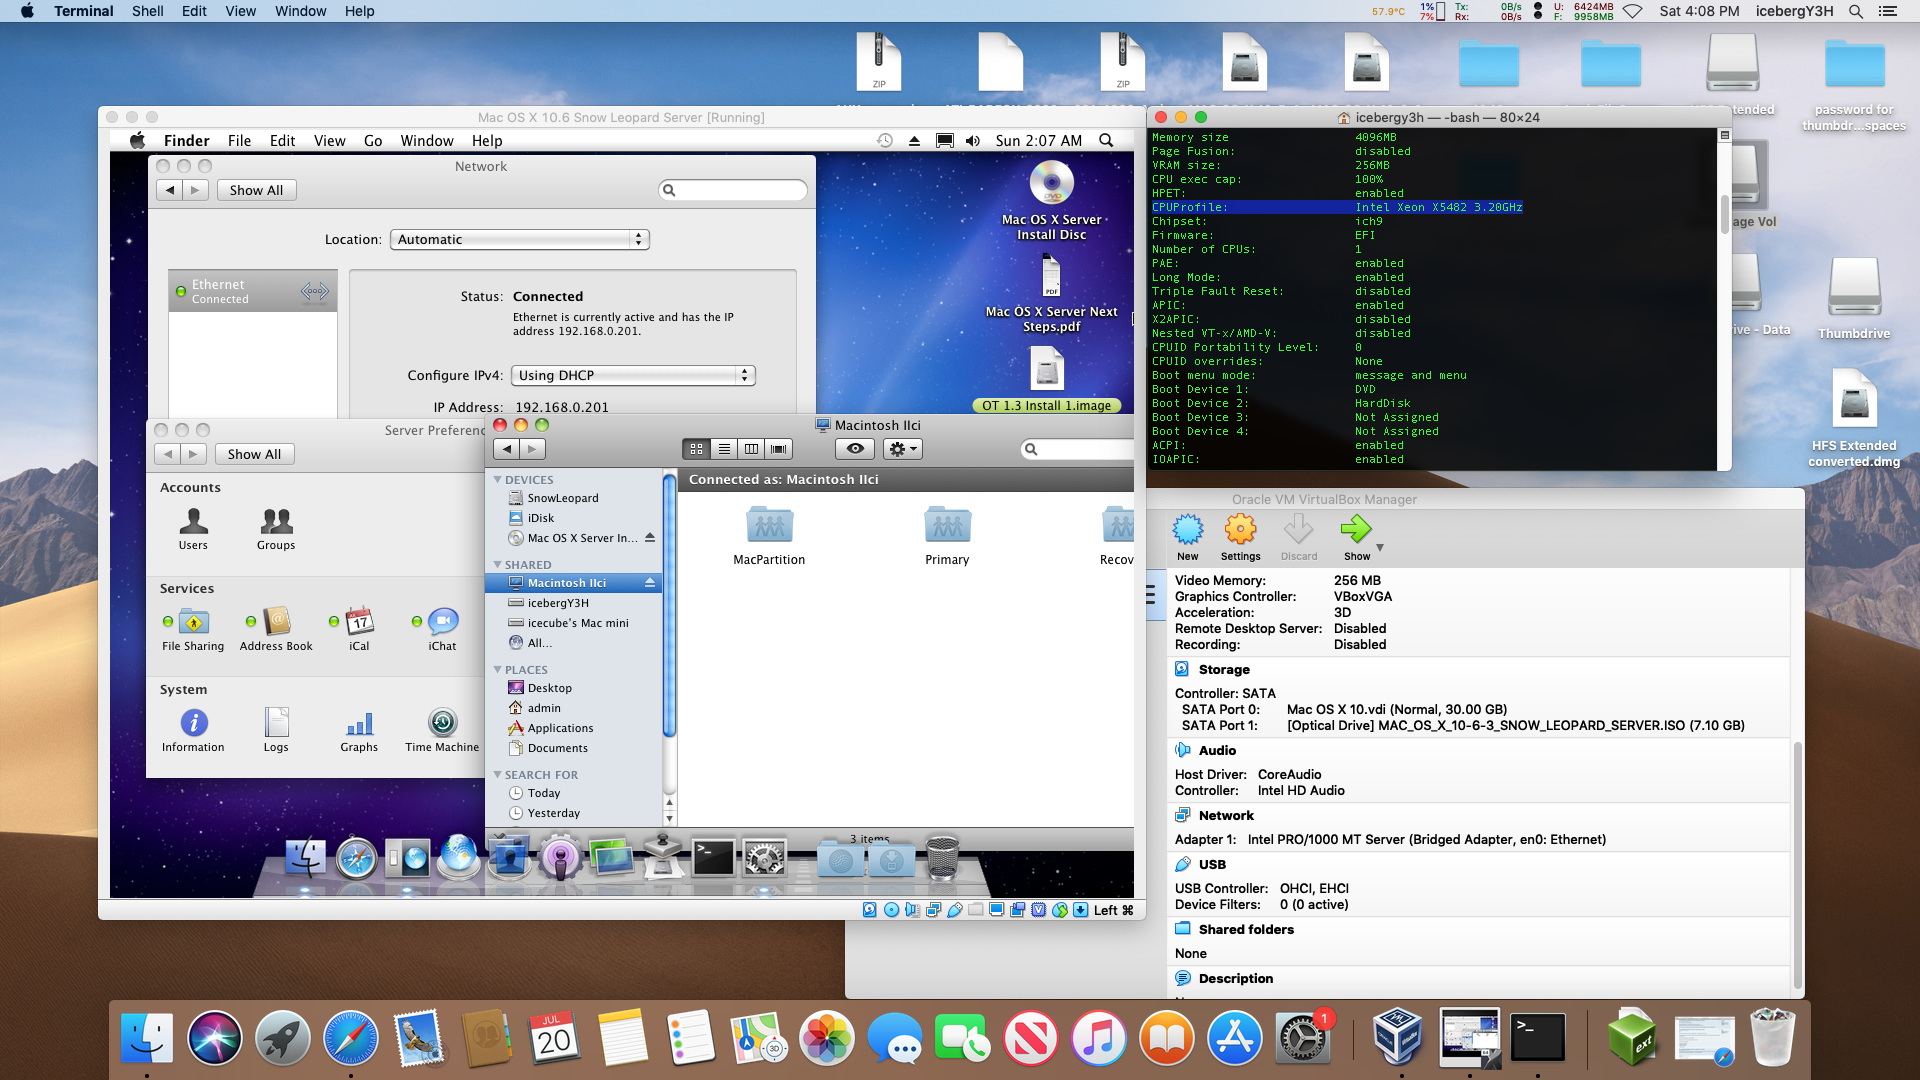 Another client test in progress (10.6 Server VM, 10.14 Mojave) |
One of the many rabbit holes that was explored for this Guide was this page. It shows how to connect to 10.5 Leopard with 7.6.1 fully updated. In reality as it is described it does not work without a PCI PowerPC Mac. Other users commented on this and had difficulty making it work as easily as it says it is. For one the default experience is much like the image below: a simple exit to the Finder with a dialog box saying a type 1 error. 10.6 Snow Leopard on the same exact setup at least kicks a message saying the versions are incompatible before you can even log into it. It is possibly a troll, because Leopard cannot be installed on a 2GiB volume, it is way too big for that: Jaguar can, but even Tiger wouldn't cut it either. (Attempting to downgrade 10.5's AppleFileServer to 10.4's version failed.) System 7.5.3 can access volumes up to 2TiB so it is a serious headscratcher how he has 0K in disk and 1.9GiB free. That sounds very close to the way that System 7 reports volumes greater than 2GiB (see the image below), so something is very suspect and the author believes there's more to the story than what is shown and told, but now that a PCI Power Macintosh is now known to be a requirement, we can sleep easier. Following the forum thread closely provided a partial solution, but not the same as is shown.
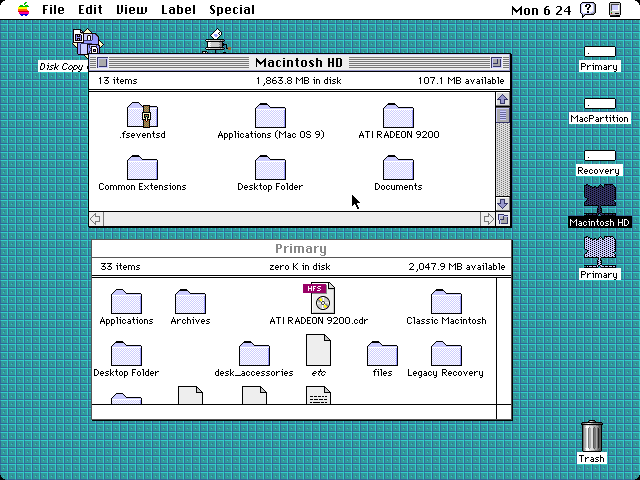 2GiB size limit: 2GiB upper versus 40GiB lower (System 7.1) |
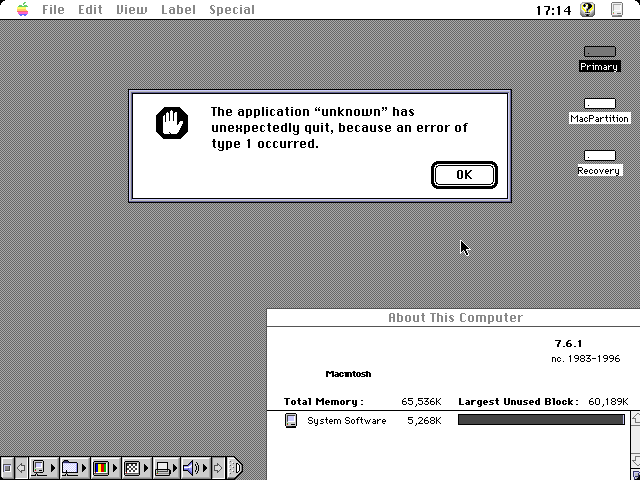 Normal error attempting to connect to 10.5 (7.6.1, Mac IIci) |
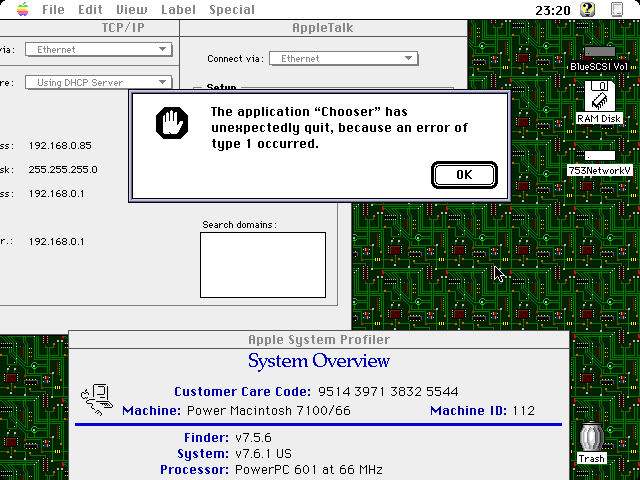 Same setup repeated with a Power Macintosh 7100/66 |
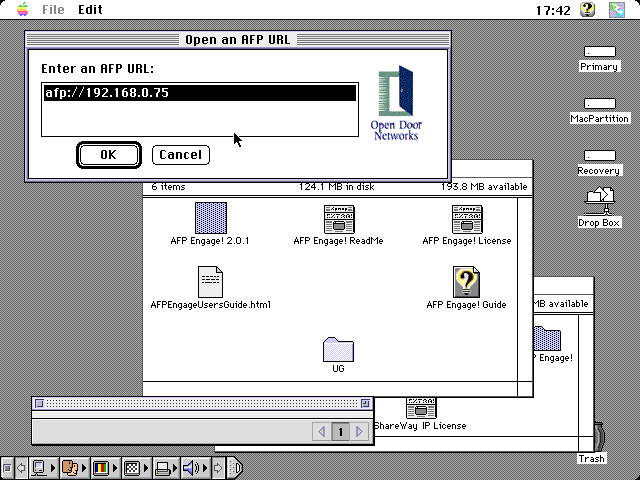 AFP Engage! connection window |
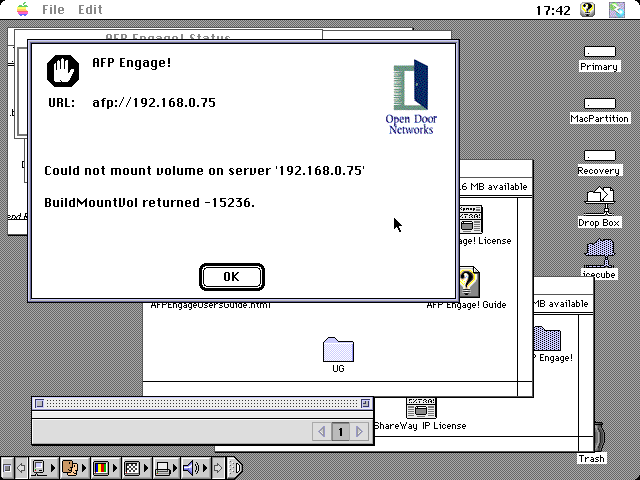 Dialog box indicating an error (10.5 server) |
AFP Engage! is a kind of Chooser substitute included with ShareWay IP Standard. It seems to have been written a little hurriedly and the Apple Guide for it doesn't work. Fortunately the HTML documentation is fine and there's not much to do with it anyways. Upon launching the program, choose Open URL... from the File menu, which prompts for an AFP URL. Then type in the full AFP URL, such as afp://192.168.0.75. If it works, then you can choose the volumes to mount and proceed on. In this case involving 10.5 there is one major problem and one minor problem. The major problem is it can't log in with user credentials, so any shares that are mounted are read-only or otherwise restricted. The minor problem is that it kicks an error box, but it can be ignored and it mounts anyways. In our scenario involving 7.6, Leopard should mount: 10.6 Snow Leopard will not work, but it should with Mac OS 8.0/8.1. Depending on how a share is set up, it is possible to have full read-write access available, which from a security point of view, is on shaky ground. Share folders had be manually created and added because 10.5 did not include them by default. Otherwise, yes, it does work, but it's not in the Chart for a reason: it isn't something the author would recommend someone do as a normal operation. (All the files in the Leopard share folder were copied via this operation. ShareWay IP was running in the background as well.)
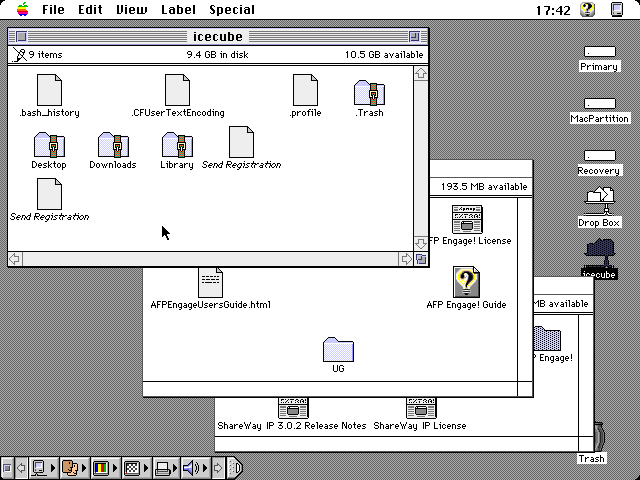 Connection successful |
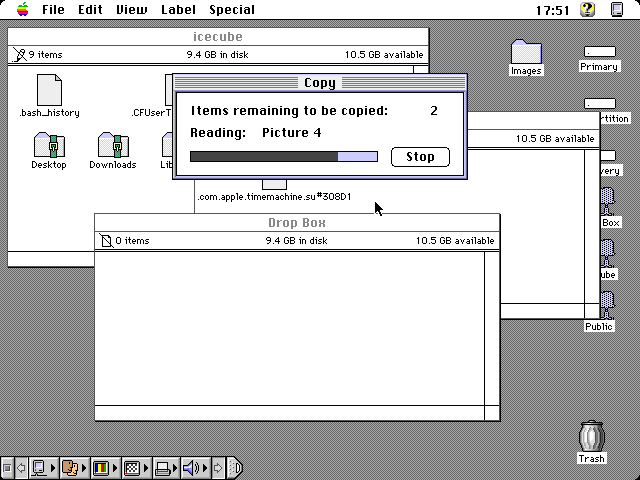 Testing the Drop Box |
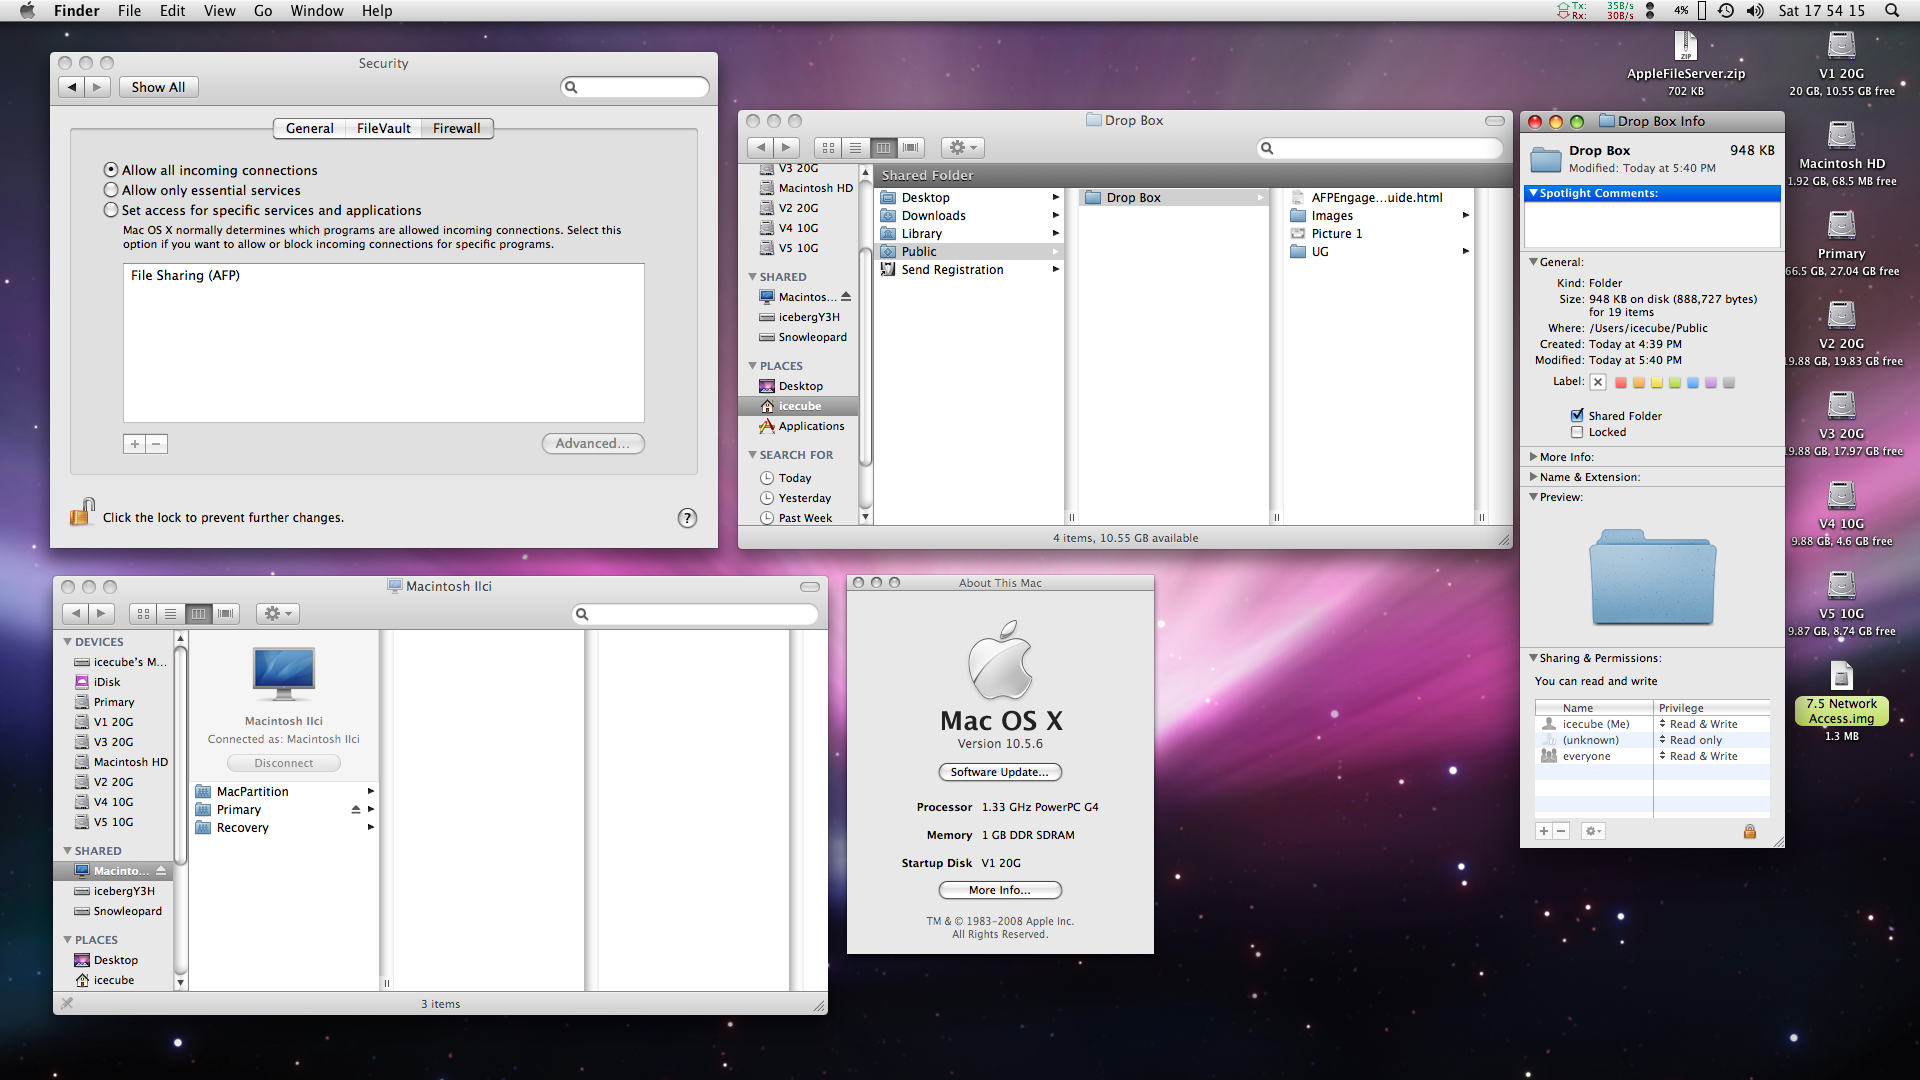 10.5 with config used. Note share settings |
 Unable to connect (10.6 Server) |
Asante NetDoubler
In former times the ability to noticeably increase performance without too many drawbacks or a stiff price tag was a notable achievement. Between budget accelerators and stuff like RAM Doubler there were different choices on the market, with RAM Doubler being quite popular. Like Startup Doubler, Disk Doubler and Speed Doubler, this product borrows the name branding led by RAM Doubler. Information about how this software works is quite limited: the manual mentions ADSP a few times along with TCP/IP thrown in, this is because it can use ADSP or TCP as the transport protocol. It didn't go much beyond about mid to late 1998 and probably ran out of steam as the operating system versions advanced and the hardware got improved. There's also a chance that it was about time for a complete rewrite of the software (with certain applications like QuarkXPress having issues with it) and demand probably wasn't enough to make it worth doing. |
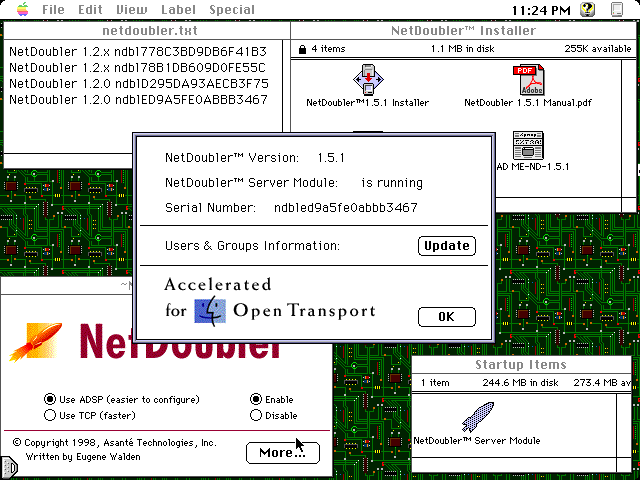 NetDoubler control panel (IIci) |
Other utilities that might help some use cases would be stuff like CopyDoubler, Speed Doubler and lastly CopyAgent. These would have the most value on PowerPC computers because SpeedDoubler is supposed to have some improved 68K emulation routines. However none of these were specifically meant for networking like NetDoubler is, so they're just going to be mentioned in passing. Of the ones mentioned so far, RAM Doubler was the most well-known and people at least knew about it because RAM was expensive back then. So while they probably do have some value, they're mostly a curiosity today. Whether CopyDoubler and so on were popular or not isn't readily clear, but RAM Doubler definitely was.
As of right now, archives of the software are limited to just Macintosh Garden and whoever clones that site. Documentation is included as a PDF on the disks, which includes a 68K version, PPC version, Pentium version for NT 3.51 or NT 4 servers and a DEC Alpha version. User interest appears to be quite low, despite frequent promises of two to four times faster file transfers, with vague suggestions of up to nine times faster being a possibility.
Requirements for this software are a bit on the stiff side. It most likely would work best with PCI 10/100 Ethernet cards, which are faster than NuBus cards, and while the AsanteFAST 10/100 NuBus cards do exist, or existed, they're not that common and most Macs of the 68K processor family will struggle to push the limits of it. On top of that, the SCSI bus, if the NuBus interface is not the bottleneck, will be a limiting factor. Anyways the specs require a 68030 or higher, at least 8MiB of RAM, System 7.5.3 or later and OT 1.1 at the base. Since most people won't have NetDoubler-approved cards that don't require a serial number (as NetDoubler was included with these purchases), use the version 1.2 codes because later ones don't work.
Currently, with only two machines available, testing capacity is limited. On a SE/30, the client control panel would cause a System bomb on startup for an unimplemented trap; removing the accelerator, disabling all extensions, updating to 7.5.5 and OT 1.3, and trying 24 bit memory mode were all tried and all failed. This meant the SE/30 was left out as the server function requires the control panel to activate it. Therefore testing was aborted due to a lack of sufficient hardware to evaluate it.
Since the software would better with a 10/100BASE-T interface, this presents an interesting problem. Author does not have any 100BASE-T capable vintage machines available at time of writing, and over on 68kmla, there was a long (with off-topic discussions) thread wondering about the effectiveness of 100BASE-T cards on pre-OS X systems. In short, yes there is a slight difference, about a 20% improvement, but the inefficiency of the network stack cuts speed significantly, if it doesn't run up against the either the system bus, CPU, SCSI interface or NuBus limitations. The October 1996 issue of MacUser (page 87, PDF page 91) also did a test of six different 10/100 Fast Ethernet cards, and the conclusion was also similar: about 25% boost in speed over Macintosh 10Mbps connections. Against a comparable PC equipped with a 100MHz Pentium processor, the PC was about two to four times faster, peaking at around 41Mbps, leaving the PowerPC hardware in the dust, which almost reached 10Mbps.
In retrospect, while MacAddict, MacUser and MacWorld mentioned NetDoubler multiple times, actual adoption was limited, and these days nobody is particularly interested either. A similar product is RunShare (check the HolyGrail 7 CD for a [k] patched archive), which also suffered from lack of interest. Considering the tsunami of momentum that began in 1995 with the trifecta of the Intel Pentium processor, Windows 95, cheaper and common PC platforms, it was a difficult decade for the Mac line to close out.
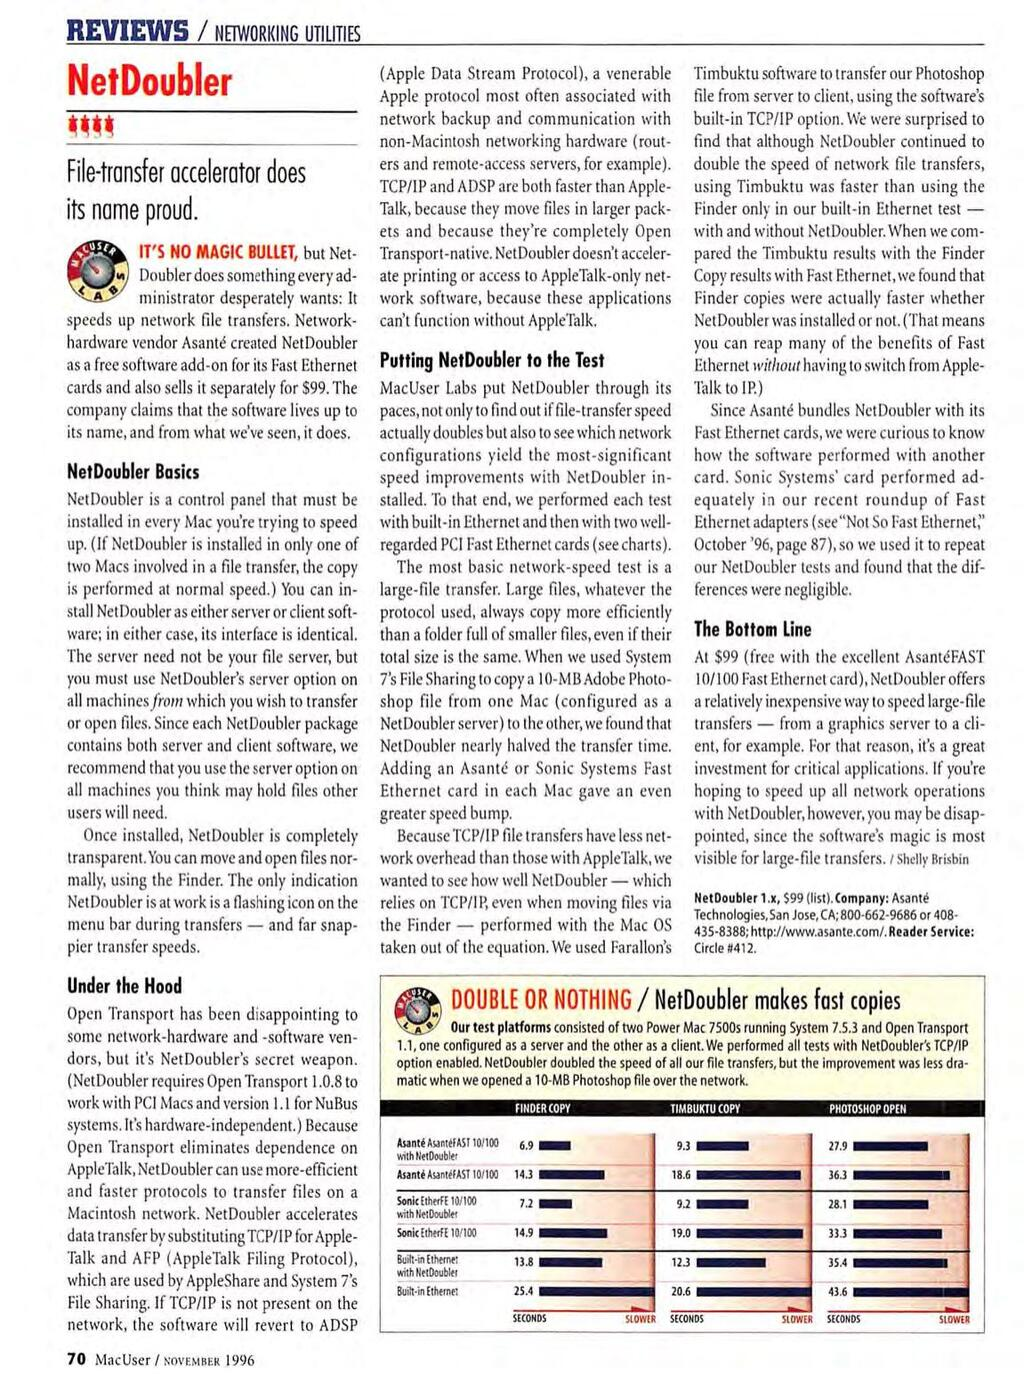
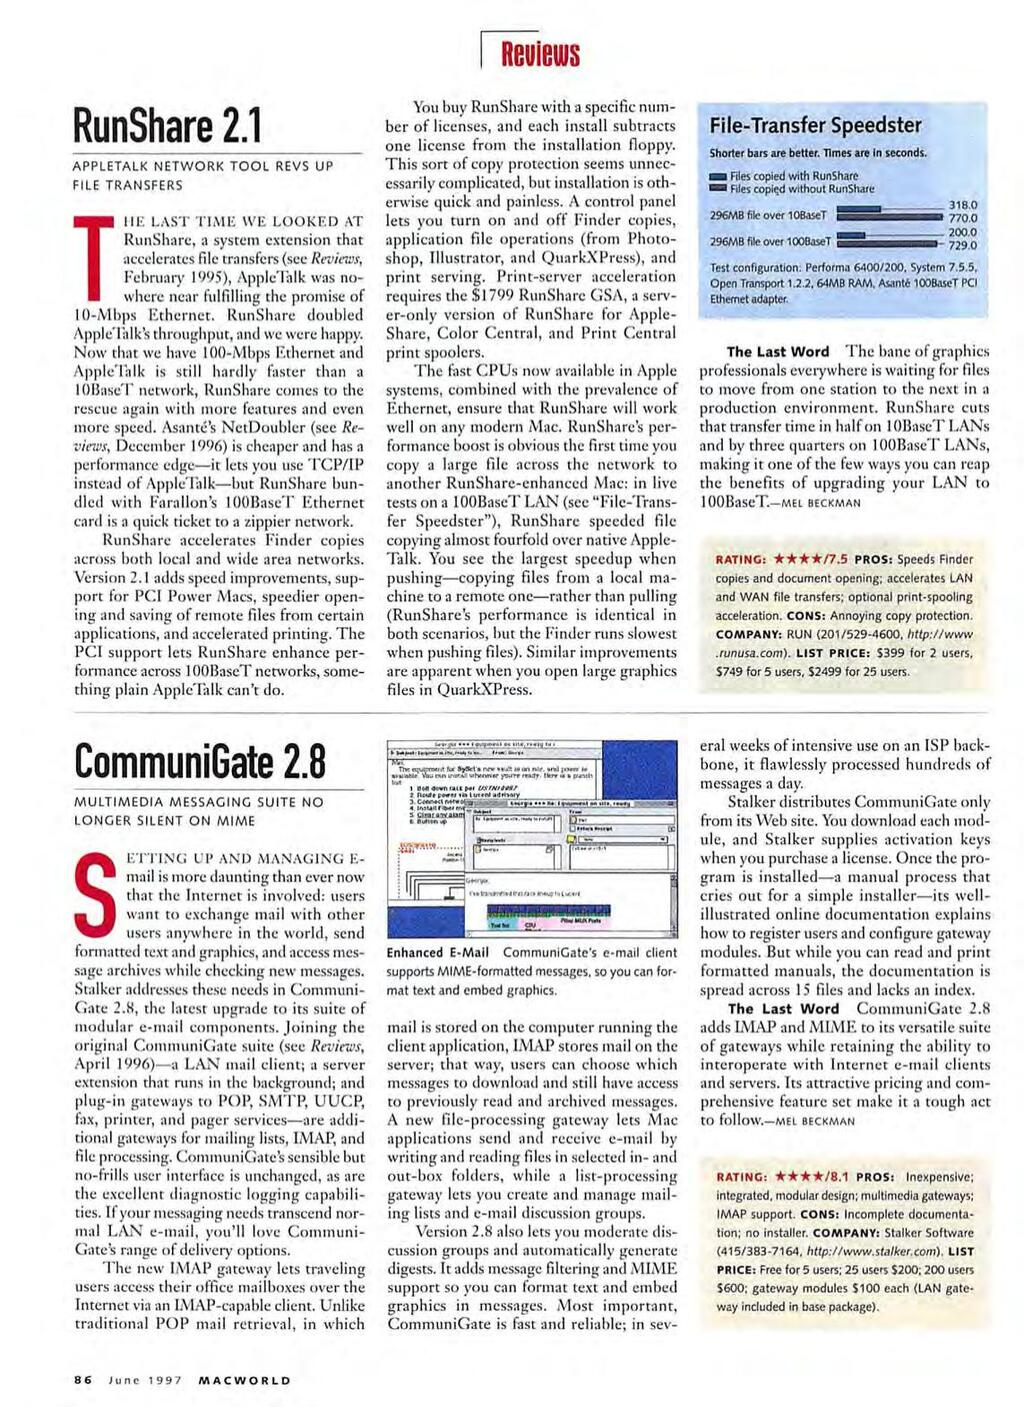
AppleShare IP Browser
A relatively recent article, this program is a bit different than other things examined here. According to the developer, anti-matter (aka Retro Acceleration) designed it to fill a need, and definitely is something we can make use of today. Another project is MacFile, which is a AFP file server for Haiku. He claims to have started on the foundation of that software around 20 years ago for BeOS, which is believable because back then BeOS was a budding operating system. A Windows AFP server is in the pipeline, but given this is a hobbyist project, it may take some time to release.
The program is relatively light on disk, about 347KiB. System requirements are modest, being System 7, 4MiB of memory and MacTCP compatible, which makes it unique because pretty much everything else that can use AFP over TCP requires Open Transport. The spec says it requires Thread Manager 2.1, but 2.0.1 seems to work too. About that, the read-me for Thread Manager 2.1 says all versions of Thread Manager are incompatible with MODE32, but it still seems to kind of work anyways. As shown below, it uses AFP2.2, which means it should be capped Mac OS X 10.4 Tiger. The log is from a Ubuntu 10.04.4LTS VM with Netatalk 2.1.6. 192.168.0.123 is the address of the SE/30, using System 7.1 with MacTCP in all cases.
Compare to a DDP connection, via EtherTalk, this is through the Chooser on the same machine:
So we know it uses AFP over TCP, which is great, but what is not great is AFP3 servers. In basic testing with a Mac OS X 10.4 server, it worked fine downloading, but uploading was a different story. Illegal instruction crashes persisted whether MODE32 was installed or not, or whether TM was v2.0.1 or v2.1, with no improvement with a IIci. Going to Mac OS X 10.2.7 didn't work at all (AppleTalk was not enabled in NetInfo, so it would only be AFP over TCP). Going back more with Mac OS 9.2.2 would also crash, even when program memory was increased to 4MiB instead of the normal 2MiB.
Finally, just in case a newer system might work, using macOS 10.14 Mojave with 10.5's AppleFileServer would lock up the program before the login sequence could be completed, usually with an address error or illegal instruction error. This probably happens because the authentication (based on the log information above) is only over the Cleartext UAM, which Mojave doesn't support. Other Mac OS X versions were not tested but the pattern is clear: AFP3 servers are spotty, which doesn't make sense because Mac OS 9 does not have an AFP3 server. On the other hand, Netatalk 2.1.6 worked flawlessly on uploads and downloads. Looking at the image to the far right below, note how the program image is corrupted strangely: it looks like the Asante EN/SC driver extension mixed with something else, even on remote volume. No viruses were found on the system and the driver extension isn't even installed on 7.5, only on System 6 and 7.1. Weird.
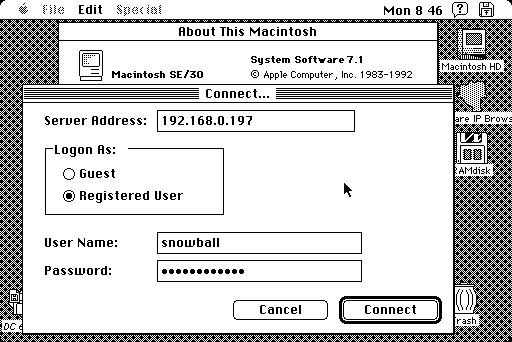 Login prompt |
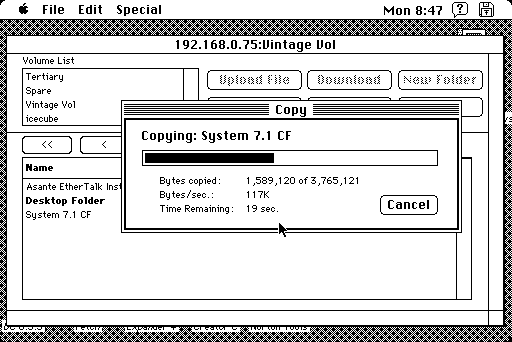 Download process (10.4 server) |
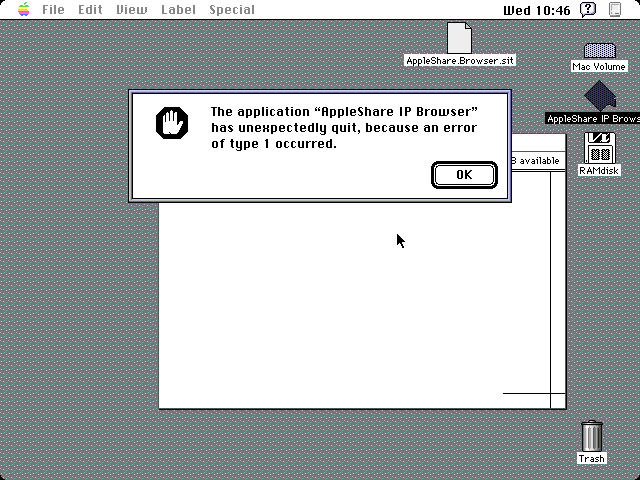 Upload failure |
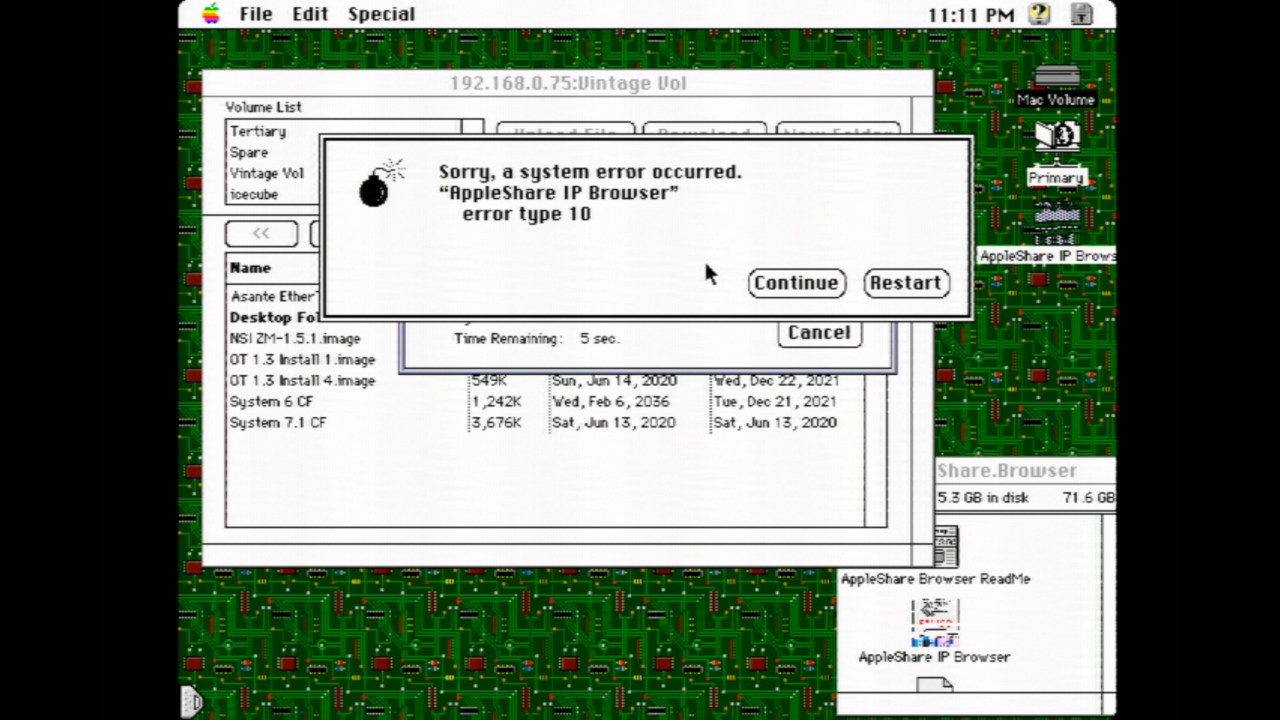 Another failure |
Speed is "acceptable", around 110 to 120KiB/s. The user interface could probably use an overhaul to be more consistent with the Macintosh Human Interface Guidelines, but it's workable, and certainly other programs made back in the day, particularly in the 1984-1985 era, were worse. The login dialog is simple enough to work with, assuming you know the IP address of the server, the rest is somewhat straightforward. File dates on remote servers probably won't be accurate. Folders are marked with bold text; a small application icon, document icon, or folder icon would be a nice UI improvement. Programs that the author holds in good regard for a similar purpose would be DiskTop and Fetch.
At the end of the day, if it works, it works. It's probably better than Rob Braun's Cloud 7 project, which was a sort of "HTTP Disk" (which also was an earlier name for it) which won't get much mention here because it never seemed to work properly. Given that the source code is available, another experienced Mac programmer could comb through it for some improvements, as it holds some promise. At the time of testing, the current version is 1.0b28, it is hoped that some development can continue as it would help out the Macintosh Plus and SE computers more than anything else. The problem then is that a MacIP gateway would be required, which most of those can already serve files without this program being required in the first place. If this program was meant so older machines could access AppleShare IP servers using AFP over TCP, then that doesn't make sense because AppleShare IP already serves files fine over DDP via EtherTalk or LocalTalk with a compatible bridge.
Mac OS X
Mac OS X 10.0 Cheetah
This section won't be that detailed because Cheetah is noted for having issues with stability, and 10.2 Jaguar will run fine on machines that can run this. Surprisingly, it runs reasonably fast on a slow G3, in fact better than Jaguar does, but very little software is properly compatible with it, especially still lasting around these days, and most people who will install it are doing so out of curiosity, of which, it can be fascinating from a historical angle. For the curious, it mostly looks a lot like 10.1 Puma and 10.2 Jaguar, with the obvious feature being that the System Preferences application looks a bit different and clues here and there of missing features compared to later versions of OS X. Disk Utility is primitive, Disk Copy is only usable for mounting images and so on. For AFP, it only supports AFP over TCP/IP, and should be easy enough to figure out how to get it to work with compatible clients and servers. The Network control panel is all that is necessary to set up TCP/IP addressing and flick on AppleTalk, and then the Sharing control panel can turn on the local file server feature. Other servers are located from the Network browser in the Go menu. Recall that there is some footnotes about OS X 10.0 below The Chart. |
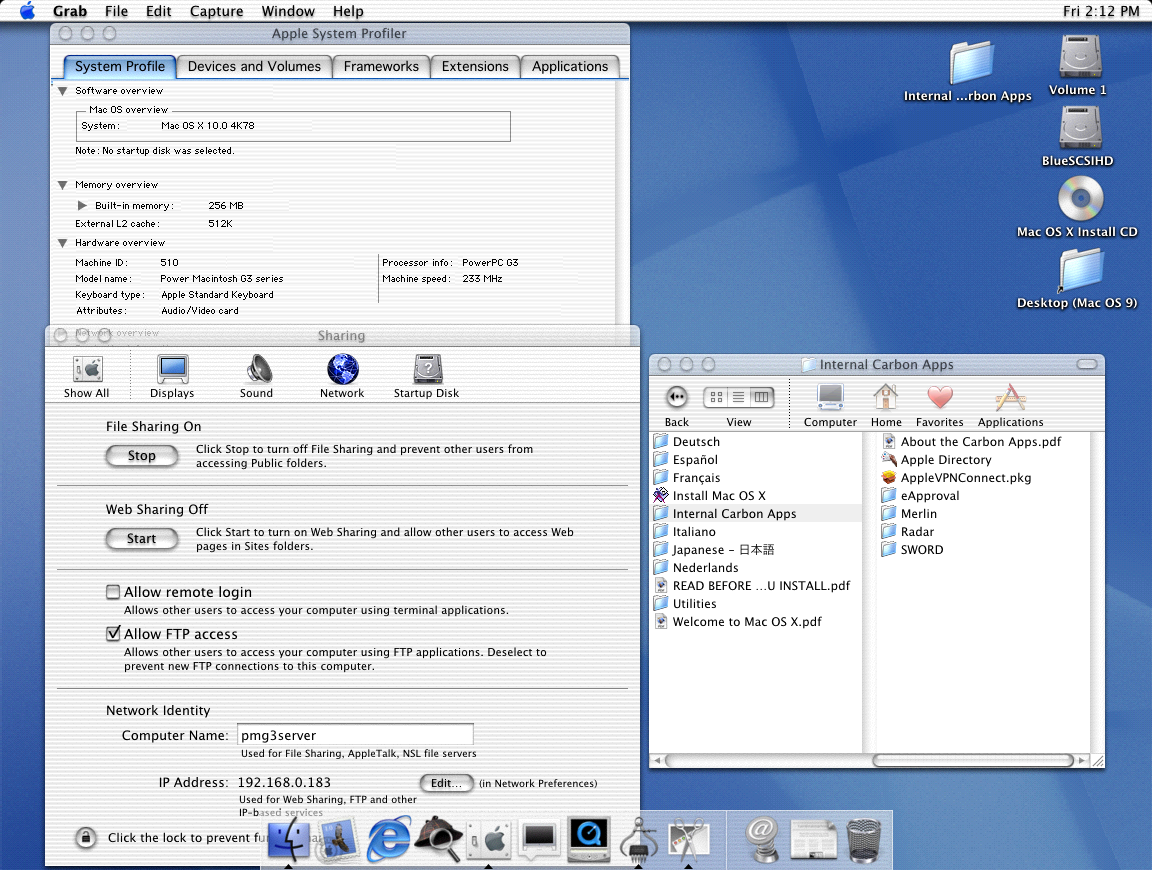 OS X 10.0 server services (note Internal Edition programs) |
Mac OS X 10.1 Puma and 10.2 Jaguar
In the case of System 6 and 7, then go to NetInfo Manager (Utilities folder). Authenticate the user. Click config, then AppleFileServer. Scroll down until you see use_appletalk, and double-click the field next to it and change the value from 0 (false) to 1 (true). (Panther has this too, it may be needed for printers.) Save the changes with Command + S or from the Domain menu, then click the lock. Reboot the Mac. This step enables a backwards-compatible version of AppleTalk for use with older computers.
(The remainder of this section pertains to 10.2, although 10.1 isn't that different) Next, open System Preferences. Click Network. Select "Show" to Built-in Ethernet. Set as either DHCP, or configure it manually with a compatible Internal IP address and a subnet mask of 255.255.255.0. If a cross-over cable is used between this Mac and the vintage machine, then set both to have the same subnet, but different nodes (such as 192.168.4.8 for one and 192.168.4.9 for the other); if a router is used, then both will share the same subnet as the router designates but maintain different nodes. Then enable AppleTalk under the AppleTalk tab. Head to the Sharing pane. Turn on Personal File Sharing. Enabling the Personal Web Sharing permits Internet sharing, which also needs to be activated in the Internet tab. For Guests to connect, set the proper permissions under Get Info for the volume or folder to share.
Open the Go menu, and select Connect to Server...; the target machine should show up after a little bit (System 6 cannot be mounted to 10.2's desktop because it has no server element). Double click it or click Connect and login. Easy as cake layered on pie.
From the other side, open the Chooser on the classic Mac and mount the volume.
In System 6, it appears that all mountable folders and volumes may locked (read only) in some cases. The Public Folder (write only permissions) may be the sole mountable volume unless SharePoints is used to enable additional folders. For System 7 and above, any shared folder or volume is available as a network share. Guests will only be able to mount the Public Folder unless full permissions are granted for Guests (Everyone). Be advised of the 2GiB volume limitation under System 6 and 7 as noted earlier in the Notes.
In 10.2 and above, while connecting to a server, the Options button can set some additional toggles, as shown below for a host of OS X Tiger.
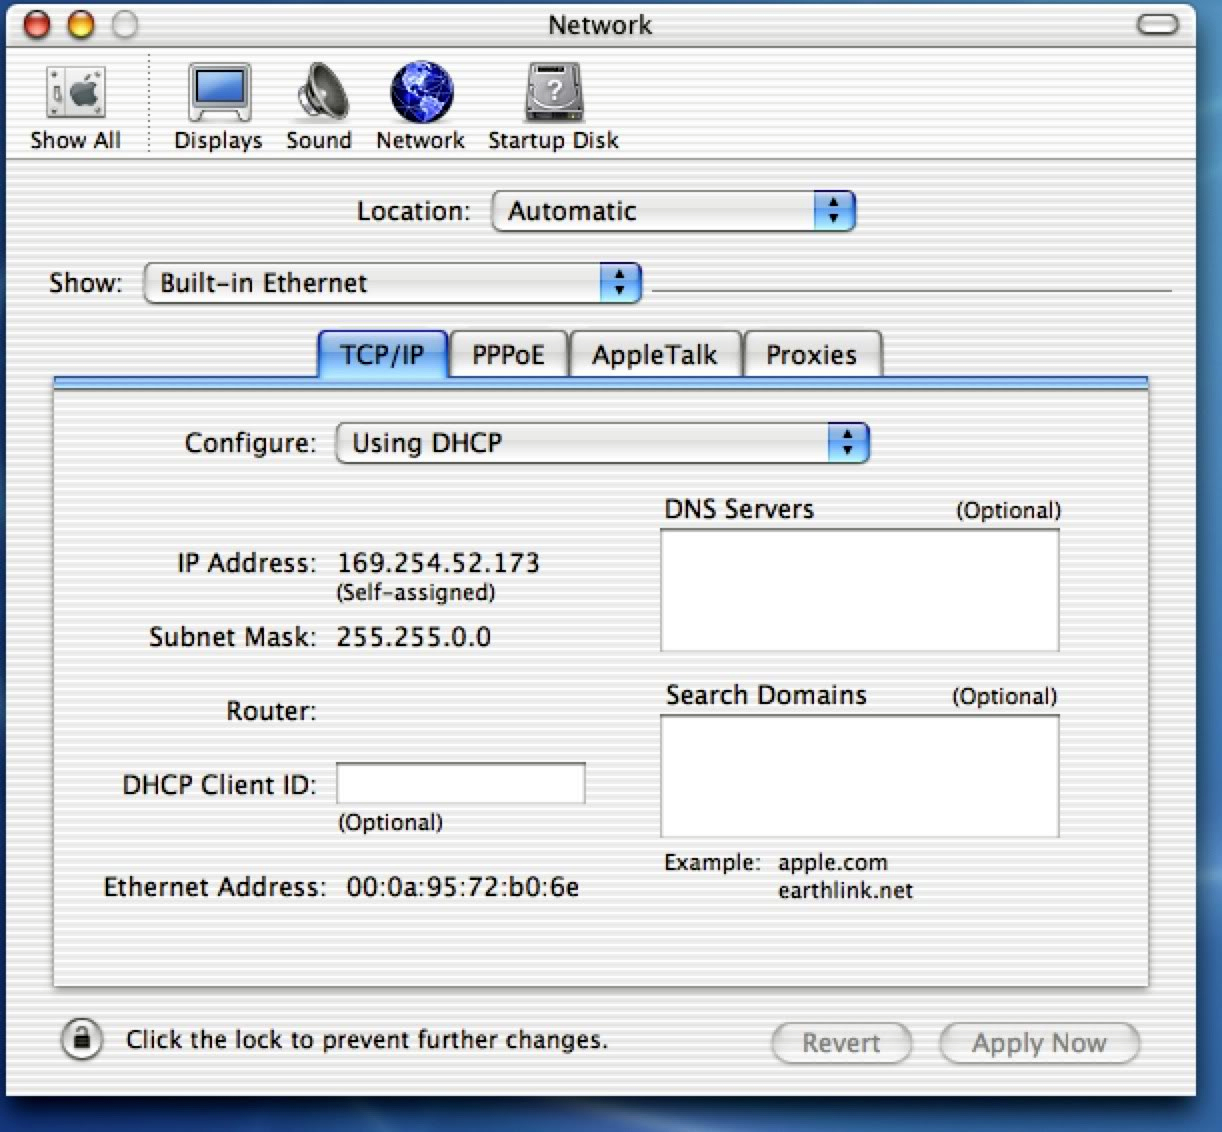 Network configuration pane (self-assigned IP) |
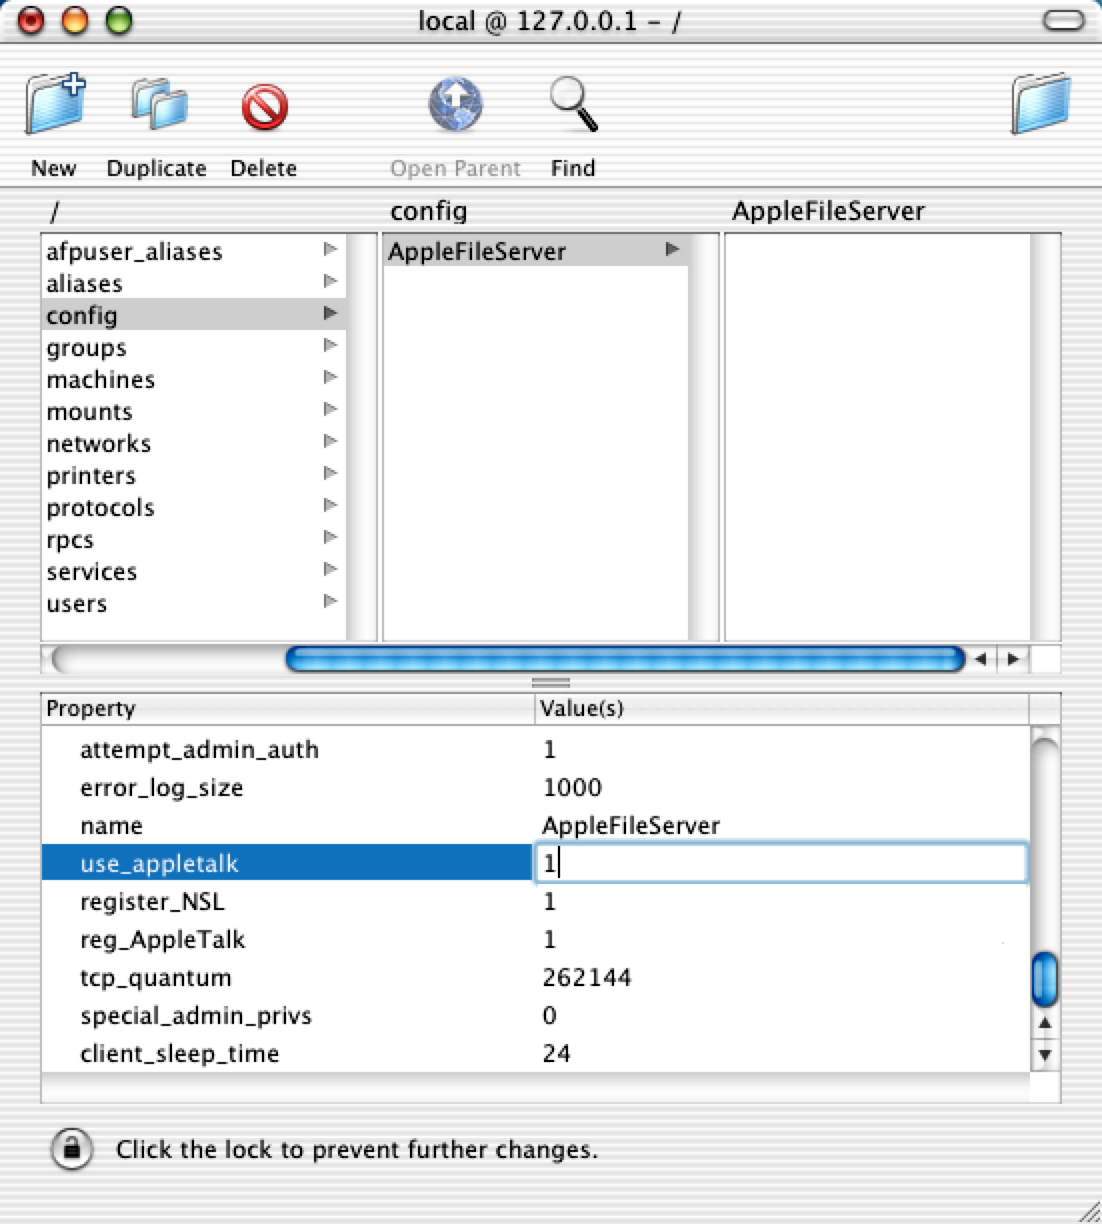 NetInfo Manager editor |
 Connect to Server from Go menu |
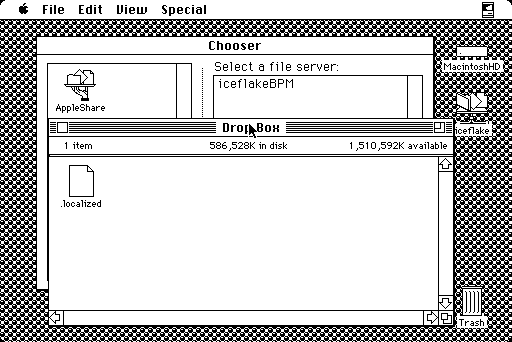 OS X Drop Box mounted on System 6 |
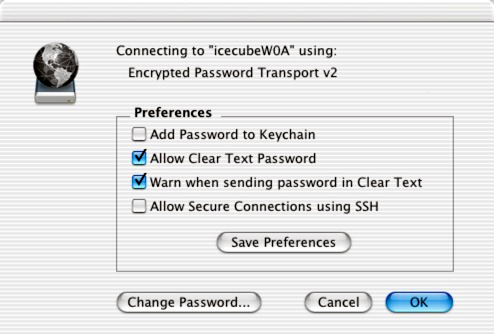 Connection options prompt |
SharePoints is an addon to Mac OS X 10.1 thru 10.4 which allows the creation of additional share folders, just like in the old Finder of System 7 thru OS 9.2.2, where users could share any folder they desired. The addon can run as a program or as a .prefpane inside the System Preferences application. Folders can be easily configured for SMB (Windows, Linux) computers to access or AFP purposes. The images below give a sample of what it looks like under 10.2 Jaguar. An attempt was made to share a non-logical disk, a USB thumbdrive and a mounted disk image on the computer, without success.
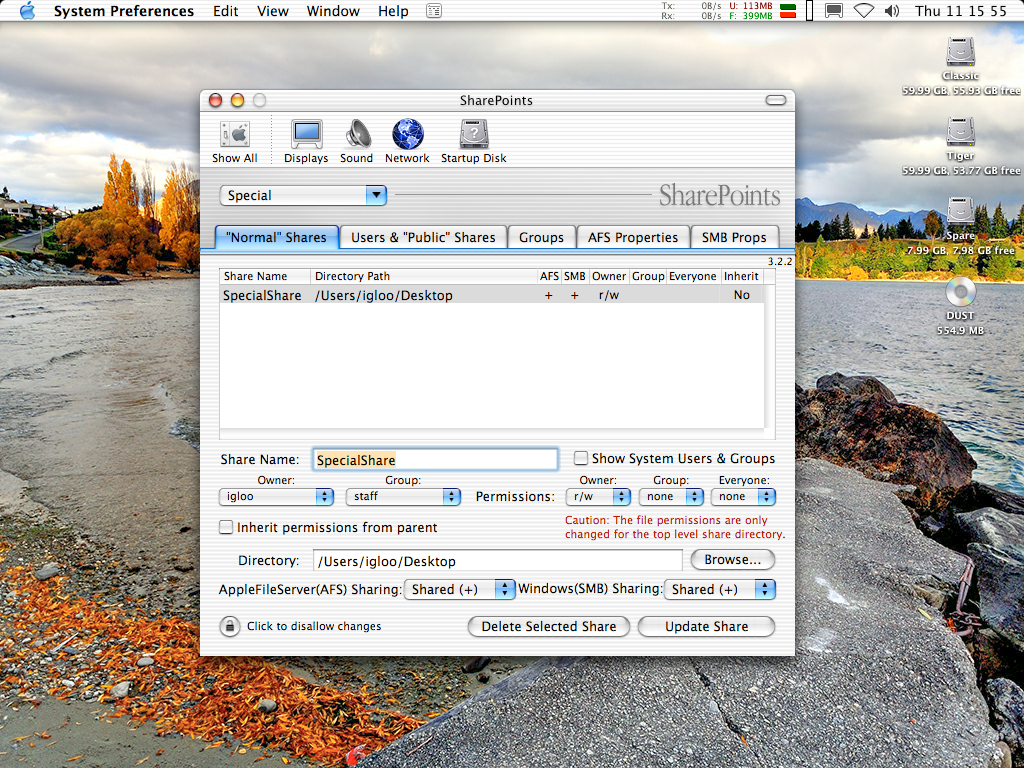 Shares overview |
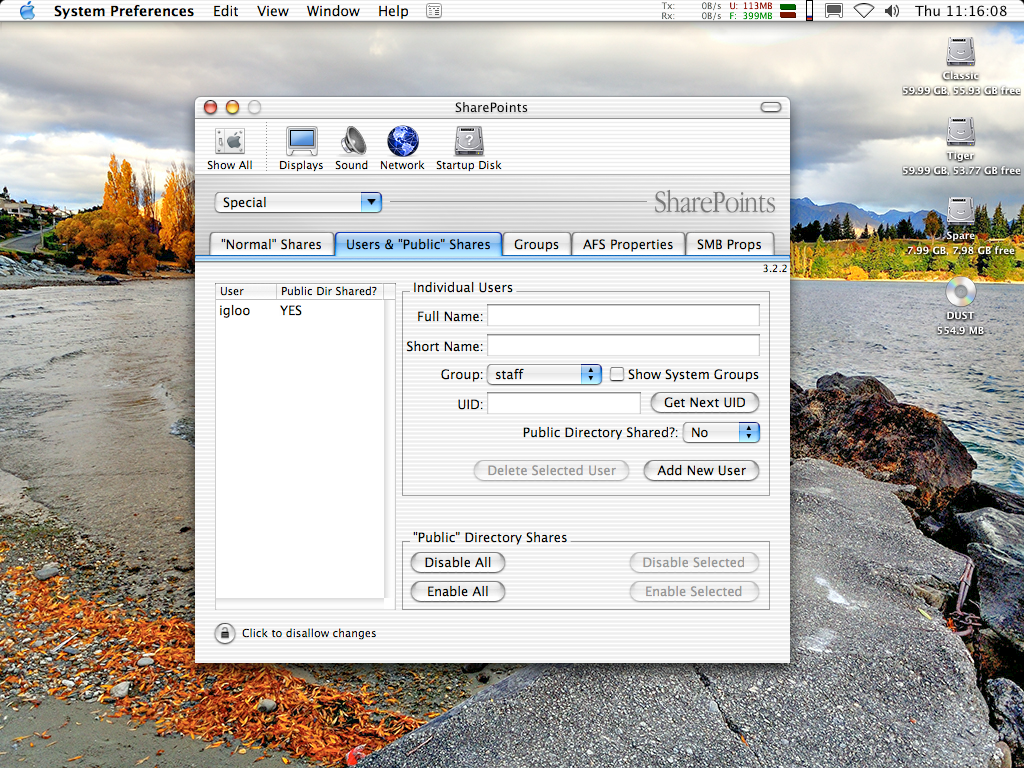 Users and Public folders |
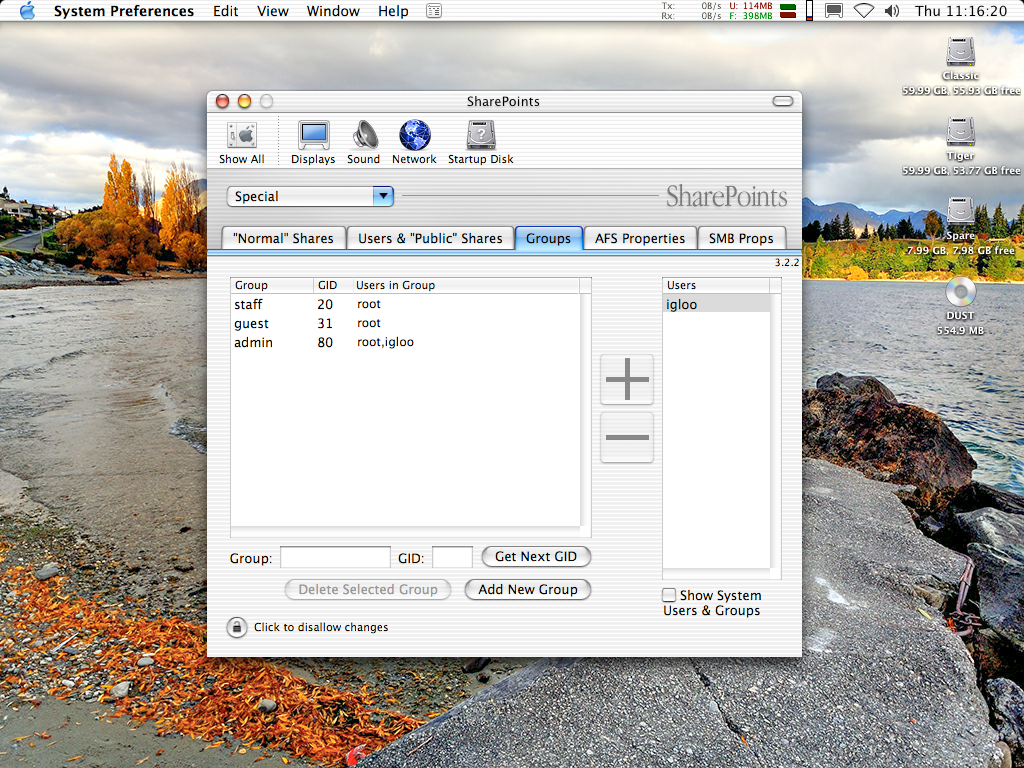 Groups |
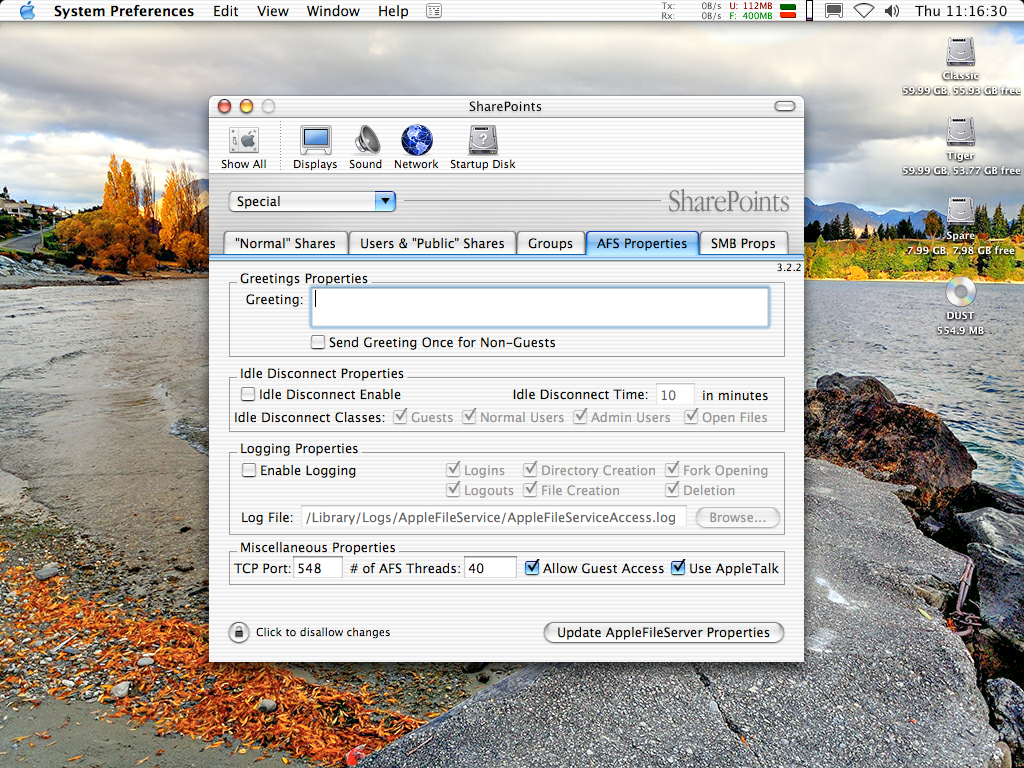 AFP settings |
 SMB config |
Mac OS X 10.3 Panther and 10.4 Tiger
As stated in the Chart, 10.3 Panther can mount a System 7+ server, even over an AppleTalk bridge. If the System version is 7.0.1 or 7.1, then upgrade the File Sharing Extension to the one from System Software 7.5.3, the version number of the extension is 7.6.2. Alternatively, use AppleShare Server 3 or 4. 7.5.3+ won't need any such modifications. Otherwise, for 10.4 Tiger, it can mount a Mac OS 9 server as long as the "Enable file sharing clients to connect over TCP/IP" option is enabled in the File Sharing control panel, as Tiger cannot access file servers with old-fashioned AppleTalk, only printers.
Open System Preferences. Click Network. Select "Using DHCP" protocol, alternatively, setup a manual configuration with a compatible Internal IP address and a subnet mask of 255.255.255.0. Click the AppleTalk tab, and make it active. If AppleTalk cannot be enabled, then open Directory Access (Utilities folder) and enable it there, then go back and make it active: if it still cannot be active, then it is because AppleTalk can only be active on one interface at a time (i.e. WiFi or Ethernet, but not both).
For 10.4 Tiger only (10.3 does not need this step), click the Sharing pane. Disable Personal File Sharing. Open Terminal. Paste this into the command line:
Enter the administrator's password. If it is successful, nothing unusual should appear.
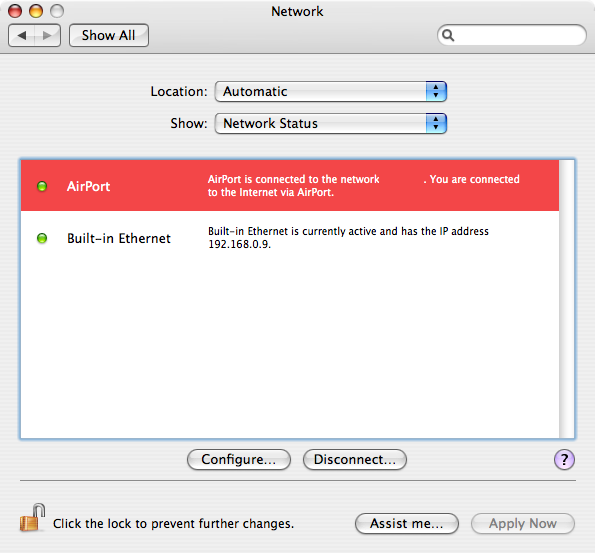 10.4.11 Network pane |
 DHCP without a router (see note) |
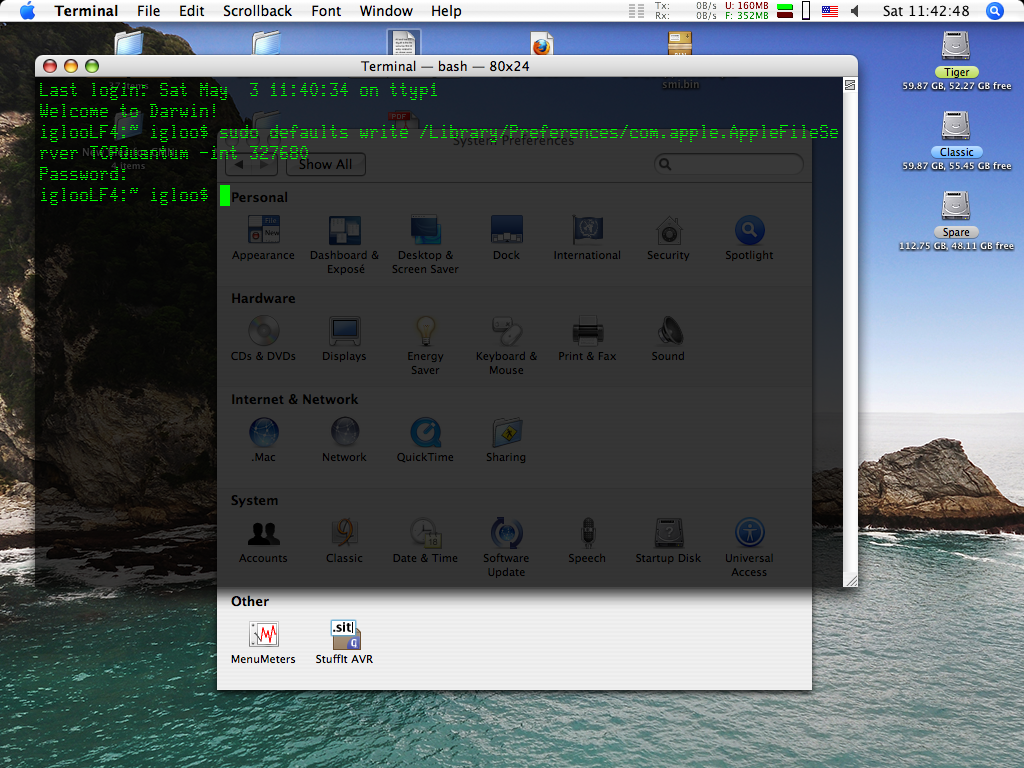 Terminal TCP Quantum hack |
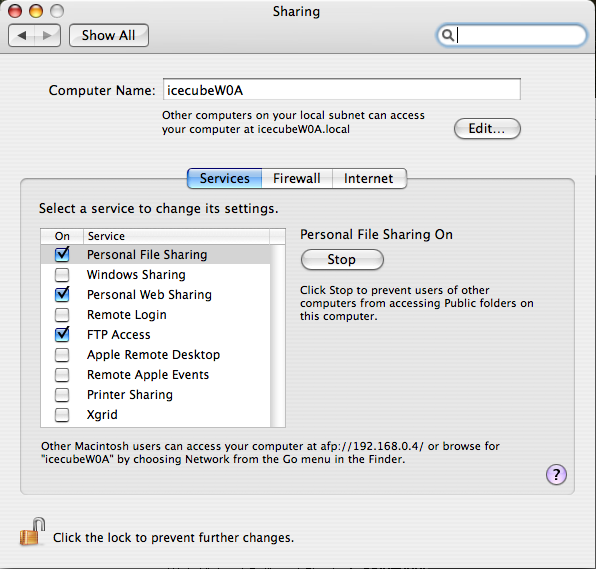 Sharing pane |
Go back to Sharing. Enable Personal File Sharing. Locate a folder or volume to share in the Finder. Right click it or press Command + I for Get Info. Look down to "Ownership and Permission" and make sure that these settings are in line with the desired properties. For read/write access, "Others" should be set to "Read and Write", or set it up as the intended application allows. Alternatively, create users with various permissions, logging in as a Registered User, with optional administrator rights.
Open Chooser on the Mac, and click AppleShare. The host Mac should appear; if it does not, click the "Server IP Address..." button and enter in the Internal Ethernet address. Select it and click the OK button, then login and mount the volume. If server address starts with something like 169.254.131.43, that is a self-assigned temporary IP address when a router does not assign an IP address. Manual addressing in this scenario is preferable over self-assigned IPs because it's more reliable.
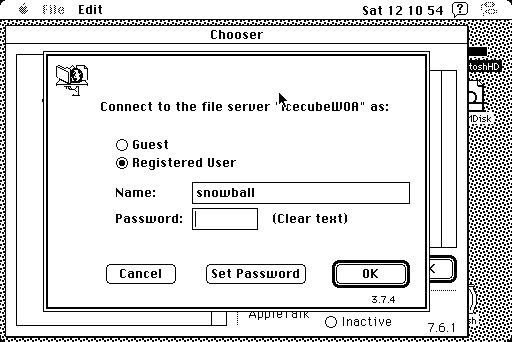 Password dialogue box |
 Mounted Drop Box (Guest login) |
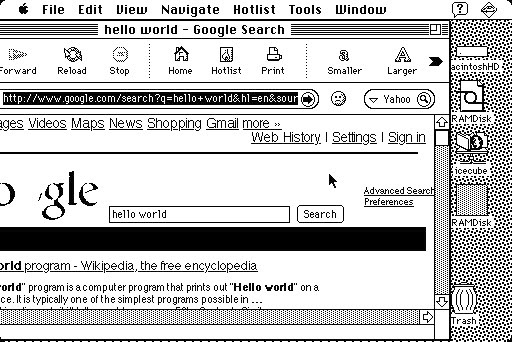 Shared Internet access with AFP |
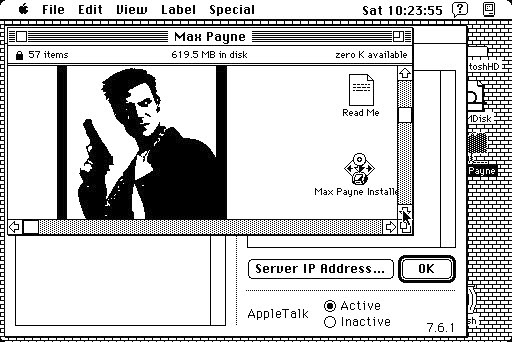 Mounted CD volume |
Mac OS X 10.5 Leopard
Begin by opening System Preferences. Click the Network control panel. If you want to use DHCP for your network settings, then under the "Configure:" selection, choose Using DHCP. Conversely, to configure things manually, select "Manually" and enter a compatible Internal IP Address as discussed earlier, followed by a Subnet Mask of 255.255.255.0 plus the router address if one is used. Enable AppleTalk under the AppleTalk tab; this can be found in the Advanced button on the lower right area of the window. Click the Show All button or go back, and select the Sharing pane.
Then in the Services field, turn File Sharing on with the checkbox. Near the right area, click Options. Click the "Share files and folders using AFP" button. Click Done, then local access permissions can be tweaked in the field for this subject. From the client, open the Chooser. If the target computer does not appear in the AppleShare field, try entering the target address manually; then various directories or volumes depending on permissions are accessible.
To access OS 9 servers, set up the server system as directed in the Open Transport section. Open File Sharing. Click the "Allow users to connect over TCP/IP" button. If the check box is dimmed out, then dig into the install CD for the path /Mac OS 9/CD Extras/File Sharing Extras/ShareWay IP 3.0/ShareWay Applications/ and drag the ShareWay IP Personal Background into the Extensions Folder of the hard drive and reboot. Or, install the regular program there, but it's a 10-day trial version. Keep in mind that ShareWay IP Personal Bgnd can cause problems when the system is coming up from sleep. (Sleep can be hairy on pre-OS X systems. Some INITs (system extensions) and CDEVs (control panels) are fine, others get destabilized and can lock up the system. File Sharing can also lock up the Finder when waking up. The author would go out on a venture and say that after Jaguar was when sleeping became "safe".)
To mount the OS 9 system on the OS X side, use the Connect to Server feature in the Go menu and use the internal IP address, as it won't appear in the Network "browser" viewable from any root level volume window, such as afp://192.168.3.21.
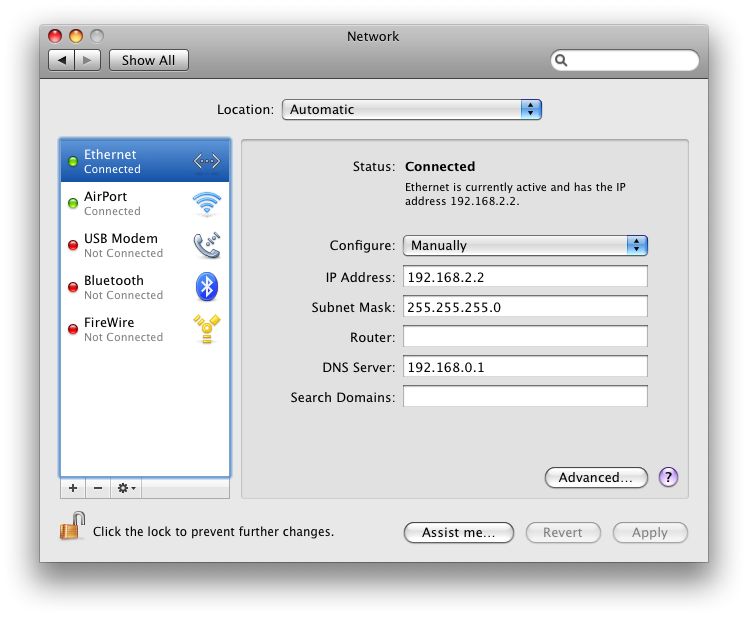 Network pane |
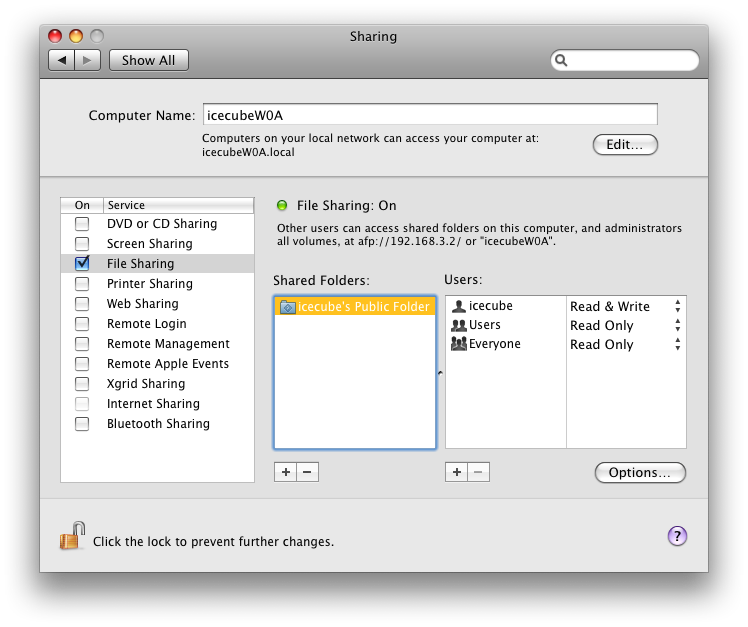 Sharing windows |
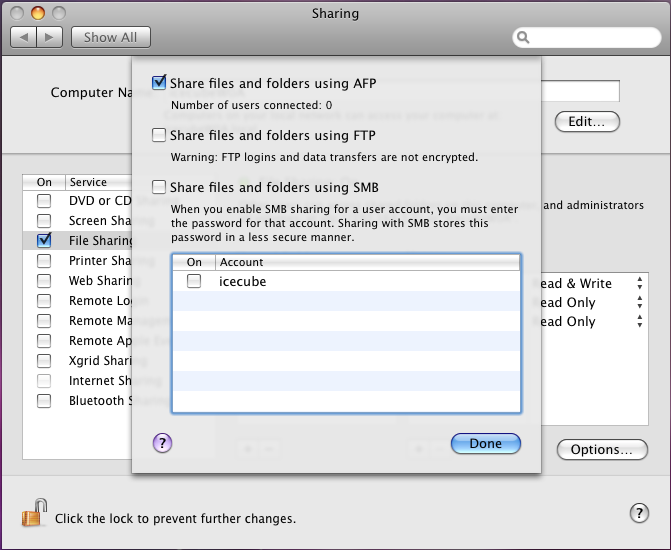 Enabling AFP, SMB or FTP |
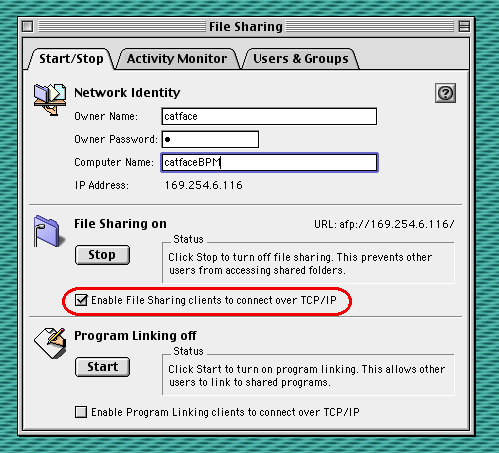 File Sharing: TCP/IP setting |
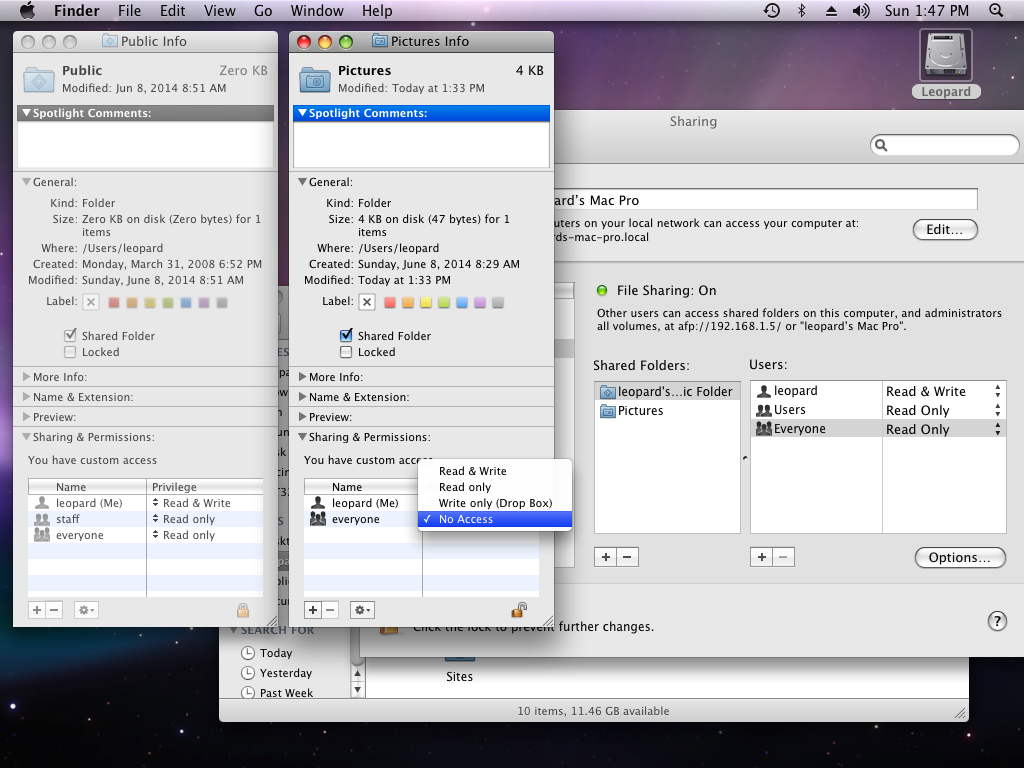 Editing folder privileges (10.5) |
Starting in Mac OS 7.6, upgraded with AppleShare Client 3.8.3, there are two authentication methods available: Apple Standard UAMs and Encrypted Password Transport. Standard UAMs only allow a Guest to login and thus only the user's Public Folder is accessible. Encrypted Password Transport is required to login as any other user. Normally, this is installed with the AppleShare Client 3.8.3 installer, and this installs a DHX (Diffie-Hellman key exchange) extension into the Extensions folder. If you want Guests to access other directories, then the folder will have to be set as a Shared Folder (Get Info window on the folder) along with changing the Sharing and Permissions in the bottom part of the Get Info window. These settings can be configured in the Finder directly or within the Sharing pane of System Preferences.
Certain Mac OS X features
For situations which have two TCP/IP connections, ensure that the connection to the Internet has the Router Address field filled out, otherwise it won't be able to locate the router; because OS X can have a LAN on Ethernet for example, yet have WiFi out to the Internet. In this instance, leave the Router Address field blank in the Ethernet (if manually configured), and the DHCP setting in the WiFi configuration will automatically resolve the router address which has Internet access.
To share the Mac OS X's Internet connection over the network, enable Personal Web Sharing in the Sharing pane of System Preferences. Click the Internet tab. Set "Share your connection from: _____" to Airport, FireWire, Bluetooth or whatever is not Ethernet. Set "To computers using" to Ethernet. It is not possible to share an incoming Ethernet connection to an outgoing Ethernet connection: use a router for this instance.
Dual TCP/IP config (10.5) |
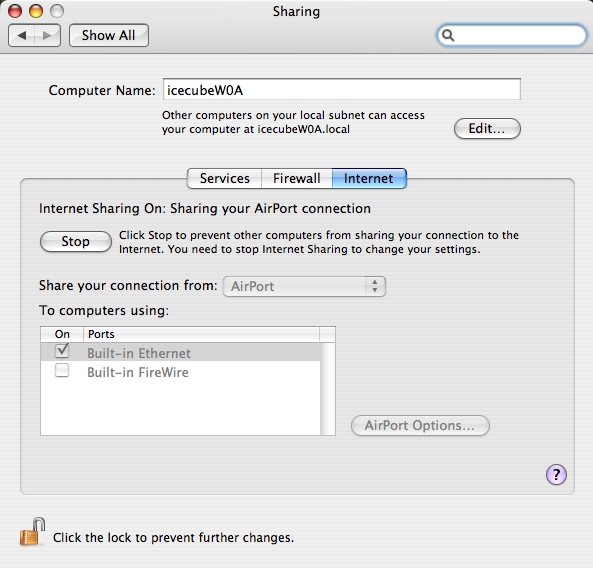 Internet Sharing config (10.4) |
10.4.11 Network pane with dual TCP/IP |
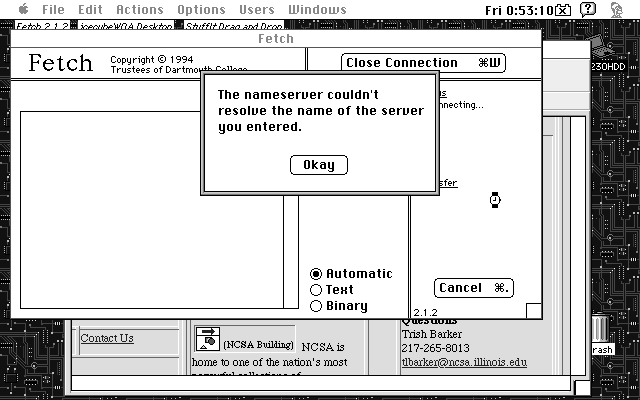 Port 80 issue (7.6.1): Fetch and Homer 0.94 can't connect but Mosaic 2.0.1 can |
Note that certain Mac OS versions will only accept Port 80 HTTP traffic: it is not known at this time what the OS limitations are at this time, although 9.2.2 on an iMac G4 800MHz did not experience this issue. Only HTTP, FTP and IRC ports were tested, others may slip through, a port scanner could probably figure out what the limitations are. Other computers running Ubuntu, OS X or Windows should work fine. Setting the host computer to manual addressing and the client to DHCP ought to work, though testing indicated that MacTCP can work as well.
The client computers accessing the shared Internet will be assigned internal IP addresses as usual, but will share the external IP address with the host. For example, if the external IP address on the host Mac is 204.56.127.24, then the clients will also have this external address. (The image at top left shows a DNS address of 192.168.0.1, which is the address of the modem. The WiFi is enabled with DHCP and is going through a router with an address of 192.168.1.1.) For a manual client configuration, set the Internal IP address to one compatible with the host (i.e. a host of 192.168.2.2 and a client of 192.168.2.3), set the subnet mask 255.255.255.0 and the router address (gateway) and DNS server to whatever the host designates. Try using DHCP or a different computer to find out what the relevant settings are supposed to be for a manual configuration if you're using MacTCP (or use ifconfig from a Terminal window).
Beyond Mac OS X 10.5 Leopard
To enable file sharing with legacy systems with these platforms we'll have to make a slight change to the underlying operating system's AFP server program. Don't worry, it will be distilled down to Novice level. All credit goes to the users here, the actual process is explained on page 3, and has some technical detail which Expert users will appreciate.
Mac OS X 10.6 Snow Leopard, 10.7 Lion, 10.8 Mountain Lion, 10.9 Mavericks and 10.10 Yosemite
For this operation, the AppleFileServer.app from 10.5 Leopard will have to be obtained. There are two ways of doing this: extracting it from a 10.5 install and then there is using a utility like Pacifist to extract it from the 10.5.8 Combo update from Apple. This section will go along the path of extracting it from a regular install. The procedure in twenty-five words or less is: Downgrade the AppleFileServer.app by copying it from 10.5 Leopard to the OS X 10.6 through macOS 10.14 operating system. The later OSs will be reviewed below.
Open System Preferences. Turn off File Sharing on the left hand side. Open the Leopard volume in the Finder, then navigate to the System folder, then Library, and lastly CoreServices. Keep this window on hand, then open the same path on the newer platform's volume at /System/Library/CoreServices. Drag the newer version of AppleFileServer.app to the desktop to copy it, then right-click (or Control+click for one-button pointing devices) and choose "Compress AppleFileServer". Drag the result, AppleFileServer.zip back into the newer System's directory, |
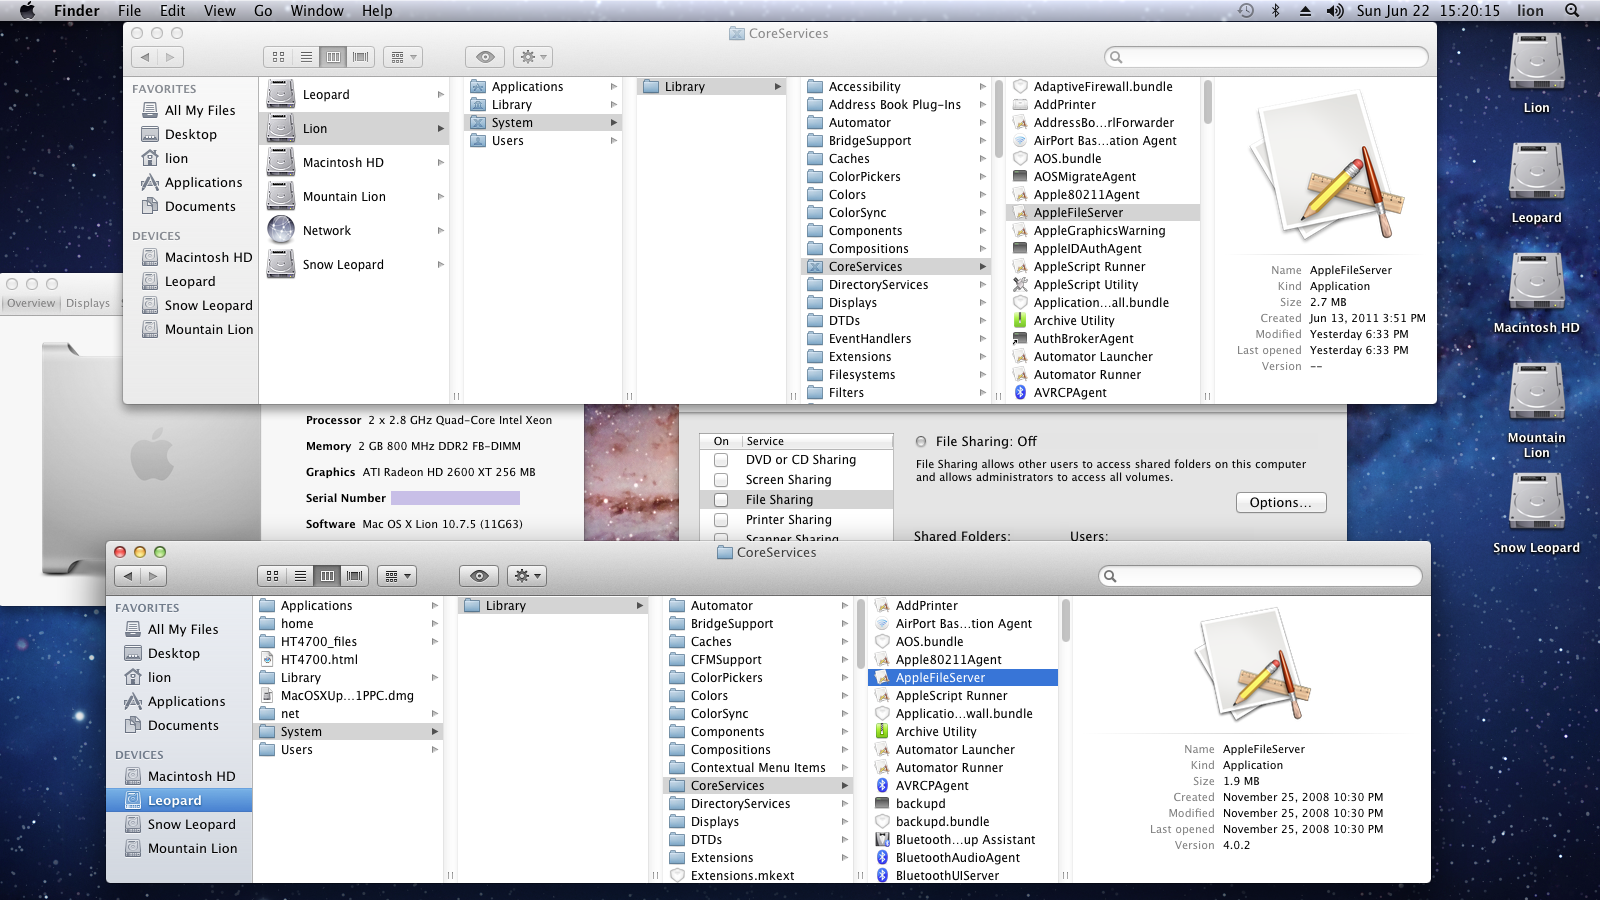 Both locations shown: 10.7.5 on top, 10.5.6 on bottom (10.7.5 running) |
Assuming the system has already been configured with the appropriate interface in the Network control panel (it's a lot like 10.5), simply turn File Sharing back on and from there, the system is ready to be mounted on a older Mac client with Mac OS 8.0 or greater. Advanced users: Compressing into the Zip archive removes the ownership of the ... directory from its ownership by root. sudo chown root -hR AppleFileServer.app could do the trick, but attempts by the author to verify the integrity of said command line entry were not exactly successful. Linux folks: Mac OS X programs, like TextEdit.app, are technically directories with various binary files inside. Most replies indicated preference for using Disk Utility's Repair Permissions widget. Another valid method is to just use tar with the preserve permissions argument. In testing, the feature worked fine without fixing the permissions.
Caution: These systems do not like Classic Mac files with type/creator codes and stuff like icon data. In some cases it will say that a disk error has occurred just before it finishes copying the file. The easiest way to check this is to copy a small program like Disk Copy 4.2 into the target directory and see if it brings up the error dialog. In testing, Mac OS 8.1 would simply copy very slowly, about 200KiB/sec or less, whereas Mac OS 9, 9.1 and 9.2 would transfer at normal speed, then pop the error. It would be wise to use Stuffit, Compact Pro, MacBinary or BinHex style encoding for insurance reasons. The testing indicated that raw programs like Disk Copy 6.3.3, Marine Aquarium 2, TomeViewer 1.3D3 and so on would cause this error, but .dmg, .bin, .sit, .hqx, .rtf and .txt files were fine.
10.7 and 10.8 have a reduced set of enabled UAMs (User Authentication Modules, basically methods of authentication, such as cleartext, two way random number exchange, DHX, and so forth) which could preclude the mounting of certain older machines, such as older NAS units. Try reading this Apple KB on enabling less secure UAMs. As part of testing for this Guide, running through the procedure did not change any of the restrictions of servers (such as 7.5.5, 8.1, 7.0.1, et cetera) listed in the Chart: the procedure doesn't work with 10.5 or 10.6, yet 10.9 might apply because it works with the command to read the list of disabled UAMs.
Mac OS X 10.11 El Capitan, macOS 10.12 Sierra
System Integrity Protection, or SIP is a type of security system that is designed to protect against modifications to certain features, components or properties of the base OS X system, first deployed with 10.11 El Capitan. It sits at an effective level higher than the root user as it restricts modifications to many parts of the system. Since one of the protected directories is /System/Library/CoreServices, SIP must be disabled for the above operation to work as even the root user can't modify these protected directories, however the procedure is the same. Later version of macOS, particularly macOS 11 Big Sur are different, but we'll get to that in a minute.
Turn off File Sharing first, then we'll have to disable SIP. Since no Apple M1 or above "Apple Silicon" machine supports anything below macOS 11 Big Sur, we won't have to worry about those machines (which have a different recovery entry process). To disable SIP, reboot the system, then hold Command + R keys until an Apple logo is shown. This boots the system into a recovery mode. From the Utilities menu, choose Terminal. Type the following to disable SIP:
To turn on SIP, replace disable with enable. Type reboot to immediately reboot the system with the changes applied.
From there, AppleFileServer.app can be copied over to /System/Library/CoreServices/ as above, then File Sharing can be started. Make sure to tick the box for "Share files and folders using AFP" in the Options prompt, which is to the right side of the File Sharing window.
macOS 10.13 High Sierra and 10.14 Mojave
Starting with 10.13 High Sierra all solid-state internal boot drives were updated from HFS+ Extended partitions to APple File System (APFS) formats. In 10.14 Mojave, standard hard disks got converted too. APFS file systems cannot be shared with the Apple Filing Protocol; only NFS or SMB/SMBX compatible networking is possible with APFS volumes. There is a workaround though, but only just, and it certainly won't last long.
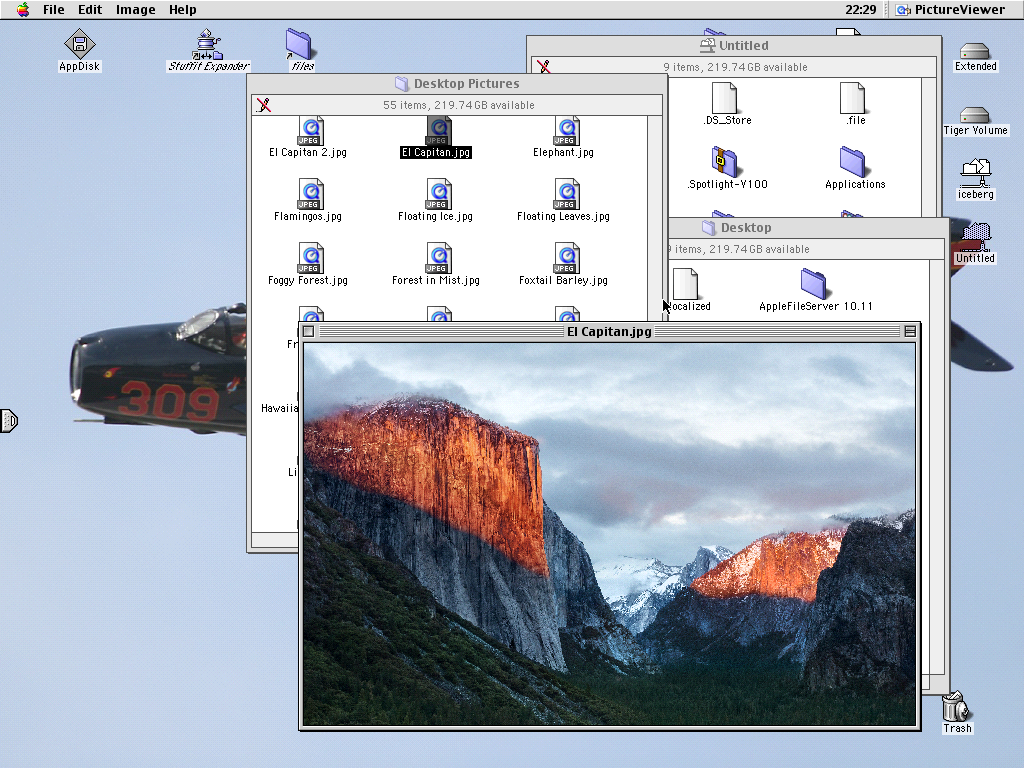 Mac OS 9.2.2 connected to 10.11 (Mac mini G4) |
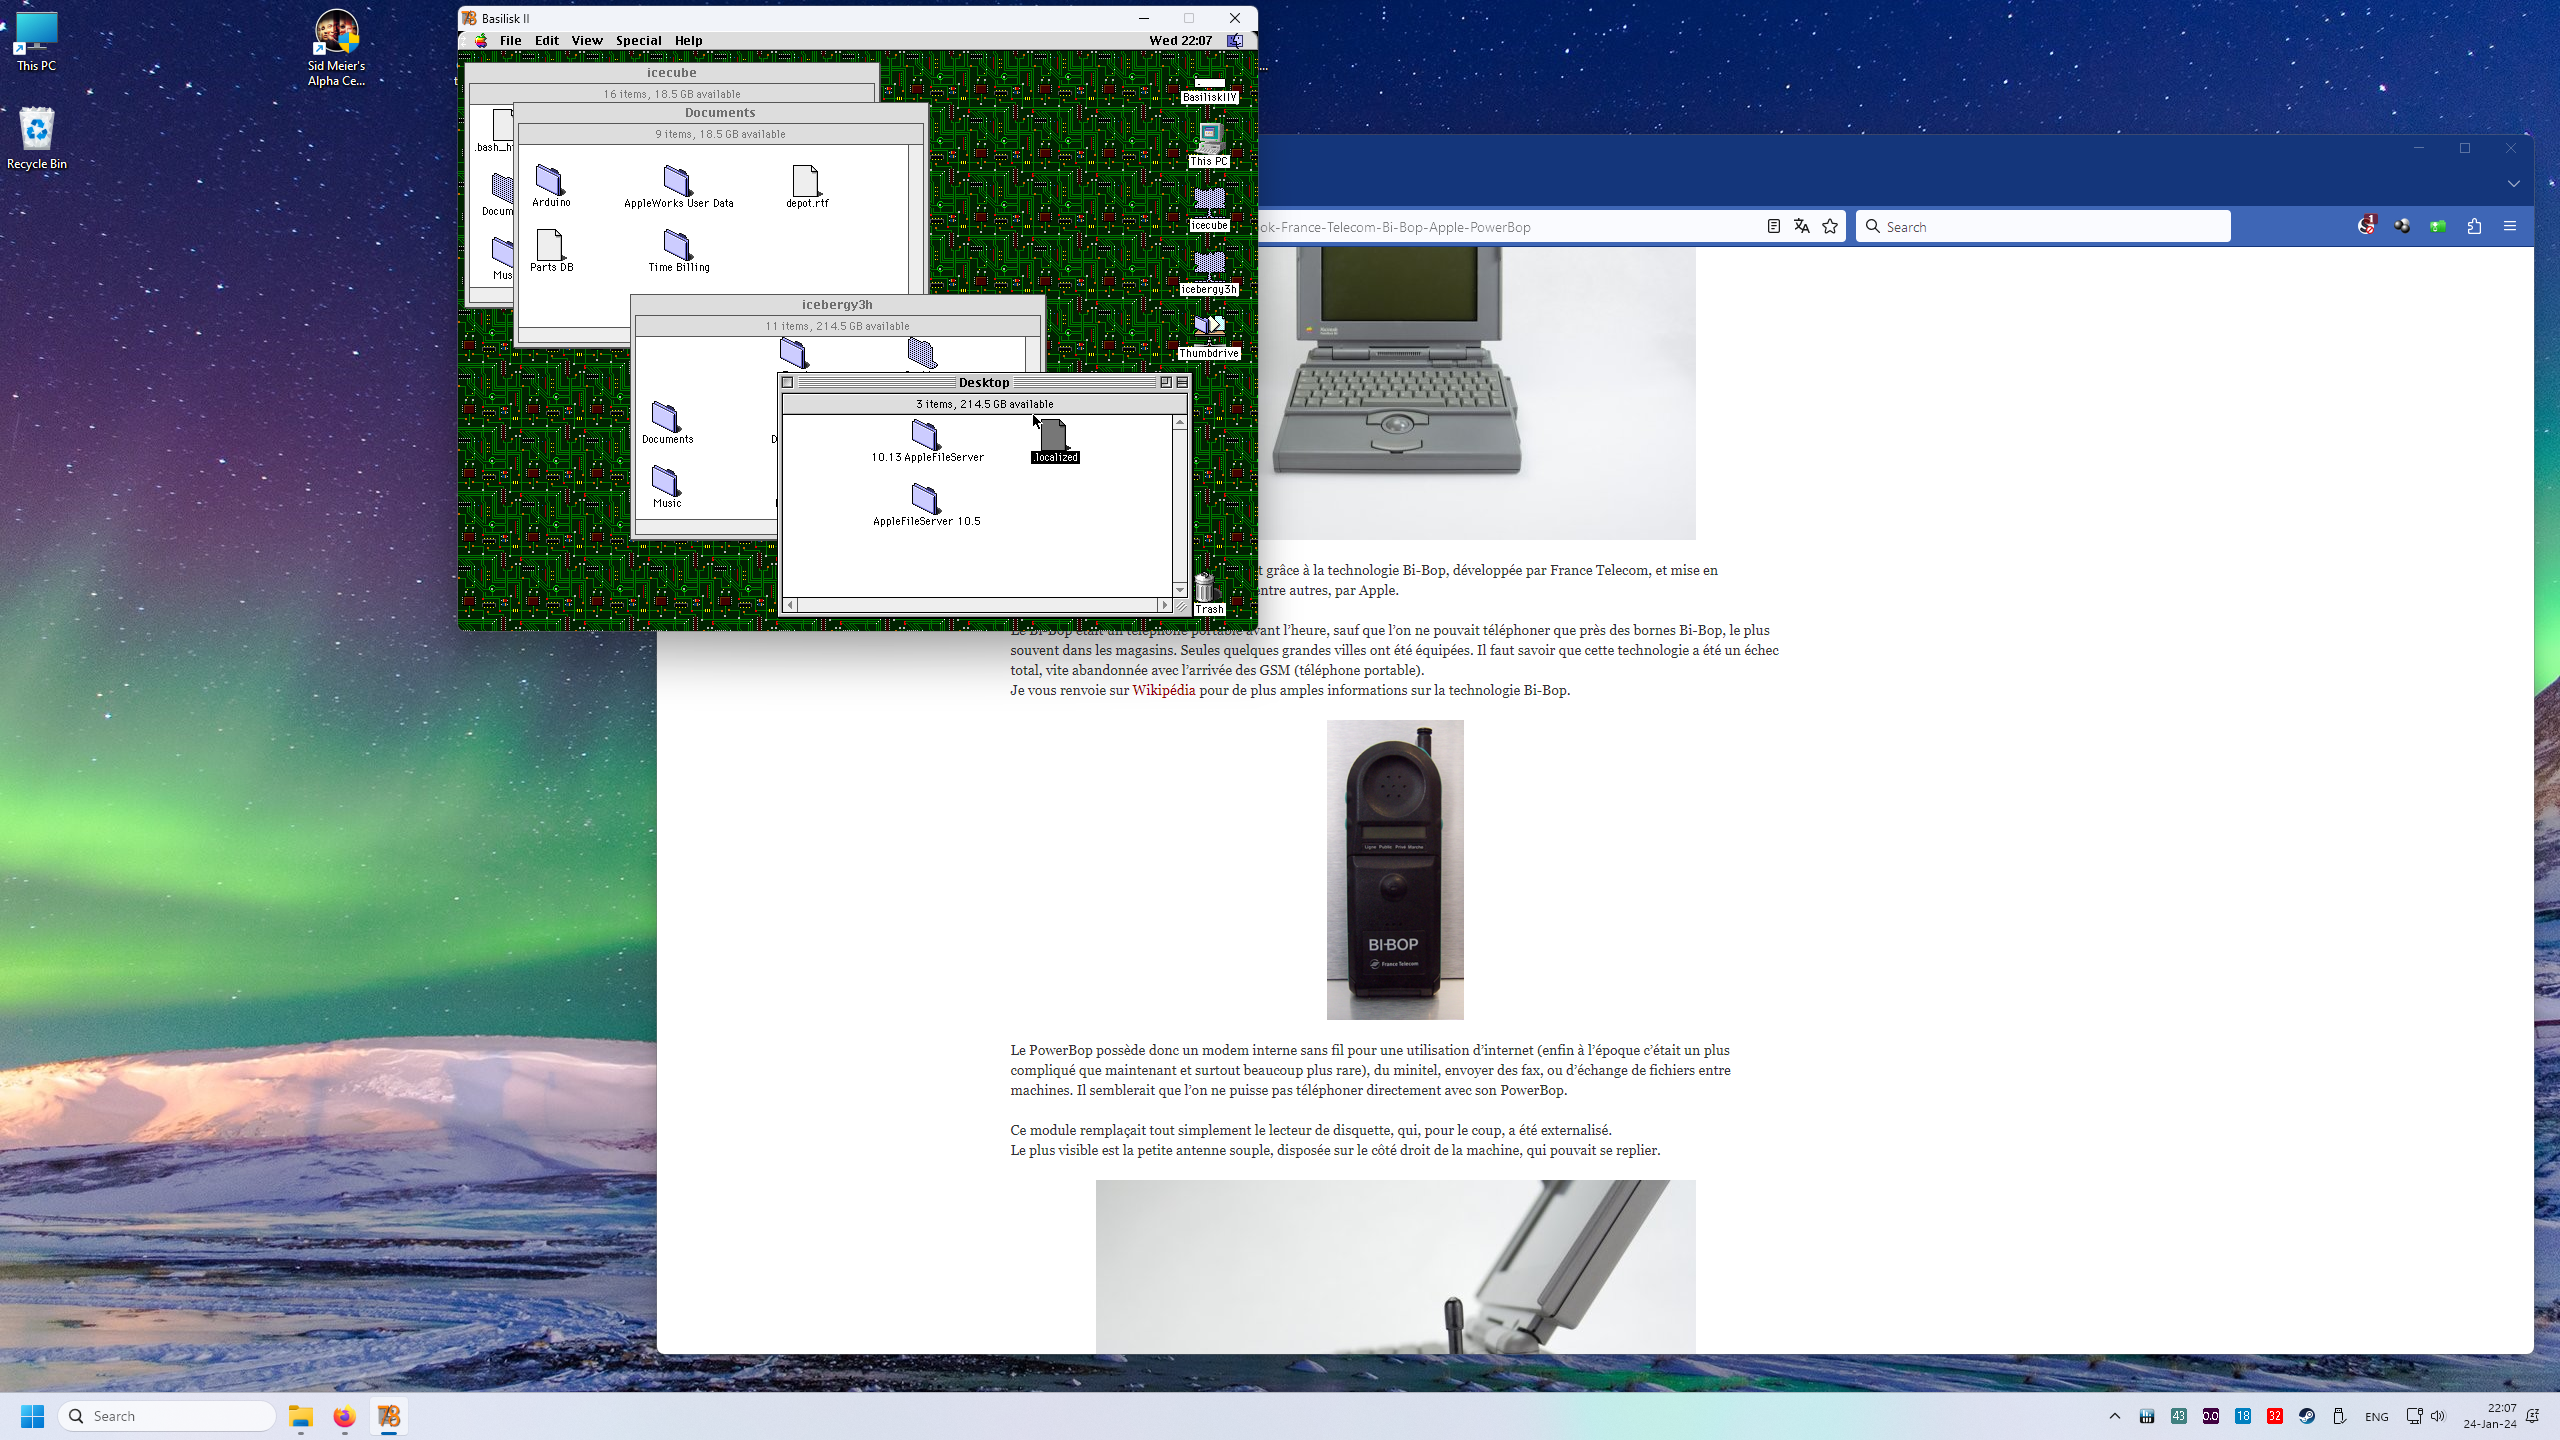 Basilisk II connected to 10.13 and 10.4 Tiger |
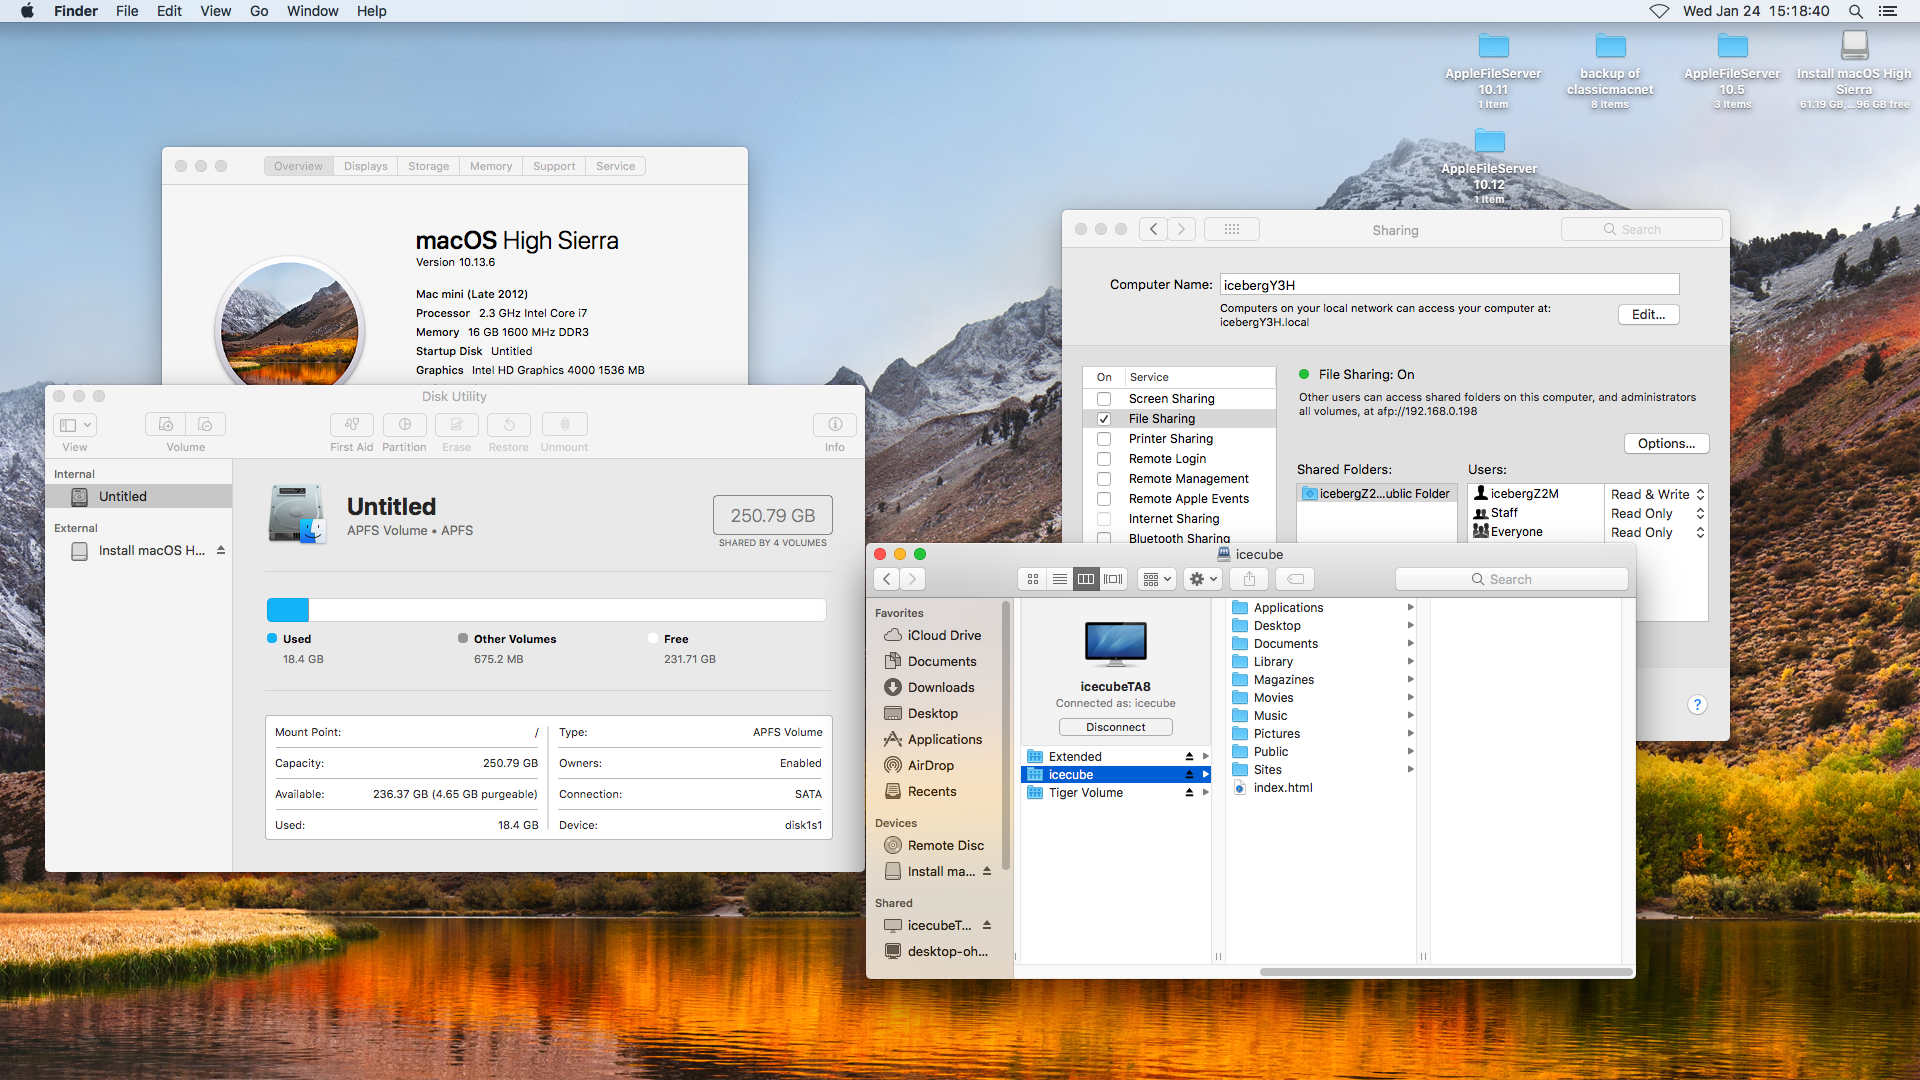 OS X 10.13 High Sierra APFS SSD volume (Mac mini 6,2) |
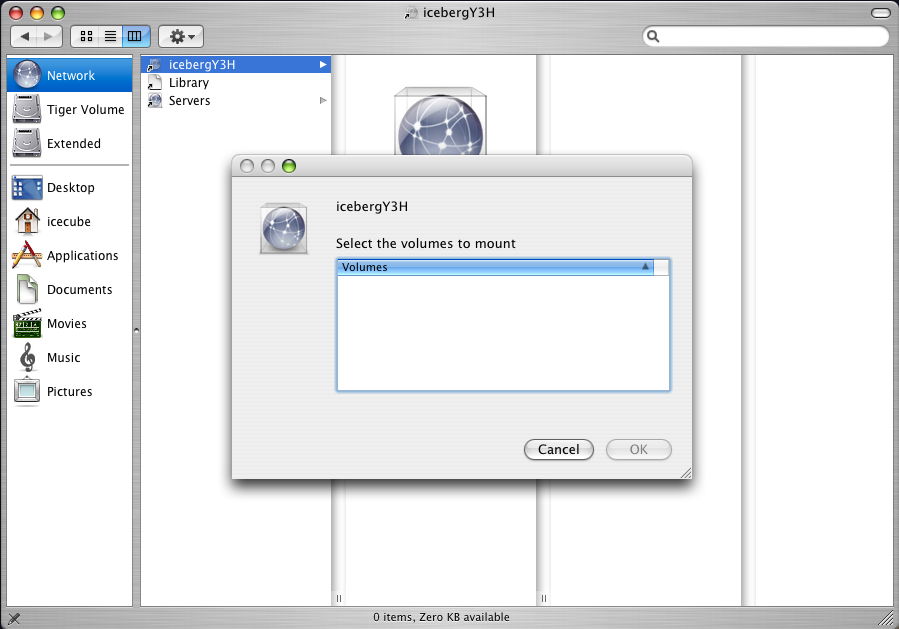 OS X Tiger unable to mount APFS volumes |
If the primary OS volume has been converted or otherwise freshly formatted to APFS, the only option is to thoroughly wipe the disk and start fresh as Mac OS Extended (Journaled) aka JHFS+ Extended. There are a couple ways of doing this -- using the Disk Utility program inside a bootable Installer USB flash drive is probably the easiest since the Installer can be already ready to go. One person reported that they had to boot from 10.12 Sierra, else they got an error, but the author used a 10.13 High Sierra bootable Installer drive and it worked. If you use the Terminal program diskutil to format the drive you may have to zero out the volume, using something like the following:
diskutil eraseDisk JHFS+ Untitled /dev/disk1
...otherwise it can make a fuss about erasing the disk. From here, you can have a go at this method, which is probably the smarter way to do it.
One problem is that the bash shell in the Recovery mode is not fully featured. man doesn't work, open doesn't work, and it's rather limited. Other users have specified Installer commands that used open but in the author's experience, they didn't work. Some specified single-dashes (-) for the arguments rather than double-dashes (--). Your experience may be different.
Since Mac programs in OS X are technically directories, you have to browse inside the "directory" to start the installation process. The following commands were successful at starting the Installer and forcing HFS+ Journaled as the file system format once the disk was wiped:
cd "Install macOS High Sierra.app"/Contents/Resources
./startosinstall --agreetolicense --converttoapfs NO --volume /Volumes/Untitled
If you have System Integrity Protection enabled, reports indicate that the --volume argument may not work. From there, install away, disable SIP as shown earlier, copy over the AppleFileServer.app, and continue on.
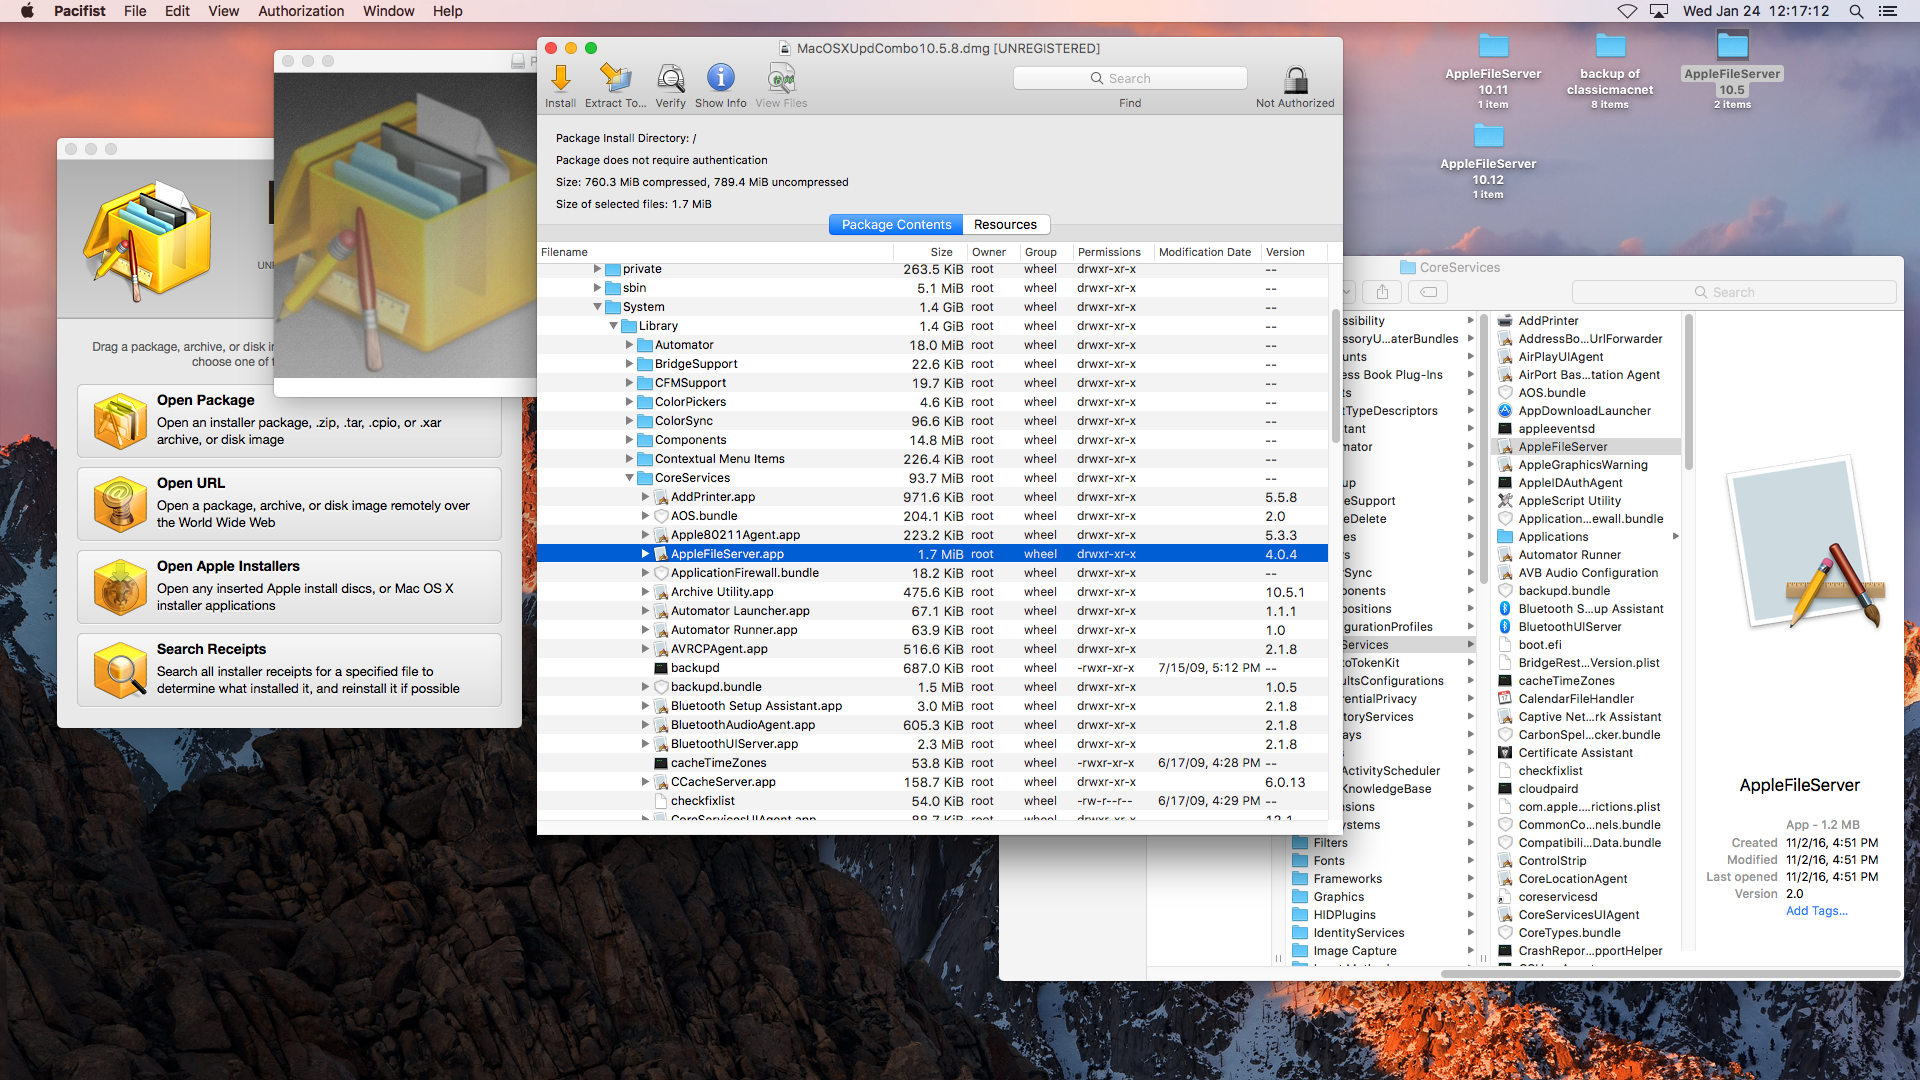 Using Pacifist (10.12 Sierra) |
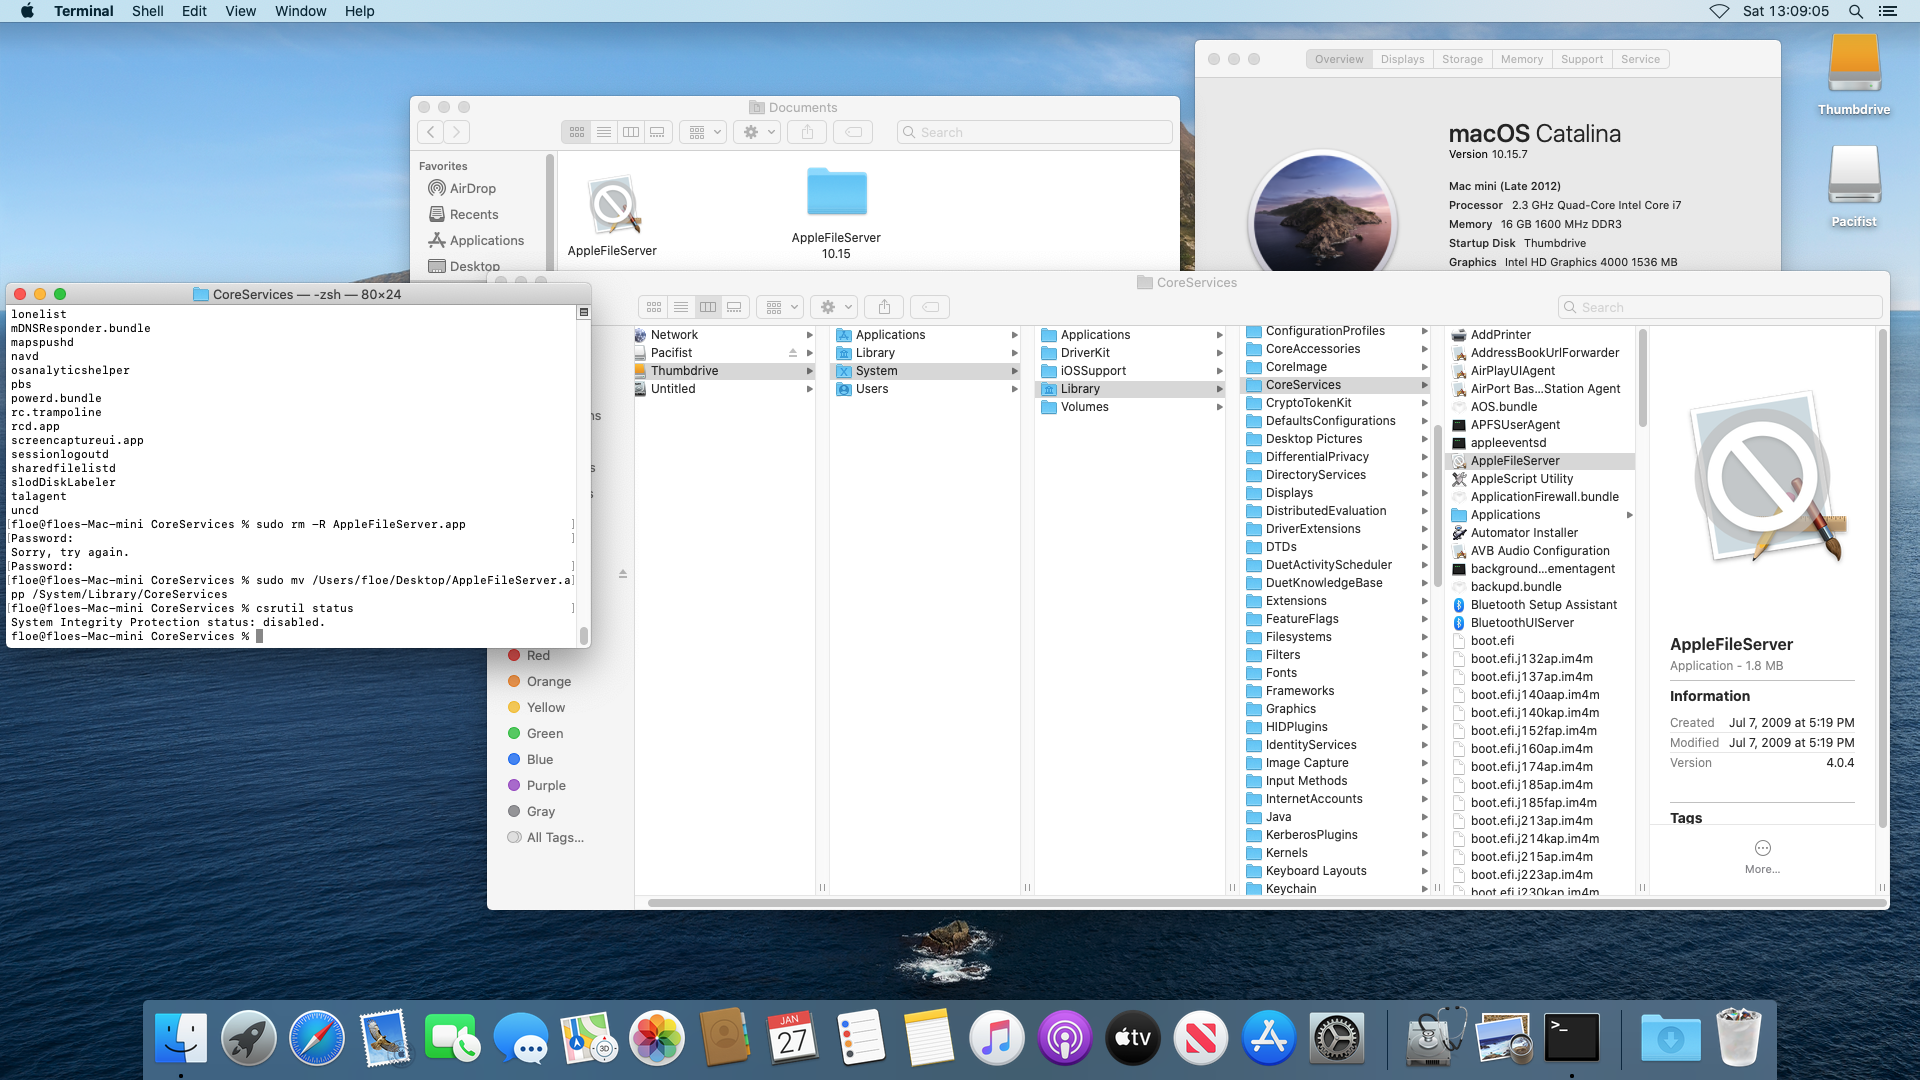 OS X 10.15 attempt with AFP (note crossed out icon) |
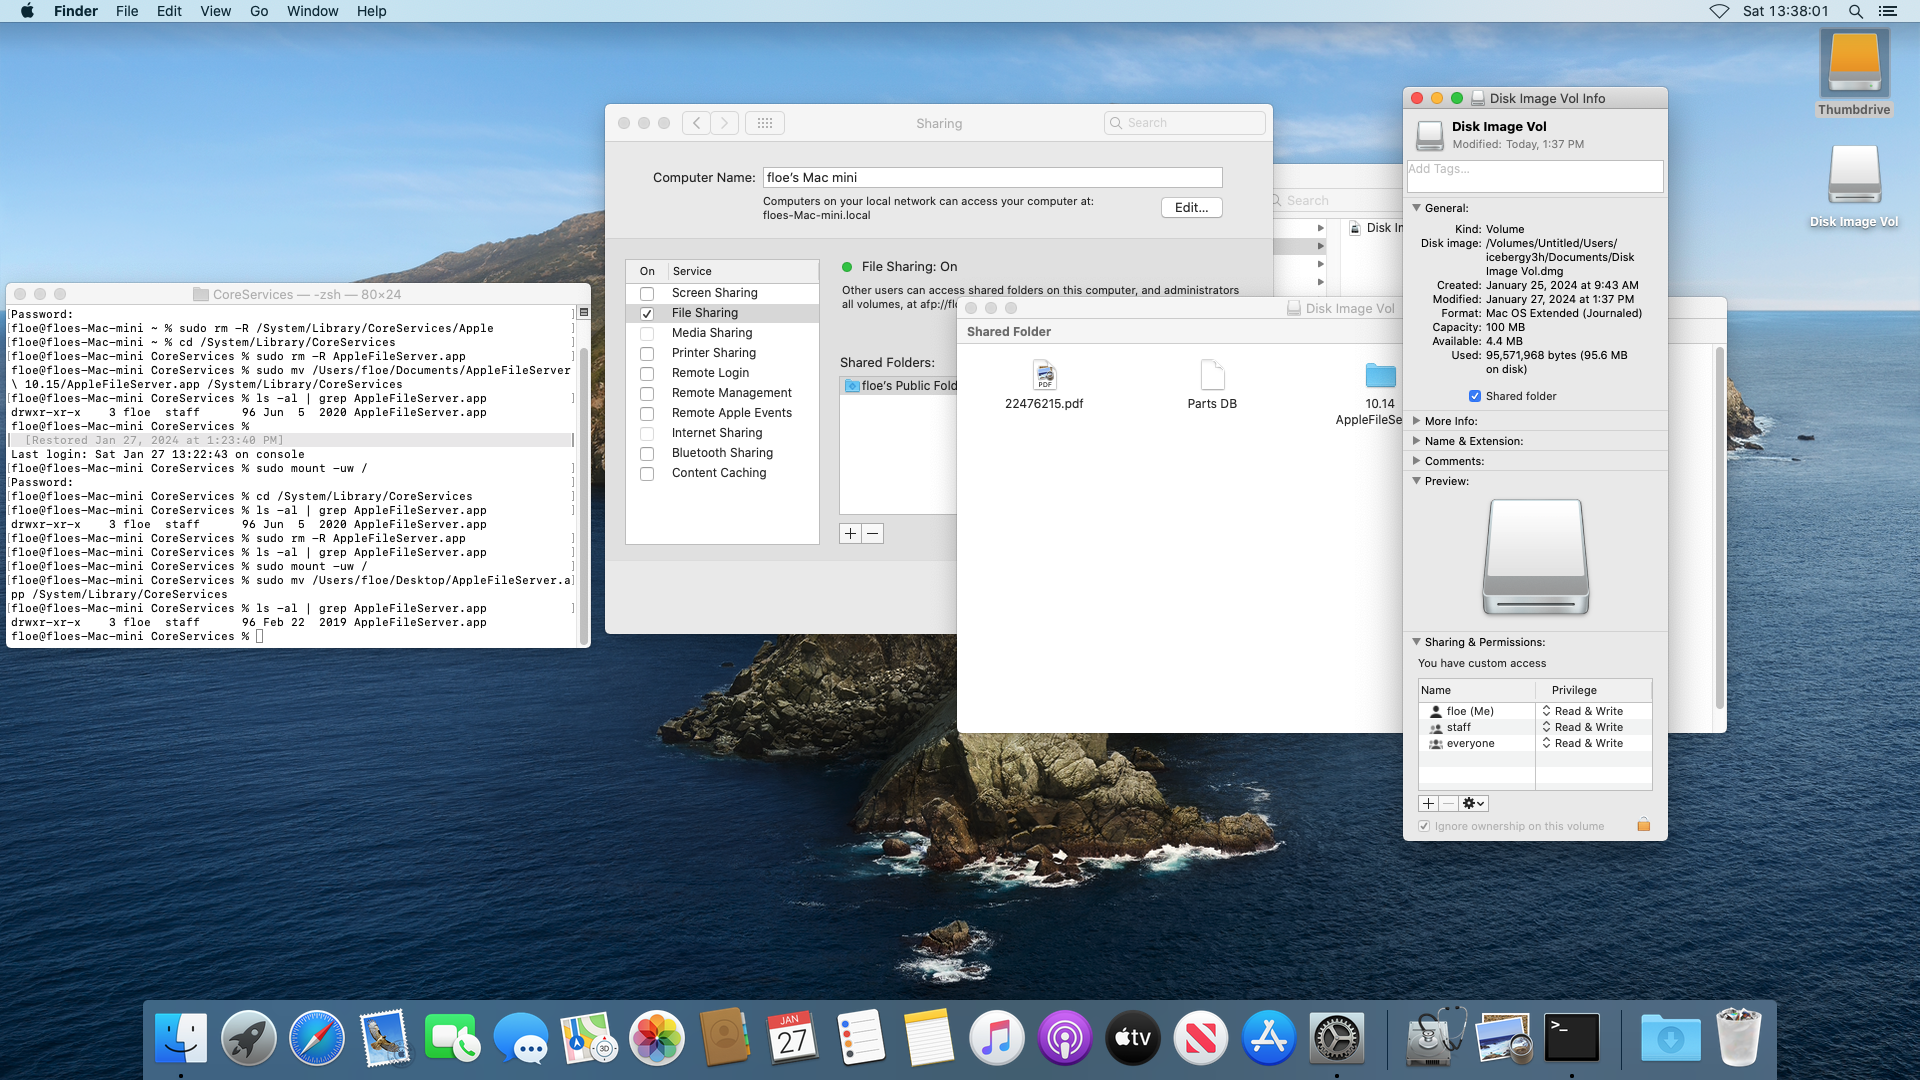 OS X 10.15 forced attempt unsuccessful |
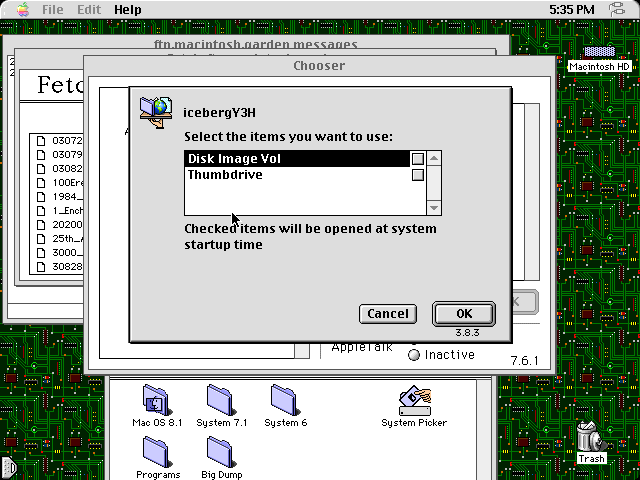 Mac IIci with 8.1 trying 10.14 (see note) |
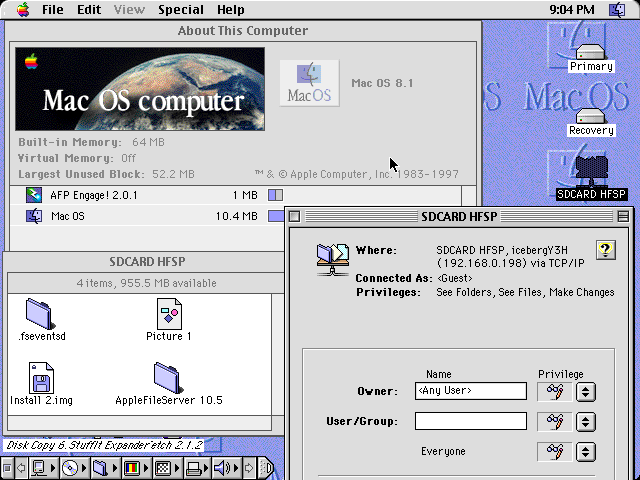 Mac IIci using AFP Engage! with 10.14 server |
Certain 68030 Macs can use ResEdit hacks or stuff like Born Again to use Mac OS 8. It's sluggish and isn't a happy camper: opening the Chooser is notable for taking around 20 seconds to open and it can't open a connection to these newer machines without failing to the desktop with an error display. Like 68040 and NuBus/LC bus PowerPC machines the process doesn't work for reasons explained in the footnotes for The Chart and a PCI PowerPC processor machine is required. However using AFP Engage! (see the ShareWay IP section earlier) does allow it to work, but it not recommended for a reason: system stability. It might work, or it might not work very reliably.
Although some courageous individuals have installed 10.14 Mojave with the HFS Extended file system, it is not for the faint of heart and the operating system was not designed for it. The most promising method involves using something like Carbon Copy Cloner (CCC) to copy the entire contents of an APFS volume with 10.14 Mojave onto a HFS Extended file system volume. The difficulty of doing this successfully was increased in 10.15 Catalina and as such, this Guide will draw the line at 10.13 High Sierra as being the last one to practically run on HFS Extended and share the boot volume. The screws got tightened further with 10.15 Catalina, whereby the boot volume is split into System and Data compartments, and altering elements of the System sub-volume is more difficult. In macOS 11 Big Sur the entire file system is cryptographically signed and uses snapshots (like Windows has done for years) to revert to previous states: and if that's not possible, the system can refuse to boot. | 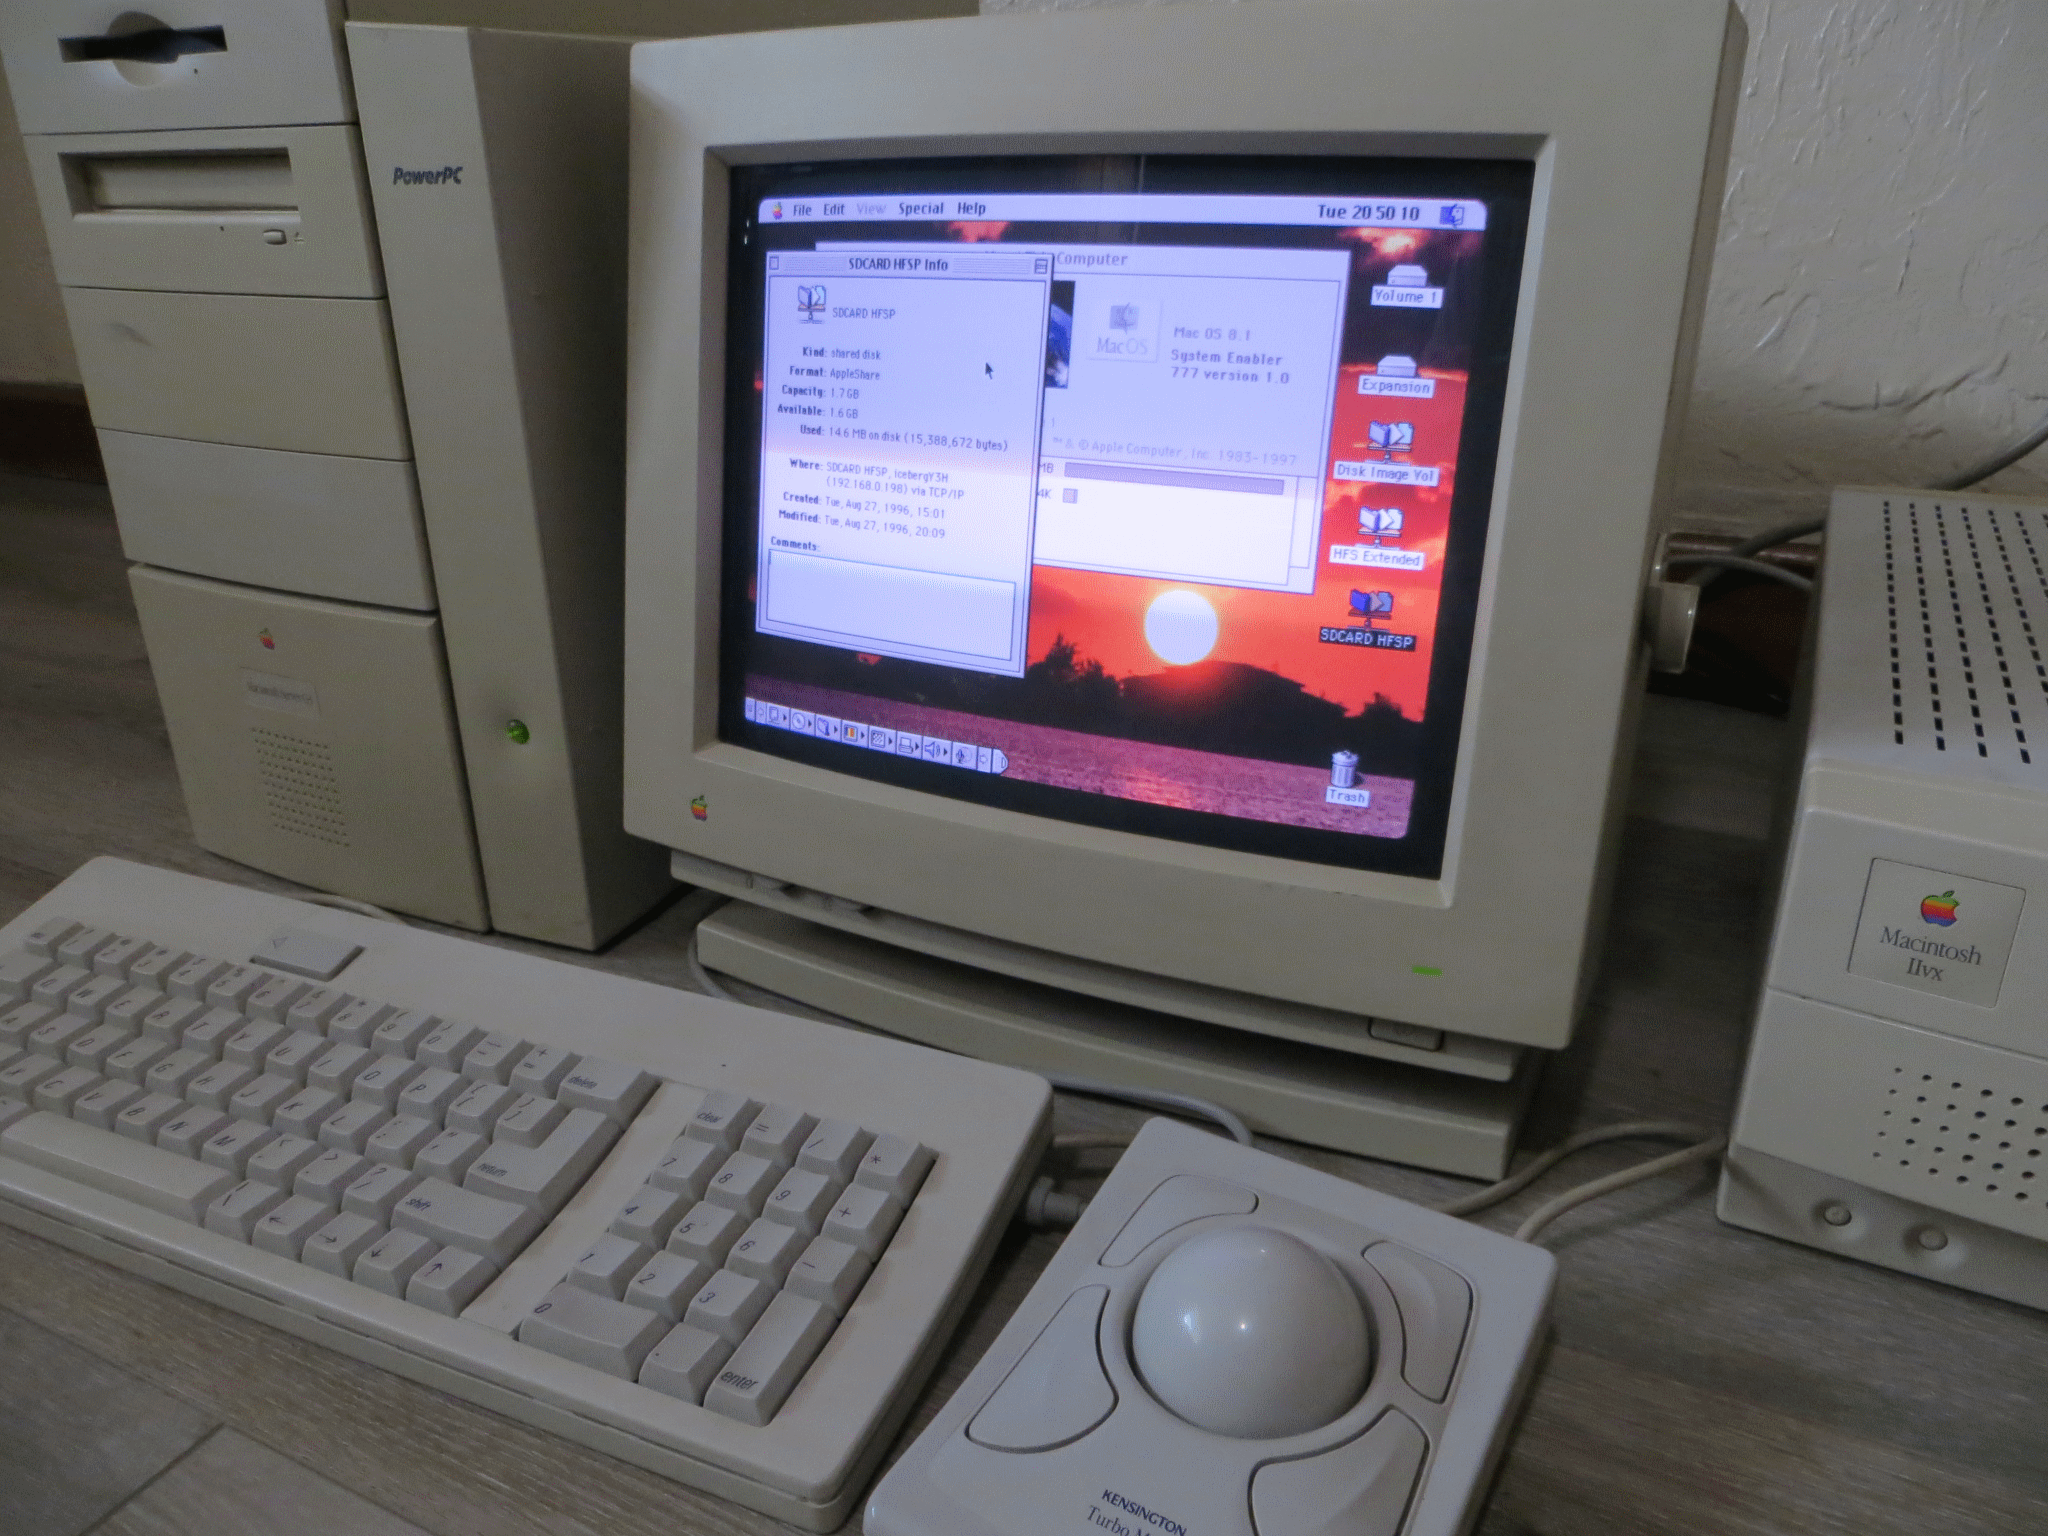 8.1 connected to 10.14 (Server G3) |
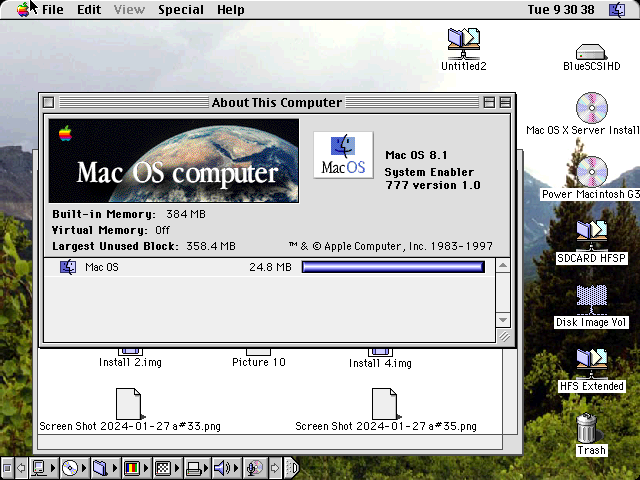
If you are willing however, you don't have to share the boot volume. Since the boot volume has to be APFS, it doesn't mean you can't share a HFS Extended partition if you have one, or even a HFS Extended disk image that is mounted: but the system may require a .img or .dsk to be converted to .dmg, use Disk Utility to do that by selecting Convert... from the Images menu. Since these newer systems cannot format a volume as HFS or HFS Extended non-journaled, this may be a problem, but using gParted on a Linux system can get around that as it can format a wide range of different file system types and partition sizes. Installing support packages hfsplus, hfsutils, or hfsprogs are usually required for that. An alternative would be share the entire volume such as a USB flash drive, which can also be formatted with two partitions, one with something common like exFAT and a smaller HFS Extended partition. However this isn't standard, but it does work, and gParted is good at doing that kind of stuff.
To share a disk image (mentioned earlier in the Notes for the Chart as disk image bridging), open Disk Utility, then create a new disk image, with a format of HFS Extended. Set the size as desired, then mount the disk image. Chose Get Info on the volume, then add it as a Shared Folder (alternative: add it to the Shared Folders in System Preferences, which is probably better). The same concept can be applied to a USB flash drive, hard drive, SD card on compatible Mac models equipped with one or any other volume that is formatted as HFS Extended. From macOS 10.14 forward this is the only way to share out to other computers via AFP.
macOS 10.15 Catalina and macOS 11 Big Sur
macOS 10.15 Catalina is a bit different than 10.14 Mojave, but is still doable. However no Mac that runs OS 9 or before can connect to it. This is because 10.15 Catalina requires all programs to be 64-bit native, and it cannot run 32-bit programs. Since the 10.5 Leopard AFP file server is a 32-bit program, it cannot start up the file server element and thus 10.15 Catalina can only serve OS X clients. If you wanted to try anyways, the first thing to do is disable SIP as earlier, followed by something like this:
cd /System/Library/CoreServices/
sudo cp AppleFileServer.app ~/Desktop
sudo rm -R AppleFileServer.app
sudo mv ~/Documents/AppleFileServer.app /System/Library/CoreServices/
Since 10.15 Catalina splits the volume into Data and System sub-volumes, and then makes the System read-only by default, the first command makes it read-write enabled: but this read-write property does not appear to extend to the Finder, and is restored as read-only on reboot. A Catalina server may not provide access to files through AFP without allowing AppleFileServer access to the whole disk. To do this, open up Security and Privacy pane in System Preferences, click Privacy, then Full Disk Access. Click on the plus icon (+) to add /System/Library/CoreServices/AppleFileServer/Contents/MacOS/AppleFileServer to the list. (Credit goes to the user smockonallama of the MacRumors forums for this information.)
macOS 11 Big Sur removed all elements of the AFP file server and thus 10.15 Catalina was the last macOS version to feature AFP file sharing as a server, but it still has an AFP client. FTP or some other method will be required if you want to use such a machine as a file server. Because of the affair with Apple and Samba, plus Microsoft's jockeying about with SMB2 and SMB3, you may be best sorted with NFS or some kind of network server box or NAS that can serve multiple protocols from the same machine.
Microsoft Windows AFP options
AppleShare Client for Windows was primarily intended for DOS 3.3 or Windows 3.0; a really old PC box is the only way to test these out. See this page on installation and an associated troubleshooting reference for further information on setup.
AppleShare PC, not the same thing as AppleShare Client for Windows, was not designed for Windows 3.0: rather, it was usually deployed on MS-DOS 3.x or MS-DOS 4.0 systems. It functions as a client, and uses a Chooser-esque interface to mount AppleShare servers as MS-DOS drive volumes. But there could be a way to run AppleShare PC on Windows 3.0...though it probably depends which version of AppleShare PC is involved here, since there was AppleShare PC 1.0, 1.1, 1.2, 2.0 and 2.0.1. Cards compatible with AppleShare PC are limited in number, and was usually ran on 286 or 386 systems. Memory can also be a problem. There's a lot of Apple KB articles for AppleShare PC, so odds whatever issue you have might be found by searching the KB databases.
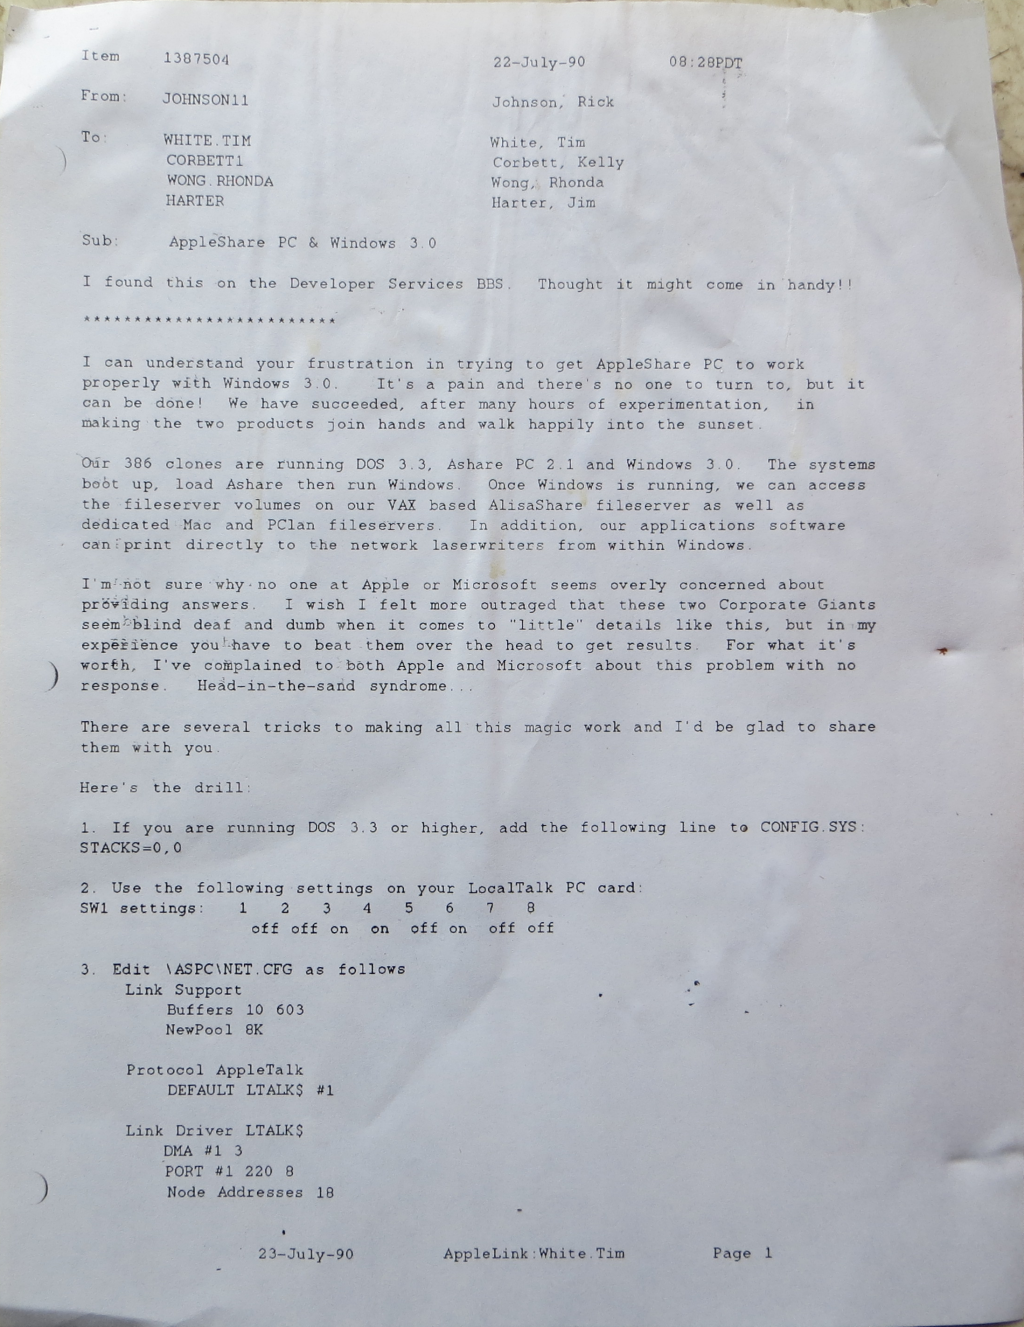
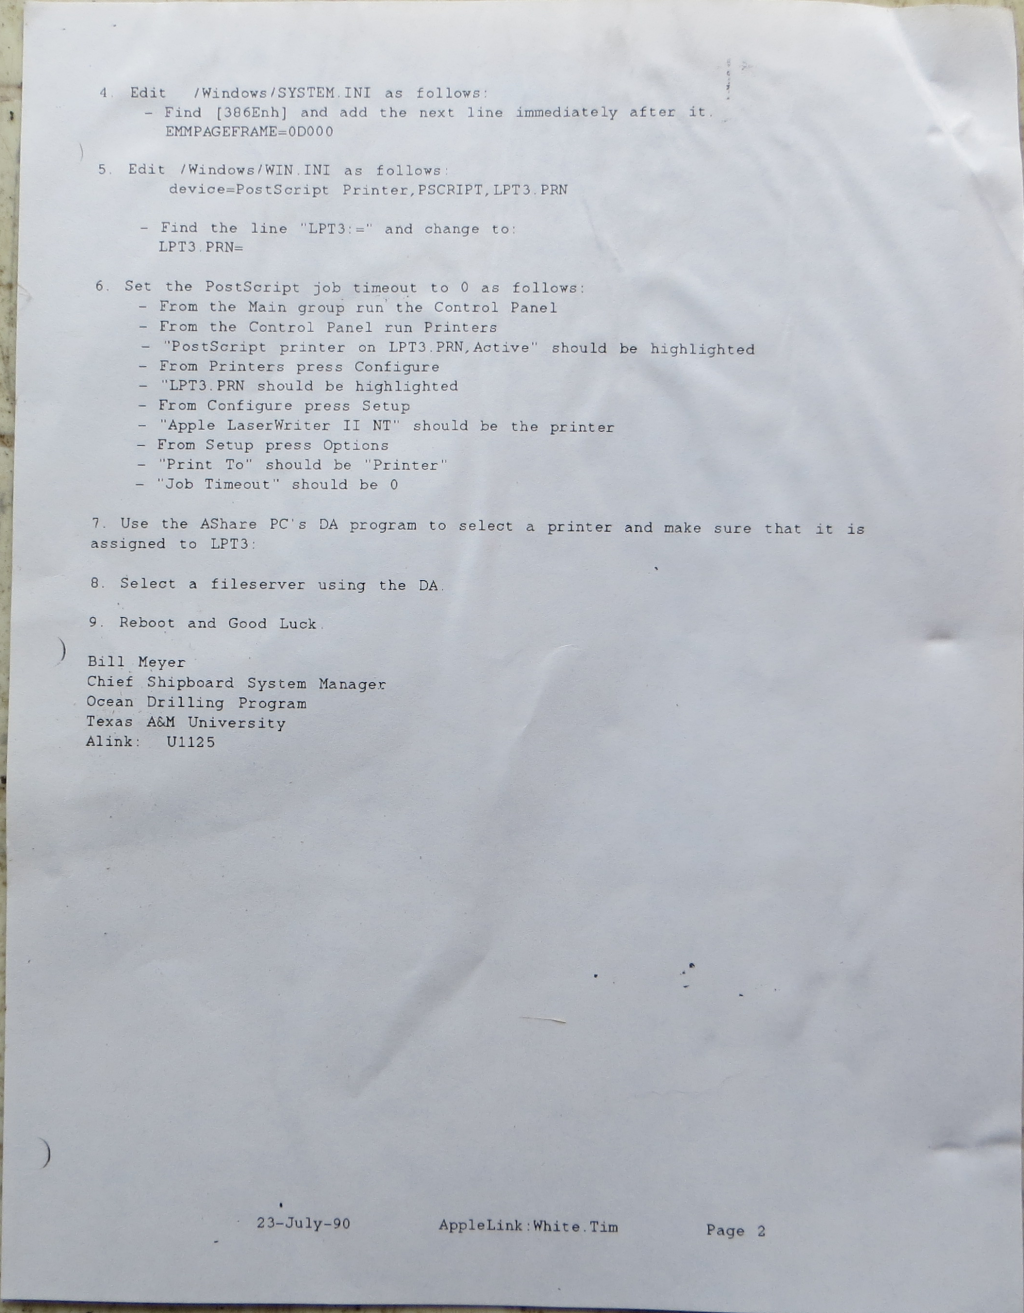
Apple mentions two later AFP clients available for Windows. The first is TSSTalk by Thursby (who later developed DAVE; TSS stands for Thursby Software Systems) which basically disappeared from the Internet and no examples can be found. The next one is PC MacLAN by Miramar which was originally designed for early 386/486 boxes. Earlier versions like version 5.x came on two floppy disks which are old (the box artwork shows Windows 3.1 style windows) and is probably not suitable. A test run of version 6.1 failed to install on a Windows XP and 2000 virtual machine: it's probably meant for 95 or 98, and could be unreliable. Interesting information: It can be very picky about the Ethernet NIC being used, and it apparently supported the Apexx LocalTalk Parallel Interface adapter: further information is unavailable. (Apparently there was also the EtherChain Parallel Interface adapter. A search for more information came up short, it's unlikely it sold well.) |
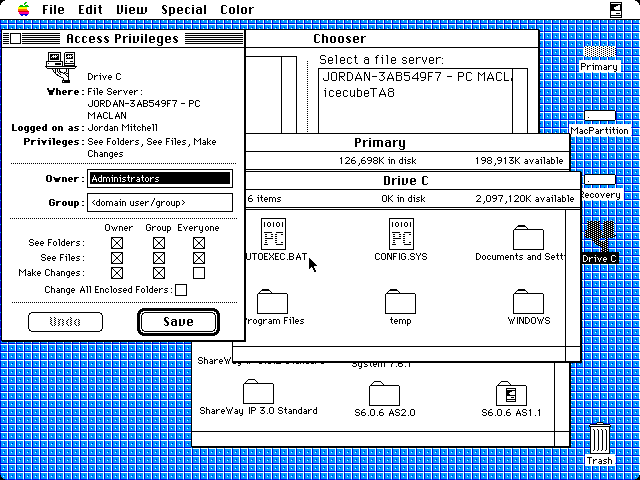 PC MacLAN VM server w/LocalTalk (IIci, System 6.0.6 AS 1.1) |
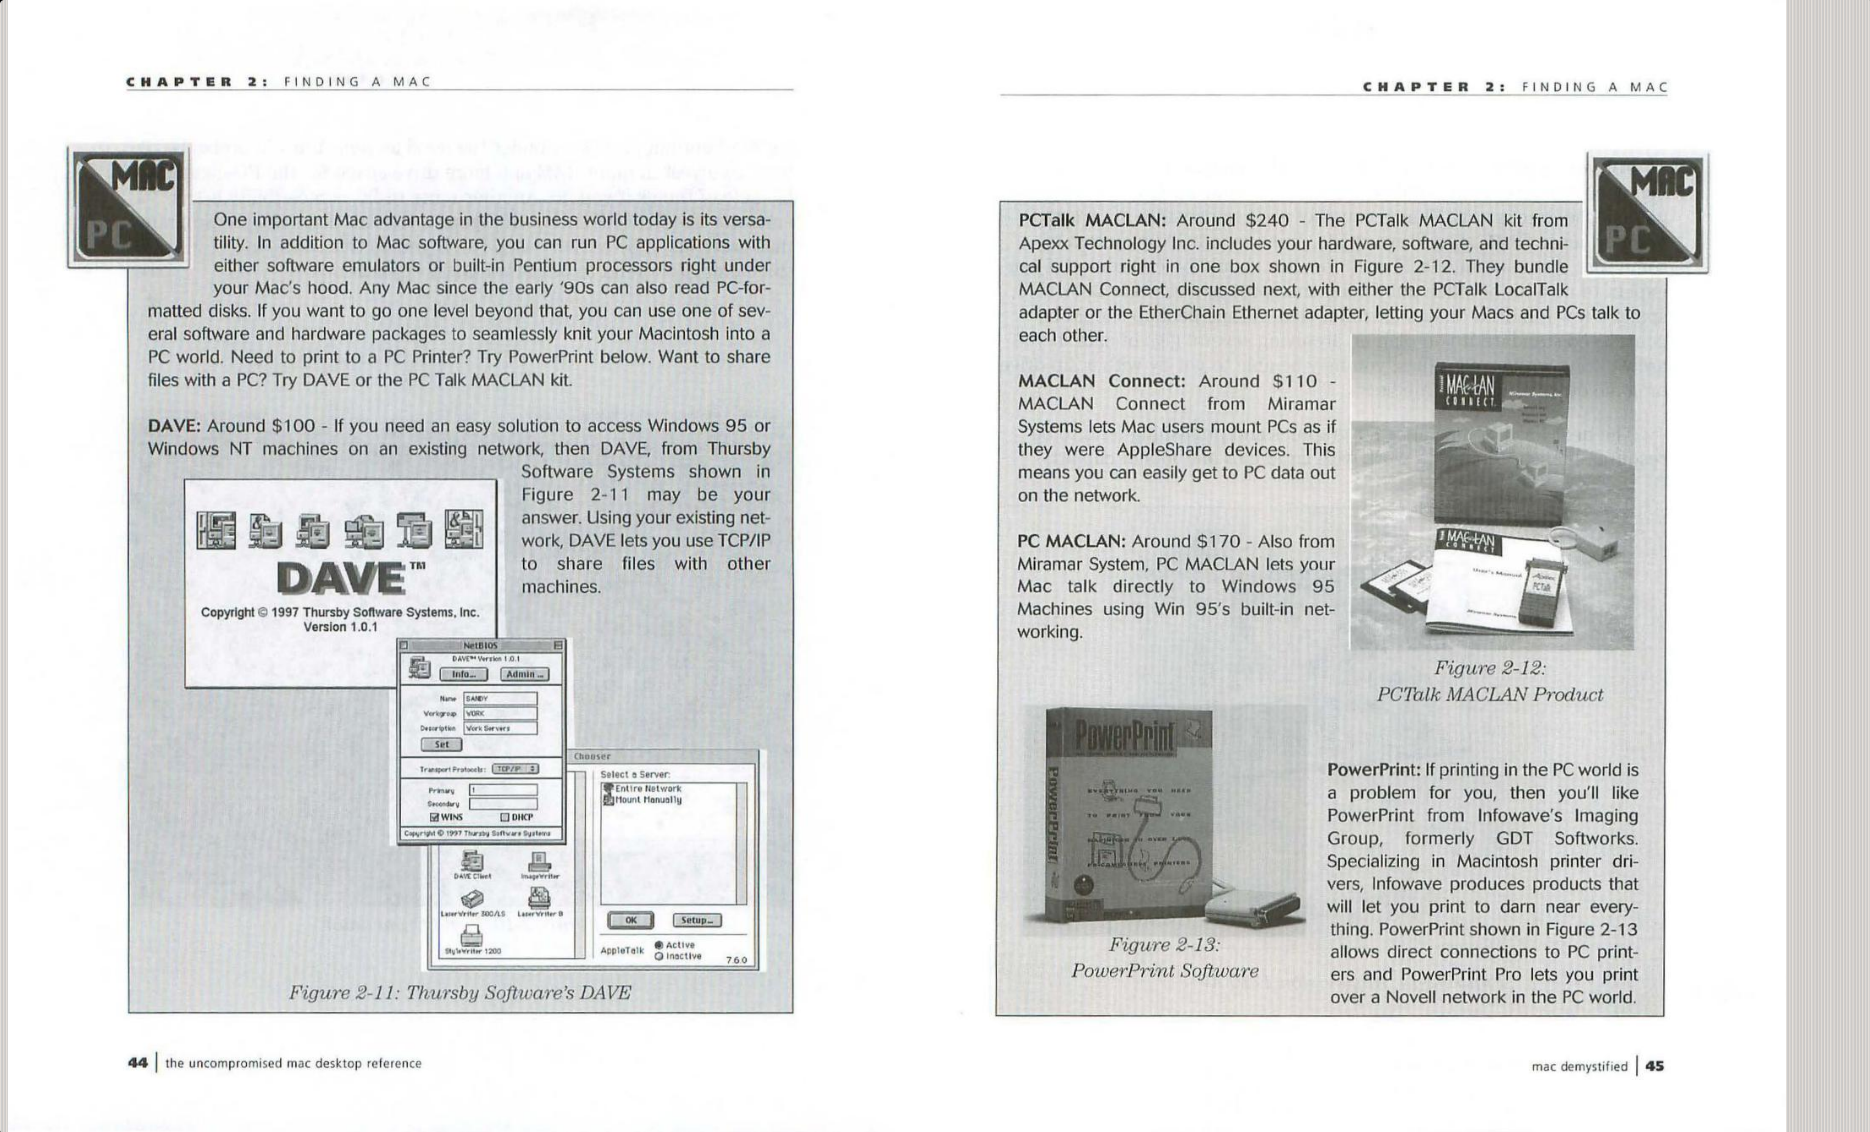
The last version is version 9, which was meant for NT, 2000 and XP. It supports normal AppleTalk and AFP over TCP (using AFP2.2 itself, but compatible with AFP3 to a point), and includes a file server, client and print server. A registration number can be located to allow full use of it, otherwise it's just a demo that closes down after some minutes. It was slow in a VM instance of Windows XP, a real machine might be the same or different. Right click on a server to choose "Login via AppleTalk" if the AFP over TCP function doesn't work, which could be spotty or sluggish: however, a test run with System 6 using AppleShare WS 1.1 was successful, so it should work down to a 512K using S3.3/F5.4. The highest that its client could connect to was 10.4 Tiger with a normal login, 10.5 Leopard would only work as a Guest user and 10.6 Snow Leopard wouldn't work at all. 10.3 Panther was the highest version of OS X that could connect to the MacLAN server. The documentation PDF should cover any questions about getting it going, and assuming things work out fine, it actually seems quite good, even if it's a bit unpolished. |
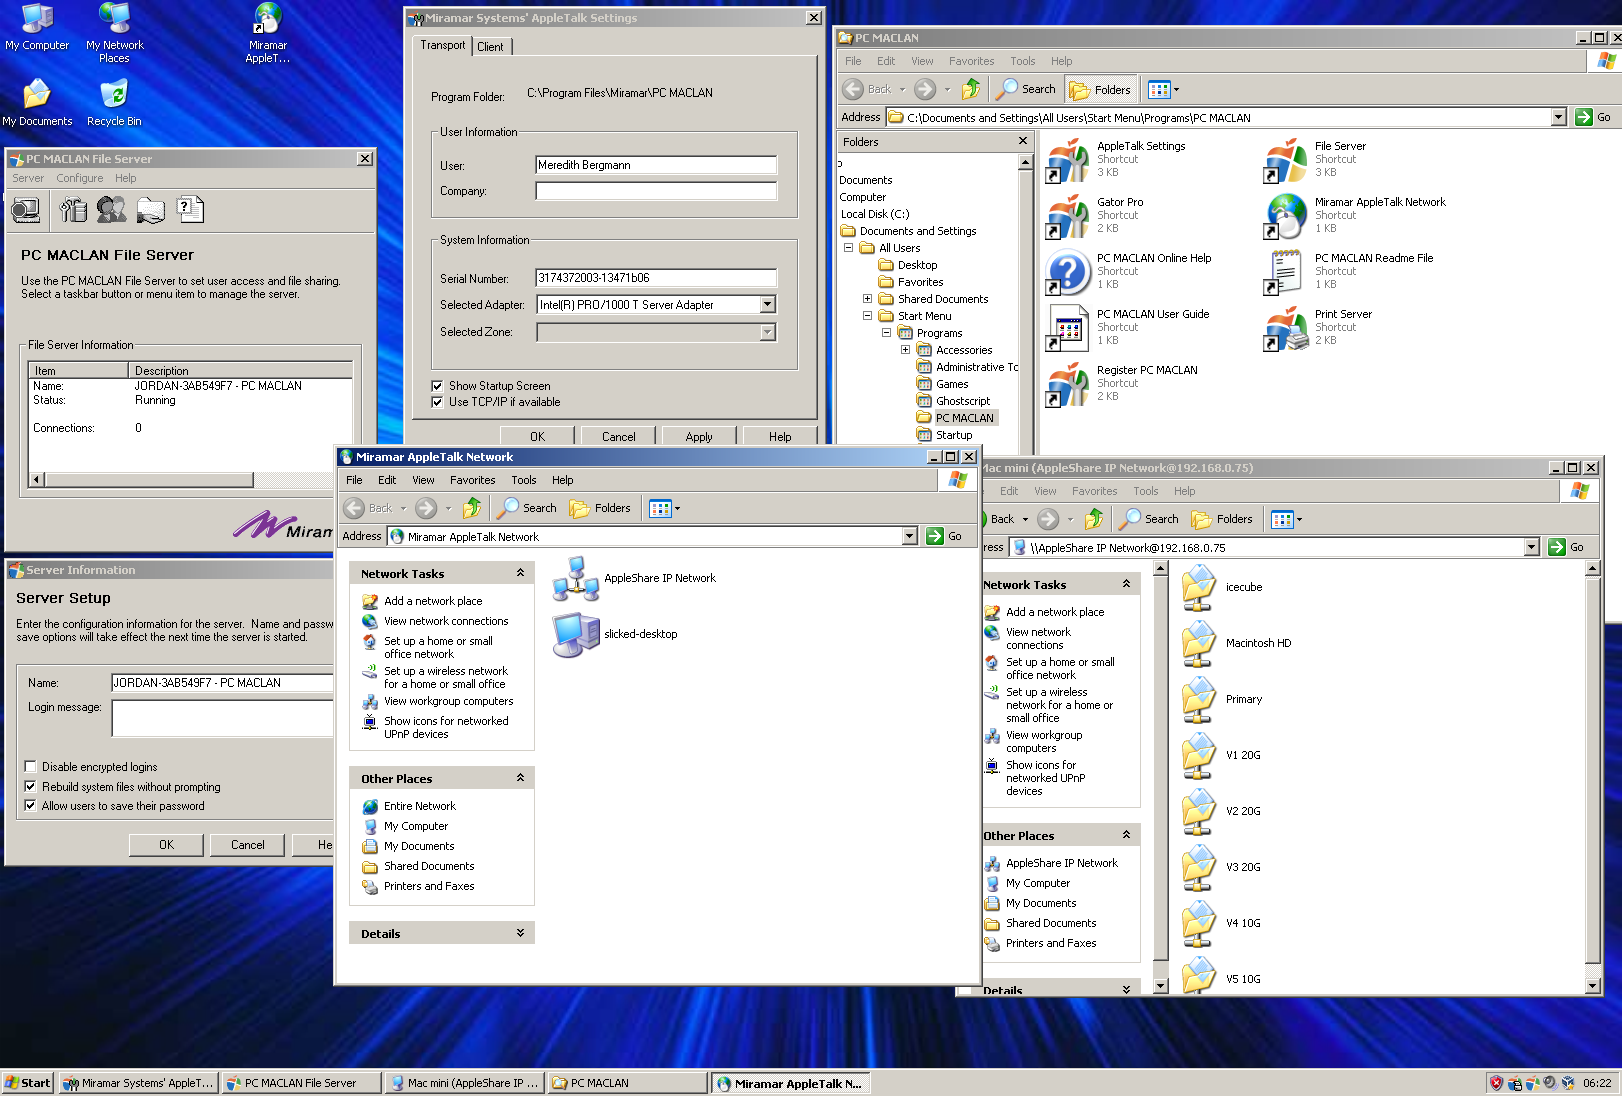 PC MacLAN v9 demonstration (Win XP, VirtualBox VM) |
Windows NT Server 3.51 and 4.0, Windows Server 2000 (NT 5.0) and Server 2003 (NT 5.2) can run a variant of an AFP server. Windows 2000 Server is the only case demonstrated: 2003 Server could work with 10.7+ but it is not on hand for testing. Windows 2000 and earlier are a bit sketchy with PCMCIA WiFi adapters, a good compatible card is probably a must versus something more esoteric: Windows 2003 Server should be easier for that. Windows NT Server 3.51 is probably okay to run on really old PC hardware, or NT Server 4.0. Are there any advantages to such a setup versus a more modern Pentium III, Pentium 4 or Pentium M with Windows 2000 Server? Probably not. But here is a tutorial for NT 4.0. Make sure to install the updates and service packs. As for NT Server 3.51, the Macintosh server feature has to be installed when the OS is first installed.
Various other third-party software exists, or existed. Novell's NetWare was popular back in the day, because it had a lot of compatibility with other systems, and kind of took over TOPS' share of the cross-platform file sharing situation and was really popular on PC machines. Farallon's Timbuktu is a type of remote access software that can also exchange files. It started out first on Macs but was later expanded to Windows and eventually OS X platforms, though there's going to be version incompatibilities, big memory requirements and will probably be slow, although Timbuktu 3.0 seems to be reasonably responsive considering the work it has to do, but expect performance on serial ports to be pathetic. Ethernet is tolerable, assuming no heavy processing is going on, and probably also depends what system(s) it is working with. It can transfer files, monitor a remote system, take control of a remote system, has a chat interface, and a few other things, via AppleTalk, TCP/IP or direct modem. |
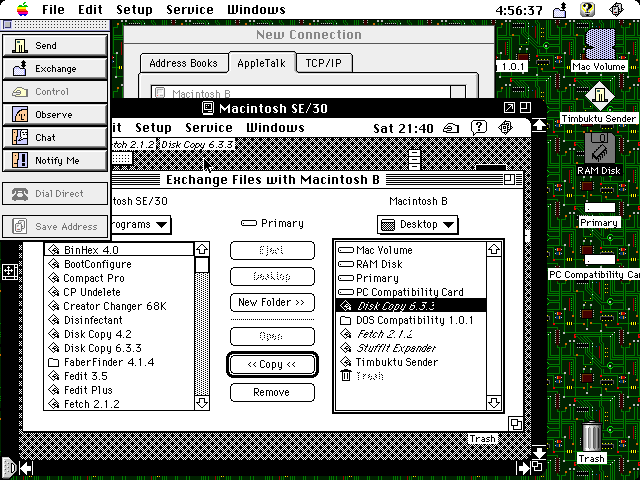 Farallon Timbuktu 3.0 (Q610) |
COPSTalk for Windows is really old and meant for the Windows 95 era, just like Personal MacLAN Connect, PhoneNET PC, AppleShare Client for Windows, and other versions which are not covered in detail in this Guide. It's safe to say that in the late 1980s and early 1990s, networking with PCs was kind of a mess, with various parallel port and serial port stuff like LapLink cables, which persisted through the Windows XP era. Jaffer, a Java AFP server, was meant for OS X and AFP over TCP, but it hasn't been taken out of beta stage, neither updated since 2007.
Microsoft Windows 2000 Server
Windows Server 2000 and 2003 support the Services for Macintosh feature to share out AFP volumes to Mac client computers. There are some third-party Windows software available (like Novell's Netware) which can provide server features as well to other Windows versions, however these additional software suites are not examined as part of this Guide. In this demonstration, we'll set up 2000 Server up and prepare it to accessible to other Macs. At this present time, 2003 Server will not be explored because it is too expensive on the open market. The Server editions of Windows have many other useful features like Telnet server, WWW server, FTP server, DNS server services, and more.
Attempts to get the Services for Macintosh working for AppleTalk inside a virtual machine (VirtualBox primarily, but VMware was trialed as well) was unsuccessful unless the client was capable of AFP over TCP/IP. In the past users have reported various issues with Windows 2000 Server SFM: this page talks about some of them.
During a fresh install of the Software, the Windows Components Wizard appears where optional elements can be installed or removed. (The image shown is post-install, because screenshots cannot be captured during the install process of Windows without hardware video capture tools or the use of virtual machines.) Scroll halfway down through the list until the "Other Network File and Print Services" component is shown. Tick the box. To install the FTP Server option, first find the "Internet Information Services (IIS)" component, click the Details button, then scroll until the FTP Server option is located. Tick the box and it should be taken care of. If any of these options were not installed the first time, they can be reinstalled afterwards by heading to the Start menu, then Programs, then Administrative Tools, then the Configure Your Server app. Hit the Advanced option on the left toolpane, then tick the Optional Components hyperlink, then the start the wizard. Alternatively, this wizard can be found in the Add/Remove Programs in the Control Panel, on the left pane. |
 System 7.6.1 to Windows 2K Server with CD drive (Win98SE disc) |
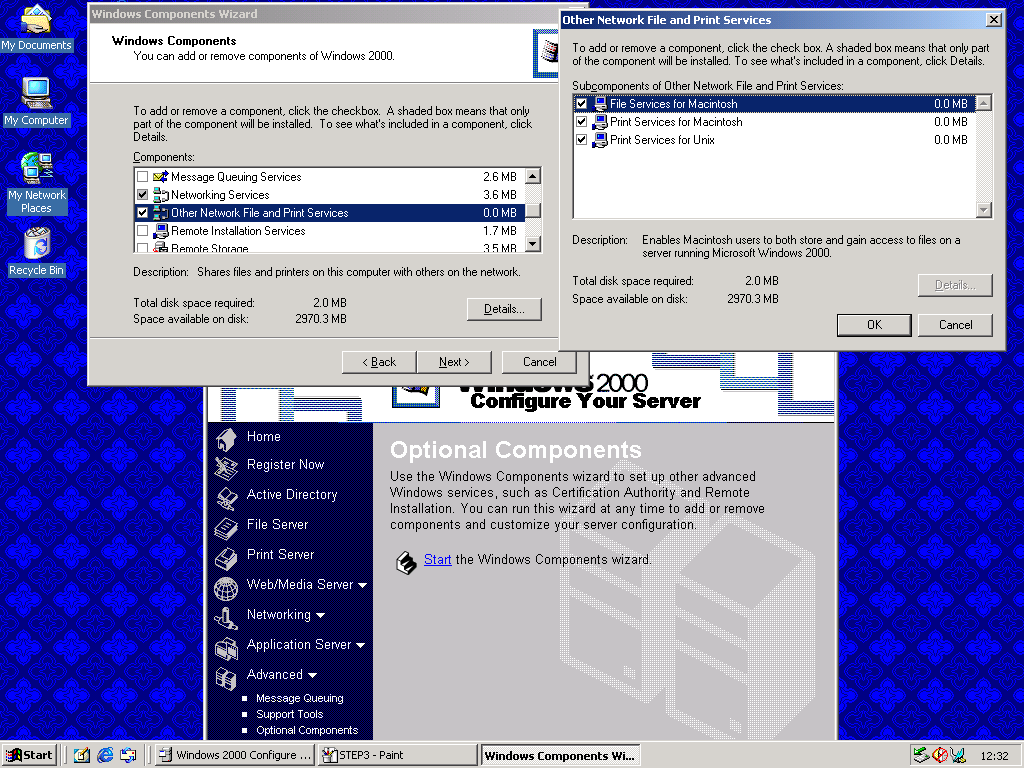 Installing components |
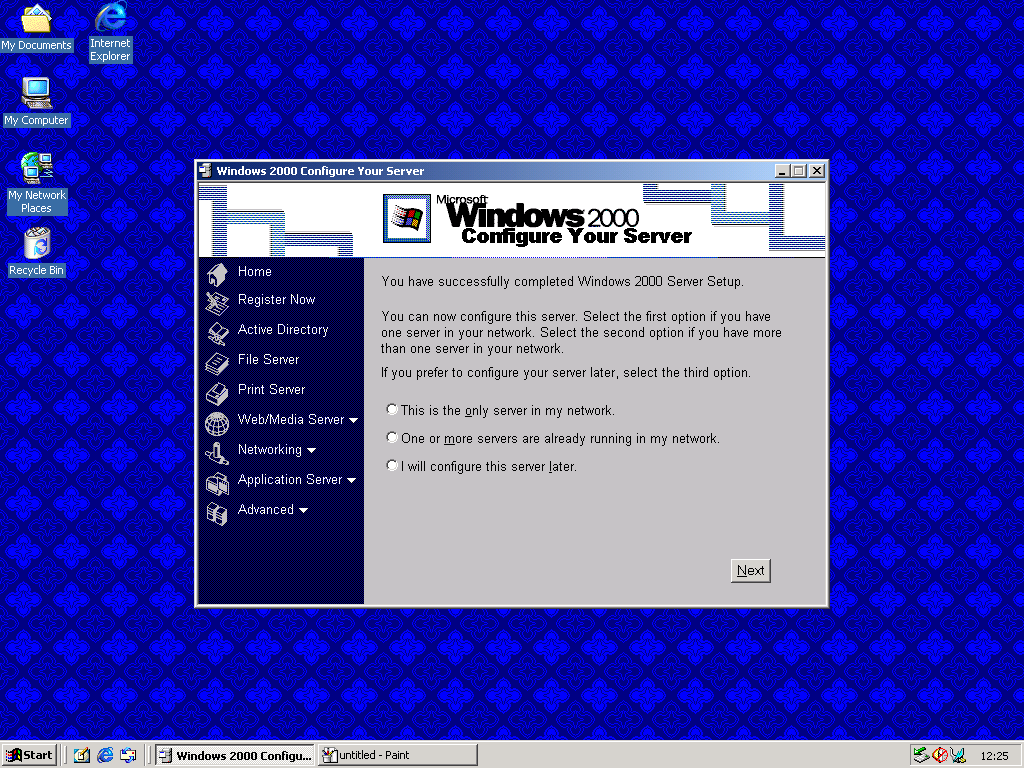 Completing server setup |
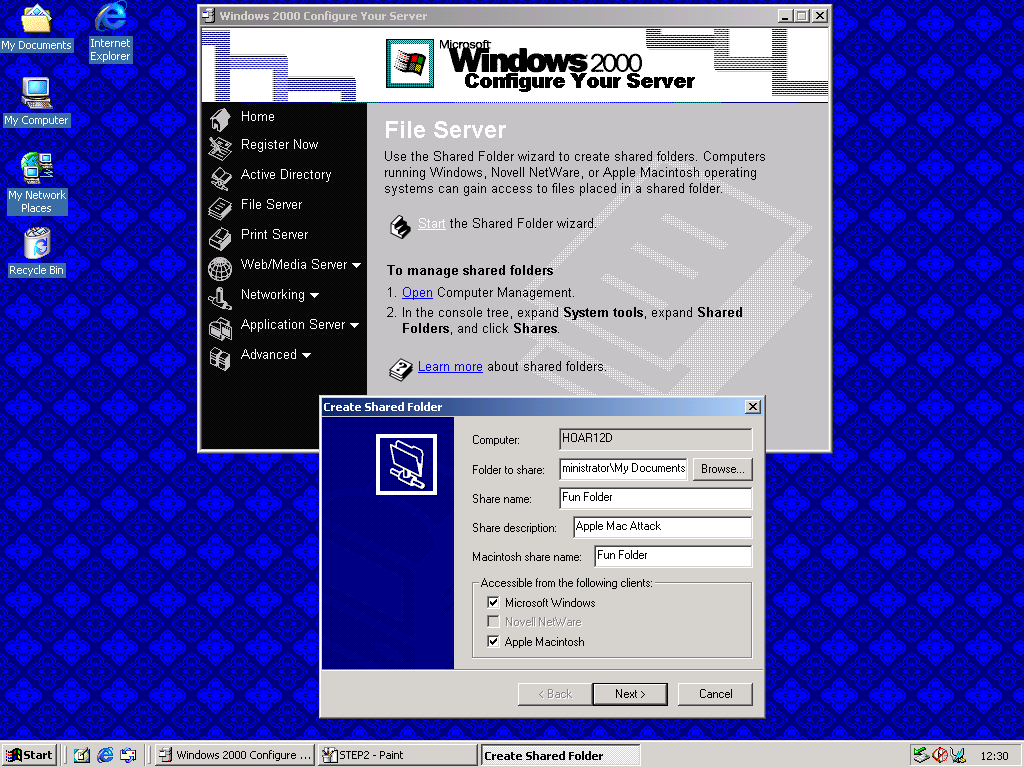 Configuring a shared folder |
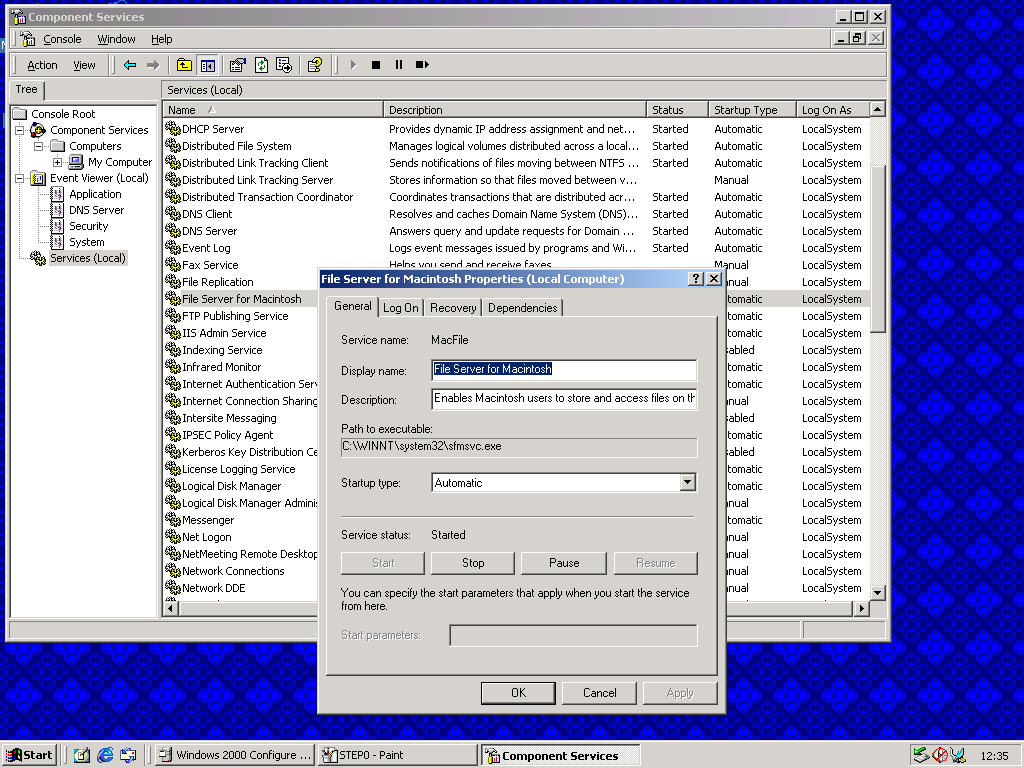 SFM service properties |
The Configure Your Server app is started by default on a fresh install of the OS and some quick configuring is all that is necessary to configure some settings, then dismiss it. Windows 2000 Server has a host of features but we'll just demonstrate SFM over Ethernet. LocalTalk access is not supported unless a LocalTalk PC card is installed or a Ethernet to LocalTalk bridge is used.
To start the SFM service, from the Configure Your Server app (if it is lost, it's in the /Start/Programs/Administrative Tools area), click the File Server option on the left toolpane. Start the Shared Folder wizard. Browse for a folder to share, we'll use the My Documents folder to start off with. Name the share. Tick the "Apple Macintosh" client option, then fill in the Macintosh share name. Click Next. To simplify setup and because we are not worried about Internet malware (LAN only), you may select the "All users have full control" option, or the preferences may tweaked as needed. Click Finish.
From the Component Services app (Start/Programs/Administrative Tools/) the service may be stopped or started as the situation merits: shares can also be added or removed from that application. To configure Ethernet to be used, open the "Network and Dial-up Connections" applet. Double click Local Area Network. Scroll down in the little component area in the window until you find the Internet Protocol option at the bottom. Hit the Properties button. The "automatic" option is DHCP Server -- for manual setup, tick the "Use the following IP address", then fill it out -- for our example, 192.168.3.5 and a subnet mask of 255.255.255.0 was used with a cross-over cable. If the machine is hooked to a router that goes out to the Internet, then fill out the router's internal address (like 192.168.1.1) for the gateway, which requires machines to be in the same subnet as the gateway.
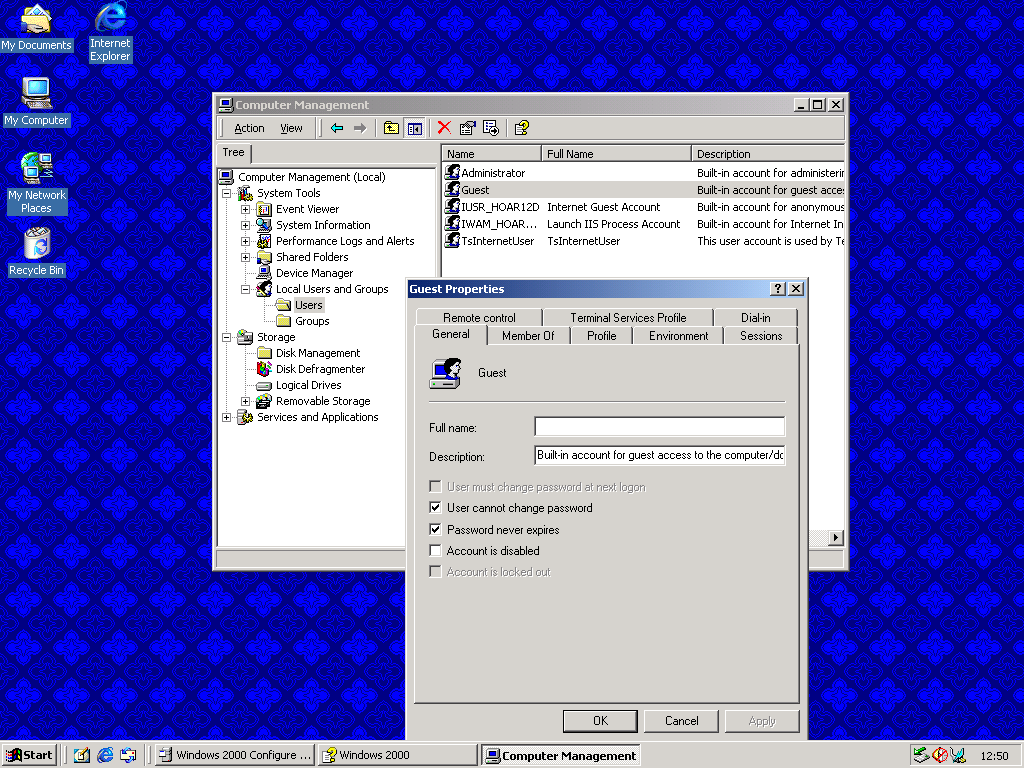 Guest properties settings |
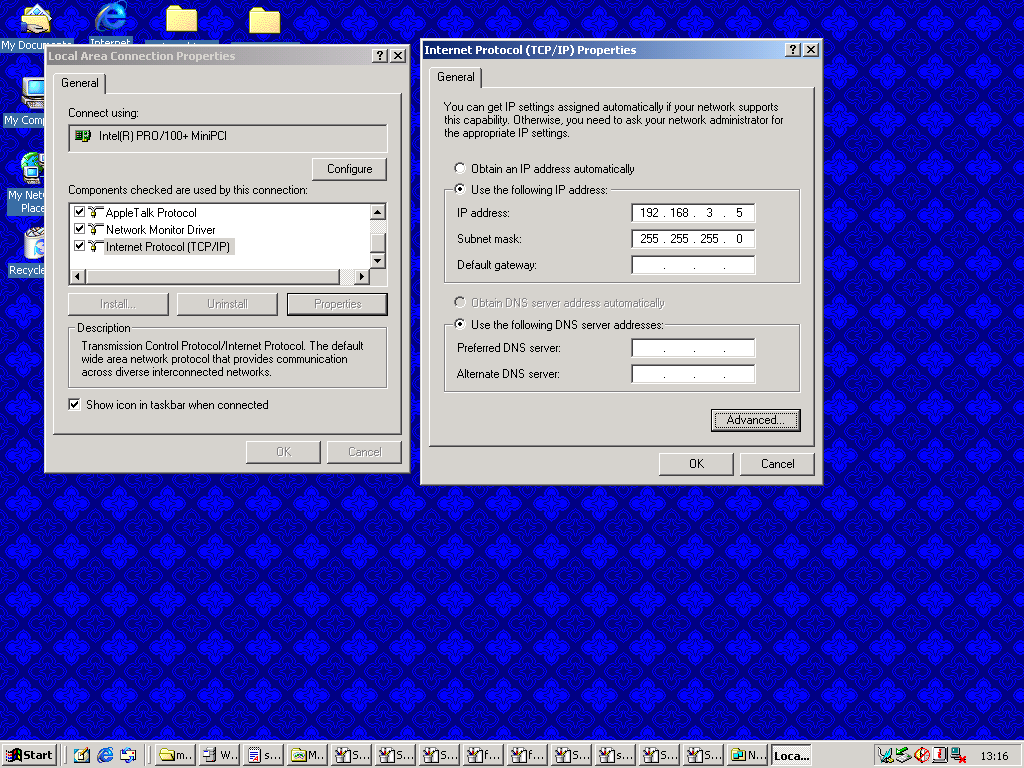 Configuring TCP/IP |
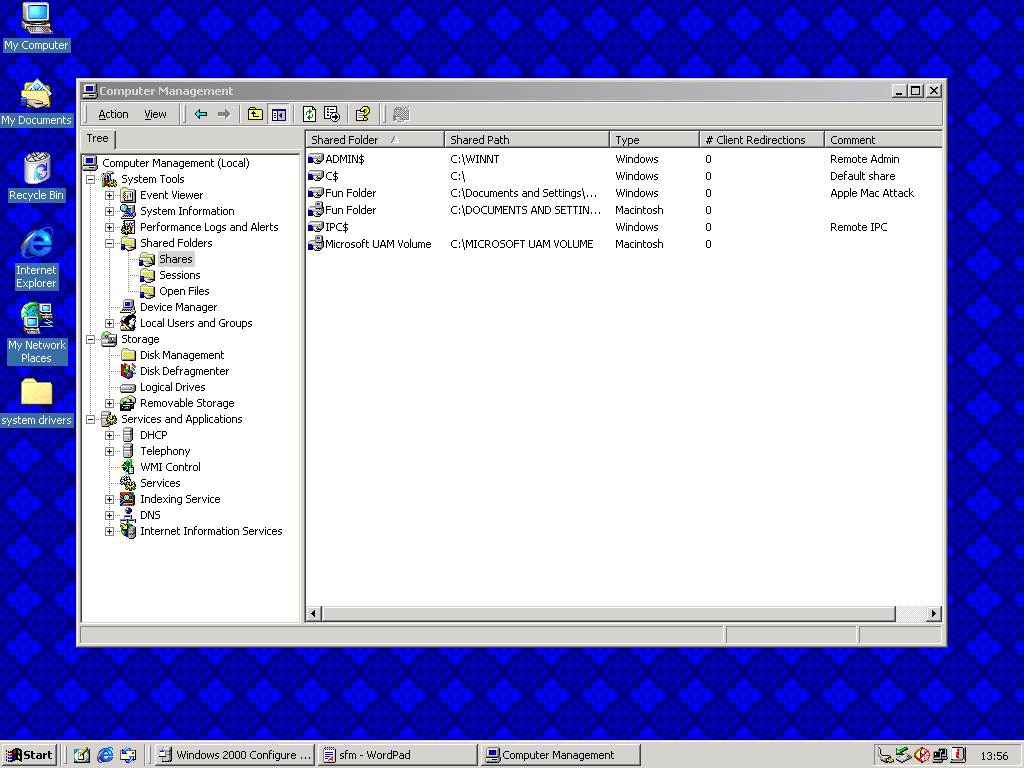 Viewing available shares |
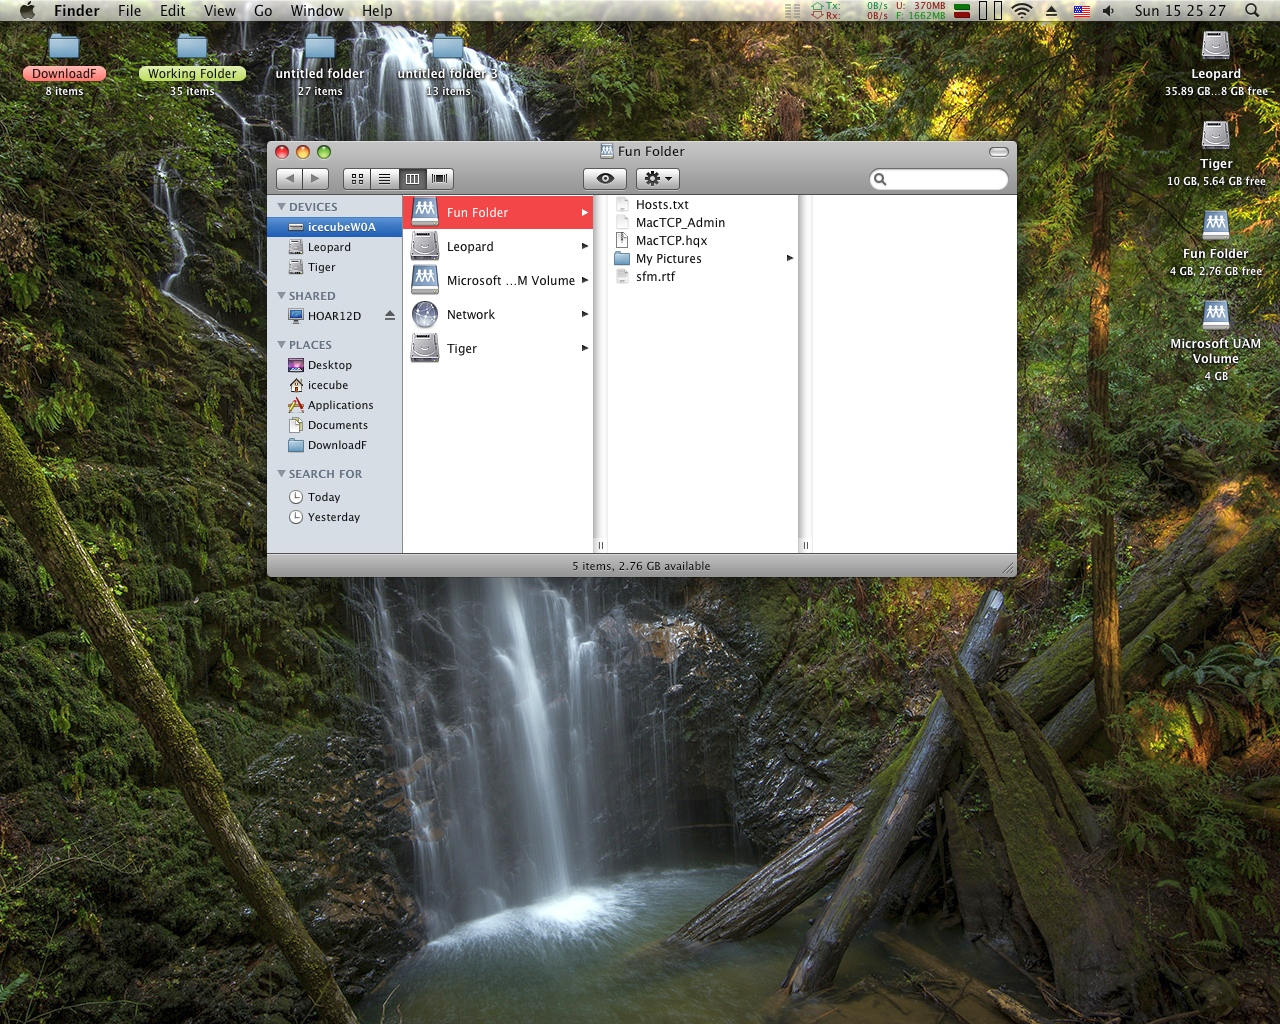 W2S SFM under 10.5.8 |
Because the Services for Macintosh is a file server feature only, it won't be able to access any Macs and mount them in the Network Connections area. To mount the Server on a Mac, first configure the Mac side as demonstrated earlier with the MacTCP and/or Open Transport setup instructions (and the Ethernet cable is connected, with a straight cable for a router, or cross-over for direct computer-computer connection). Then head to the Chooser and mount the volume -- in OS X, open the Go menu and mount it from there. It is possible to share the CD drive if the volume is CDFS -- HFS disks will not work. The "shared folder" representing the CD drive may have to be removed and replaced with a new share if a different disk is inserted. OS X does not have this abnormality while sharing its CD drive. | 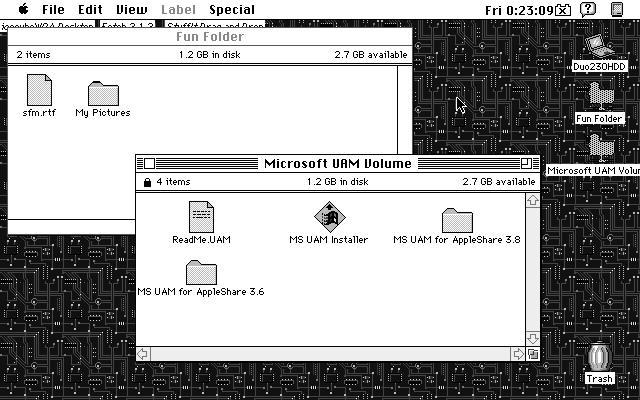 Shared folders |
For a Guest user to connect, the shared folder must be in the root path of the hard drive (for instance, D:/SharedF) as directories and files in the user folders cannot be made accessible to Guest user accounts: ensure the checkbox for Guest access in the folder properties is marked, lest it won't work. Also the Guest user account will have to be activated (see the image above, to the far left). Only NTFS based partitions or volumes can be shared, FAT32 is not accessible to SFM client users. For all users, the UAM volume is available to be mounted. This is a UAM network extension meant for AppleShare 3.6 and 3.8 intended for semi-secure password transport and login into 2000 Server kind of like DHX. It won't work with AFP over TCP/IP. Logging in as a user or an administrator will mount the shared volume (Fun Folder in our case) and the machine name is broadcast over the network. In pre-OS X systems, the Chooser will work fine, however in OS X you must use the Connect to Server feature and enter in the IP address (such as afp://192.168.3.8) because the advertising doesn't work under OS X. All read/write/access permissions are administered on the Server.
In Windows 2000 Server and possibly later versions of Windows Server, the Macfile utility, accessed from the command line (or Command Prompt) can perform some interesting functions, such as the forkize feature which can join a resource fork to a data fork to make a single file, while also setting the type and creator data. It's probably rarely used, but it's worth a mention. The command copy can also combine (known as concatenate; use copy /? or see the Windows Help documentation on the copy command; or here) one or more files together, but it's not the same thing as the Macfile utility.
Linux
For Linux, the Netatalk stack is used for file server services, and the afpfs-ng Terminal-driven stack is used as a client to access AFP shares. First the Netatalk portion will be discussed. For users of older distros, the repository sources may have to be updated. In Ubuntu for instance, older releases have the repository sources at old-releases.ubuntu.com, and the Software Sources manager will not know of such a location (perhaps excepting newer distros at the time of this writing, like 12.10 Quantal), so the sources.list file will have to be manually updated to the new locations. To do this, type the next command into a Terminal window: sudo gedit /etc/apt/sources.list
| 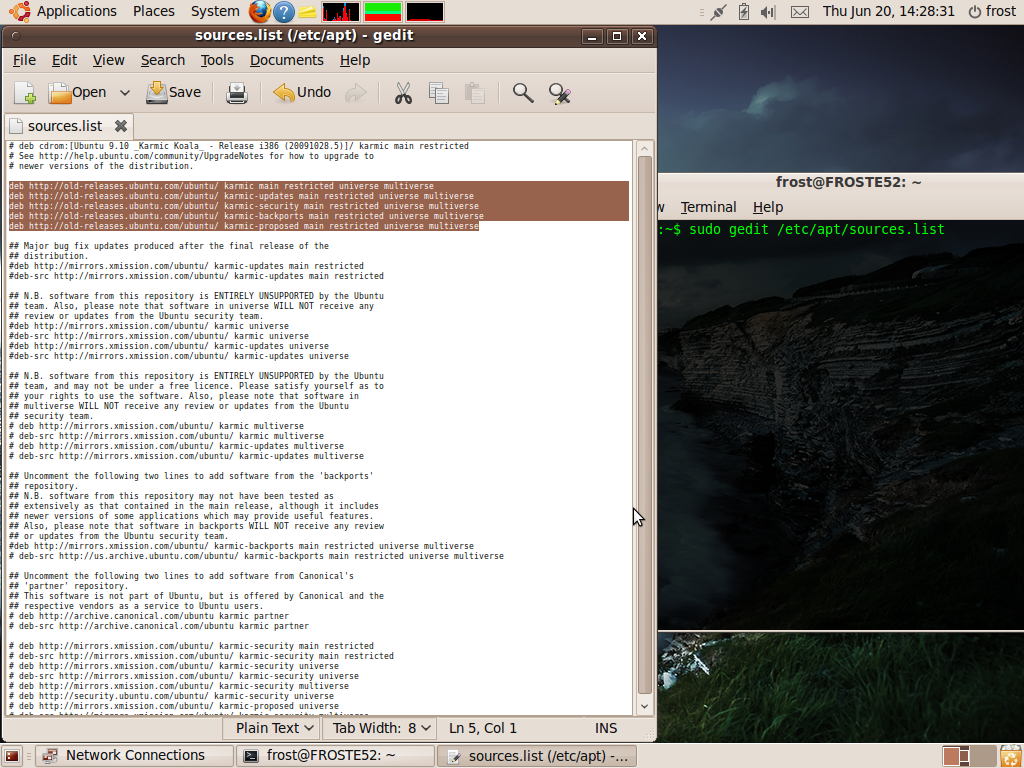 Editing the sources.list file |
Comment out every single line as shown in the image (or delete them, same thing), and add the proper repository sources as shown, or directed. For example, 7.10 Gutsy would get the first line of the source to look like this: deb http://old-releases.ubuntu.com/ubuntu/ gutsy main restricted universe multiverse
The whole list of archived repository data is located here for reference, so it's just a matter of editing the file to look similar to the previous image, so that the Software Sources will look like the image to the right, with proper pointers. Do take notice that as old releases, they will not receive any updates, security patches, fixes or any other maintenance. | 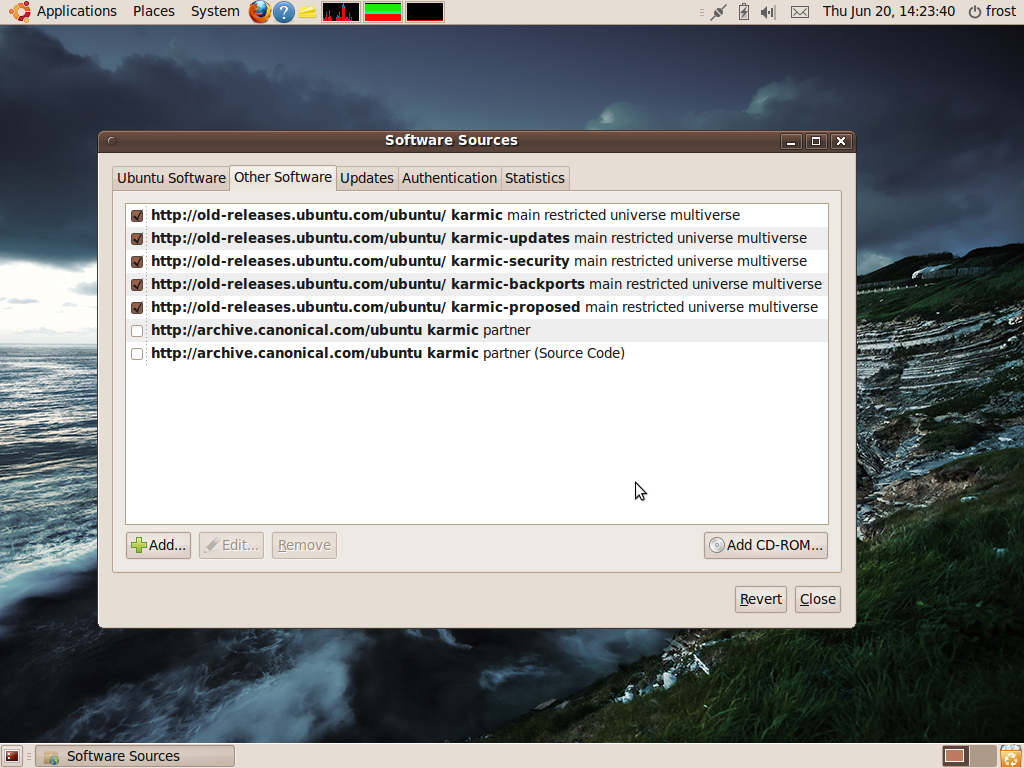 9.10 with refreshed sources |
An easy way of doing this is just a find and replace operation to replace http://archive and http://security with http://old-releases/, which reduces potential errors.
The lower limit of this Netatalk package to work successfully is not known (like if it will work with Ubuntu 4.10 Warty), and depending on alternative distros like KDE or Slackware, this may or may not be a concern. If the Linux system has no repository support, then the difficulty of this work can quickly ratchet up to Expert Grade -- not for the average user.
For cases involving emulators like VirtualBox, the Ethernet connection type probably won't work for Netatalk if it is set to NAT. Instead try using Bridged Adapter (shown with VirtualBox) which assigns it as a separate interface to the router rather than forwarding traffic through the host machine's interface connection, otherwise AppleTalk traffic cannot be passed through. As WiFi is still a popular method of transferring data these days, recall that only certain types of WiFi routers can process EtherTalk Phase 2 DDP traffic over WiFi. The section Wireless Access earlier discussed this issue. AFP over TCP/IP will still work over WiFi and NAT.
Netatalk 2.1.6 Server
Owing to the perplexing complexity of the Linux platform, it can be considered reasonable that only two distros are demonstrated -- in this case, Ubuntu 10.04.4LTS "lucid" and 9.10 "karmic". The Netatalk stack must be installed from source because using sudo apt-get install netatalk will not set the --enable-ddp flag which is required for systems not using AFP over TCP/IP, however this depends on the repository. Some will have it already enabled, but it isn't very hard to compile from source anyways. Netatalk 3.x dropped AppleTalk support (DDP) and will not work entirely in this manner of this section. Specifically, Netatalk 3.x is designed for OS X 10.4+, not for older Mac clients and includes OS X specific features such as Time Machine support. The Netatalk service is a server only and cannot access any other AFP servers as a client. | 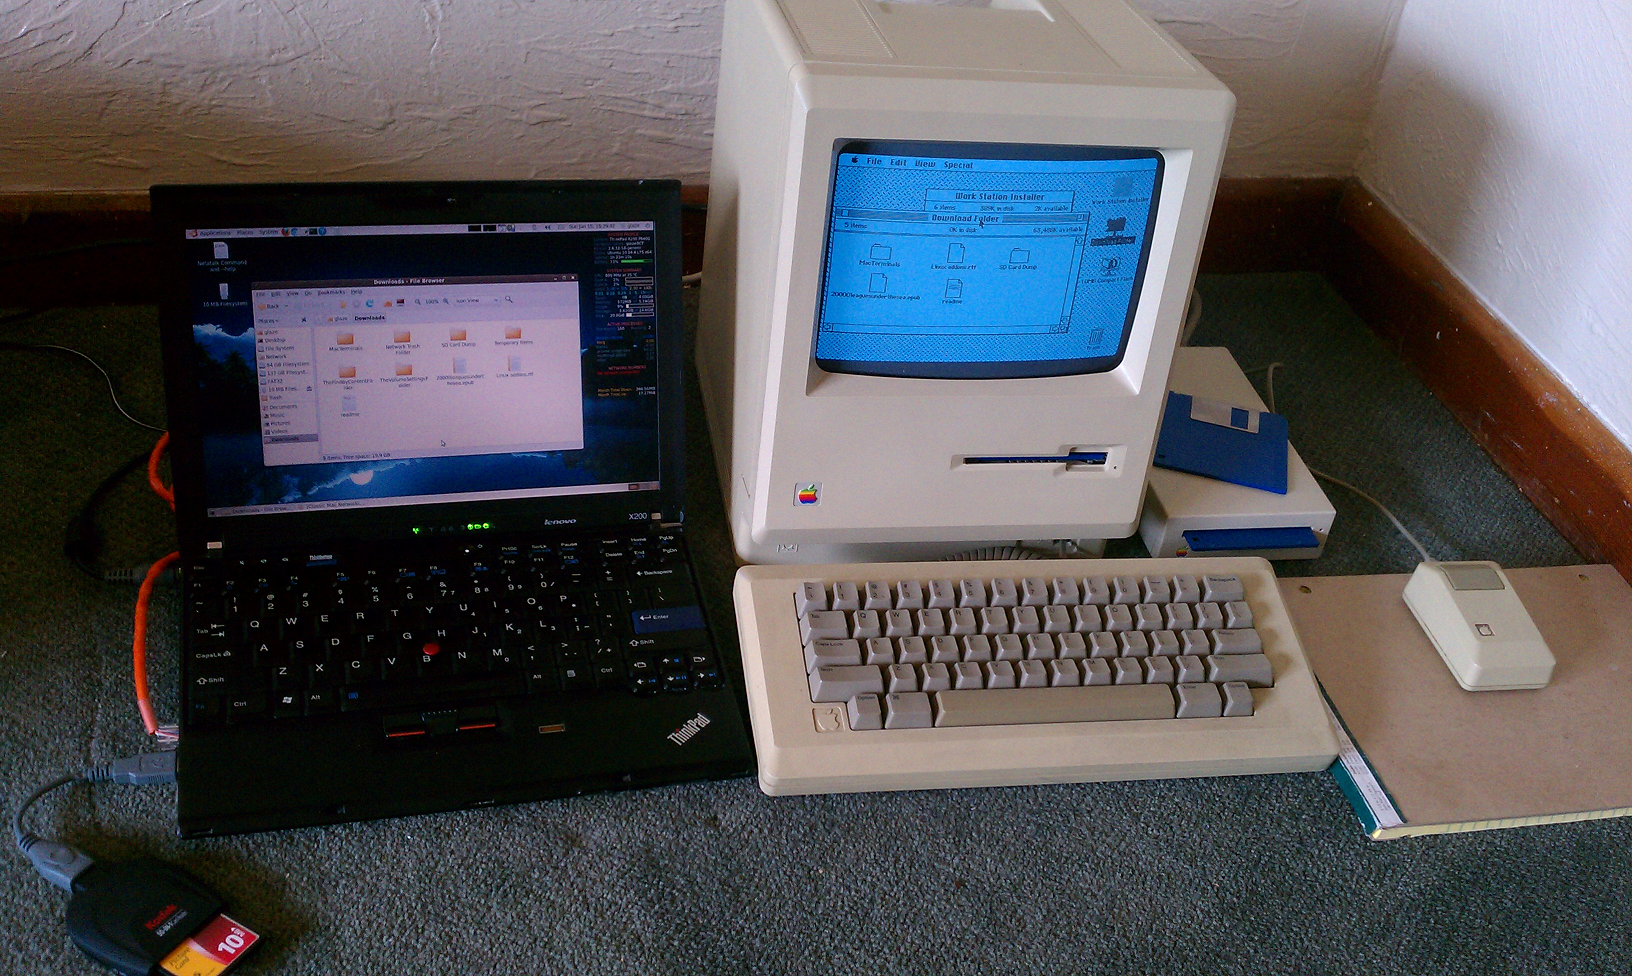 A Lenovo ThinkPad X200 using Netatalk with a 512Ke (S3.3/F5.4) |
Although this section prescribes the use of Netatalk 2.1.6, any version of 2.2 ought to work. In testing under Ubuntu 10.04.4LTS x64 however, 2.2.3 with Zeroconf enabled kicked an error on the client saying that it didn't have a recognizable logon sequence, 2.2.4 worked fine, but Zeroconf was not enabled, and 2.2.5 had a build error. Therefore, should 2.2.x not work on your platform, simply default back to 2.1.6. The very first commands to be run are the following (the second one is more or less optional...depending on the case at hand)... sudo apt-get update
sudo apt-get upgrade
| 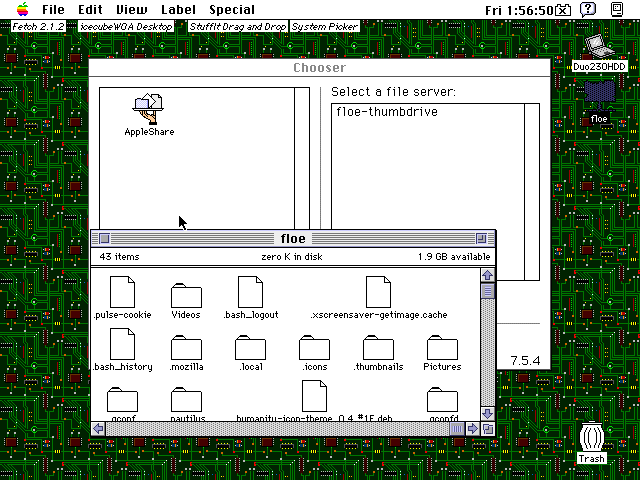 7.5.3 to Netatalk 2.1.6 |
Then the next step is to install each of the following libraries, from either source (common-man need not apply) or from the repositories for the distro in question:
On a Debian system as we have here (Ubuntu is based on Debian), we type:
Multiple libraries can be installed with a single command, as shown. Avahi is an open-source implementation of Zeroconf (Rendezvous/Bonjour in Applespeak) and helps advertise computers over networks (configuration not demonstrated here); libcups2 is part of the Common Unix Printer Service; libdb-dev is the Berkeley DB stack from Oracle for managing databases; and libssl is for SSL encrypted networking services. The Berkeley DB is required, the others are more or less optional. Next, we get to build Netatalk from source code. Point a browser to this website. Click the version 2.1.6 directory. Download the netatalk-2.1.6-tar.gz file (the tar.bz2 can be used also, just a different Terminal command to unpack it). Open the Terminal application. Use the cd command to navigate to the directory where the tarball (.tar.gz) was downloaded. For example, if the tarball was downloaded to the user's Downloads folder in the Home Directory, then type: | 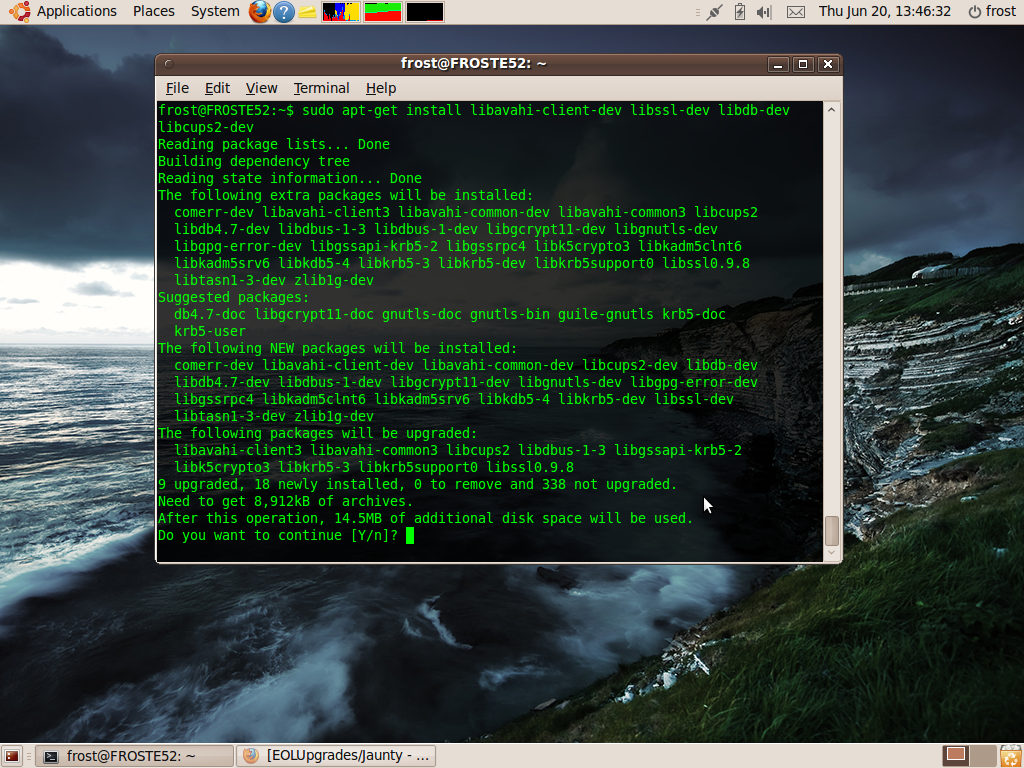 sudo apt-get command |
...to navigate to that directory. cd .. goes back one directory, if needed, and ls lists the contents (mostly... ls -al lists everything) of the folder in question (and clear clears the terminal). Once the download has been located, type the following:
The tab key is an auto-completion helper. The Enter key completes the command. If the .tar.bz2 was downloaded instead, then replace the z with a j.
Newbie pointers:
- tar: Tape ARchiver, dates back to the old UNIX days when data was commonly stored on tape media.
- x: eXtracts the archive. The opposite of this is the "c" flag, which is what would be used to create a tarball archive of the name that just follows after the "f" flag; like this: tar -czf SystemNADs.tar.gz System701NAD.image.hqx System608NAD.image.hqx for a gzip compressed archive with multiple contents.
- j: Runs the archive through the bzip2 archive utility.
- v: Verbose mode, shows the list of files as they are processed. Optional.
- f: Indicates that the file is just after this character.
- z: Pushes the archive through the gzip utility.
Coming along? Good. Once the archive has decompressed, there should be a folder named netatalk 2.1.6 in the source directory where the archive was located. Navigate to that directory by typing: cd netatalk[tab key][enter key]
Now let's get even more ornate by entering in the following for a Debian based distro; but read the next paragraph before completing the command: | 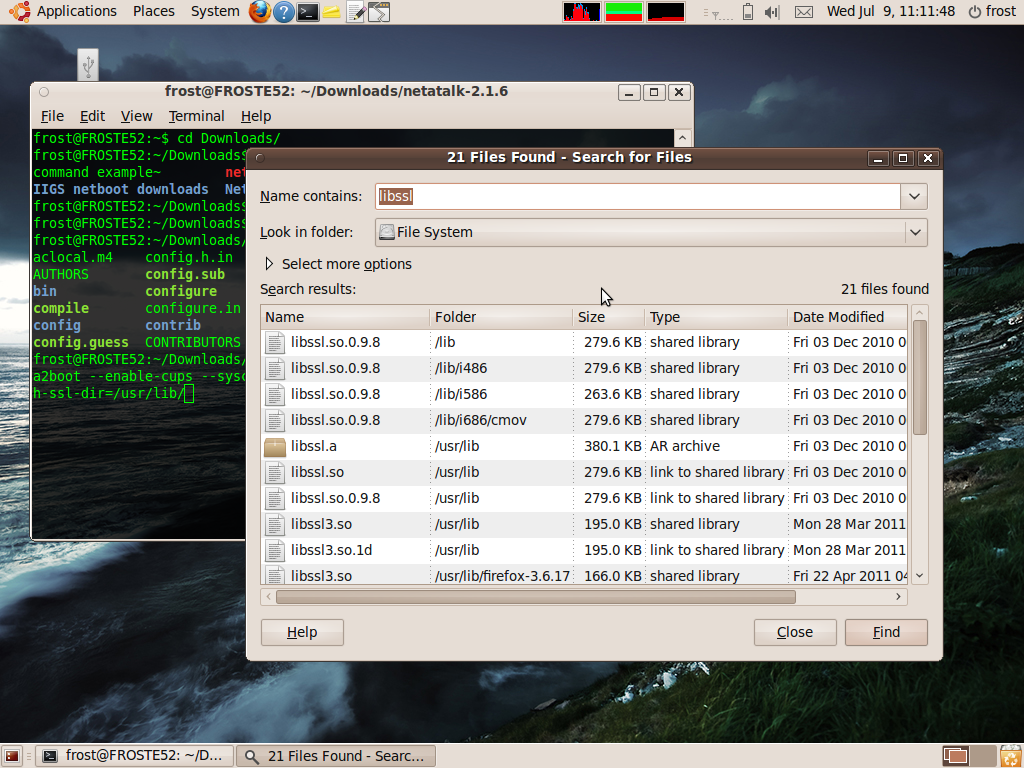 Locating libssl (see note below) |
Notice! Triple-check the command matches as it is written here, as it generates a Makefile which tells the compiler how to build the stack. Any errors will appear just after the command is entered, usually like warning: --enable-ssl not understood. If it was configured incorrectly, redo it. Distros with install directories other than the kind used here may have to change the --with-uams-path and --with-ssl-dir paths: see the image above of how the /lib/ssl path may have to be located manually, which is a highly suggested step to make sure that the reference path is correct. The varieties of Linux inhibit a comprehensive list here other than Debian systems. Both Debian and Ubuntu systems get the --enable-debian flag. Other systems like SUSE get a different one -- see the netatalk manual page; or type ./configure --help to see what flags like --enable-suse to use. Here are some additional flags which may be needed depending on the case at hand: | 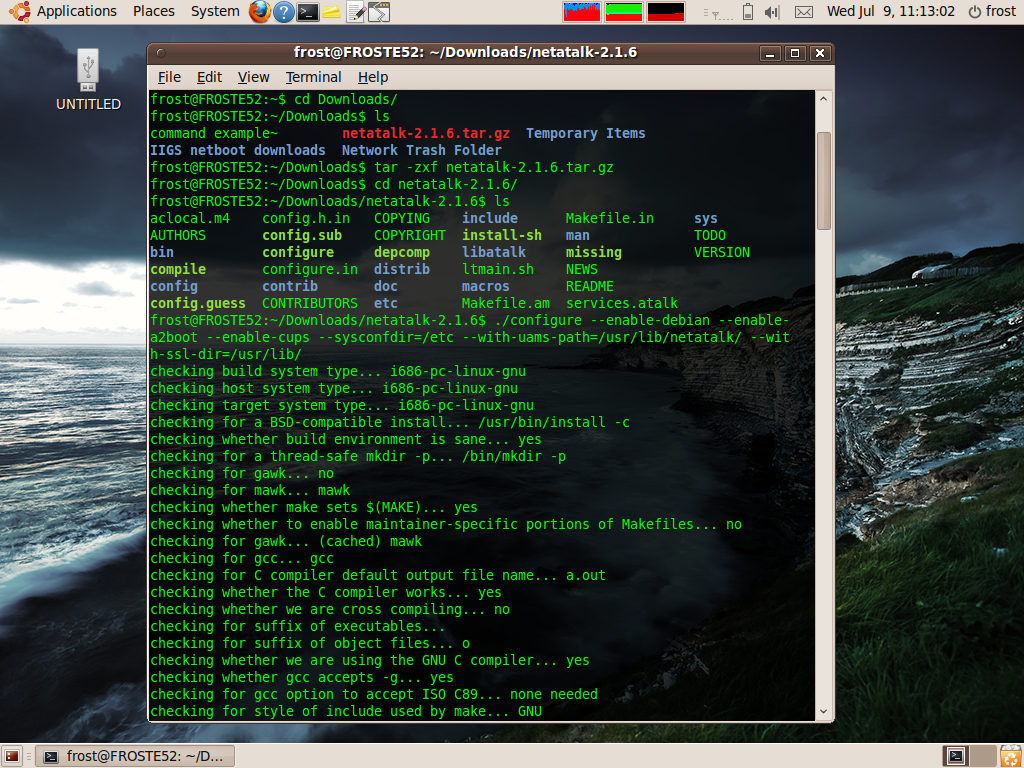 Watch for errors just after the command! (Shown with no errors) |
- Apple II: Add the --enable-a2boot flag if you're expecting to netboot a IIGS; the Apple II Networking section has additional details. Based on the developments of the A2SERVER project, the Apple II compatibility could be a bit rough on the edges. Newer updates have addressed this shortcoming better.
- Printing support: The flag --enable-cups turns on CUPS capabilities so that the Netatalk service can handle print jobs. Printing is not a subject of this Guide. A user on 68kmla reported that omitting libcups2-dev allowed the Netatalk service to function under Lubuntu.
- Netatalk 2.2: This version added Zeroconf support and disabled ddp by default. Should you decide to experiment with these versions, turning on DDP with --enable-ddp and enabling Zeroconf with --enable-zeroconf should be beneficial. Two separate accounts indicated build errors with Zeroconf, your results may vary.
Examine the Summary for anything strange, then enter the next two commands in sequence. These can be made "silent" so there is no output, see man make for details about the -s flag:
|
sudo make
sudo make install
Enter the appropriate password as requested. Gasp in amazement at the nerdy printout. Once that is done, we have a couple of configuration files will need to be edited with a text editor. The first is /etc/default/netatalk, the second is AppleVolumes.default, the third is afpd.conf and the last is atalkd.conf. First type the following command in Terminal: sudo gedit /etc/default/netatalk
| 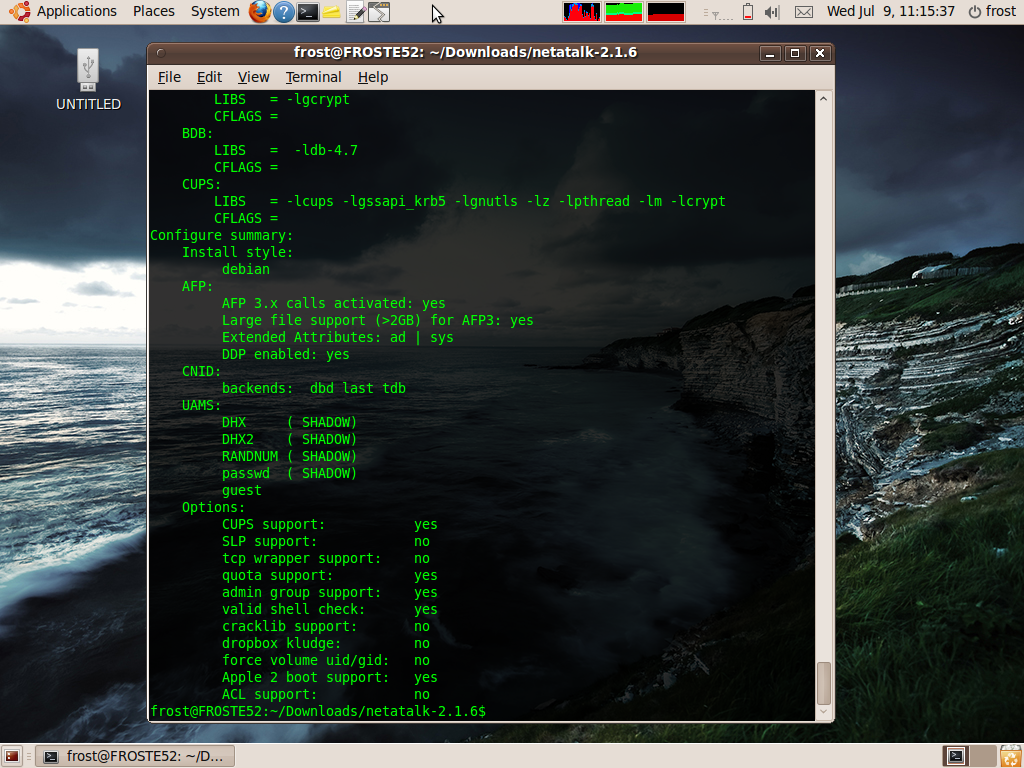 ./configure result. Verify for any unusuals |
(If the --enable-debian flag has not been used, then the path is /etc/netatalk/netatalk.conf) This is the configuration file that sets some global parameters. If any blank documents show up instead of ones with text like as shown to the right, then the command or path is most likely incorrect. Don't save the document, quit and recheck the command. Scroll down until near the bottom, and find ATALKD_RUN and change the no to a yes. (For Netatalk 2.2.x, remove the # in front of the line.) Save changes, then close and follow up with the next command is to edit the shared folders: sudo gedit /etc/netatalk/AppleVolumes.default
| 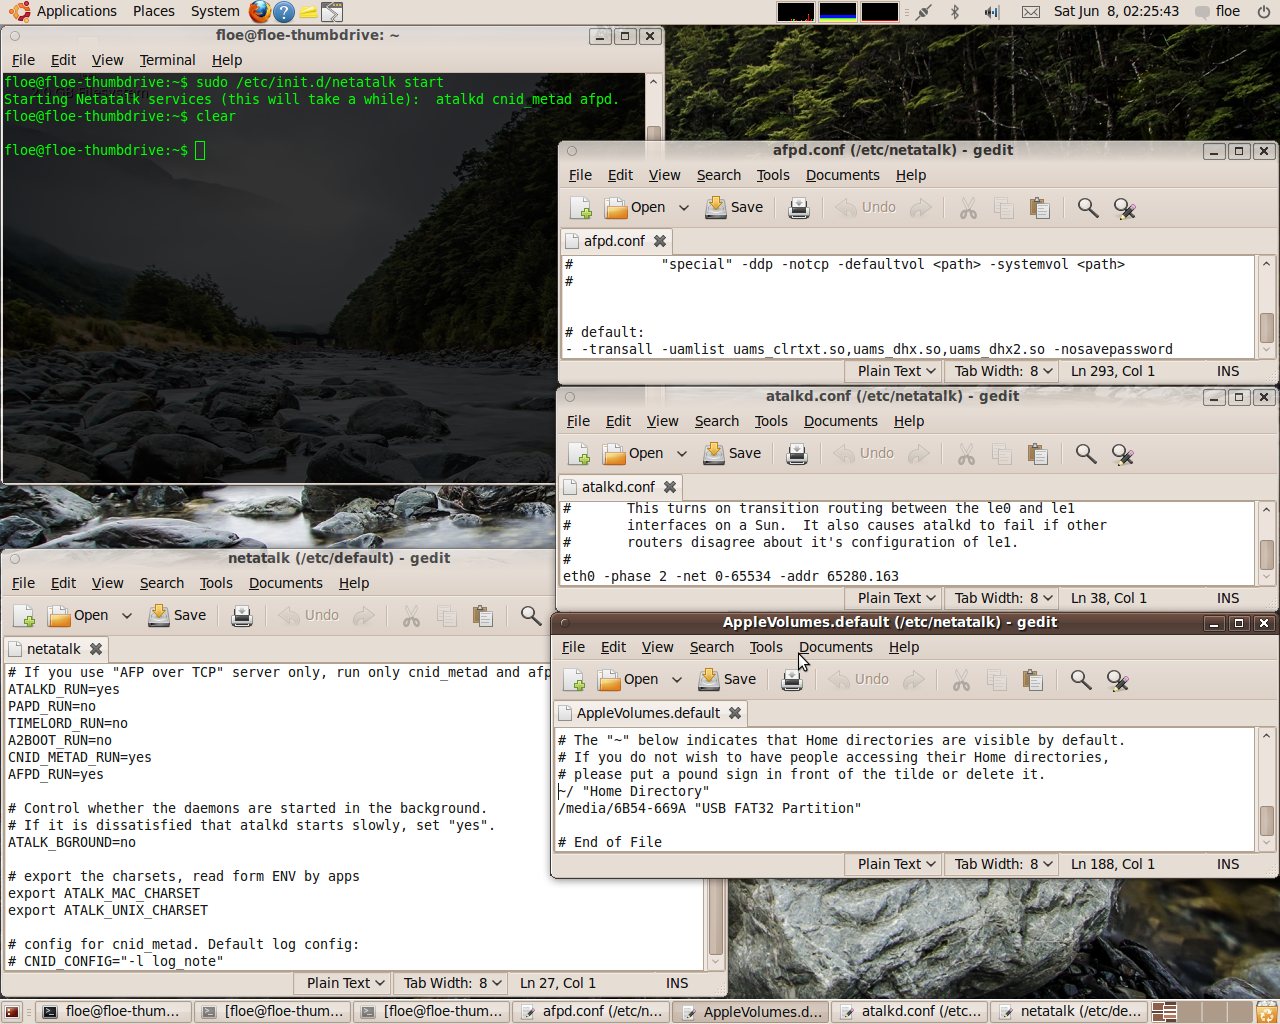 All config files & start command |
This file describes which local folders are shared. The default is ~/, which just a symbolic link to /home (which is the Home folder of whoever is actively logged in at the moment) or as commonly called the Home directory, assuming only one user on the system, but entry can be removed to prohibit access to the Home directory. Sharing additional folders in the Home Directory path, such as ~/Downloads is not a good plan because of technical reasons: think of it like double-sharing the same directory path which can easily lead to backend database corruption. Instead a better plan is to create share folders out of /srv/ which can be accessed by all users of a system, depending on permissions and is not only easier to control but safer. To do this, the first thing to do is create the directory:
This creates the folder named NetatalkAFP in the /srv/ directory. Feel free to change the name to something else, or create sub-directories. Continuing on, nobody can really do anything with it except root, so we'll change the ownership and file permissions:
chown, or change ownership, is used to change the ownership so that the root user still has ownership, but anybody in the adm user group also has ownership. adm is short for Administrators, but different Linux distributions can use different names for the administrator group, such as wheel, admin or something else. Use the groups command to find out what a user is in, such as this:
chmod changes the permissions of a file or folder. In this case we want to change the permissions of the folder so that anybody logged in as an Administrator (in this case, but users can be allocated separate folders individually) can copy, delete, write or execute files, depending on who they are.
Add the proper share path line to AppleVolumes.default, like so:
The name in the double quotes describes the name of the share, which Chooser clients will see or OS X clients can observe when mounting a share. If you only want to share a specific folder in the Home directory, then remove the path ~/ "Home Directory" and specify the full path of the target folder, such as /home/Downloads "Downloads Folder".
To share the CD-ROM drive, adding the line /media/cdrom0 "CD Drive Share" ought to work: but first run this command cd /media/ && ls and see what the result is (like cdrom cdrom0 floppy floppy0; various systems may differ slightly) before adding it... if the system has a USB CD drive, then it won't work without a disc in it; in this case, you'll have to share the name of the volume, as shown below. In this case, this file will have to be manually changed and Netatalk restarted if a different disc is inserted:
Users with Mac OS System versions prior to 7.5.3, or Apple II computers (ProDOS doesn't like volumes greater than 32MiB) may want to add a modification to avoid file system issues, such as the following examples:
The volsizelimit:XX addition reports the size of the volume according to XX mebibytes (not the usual *NIX megabytes) for compatibility purposes. Older versions of Netatalk had issues with file size not being reported properly (such as a 1.2MiB file being reported as 6.3MiB, and so on) and so if you see volsizelimit:63 in older user examples, that is why. (Newer updates of Netatalk 2.2 have fixed this issue.) According to the documentation, limitsize is supposed to set the maximum reported volume size at 2GiB, but it doesn't seem to work, or if it does, there's no real way to tell if it is working or not. It goes on the line that starts with :DEFAULT: options: upriv,usedots, so like this:
Save the changes to the file, then close it. Now it's time to edit the afpd.conf file.
Head to the very bottom of the document, line 293. Place the text below in its place:
A UAM means User Authentication Module, basically a way of exchanging password and user identification via various methods. For instance, the Clear Text UAM sends the username and password in plain raw text; the 2-way RandNum has some elementary pseudo-encryption; DHX stands for Diffie-Hellman key exchange, a type of encrypted password exchange. Not all AppleShare clients can use all the options, like AppleShare WS 1.1 can't use DHX. The -nosavepassword flag forbids clients from storing the password on their systems for faster access or auto-mounting, and thus a security hole; feel free to omit it for basic home LANs.
Now, since the entire setup will be over Ethernet (although using the wireless port is optional), the primary interface "callsign" for the port must be discovered. On Ubuntu, the command is simply ifconfig, on Debian systems it is /sbin/ifconfig. Note the interfaces active: there are usually three on a modern computer, wlan0 (wireless interface), eth0 (Ethernet port), and lo (loopback interface for localhost at 127.0.0.1). Sometimes the eth0 can be replaced by en0, or it is incremented to eth1 or en1 depending on the system (along with wlan1, et cetera). We tell Netatalk what interface to use for the service by editing one last configuration file, which is the atalkd.conf file:
Scroll to the bottom and place the following at the bottom, replacing eth0 (that's a zero) with the appropriate networking identifier if it is not eth0:
If you use WiFi instead of Ethernet, then the line might look like this. Remember that WiFi routers typically do not handle EtherTalk Phase 2 packets correctly, and AppleTalk may not work:
To set up Netatalk with various zones, read this page for zone configuration involving the atalkd daemon which can create zones. Don't bother with zones unless a really big network is in use.
Close and start Netatalk with the command below:
Ensure that the atalkd cnid_metad afpd services are started. If not, there is a problem somewhere in the config files or the ./configure string was incorrect, most likely.
If any changes are applied to any of the configuration files while Netatalk was running, use the previous command but replace start with restart to update the changes. start can also be swapped for stop to terminate the Netatalk service. The service must be started each time the computer is booted, to establish this automatically, use this command (unconfirmed for this application, advanced users will probably just make a cron job):
|
sudo update-rc.d netatalk defaults
Now the server is available to clients. As there is no client component to Netatalk, it cannot access other servers. To configure the Ethernet connection, open the System menu, then the Preferences submenu, followed by Network Connections (for GNOME 2 systems). Click the "Auto eth0" (or "Auto eth1") interface, then click Edit. From this window, click the IPv4 tab, then Address field can be edited to set up either a manual address (like 192.168.1.109, netmask 255.255.255.0, router address as required) or leave the default DHCP Server settings; if those don't work then check for a "Link-Local" setting, which is used for direct computer-computer connections. "Link-Local" should be used for AppleTalk bridges rather than manual addressing or DHCP for cross-over setups without routers. | 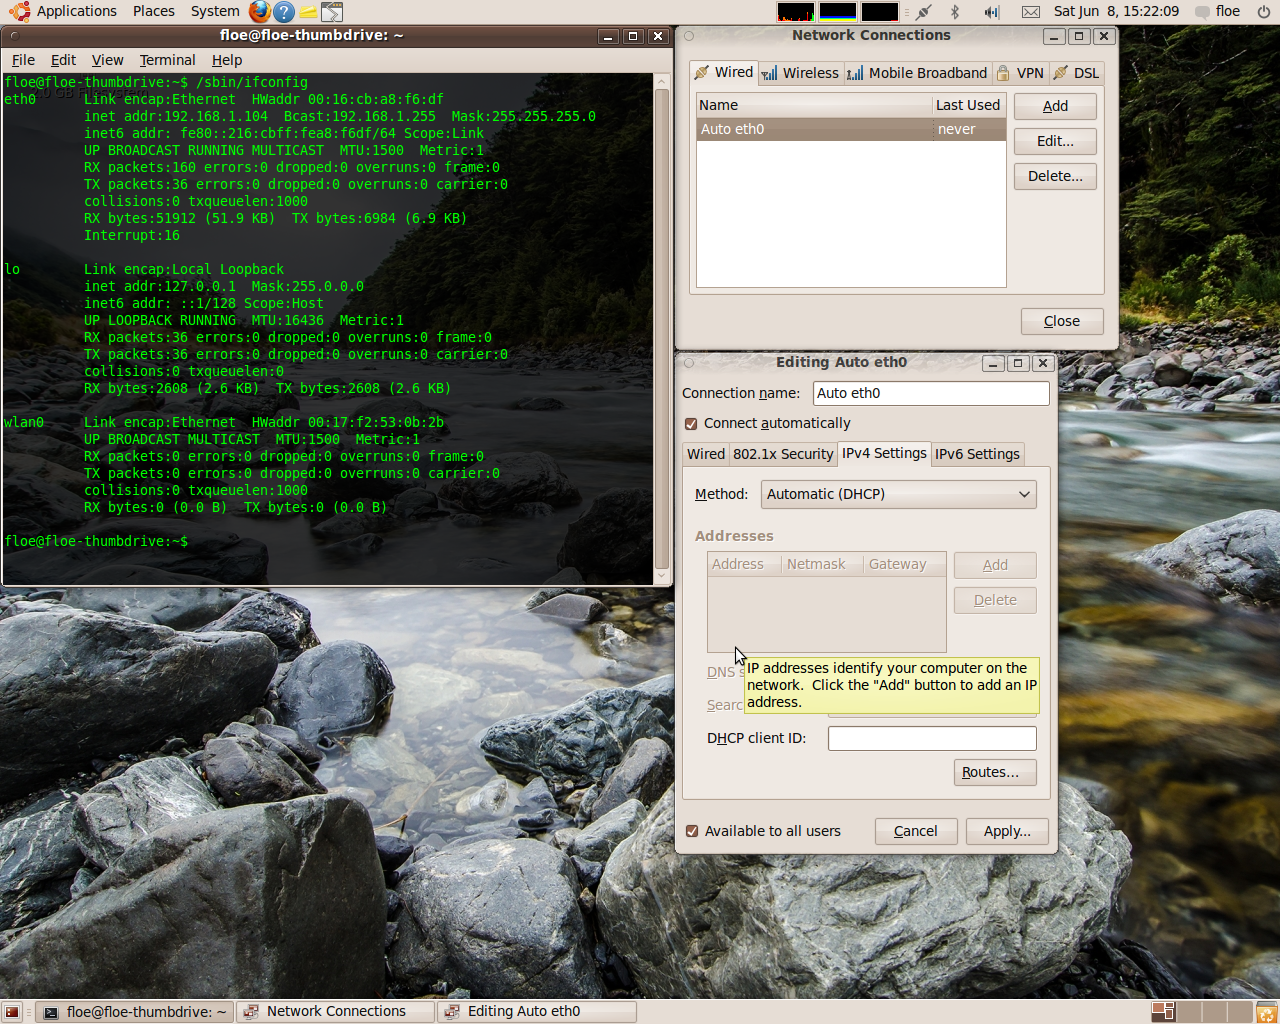 DHCP Server IP address (after the eth0 "inet addr:") |
At this point, vintage machines should be able to detect the Netatalk service in the Chooser. Later Macs may or may not detect the machine in the Network "browser"; in this case, head back to the Linux system and use ifconfig (or /sbin/ifconfig) to find out the internal IP address: look for the address after inet or inet addr: in the eth0 or en0 interface (or eth1, en1, wlan0, wlan1, et cetera depending on which one is applicable), and enter that address in the Go menu > Connect to Server prompt. An example would be afp://192.168.1.106.
To permit Guest access, run something like the following, to create a Guest share path:
Add the share path to /etc/netatalk/AppleVolumes.default like as shown earlier. Then edit the afpd.conf file so that the line at the bottom looks like the following with the uams_guest.so, tacked on:
Finally, restart the service with sudo /etc/init.d/netatalk restart to apply the changes, if it was already running. Guest accounts can be convenient, but also unsecure. Because a dedicated share folder is assigned, the amount of harm that can be done is lower.
Logging is useful during troublesome times: look to sudo gedit /etc/netatalk/afpd.conf for two examples, one being the standard log, shown in the previous code box and the much more verbose debug log, used like so:
-setuplog "default log_maxdebug /var/log/afpd.log"
There different ways of following the log, but you can use something like tail -f /var/log/afpd.log which just watches the last 10 lines in the terminal window, or you can pipe the log file through grep (example: tail -f /var/log/afpd.log | grep "getvolparams") to filter out everything you're not looking for; or open it with a text editor and refresh it. Some Linux distributions include a GUI log file viewer. The log feature can also be enabled during the ./configure step. To parse through the log after the fact, try using something like cat /var/log/afpd.log | grep "getvolparams".
Thanks go out to protocol7 at 68kmla.org for suggestions regarding this setup. Another nod to this page here for additional hints.
Beyond Netatalk 2.1.6
New developments in the AFP client and server relationship, starting in macOS 11 Big Sur have reduced the availability of AFP file sharing. There are two practical options to build a Netatalk stack: using MacPorts or Homebrew to install a macOS port of Netatalk, which can have its own complications. In particular the security systems, beefed up considerably with macOS 10.15, have made it increasingly more difficult to integrate the service into the system. The other option is to use a virtual machine server, running in something like VMware or VirtualBox to provide a Netatalk AFP server, FTP server, time server, MacIP server with macipgw (the latter has not been updated in 9 years at the time of this writing) and so on. An example would be the ones available from MacIP.net. You can also make your own from within a virtual machine off the same concept. If you use Netatalk in a virtual machine, make sure to set the adapter interface to "Bridged Adapter" not "NAT" (assuming VirtualBox) because then it will get it's own MAC address and internal IP address from the router, and can thus forward AppleTalk traffic correctly.
Other developments concern Netatalk itself. A number of hardy individuals have gone to work on the Netatalk 2.2 line and released updates such as the 2.2.10 and 2.3 updates, fixing a number of bugs, issues and cleaning up the mess of code dating back to the 2.4 kernel days. These versions have different build and configure strings than Netatalk 2.1.6 does. At the present time Netatalk is a bit on the fluid side because Netatalk 3 isn't really all that important because of the uncertain possibility of when the sun will set on the AFP client included in the latest macOS versions. Another consideration is the removal of AppleTalk kernel module from modern Linux kernels. There's valid reason to do so, as practically nobody still uses AppleTalk aside from enthusiasts, so a modern rewrite is in the works: it may be complete by the time you read this. | 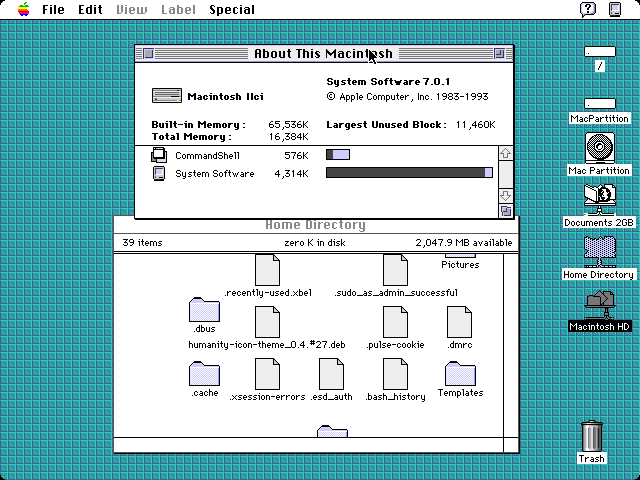 Netatalk 2.1.6 server (A/UX 3.0) |
Anyways, because of the way that Netatalk 2.2.10 and above versions or forks work, you'll have to find the instructions pertinent to that particular version. The GitHub page for Netatalk has a Wiki top title bar link, and the main page has a Releases link that can be followed to look at the latest version -- which at the time of writing, has bumped up to 2.3.2. These versions have different build procedures than Netatalk 2.2.5 and earlier do, so follow the instructions on the Wiki for those versions. Generally, the ./configure string will look something like this (for a Debian based distro):
... but will change based on the distribution and optional settings. In addition they may also have different or more dependencies depending on what you're looking to do: however the .conf files are mostly the same where they are manually edited. Most of the text above for 2.1.6 is the same for 2.3.2 except the ./configure string is different, the dependencies are different, there is no need to edit /etc/default/netatalk, and it is started up with systemctl instead of init.d. The Netatalk package is still in a state of flux and the version chain has not yet been finalized, and even direct URLs change from time to time. Currently the Netatalk package is the most reliable way of networking across Macs in the current age besides a G3 or G4 box that runs OS 9, 10.2 Jaguar and 10.4 Tiger. | 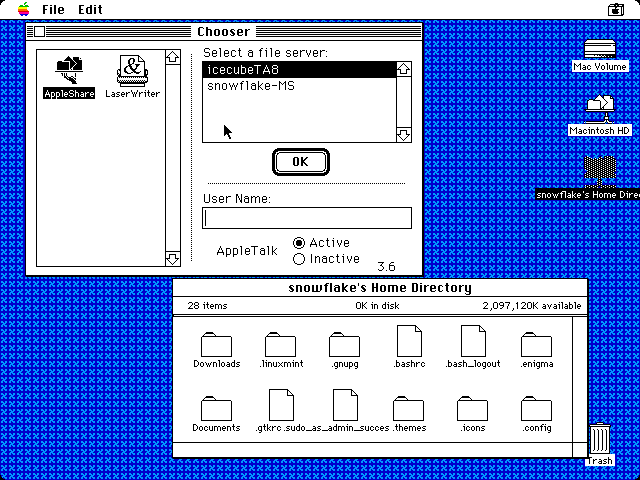 Netatalk 2.3.2 server (Linux Mint 20) |
Deploying Netatalk 4.0
Preamble
Previous text has already spoken about the intermediate AppleTalk capable versions, skipping entirely over Netatalk 3 because it only uses AFP over TCP and isn't really designed for vintage machines. Arguably the largest user base of Netatalk does not make any use of AppleTalk at all, but once again new maintainers have rolled AppleTalk back into Netatalk 3 infrastructure, refreshed a number of things, and released it as Netatalk 4.0. It is a fairly significant departure from previous versions so the old text will be retained for posterity reasons, but also to reflect the fact that a number of new exciting developments were underway as these sections, and this entire Guide for that matter, was being overhauled.
Right away, most people reading this may be interested in setting up a MacIP server to allow LocalTalk machines to use TCP programs. At the same time we should check if AppleTalk is available in the kernel. The second one is arguably more important because if AppleTalk is not enabled in the kernel, then only AFP over TCP will work. This process, like almost everything with Linux, depends on what distro is the subject. As this section assumes the use of a Debian system (Linux Mint is a Debian system, and uses Ubuntu repositories), there's two places to check: in /proc, or if there is nothing there, in /boot which the latter is normal for Debian systems. There should be a config file there, such as config-6.8.0-45-generic which is the configuration file report of what the kernel was built with. When a kernel is built, there is an option to export a list of what the kernel was built with: if this was not enabled, then you're stuck because there's not really a way to see what the kernel configuration was or is. Open the file report and check for ATALK. If it says CONFIG_ATALK=m then it should be okay: a =y means yes, =n means no, and =m means that it's a module, where it can be loaded and unloaded at the user's discretion. Since the Netatalk package includes an AppleTalk module, this is acceptable. If it's a no, well, then the kernel will have to be recompiled with support for it, which is outside the scope of this Guide.
While we are here, we can also check if IPDDP is enabled or not. IPDDP is a really old IP over AppleTalk feature that came out around 1993 by Bradford W. Johnson and Jay Schulist. Kernels before 6.7 will have to recompile with the feature disabled to use macipgw because IPDDP will intercept the MacIP datagrams and hoard them for itself. From the 6.7 kernel forward there shouldn't be any entries because it was removed sometime in October of 2023. COPS was also taken out around the same time because basically nobody uses it on a modern machine and it was just some old ISA LocalTalk cards which used COPSTalk to access LocalTalk networks. Anyways simply search for IPDDP: if nothing shows up, all is well. If it is included, then it will have be disabled for macipgw to work, which involves recompiling the kernel. In most distros the easiest way to check the kernel version is type uname -a in a Terminal window, which might produce a result something vaguely similar to this: |  Checking IPDDP and AppleTalk (Ubuntu 10.04 LTS) |
This is the output of a Linux Mint 22 system with a 64-bit kernel, version 6.8.0-38, standard desktop variant, Ubuntu base. Other systems have different output results.
Getting started
Let's start a basic installation from source code with AppleTalk compatibility, macipgw feature and Webmin administration functionality. Other features are possible and the Netatalk 4.0 package as a whole is quite capable of a fitting a variety of user scenarios. For those cases, the use of the Webmin control panel is a good choice. To use the Webmin module, it is ideal if the Webmin suite is set up first so that way when Netatalk is compiled and built it will detect the Webmin suite and automatically prepare itself. Sourcing and installing Webmin is very easy: simply head here. Next, enter the following 3 commands in sequence (for a Debian distribution: for the others, see the website) below. Bear in mind that Webmin uses some 220MB of disk space, for compact low-demand virtual machine instances, this may be undesirable. | 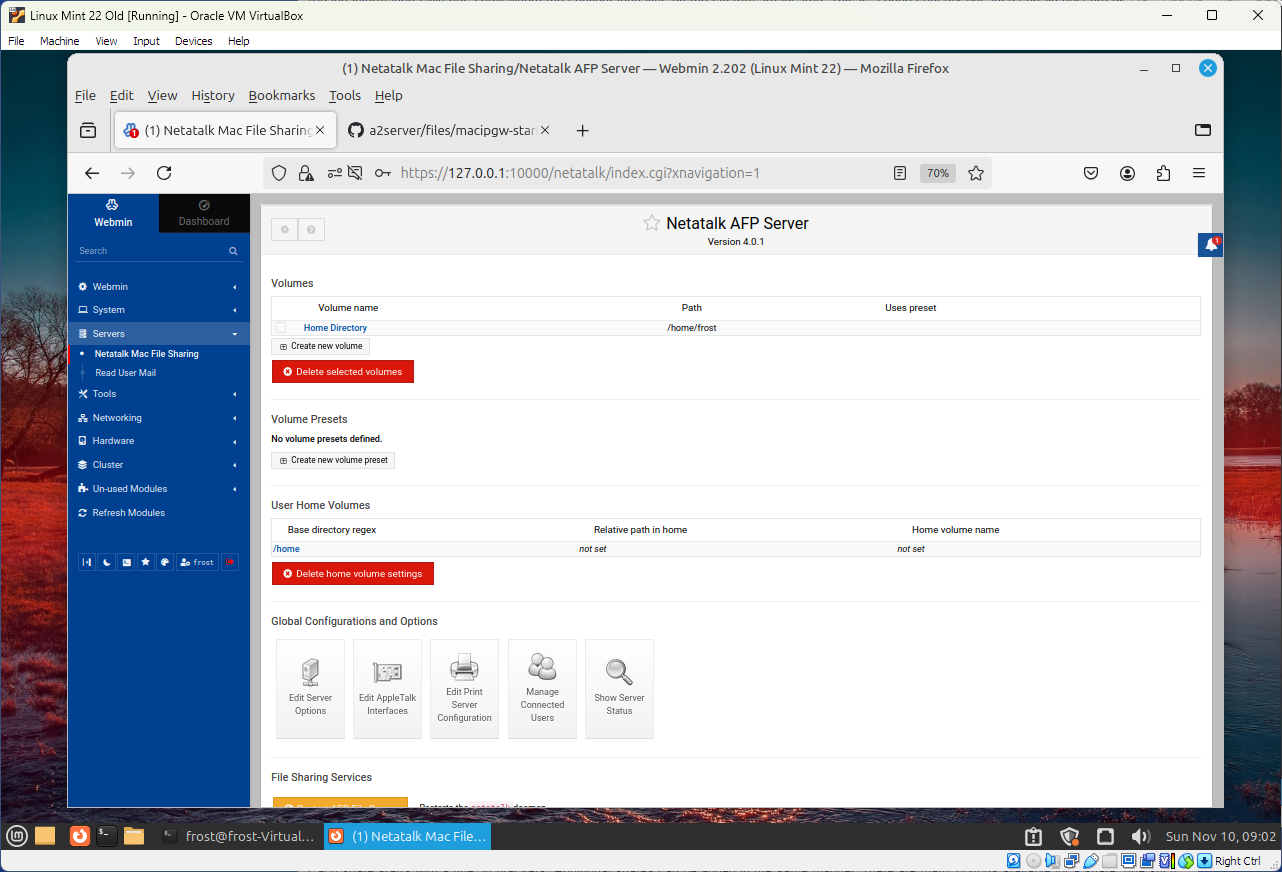 Netatalk Webmin module demo |
After installation, the Webmin console can be accessed from a web browser, using a URL like 127.0.0.1:10000 or 192.168.0.95:10000, which prompts for a user login, usually the same as credentials as the currently logged in user. The Netatalk module should then show up on the left toolbar under "Netatalk Mac File Sharing".
Prepare the dependencies for Netatalk. This will change based on what you want. The demonstration here will work for getting a Classic Mac OS and OS X file server going with a macipgw feature, but Netatalk is capable of much more. Review the packages required if you are looking for anything more out of your Netatalk server, particularly if you're working mostly with newer Macs. The INSTALL.md text file included in the Netatalk tarball file has a list of what does what: for some of those, the flags in the meson_options.txt file also in the tarball talks about what flags to use for stuff like Kerberos. Check if perl is installed on your machine: type $ perl -v, if there is no response then it's not installed and that will be required as well. Use the following command to fetch the packages required for this setup, but read the next paragraph before completing the command:
The update command updates the repository cache information. The next command downloads and installs some required and some optional packages for Netatalk to function. libavahi-client is a service for advertising the server on Mac OS X 10.2 Jaguar and above clients; libdb is a Berkeley database for keeping track of CNIDs (Catalog Node ID, basically every file and folder has a CNID entry); libevent allows Netatalk to act and react on certain events; libgcrypt20 is for DHX and DHX2 encryption authentication of users; meson is the build engine for compiling, building and installing Netatalk and finally xsltproc with docbook is for installing the manual pages, which as of right now are in XML format: these last two are optional but without them the man pages won't get copied over. For additional capabilities like printing, add libcups2-dev; pretty much everything else like PAM, Kerberos or ACL support is all newer OS X/macOS stuff. After the install process for these dependencies is finished, a reboot is suggested.
Recall that the start of this subsection provided a notice about future versions being possibly different than the example shown here. Formally, the instructions for building Netatalk are first outlaid here, which is intended to reflect the current release version. However other instructions can accompany this page, and does not reflect all the capabilities of Netatalk and isn't meant to be comprehensive. This means you may need to check other documents specific to the release version, as this text below is accurate for Netatalk 4.0.4, but as this paragraph is written, the current release version is 4.2.0. Carefully evaluate the build and dependencies to compare to this page, to determine what you should do in that case.
Previous versions of Netatalk used the standard GCC compiler. Netatalk 4 was designed to make full use of Meson instead of partial use like Netatalk 3 did. Netatalk 4 also specifies the UnicodeData.txt file, which is optional with version 4.0.5 and up. There are two normal ways of doing this: adding unicode-data to the apt-get install string above, which installs some 40MB of mostly irrelevant data, or by simply downloading it from here and dropping it into the Netatalk folder after the tarball has been extracted. It's essentially just a mapping of a bunch of characters from legacy character sets into a standard Unicode format that can be parsed by a computer. Starting with Netatalk 4.0.5 this is no longer necessary.
Obtain the desired version of Netatalk from the GitHub, SourceForge, or so forth. Assuming that it gets downloaded into the user's Downloads folder in their Home folder, follow these next steps within a Terminal window:
[tab key] refers the physical Tab key, which auto-completes the rest of the folder name. Having moved to the Downloads directory and extracted the archive, there should be a folder named something like netatalk-4.0.4 in the same Downloads directory. Next, navigate to the folder containing the Netatalk source code, shown here with 4.0.4:
Now it's time to build it. This build string may change, but should be fairly close (check the meson_options.txt file in the netatalk source folder for CUPS printing); check to make sure this is compatible with your desired build:
Monitor the output for anything strange or abnormal. If there is a mistake, then it may fail to build, but if it is a simple user error (i.e. forgot to add something) then use the --reconfigure switch immediately after the build command to rebuild it. Check the summary at the bottom to confirm desired build settings. The next steps in order is to compile it, then test it, then install it, as shown with the next 3 commands in sequence:
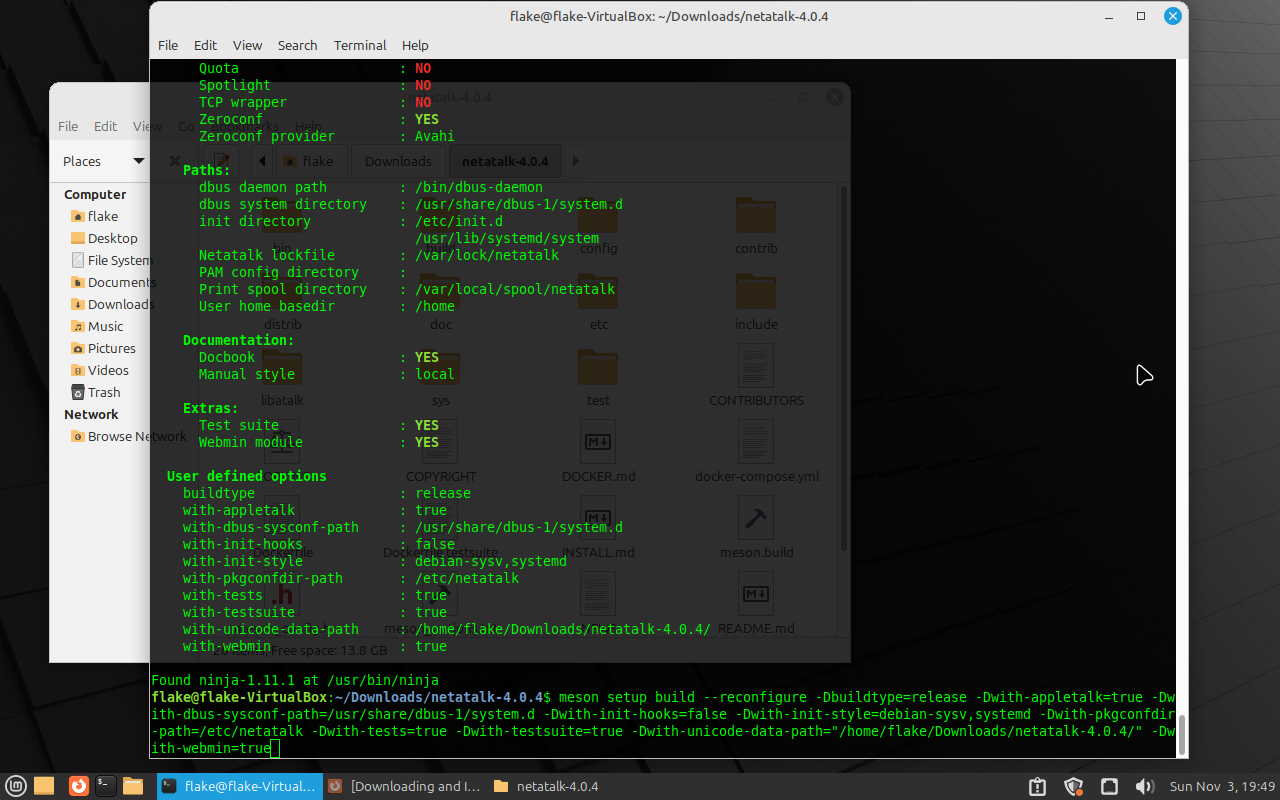
Next, check that the capabilities align with what is desired. Each command below will make a short report on Netatalk and AppleTalk capabilities:
We're almost done with Netatalk. Unlike previous versions of Netatalk, there's generally only two configuration files to edit. The output from the previous version information reports show where the configuration files on the system are located. This is a good concept because certain obscure or less common systems like Solaris are different than more mainstream distros. The first configuration file to edit is atalkd.conf, but most of the main server configuration is in afp.conf. Let's start with the easiest one:
Replace xed with whatever text editor is preferred or built in to the host operating system: pluma, gedit, pico, nano or vi are all viable. This file is for defining the hardware port to send AppleTalk traffic out on. Since most computers these days have Ethernet ports, and WiFi is already sketchy because of the way that they don't always handle Phase 2 frames properly, most people will use Ethernet. WiFi is acceptable though as long as it is compatible, as discussed earlier in a subsection titled Wireless Access. Anyways use ifconfig from a command prompt to list the interfaces. For most machines, it will be eth0 or en0, but could be other labels. Add the interface to atalkd.conf, save and close.
atalkd can do routing between different interfaces, and can create EtherTalk zones as well, but most people won't need to do that. The example in the the manual page for atalkd.conf has an example. In most cases atalkd should automatically determine the interface, but don't count on it, especially if you have more than one interface. If you use an AppleTalk router or gateway on the EtherTalk network, you may have to configure the network number and node as well. Another cool feature is nbplkup, which works kind of like CheckNET or other types of AppleTalk system scanners, useful in certain testing and diagnostic scenarios.
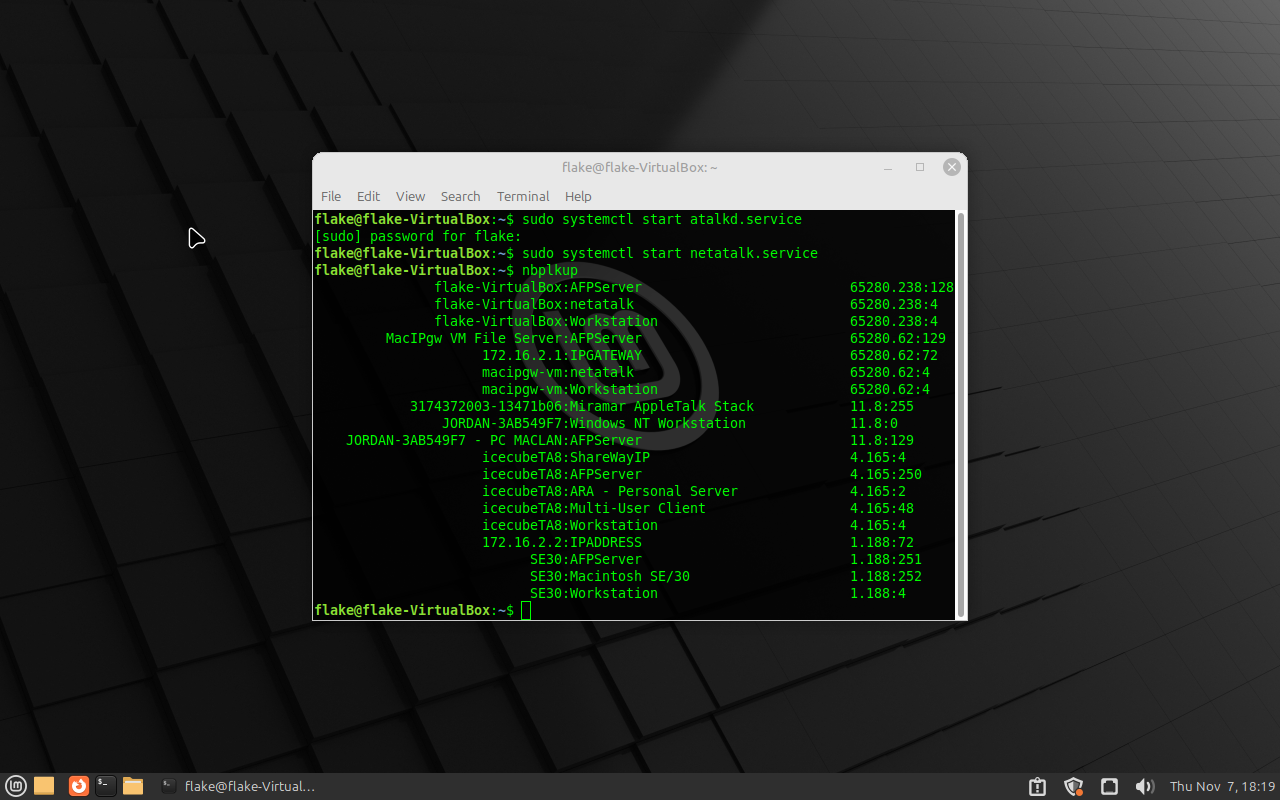
In previous versions of Netatalk a user configured the share directories with AppleVolumes.default. Instead with Netatalk 4.0 nearly all of the settings are in one file:
This file includes a script to automatically add the user's Home folder that is logged in as a share. Sharing home directory folders individually is a bit undesirable because this can contribute to CNID database corruption; do not share the same directory path more than once (i.e. sharing ~/, ~/Documents and ~/Downloads). Instead use share directories out of the /srv/ path and leave the Home Directory path alone or remove it if Home Directory access is not desired. To do create a share folder, see the flow below:
The first command creates the directory named Netatalk_Server, which can be changed for a different folder name. The second changes the ownership of the folder and everything inside it so that users with administrative privileges (i.e. those who can use sudo) can write to it. adm could also be admin or wheel depending on the operating system: this is for Linux Mint, but Ubuntu typically uses admin. To find out what group a user is in, type groups USER, replacing USER with the username. An example follows below:
Lastly the chmod command changes the permissions of the folder, allowing read/write/execute access for the owner (root), the same for the adm group, and read/execute permissions for Others, which generally means guest users (use 2777 to allow guests to upload files, generally not recommended security-wise). See this page for why the sticky bit 2 is also set in front, it's "complicated". Side note: Use something like stat /srv/Netatalk_Server to view file or folder permissions, or ls -l. Now head back to the afp.conf file, and do something on the order of this: [File Server Folder]
path = /srv/Netatalk_Server
| 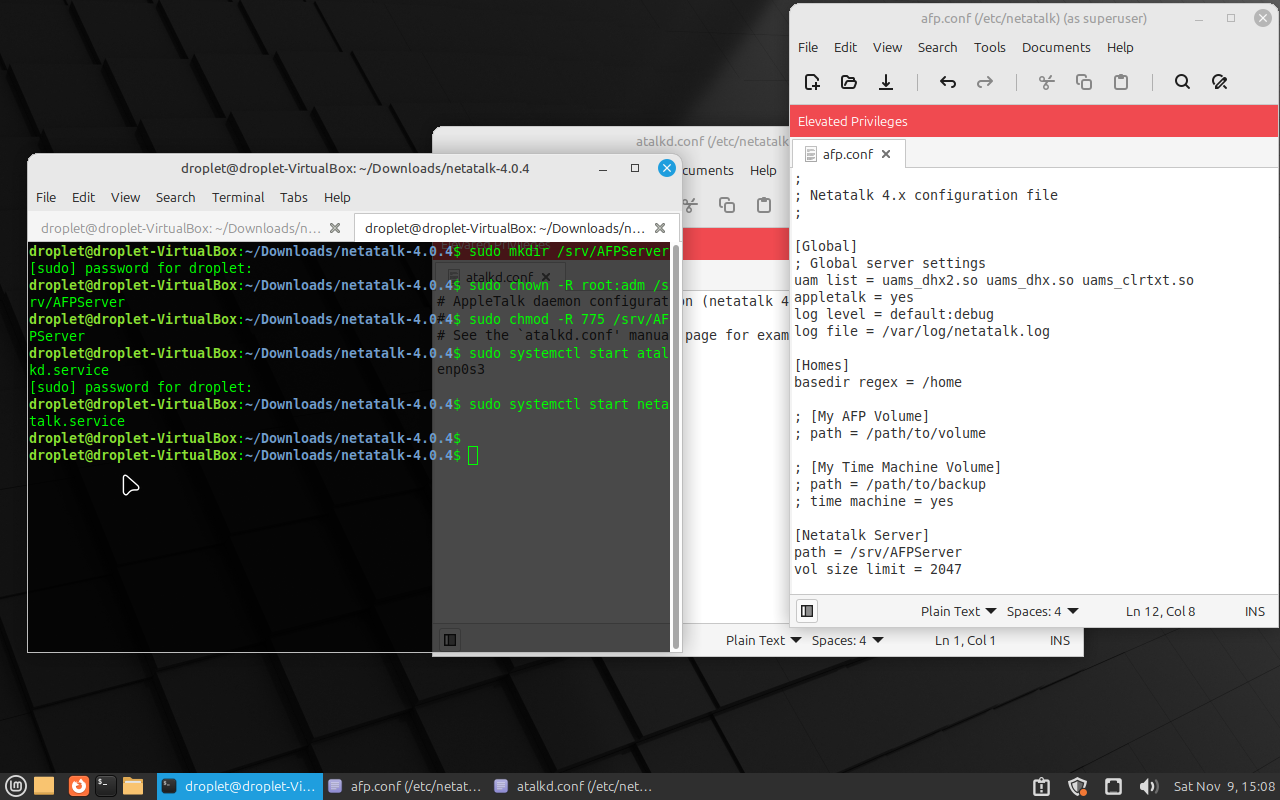 Service started, config files visible (Netatalk 4.0.4) |
Each share starts with a title, in brackets, and this is the share name that shows up in a Chooser window to mount a volume, and similar for OS X. Additional shares can be added in the same manner. There are many options available for a share, one such is like this:
This limits the reported size of the volume to just under 2GiB, to help with pre-System 7.5 operating systems which have issues with volumes greater than 2GiB. Using vol size limit = 2047 is viable too, but that was designed more for Time Machine reporting, so it wouldn't overflow the disk (see the man page for afp.conf; there's also an option for ProDOS which can't go beyond 32MiB). In most cases Netatalk should automatically detect AFP2.1 (see this section) and earlier clients and apply the feature but in some cases it may not work so the manual method is still mentioned here. Under the [Global] tagline, make it look like the following:
The Cleartext UAM allows for a number of older Systems that cannot use DHX or Two-way Random Number Exchange. It's not great because passwords are sent in the clear, but it's better than nothing. The afppasswd utility (its man page offers some ideas on how to use it) can be used to create the credentials for "Randnum exchange", but it is more work for a relatively easy to crack method. If security with the Cleartext UAM is an issue (like with Guest users) then consider creating a Linux user account that does not have administrator privileges and assigning that as a user account for old computers to sign into.
Add uams_guest.so to the line with UAMs (the one that starts with uam list = uams_dhx2.so ...) if Guest user access is desired. For logging, normally the log entries are shown in /var/log/syslog, use something like tail -f /var/log/syslog to have a terminal window show the last 10 entries and keep an eye on things. Since this could clutter the feed on a busy system, an alternative logging output may be desirable. A mostly complete [Global] section might look like this, with logging, guest user access and AppleTalk:
A lot of other changes to Netatalk configuration are packed into this text file. The man page lists a substantial amount of options that can be a bit overwhelming for some people, consider using the Webmin module in that case. Next, to start the file server, first start up the AppleTalk daemon, which is the first command below. It may take a minute or so for it to complete its processes, then follow up with the Netatalk service:
At this point, vintage machines should be able to find the server readily in the Chooser. Mac OS X boxes should be able to find it in the Network browser, or worst comes to worst, use the server's IP address, which can be readily found with ifconfig.
MacIP server
And now for macipgw. It's a service that can provide a MacIP server to route TCP traffic over AppleTalk, usually with LocalTalk clients. Integrated with Netatalk with the version 4.0 release, it makes sense to use it when LocalTalk is the only option and Ethernet cards are becoming increasingly hard to find. As per the introduction to this subsection, if IPDDP is enabled, usually with pre-6.7 kernel versions, then it will have be recompiled with it disabled. Since most people won't have kernels that old by the time this goes out to press it shouldn't be a problem, but it is worth checking.
The next problem is dealing with NAT, or Network Address Translation. In previous versions of Linux this was done with iptables, but nowadays that is obsolete and replaced by nftables. Both are cryptic and difficult to understand, with man pages the size of small dime novel and read about the same. But without NAT to intercept and redirect the MacIP intended traffic this will go nowhere. It's important to understand that nftables can be set up many different ways and this script below does not represent a script that is suitable for every scenario, but it does work in that it allows the host machine and the vintage machines to use IP programs independently, and was designed for use in a virtual machine instance of Linux. | 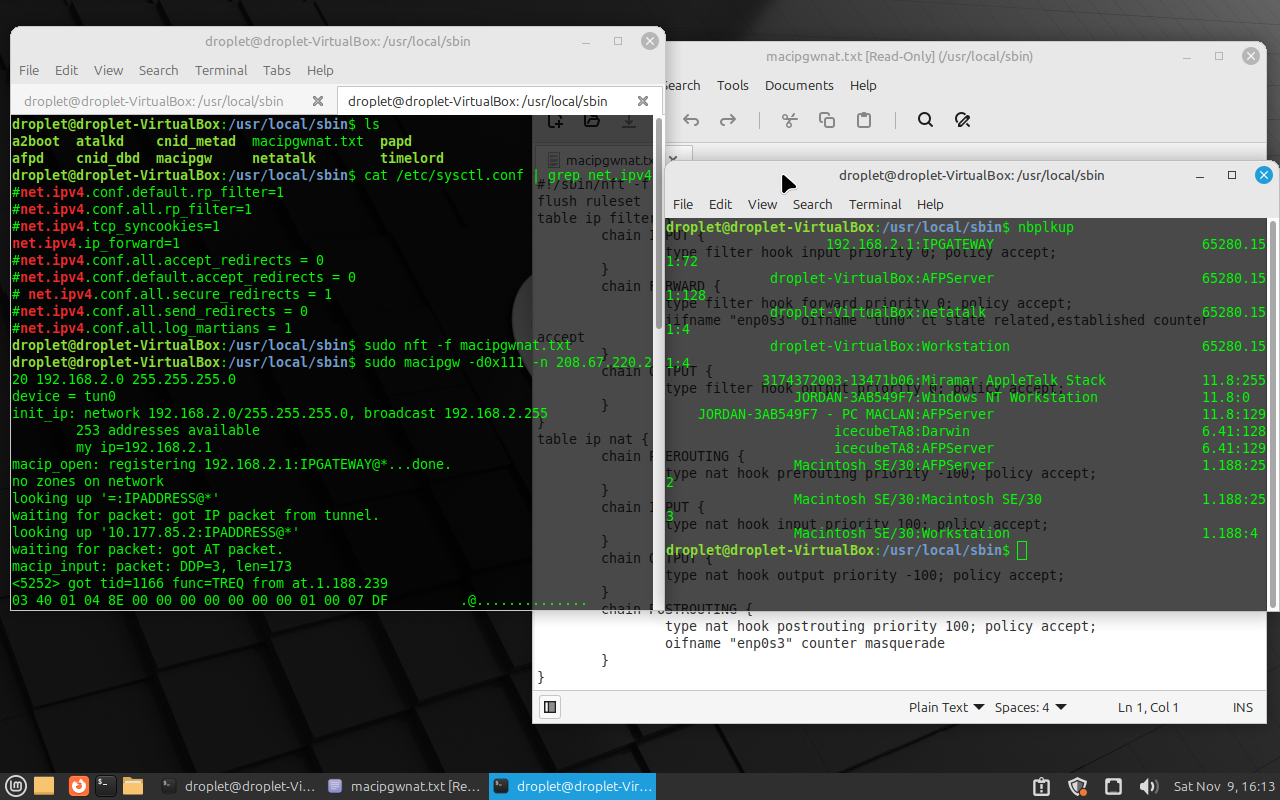 Starting macipgw service |
macipgw requires IP forwarding to be enabled in the kernel, a network tunnel to forward data to (this is what NAT is for) and atalkd for operation, latter of which is fulfilled by the installation of Netatalk 4 with AppleTalk enabled and the atalkd service started. To enable IP forwarding, there are two ways of doing this. The first is not persistent through reboots, the other is:
That's all well and good, but for continued use, it's better to edit /etc/sysctl.conf, like this:
Remove the # in front of the line that has net.ipv4.ip_forward. A reboot may be a good idea. Now to set up NAT, we will create a text file to load a script into nft (the file can be called other names, but this helps it be more clear). Use xed, pluma, gedit, or whatever the distro uses for a text editor (they seem to change all the time), or pico / nano or even vi for the turbo users:
In the new text document, which should be blank, paste the following script into it. Change the red text (the enp0s3 interface) in the double quotes to the correct port for AppleTalk traffic that was defined in the atalkd.conf file, which is usually eth0 or en0, but varies based on the platform. The quotes are intentional and required.
Save and close the document. Start up nftables with the next command, which loads the script for this job:
Finally to start the MacIP gateway service, use a command like the one below. There is a systemd profile for macipgw.service, editing the configuration file in /usr/lib/systemd/system/macipgw.service with a text editor is doable, but considering the status of the service right now, that may not be fully ready yet to trust. The debug information is too useful to pass up.
The -d0x111 switch enables maximum debug level output directly into the Terminal window, and is optional but suggested; 208.67.220.220 is a DNS server, but there are other choices, like 8.8.8.8; 192.168.2.0 is the desired network address subnet to offer the service on. The gateway will reserve 192.168.2.1 for itself and assign clients addresses starting from 192.168.2.2 upwards. The last is just the subnet mask, which could be different for networks that use schemes like 10.0.0.1 or 172.16.0.1. For networks that use zones, there's a -z switch to indicate which zone to seed MacIP on, check the man page for macipgw. Monitor the output to check for errors, such as unable to assign addresses or other conflicts. Some can be resolved with a reboot. | 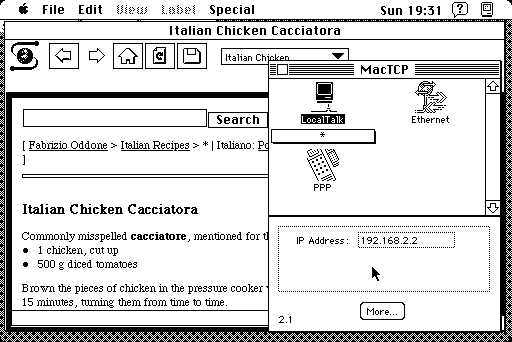 Browsing the web (SE/30) |
So...how does it work? Well, the best way to describe it would be "beta". Most of the issues with it are usually DNS related or technical matters. It's not particularly reliable: FTP might work to a UNIX or Windows host, but not a Mac OS X host because Fetch 2.1.2 returns an error saying something about an illegal PORT command (check the bottom of OS X's ftpd man page). Remote FTP servers probably won't work. HTML should be OK along with AFP over TCP. Other protocols like SMB or NFS will probably be prohibitively slow because LocalTalk is not a good interface to use with higher overhead processes like NFS. It is highly probable that most of the issues are with NAT translation on the server. It still needs refinement and probably a rewrite of the code, or it could just be the way that NAT works which gives us most of the problems. It doesn't help that nft is a enigmatic, quirky program which really isn't meant for the common man to use: that's not to say that iptables wasn't that way too, because it was, but they're not very approachable and are definitely intended for experienced users.
Currently active Netatalk maintainers NJRoadfan and rdmark were invaluable in their technical assistance to make this subsection possible.
afpfs-ng Client Access
This software is meant to access AFP servers from Linux systems. There are a couple of hard realities about this software:
- It's still a beta, but runs like alpha software
- All the Ubuntu sources classify it in the "unstable release" category, with good reason
- It only works with AFP 3 servers, which means OS X. See the More Info page for AFP version by OS
- It only works from a command line despite a lovely teaser X11 image floating around
- It has to be compiled from source for most distros, meaning there could be gotchas relating to the ./configure string
- Testing on OS X 10.2.8 machine (iMac G4 800MHz) failed to produce results worth posting here. The computer could be detected and shares listed, but no one share could be mounted
- Then it bears mentioning that that it has not been updated since 2008
Otherwise, for the more adventurous Linux types, feel free to head out and test it out, although many users have reported issues with the software. Because it only supports AFP 3 servers, this means that there are plenty of more established networking methods available such as FTP or SMB that are more likely to actually work. Something slightly more viable is this AFP client which works in the command line, written in Perl scripting language.
iOS Netatalk Server
The Cydia version of Netatalk at the time of testing is 2.0.4-7, but it only works with AFP over TCP/IP, and the advertising feature doesn't work in pre-OS X platforms. Thus, the minimum OS to mount this share should be 7.1 with OT 1.3 and ASC 3.7.4, and the maximum will most likely be the last macOS version to have an AFP client (only 7.5.5, 7.6.1 and 10.5.8 were tested) -- or install openSSH and use a GUI SSH client like FileZilla or Fugu to access the device. In Mac OS X, it will show up under the "Network Locations" area from the Go menu/Connect to Server feature. For the Classic OSs, the "Server IP Address..." button in the Chooser is the only way to mount the iOS share. As this package can only be installed on jailbroken devices, this section will only cover the Netatalk element. Detailed tutorials elsewhere on the web can demonstrate how to jailbreak with software like redsn0w, limera1n and other utilities. | 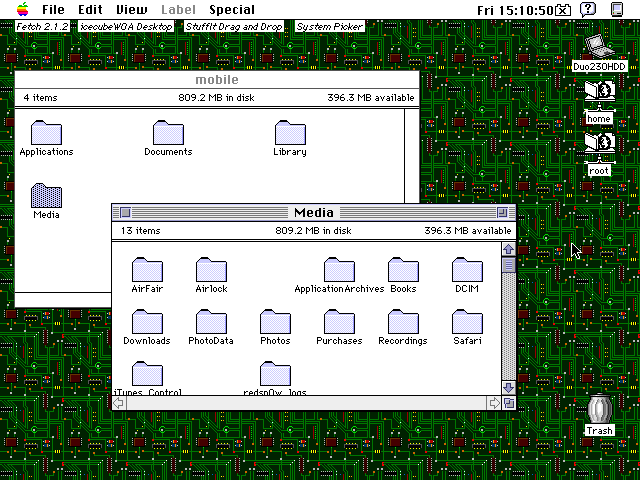 iPad 1 3G 32GB mounted |
Once the Cydia package manager is available, search for "Netatalk" with the search function. Install it, then restart Springboard (or "Respring"), assuming the useful SBSettings package is installed: if not, just reboot the unit. Next, if SBSettings is open, then the WiFi internal IP address should be visible from the drop-down menu. Alternatively, tap Settings, then either General or WiFi (depends on the iOS version, and device) to open the WiFi Networks panel. Hit the little blue > icon to obtain more information on the currently active WiFi network, and then the internal IP address should be shown in the "IP Address" field, which can then be entered into the client IP address box. It is unknown whether this service will work over cellular data, although there are a few jailbreak programs that can fake WiFi access to cellular-denied apps.
Now for Classic OS systems and earlier, assuming they have already been configured as demonstrated in the earlier systems, the Netatalk share can be accessed either in the Chooser with the "Server IP Address" button, which can be used to connect to a non-standard AFP port, such as 192.168.2.83:5480. In OS X, use the "Connect to Server..." selection in the Go menu: the "Browse" button or Cmd + Shift + K will instantly bring up the Network Locations area in a new Finder window in later OS X versions like 10.4 and 10.5. The root and home directories are available to be accessed once mounted. home is for the mobile user account, which assuming only one user account on the device, is the default. For users who have not changed the root and mobile user passwords the default passwords for both are alpine. The mobile account cannot be logged into -- use the root account. Install MobileTerminal to change the default user passwords, instructions should be on Cydia.
The device for this testing was an iPad 1 3G 32GB model on iOS 5.1.1, the last iOS version for this unit, which has been obsolete for over a decade.
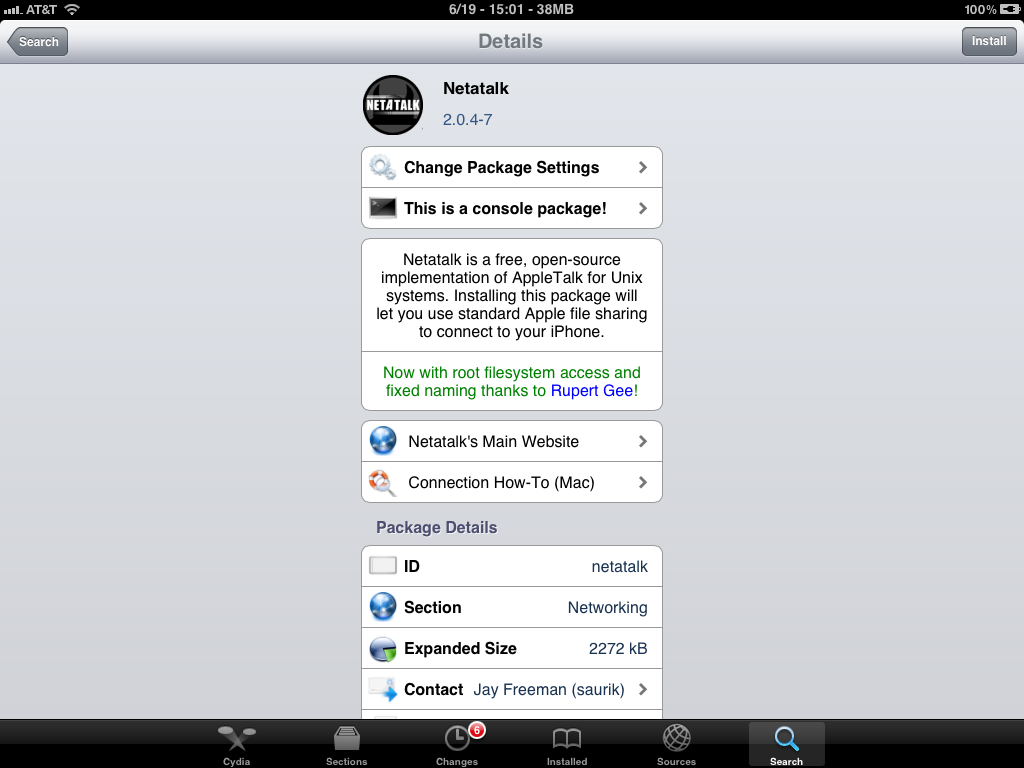 Netatalk package in Cydia |
 Package components to be installed |
 SBSettings menu showing IP address |
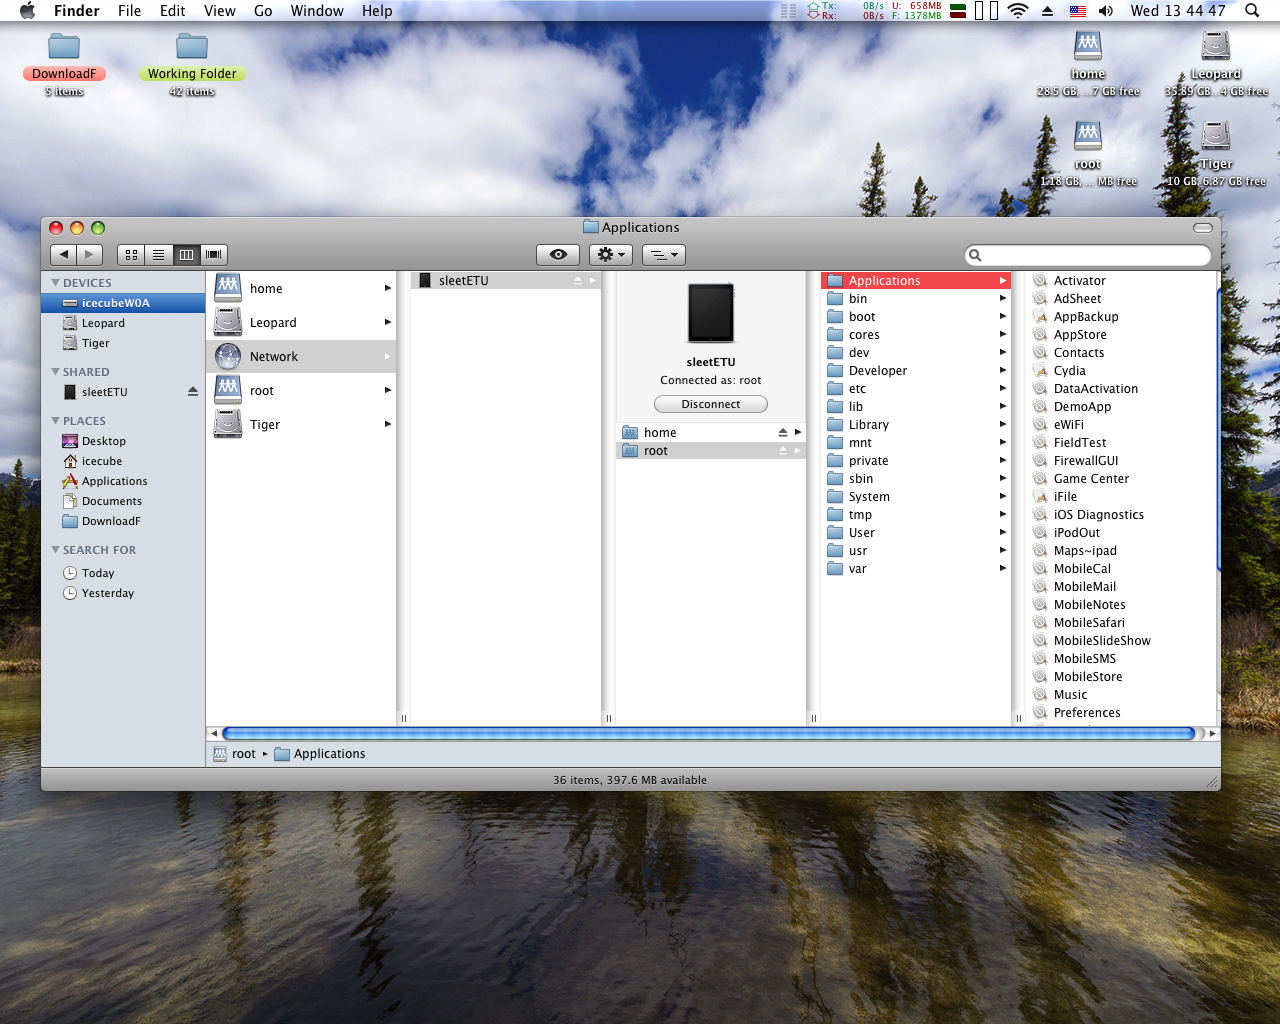 OS X 10.5.8 accessing the share |
This service has fallen by the wayside and allegedly has not been updated since at least a few years ago, which makes it incompatible with newer devices. This probably means it caps out at iOS 7, which are quite dated already. On top of that there was apparently a Netatalk 3 binary (v3.1.7-4) too, which is incompatible with older devices, but should work with iOS 8. No further word on that fork.
Novell NetWare
Basic overview
This product line was all the rage on PC boxes back in the day for business file sharing purposes. It apparently was good enough that once other options became more available people either kept going on it for existing enterprise/business/large school type situations, or left for other alternatives. Finding accurate up to date information about it is not easy, and most people who messed around with it, while they remember the affair very well (probably because of the difficulty of interacting with it), they don't seem to be rushing to go back to it either, which kind of speaks for itself. By the late 1990s the sun had set and it was past its prime.
As far as Macintosh clients are concerned, there are only a few choices. Since the Chooser is used to connect to NetWare servers unless IPX is used, really any Mac can mount a NetWare server, but whether the server configuration program works is a different matter. Any specific overview of a NetWare feature is best left to this site because his expertise and familiarity with the overall platform, plus relatively detailed pages on specific versions makes it the go-to site. For NetWare servers on Macintosh, we can stop right there because there weren't any, only on PC and a few other systems. Clients can be simplified into two types: one that use an AppleShare gateway of sorts, and the other that uses NetWare's native protocol, which involves IPX. IPX was a competitor to TCP/IP and how you're reading this right now probably tells you how far IPX went. MacIPX was a control panel developed by Novell to facilitate IPX communication for Novell's products, but Apple didn't do much with IPX. According to the zx.net.nz site, AppleShare was used for transport up until NetWare 5.1 with a special Macintosh native extra, which was over IP. This section is in this EtherTalk heading because the primary link interface is Ethernet, although others can be used, but also because it relies on the AFP transport protocol for Mac clients. Other clients will use IPX.
Since this Guide is focused on Macintosh systems, no customary tutorial will be provided for getting a Novell NetWare server up, as David's site has an outstanding gallery of images for almost every single step showing what it looks like, and the process is exhausting, requiring multiple reference sources and digging though 300-page manuals. Like NFS and SMB, it's an early protocol dating out of the late 1980s and is a challenging journey getting one going. If you are familiar with MS-DOS matters and enjoy tinkering with Linux on a lower level, then it won't be too much out of what you're already used to. If not, then buckle up for a rocky road.
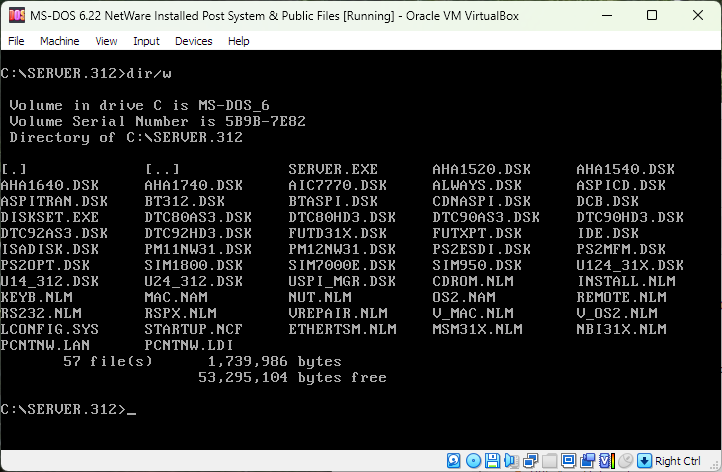 SERVER.312 directory |
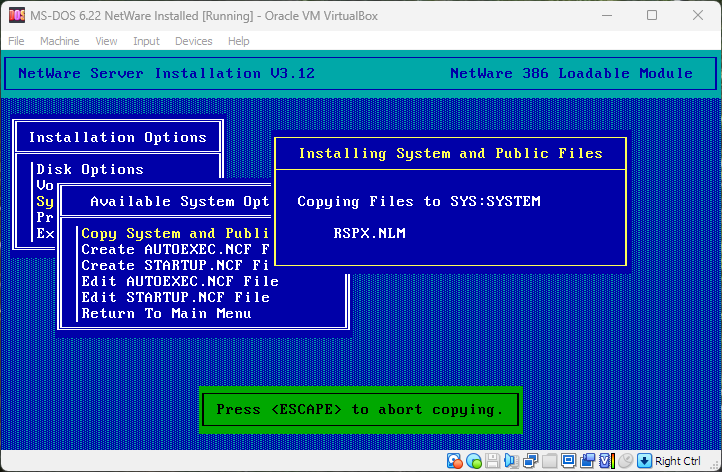 Installation in progress |
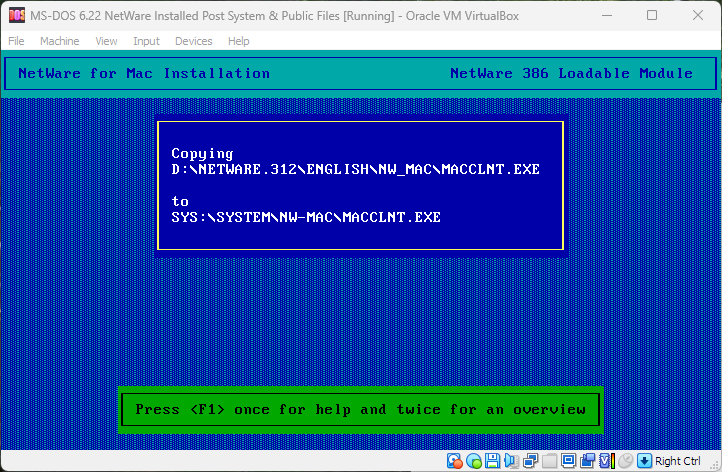 Macintosh package installation |
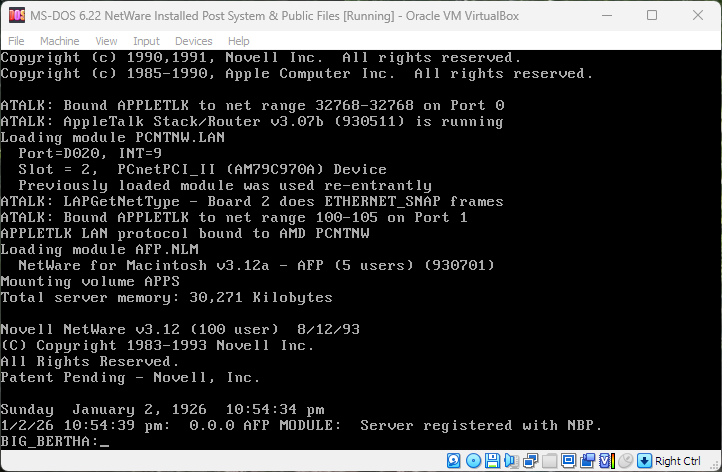 Main NetWare console |
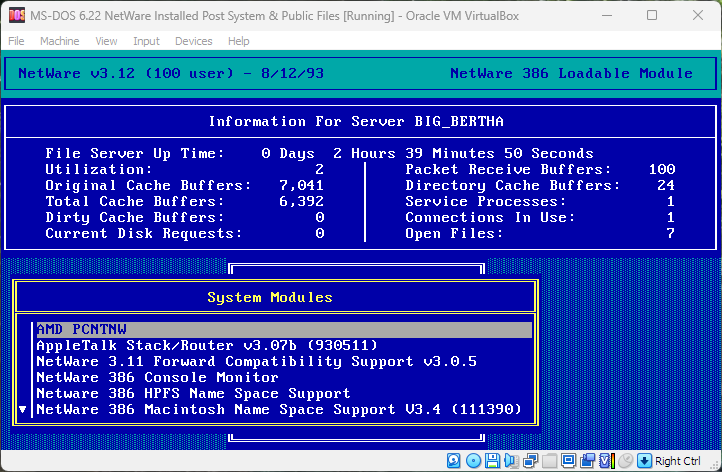 Monitor program |
A VirtualBox or similar MS-DOS emulator would be sensible. It's kind of a weird package, because it runs its own operating system on top of MS-DOS, like Windows 3.1 does. Suggested software packages include: MS-DOS 6.22, a CD-ROM driver, Ethernet packet driver, a TCP/IP stack and probably something to limit the CPU load in a virtual machine, like DOSIDLE.EXE. A good TCP/IP stack, which isn't required by NetWare but is a good idea to help get a packet driver or other articles going, would be mTCP. It's a reasonably well documented software stack designed to run TCP/IP on really old x86 systems, even a 8088 or 8086. Normally it comes with a FTP server, FTP client, IRC client, DHCP utility, a ping tool, a HTGET which is kind of like Linux's wget program, HTTP server, and a few other things -- for just over 1MiB on disk. It's impressive. |
 Some of the sources used |
As for virtual machine environments, VirtualBox works, and its snapshot/clone feature is nice when things go bad and reverting is the best option. But other emulators work too, like QEMU and KVM. Since only VirtualBox was demoed, author can only speak for that one. But one problem is dealing with the Ethernet driver situation. The best candidate would be a NE2000 "compatible" driver, which it seems like VirtualBox 7 does support, more on that in a moment. Otherwise you'll be limited to either the PCnet-PCI II (AM79C970A) or PCnet-FAST III (AM79C973) choices. The first works with a DOS driver that has to be manually copied and linked in the INSTALL NetWare component, and by linked, something like C:\server.312\pcntnw in the AUTOEXEC.NCF config file. It's also rather tricky to find because it's not a common driver for some reason. NetWare 3 was around before PCI and was smack-dab in the middle of the Bus Wars between ISA, EISA and MCA, with VLB coming late to the party, but PCI based drivers still work. We are most certainly glad to put that affair behind us, particularly MCA.
As far as the other option is concerned, you should be able to make use of something like the command below to use a NE2000 VirtualBox driver, which would be nice since NetWare already has drivers for that. This command would be used in a Command Prompt for Windows (example shown, highlighted in red) or Terminal window for other systems. Avoid spaces and funny characters in VM names.
Apparently, other types are possible for the type: 3c501 or 3c503 for 3Com EtherLink models that should be familiar, and wd8013 for an old Western Digital branded card. Only one post on the VirtualBox forums mentions this: author is grateful for Dave pointing it out as it's rather obscure. Whether this undocumented feature works in VirtualBox 6 or earlier versions is anybody's guess. Considering that 6.1.50 reports the line below, the answer is probably "Only with VirtualBox 7 or higher".
Use Bridged Adapter, not NAT for the adapter interface. PIIX3 chipset should be fine, PS/2 mouse (not that it matters here), and figure 32MB of memory. When formatting the hard disk, make sure to leave plenty of unformatted space for NetWare to use, as it likes to have one MS-DOS partition and then one NetWare partition, or more.
Macintosh clients
As NetWare was commercial, enterprise-level file sharing software, it is configurable for a number of different uses and has a lot of things that can be done with it. One thing that is odd is that users, groups, access rights, privileges and so forth are done on a workstation (client) machine, not the server itself. This is kind of like Rhapsody 5.6 in some respects. As almost anybody fooling around with NetWare today is probably not doing it for a serious purpose, but rather a hobbyist pursuit, it's probably best to keep things simple. A MS-DOS workstation client to configure the users and groups et cetera would probably make the most sense. In addition, only NetWare 3.12 is demoed here, but according to the host of the zx.net.nz site, NetWare 4 is quite similar.
The first client is one that comes from Macintosh Garden. It doesn't seem like a complete and proper archive, because the disk image has a title of Untitled and doesn't seem to be complete, but it's sure better than nothing. The best we have for version information is the NetWare Control Center, which is v1.0 and dated for 2 December 1988. On our demo machine, the NCC didn't work, saying it couldn't find any NetWare servers, even when a server was mounted. This could have something to do with the NetWare version (the Macintosh Garden page says it was for NetWare 2 and 3) or the frame type (802.2, SNAP, Ethernet-II, and 802.3 are the available options) isn't working right. SNAP is the only frame type that will work with a Macintosh system, as far as we can tell. On our System 6 system, the Rights file is dropped into the System Folder, with the NetWare desk accessory is copied into the System stack with Font/DA Mover. This means that the privileges of a volume or folder on a NetWare server could be checked, similar to Access Privileges of AppleShare WS 1.1. It didn't work right either and the manual provides the best overview of what it and the NetWare Control Center would look like. Odds are pretty good it works like the v2.1 release below.
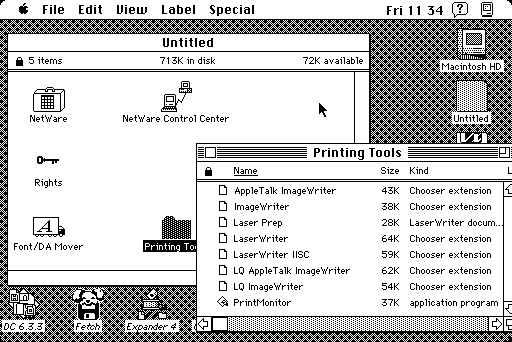 v1.0 archive contents (SE/30) |
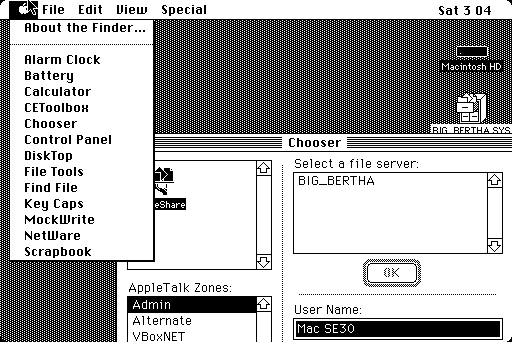 Chooser view, NetWare DA |
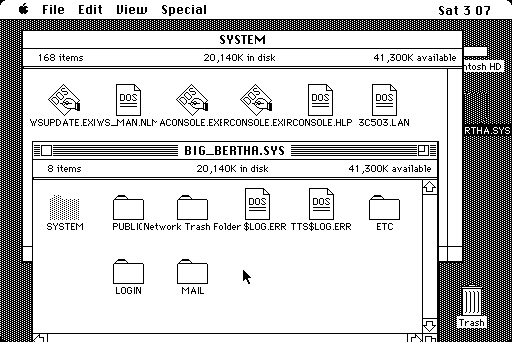 Root directory contents |
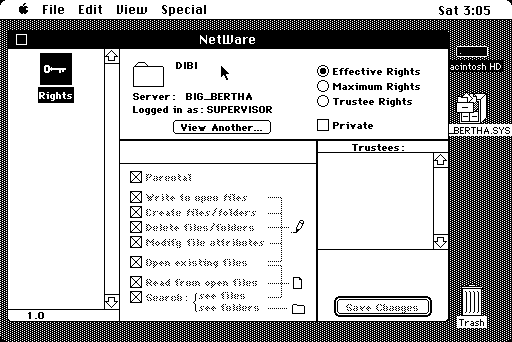 NetWare DA (didn't work) |
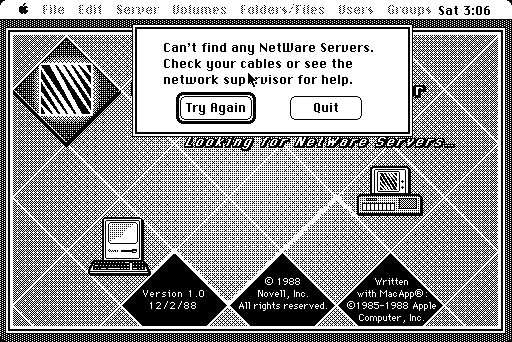 NCC program |
The documentation says System 4.2 (aka System Software 5.0) is a minimum requirement, which means the 512Ke could probably work, but a 512K is uncertain. Given that it just shows up in the Chooser like any other AppleShare server, there is a good chance it could work on the 512K, but it's likely that NetWare Control Center requires System 4.2 or later, which doesn't affect conventional use of the file server. In addition the manual shows (page 2-5, PDF page 32) AppleShare 1.1 in an Installer window, so it's not limited by the AppleShare client version, and an AppleTalk bridge would do the rest of the work for serial only systems like the 512Ke.
Since NetWare has a built-in AppleTalk router, it creates zones and uses them to filter users and groups into useful divisions, similar to how Workgroups function with SMB. Clicking a zone entry shows servers in that zone, which can then be mounted just like normal AFP servers with the same login dialog. As users couldn't be set up till later, SUPERVISOR with an empty password was used as a login, which would be a first priority to fix. In testing, the file copy process was as fast (results in the Data Transfer Rates section) as a normal AFP transfer, this is most likely because it's using AFP as the transport protocol and the virtual machine is not the bottleneck. On a real machine, most likely with a 386 or 486 processor, the results would probably be different, and the only question left is who would be faster: a enterprise level file server software suite or a Macintosh AFP client. For now, we won't know more. It would be nice to also check against native IPX clients and MacIPX for good measure, which would require real hardware to evaluate.
The next two versions are found from digging DiscMaster, which scrubs archive.org uploads. Searching for NetWare Control Center provided two results: a version 2.1 from 5 Feburary 1991 buried in an archive named NOV-APP1.SIT and v2.11 from 25 July 1991, stuffed in an archive called macutl.sit. Aside from TeachText missing on one of them, they come with the same articles, except for the version changes on each one. Neither can be considered authentic archives, but like v1.0, better than nothing. Odds are nothing significant changed between them so focusing on one will make this shorter. About, Message, NetWare UAM, Notify, Print Queue and Rights are all System extensions; the NetWare DA can be either copied into the System stack with System 6 or opened and the DA inside the suitcase pulled out for System 7. |
 Starting up NCC (System 7.1) |
Since System 6 was still quite common at that time, the DA and related stuff like Rights, Message and Print Queue make sense in the manner that they are, but they should work fine in System 7 too. None of them seemed to work correctly in System 6 at any rate. Unlike the previous v1.0 that we saw earlier, NetWare Control Center seems to work, even if it seems to hesitate, which suggests that v1.0 was for NetWare 2.0, which came out somewhere around 1987 for 2.0a. It doesn't function quite the same way as the last version (next paragraph) does so a image gallery of what it looks like follows next.
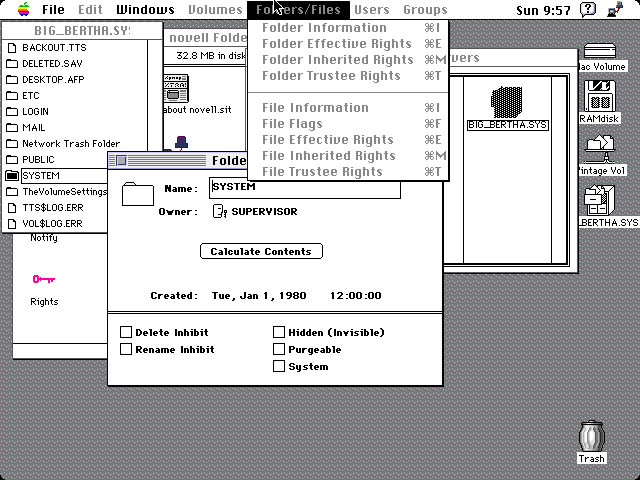 File/folder information (IIci) |
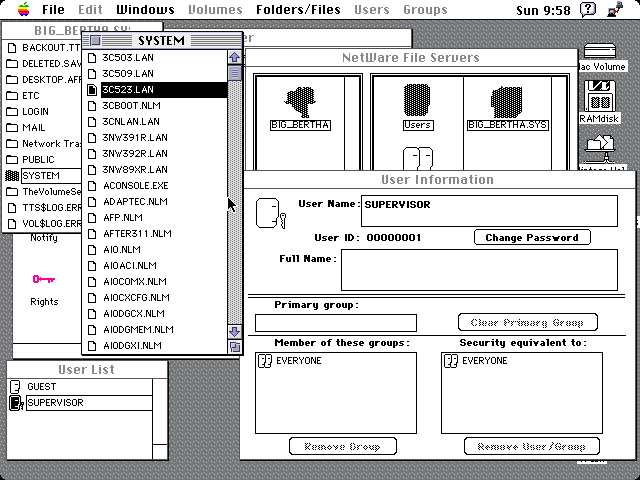 User info, file browser |
 User information and menu |
 Volume info and main window |
 Various rights |
 NetWare DA main view |
 Messaging feature |
 Print Server queue window |
 User access rights panel |
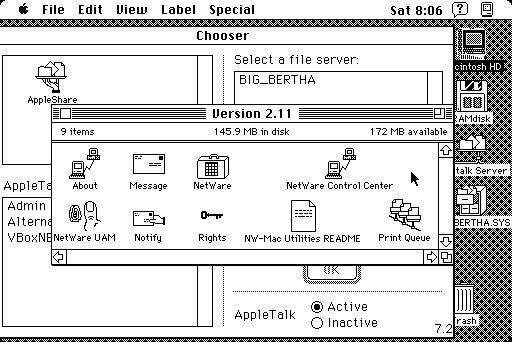 v2.11 folder. 2.1 similar |
Finally the last version(s), being very much different than these previous examples are, are going to be similar to the version demonstrated here. Other examples are likely out there, like version 5.11 on Macintosh Garden, but for now, what we have here will do fine as that'd require more time getting a server going and the previously linked site already does a great job. Also the OS/2 Museum website goes over NetWare 2 and 3, which provides an entry-level overview of the work involved with such an installation. Overall the NetWare suite probably did quite well for the cases where it was deployed, and it's obvious that it was meant as serious software, even if it's messy and difficult to work with. It would be nice to include a ready-to-go VirtualBox .vdi image ready for the curious readers to take a look at, but the best that can be done is asking for a Zip archive of the resources used for this section. Considering that the author skipped on installing a laundry list of patches and updates, it's possible that this NetWare experience could have been better, or worse.
Infrared Interface File Transfer
In the mid-1990s to early 2000s, this wireless interface was not at all uncommon in a world where wireless networks as commonly used today, such as Bluetooth, WiFi, Qi wireless charging and so forth were mainly a pipe dream. As one might expect, this meant that it was also shockingly slow by modern standards -- typically, they maxed out at 4Mbps for Fast IrDA and 115200bps for Serial IrDA, like as used by the Palm handhelds -- but, they weren't wired connections! In some cases, this interface is still found today in somewhat uncommon hardware or other equipment like certain industrial kit. There are a couple implementations of the protocol, like IrCOMM, not including proprietary ones. All in all, this protocol is pretty much dead, having been eclipsed by other methods like Bluetooth.
Palm OS devices like the popular III and Palm V series made use of this interface as one of the two possible methods to sync the devices to a computer, or to pass small amounts of data to each other, such as a Memo Pad document, business card, an application (it was called "Beaming"); there were even a couple of games like IRBattleship, IR Pong, and IRChess that permitted two players using IrDA. In other platforms, the IrDA interface was built into computers directly such as the PowerBook G3 series, iMac G3 233MHz (Rev. A and B) and other systems like the IBM ThinkPad 600X, A31p, Compaq Armada M300 and so on. For other platforms that did not have it built in, USB to IrDA adapters, RS232 to IrDA and sometimes Macintosh compatible IRTalk adapters like the Farallon AirDock are all candidates. The newer class of machines like the Mac |
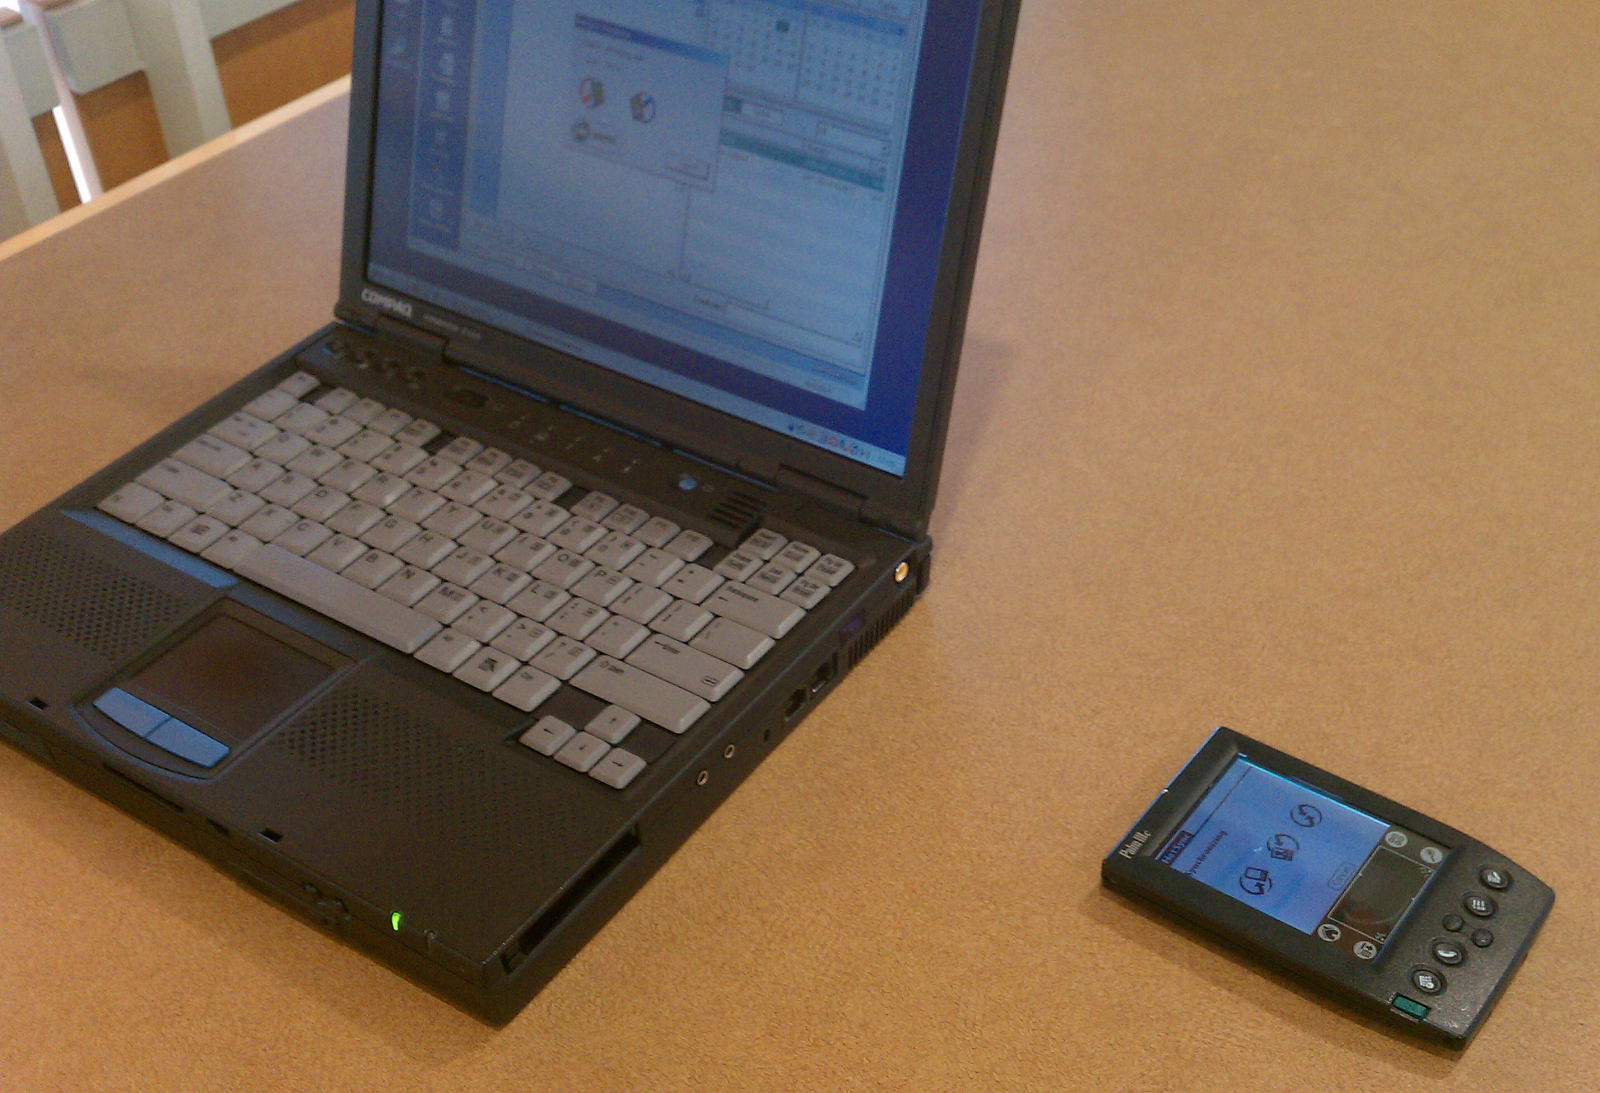 A Palm IIIc syncing via IrDA |
Mini series have IrDA too but that is for controlling it as a home media server with a remote and thus is one-way only. In this case, the user will have to procure a USB IrDA adapter: but first check if there are any (stable!) Mac OS or Mac OS X drivers for the unit in question.
Driver support for external adapters and built in units will have to be procured first. All the Macs that had built in infrared ports have drivers that are installed along with the proper OS for that computer, sometimes requiring a gray machine-specific CD instead of the normal retail version. Needless to say, IrDA works best across portable or handheld devices with small files and mainly text information, rather than trying something impractical like backing up a hard drive across two iMac G3 233MHz machines over IrDA.
Mac specific information
Primary importance goes to the fact that some Macs have IRTalk, others have IRTalk and IrDA, and the last sort have just IrDA. There are a number of problems with the infrared interface on Macs: first and foremost, it doesn't play nice with PCs. As for the Farallon AirDock, that only speaks IRTalk at a maximimum of 230400bps. It's meant as a LocalTalk to Infrared device, not for other serial purposes.
IRTalk is just AppleTalk over Infrared, just like TokenTalk is AppleTalk over TokenRing, EtherTalk is AppleTalk over Ethernet and LocalTalk is simply AppleTalk over the serial port(s). The IRTalk protocol is foreign to the PC world and will be wholly incompatible. The Apple IR File Exchange program is for IRTalk purposes, it appears: trying to use the program on a PowerBook Pismo with 9.0.4 didn't work very well because it wanted the Infrared control panel to set the mode to IRTalk. That won't work at all because the Pismo doesn't have any driver support for IRTalk at all. IRTalk is supposed to handle a bitrate of 230400bps but that means nothing because only Apple uses IRTalk. The Farallon AirDock does also, which limits their value since there is more than just IRTalk. IrDA normally caps out at 115200bps, but for most stuff that used it, it was fine.
Then using the same Pismo to try to exchange data with a Compaq E500 was met with failure. Here's what happened: After a short interval, connection was momentarily commenced. Then the Found New Hardware wizard woke up and wanted to install software for something named "Macintosh". There are no such drivers for that "device". Because the 1400cs which was also on hand only spoke IRTalk, it wouldn't even start to dance with the E500, so that was a dead end. By the way, ZTerm won't be able to recognize the IR interface to send data through. There are other programs that can use it though, like Palm Desktop.
For your convenience, the following links have been provided for reference should you decide to experiment with this method. OS X does have some infrastructure available for the infrared interface but Apple was looking at Bluetooth by then. Expect a bumpy road. The relevant settings are in the Network control pane of System Preferences, on compatible PowerBooks. At some point around OS X Tiger the drivers were removed and are no longer supported.
PowerBook G3 Series: Infrared Port
Macintosh Infrared: Is It IrDA Compatible?
iMac: Infrared Communications
iMac: Sharing Files Via IrDA
IRTalk and IrDA information
Encountered Issues
• System hangs before loading control panels.
This likely happens because AppleShare is unable to load correctly. Turn the machine off manually, hold down Shift while rebooting until "Extensions Disabled" appears. Head to the System folder and trash the AppleShare Prep and AppleTalk Prefs files. Reboot. This can also happen if the Installer is not used to install AppleShare, in which case the system can bomb. If the problem persists, reinstall AppleShare. Some AppleShare installers make changes to the System file, like v3.5. Others do not, like v3.7.4.
The extensions are usually loaded in a special sequence, usually alphabetically (although there are characters like "space" that come before the A thru Z), and barring any extension managers, A is usually first up -- in this case, AppleShare.
• All connections are good and settings are good, but the computer does not appear in Chooser.
Try entering the IPv4 address in the "Server IP Address...". Usually if a computer cannot be detected the "Server IP Address" method won't work. Only applies to 7.1 and up with AppleShare 3.7.1 or greater using at least OT 1.2 (the default for Mac OS 8.0). If it still doesn't work, recheck the configuration on both sides, reboot all computers or try FTP to check if TCP is functional.
• In OS X, the connection automatically terminates after about two hours.
No solution for this issue has been found yet. It could relate to the auto-disconnect feature in OS X, however this can still happen even when it is off. However, this did not happen when the author used a router as a gateway. There could be a hidden anomaly caused by using cross-over cables.
• The Chooser returns a dialogue box that says the connection is unexpectedly broken, whether double-clicking on the server name or entering the Server IP Address.
Try rebooting the target computer. Attempt once again. If that fails, try disabling the built-in firewall and unchecking any boxes in the "Advanced..." prompt of the Firewall tab of OS X. (Disconnect from the web if security is an issue) Re-apply the TCP Quantum hack in 10.4 only, then turn off AFP file sharing, then back on again. If that doesn't work, you might be forced to reinstall OSs or move on to FTP. If a cross-over cable is being used, try adding a router. The server may also be an incompatible version with the client, or the client may need upgrades, see The Chart. The login password could also be incorrect. If a connection is with AFP versus TCP, then the TCP/IP control panel could not be configured correctly. Apple TA43918 also suggests a culprit.
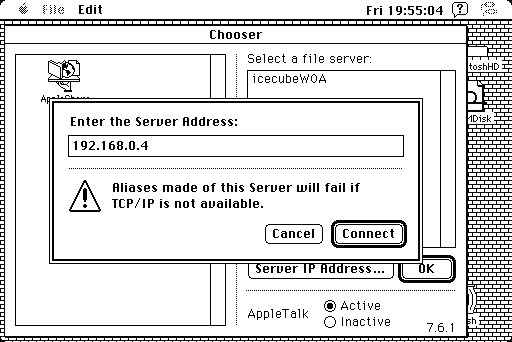 Using the IPv4 Internal Address |
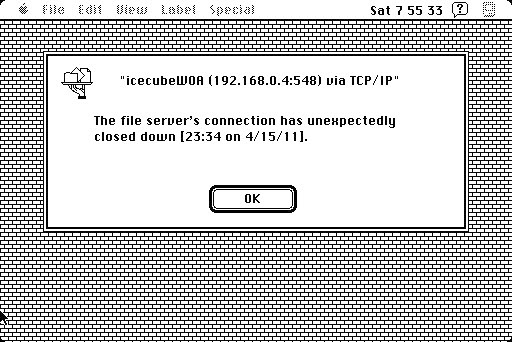 Unexpected connection termination |
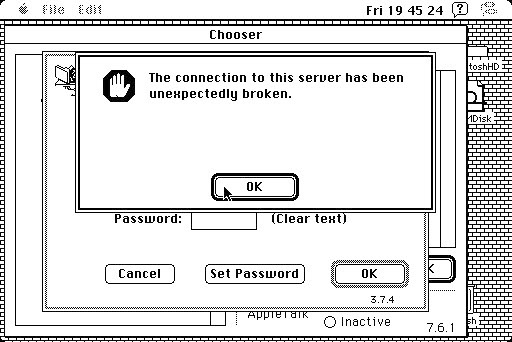 Connection failure error |
 Open Transport not loaded |
Also, it has been noted that while logging into a 10.4 system, with Guests disabled, the toggle radio button for Guests in the login screen in Chooser is active, but when a Guest login is attempted, the process fails. Normally the radio button for guest login is disabled if the host doesn't support a guest login. For Netatalk servers, try temporarily disabling the firewall or making sure AFP traffic can go through. Firestarter used to be popular but fell by the wayside, nowadays most people use ufw or nftables, latter of which replaced iptables.
• The Chooser or the system freezes for about two minutes if the cable is accidentally disconnected.
Use the AppleShare Client Setup Utility to reduce the default timeout from 120 seconds to something more reasonable. There is also a different version for 7.0/7.1.
• The system complains that it cannot start File Sharing.
There are a number of reasons why this occurs. The dialog can be a source of intense frustration because it doesn't offer any clues as to the reason why. Try reading this Apple KB for ideas. The LocalTalk section has additional Apple KB articles to parse through.
• I'm having trouble with my Asante Ethernet card not working.
For Asante MacCon series cards for the SE/30, replace the 20MHz oscillator on the main board. It's just a generic 20MHz 18pF, any respectable make one can do, but a good rating (i.e. 70 degrees C rated, 10PPM stability and tolerance) is desirable. Make sure the lead spacing matches. There's also a capacitor on the daughtercard, but that shouldn't be a problem, but may as well knock that out too. Check the pins on the RJ45 jack to make sure they're not sunken down too low for good contact. Check to make sure the daughtercard connection isn't reversed. If the daughtercard doesn't power up, check the nearby fuse on the daughtercard.
The Asante MC3NB cards for the Macintosh II series can have an issue connecting to a modern network or computer with Auto MDI or Auto-MDI-X auto-negotiation. Replace resistor R28 (36K ohm) on the board with a 220K ohm 1/4W resistor. If the yellow LED is on, that indicates a collision has occurred. It shouldn't normally occur if the previous two passive components have been addressed: otherwise, other devices may have be removed one at a time to try to isolate the culprit.
• Screenshots are not working.
The reason usually has to do with memory. Generally, FlashIt 3.0.2 can get around most issues with the default Command + Shift + 3 shortcut. Assign the Canvas document format in the control panel to something like Command + Shift + 4. If that doesn't work, try increasing the memory allocated to the active program. If the Finder is the active program, then the default for System 6 is about 160KiB, so try bumping that up to like 512KiB and reboot. The FlashIt manual (see the Download Town section) has more information.
• Mac OS X does not refresh the Network browser function in the Finder.
This is not an unusual problem. Try disabling the WiFi or Ethernet connection in System Preferences, then re-enabling it. It may only show certain AppleShare servers briefly: with OS X 10.3.9 Panther, certain shares were often only visible for a few seconds. Others have found a different way by messing with a certain .plist file.
• Open Transport refuses to load.
This is a rare problem, but can happen. Unfortunately, a thorough search of the documentation and Read-Me files, which are mostly mirrored to Apple's TIL database, do not provide any clues as to the problem. If a fresh reinstall of the software from known-good installation sources is executed and there's no outstanding hardware concerns, this shouldn't happen, but nobody has a solution for this. Author encountered this problem on a Power Macintosh 7100/66 with 7.1.2, but not any other operating system or Macintosh. Both Open Transport 1.1 and 1.3 did this, even though both are supported on 7.1 and the documentation explicitly indicates that 7.1.2 is compatible. If this happens, try updating or re-updating with System Update 3.0 for 7.1: otherwise there's no solution out yet. A poster on Reddit indicated that problem with Mac OS 8.5, but no response indicated any suggestions.
TCP / UDP Networks
TCP and UDP stands for Transmission Control Protocol and User Datagram Protocol which are on the transport layer of networking hierarchy. Other protocols like FTP and Telnet are transported on this "layer". In this chapter, the most common TCP methods will be reviewed.
Setting up MacTCP and Open Transport
MacTCP
MacTCP is used by System 6.0.5+, 7.0, 7.1 and 7.5 with Classic Networking enabled. In all systems it's just a control panel that is installed by dropping it in the System Folder whole (System 6) or the Control Panels folder (System 7+). Two primary versions of MacTCP are in common circulation: MacTCP 2.0.6 and an unofficial 2.1 update. The 2.1 update patches the "Ping of Death" and optimizes a few things, but generally both are acceptable. MacTCP 1.x requires System 6.0.5 or later, but there is no real reason to use MacTCP 1.x over 2.0 aside from maybe Apple Internet Router 3. Bear in mind, the previous KB article is wrong about the Macintosh Plus and System 6.0.3 has been cited before (with MacTCP 1.0) as a minimum requirement for MacTCP. In addition, the 512Ke will run MacTCP 1.x and a special procedure was specified for using System 3.4 instead of System 6.
A common misunderstanding is that the "Server" selection of MacTCP is the same thing as "DHCP Server" -- they are not the same thing and MacTCP has no understanding of DHCP. Dynamic Host Configuration Protocol allows automatic configuration of IP addresses and related TCP parameters supplied by a router. Instead the "Server" selection is for BootP or RARP, an entirely different beast than DHCP and "Dynamic" is some kind of a hybrid mashup that isn't worth getting into because it was an Apple-proprietary extension to certain TCP/IP protocols. Another frequent error is that MacTCP enables AppleShare traffic over TCP (AFP over TCP): this is not the case and MacTCP is not capable of doing this by itself.
MacIP tunnels TCP inside AppleTalk packets, which client machines would select LocalTalk to receive from a DDP/IP server. This is normally done using stuff mentioned in the LocalTalk section, by using Open Transport with a certain version of AppleShare Client with a server that can serve AFP over TCP, or using something like Apple Internet Router 3 with the IP Tunnel extension. AppleTalk Remote Access does not use MacTCP but instead dials directly to a remote machine and exchanges AppleTalk packets over modems.
MacTCP is not compatible with 7.6 and above and attempting to install it on a build where Open Transport was not installed causes it to hide the control panel and changes the type and creator to ???? from its proper type of cdev and creator of ZTCP: even after overriding these changes, AppleShare won't start, because it requires OT and programs that require TCP will not work.
According to this site, MacTCP originally came with the Apple Internet Connection Kit. Also known as the Macintosh TCP Connection Kit, it retailed for $50. It also included MacPPP for dialup and some other goodies. It could have been had for a little as $25 with the Internet Starter Kit...or by buying 7.5, which retailed for about $99 to $129 back in the day...and plucking it out of the System Folder...as it is just a control panel... but 7.5 did not include PPP.
MacTCP v.2.1 can be found here. Do not configure MacTCP or open it if you plan to upgrade to MacTCP 2.1. If it has been opened, then trash the MacTCP control panel, the MacTCP DNR and Prep files in the System Folder and reinstall. MacTCP 2.1 is not required over 2.0.6 but is recommended. Update a unopened, unaltered copy of MacTCP with the 2.1 updater, then toss it in the System Folder for System 6, and into the Control Panels folder for System 7 and 7.5. Duplicate the control panel first before updating it, in case the update process fails.
Let's start a basic configuration. For MacTCP 2.0.6, click the More... button. Under "Obtain Address", select Manually if you're using an Ethernet connection. See the LocalTalk section if not, or check the Serial Data Interlinks section if using PPP over a serial port. Under "IP Address" set the Class to "C" for address ranges in the 192.168.x.x range; for 172.16.x.x, use Class B, for 10.0.x.x use Class A.
Direct connections with a crossover cable and manual IP addressing setup won't need a DNS entry, but most people want to use their vintage Mac for TCP over the open internet. Find the DNS address (instructions here), which in most cases can just be the address of the router under the IP Address field, then put a full stop (a period .) under the Domain field, and click the Default radio button. Additional DNS addresses can be similarly added below. Under "Routing Information" put in the router address, if you don't use one (cross-over cable) then just put the Internal IP address of the host computer. Click OK and enter the desired internal IP address in the text box. Select the interface for the TCP traffic to work on. Reboots are required if MacTCP has already opened a TCP session, otherwise, it is ready to use. Individual addresses and setups vary.
For MacTCP 2.1, the process is the same except enter in 255.255.255.0 in the Subnet mask field, assuming a normal internal IP addressing scheme like 192.168.x.x.
Both versions allow the user to choose which interface to work with for TCP traffic. Most network cards will have two options: Ethernet and EtherTalk. EtherTalk will not work for normal TCP traffic: use Ethernet for all cases, or whatever is not LocalTalk or PPP. LocalTalk requires a compatible MacIP gateway to tunnel the TCP packets inside AppleTalk packets; PPP is used by null-modem or modem connections. MacTCP Admin is a slightly different version of the control panel for network administrators and isn't required. Generally, most issues with MacTCP are DNS related.
A helpful program to help diagnose MacTCP equipped computers is MacTCP Watcher. Since MacTCP acts more like a daemon, it can't reply to ping requests. MacTCP Ping, a program by Apple, and MacTCP Watcher can conduct ping tests for network testing. More information can be found from this link or the MacTCP 2.0 Administration Guide. Additional technical information is available in this TechNote which goes over some inner workings of the program.
Other utilities that a normal person won't really need, such as MPing, MacTCP Spy, development stuff, MacTCP 1.1.1 and so on can be found on the Autumn of 1992 CDSN disc, which has a number of other curious things like AppleTalk Peek and AppleTalk Poke. This disc along with a few later versions can be readily found on the Macintosh Garden. Some of the documentation has been converted into a modern PNG format from the original MacDraw for your convenience. The later 1994 CDSN is similar to the 1992 version, but has a few extra things and is worth poking around.
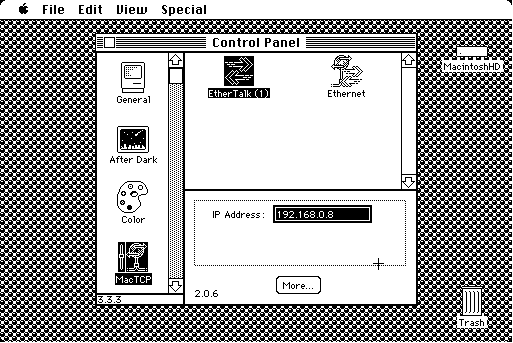 MacTCP with System 6 (EtherTalk will not work) |
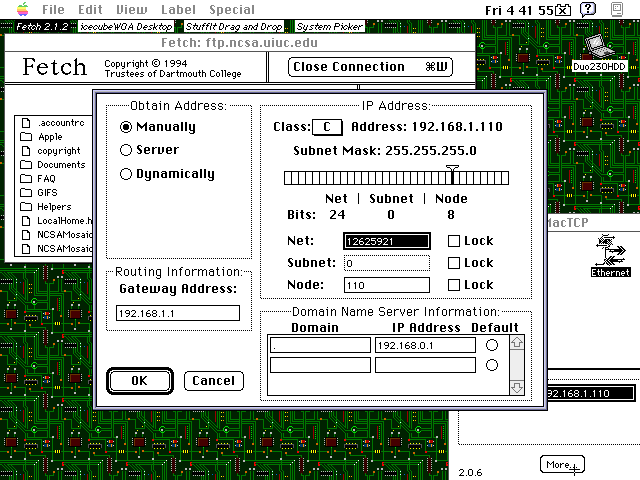 MacTCP 2.0.6 settings with active Internet access (7.5.3) |
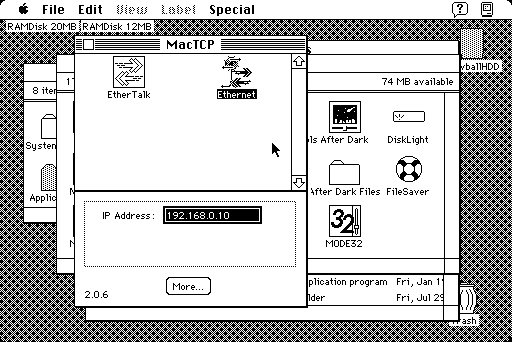 System 7 using MacTCP 2.1 |
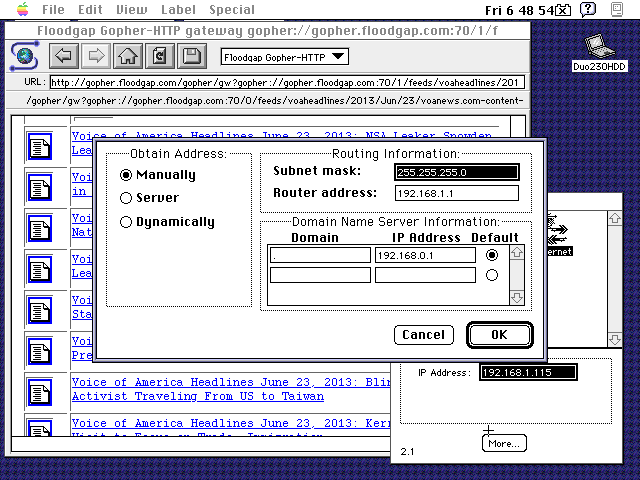 MacTCP 2.1 under 7.5.3 |
If you're on a direct connection without a router, then both must be in same subnet (192.168.2.10). The node (192.168.2.10) must be individually assigned to a different number. Two computers can't have the same internal IP address of 192.168.2.5, but rather set one to something like 192.168.2.5 and the other to 192.168.2.8. If the computers involved are going through a router, then they all must be on the same subnet as the router, lest they won't talk to each other. Should all this be still unclear, refer to this image which might clear things up. Remember that some routers may live in a different subnet than the one that is assigned for clients (like as shown in all these images), but most of the time the router assigns addresses in the same subnet. In the latter case the Router address and the IP Address for the DNS would be the same, such as 192.168.0.1 which is very common.
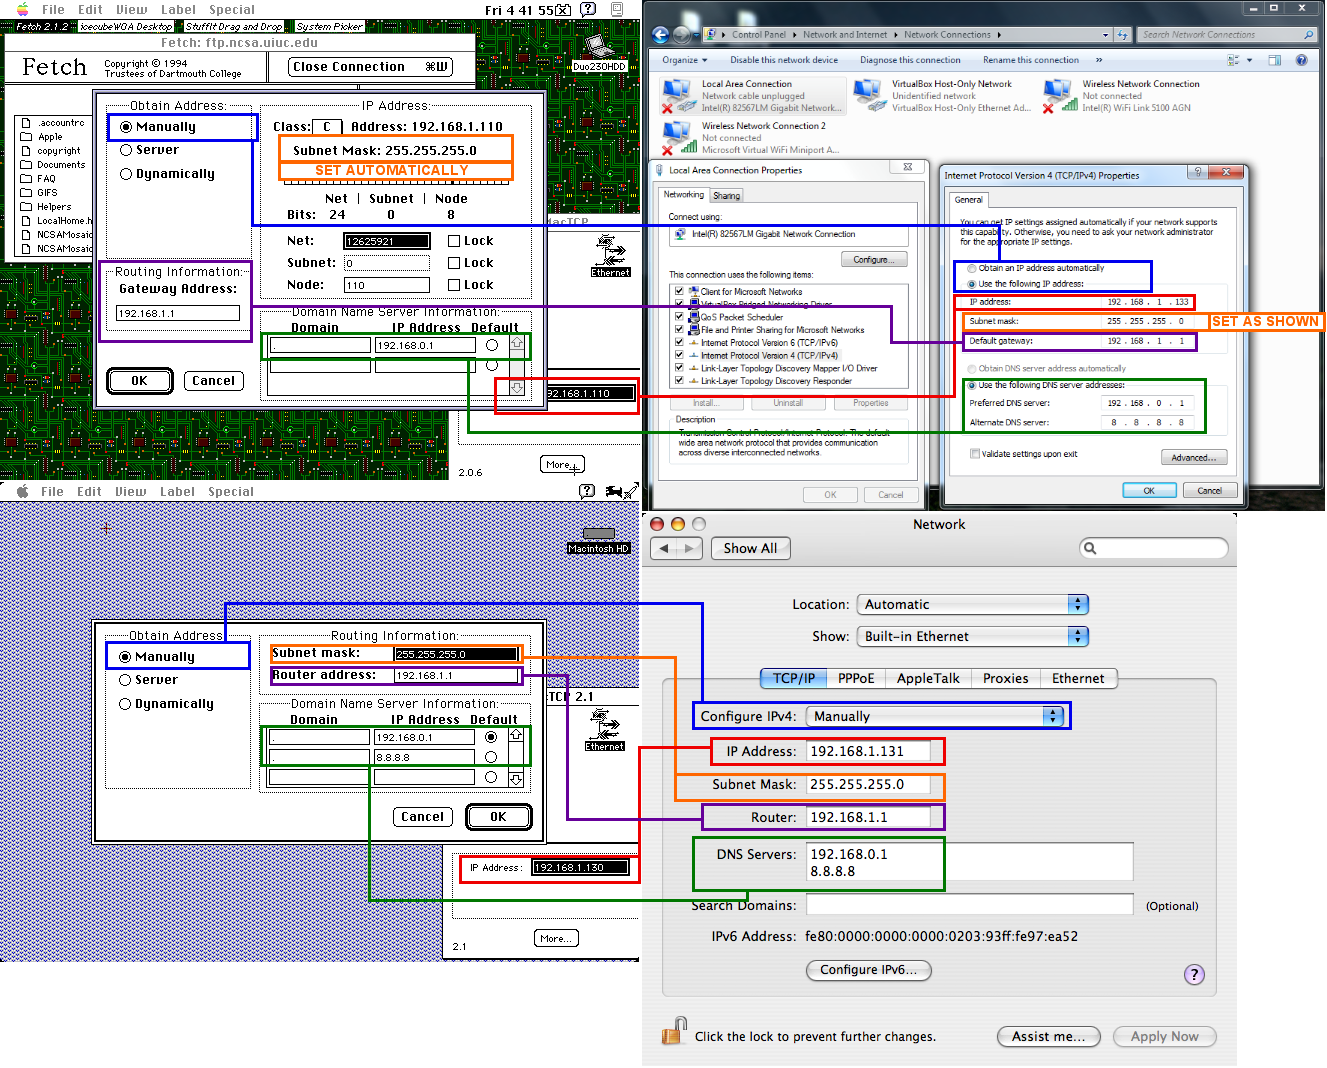
To find out the Ethernet MAC address under MacTCP, turn off Caps Lock if it is on, then hold down the Option (alt) key and click the "Ethernet" icon in MacTCP's main window. The address should appear just below the Ethernet icon, like 0020A51500C5. For Open Transport systems, open the TCP/IP control panel, then from the File menu, choose the Get Info selection; or switch the user mode to Advanced and click the Info button in the lower-left of the main TCP/IP window.
Open Transport
System 7.5 can use either Classic Networking or Open Transport Networking through a switcher application called Network Software Selector. This application is proprietary to 7.5 and is not compatible with System 7.1 or below, or 7.6 and above. Classic Networking hides the TCP/IP and AppleTalk control panels when enabled, and replaces them with Network and MacTCP, respectively. The only way to switch to Classic Networking in 7.1 is to uninstall OT, or run two duplicate OSs, one with OT and the other without. Open Transport gobbles more memory, about 760KiB in 7.5.5, which could pinch those running on low memory ceilings, and isn't required unless more powerful Internet requirements demand it, or hooking up to 10.4 Tiger. System 7.6 and above have OT running full time and cannot use Classic Networking or MacTCP, but Open Transport simplifies compatibility issues with modern Internet requirements. However, aside from AFP connections to newer computers, MacTCP can work just fine with almost all normal TCP operations, such as FTP, WWW, IRC and so forth. | 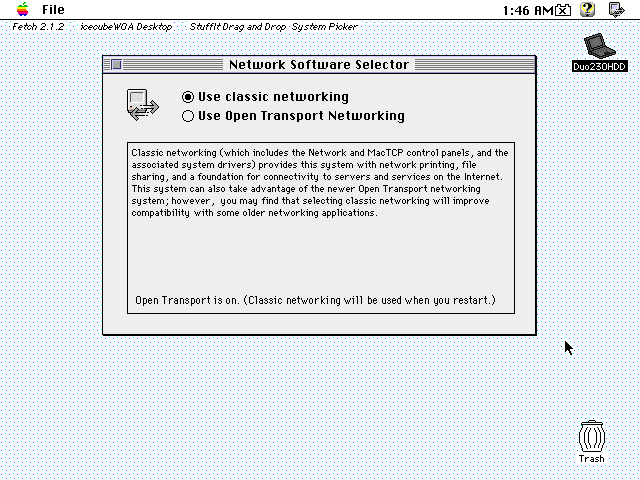 Network Software Selector (7.5.3) |
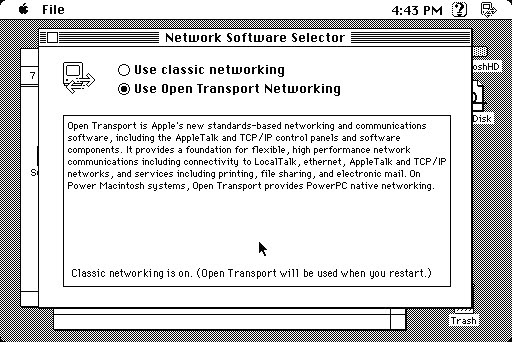
MacTCP and Systems earlier than 7.1 with an AppleShare version earlier than 3.7.1 do not have the "Server IP Address..." button in the Chooser (even 7.6.1 with OT 1.3 installed doesn't put it in, because the AppleShare extension included is version 3.6.4) to attempt to connect to a server via AFP over TCP. AppleShare Client 3.7.4 requires OT 1.1.2 or later: the default install of OT in 7.5.3 is version 1.1, the default in MacOS 8.0 is 1.2. The best way of installing Open Transport is to use the Open Transport 1.3 "Golden Master" which does not require previous versions of Open Transport to be installed first.
Open Transport built into Mac OS 9 also included a special licensed limited edition of ShareWay IP Personal for tunneling AFP packets inside TCP/IP packets which can be activated from the File Sharing control panel, which allows clients to connect to it over TCP/IP. It can sometimes interfere with older System Software versions; in such case turn it off. Alternatively, try turning it off, mounting one computer, turning it back on, and mounting the other.
Open Network Software Selector if necessary, which may not always be installed by default, and tick Using Open Transport Networking. Reboot the machine. Next, open the TCP/IP control panel and set TCP/IP to Ethernet, and select Using DHCP Server. Save and close, then it is ready to use. Manual configuration is easy: set the IP address to a desired internal IP address compatible with a router's addressing range or desired manual addressing scheme. Next, set the subnet mask to 255.255.255.0, assuming a Class C type network with 192.168.xxx.yyy addressing ranges, then fill in the address of the router in the Router Address field if a router is used. DNS can usually make do with just the address of the router, or locate the DNS address manually and paste it in there.
Most of the time the TCP/IP control panel will not immediately load the TCP information after a reboot or system boot up. The reason is that TCP uses a lot of memory on older 68K machines and therefore it sits dormant until a TCP program requires its services. Overriding this is possible under the Advanced User Mode (the AppleTalk control panel also has this option) in the Edit menu, which unlocks a button to change to "always on", which generally is unnecessary. Any IP address used by DHCP that starts with 169.254.xxx.yyy is a self-assigned IP address; therefore, if a router is being used, it means that it isn't connected to the router. Manual addressing can sometimes be better for those who know what they're doing.
When connecting to AppleShare servers, the Chooser does not permit passwords longer than eight characters unless the System version is 7.6 or higher with the Encrypted Password Transport method. Encrypted Password Transport should be an available option if the DHX extension is installed in the Extensions folder, which comes with AppleShare Client 3.8 and higher. In such a case, login as a Guest if permitted, or temporarily change the password, or access from the other machine if possible. Sometimes the EPT method will be the only method of authentication establishment, particularly with OS X 10.5 upwards. In Mac OS 8.5 and above, the Network Browser can be installed into the Applications folder. It's sort of a Chooser substitute and was designed for AFP over TCP networks that were larger than normal LANs, such as large institutions and corporate offices.
It should be pointed out that it is possible to use the Server IP Address... option in the Chooser to manually connect to a AFP over TCP host even while the AppleTalk control panel is set to something else (see image to the right, note mounted server volume). However the Chooser will not populate discoverable servers because the AppleTalk control panel isn't set to the same one as the one used for TCP; meaning that the Chooser is "looking" for servers on the Printer port (in this example), but TCP connections are going through Ethernet, not the Printer port. This isn't "wrong" but usually it's best to set them to the same interface. OT 2.0 Extras is a special disk image that comes with an AppleTalk Options CDEV for suppressing router alerts, TCP/IP Options CDEV for something related to MTUs, SNMP Admin with manual, Remote Only 2.1 and some AppleScripts. A separate version exists for OT 1.1. Neon Software's OTTool has ping, traceroute, DNS and a few other minor things, but most people won't need it or OT Extras. |
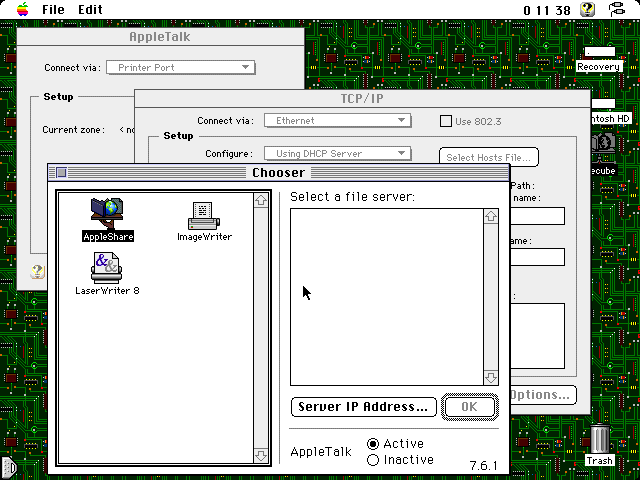 AppleTalk setting difference (Quadra 650, 7.5.5) |
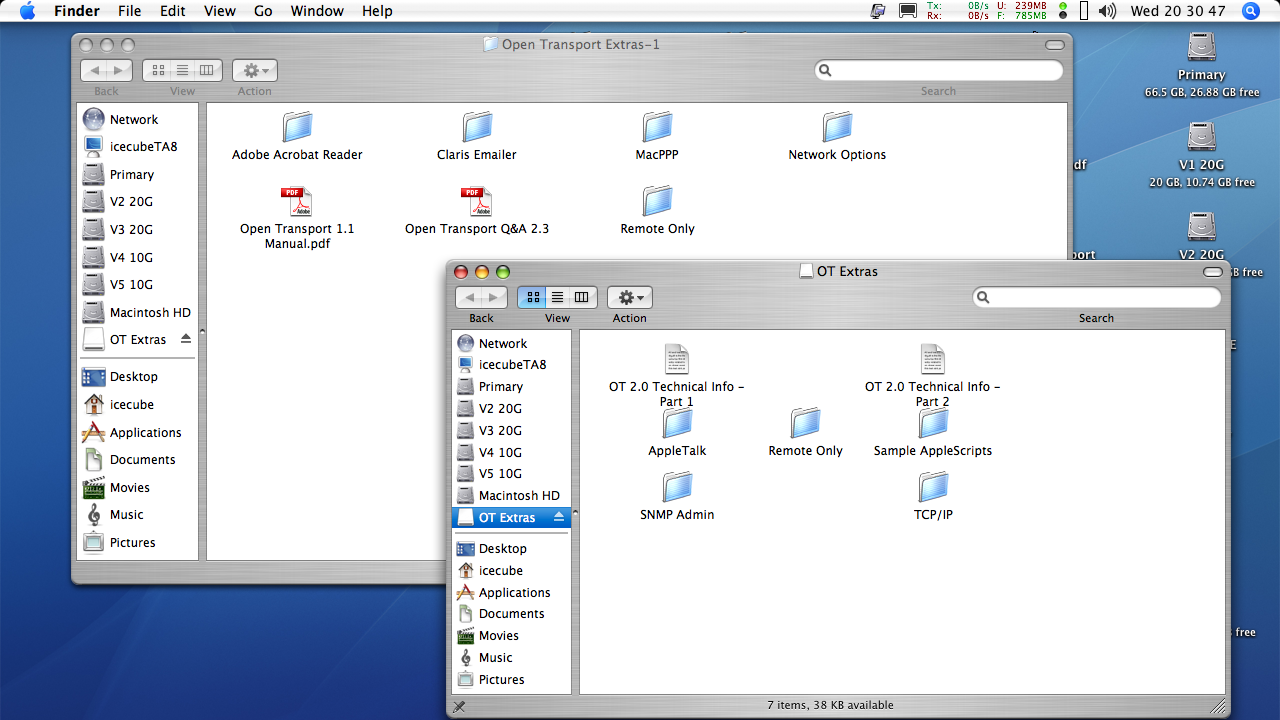
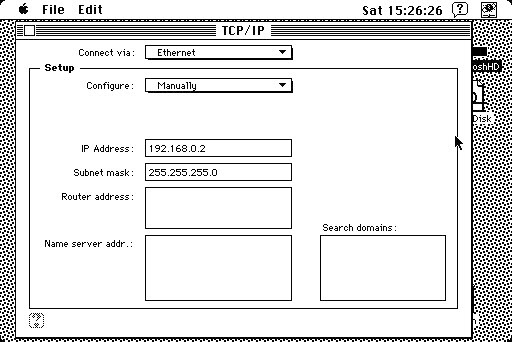 Manual configuration for use with a cross-over cable |
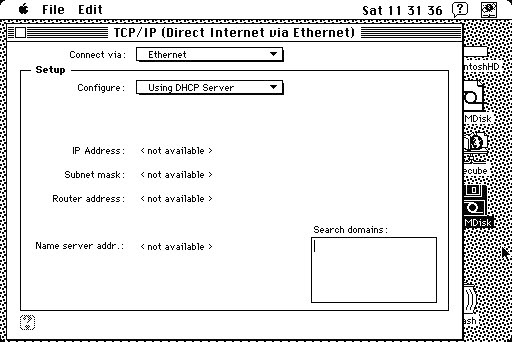 DHCP Server "sleeping" |
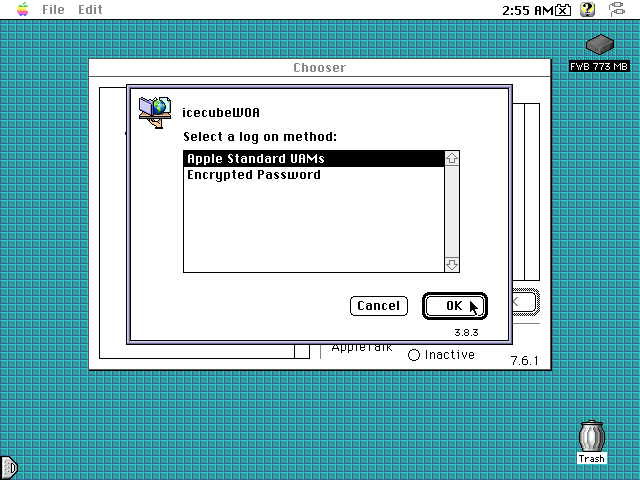 Cleartext vs. Encrypted (DHX) on a Quadra 700 with 7.6.1 |
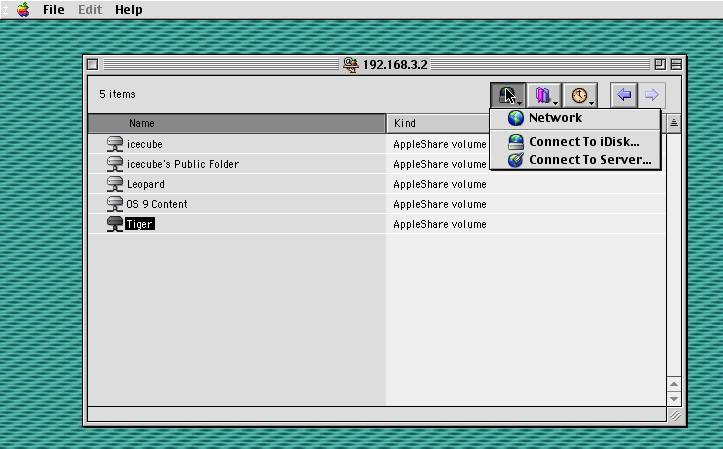 Network Browser (9.2.2) |
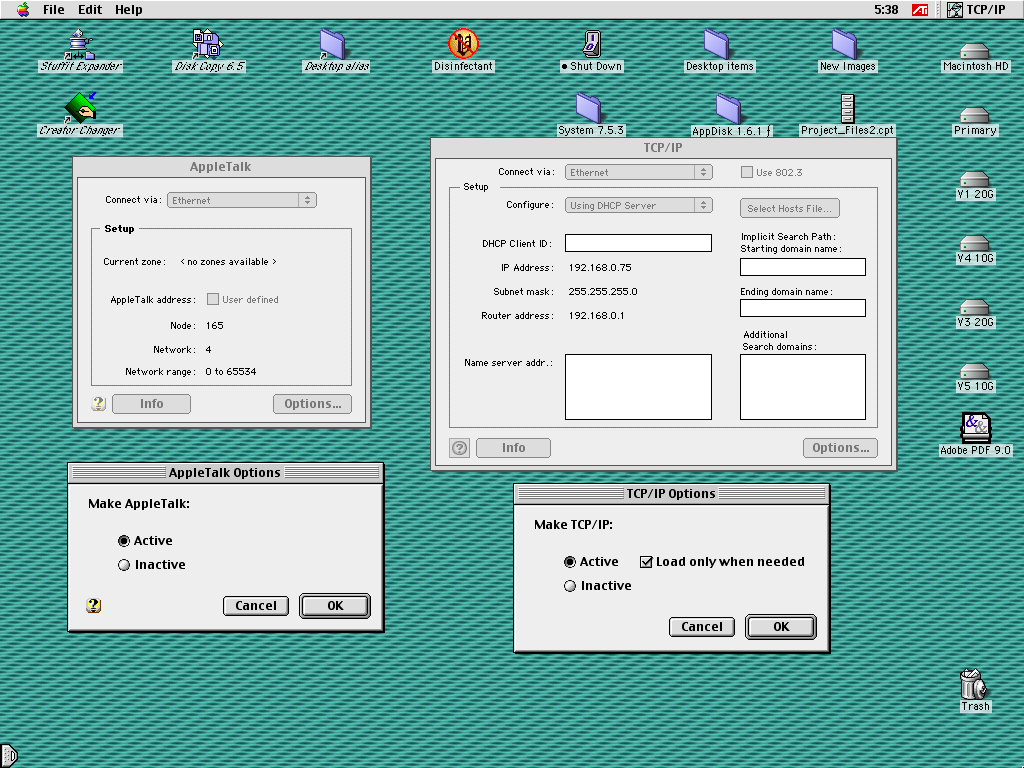 AppleTalk and TCP/IP Advanced User Mode composite image |
In Mac OS 9, file sharing locally and online Internet access simultaneously can be only done via a router or with Internet connection sharing, which some operating systems offer built-in or with programs like Vicom Internet Gateway. When that article was written, most people didn't have routers, and used dial-up directly off of one computer.
File Transfer Protocol
Although FTP client software has changed dramatically over the years, the networking protocol itself has actually changed very little since its introduction in the early 1970s. That is why it makes a such good choice for online and LAN cross-platform networking. There are two sides, a client and a server; the client needs a client application to access the server, and the server itself which likewise requires FTP server software to facilitate the connection. Two clients can't talk to each other, neither can two servers. The client can PUT (upload) or GET (download), depending on permissions. This entire section will presume the connection method is over Ethernet, but FTP can work over other physical layers, such as PPP.
MacBinary (.bin) or BinHex (.hqx) encoding is essential protect resource forks when transferring files with FTP. The section here talks in detail about the methods to safely encode files with BinHex or MacBinary methods. Additionally, the correct FTP encoding method (Binary or ASCII) is important, which is dependent on the file(s). See this page for more on this. The image to the right was deliberately corrupted by uploading it in ASCII when it was supposed to be Binary. (Compare to what happens when a floppy starts going bad.) For this section, we'll be operating under the assumption that the Ethernet network has already been configured and wired up. If not, then see the Client Access section below for some basic instructions. To begin, start by starting the Server software, then head to the client and start it up to initiate the file transfer process. Server Software |
 The side-effects of improper encoding... (converted to .png) |
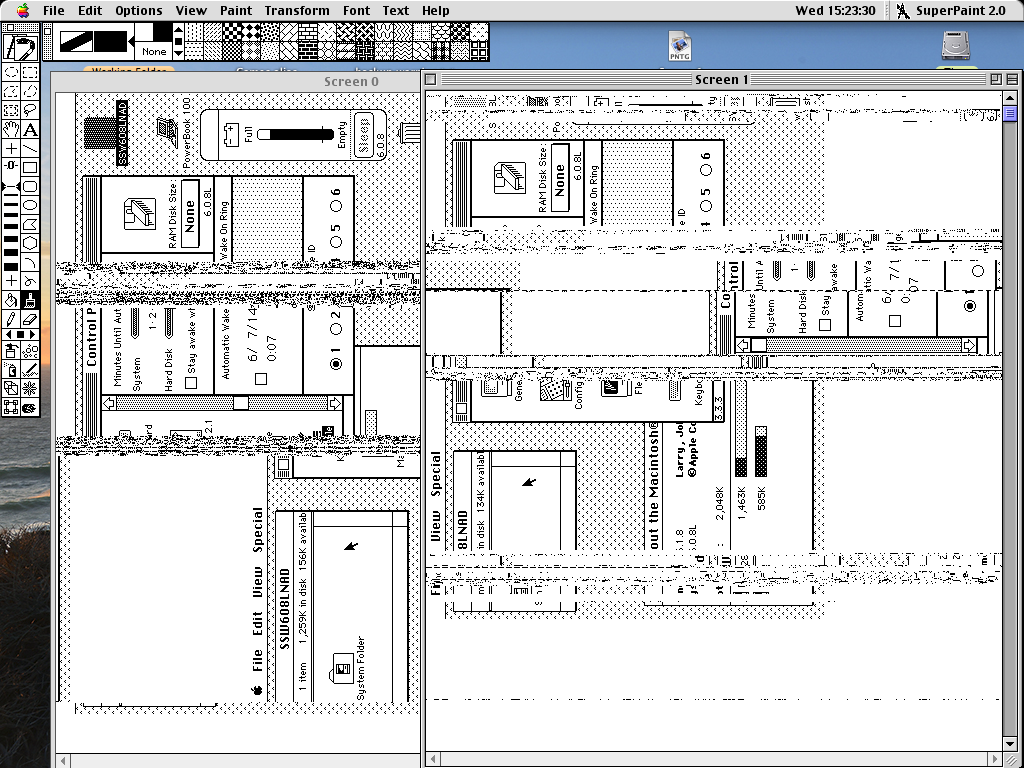
Both Mac OS X and some Microsoft Windows versions have built-in FTP server software. Third-party applications can bridge the gap for platforms that lack this easy option. Note that some FTP servers might use certain legacy operations that could cause more modern FTP clients to falter, and some newer FTP servers don't work all that well with very old clients. One user, adespoton, reported good results with lftp, a command line only client with a host of interesting features, particularly with its ability to function similar to automated backup software, except over FTP. Additionally, consult this FAQ for other factors that can affect FTP servers and clients. One important consideration is using active over passive FTP: there is a big difference. In the old days it didn't matter too much but these days it does because of firewalls being standard equipment on pretty much all common operating systems.
NetPresenz 4.1
NetPresenz is a FTP, WWW and Gopher server application which runs only under pre-OS X machines. It requires a minimum of System 7.0.1 for it to run, and it's available in English, German, French and Japanese. It can be found along with a variety of other FTP client and server applications here. Use the Wayback Machine to dig back to older FTP server and client program versions for OS X.
NetPresenz is a good program. There is plenty of documentation and it's pretty minimalist for slow computers. To set it up, first get MacTCP or Open Transport ready as described earlier. It requires an IP address assignment to work, but aside from that it just needs a quick pass through the NetPresenz Setup program, which manages all the configuration of the server services. Upon first opening the Setup program, it will ask about Internet Config. Internet Config was a tool back in the day to manage the preferences of all compatible Internet applications, e.g. browser, email client, FTP server, IRC client et cetera in one central application. It is not required to run NetPresenz and given that the likelihood of anybody using an original IIx to check email, chat, browse and all in one main computer is quite slim, so feel free to skip it. SIVC can also can be ignored. |
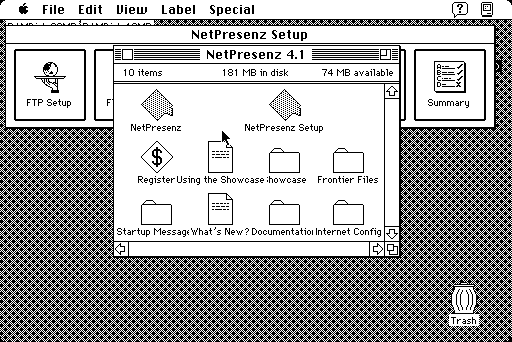 NetPresenz Folder |
Once the configuration settings are satisfactory, launch NetPresenz in the main folder to start the server. From the Setup application, the background mode can be on or off; on means the application runs in the background and the computer must be rebooted for it to quit. Off means that the server runs like an application and can be quit at any time, and it will show a nice FTP log of what is going on. Make sure a volume or folder within a volume is shared using the Get Info/Sharing menu (or File Sharing... for later Mac OS versions). Generally, any issues are either MacTCP or Open Transport TCP/IP control panel related or identified in the Summary under the File menu in the Setup program, which has a nice run down of what might be causing a problem. Check the Summary after the Setup program is first run to make sure everything is alright -- afterwards it shouldn't be needed. |
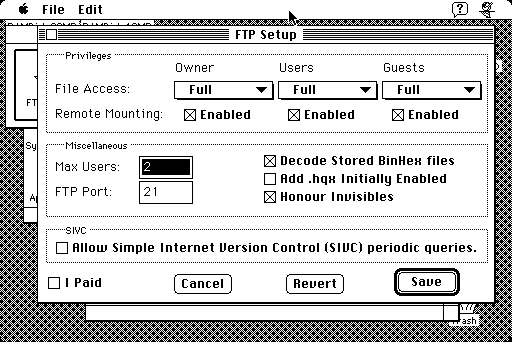 Setup application config dialogue |
It is not as flexible as Rumpus but it's much easier to work with. It relies on File Sharing for authentication of user accounts, check that is up and running first before the server is started. Basic configuration like maximum user count, which accounts can access, default directory, and other basic things are easy enough. Notice in the last image to the right, how the last line of NetPresenz starting up shows the IP address it is running on. This is useful for running with DHCP settings. Do be advised that this program, because it relies on the File Sharing and Users & Groups elements of the standard Mac OS, it won't work right with AppleShare Server installed; and it cannot "share a share", meaning share another network volume like Rumpus 3.5 can. |
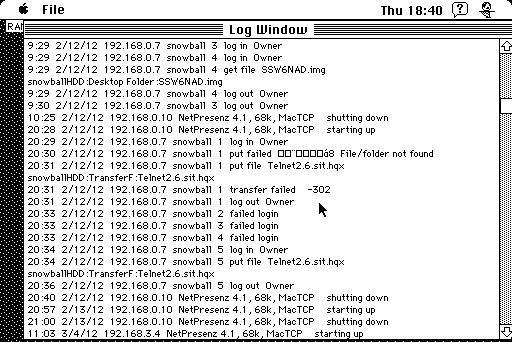 Bottom line shows IP address |
NCSA Telnet 2.7b4
This is a rather troubled child which sometimes can have rather sporadic reliability. The author noted spotty client access from other client computers, though for System 6 there aren't too many alternatives. It is very easy to set up and enable the server, although for System 7, NetPresenz is a much more reliable program. If it works -- great: if not, move on. Other internet denizens have reported similar results.
This program wants an IP address assignment before it will start up correctly. From that point, go to the Edit menu, then the Preferences sub-menu. Set up the user account in the "FTP Users" prompt first, by filling in the password and default directory. Finally, turn on the server in the "FTP Server" selection. It's really meant for transferring files by Telnet: what happens is the remote computer calls up the FTP server on the computer with NCSA Telnet running. See the Telnet section for additional discussion about this feature.
Technically, NCSA Telnet 2.6 is supposed to be for System 6 and 2.7b4 is supposed to be more compatible with System 7. Version 2.5 has a SLIP feature which is described in the Serial Data Interlinks section, because this feature only works over serial ports and requires a SLIP server which is not the same thing as a PPP server.
Rumpus
Rumpus is a FTP server produced by Maxum. The two versions we'll be discussing are 1.1 and 3.5.
Rumpus Pro 1.1 came out some time ago, but is still useful enough. Actually it's supposed expire on September 30th, 1997, barring a valid registration credentials, but if it is downloaded from the right source (Macintosh Garden), there should be a Rumpus Pro 1.1 [k] patch which makes it so it continues working in demo mode. Unlike version 3.5, it cannot share a non-logical volume.
It is nice and easy to get going. There are only three windows to worry about: Configuration, Monitor and Define Users, all from the File menu. Choose Configuration, and from the Basic tab, the FTP root directory can be changed and the Security tab determines how secure the server is supposed to be with some checkboxes and radio buttons. "Anonymous Login Only" means only Guests are allowed, the Users & Groups security mode borrows the same user and group profile information used by File Sharing, and "Built-In Security" means that the list of allowed logins will be configured inside the program through the Define Users window from the File menu. The remaining tabs in the Configuration window can be passed on for a basic home LAN. As long as the program is open, the FTP server is active and can be connected by any usual client. |
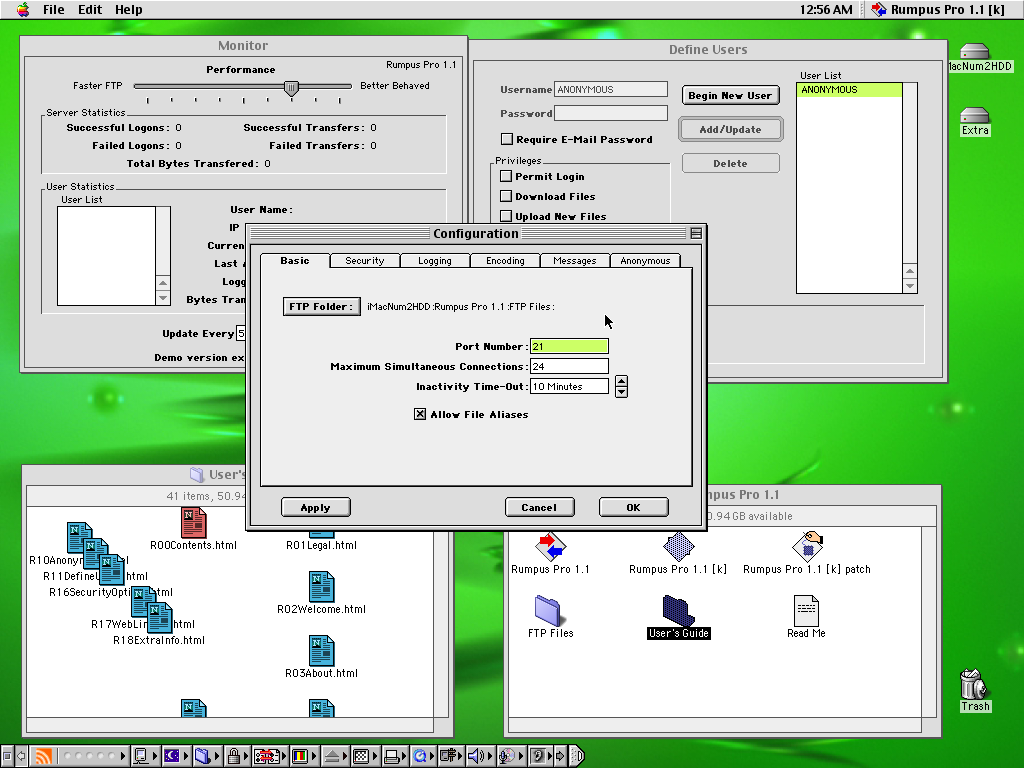 Rumpus Pro 1.1 |
Rumpus 3.5 is the last version for Classic Mac OS, and it requires a PPC processor, System 7.5+ with OT, and at least 8MiB of RAM, according to the system requirements inscribed in the User's Guide. The copy most commonly found floating around is set to expire on 30th of June, 2006. Because the standard version is supposed to cost $250 US it is a little hard to justify purchasing it. It is however on the professional class of FTP server software and has plenty of features and configuration options. Compared to Rumpus 1.1 and NetPresenz 4.1, this one is clearly meant for full-blown server jobs. It adds the following: web admin, web server, puts the User management into high gear with more options (read: restrictions and limits), has folder sets, can block IPs, can manage suffixes (i.e. an incoming file with no type and creator but with .sit extension can get automatically mapped to SIT! and SITD) and finally some other settings like the FTP high port address range. It looks pretty much the same as version 1.1 in its overall UI, it will be slightly trickier to get going but in principle it does beat the stuffing out of configuring an FTP server entirely from the command-line. | 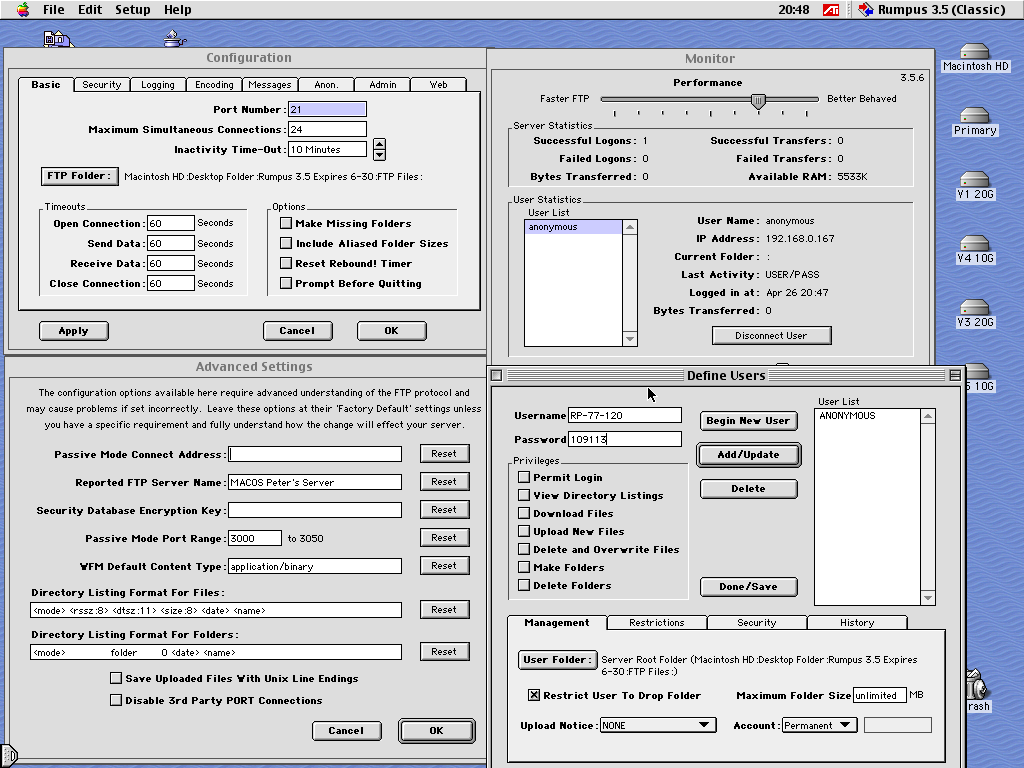 Some Rumpus 3.5 config options |
The reason this software is mentioned here is because it can share a non-logical volume, like a mounted AFP volume, such as an EasyShare server running off an HFS floppy disk, which is a novel feature. Finding out the IP address of the server is different between the two versions: Rumpus 3.5 shows the IP address of the server in the About Rumpus selection from the Apple menu, while version 1.1 will have to go to the TCP/IP control panel. Unless the ability to "share a share" is needed, and it is just a local LAN FTP network, NetPresenz 4.1 should be good enough. As it does require a proper registration process and the included help documentation is easy to follow, there's not much more to say. BSNG does have an entry under "Maxum Software", also check Macintosh Garden.
Mac OS X's Built-in FTP Server
For OS X 10.0 up to 10.4, simply enable FTP Access under the Sharing pane in System Preferences. In OS X 10.5 and 10.6, head to the Sharing pane, then click the File Sharing checkbox, then click the Options button. Click the "Sharing files using FTP" button. 10.7 on upwards requires a slightly different process, instead being done all in Terminal, like so:
Open Terminal. Sudo permissions are required. First, to load the service daemon:
This starts FTP and you are ready to go. To stop the service, type:
To restart it again, type:
Now to remove the daemon from service and remove it from the services running, type:
Information for this procedure was gleaned from this link. In 10.4, only the first command entry works properly. A little more difficult than simply pressing a button in System Preferences, but that is the way it is. This was likely removed from the Sharing pane because FTP passwords are all sent in cleartext, excepting SFTP or FTP with TLS encryption. One way to speed this up is to use an AppleScript executable and a GUI prompt.
Starting with macOS 10.13 High Sierra, the terminal ftp client was removed and the built-in FTP server ftpd was removed. FileZilla Server became available for macOS right about the same time. Command-line FTP servers and clients are still possible by using a package manager like Homebrew to install something like vsftpd. Other options are available.
Microsoft Windows Built-in FTP Servers
The Server builds of Windows have an option for using a built-in FTP server. Windows 2000 Server will be demonstrated in this case. This option is also available under Windows 2000 Professional, and Advanced Server, as seen here; Windows XP has it as well, though Windows 98 Second Edition does not have this feature. If the FTP Server is not installed by default when the OS was first installed, then head to the Control Panel, and then the Add/Remove Programs applet. From the left pane, click the "Add/Remove Windows Components" button. Find the Internet Information Services (IIS) option, double click it, then tick the FTP Server option. Then click OK and then follow up with Next to install it: the installation CD will most likely be required, depending on which version of Windows is involved. |
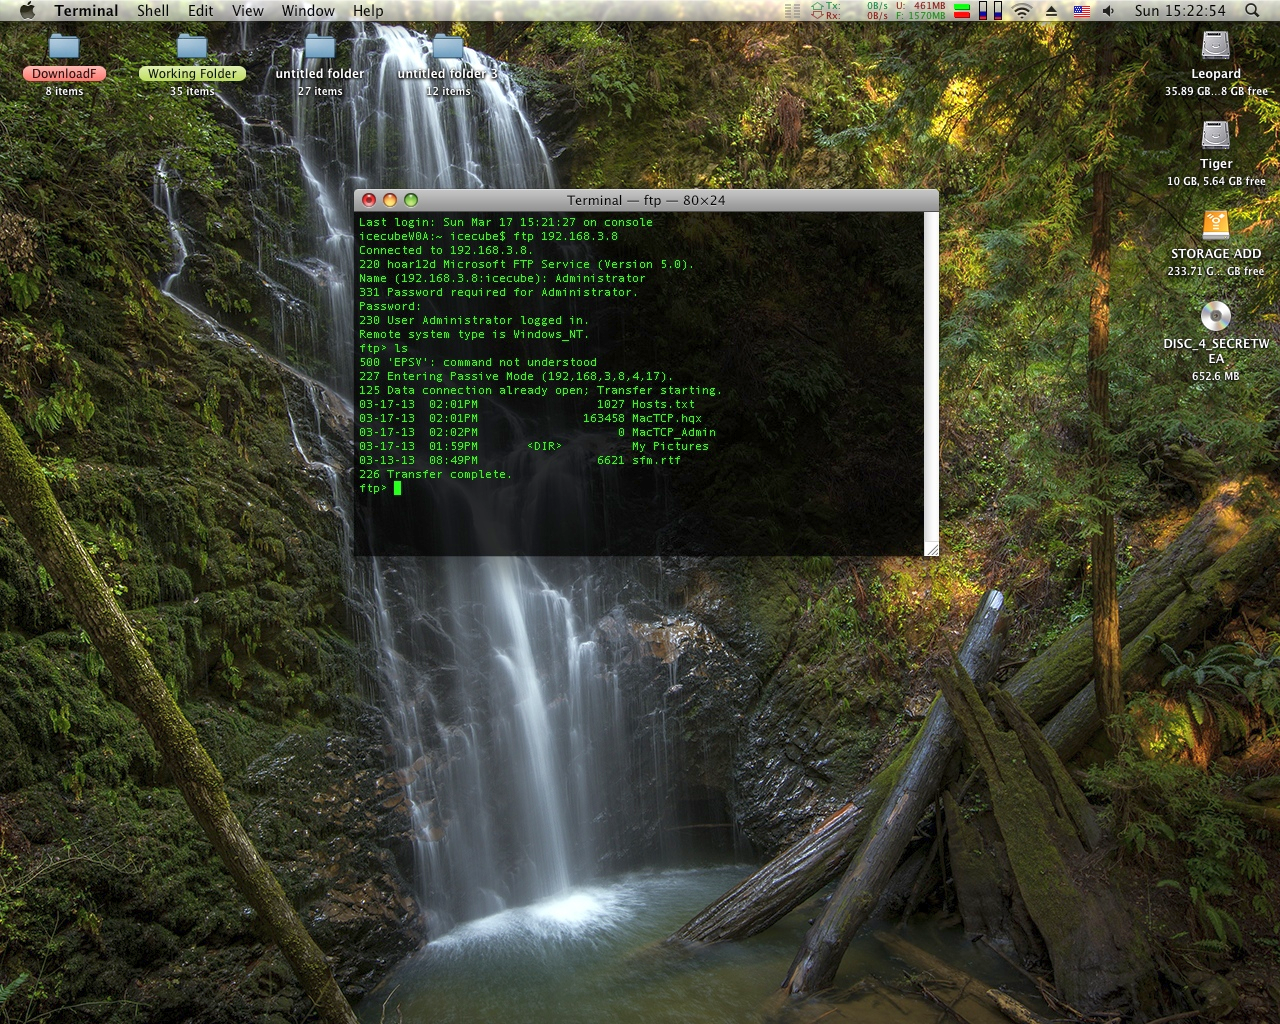 Terminal login (10.5) |
Next, head to the Start menu, then Programs, then Administrative Tools, then Computer Management. Find the Services and Applications option under the left toolpane (or tree). Look for the Internet Information Services submenu. Right click the "Default FTP Site", and from there it can initiated or terminated, or additional options can be seen with the Properties link. The Server can also be started or stopped from the Component Services app in Administrative Tools, off the Start menu. Under Identification (shown in the second image below) leave it at [All Unassigned] for automatic configuration, or select an IP address from that drop-down menu for advanced users. For the third picture as shown below, changing the default FTP folder could be a good idea, since the address shown in the "Local Path" field is designated as / (meaning root directory, called a fake root since it's not the "real root directory") and it is not possible to explore any higher directories. |
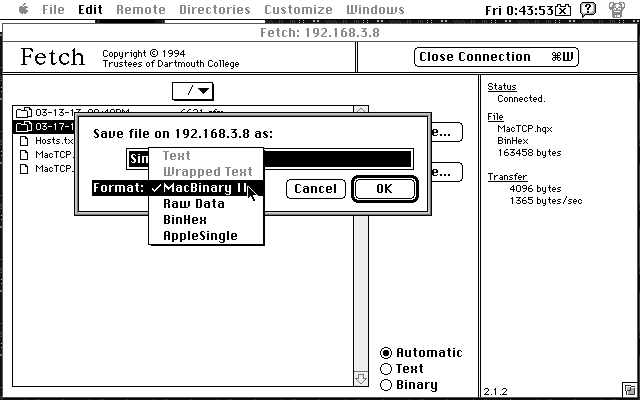 Fetch 2.1.2 in use |
For testing it was changed to the My Documents folder, which worked fine, and is a more convenient than a buried directory. Fetch 2.1.2 didn't list the directory contents unless the Write button was checked. Fetch 2.1.2 is a little ho-hum with the FTP server (like selecting the directory drop-down menu can change the way the list contents are shown) but works...okay. Check that the Windows Firewall, found in the Control Panel, permits the FTP Server through. An exception can be added in the Advanced tab, or a specific port in the Exceptions tab. Clients looking for the server will need to know the IP address: using the command ipconfig /all from the Command Prompt to find out what the internal IP address is universal across the versions of Windows.
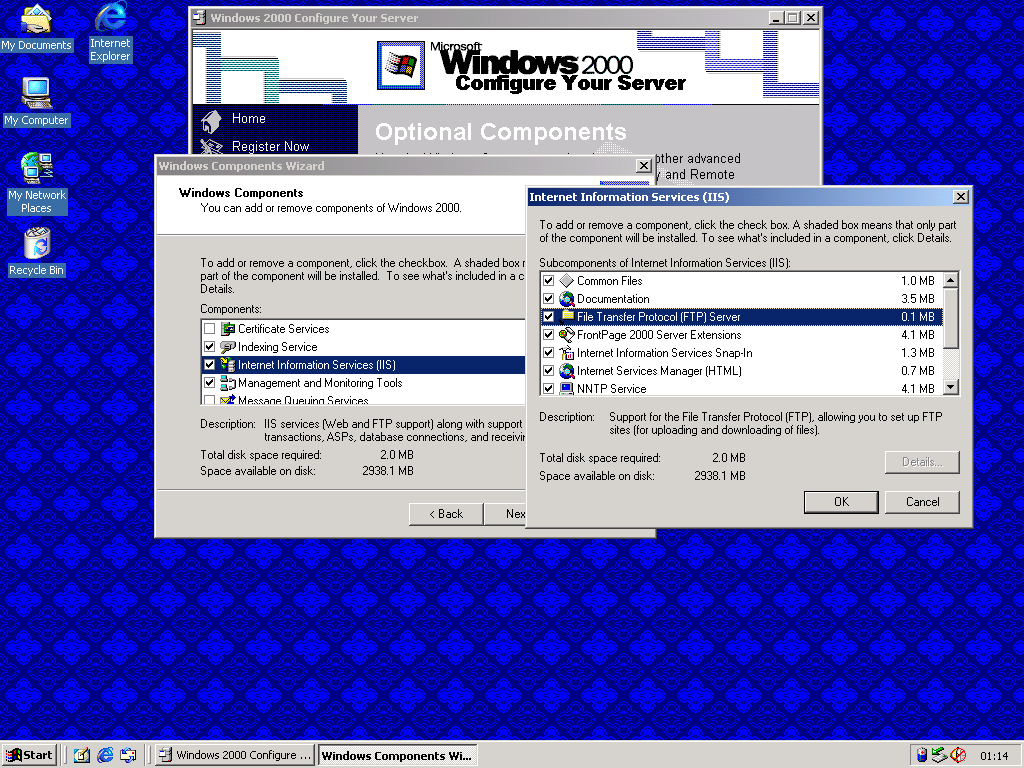 FTP Components |
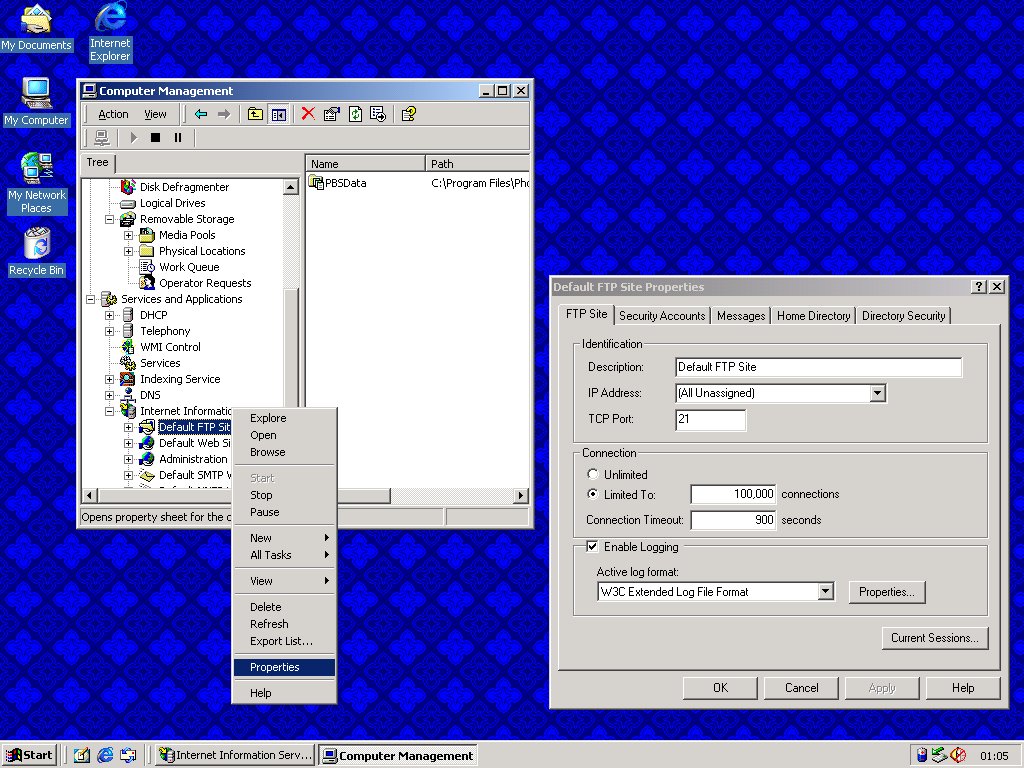 Setting up the server |
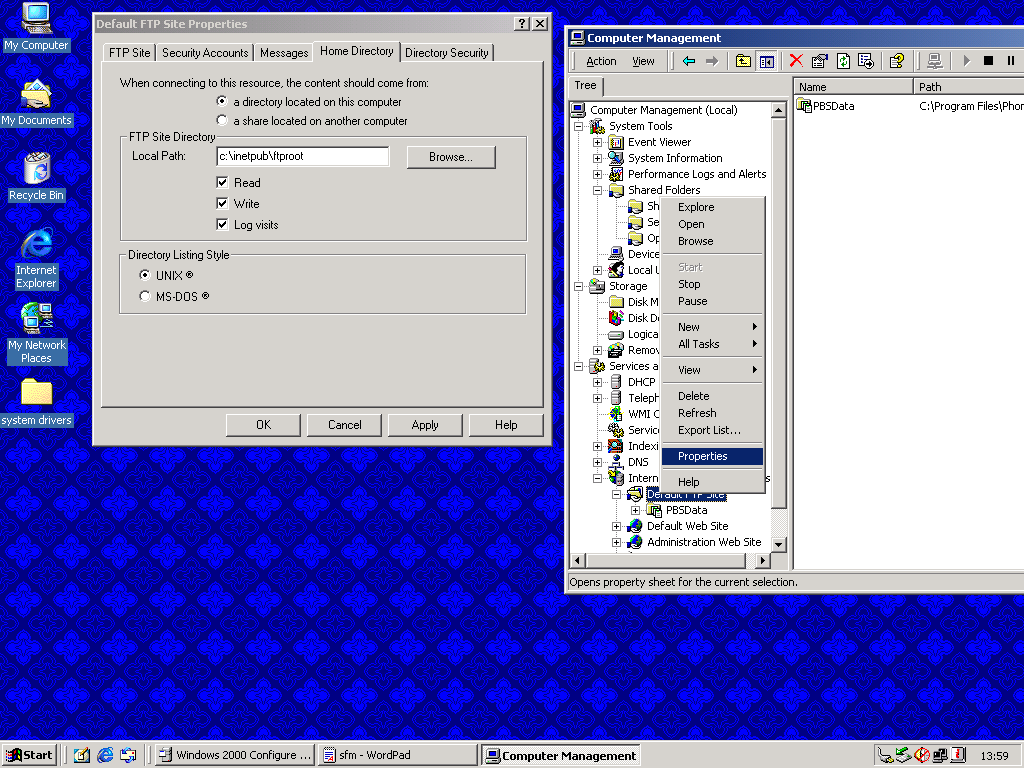 More setup (see note) |
Setting up Ethernet |
Under Windows 7, the process is a little bit different. Start by opening the Control Panel, then click the Programs and Features element. On the left pane, click the "Turn Windows features on or off" link. Look for the Internet Information Services dropdown, then expand it. Click the FTP Server button. Then expand the Web Management Tools dropdown, and enable the IIS Management Console along with the IIS Management Scripts and Tools features. Click OK and let it do its thing. IIS 7 may not be installed by default on your Windows version: there is a Microsoft KB available on how to install it. Additionally, Windows 7 Ultimate, Professional and Enterprise Editions are the only ones that have the FTP server as an option: Home Basic, Home Premium and Starter do not have the FTP server available.
Click the Start menu. Type IIS and then open the IIS Manager. Right click on the left pane and then select Add FTP Site. Add the name of the "site" under the "FTP site name" field, then add the directory to be shared (like C:\Users\glaze\Downloads) then click the Next button. In the IP Address field, type the address that is desired, or click the little drop down arrow to select from the local list of internal IP addresses (the example shows 192.168.1.103 for this computer). Early Macs won't support SSL authentication so leave that turned off for local networks, then click the Next button.
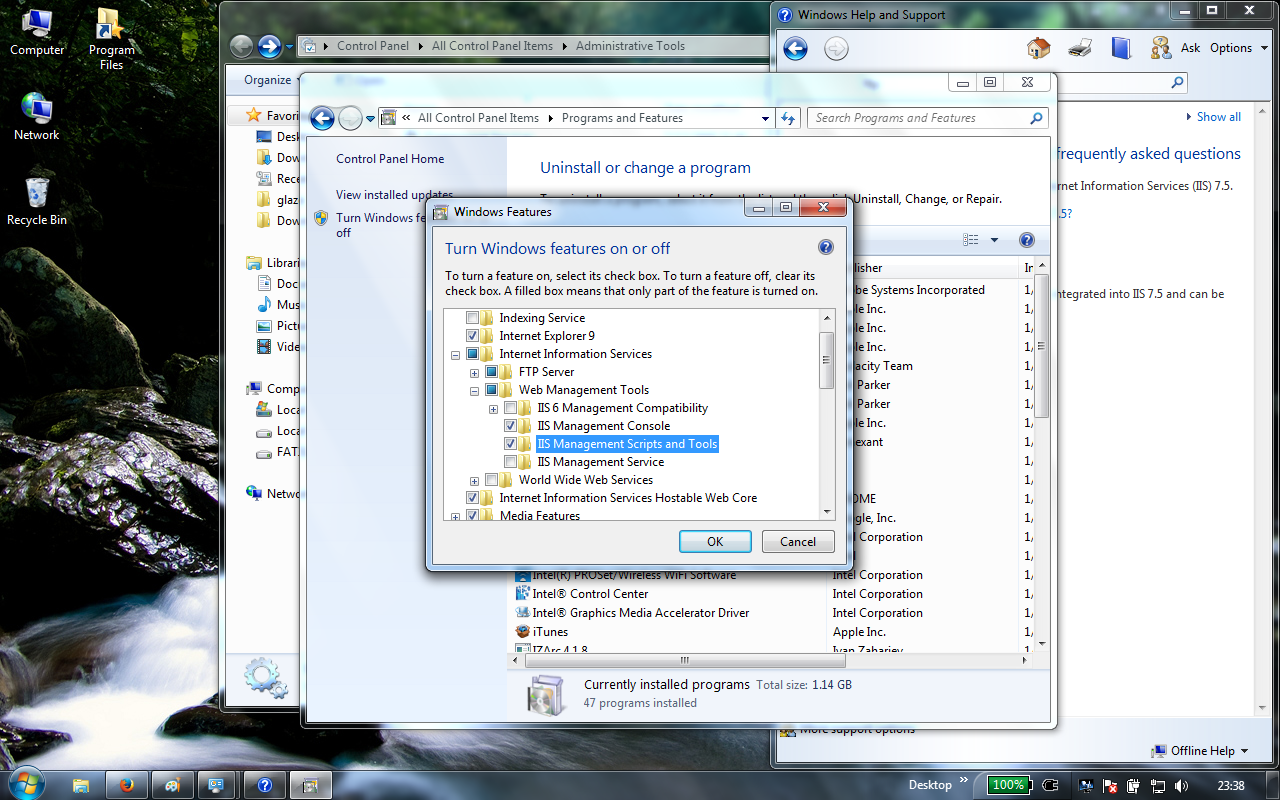 Installing the FTP Server components |
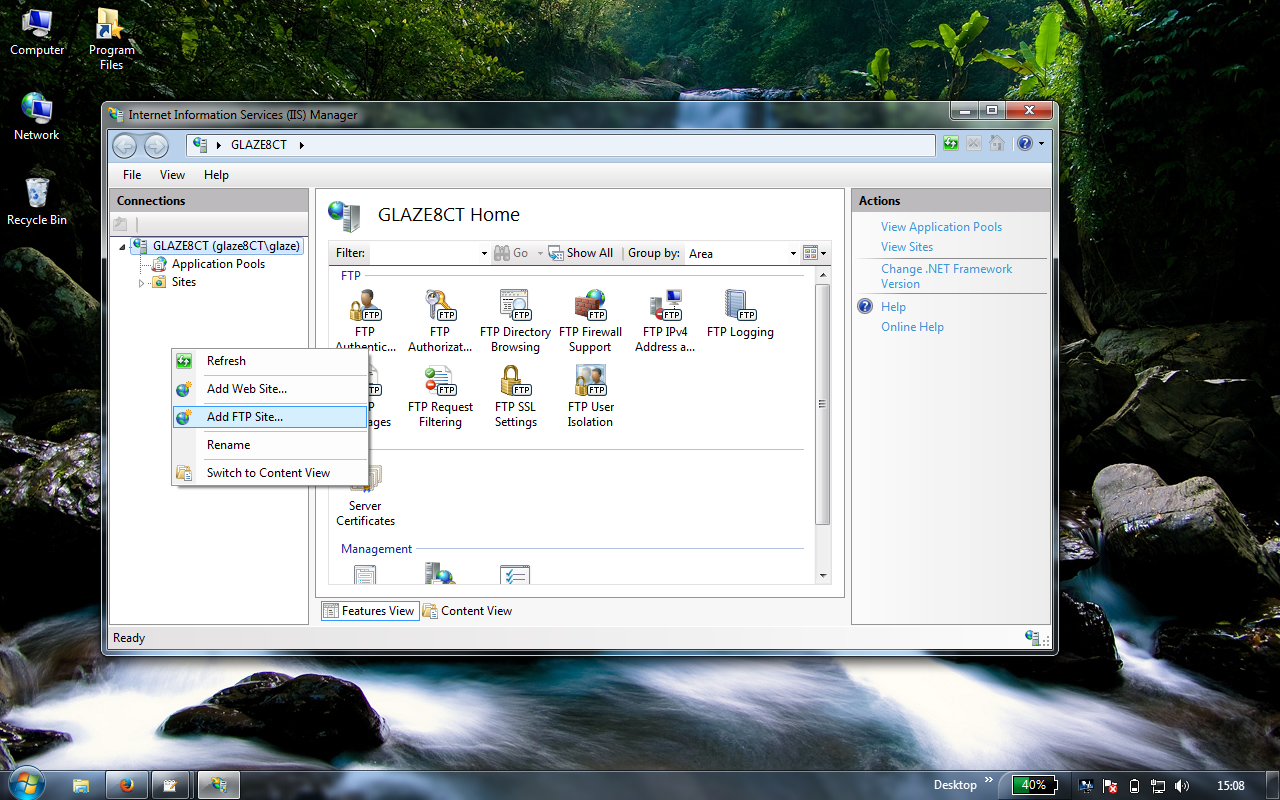 Adding a FTP site with the IIS Manager |
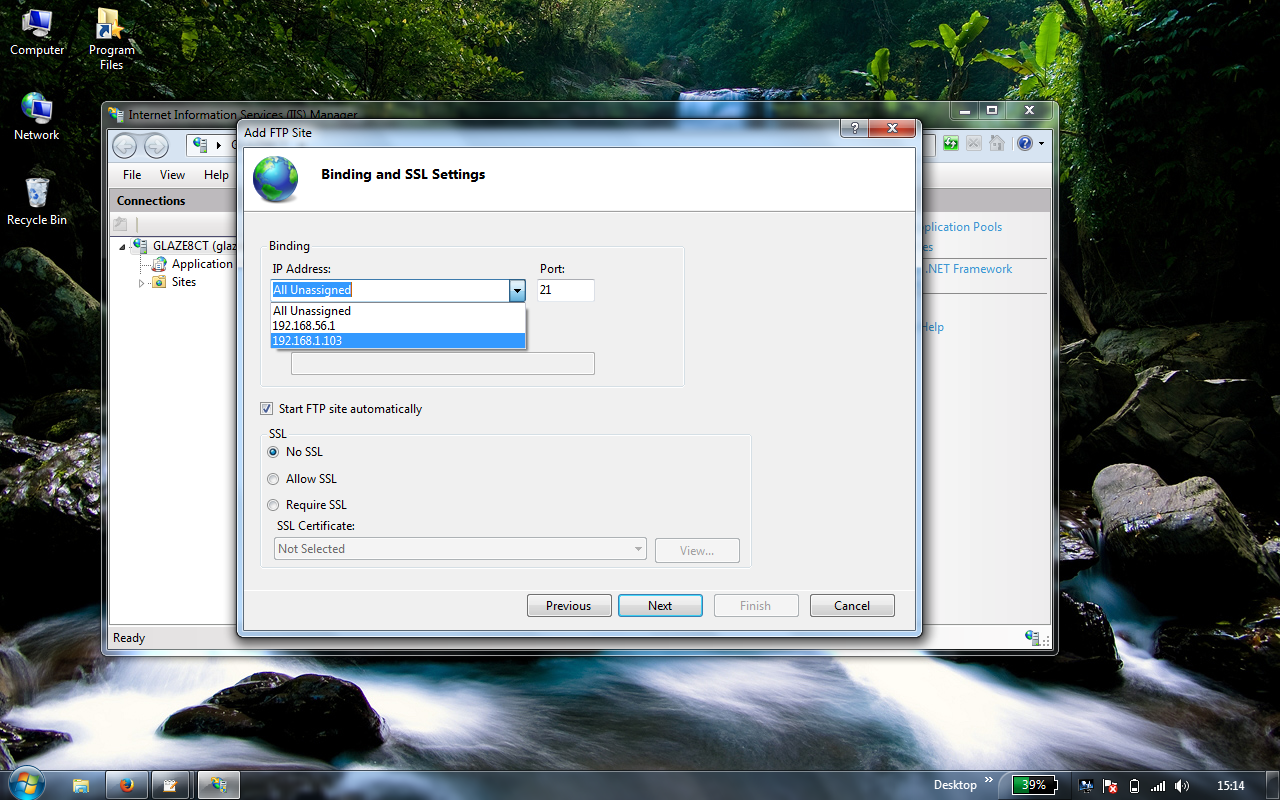 Setting the IP Address |
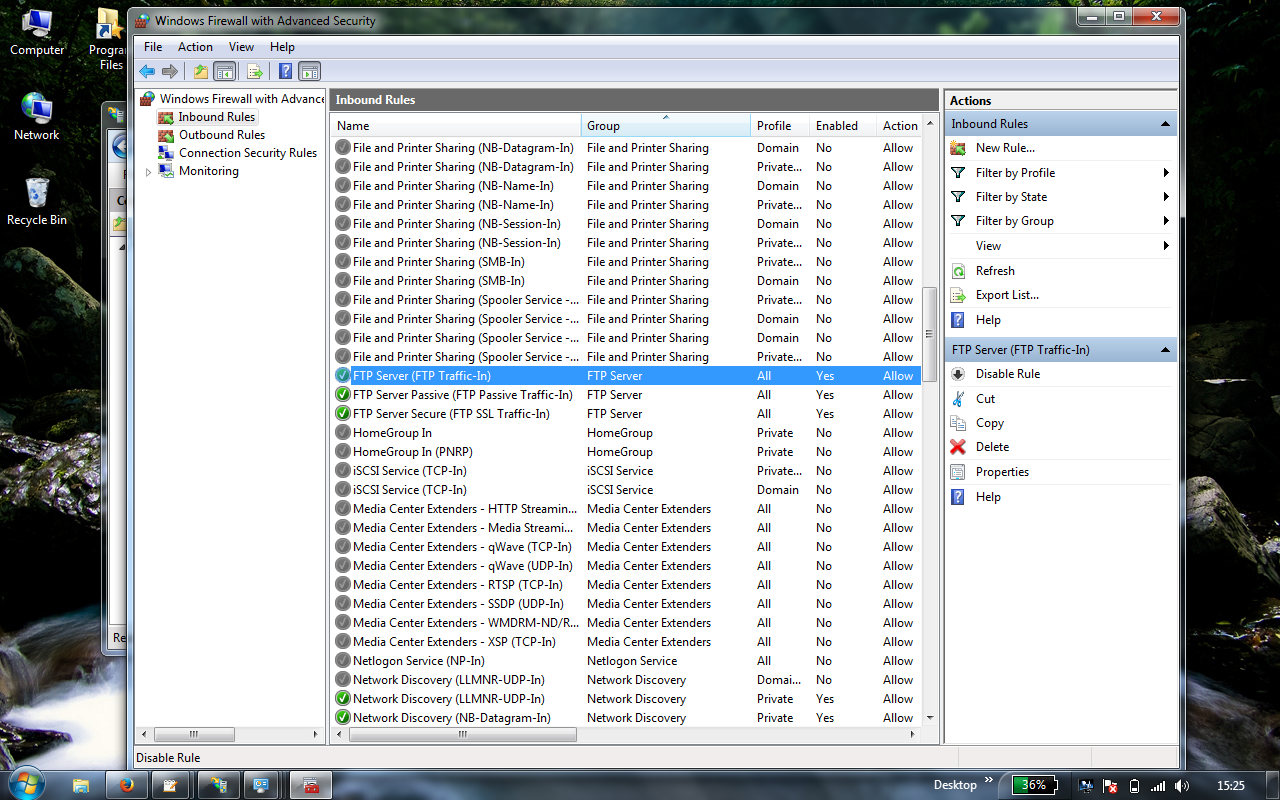 Configuring the Windows Firewall |
The last window shows the authentication preferences on a basic level. If it is desired to enable anonymous logins (the username becomes anonymous and the password is usually just blank), then enable the checkbox, or tick the Basic button. From there, in the Authorization area, choose the desired access capabilities. For this example, Specified users was chosen and the user glaze was entered in the text field below. Then allow read or write capabilities with the appropriate checkboxes, then click the Finish button -- and the FTP server is active and ready to be used.
As Windows systems are typically (or are supposed to be) secured by Windows Defender or the built in firewall, the FTP server will have to be allowed to accept incoming connections. To do this, head to the Control Panel, and click Windows Firewall. Look to the left pane, then click the Advanced settings link. In the new window that opens up, look once again to the left pane, and click Inbound Rules. Scroll about a third of the way down until the FTP Server group comes into view. Enable the rule by activating it on the right Actions pane. Users with additional firewall, port blocking, antivirus and so on software may have additional steps to make.
To stop the FTP service, the IIS Manager has the capability on the right side. First select the name of the FTP "site" as was designated earlier, then stop the service with the Stop link on the right control pane. Don't forget to re-enable any firewall or anti-virus settings if they were changed or disabled.
Windows 10 and 11 are almost identical to Windows 7. Like the latter, check that it gets through Windows Defender and Windows Firewall.
Linux
Linux systems usually do not come with FTP servers built in. From Ubuntu's Software Center for example, there are few FTP servers listed, but most of them are geared towards power users who think Terminalese. ProFTPD is an example (has, or had a reputation for security weaknesses), but there is a GUI module which ought to work fine called GAdmin-ProFTPD, but apparently it's only for GNOME and KDE. Pure-FTPD is another example which should have a GUI module available. Other distros may have other options but the wide variety and highly dynamic nature of Linux requires that this section be rather short on details. Power users will most likely know the best available option(s) for them, "the rest of us" are more or less regulated to the back seat in such departments.
In the mean time, personal testing did not produce satisfactory results. ProFTPD would not work except on the local host, using the GAdmin app; PureFTPD was too complicated and wouldn't start (from the PureAdmin GUI app). Apparently there is a frontend GUI for wu-ftpd floating around somewhere. Most of this information is probably outdated, because the Linux front tends to be heavier on the security front than Windows does, so they've been using SSH or SFTP for awhile, but there are usually some FTP repositories still out there because of compatibility.
Clients and Client Access
For classic Mac systems, follow the network configuration settings found earlier for MacTCP or Open Transport, as appropriate. Some Mac OS X systems are described in the AFP networks section on where to get their Ethernet or WiFi settings sorted out. Older Windows versions are generally pretty easy, by locating the Local Area Connections configuration and right-clicking it to select Properties. It's usually buried under "Internet Protocol (TCP/IP)", with DHCP being common for router controller networks or sometimes manual addressing. Starting with Windows 8 things got a little bit different but most of the time people have routers and operating systems are preset for DHCP out of the box. Linux is always a question of what Desktop Environment is in use. Some have a "Link-Local" setting which is meant for cross-over cables direct from machine to machine, which isn't very common anymore.
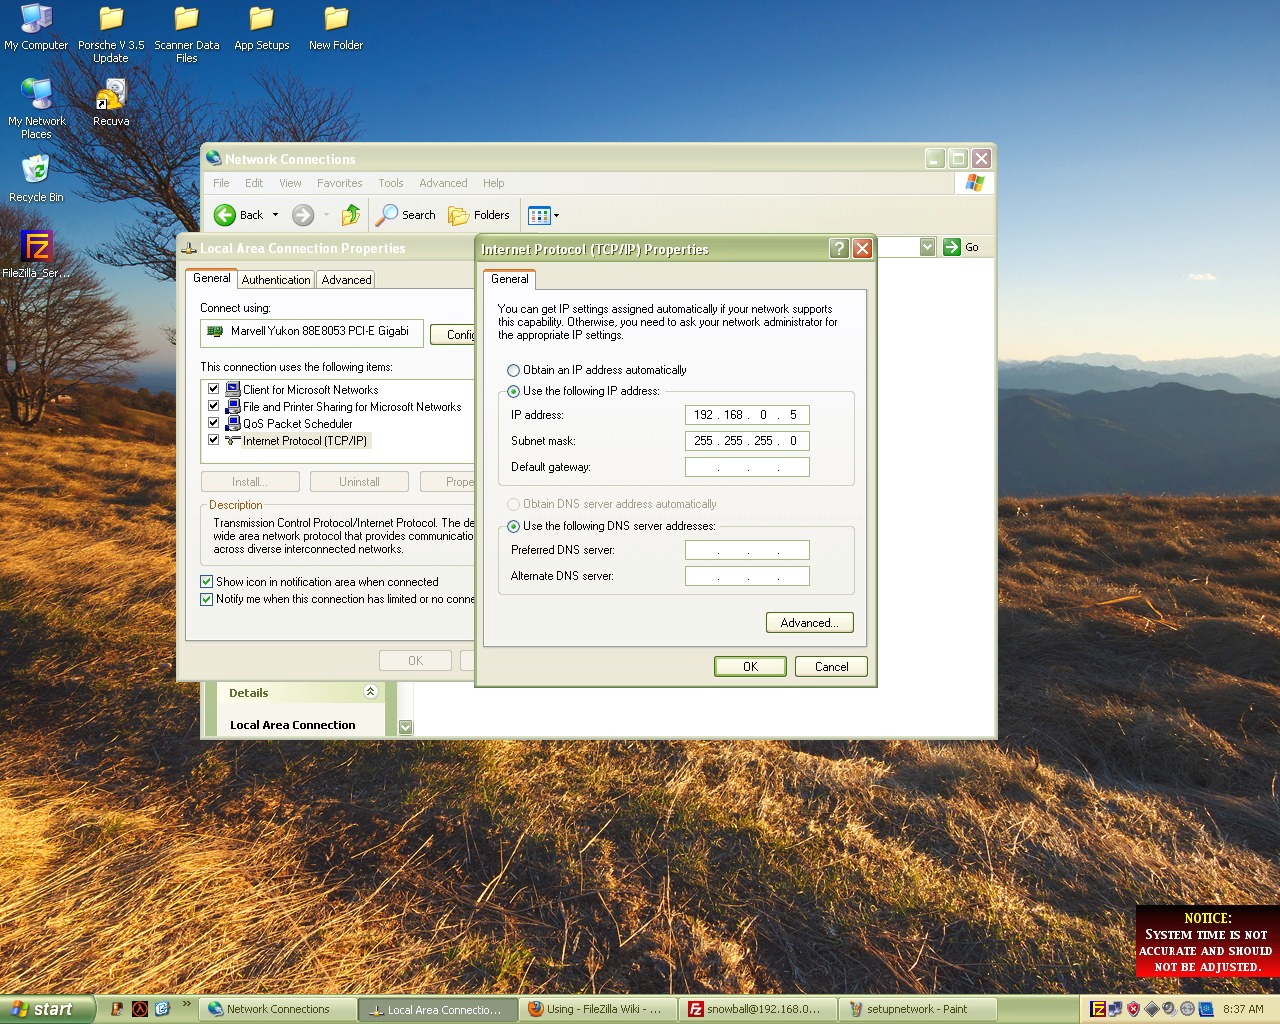
Once the Ethernet hardware has been established and configured, and the server software started, the final step is to start the client. There are a variety of client connection programs, so let's take a look at a few examples. Fetch 2.1.2This client is a very nice and capable client because it fits onto a 800KiB floppy disk, runs under System 6, is fairly reliable, has built-in encoding and decoding (MacBinary, BinHex, AppleDouble) on both ways. It is reasonable on memory, figure a max of 600KiB on a color PPC machine, less for 1-bit displays -- and is a FAT binary for both 680x0 and PowerPC processors. Not bad for ~486KiB on disk. There are two known downsides of this program: it isn't that efficient on faster computers (i.e. G3, G4) with higher throughput capabilities compared to other later FTP clients, and the built-in BinHex 4.0 decoder can cause issues. Best bet is just turn it off in the Preferences menu. |
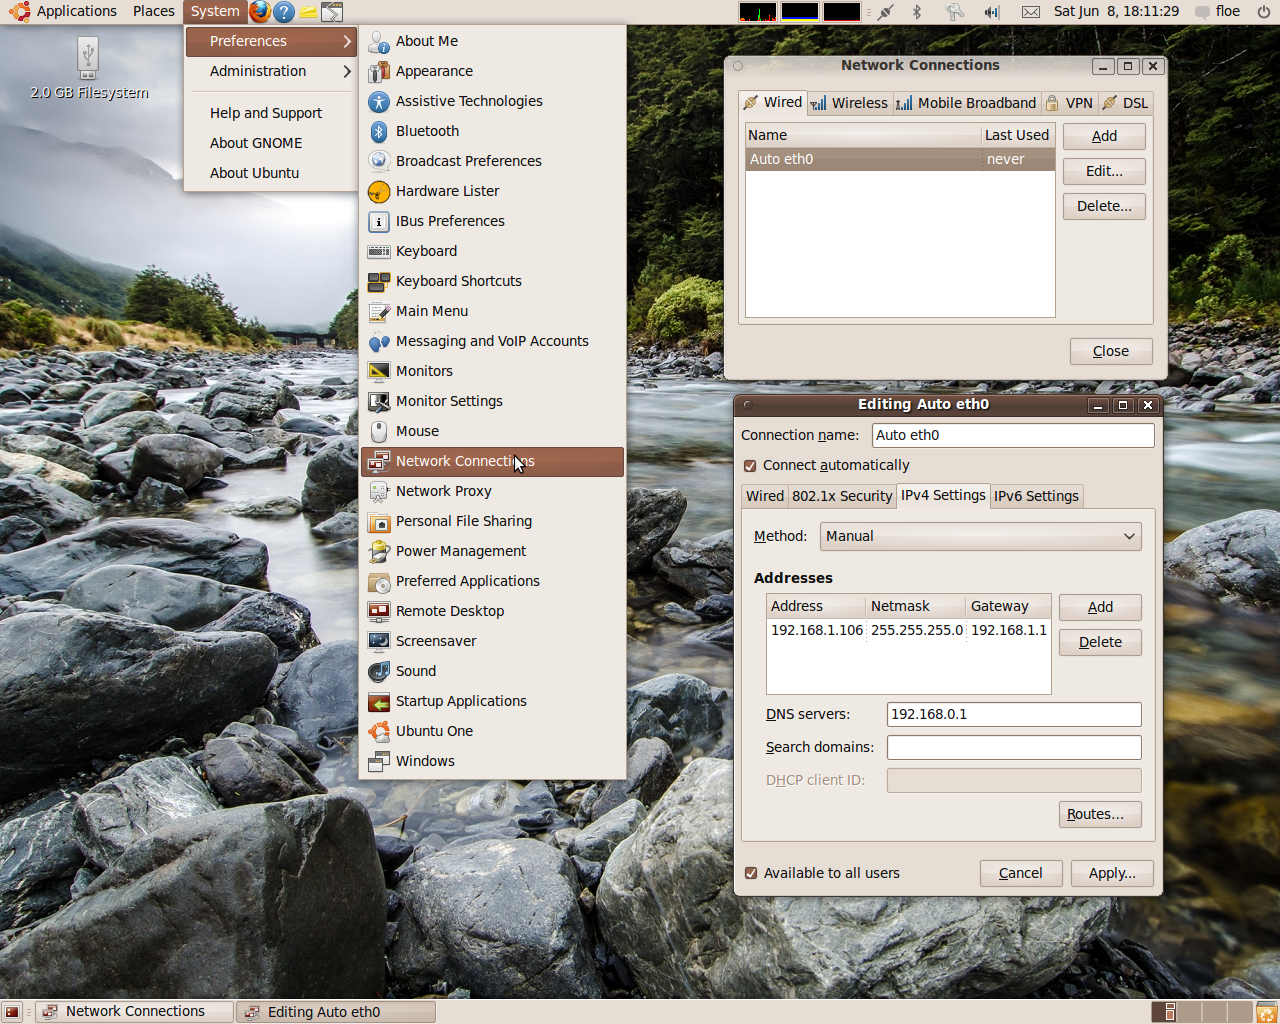 Configuring eth0 (Ubuntu 10.04LTS) |
Start by opening the application. It will present a login dialogue box. Enter in the host or target computer's IP address, either internal for a LAN or external for a outside FTP server. Next, add the login details, and put the login directory or use / for the root directory, then press Okay to login. The program includes some helpful documentation as well. As with nearly any FTP client, it can access external volumes on the target computer: in the image shown to the right, "7.6.1 Network" is a CD-R, "Disk Copy" is a branch of the same volume (appended disc), "Leopard" and "Tiger" are local partitions, and "STORAGED1" is an external FireWire hard drive. |
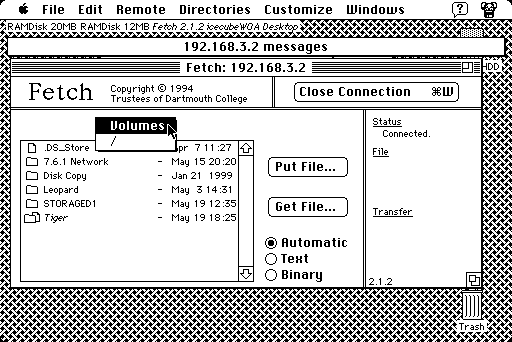 Navigating remote volumes |
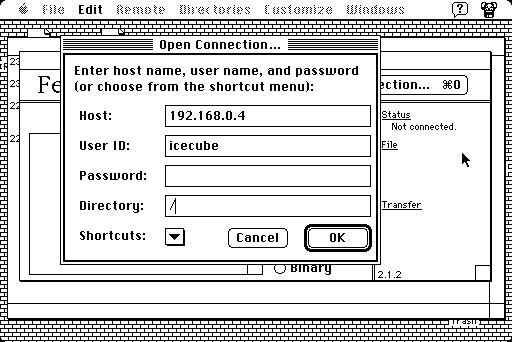 Open Connection dialogue |
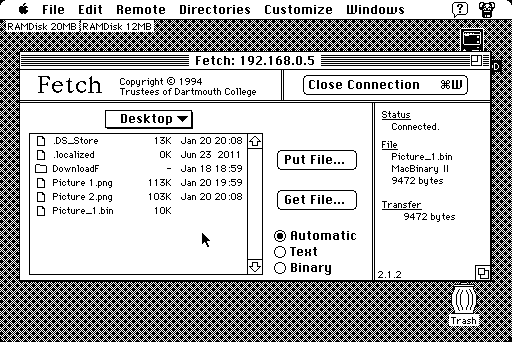 System 7.0.1 to 10.5.8 |
 GETing multiple files |
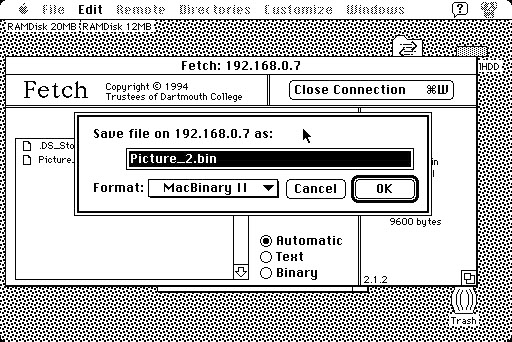 PUTing a file on remote volume |
To access a remote server, such as ftp://ftp.belnet.be/debian-cd, then for the Host, enter ftp.belnet.be, and for the user (assuming guest credentials) anonymous, leave the password field blank, then for the directory put /debian-cd, then press Okay.
If the program bombs with errors like "math co-processor not installed", even on a machine that has one, or "bus error" or "address error" the first thing is to check MacTCP. If MacTCP is not getting the correct routing and DNS information this happens. Use MacTCP Watcher to try to zero in on the problem.
Other clients include Transmit 1.6 (bombs on a SE/30), Fetch 3.0, and so forth. Some may be found around the internet, or here (use the Wayback Machine from archive.org to get older versions). Fetch 2.1.2 is probably fixed on Active FTP mode, but 3.0 does have an option to enable Passive mode in the settings, under the Firewall tab. Binary files such as MacBinary II files are typically faster to send over the wires versus BinHex text files.
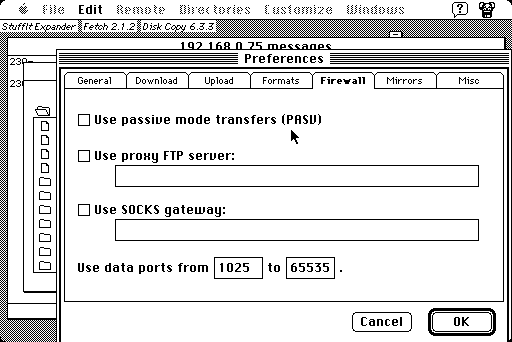
FileZilla ClientThis client is available on a variety of platforms, including Linux, OS X, and Windows. They're all identical for the most part. It also can access SFTP and SSH servers, with native support for FTP with TLS encryption. Download FileZilla Client (older releases are tucked away for now, but can be found here). Do not install the ad-sponsored version. On the download page, click "Show additional download options" and chose something there. You may have to hunt for older versions if you don't find one compatible with your target system listed. Install and open it. (Wiki documentation is available here.) Under Host, fill in the target IP address of the host, username and password, and port if not 21. The Site Manager (File menu) can store shortcuts for commonly used servers: settings are available in that same window to specify Active or Passive FTP, useful for firewalls. |
 FileZilla Client under Windows XP |
To transfer files, navigate in each pane to the respective directories: the left directory in this case is the local computer (client) and the right pane is the server. Drag files from one pane and drop files in the other pane to copy. The program also has automatic file type classification in the Settings menu. Consider using that to assign .hqx BinHex files as ASCII files, so they will be automatically sent in the right format.
Using a Web Browser
Type (for instance) ftp://snowball@192.168.0.10 in the address bar. Enter in the password. It is read only. The syntax is:
ftp://[username:password]@[IP address][:port]. An example of this with a non-standard port would be something like: ftp://rachelsmac@192.168.18.128:2100. If the system requires a password, it will be prompted for: the example shows the case of either a blank (none, or "null" in computer speak) or a prompt style method. The "port" is only required if the port is non-standard, i.e. other than port 21.
Using Terminal
The hard-boiled geeky method. OS X earlier than 10.4 may require the BSD Subsystem to be installed. Note the ftp terminal client program was removed in macOS 10.13 High Sierra and does not work. You will have to install Homebrew or something like MacPorts and install inetutils. Anyways, open Terminal and if your host IP address is 192.168.0.10, then type:
Some basic Terminal commands for newbies:
|
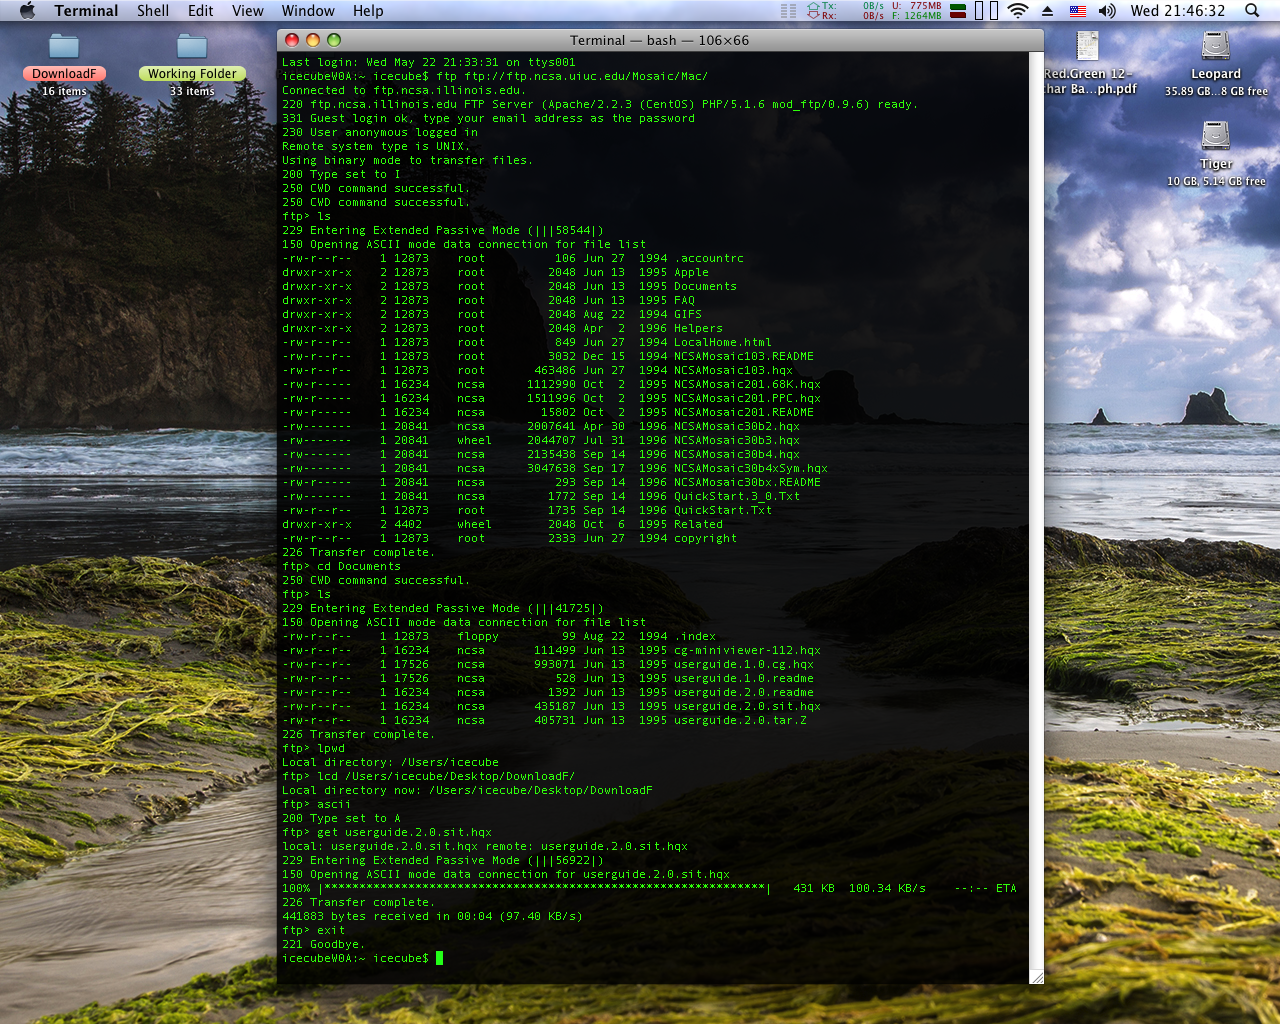 Terminal file transfer on a remote server |
- get Extracts a remote (server) file to the local (client) machine. See the previous line about quotes, if needed. Remember that the location where the item will be deposited is, by default, ~/; thus, use lcd to navigate to a different folder or use cd to change the local working directory before calling up the ftp command.
- bin or ascii Changes the transfer method from one method or another. Use ASCII for BinHex files (.hqx), UUencode and text files and Binary for everything else: but this is just a basic rule. If the file is corrupted in one method (i.e. ASCII) then try Binary. More info here. Usually the server will declare the transfer type at the beginning of the connection.
- lcd Changes the local working directory. This is used if you are changing the location where the get command will deposit the file onto the local machine. An alternative is to cd into the desired directory beforehand, then invoke ftp. Otherwise, the default folder on the local (client) machine is ~/ (for *NIX and OS X) aka the Home folder of the currently logged in user. This lcd command is important if various files need to be PUTed on a remote machine but are located in different places on the local machine. Here's why: if a user attempts to put 12_stock_report.pdf onto a remote machine, and the file "12_stock_report.pdf" is not in the same directory as the "present local directory" (use lpwd to find out what it is), then the put command will fail because it can't find the file. To remedy this, note the location of the file and use lcd to change to the directory where it is stored, then use the put command to STOR the file. (See the image for an example.) Use !ls to list the local directory contents.
- lpwd Prints the local working directory, "where you are" on the client computer.
- Tab key: Auto-completion key.
- Control+C: Cancels present command or operation. May terminate the ftp session.
- man or --help are help tools. man would be used like this: man md5 to look up the help pages for the command-line md5 file checksum utility. Use the space bar to view the next page, the Return (or Enter) key to advance down one line, and use the q key to quit the man page mode when you're finished. md5 --help an example of how the --help tag is used to get a couple of quick pointers on how to use the command. It's basically equivalent to the MS-DOS -help or /? tag (like dir /? or copy /?).
It is possible if a local FTP server is active to browse the local machine, by using the IP address of 127.0.0.1, for either fun or practice before the big game. FTP commands were originally made to be really short, with most common functions using only three characters, like put. There are many other commands like mget which is for grabbing multiple files at once. More examples can be found like this MAN page and another here (latter with mostly emphasis on Windows machines).
All in all, having FTP client access in Terminal is a neat feature, and works well enough for simple, short file exchanges in both Linux and OS X. A client application is a better idea for sustained access, though. Windows also has command-line FTP access in the Command Prompt. One notable difference is that something like !ls or !pwd doesn't work. Just type ! alone which escapes out of the FTP program into a shell: type exit to go back to the ftp> prompt and program.
Mac OS X's Go Menu featureHead to the Go menu, then Connect to Server..., or press Cmd + K. Type ftp://192.168.0.10 or whatever the target computer's IP address is. Mac OS X will mount it as a network volume. Authentication is required if Guests are not permitted access, i.e. Anonymous users in the context of FTP to connect. To login as user snowball with an IP address 192.168.0.10 for instance, type: ftp://snowball@192.168.0.10 then enter the password for the account. If the port is not 21 but something else like 2100, then type: ftp://snowball@192.168.0.10:2100. This is read only, and doesn't seem to always allow all parts of a file to copy correctly sometimes. Other operating systems have a similar feature, especially Linux, and they also can have spotty reliability. |
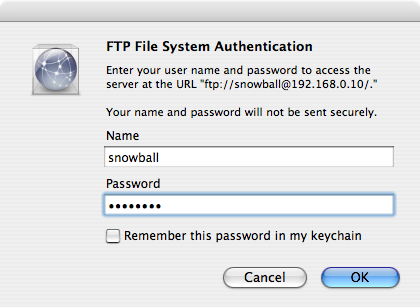 The Go Menu method login prompt |
TelnetTelnet is a TCP based feature which allows remote computers to be administered from a local machine. An example would be to control a *NIX workstation at a workplace from home through the Internet, to a certain point. SSH is the encrypted variant which works in a fairly similar fashion to unencrypted and rather dangerous Telnet service. Like FTP, a server element is required -- two Telnet/SSH clients cannot communicate with each other. The Telnet protocol is a plain-text service and can be easily hijacked by malicious users or malware. Do not run this service on public, unsecured or untrusted networks. |
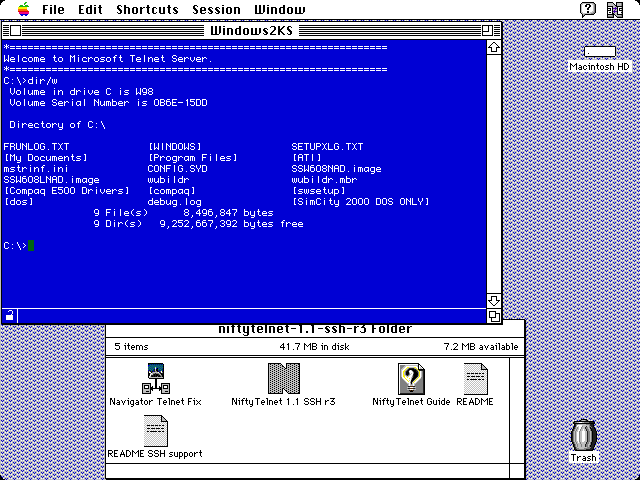 Nifty Telnet with active Telnet session |
Connect all computers via Ethernet or one to another via pseudo-PPP dialup, and then set up MacTCP or Open Transport as applicable. Next, we'll discuss the programs, then how to get them all set up. The prevailing assumption is that the vintage Mac will be a client connecting to a newer machine running a server. There are no known Telnet or SSH server programs for Classic Mac OS.
Server Setup
Microsoft Windows
Right off the bat, this section will suggest the use of the built-in server. Only Windows 2000 and higher have a built-in server, so let's start with Windows 2000. Because the default authentication mode is NTLM, which none of our clients can understand, the plaintext authentication mode must be enabled. Users who wish to do this full-time should enable a special user account just for Telnet purposes rather than logging in as the primary user, being the root user aka Administrator in Windows terminology.
To enable the plain-text authentication, open the Command Prompt. Type tlntadmn. Select the 3rd entry by typing 3, then press the Enter key. We need to change the NTLM mode, so then press 7, then Enter. It will ask if the value should be changed, which it will be, so type a y, then it will prompt what value to change the option to. Change to zero by entering 0, then hit Enter and confirm. Afterwards choose "Exit this menu", then "Quit this application". Type exit to quit the Command Prompt. (This tutorial was the reference for this section.)
Now to actually start the service, open the Start menu, then Administrative Tools, then Computer Management. If Administrative Tools is not visible, then turn it on by right-clicking the task bar, select Properties, then click the Advanced tab. Look for the "Display Administrative Tools" check box, enable it, then click Apply. From the Computer Management window, expand the the Services and Applications tree. Click the Services entry. Then find the Telnet service in the nearby list of services, and double-click it. Change the "Startup type" from Disabled to Manual. Start the service by clicking the Start button. If you are using DHCP, you'll need to know what the IP address of the server is. Using the Command Prompt, type ipconfig or if it still doesn't show up, ipconfig /all.
And now for Windows XP, the old warhorse. Open the Command Prompt. To enable plaintext authentication, type:
To revert to the original model, just use this: tlntadmn config sec +ntlm -passwd. Start the service like as described with Windows 2000. In the Control Panel is an entry for Windows Firewall. Open it and go to the Advanced tab. In the area for "Network Connection Settings" is a Settings button to add an exception. Add Telnet Server. Then start the Telnet Server from within Computer Management, just like Windows 2000.
Windows Vista and 7 do not install the Telnet Server element by default. To do this, open the Start menu, and type Turn Win and select "Turn Windows features on or off". In the dialog that opens, select Telnet Server, then press OK to allow it to install. A client feature can also be installed. Follow the instructions in this article to enable the plaintext authentication: it's just like Windows XP. Then someone has to be added to the TelnetClients group as by default nobody can login. Just enter a valid username in the text box, the click "Check Names", as shown. This article could also be relevant. Lastly, activate the server as described here. Type Component Services in the Start menu to find it. Looking under the Log On tab, the radio button for Local System account may have to selected as active. |
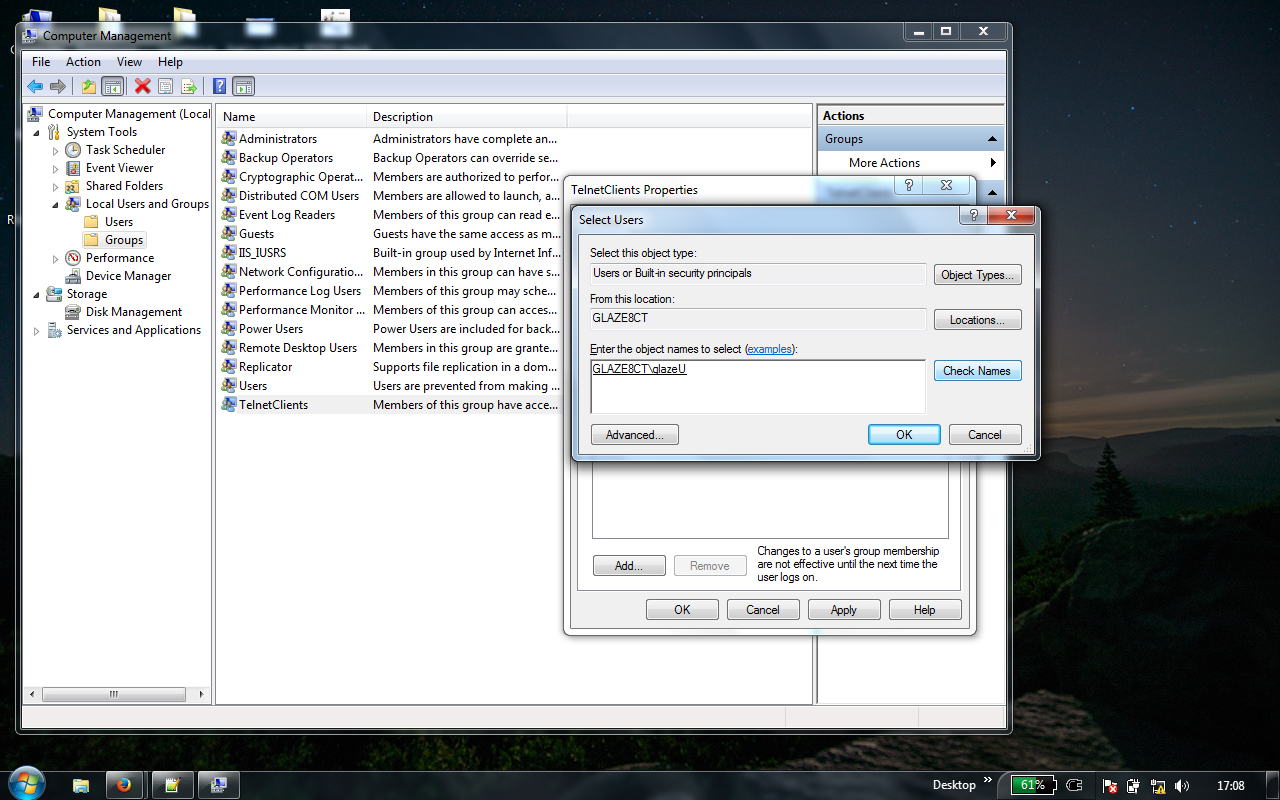 Adding a user to the TelnetClients group (Windows 7 x86) |
The Telnet Server will have to also be allowed access through the firewall. One way of doing this is by adding or modifying the rule within the Windows Firewall with Advanced Security program. There's a couple of related rules that are not enabled immediately after an installation of the Telnet server, under the name Telnet Remote Administration. As part of testing, this platform behaved somewhat strangely on client systems. Backspace on a Linux system didn't work with this server, same with NCSA Telnet 2.7b4.
Windows 10 and 11 do not have a Telnet server feature, only a client. Third party Telnet servers will be required, and are not recommended because these systems are new enough to use more secure methods. They also are new enough that the security risk is unjustifiable, compared to an older Windows XP machine that is isolated and doesn't have anything even remotely important on it.
Mac OS X and *NIX
Obviously the many deviations of Linux mean that only one will be discussed. Power users using other systems like FreeBSD can work through the proper channels to get their Telnet server going. As for Ubuntu, to get the Telnet server installed and started, type the following:
Use ifconfig from the command line to find out what the Internal IP Address is, depending on what interface is in use. Like with Mac OS X, any firewalls or port blockers will have to be either disabled or permit Telnet traffic through. To turn the Telnet server off, the configuration file can be edited with sudo gedit /etc/inetd.conf and put a # in front of the line that starts with telnet, then stop the service (assuming nothing else is using openbsd-inetd) with sudo /etc/init.d/openbsd-inetd stop.
As for Mac OS X, if the BSD Subsystem is not installed, it will have to be installed for the Telnet daemon to be present. Normally the BSD Subsystem is installed automatically with 10.4+, but optional with 10.0 through 10.3. Afterwards, follow the instructions in this KB article. The firewall will have either allow the service through or be disabled, and the service is ready. For 10.3 Panther and above, enter this into the command line:
Replace start with stop to end the service, and for proper restoration, reapply the # characters that were removed in the /etc/inetd.conf file.
Client Access
A common Telnet client for Mac OS Classic is the NCSA Telnet series which has all the marks of being one of the first ones out the door, and the only one that works with System 6. Version 2.6 is suggested for System 6 but your mileage may vary, in practice 2.7b4 worked fine. MacSSH 68K and Mac68K PPC will also do Telnet, just like NiftyTelnet 1.1 SSH r3. System 7 is required for NiftyTelnet and MacSSH won't work under anything less than 7.5.
This subsection focuses on getting the Mac client programs going. Other clients such as Mac OS X do have additional parameters that can be set from the command line, such as configuring the terminal mode, escape key and other things. Use man telnet or for the Windows equivalent, try this article. As most newer computers can use SSH, it should be used over Telnet except for a small number of cases where Telnet is the only option. For the old Mac, only the TCP/IP control panel (with OT) or MacTCP needs to be configured, which should be already ready to use.
NCSA Telnet
This one is really basic. After the program is open, choose Open Connection from the File menu. Enter the IP address of the target machine, such as 192.168.1.127. For running multiple Telnet sessions, enter a name for the window so it is easier to identify which computer is associated to a particular window. NCSA Telnet 2.6 has a checkbox for "FTP session": this is basically the same thing as going to an FTP prompt, like what someone might use in a command line with ftp <IP address or domain name>, such as ftp 192.168.1.114. But the server has to have an FTP server running otherwise it won't work. The Send FTP Command from the Network menu makes the host server login to NCSA's FTP server, assuming it is on. Anyways, click Connect or just press the Enter key, and the connection is active. Log in as Administrator on Windows systems -- hopefully that account was enabled in the system installation process -- otherwise, you'll have to make another account because if there is only one, it is "already logged in".
To clarify on the Send FTP Command function, let's say a IIvi is running NCSA Telnet 2.7b4. The IIvi logs into a Pentium 4 machine with Linux on it that has a Telnet server service. When the IIvi user selects the Send FTP Command, this makes the Pentium 4 computer log into the IIvi's FTP server: and it's the only way to send files with NCSA Telnet, as there is no rcp function.
Change the Delete key to Backspace from the Session menu to restore the conventional backspace: the default is Delete, which is a forward delete. Use Close Connection to terminate the interaction rather than quitting the application directly.
Nifty Telnet SSH 1.1 r3
Slightly more modern than NCSA Telnet, but requires a 68020 or later along with System 7. The SSH functionality will be reviewed in the next section.
After the program has been opened, a New Connection window is presented. This window also shows the "shortcuts" or being translated, "connection bookmarks". For the first time, it's a good idea to set up a new shortcut. Don't worry it won't take long. Click the New button. Provide a name for the shortcut in the first field, such as Mac OS X Leopard Machine. The Host Name can be either the IP address, or the domain name if DNS is working properly. In the Protocol drop-down menu, choose Telnet. Click the checkbox for "Delete Key Sends Backspace" if you prefer a traditional backspace instead of forward delete. Change the colors of the text and background to something more reasonable than the almost unusable defaults. If nothing else needs to be changed, press the Enter key to conclude and then click Connect to link with the newly created session shortcut. |
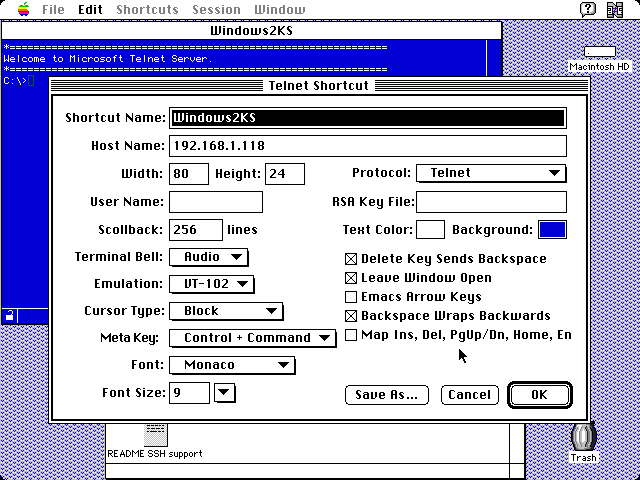 Shortcut editing window |
MacSSH
The program presents an Open Connection window after it has loaded. Enter the IP address or domain name and then press Enter to connect. It is a lot like NCSA Telnet software, as it retains much of the same outside appearance other than some obvious changes concerning the Session menu and the SSH additions, while retaining the FTP server feature. It is claimed to require System 7.5.1 and 32MiB of RAM minimum, but considering the Get Info window asks for 6MiB, that's kind of questionable but if the host system has only 8MiB, then there is a very good chance it won't work. It does however, support SSHv2, which Nifty Telnet does not.
If you only have 8MiB of RAM, it won't work: because 7.1 with OT on uses about 3700KiB, leaving about 4MiB allocated for programs. Opening a SSH-3DES connection causes it to quit owing to insufficient memory.
Command line from a *NIX or Windows computer
Both the Windows platform and the *NIX systems have their own telnet command which does allow for some degree of customization, such as whether to use an ANSI or VT100 shell. Some don't include a telnet client by default, so it will have to be installed first. A popular program is PuTTY for Windows, there are *NIX ports. Because the focus of this Guide is not on connecting newer computers to newer computers, no further explanation will be presented. Also the newer machines have no problem running SSH which should be used instead. Sometimes the username has to be appended, like telnet igloo@192.168.1.118.
Using Telnet
Now that you're in, the cold world of the command-line interface is readily visible to those unfamiliar with command lines. Expert users, however, could ask for nothing more than a steady blinking cursor awaiting commands. But what commands? How are they used? Well, in a normal fashion, new users are just pointed to "man pages" which are usually intimidating for new computer users and short on examples. But let's have a look at the most likely used commands for each operating system, and how to use them.
Microsoft Disk Operating System
This old fellow has been around for over 30 years, and its command line is somewhat similar to the UNIX/Linux command line interface, but there are some differences. Users who expect to conduct some "critical operations" which could cause problems may want to read the instructions for the command first to make sure it's being done right. The MS-DOS autocomplete feature is turned off by default in 2000, but it can turned on. Windows 98 is still left out though.
- dir This shows a listing of the directory contents. It's basically like the *NIX ls -l command. dir/w makes it into a wider format and dir/p pauses after each screenful of information, and dir/s is like the *NIX ls -R command, where all the contents of each subdirectory (for instance, a folder with two other folders in it, it will list the main folder, then the first subfolder, then the second subfolder). Feel free to mix them, like dir/s/p.
- /? or help <command> Basically the shorthand help for the command, used like cd/? or help cd.
- cd Changes the directory. If the C: drive has three folders in it, such as WINDOWS, System32, and Program Files, one would use cd WINDOWS to navigate to that folder. Folders with spaces don't need to be "escaped" nor do they need quotes like *NIX does. Just type cd Program Files. MS-DOS does not support "fast navigation", such as cd Program Files/Notepad++/plugins until later versions; otherwise, only one directory can be advanced at a time. Use cd .. to go back one directory and just use D: to switch to the D:/ drive, or A: to change to that volume. On older "basic" systems, A: drive is the first floppy drive, B: is the second one, C: is the internal hard drive and D: is the CD-ROM drive. It will vary according to the system in question.
- del Deletes a file, such as del "\Drop Folder\Typing Tutor 5+.dsk" /P if it's inside another folder; otherwise, just del "Typing Tutor 5+.dsk". Use rmdir for directories, like rmdir "Drop Folder" /S to remove that folder and everything inside it.
- mkdir Creates a folder. Used like this: mkdir "68040 Product Sheets" to create that folder in the present location.
- ren Renames a file to something else: an example would be ren "PB1400c.mp4" "PB1400cG3 Upgrade.mp4" where "PB1400cG3 Upgrade" is the new filename.
- move Moves a file to another location: move "MacOSXUpdateCombo10.3.9.dmg" "D:/Mac storage"; or for renaming a directory.
- copy Used for copying a file from directory to another, like copy FileZilla-3.5.3-univ-osx.dmg "F:/OS X transfer folder/FileZilla-3.5.3-univ-osx.dmg". There is a /A and /B switch, for ASCII and Binary files, respectively (it would go at the tail end of the entry).
- exit Disconnects from the server.
*NIX
Each UNIX and Linux distro can have slight differences between them, for instance BSD functions a little bit different than Debian does but in truth they're generally similar in the command line. There won't be much description via examples because suitable links will be provided that do.
- ls is the same thing as the MS-DOS dir/w entry. Of interest, ls -Al lists all the contents of a folder in a list format. Use ls | more to break it up a bit: arrow keys will scroll up or down, space bar for "page down" and the Q key to exit. That's for OS X at least: under Ubuntu 9.10, the arrow keys won't work.
- --help or man <command> Basically the shorthand help for the command, while the man calls up the often confusing and short on examples manual page. Use the arrow keys to scroll up or down by line, space bar functions like a "Page Down" button and q exits the viewer. Examples: ls --help or man ls.
- cd changes the the working directory.
- mkdir works the same as it does with MS-DOS.
- rm Deletes a file. rmdir is for directories (folders).
- mov Moves a file to another location.
- cp Used for copying a file from directory to another.
- exit Hangs up from the server and closes the session.
But there is more. Telnet has a special "mode" which is activated by an escape key, which is usually defined as Control + ] (right bracket). This brings up a special telnet> prompt. (This is how NCSA Telnet has the "Send Are you there?" command: it basically does this: Control + ], then types send ayt, then the Enter key to leave the telnet> mode.) Inside the telnet> "mode", enter ? to see what commands are possible like status, or to invoke a sub-shell with !. What this does is temporarily side-step out of the telnet session and call up the local shell, such as the following case: A user named Dave on Computer A has telneted to a remote computer, logged in as veronika on Computer B. By typing Control + ], then !, he is now out of the shell on Computer B and is back on Computer A. Type exit to leave the sub-shell and return to the other computer in the telnet session. |
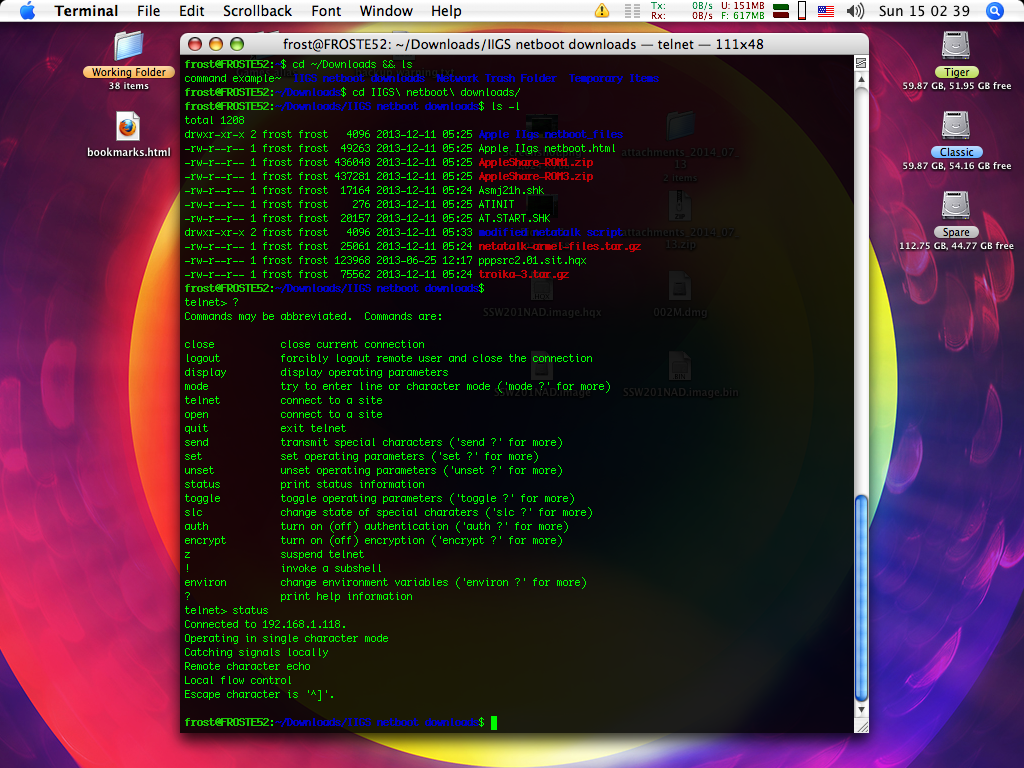 Telnet command mode |
The only problem with all this that was just described is that none of the telnet clients (MacSSH, NiftyTelnet and NCSA Telnet) can actually enter this "mode". NCSA Telnet can only do part of them from the Network menu, or the ones listed in the Set Keys dialog from the Session menu. NiftyTelnet has none of these listed, not even in the Apple Guide "documentation" and MacSSH is just like NCSA Telnet.
The escape character sequence has an equivalent with rlogin (rlogin is somewhat similar to Telnet), which is a tilde (~), or Shift + `. But with rlogin, it has to be with a newline: this is fancy computer speak for a virgin line that hasn't had any text entered into it previously. Say that Dave enters in sudo apt-get inst to install a package onto a Debian Server computer, but decides not to do it, and backspaces all the text out. It's not a "virgin line" anymore, so just press Enter to get a new one, and now it's possible to enter a tilde for the special escape mode. There's no indication that you're in "the mode", but if you type a ? then a list of possible commands to enter in the mode are presented.
About rcp and scp
A command-line tool for sending files or directories is rcp. But because it sends everything in the clear, it has been supplanted by scp which leans on SSH for its functionality. Both commands are used for copying files between two computers remotely. But there is a catch: Windows 7 doesn't have it (so likely Vista too, and it doesn't have scp either), neither does Ubuntu 9.10, which instead rcp is a symbolic link to scp. Only Windows 2000 and XP feature it along the Windows line (ME might have it). Mac OS X has it but it's not clear which versions have it and which ones don't. rcp and scp are not technically invoked as part of the telnet or SSH process: rather, they are called up as separate programs, like how someone might use wget, curl or ftp from a command line. The frameworks which rcp depends on will vary from operating system to operating system, so there is not a concrete list of what it needs to work (because there is no RFC standard for rcp, so the implementation varies from OS to OS). NiftyTelnet has a nice scp mode but that will be explained in the SSH section below. Otherwise, the only way to transfer files from within Telnet is via FTP.
Using command line programs
Any command-line terminal program like emacs, vi, nano, lynx, or even games like nInvaders can be started. As for Lynx, it would be a good idea for users who want to make a regular habit of using it on a Classic Macintosh, especially those without arrow key keyboards to create a whole new keybinding map and read the manual thoroughly. Plenty of practice, probably on a newer machine with color enabled, is prudent for putting the Lynx learning curve on the fast-track. Although it is possible to navigate Lynx without arrow keys or Control keys, it does get a bit harder to use. There are ways of piping X11 over this interface but it's best left to advanced users.
Secure Shell
SSH borrows a good deal of its principle operation from Telnet, and other than the fact that it is encrypted and some changes here and there, it's fairly close in its operating procedures and principles. The only known candidates are MacSSH and Nifty Telnet 1.1 r3. Like Telnet, a SSH server element must be active or the whole shebang will not work, and also like the Telnet an Ethernet or pseudo-PPP dialup connection is assumed to be already established.
Establishing the server
In Mac OS X, this is beyond easy: Just open System Preferences, click the Sharing icon and enable Remote Access: if the BSD Subsystem isn't installed, then it must be because without it, the OpenSSH suite isn't installed. Older OS X versions had SSHv1 and SSHv2 enabled; at some point, it was changed to SSHv2 only and SSHv1 has to be manually enabled in the /etc/sshd_config configuration file. In any case it looks like OS X 10.5 Leopard was the first to disable SSHv1, based on looking at the default readout of /etc/sshd_config as it doesn't have a 1 under the Protocol line near the top. There really isn't much for results on the open internet to confirm it, but 10.6 Server also doesn't have the 1 either, but 10.4 Tiger does. Compare both config files side by side: these example config files should be the same as a fresh install. In any case you'll probably need to mess around with the authentication too, but it gets better because depending what client is involved, the client configuration file /etc/ssh_config may need tweaking as well if you're logging in from a Linux or Mac OS X box. The default way to SSH into a server would be to type something like ssh glaze@192.168.0.181, enter a password and you're in.
Windows operating systems also have it easy, but easy as in easy to describe: Third-party programs are required. As for Linux, only Debian systems will be discussed because it is beyond the scope of this Guide to discuss Linux SSH servers in detail. Other systems like iOS also have SSH server programs or daemons (jailbreak required for proper iOS root file system access).
To install the server or the client, check the instructions available on the open internet to install OpenSSH. Because SSH is fairly popular in the *NIX world it shouldn't be hard to obtain good instructions relevant to your particular distro. After the stack has been installed, and operating under the assumption that the default configuration is acceptable, just type sudo /etc/init.d/ssh start to get it going. Replace start with stop to terminate it. Like as mentioned with OS X, some work to mess around with the protocol version and authentication levels to be compatible with each other may be required.
Because SSHv1 is weak on the security front, most places disable it and use SSHv2 instead: but only MacSSH can use SSHv2. Read this page on how to enable SSHv1, and they also describe how easy it is to crack SSHv1. Use caution on untrusted, insecure or sensitive networks when using SSHv1.
Client connection
Users who want to login without entering any credentials will have to set up the public and private key pairs and then exchange them. This case mostly describes full-time use of SSH, as like Telnet the target server machine will require login credentials but with the public/private key pair it will login automatically. Both Nifty Telnet and MacSSH advise how to do this in their documentation (ReadMe SSH support, QuickStart respectively). While MacSSH does have a lot more options and switches to play with, it wants 6MiB of RAM versus Nifty Telnet which specifies just 1MiB.
Nifty Telnet isn't that hard to use. Starting from the New Connection window from the File menu, click Edit, assuming this is a new connection. Add a name for the Shortcut in the Shortcut Name field for future reference, the IP address of the server (or hostname assuming DNS is working right), and for the Protocol, choose SSH - 3DES. Tick the Delete Key Sends Backspace checkbox, and everything else should be fine as default, aside from the terminal colors. Click OK and then Connect from the New Connection window. When a user logs into the remote SSH server, a dialog box will show up asking for login credentials. It is not unusual for it to take about a minute to establish the connection.
MacSSH being a spin off of the NCSA Telnet breed works differently. Start with the Favorites menu, then select "Edit Favorites...". It is probably better to create a new favorite rather than edit the default one, so click the New button. Enter the name of the shortcut, the host name (or IP address), set the port to 22 (SSH), then click the Security tab. Choose ssh2 from the Protocol drop-down menu, then fill in the Username field but not the password. Under the SSH2 tab, select 3DES for the Encryption method, turn off zlib compression and everything else should be okay as is. Click the OK button, close the Edit Favorites window and finally choose the server shortcut from the Favorites menu.
The last candidate is SSHeven, a modern creation. As of this writing, it hasn't been updated since December of 2021, but promises full connection and encryption support with modern servers. scp is still not ready yet but it's in the pipeline should it get finished some day, as it looks quite promising.
Secure Copy
And now for scp. It uses the SSH frameworks for authentication and some other matters. Normal terminals can use it to send files around in an encrypted (like SFTP) fashion with some rather confusing command line entries. Nifty Telnet has a little GUI window but there is no remote directory browser. So unless the user knows the target file location off their head it's a bit of a guessing game. Instead, open a SSH session, navigate to the source file location, then type pwd to get the full directory path and use that for reference (the terminal window and the scp window are draggable, so that is good); it will ask again for login credentials so for full-time use of this program, set up a private/public key authentication method. To start a scp file transfer, open the New Connection window, click a shortcut to an existing server that is active and ready, then click the Scp button, which brings up a dialog to fill in the source file(s) to send or receive and the transfer mode. Another login will be required, and then the transfer starts. It is slower than AFP and FTP but it's encrypted so there is some overhead work to get done.
MacSSH has no scp file transfer utility so FTP is the only way to send files around: the Upload feature in the File menu just dumps the raw file into the command line -- not a good idea for binary files. Incidentally, the best tutorial on scp the author found was this one.
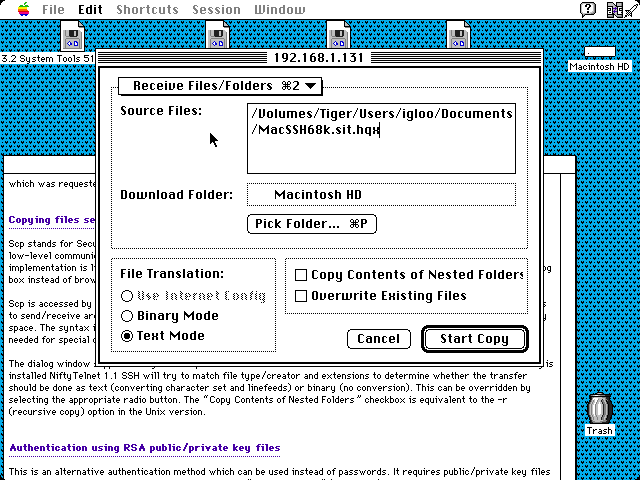 scp Receive mode (see the Text mode) |
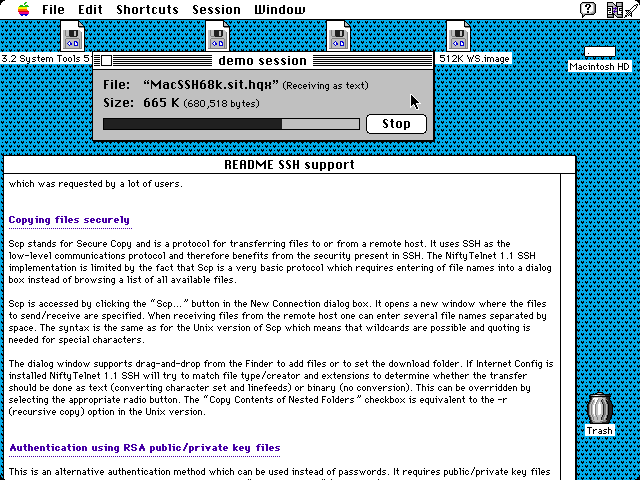 Progress dialog (same for sending) |
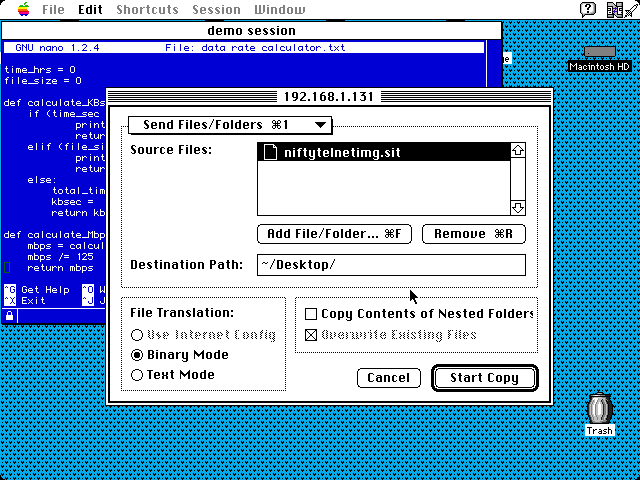 scp Send mode (note Binary mode) |
Server Message Block
Originally designed in the 1980s, SMB has been a staple of Microsoft operating system networking for many years. It has gone through a number of revisions and changes much like NFS has. Since 68K scene is set in the past for the most part, this means that the clients will only communicate via SMB1, not SMB2 (introduced with Windows Vista and to a certain extent OS X 10.7 Lion) or SMB3 (introduced with Windows 8) and later versions. Newer operating systems will have to be tweaked slightly to communicate with SMB1 clients and servers. Remember that SMB, like NFS below this section, do not properly handle Macintosh resource forks properly and using MacBinary II or BinHex encoding to protect Macintosh files with resource forks is essential.
SMB has characteristics that can be difficult to resolve, some are listed below:
- Stability: While SMB is native to Windows, it doesn't mean that it is intrinsically reliable. Firewall settings, NTLM and LM levels, password and signing differences, SMB versions, and more make it just as complex as NFS is. Mac OS X has had issues with SMB for many years and it certainly didn't improve its reputation with SMBX. It bears all the hallmarks of being an 1980s design dragged into the modern age in a crude fashion. No wonder Flash-based thumbdrives became so popular after the early 2000s -- they worked.
- Disconnects: Both Mac clients demonstrated, DAVE and DoubleTalk, would tend to hang the computer if the server unexpectedly closed the connection (or the user forgot to unmount it). Other systems didn't suffer from that but would still expect the connection to be closed cleanly.
- Reliability: Weird workgroup problems, authentication difficulties, fighting firewall rules, and so on is to be expected past Windows XP. It's safe to say that SMB doesn't really fall into the category of "A good file sharing protocol" compared to even AFP which generally works without speed problems (SMB3 in Mac OS X, macOS); compatibility issues (Mac OS X, macOS); security issues (Windows); unspecified, random or generic errors (all of them). Generally the most reliable file transfer method for basic file uploads and downloads across many platforms is FTP. Like NFS, unless there's some specific reason to use SMB, it's best to use AFP.
- Security: It's no real secret that all these old computers use authentication protocols that were definitely acceptable for the time and the limited computing horsepower available. The problem is that bringing a modern machine, such as Windows 10 box to the level that can speak the very early implementations of SMB opens a huge security hole. NTLM is an authentication method used by Windows boxes for awhile, but NTLM v1 is a security weakness and you probably shouldn't use it on a primary machine or without decent backups.
Macintosh side
Thursby Systems
The most popular choice for SMB is DAVE. Various users have also reported different issues with it, with the official Thursby forums going down, we may not know more. The only archive of the "Legacy DAVE Versions" subforum was in 2015 with a scant 15 topics, none of which were archived by the WayBack Machine, and none of them relate to our topic here. The first thing to get out the door is go over the versions.
Version 2.0 and 2.1 runs on System 7.5 or later, sporting a 68020 CPU with MacTCP 2.0.6 or Open Transport 1.1 and 8MiB of RAM. Version 2.5 wants a 68030 with 7.6 or greater with 16MiB of RAM. Version 3 and the remainder, namely v4.1, 5.0 and 6.2 desire a PowerPC microprocessor using 8.6 or Mac OS 9. Version 3 was the first to support OS X 10.1, the others increment higher versions of OS X as they go up. Because 2.1 is the last to handle MacTCP and 7.5, and 6.2 is the last version readily available for Mac OS 9, and should represent the final form for Classic Mac OS, such an approach allows a condensed evaluation to be presented here. As the User Guide is typically included in each version thanks to the uploaders, should any specific questions arise, they will be the definitive source for answers. DAVE 2.1 lacks a manual, but the version 2.0 Beta manual off Macintosh Garden should do.
Starting off with DAVE 2.1, run the Installer first. It's pretty straightforward, the only thing that is optional is the Print Client feature, but it doesn't use that much space (103KiB) so the Easy Install works. After a reboot, the next thing to look are the three control panels installed in the Control Panels folder. NetBIOS is the first one and the most important because without getting it configured nothing will work. When the control panel is opened the first thing that shows up is the licence code prompt, with a long 26-character string not making things easy. Afterwards the control panel is ready to set the NetBIOS name of the computer, the workgroup it is a part of and a short description of the machine.
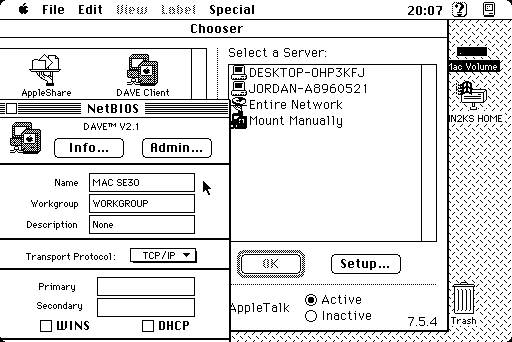 NetBIOS control panel |
 Server feature, print client |
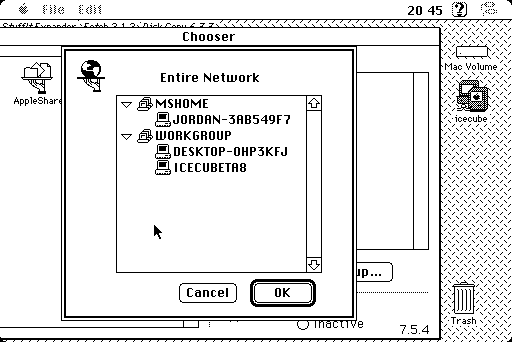 Entire Network browser |
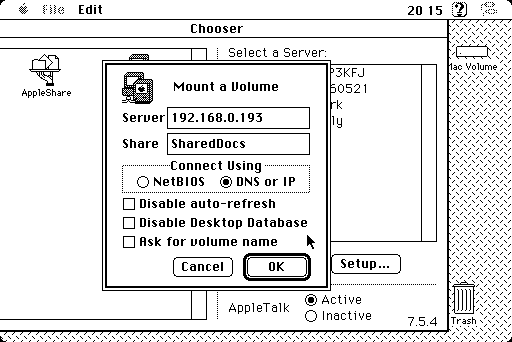 Mounting a server by IP |
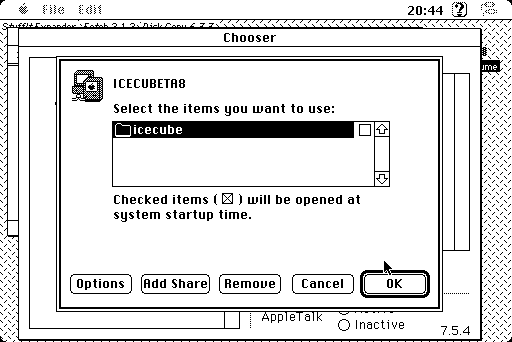 Mounting a share |
The name is just a unique name for the machine. It's not the same as the username of a User, but is more like a Computer name, to borrow the File Sharing or Sharing Setup control panel as a reference. To borrow another AppleTalk analogy, the Workgroup is the default zone to browse for other computers. Usually, the default on Windows boxes is WORKGROUP, but it can sometimes also be MSHOME in certain Home Edition versions of Windows, like XP. The Workgroup name isn't too important, it just is a way of grouping machines together just like AppleTalk zones does. For smaller networks like most people might use these days for older machines, putting all computers in the same workgroup makes them easier to find: for larger networks, like a school or office setting, then different workgroup names helps divide up the computers better, such as ENGINEERING, INTERNAL, SUPPORT and so on. Generally workgroups tend to work better if there are at least two machines in the same workgroup, and there's no incentive to have any more than one workgroup for a basic home LAN.
Next we get to WINS. WINS stands for Windows Internet Name Service and works like this: Say we have 10 machines all running SMB services. Each will broadcast its name and IP address every minute. For smaller networks, this isn't a big deal, but with larger networks, it's a major problem. The WINS service relies on a centralized hub and spoke type network topology (same as star topology) where a centralized server keeps track of what machine is where, what its IP address and name is so all the other machines can call into it when they're looking for a specific machine. This substantially reduces network traffic. In some cases this can be managed by the DHCP server. If all this information is available to you on what machine IP address is the WINS server, then DAVE can work with it by filling out the fields in the NetBIOS control panel, with some additional options under the Admin button. Read the manual for guidelines in this case. Certain old legacy programs/services required WINS services: basic file sharing does not. Smaller networks can skip on WINS and leave the info fields blank as default. |  Windows 2K Server using DAVE |
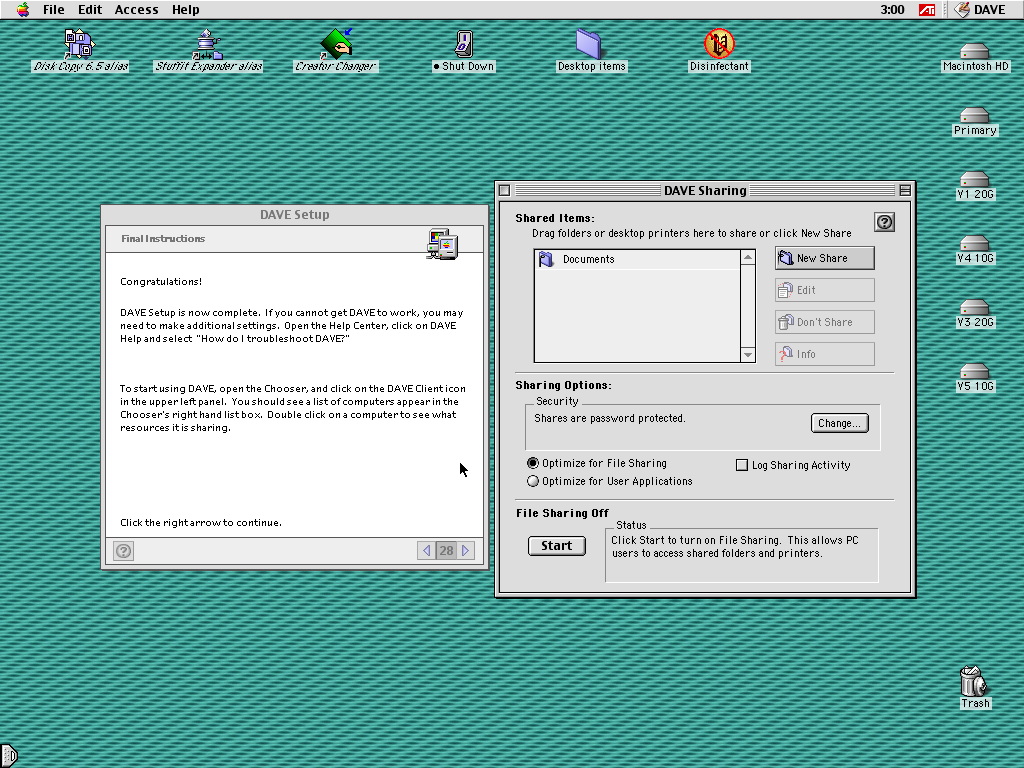 Setup Assistant done (v6.2) |
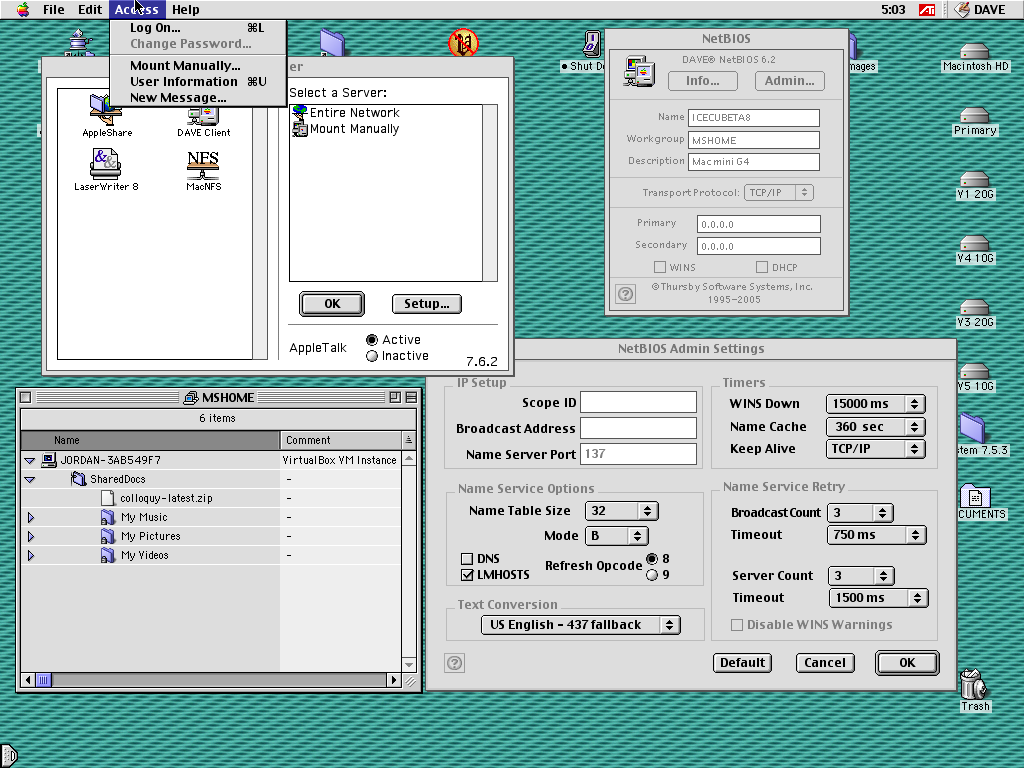 More windows |
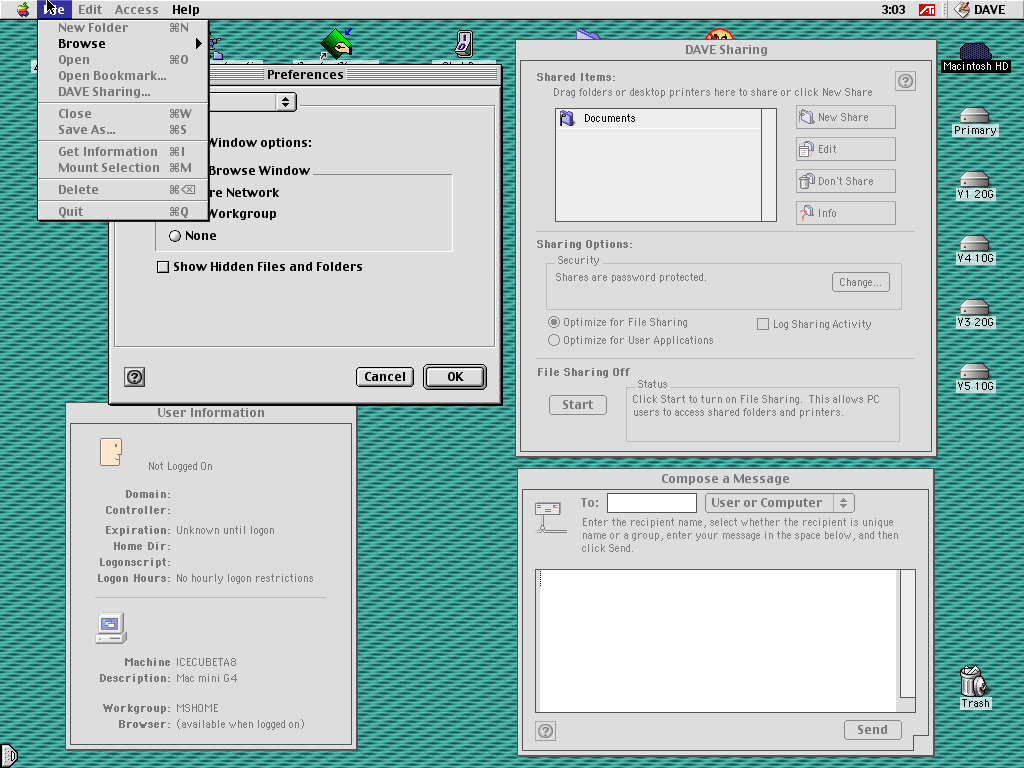 DAVE Access |
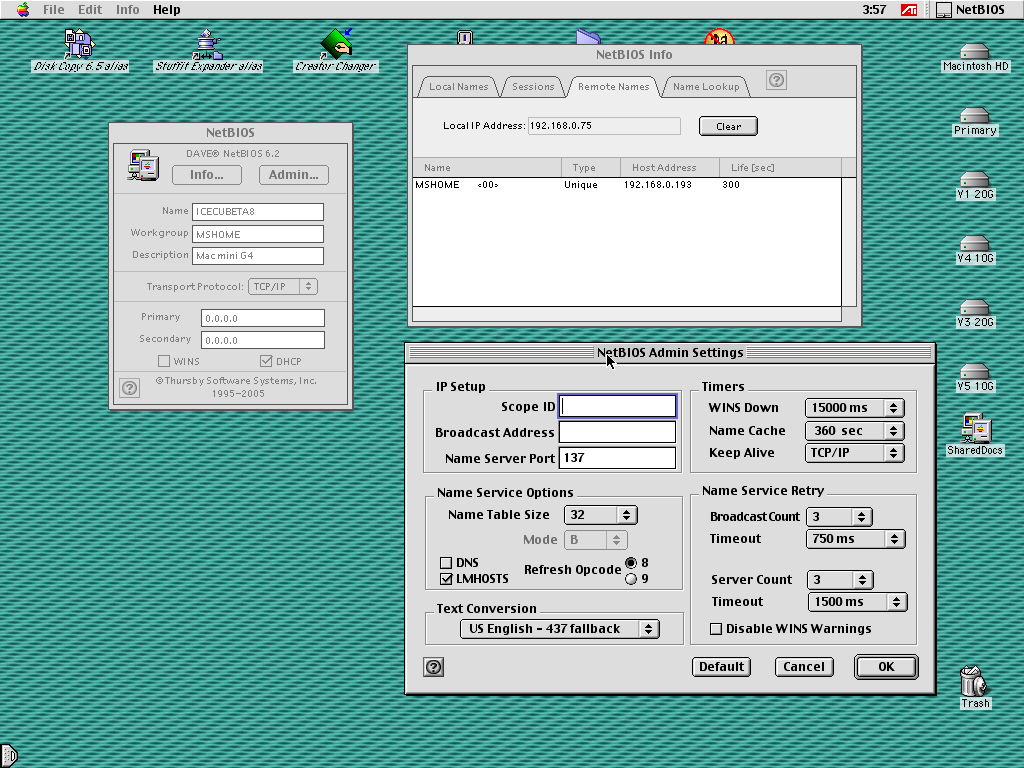 NetBIOS stuff |
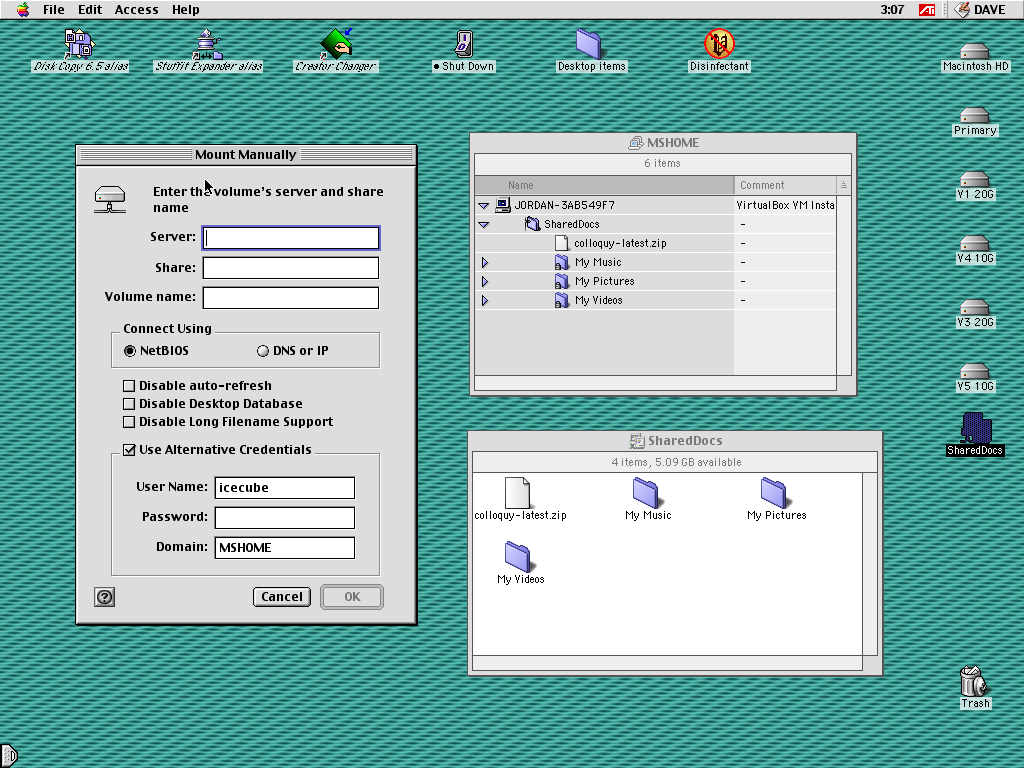 Manual mount ability |
Close the NetBIOS control panel, which saves the settings set. For basic file sharing, DAVE is basically ready to use. To access SMB 1.0 servers, head to the Chooser, then click the DAVE icon. It may take a few seconds to scan the network for all available servers in the same workgroup as the client is set to be part of in the NetBIOS control panel. Other machines in other workgroups can be browsed with the Entire Network selection, or connected manually via IP address or UNC share name, using the Mount Manually option in the Chooser window.
An example of a UNC share name would be \\MAC SE30\Documents\ where MAC SE30 is the host device name and Documents is the share name. Host names are limited to 15 characters: to use this address, double click the Mount Manually selection. There's a dialog box that prompts for this info, to connect to something that has a UNC pathname of \\DESKTOP-JAK4XCA\Downloads\, then enter DESKTOP-JAK4XCA in the Server field and type Downloads for the Share, with the radio button for NetBIOS ticked. An authentication prompt may also appear depending if guest users are allowed or not. UNC supports an additional object name (usually a file) but that's not important for this business. Share names longer than 12 characters (see the manual) may not automatically populate and will probably need to be mounted manually, if they work at all. On the other hand, to use IP address instead of the host device name, enter (for example) 192.168.0.193 in the Server box with the share name (also for example) of SharedDocs. Tick the DNS or IP radio button, authenticate, and the share mounts.
Getting the file server service started is easy: open the DAVE Sharing control panel, click the radio button for File and Print Services to On, click the Sharing... button, select a folder to share, set the password(s) for read, read/write access or both, name the share (reminder: the manual says to limit it to 12 characters or less for CIFS compatibility) then click OK. Leave "Share-level access control" active instead of "User-level access control". Other computers than then browse DAVE shares if they can read SMB 1.0 file servers, or use the SMB address, such as smb://192.168.0.99 in Mac OS X, or use the UNC path like before for Windows and Linux boxes, which can sometimes find servers in the Network Neighborhood, My Network Places, or Network, depending on the Windows version. Other capabilities are possible, but this just gets things started. For printing and other functions, such as the use of DAVE Access (in the Apple menu) to automatically mount shares, consult the manual.
DAVE 6.2 is quite similar. The only remarkable difference is that in the root directory of the hard drive, there is a folder name DAVE. It's the same thing as the DAVE alias the Apple Menu. Like DAVE Access of the previous version it can do automatic volume mounting upon boot and other things, but the file server feature is tucked away inside the File menu, and works pretty much the same as the older version does. There is a setting for NTLM, NTLMv2 and LM authentication, along with easing up access by allowing clear text passwords and sign ons. It's in the Policies section of the Preferences, found in the Edit menu. Using such lax authentication is a substantial security risk if the machine is connected to more modern or valuable (i.e. backup NAS) machines.
Connectix
Connectix DoubleTalk is probably the easiest program to access SMB servers. Since it has no server service to offer, it can only connect to existing servers, which may or may not be a problem. Users have reported stability problems so this also may or may not be a problem. It requires Mac OS 8, which reduces its value to 68030 machines which cannot normally use Mac OS 8 -- and it also requires a PowerPC processor, which reduces its appeal further. It's probably because it came out towards the tail end of the 1990s (manual is dated for 2001) where 680x0 series computers were already looking dated. Most of the text concerning NetBIOS mentioned with DAVE applies here too.
Start up the Installer and let it run its course. It's not compatible with DAVE running at the same time as only one of them can do NetBIOS-ing. Use the Extensions Manager to disable one or the other, or uninstall one of them. Afterwards a reboot is required, then the Setup Assistant starts up. It just asks for a serial number and so on, then guides through setting up a machine name, default workgroup (see above for explanation of each) and optional description. The Assistant is pretty good at explaining what each of those does, plus a manual is included. After the control panel is set up then head to the Chooser to find a Workgroup with a computer to access. It looks like it uses the AppleTalk Zones section of the Chooser to populate with Workgroups under the AppleShare label, which ... it works. Version 1.1 added some minor improvements such as the Mounter tool for accessing a server by UNC or IP address which version 1.0 can't do, which is helpful in instances where the share name is greater than 12 characters.
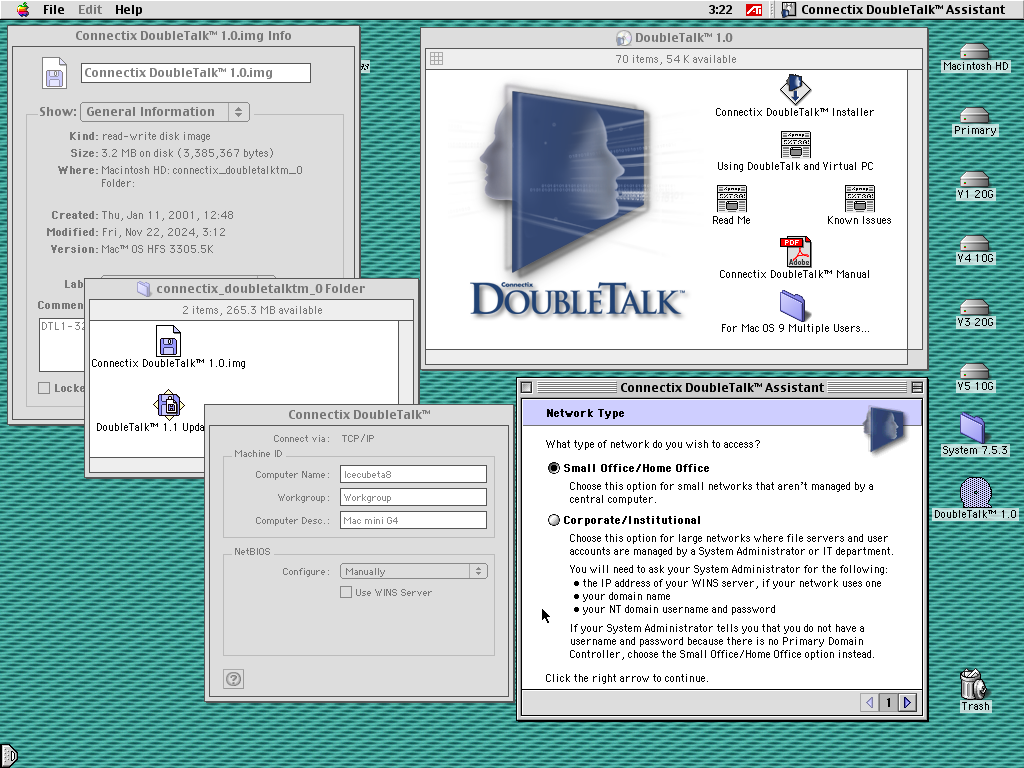 Getting DoubleTalk 1.0 going |
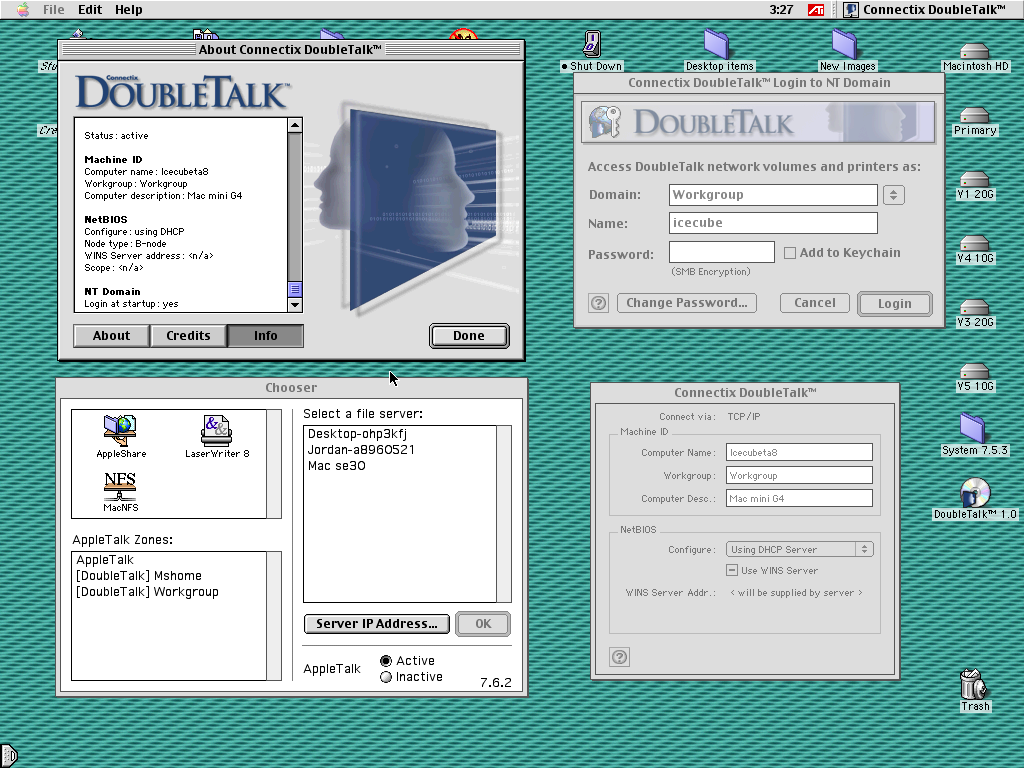 Various DoubleTalk windows |
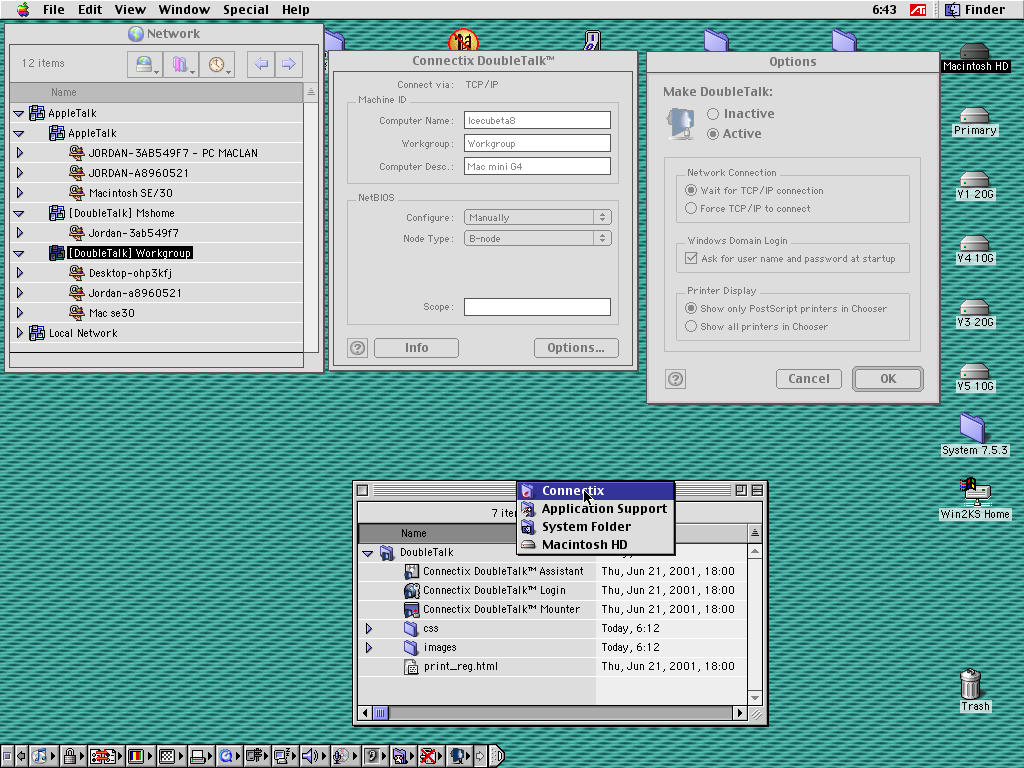 DoubleTalk 1.1 features |
Overall it seems to work but it seems to be somewhat unstable, but it was installed along side a disabled DAVE installation so that could be a factor. Shares would sometimes hang the computer trying to unmount them (which DAVE does too) and it doesn't seem very reliable. It might work well for your case though if DAVE is unsatisfactory. Problem is that DAVE can work with 680x0 computers, whereas this cannot. DAVE also is pretty easy to get going and use, so there's no real compelling advantage to use DoubleTalk unless DAVE is not working very well for some reason. SMB carries a notable amount of legacy bloat, inefficiency and peculiar things about it, but that's nothing new.
Microsoft Windows
The manual for DAVE 2.0b1 says that Windows NT Workstation/Server 3.51, Windows 95, and Windows for Workgroups (a variation of Windows 3.1) with a TCP/IP driver is the minimum. Since we're talking about Windows, Microsoft specifically states that Common Internet File System (CIFS) is a dialect of SMB, because SMB was originally developed by IBM. But CIFS was forgotten about with SMB2, which none of the Mac clients demonstrated earlier, or Mac OS X before 10.7 Lion can talk to. The manual page for Samba's smb.conf has, or had mentions of a number of different quirks about pre-Windows 2000 systems: for those, the insights from that manual can be helpful, such as ALL CAPS passwords, 8.3 filename restrictions (i.e. LOTUS123.EXE), and so on.
DAVE 2.1 would work with Windows 2000 and XP just fine both ways, but beyond that didn't work. Windows 7 would mount a DAVE 2.1 server, but not Windows 11. DAVE 6.2 seems more robust, being able to mount a Windows 11 server, but Windows 11 was unable to reach DAVE 6.2 as a client.
Windows 2000 and XP have a very easy way to share files. Setting the machine name and workgroup is first. Under 2000, just right click My Computer and click the Machine Identification tab to change it. Normally this done on a fresh Windows installation but perhaps we've forgotten about all that. In Windows XP this is done the first time a folder is shared with the Network Setup Wizard, which also lives in the Control Panel. Folders can be shared starting from there or manually.
Assuming that TCP/IP is already running correctly, simply create a new folder in the root of the hard disk, right click it, choose Properties and click the Sharing tab. Use a share name no longer than 12 characters for all the Mac clients, but even older SMB clients like Windows NT will probably want 8 or less. Windows 2000 allows for permission control of the folder under the Security tab, but Windows XP is a bit simpler. XP also attempted to unify the file sharing with the global Shared Documents folder for all users in the My Computer window, where any file or folder present there is shared. Do not share the entire root of the hard disk or any System related folder, such as the WINDOWS folder. Check that the firewall on XP allows file sharing to go through.
Other clients can then connect to the shared folders. To browse for other computers, go to My Network Places. In Windows 2000 the "Computers Near Me" means "computers in the same workgroup as this one". Other computers in other workgroups will probably have to be added manually with the "Add Network Place" to manually add a share link for that machine. Windows XP is similar by using the "Add a network place" widget on the left side under Network Tasks, to add other machines that are not in the same workgroup.
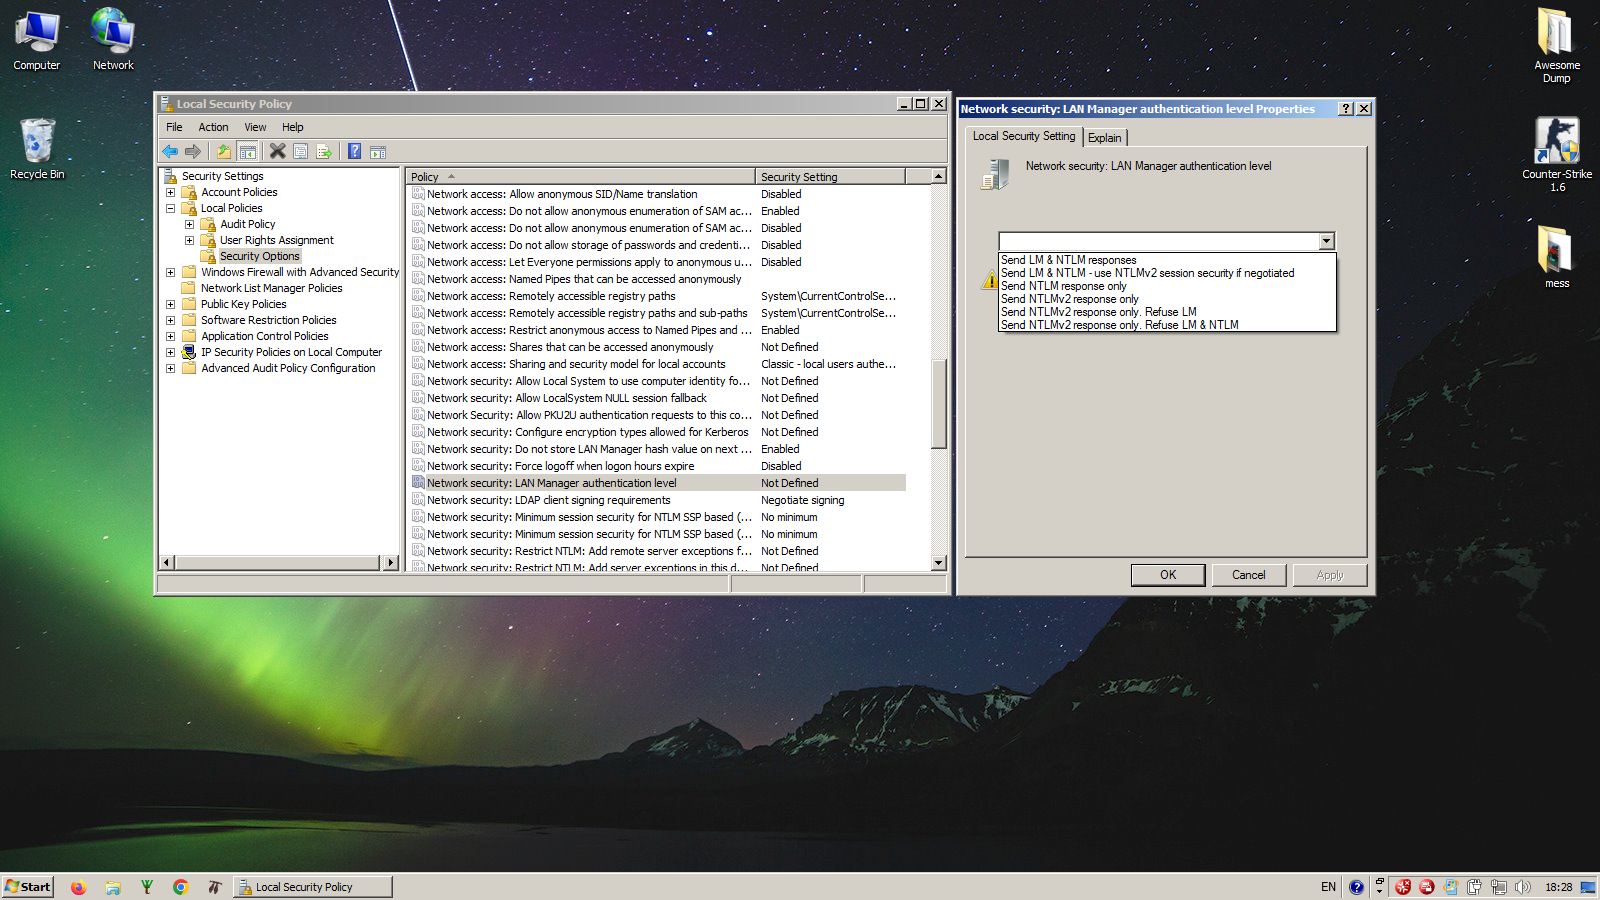 Editing policies under Windows 7 |
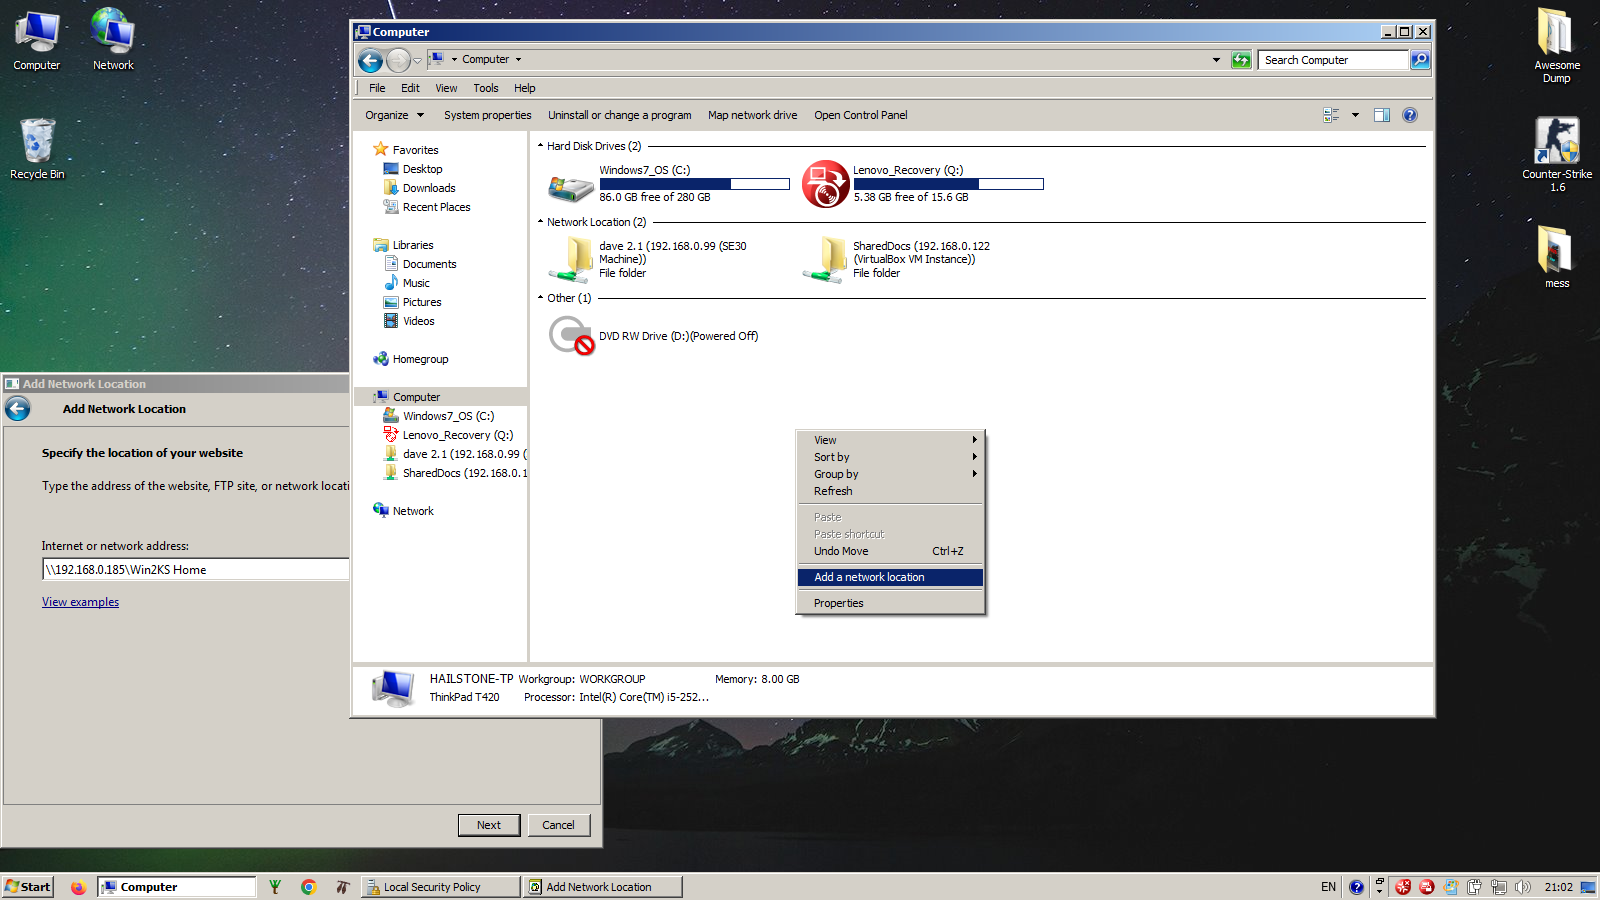 Adding a share Windows 10/11 similar |
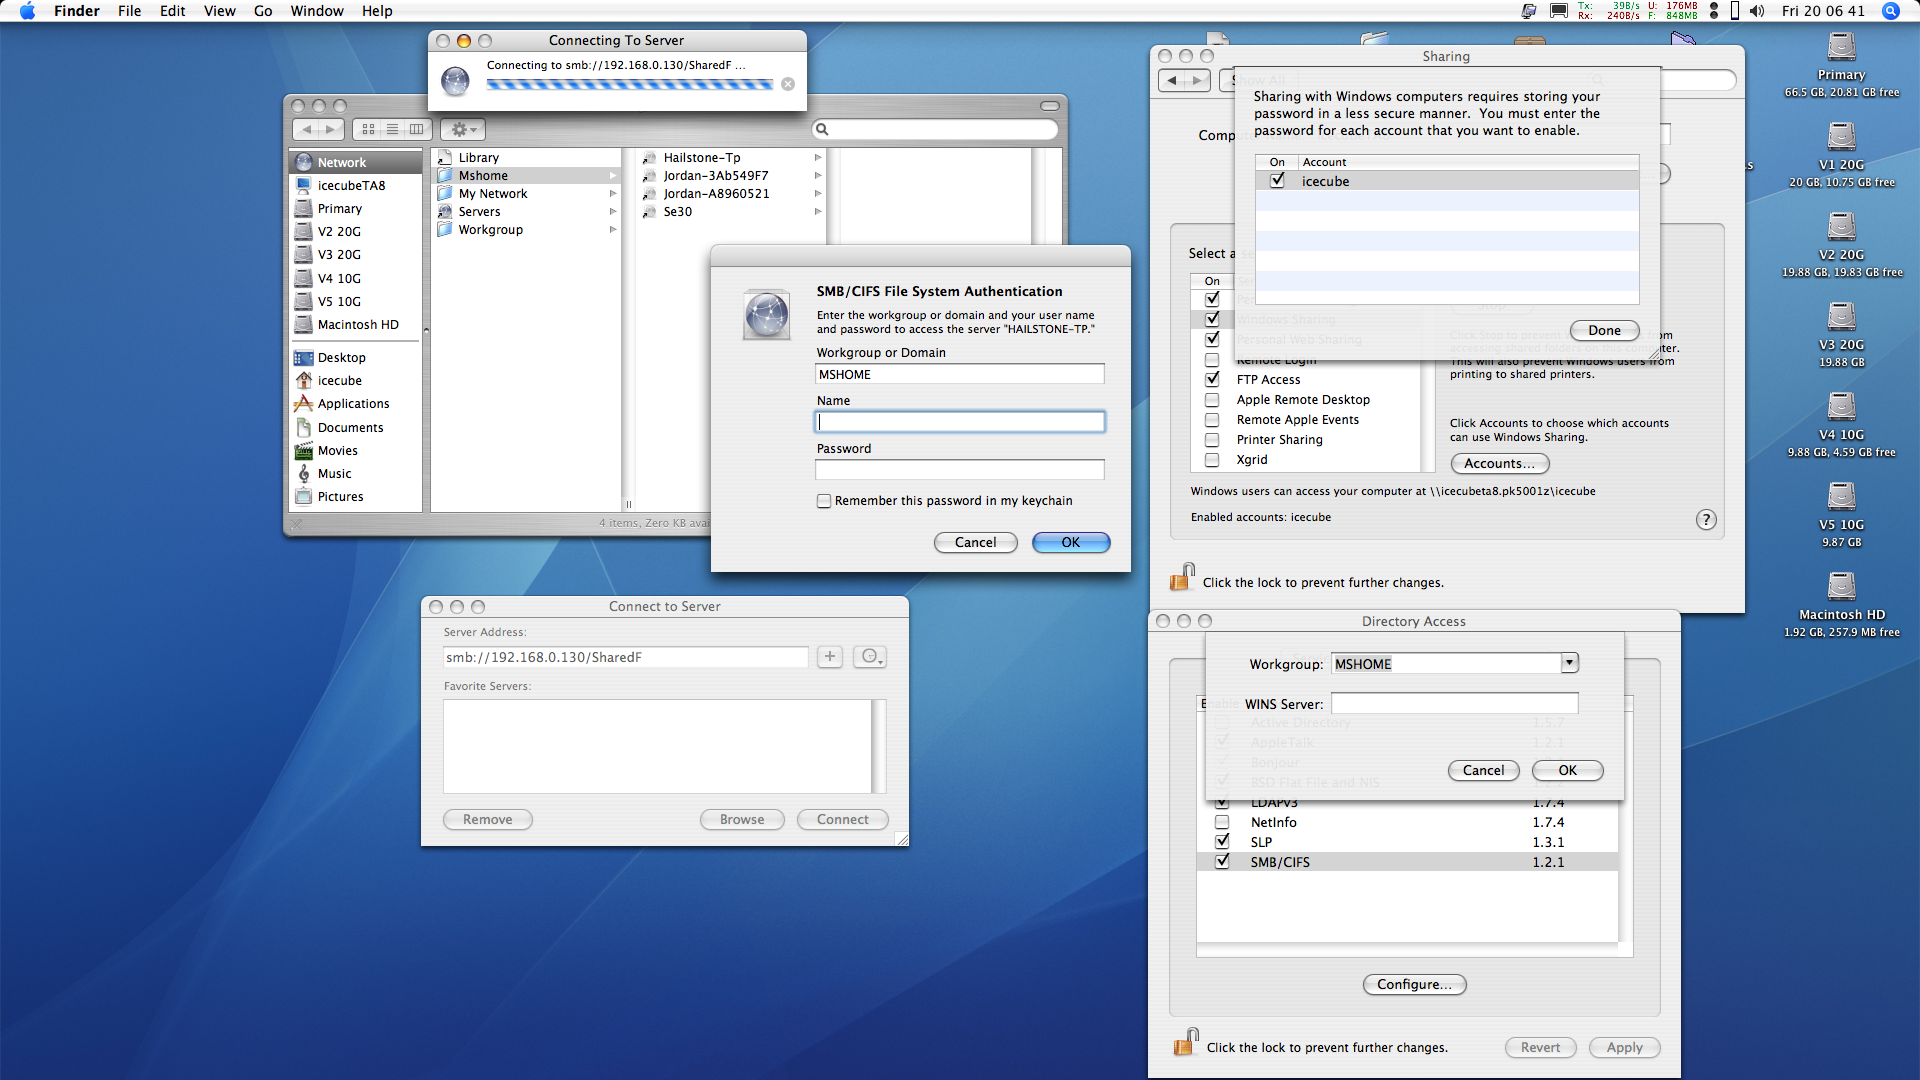 10.4 Tiger accessing Windows 7 |
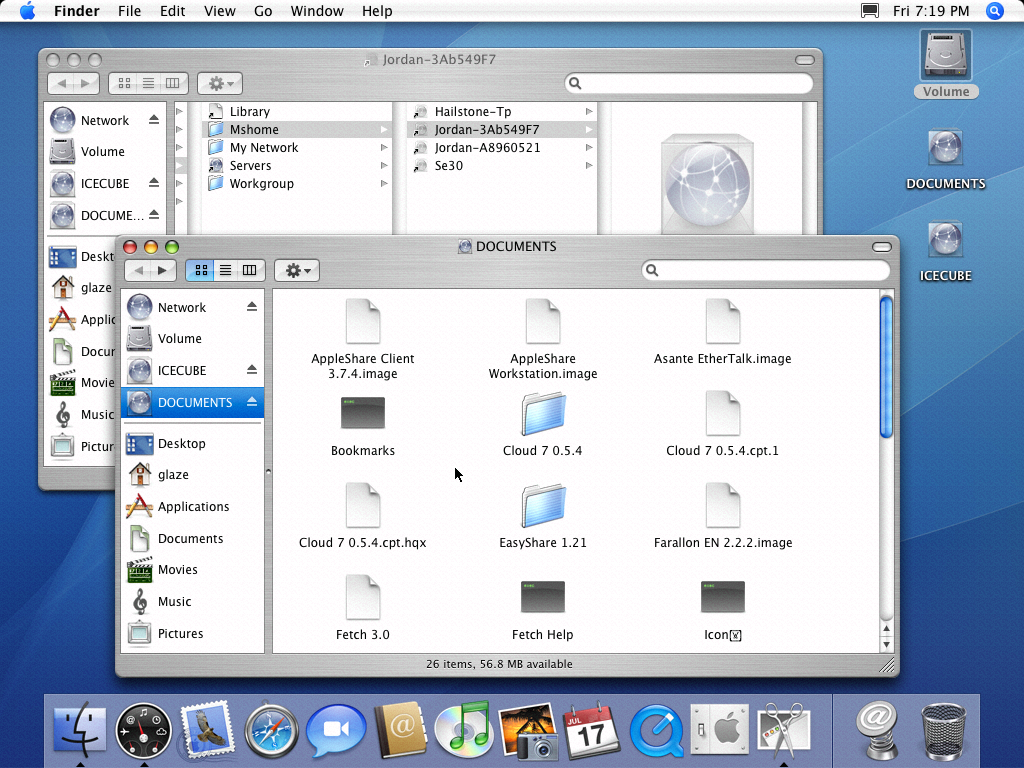 Browsing SMB shares (10.4 VM) | 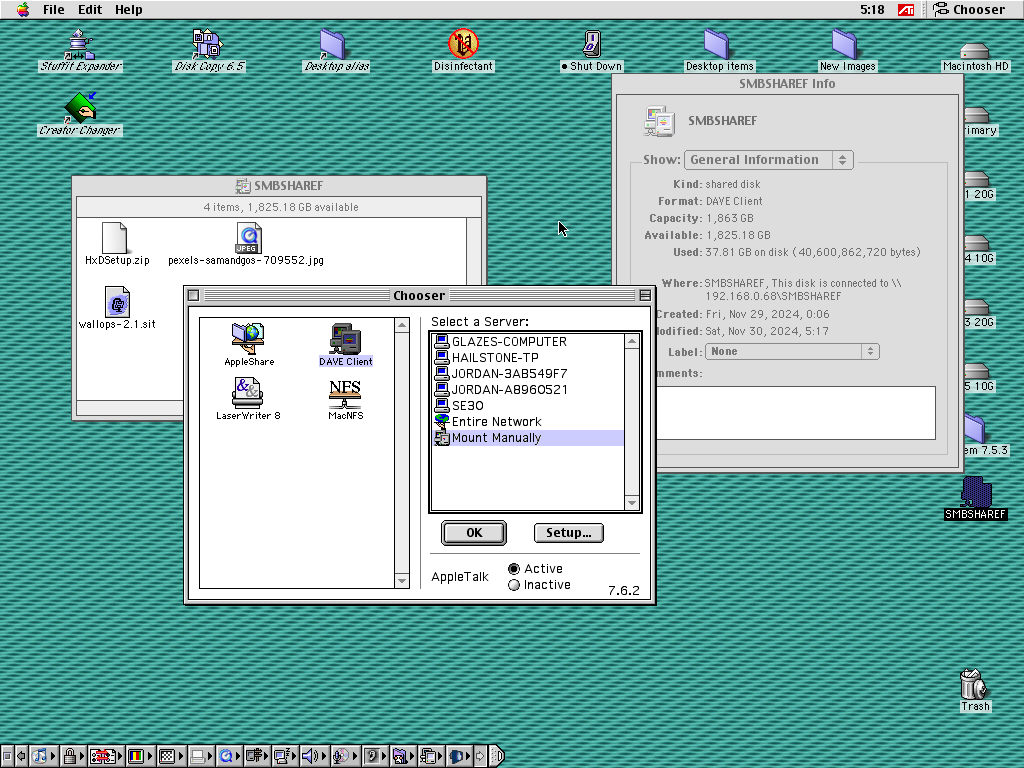 DAVE 6.2 working with Win 11 |
Windows 7 was popular for many years and so we'll mention it just like the others previously. Windows 7 likes to use HomeGroups, which are great for laptop computers. The basic idea was you'd have a laptop that would be used on a public network, such as an internet cafe or the like, which would be on a Public profile and thus doesn't share with anybody, but automatically joins or creates a new HomeGroup at home. It didn't last very long and Windows 10 ditched it. HomeGroups will not work with normal SMB clients and servers like what is used here, so a more traditional configuration is required, in addition. Right click the Computer icon on the desktop. Below the System information is a subsection with information about the computer name, description and workgroup. If this requires editing, there's a button to change it on the right, which prompts for a reboot afterwards.
Next, there's two other things to change. Since Windows 7 is still vaguely around as of right now, it is still a valid target, and a repeat of the security warning is warranted. Press Windows + R to pull up the Run command window. Type secpol.msc to pull up the Windows Local Security Policy manager. On the far left, expand and navigate to /Security Settings/Local Policies/Security Options/. Find the entry for "Network security: LAN Manager authentication level" and change from the default (blank) to "Send LM & NTLM - use NTLMv2 session security if negotiated". Next, locate "Microsoft network client: Send unencrypted password to third-party SMB servers" and switch it from Disabled to Enabled. There's more. Change the LmCompatibilityLevel as shown here, with the value choices backed up with this page. A value of 1 should work for what is going on here.
Sharing a folder is easy. Create a folder or select a folder, right click it and choose Properties. Click the Sharing tab above, click the Share... button, and follow the prompts. Conveniently, it also provides the UNC network path for the share. Usually however, it's easier to find a server by IP address if it has to be entered manually if NetBIOS isn't working.
Now to mount a server. Windows 7 doesn't normally have the Network Places or Network icon on the desktop, but it can be added (right click the desktop, choose Personalization, then Change desktop icons). Usually though, that window only shows machines in the same HomeGroup, which doesn't do a lot of good because only other Windows 7 and 8.1 computers can use HomeGroups. Instead head to My Computer, right click in the white area, choose Add Network Location. Follow the prompts. You may then use the UNC address, minding that Windows likes to use backslashes \ instead of forward slashes /. Examples include \\Mac SE30\SMBShare for a UNC address or by IP address, such as this:
Avoid spaces (Samba, used on Linux and OS X, requires a %20 in place of spaces), long share names and strange characters in share names. A password will be usually prompted: for a DAVE file server, this is usually the username specified in the Sharing Setup or File Sharing control panel, and the password should be the one specified by the DAVE program for that share, as each share can have a different password. Since Windows 2000 and above do support Kerberos authentication with newer computers, if that is used, make sure that the clocks are set the same as Kerberos provides a timestamp that will cause an authentication failure if it's too far out of sync from each other.
However there could be more to this story. Windows 7 could mount a DAVE 2.1 server, but not DAVE 6.2. There's probably more that has to be changed to make it work reliably. File transfers with DAVE 2.1 seemed "risky" with the copy process not completing. Add in a NetBIOS conflict that meant none of the machines would locate each other (despite it working earlier) and that's SMB for you. In this case the issue was that WORKGROUP ceased to work and no machines in that workgroup could see each other, but direct connections via IP was still possible and is overall probably the best method. Moving all machines to the MSHOME workgroup (although any other workgroup name could probably have worked) made it so they could find each other via NetBIOS once again. Finding the IP address is easy on pretty much every Windows machine from Windows 95 forward: use the Command Prompt run the command ipconfig. |  Win XP with WORKGROUP not working but MSHOME is |
Windows 10 and 11 depreciated SMB1 as a connection protocol, but it's still in the system. Therefore it just has to be re-enabled: on modern systems used these days, SMB1 is a security weakness and should be avoided. Unfortunately no information is readily available on what needs to be changed on Windows 10 or 11 to make it compatible beyond what is shown here, but it should be close to Windows 7. The problem of course, is the huge security hole once again, if it does get enabled. Check that 40 or 56 bit encryption is enabled in Advanced Sharing Settings, and try the LMCompatibilityLevel as per Windows 7. In any case, the workgroup is changed in the Preferences, under System, then About, then "Domain or workgroup". Shares from other machines can be done in the same way as Windows 7: right clicking in the main white space of This PC, and choosing "Add network location". Use a UNC path, or better, the IP address, such as \\192.168.0.160\SMBShare. Sharing a folder is easy: Right click it, and chose "Give access to..." and follow the instructions in the new window from there.
Mac OS X
DAVE was available for many years under OS X and ran out of steam with macOS 10.12 Sierra. It probably lasted that long because Mac OS X's built-in SMB client and server has not been the most reliable thing. Samba can be available via Homebrew or MacPorts as an alternative. Starting with 10.7 Lion Apple switched away from Samba because of GPL licensing objections and came up with SMBX. Many users have complained about its performance and it didn't get much better with the addition of SMB3 either, despite SMB3 working fine on other platforms. Before 10.7 Lion, OS X only could work with SMB1, which is taking a long time to clean out the door because of the score of legacy programs that used it.
For the most part it's pretty easy to turn on the built-in SMB server under the Sharing control panel in System Preferences from 10.1 forward. Older OS X versions used the Directory Access program in the Utilities folder to set the workgroup and WINS server (if used); later ones probably do that under the WINS tab under the active TCP connection (Ethernet, WiFi usually) settings in the Network control panel. Some users have reported that the built-in smbclient command-line program would work when the Finder's SMB browser would not work very well. Usually, connecting via smb:// IP address tends to be the best choice rather than UNC address. The Connect to Server feature (Command + K) also typically yields better results rather than relying on NetBIOS to propagate server information. When connecting to a OS X server, check to make sure that the user account is enabled for login purposes: this is usually in the same pane as Windows File Sharing, with the Accounts button.
Windows 2000 and XP were fine with OS X and macOS 10.14, but not higher versions of Windows, which aligns with the number of complaints about OS X's SMB performance from the earlier days around 2005 to the present day, but this could be authentication difficulties on the Windows side. OS X would not mount DAVE at all, and only DAVE 6.2 would talk to OS X all the way up to 10.14 Mojave as tested. Higher versions may be possible. The pages linked below offer various suggestions for what could be done about the -36 error code (registered as ioErr, or Input/output error).
- Old list of Mac OS X error codes
- OS X Tiger authentication
- OS X Tiger and error -36
- NTLMv1 with 10.10 Yosemite
- NetBIOS 10.15 Catalina
- SMB1 in 10.15 Catalina
- SMB version checking
- TA20949: Error -36
A brief interlude for Mac OS X Server. OS X Server 10.0 was the first to have SMB services available, and got it before the regular distribution, which only was added in 10.1 Puma. It's safe to infer that this probably didn't do anything to strengthen the reputation of SMB on OS X. Both relied on Samba just like Red Hat Linux and everybody else did. For now though, an image gallery of what it looks like under 10.4 Tiger follows below. Not all the Server versions will look like this, but 10.3 to 10.6 should look very close. Additional images about OS X Server are in the More Info page.
 Main view via Server Admin |
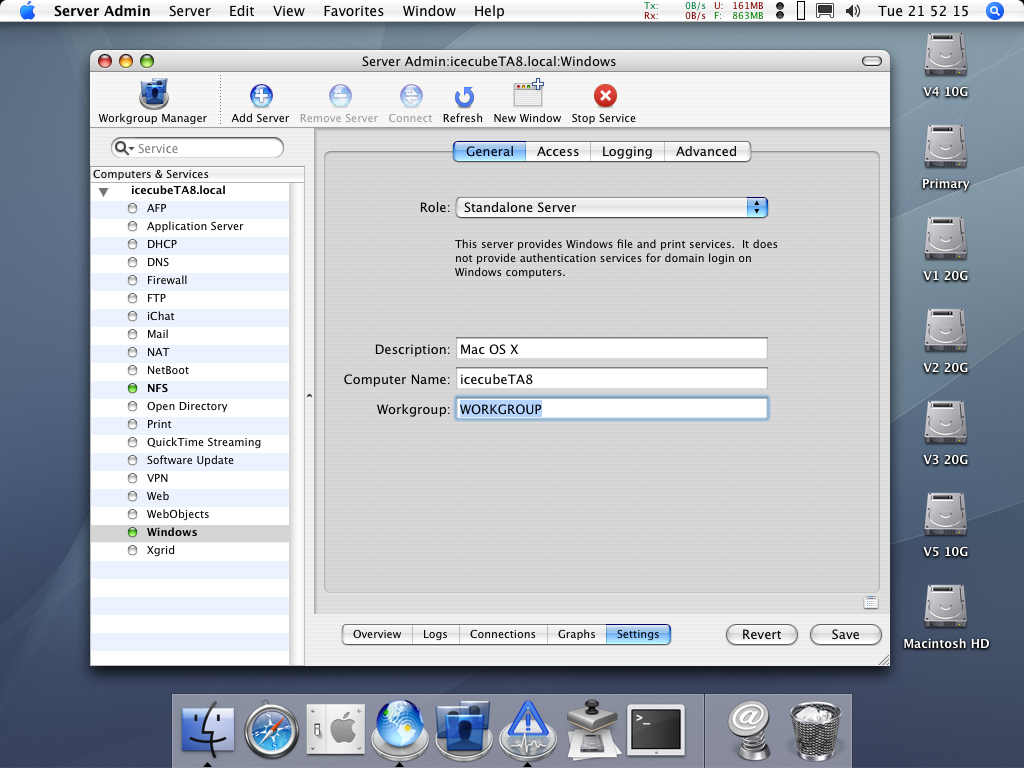 Primary role, workgroup settings |
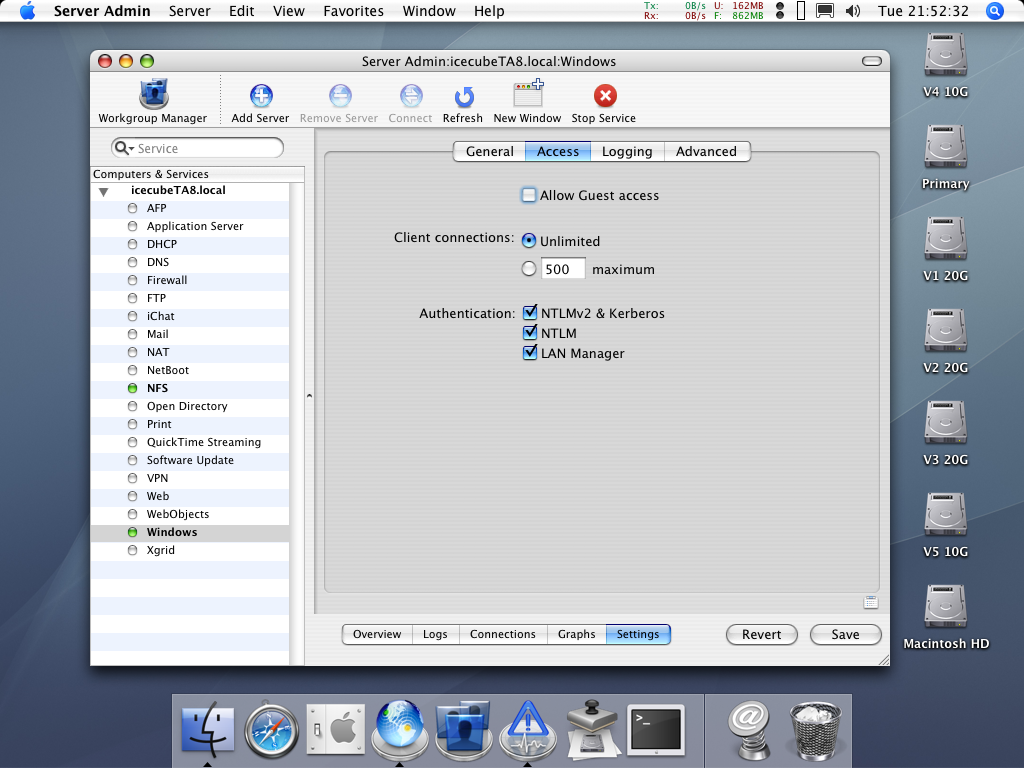 Access limits |
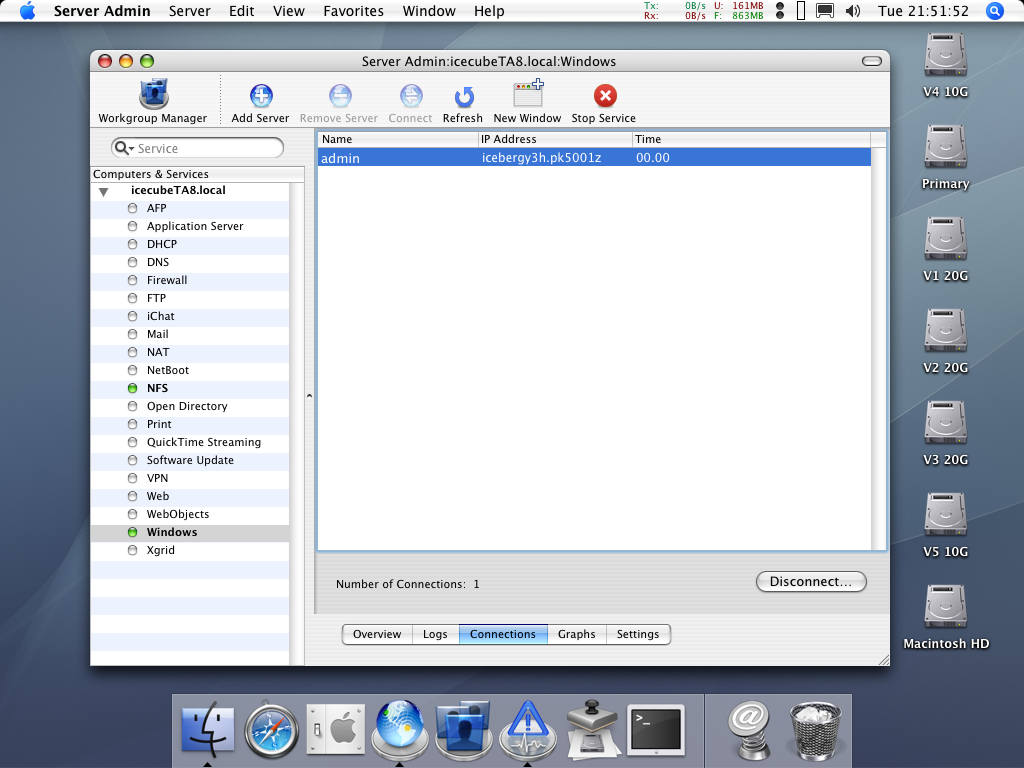 Connection list |
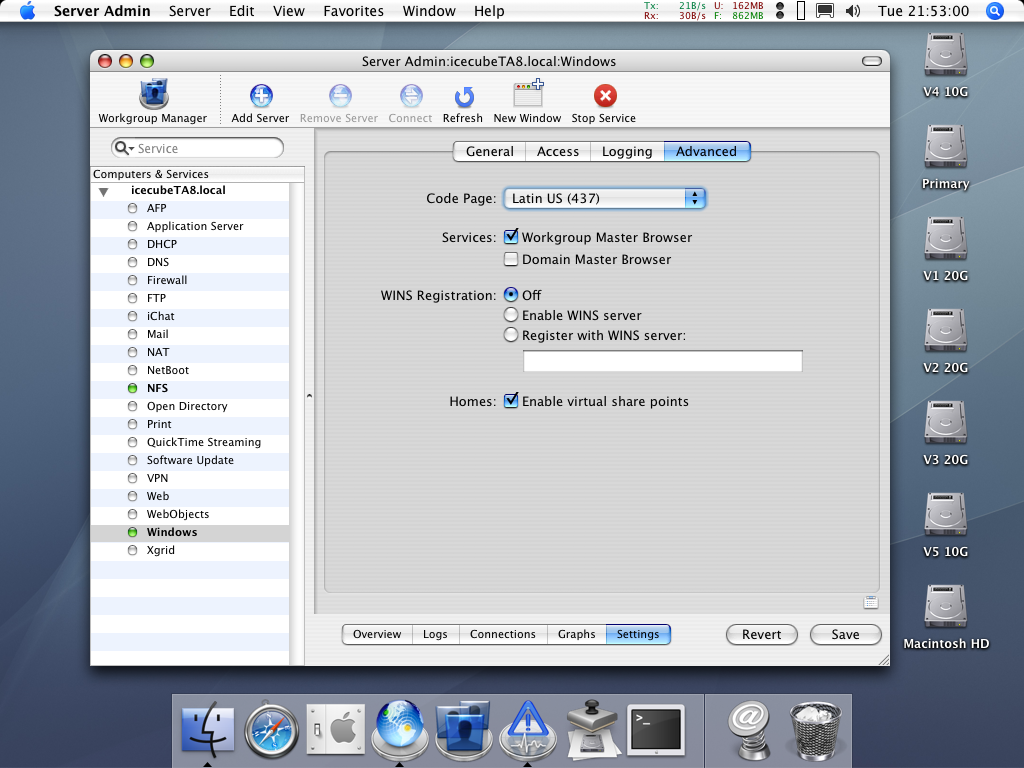 Optional WINS config |
Linux
Linux systems are as usual, "complicated", but it's not too bad. Samba support is usually included in most Linux distributions so that is usually not a problem. Samba version 4.11, released in September of 2019, changed the default minimum protocol to SMB2 which was a good idea. The Samba team intends to remove SMB1 server and client features in the future, however as of right now it is still included. The server is separate from the client: smbd is the server, usually installed via the sudo apt-get install samba command on Debian systems if it isn't included with the system. The client is smbclient. Let's start with the server.
Install the Samba package. Since SMB1 was deprecated in version 4.11, and NTLMv1 was disabled in version 4.5, we'll have to make some changes. Consider Windows systems on the network and their vulnerability should they also be using SMB1 when using this stuff. To begin, create a share folder, which can be any path, but using a dedicated SMB share directory out of /srv/ is probably the best way to do it, because it is then independent of which user is logged in and it is easier to exercise the right security procedures for it. We'll borrow the same procedure from Netatalk 4.0:
The first command creates the folder; the second changes the ownership; the third changes the permissions so that users can read and write to that folder. adm could also be admin or wheel depending on the operating system. With that done, bring up a text editor for the configuration file, such as sudo xed /etc/samba/smb.conf, and look at the code box below. Text lines to add is shown in red (surrounding text included to make it easier to locate):
Adding the lines for min protocol allows SMB1 client access and file sharing, respectively. The man page for smb.conf is very exhaustive (some 149 sheets of A4 paper for the web version from samba.org) but digging for the max protocol text shows what viable options are. Change the workgroup name to a different one if the default workgroup is not desired. Enable NTLMv1 with the line ntlm auth = yes. Scroll all the way down to the bottom, and use something like the text below:
Replace the pathname with a different one if you used a different share directory, the comment is also up to you. Samba does support dynamic sharing where the server can share the same Home folder of the active logged in user, if that is preferable. Save changes and exit. There's two more steps to wrap this up. Samba needs to know what password to assign for a user, since it is not allowed to clone the active user's password without permission. We'll do that with this next command: sudo smbpasswd -a droplet
| 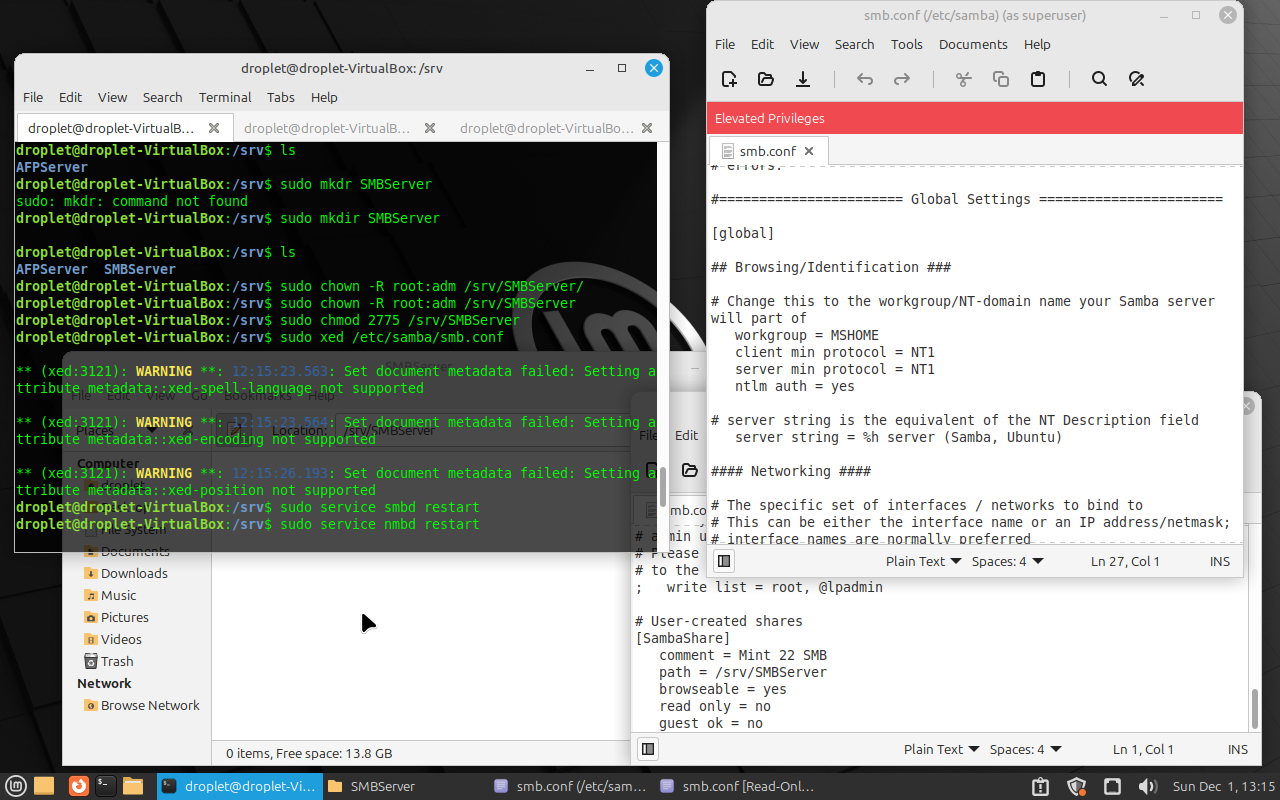 Getting smbd going (Mint 22) |
Change droplet with the username of a valid user. The program will ask for a password to use and then finish. The last thing to do is either restart or start smbd:
Use restart instead of start if the service was already running. If you're not sure, use ps -ef to look for the process, or filter it with grep like this: ps -ef | grep smb. A handy tool to scan the network to check that the service is available would be to use the Samba client feature, like so: smbclient -L 192.168.0.122, to check what is available on a server of the IP address 192.168.0.122. Make sure the firewall permits Samba traffic: for UFW, use this:
Clients should now be able to connect. In testing, DAVE 2.1 would not work with Samba, returning 0K in disk and 0K available, which was the same exact result when trying a Mac OS X server. DAVE 6.2 worked just fine, along with Windows 2000 on up doing very well. Remember that in the example shown here, SambaShare is the name of the share not the actual path of the share (being /srv/SMBServer) like it is on other systems, including Windows. Going off our example, Windows could use \\192.168.0.77\SambaShare as a connection address, Mac OS X can use smb://192.168.0.77/SambaShare, with DAVE using manual mounting because NetBIOS wasn't really working correctly. Check the manual page for nmbd for other things like a WINS server, WINS proxy and NetBIOS stuff. | 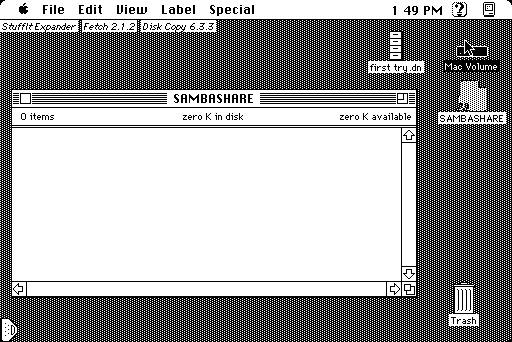 DAVE 2.1 unable to work |
And now for the SMB client. Usually, Linux will have some kind of SMB GUI interface in the window manager, and there's so many different kinds of window managers and how they do it. A solution for all of them is to use smbclient, like this:
The password can be also thrown in as well, otherwise it prompts for a password. Freddie would be an example of a username, the rest should make sense by now. In this manner it works like a semi-interactive shell, much like the ftp program has a user-interactive mode to upload, download, create folders, delete files, and so forth. There is a way to mount SMB shares, but most GUIs already can do that. Some do it by the Location field of a window, so a user can just type smb://192.168.0.64/icecube and follow the prompts, while others have some kind of Connect to Server function. /etc/smb.conf can be quite important even for client only connections with no server; it has, or had additional options to try to connect to older systems. DAVE seems to prefer very basic levels of authentication, which was common at the time it was released. Figuring out what DAVE 2.1 actually uses for authentication exchange is not easy, and all attempts failed, but it's probably possible since the man page for smb.conf indicates a small amount of legacy options, of which the CLI client in Ubuntu 10.04LTS would report a bad password error. Good luck.
Network File System
NFS has been around almost as long as UNIX has and is one of the number of ways that legacy UNIX systems could network with each other, along with FTP and UUCP. It's mostly something that is done in the command line however there are, and have been various GUI helpers to make the protocol more approachable. Like SMB it has undergone a few changes over time and this can complicate things; most newer stuff using NFS will be using at least NFS v3 or v4, but all the Macintosh clients shown here only talk via NFS v2, which was the first public release of NFS.
NFS can be very powerful and capable of much more than shown here, and it is recommended to seek other sources should NFS become a standard interconnection protocol for your network. It also can get technical and difficult to deal with (especially with Windows) and so the walkthrough here will be rather elementary relative to what NFS can really do.
NFS does have some downsides which bears mentioning here. Because of the way that it handles file permissions, files with extended attributes, and other technical matters, NFS can be problematic to use. One particular issue is that NFS (mostly for NFS v2, but can apply to later versions too) should not share a share folder that is shared by a different service, such as SMB or AFP, because if NFS and another protocol (such as SMB) try to access the same file at the same time, there could be a conflict. The entire boot disk volume should not be shared either, for similar reasons: rather, a single folder should be shared (aka exported).
Another problem is speed. NFS v2 uses UDP, which is fine for small local networks, but with increased traffic on the network, with larger files, bigger folders, and particularly faster networks, then UDP starts to falter and it becomes a major liability, and transfer speed can be atrocious without proper configuration. In contrast to most man pages the one for nfs is quite detailed and explains (particularly that one) most of these comments in better detail (i.e. the firewall considerations, security, UDP limitations, problems when a server disconnects, and so on). In short, unless there's a specific reason to use NFS, you are typically better off with AFP or FTP. Most of the issues were addressed with NFS v4 which uses TCP only as the transport protocol with Kerberos for authentication. NFS refers to share directories as "exports", so this section will also refer to them as so.
Macintosh applications
Only two client candidates are open for working with NFS, both readily available from Macintosh Garden. The first is NFS/Share by Intercon. Also formerly known as Internet Systems Corporation, its client is compatible with System 6, a nice feature. NFS/Share was also bundled with tcpConnect4, which was an evolution of TCP/Connect II. Both were an attempt at bundling multiple programs into a "superprogram"; for instance, tcpConnect4 can handle a terminal emulation, WWW browser, FTP server, FTP client, Gopher reader, NNTP reader, NFS client, NFS server (only on Windows), and a few other things like email. A quick evaluation indicates nothing particularly remarkable about this suite, or at least nothing relevant today.
The other NFS client is MacNFS by Thursby Software, who also wrote DAVE, but it does not support System 6. Arguably the first Mac System to handle NFS was A/UX: for this matter, refer to the A/UX networking books for how to work with NFS under A/UX. There are no server programs: for that, you'll have to use A/UX.
Let's start with NFS/Share. It comes on a 800KiB disk which includes the Installer and some other technical things along with MacTCP 1.1.1. SNMP Agent will likely crash the computer if it's installed and NFS/Test may or may not work: -39 comes back as an End of File error if it's opened. SNMP Agent is a client that reports certain information about the machine to a SNMP console, which isn't going to be explored here, but since we've mentioned it, Apple did offer MacSNMP as part of a software bundle, which probably nobody bought because there's no archives of it in the usual places and even in the unusual places. This "TCP/IP Connection" "kit" can be easily confused for the "AppleTalk Connection" "kit" which also included MacSNMP. If you are interested further, MacSNMP can be found with some hard digging, or by checking the Restricted Files section.
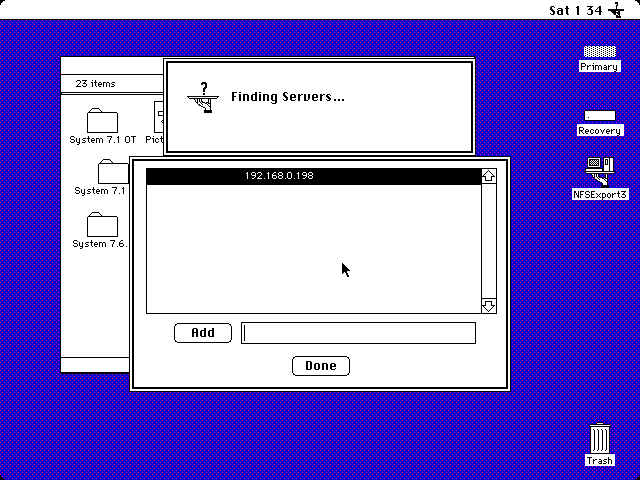
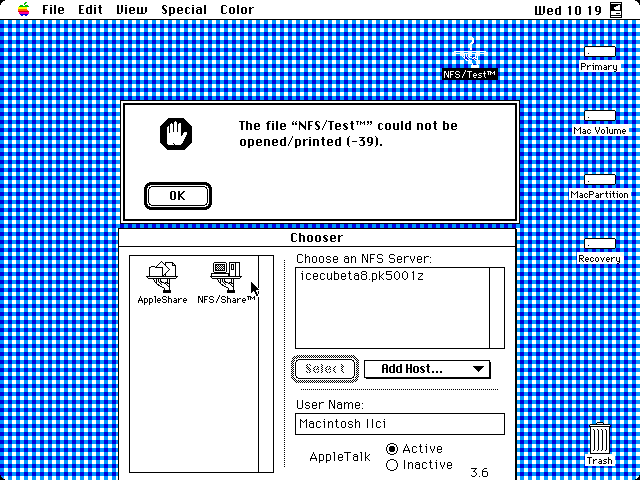
Apple did publish two TIL articles concerning issues with NFS/Share that are interesting here: TA32597 concerning an Easy Open conflict involving repeated Desktop file rebuilding, and TA45929 which is about ComTalk incompatibility because of MacIP routing issues with UDP. Depending on your MacIP router software/hardware this may or may not be a problem. Most people will never see a ComTalk device (see PDF page 31) and "Wollongong's NFS Client" most likely refers to another NFS client not tested here. Not much is documented about this product or Wollongong Group's other services.
Start up the Installer to perform the basic installation, which then prompts for a reboot. Certain options are available in the Installer for more specific situations: check carefully before choosing one. Before the Finder is made available it will ask for the registration details: have them ready beforehand, otherwise the program will be disabled and startup can continue. It demands an entry in the Organization field otherwise it won't go any farther.
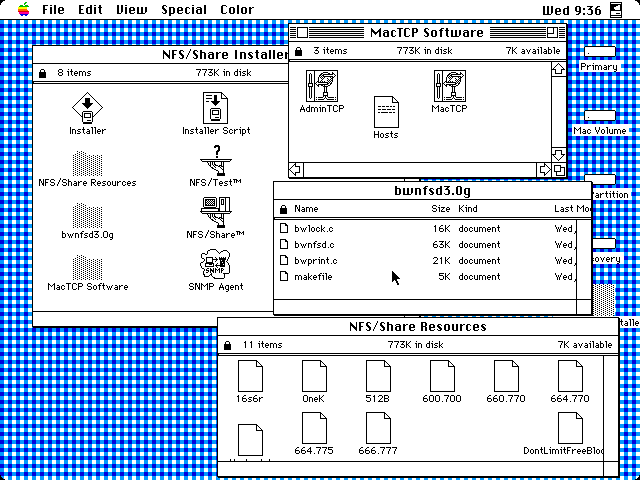 NFS/Share installation contents |
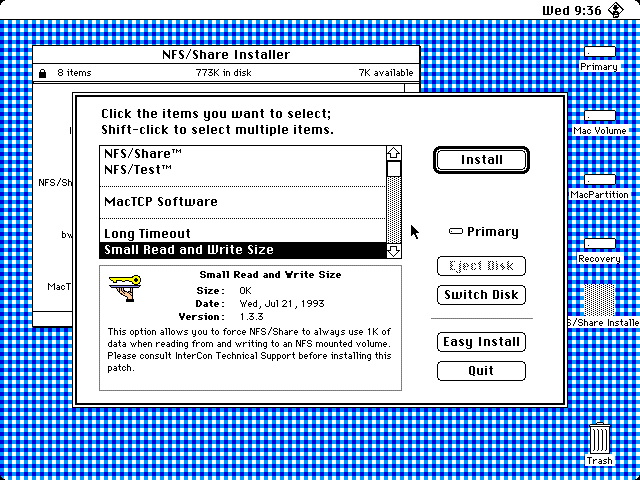 Installer choices |
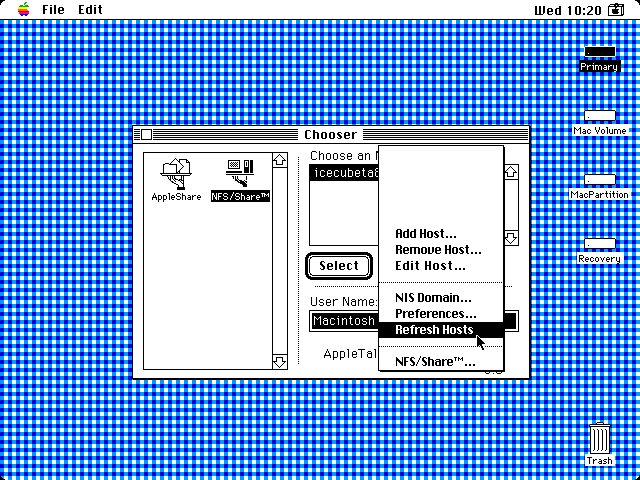 Drop-down menu |
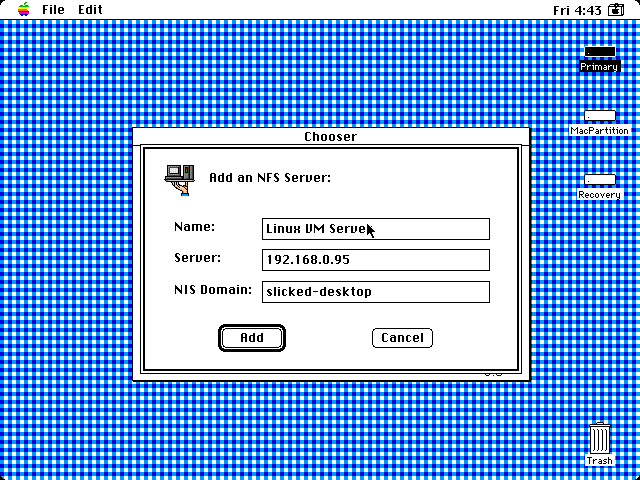 Adding a new server entry |
Open the Chooser and select NFS/Share. Although automatic entries for servers are populated, they probably won't work. Create a new mount point by selecting Add Host... from the drop down menu. Fill in the name, the IP address of the server, and the NIS domain. Without a NIS domain (a feature of Yellow Pages, see further down) or a pcnfsd server the client will be unable to connect to a NFS server. Then select the new server and click the Select button to initiate a connection. Enter in the username and password of a valid YP/pcnfsd registered user, and then the program will prompt for a share to mount. If it doesn't show up then it will have to be added manually: simply click the Other... button and carefully input the export (share) directory information. The last step is to click the Mount button mount the share on the desktop.
Like MacNFS 3.0, file download/upload performance is not particularly remarkable and there's probably better ways of networking, but it is technically feasible. There could a problem with file permissions in this demonstration below: the files marked with UNIX icons could not be downloaded. Also the export directory shown below does not register the volume size correctly: this is probably an issue with System 6, because all other clients reported 8.3GB as free space, but they were newer operating systems that can handle volume sizes larger than 2GiB.
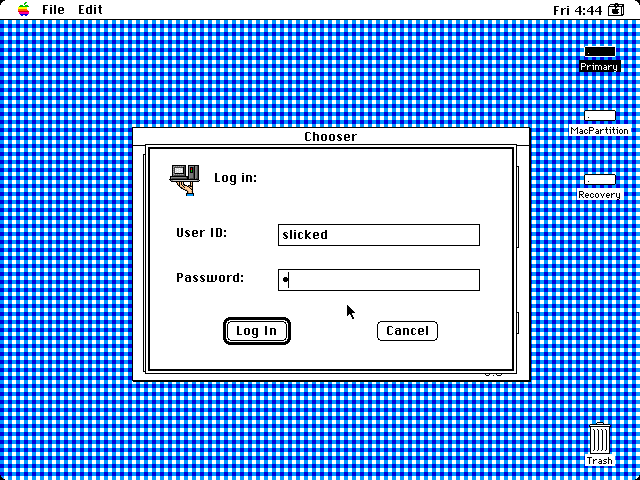 Login prompt (pcnfsd/YP required) |
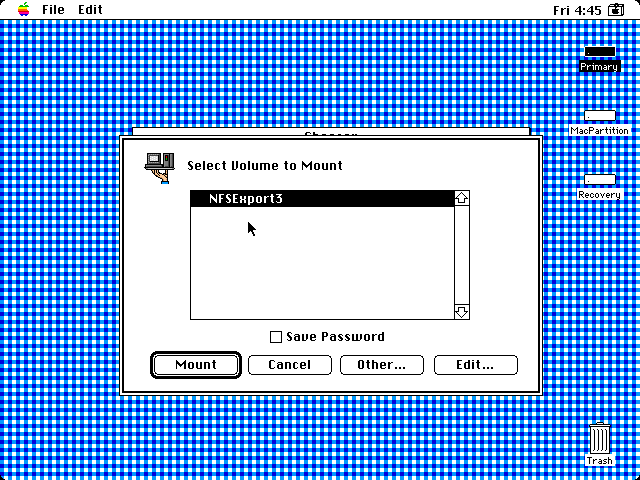 Export directories |
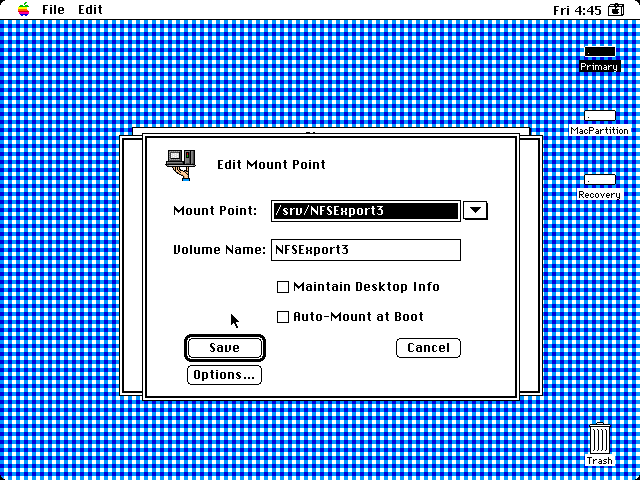 Creating/editing an export |
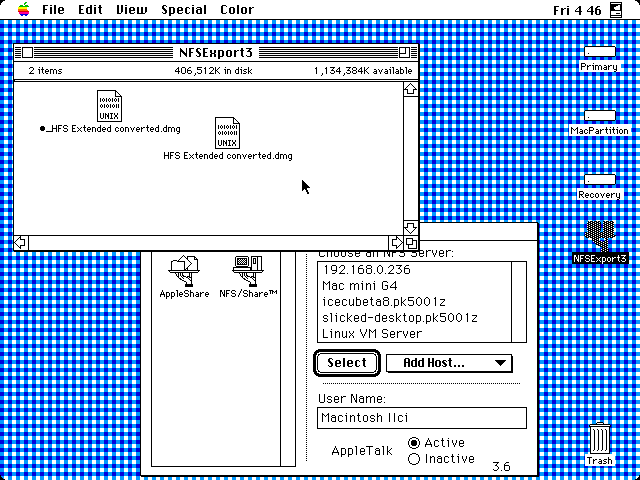 Export directory ready |
MacNFS is a little bit different than NFS/Share but works roughly the same, except it requires a 68030, 7.6 or higher, 16MiB of RAM and Open Transport. It says the server requirements are nfsd version 2, mount v3, NLM v3 and pcnfsd v2.
Once the Installer has been sourced, the next thing to do is rename the folder. It's supposed to be MacNFS 3.0 not MacNFS 3.0 installer. Following this the installation can halt because of a source disk/folder problem: the way around this is to switch it to a Custom Install and uncheck User Guide, which is best described as "somewhat usable, but lacking". If it still doesn't work, it's no problem: ultimately all the Installer does is just copy a few things around, and all that is really necessary is copy the MacNFS extension from /MacNFS 3.0/MacNFS/ and drop it in the Extensions folder, then reboot. After a reboot, the software is ready to use. Head to the Chooser with serial number in hand, and then the registration prompt appears. Fill it out and then the program is ready to use. Double click on an existing NFS share server or add a new one manually, follow the prompts and it will mount on the desktop if all is well.
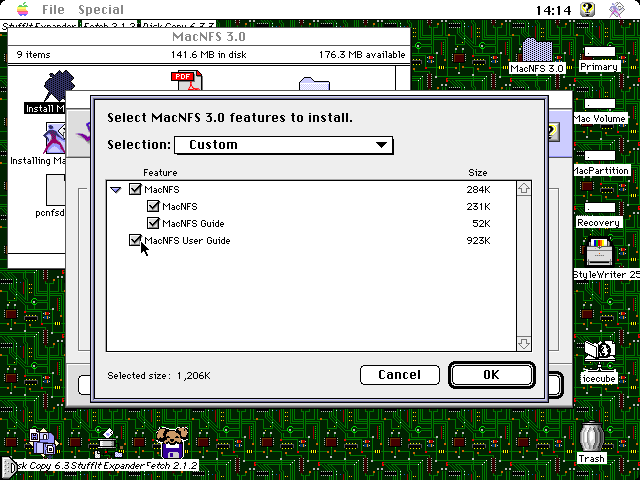 Installer (uncheck User Guide) |
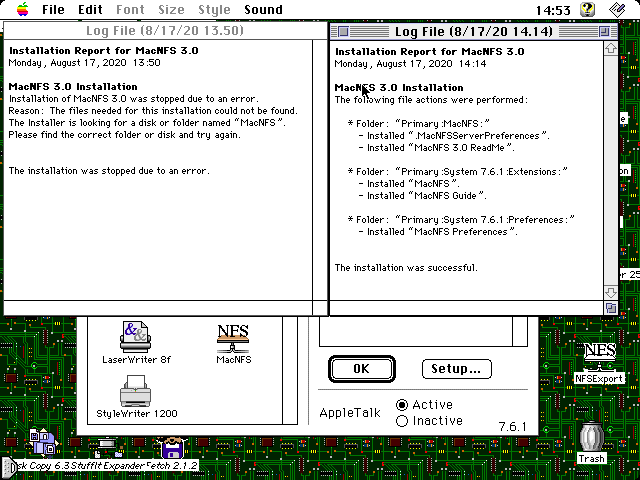 Installation log |
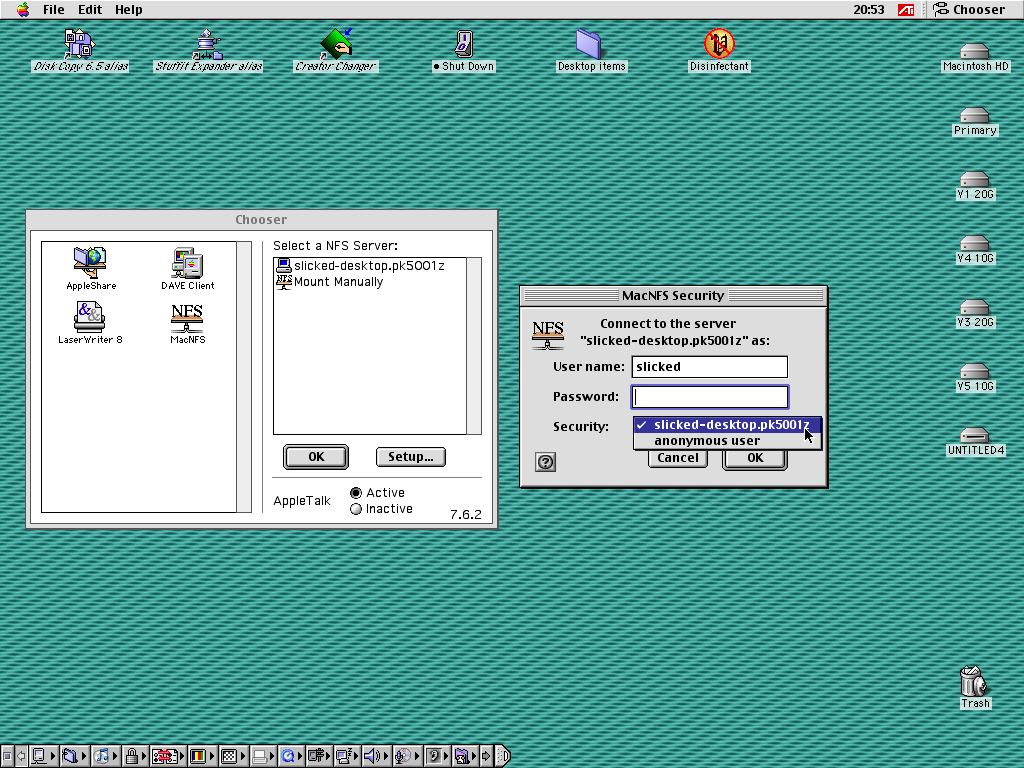 User authentication |
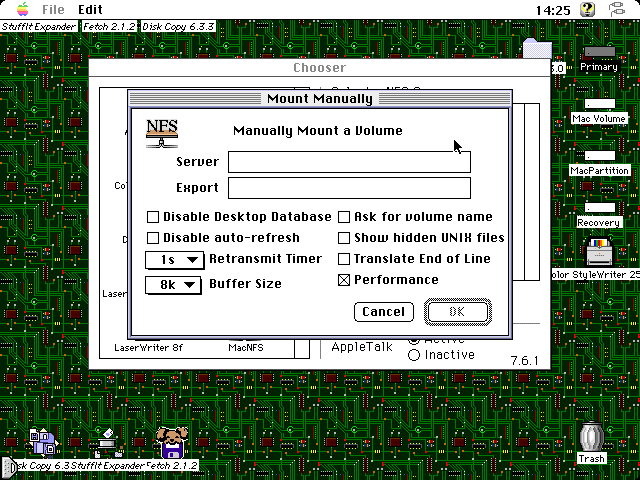 Adding a server manually |
User authentication is only possible if the pcnfsd daemon is installed (included, but not for modern systems, see further down) it's a tool for logging in with a username and password. Otherwise the only option is to login as an anonymous user (change the security type in the drop down menu to anonymous user), which some servers restrict. Changing the permissions of the share folder was required with this command to allow an anonymous user to write to the NFS export directory with an OS X server:
Performance is mediocre owing to the inefficiency of a 68030 box and all the overhead, so performance with this software on a PowerPC box should be better. Loading the directory contents, updating a folder and other operations can be sluggish. Check the More Info page for a speed test. Otherwise, it seems to work, but for serious use, a Netatalk file server would be a better choice. A gallery of MacNFS 3.0 in use follows below.
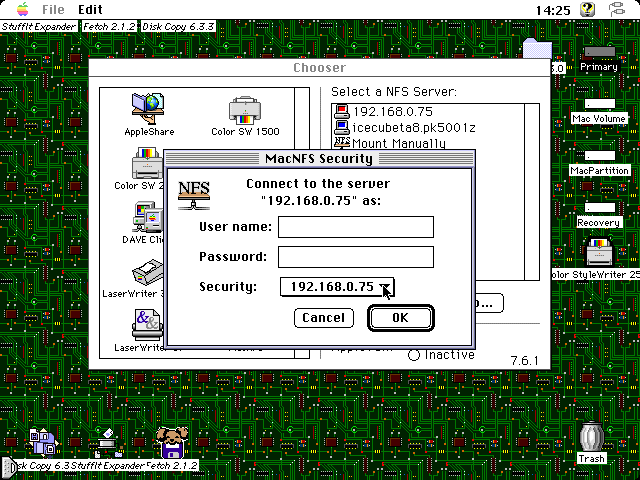 Connecting to a NFS server |
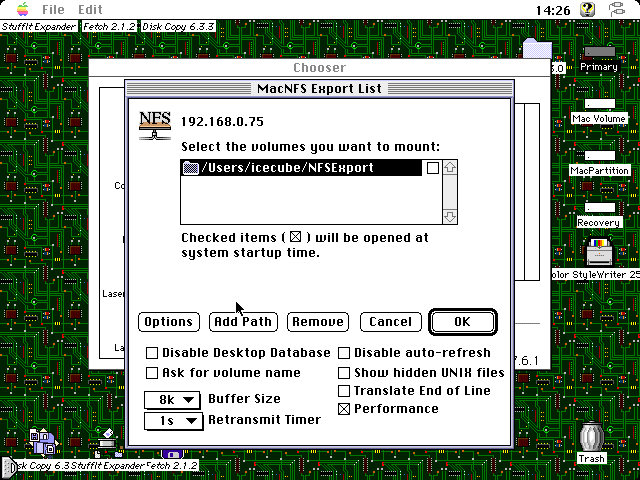 Export list (with extra options) |
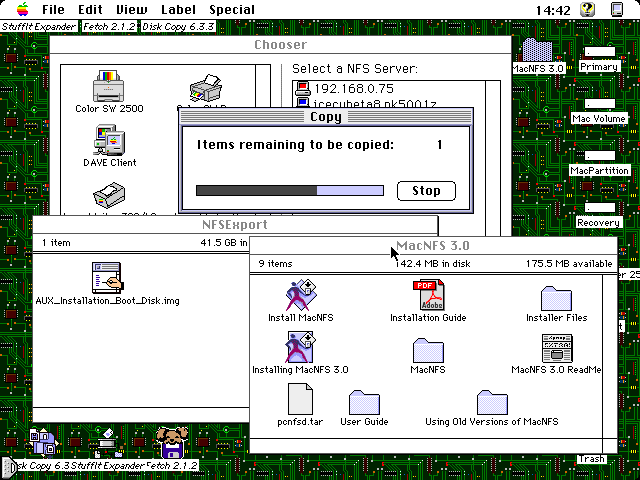 File copy in progress |
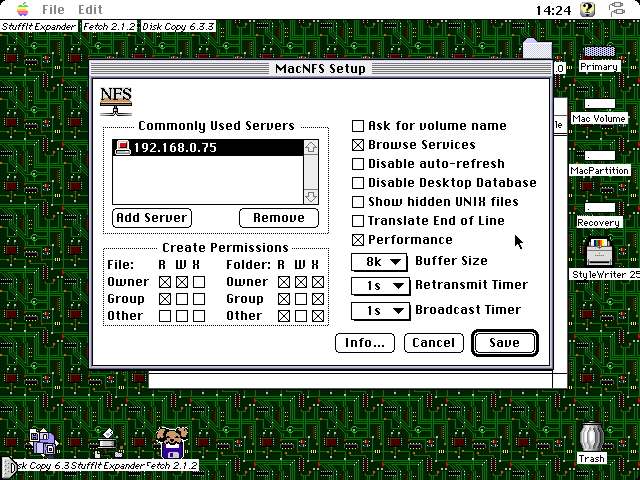 Setup window |
Microsoft Windows
NFS under Windows has a spotty history, and it's probably safe to say that using SMB is probably the better bet. From most recent as of right now working back, Windows 11 has it, but seems to be only for the Pro version, or not: there's a command out there that looks like this:
...but it doesn't work on a Windows 11 Home 23H2 build. Then there is the Windows Subsystem for Linux which run a Linux kernel in a hypervisor, which may be an option. Working back from there, Microsoft says that Windows 8.1 and 7 have it, but it doesn't come with them normally (it's not in the list of items available in a "Turn Windows features on or off" on a Windows 7 SP1 system). Windows Server 2008 and up have it, but it is not installed by default and has to be manually installed, which isn't a big deal. Server and client are two different things to install.
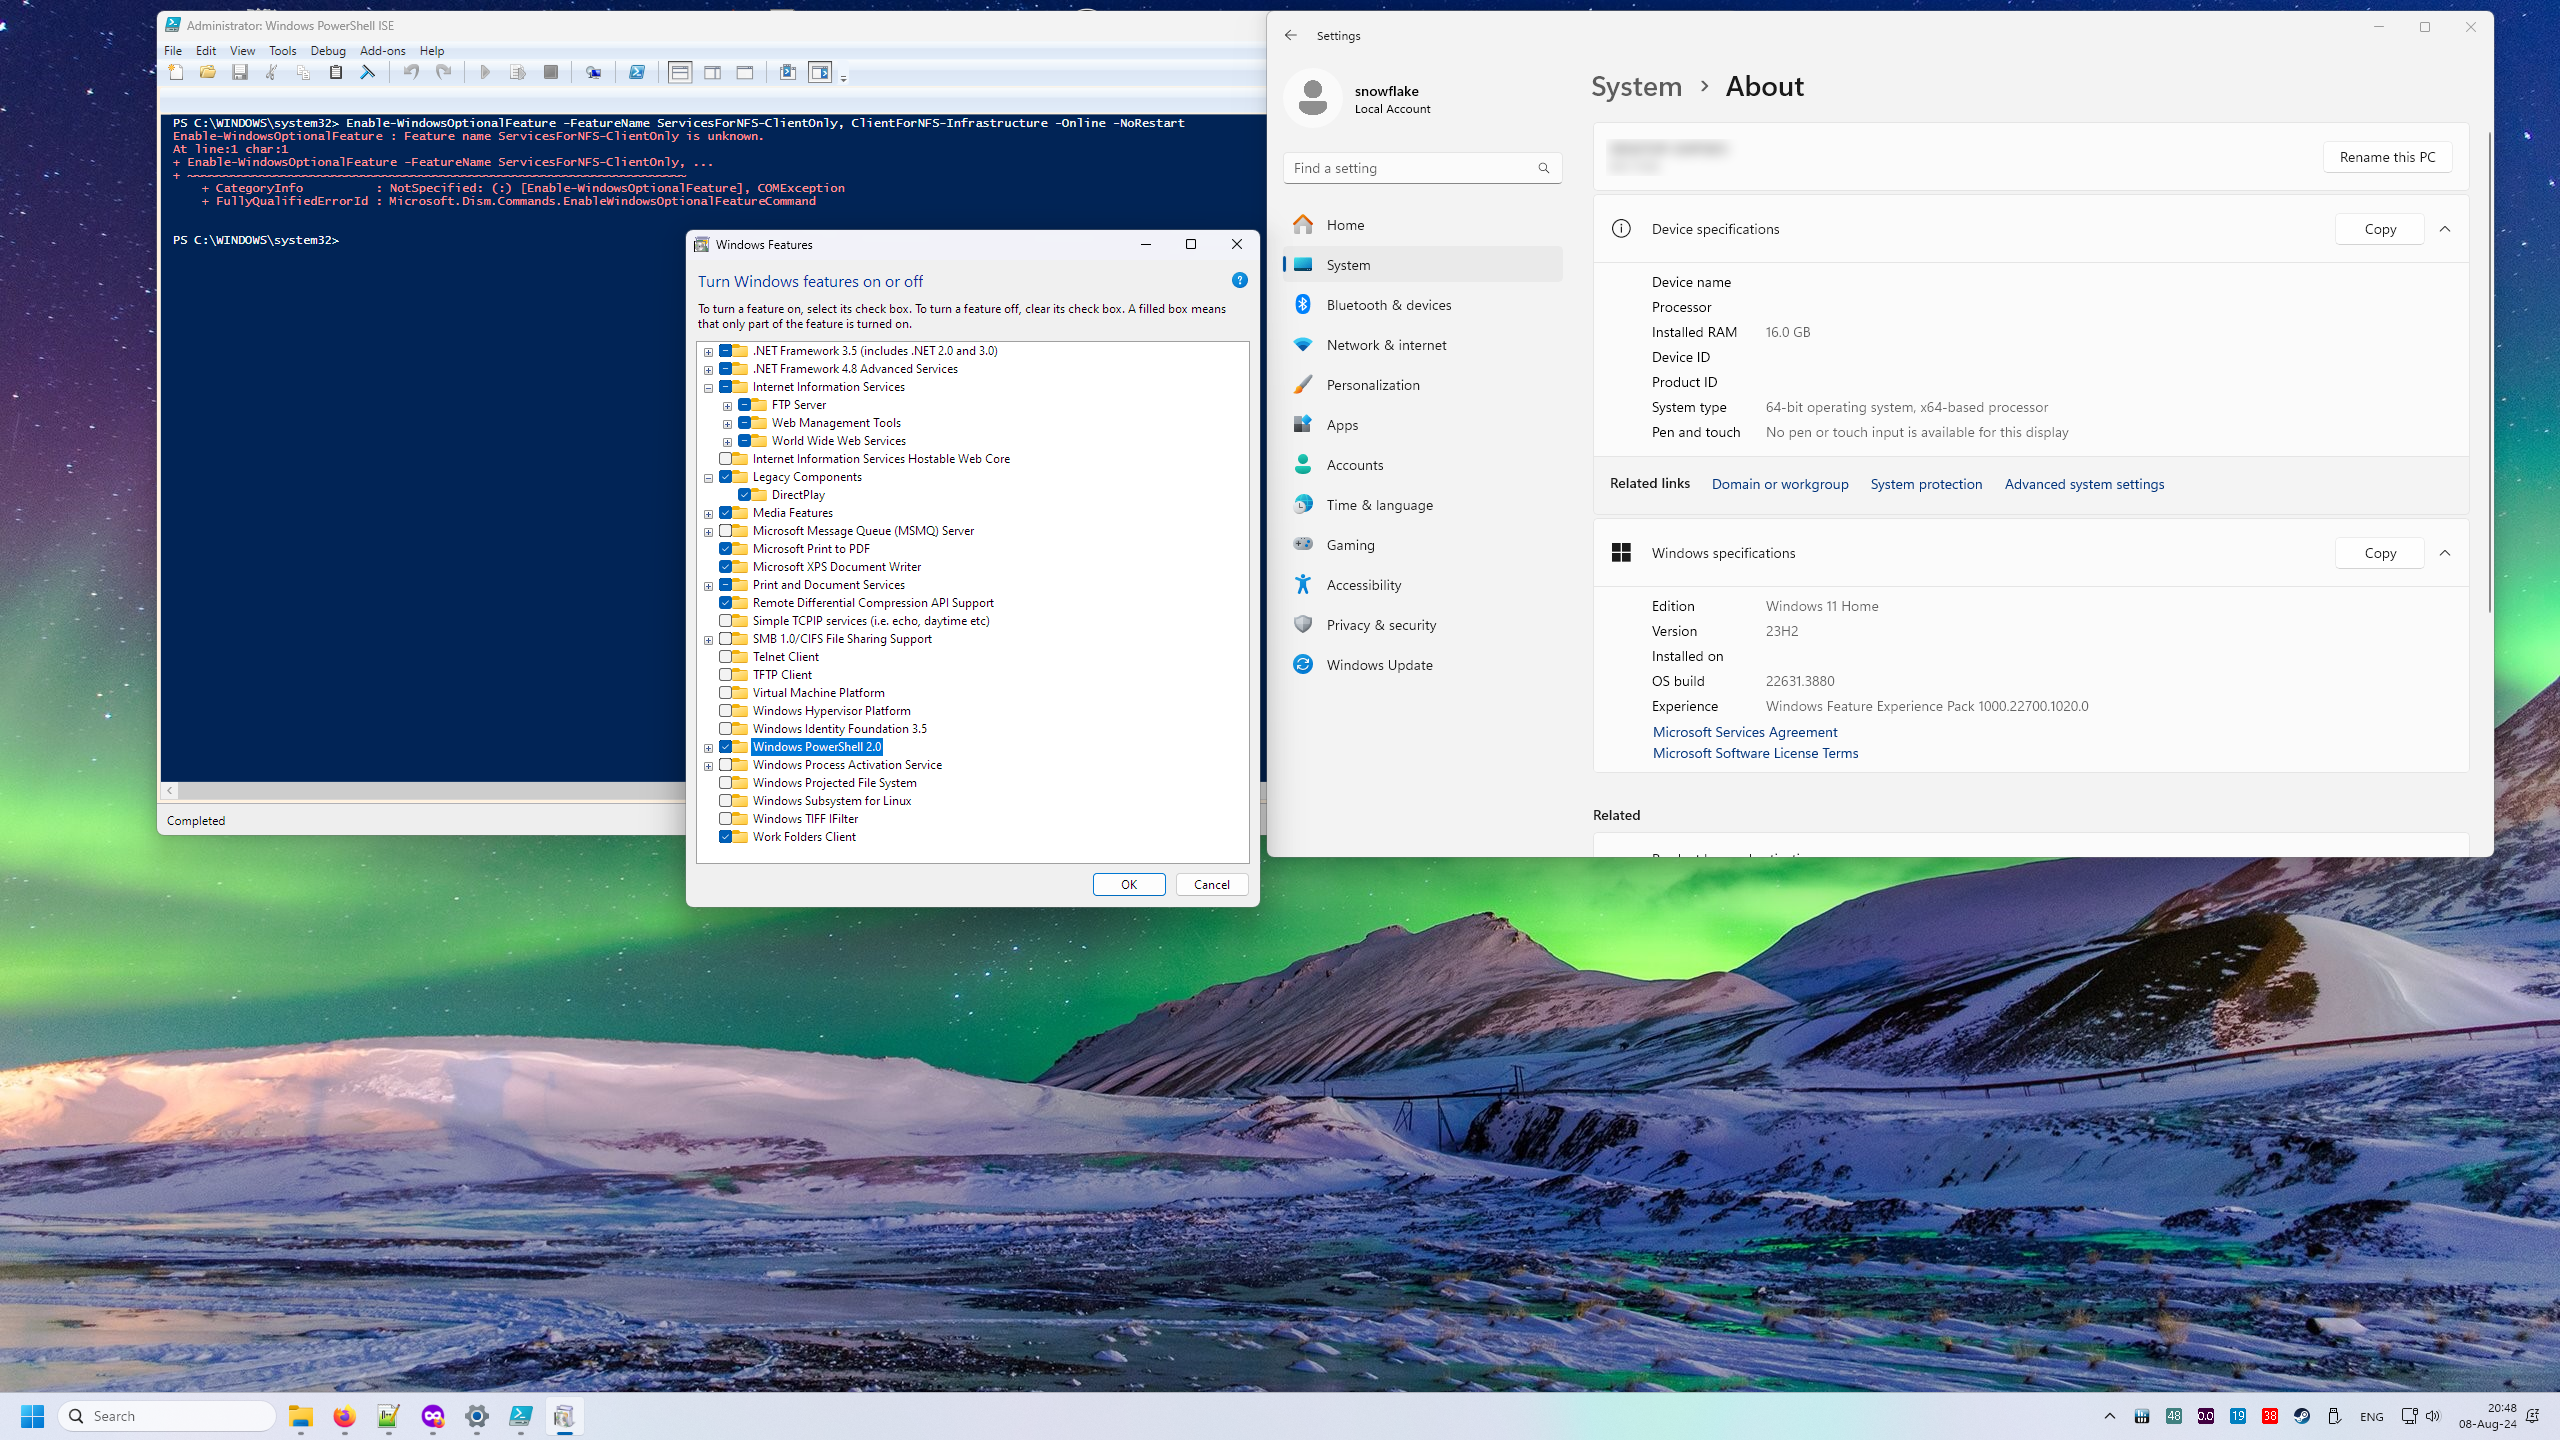
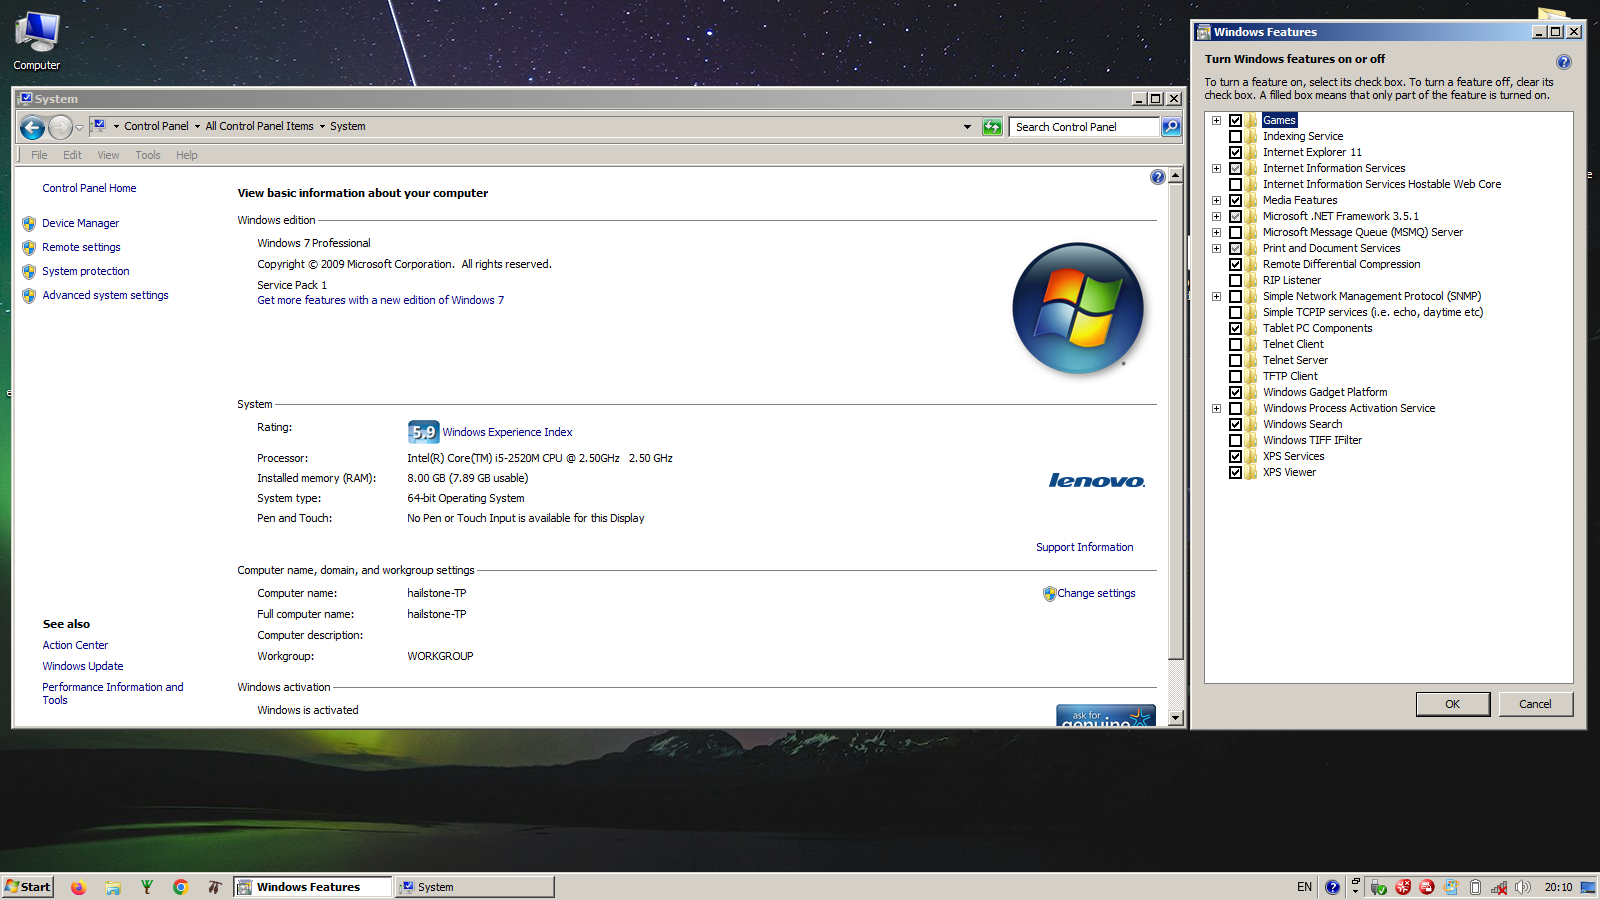
Earlier systems back to Windows NT could make use of the Services for UNIX package: the last version is 3.5 and was intended for 2000 and XP. For the latter, the Internet Archive has a source for it along with a deviation called the Subsystem for UNIX-based Applications (SUA), which can be found by digging through the download links manually here. It is a confusing and murky mess with multiple sources saying this and that, and then some people have reported issues with it, and given the nature of Windows, there's probably operations involving the Registry at some point and the firewall has to be dealt with. If you can get it working properly, great -- but the prior comment about SMB being the safer bet comes back to mind, or using Linux inside a VM.
Third-party programs are few in number. The first is nfsAxe by LabF. Information about how well it works, or doesn't work is limited: seems that the userbase is low, or was low because the last release was in November of 2009 and search engine results for it are limited. Another one is FreeNFS by Lawrence E. Smith. The Wiki on the SourceForge page is a little weak on articles and it hasn't been updated since September of 2012. Other candidates may be available, but no testing or demonstration will be done here.
Mac OS X and Linux
The first thing to get out of the way is Mac OS X Server. Before 10.5 Leopard Server the NFS service in Server Admin was rather limited in what it did, and the administrator was expected to perform a bit of command line work like old times to get it fully ready. Exports were added or modified in the Workgroup Manager, not the Server Admin, in 10.5 Leopard this operation was moved to the Server Admin. The image gallery below shows what it looks like, but not much discussion will be about it because most people don't have Mac OS X Server, and this is mostly here for historical and curiosity purposes. More images with OS X Server can be found in the More Info page.
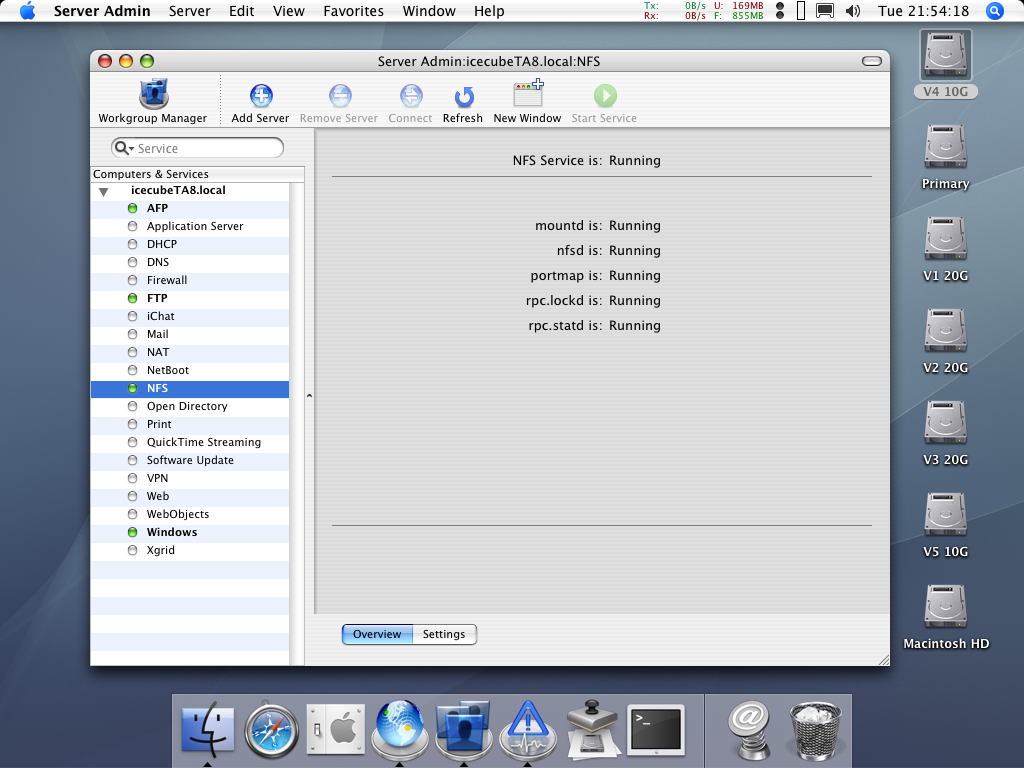 Server Admin: NFS overview (10.4) |
 Server Admin NFS settings |
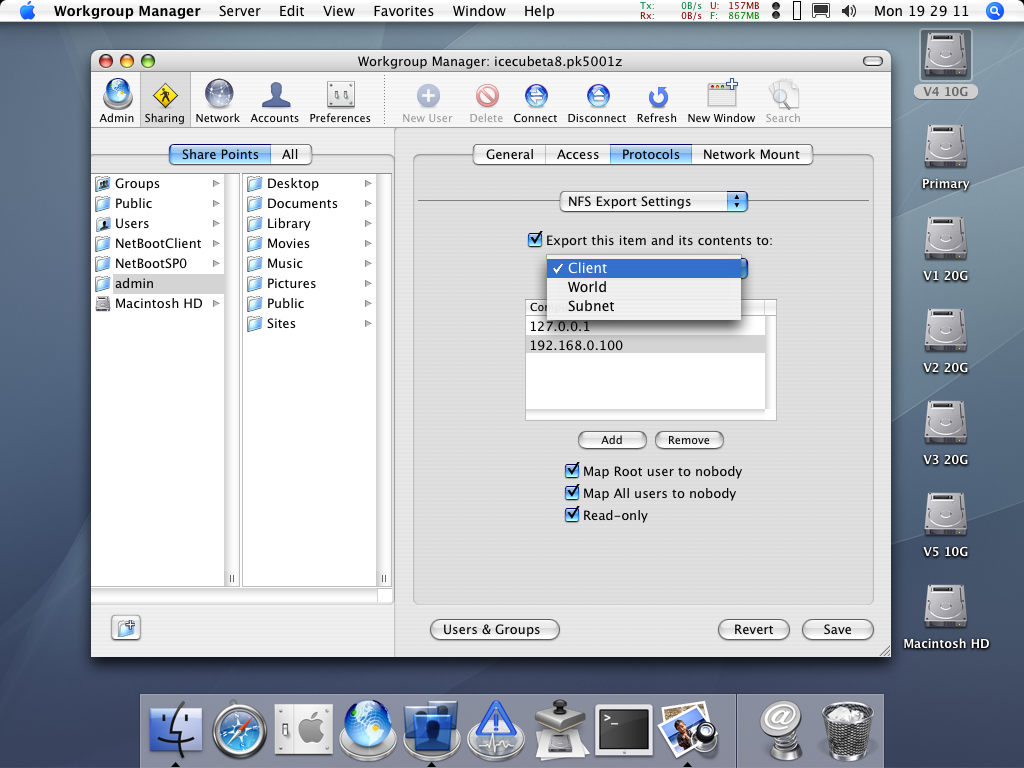 NFS share points |
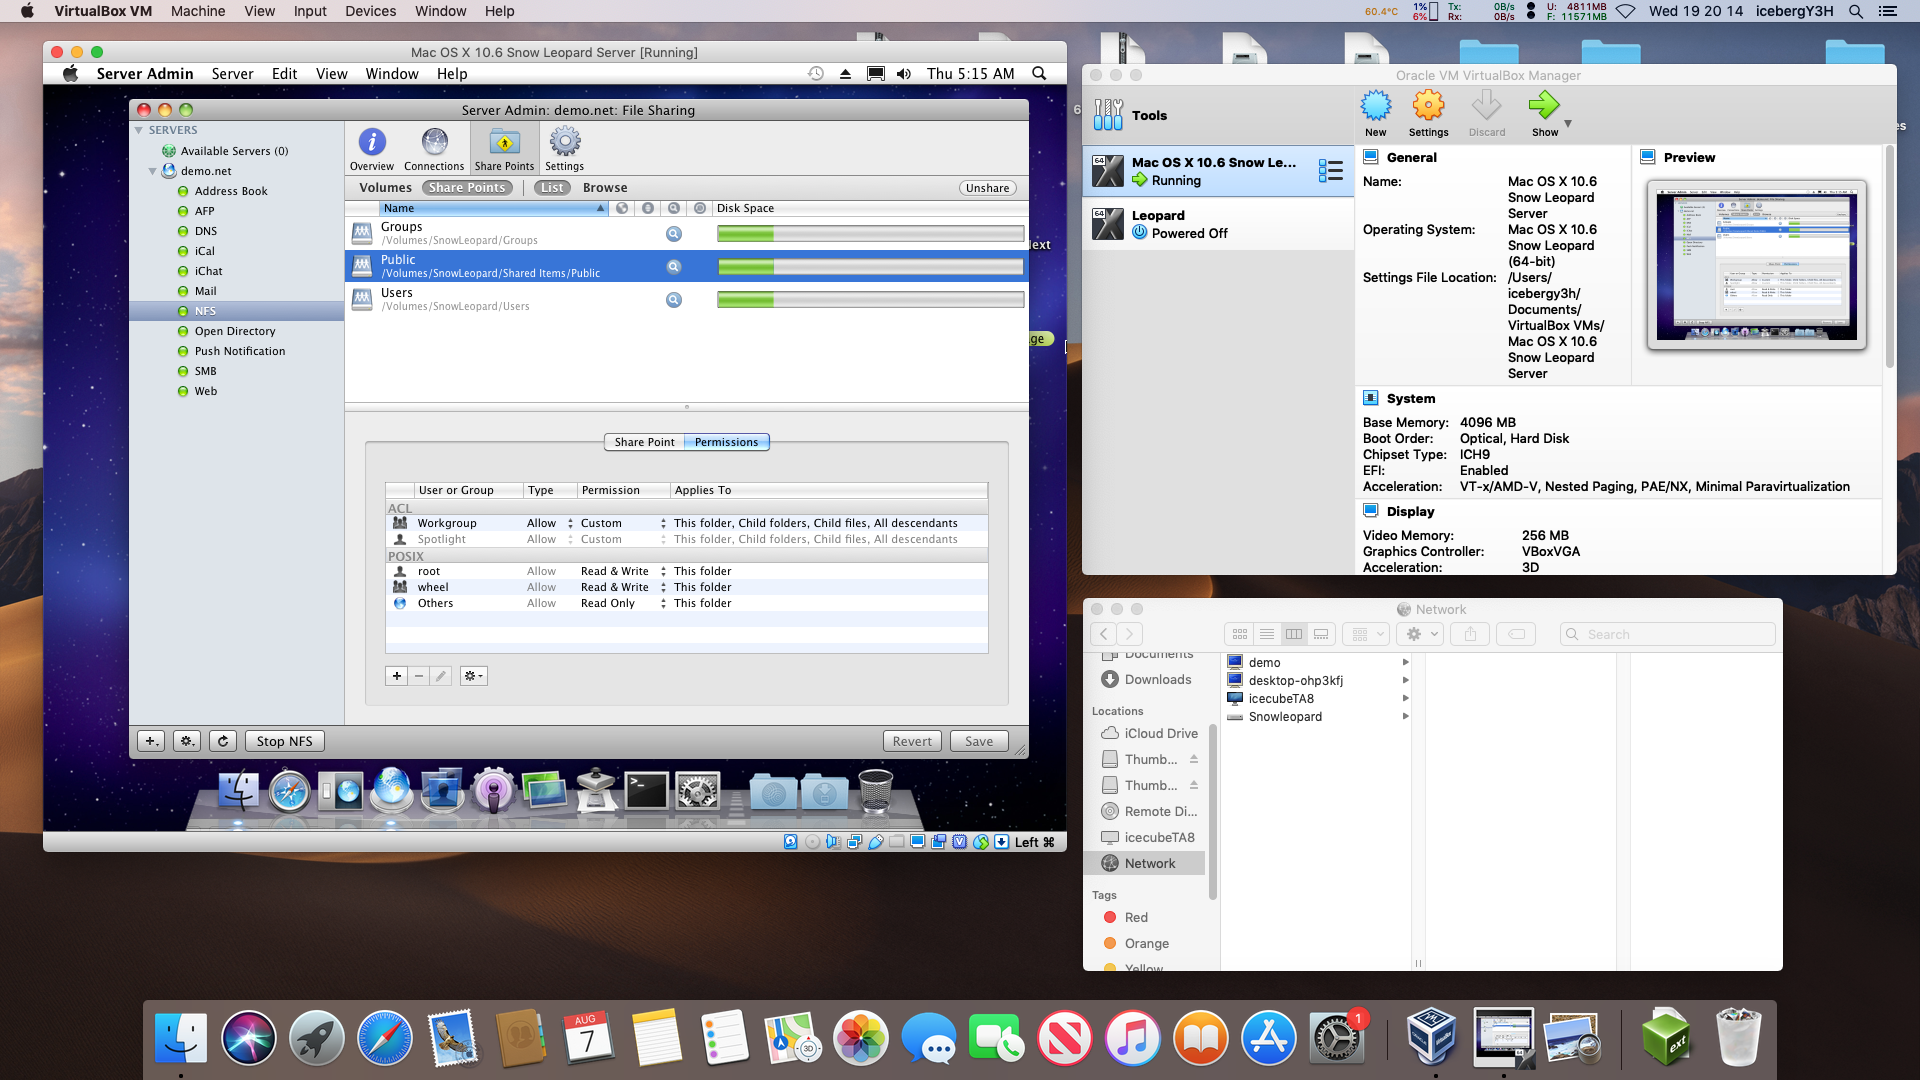 Share points tab (10.6) |
The next topic is regular Mac OS X. The good news is that it's doable. The bad news is that it changes from version to version. Early versions from 10.1 Puma to 10.4 Tiger used NetInfo Manager, but with 10.5 Leopard that changed. Enough changed that NFS Manager from Software-Systeme had to be rewritten to support it. And then it got changed again with future releases, and on top of that, reading Marcel Bresink's website gives crucial information that certain releases of Mac OS X / macOS were not recommended to use with NFS. The exact reasons are a bit unclear but given the technical inclination of NFS it's safe to say the problems are technical indeed.
Let's review a normal OS X system for NFS server and client access. There's two reasonable ways of doing this: using the command line or using NFS Manager, a program from Software-Systeme out of Germany. The command line is just the command line, but changes to the Mac OS X and macOS underpinnings can complicate affairs. NFS Manager is fine but versions prior to macOS 10.12 Sierra can't be registered because of a lack of support for updated certificates from Apple, and most of the older versions are not readily listed for download. This means that the oldest version that can be downloaded is 2.94a, which is for OS X 10.2.5 Jaguar up to 10.4 Tiger. 10.5 Leopard needed a rewrite of the program, which was released as version 3, but that version and all the way up to 4.92 are not available for the public to acquire unless they already own a license, or had a license, and archive.org's WayBack Machine was not able to grab any of those intermediate versions. Make sure to check the Notes for known issues and release notes: there can be important information there.
Only two systems were demoed for this section: 10.4 Tiger with a command-line setup and 10.14 Mojave with NFS Manager. The reference page for 10.4 Tiger was this one, and it works fine. The notes on Tiger were that the share directory had to be changed to read/write/execute permissions for everybody, (sudo chmod 777 /Users/icecube/NFSExport) otherwise MacNFS 3.0 couldn't access it (which also exposes a fantastic security hole), but other than that it seemed to work fine. As a client, Tiger is a bit weird, and this text probably applies to the later versions to. Remote exports could not mounted unless this command was used (NFS v3 should work just fine; IP addresses and export paths are as used, shouldn't use private for that purpose though):
Without the resvport flag it would straight up refuse with Operation not permitted being returned as an error code. As for the rest of OS X and macOS, because of the variety of changes and gotchas, you will have to poke around to find additional information. One problem is pcnfsd: see below. Automounting shares in the Finder is another can of worms; but considering the tidiness of Marcel Bresink's NFS Manager, for more permanent deployments of NFS, it would be worth a look.
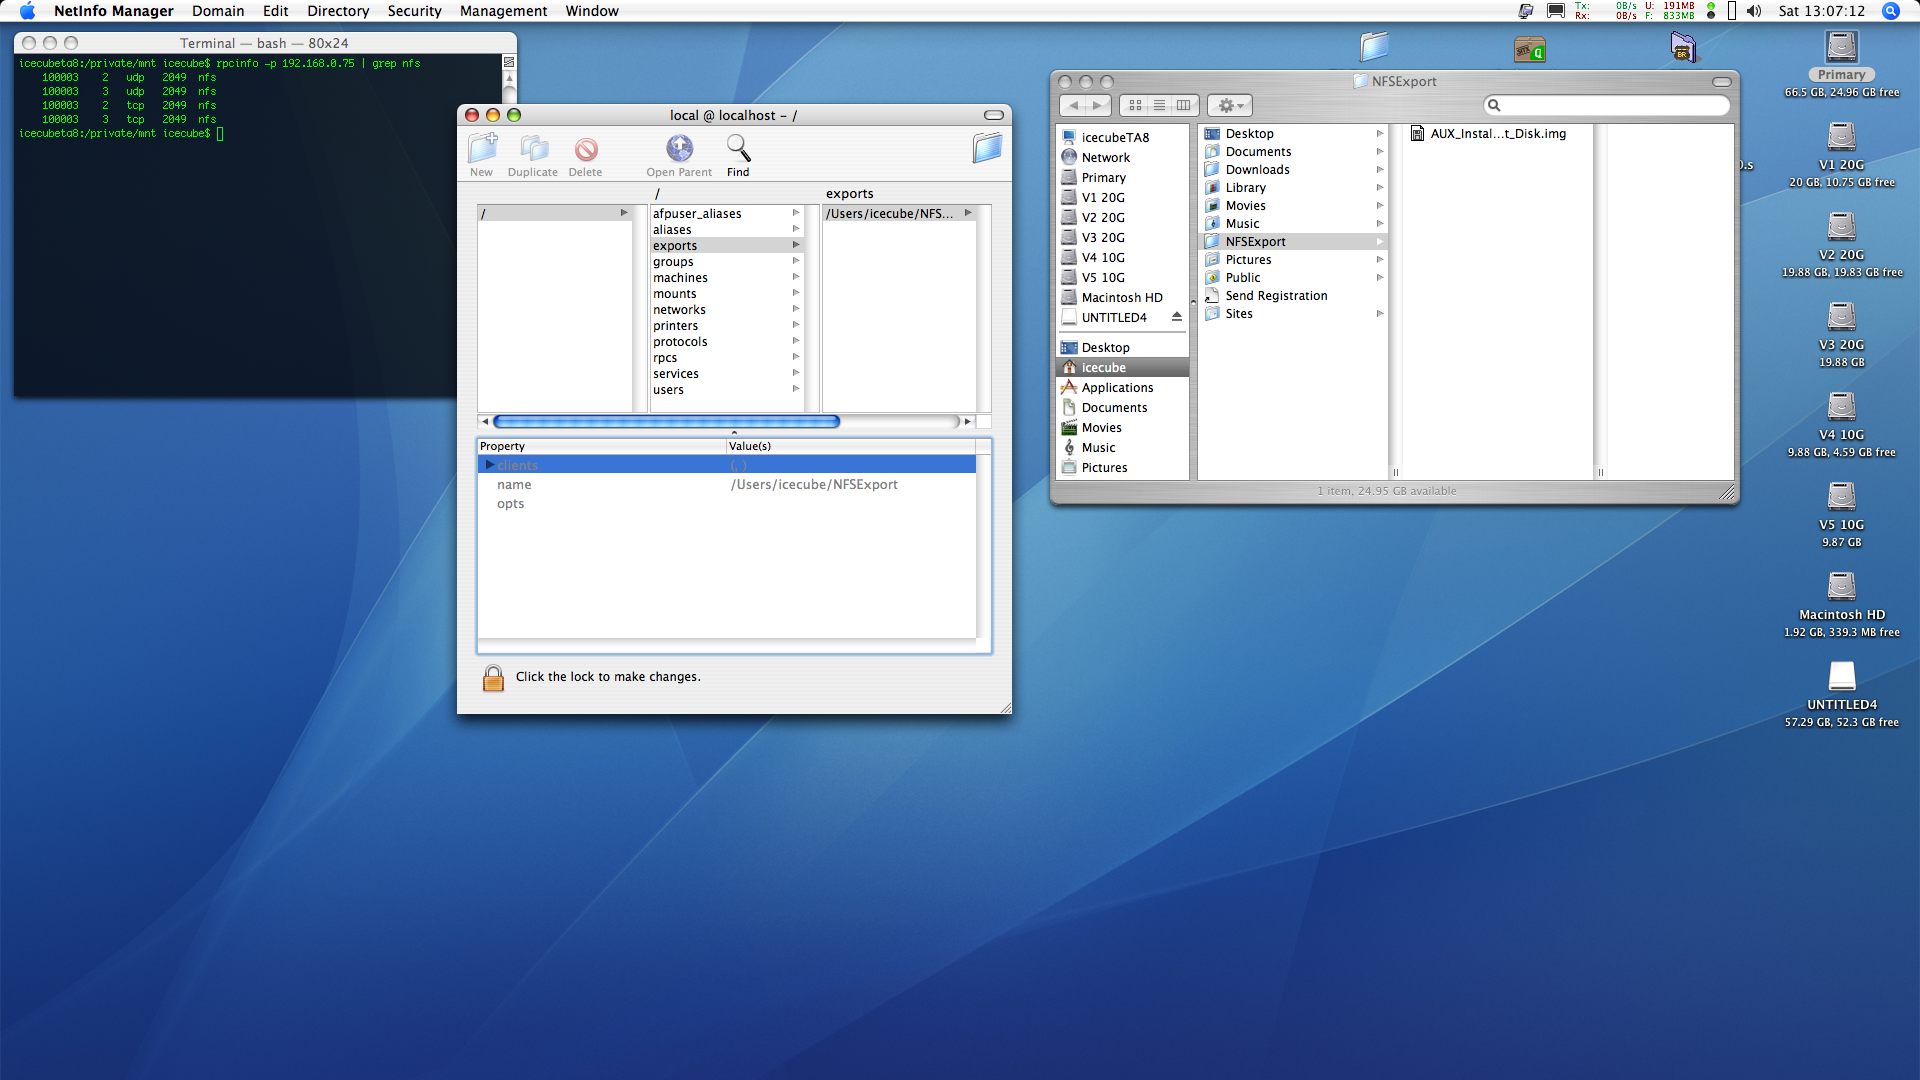 Initial NFS service started (10.4) |
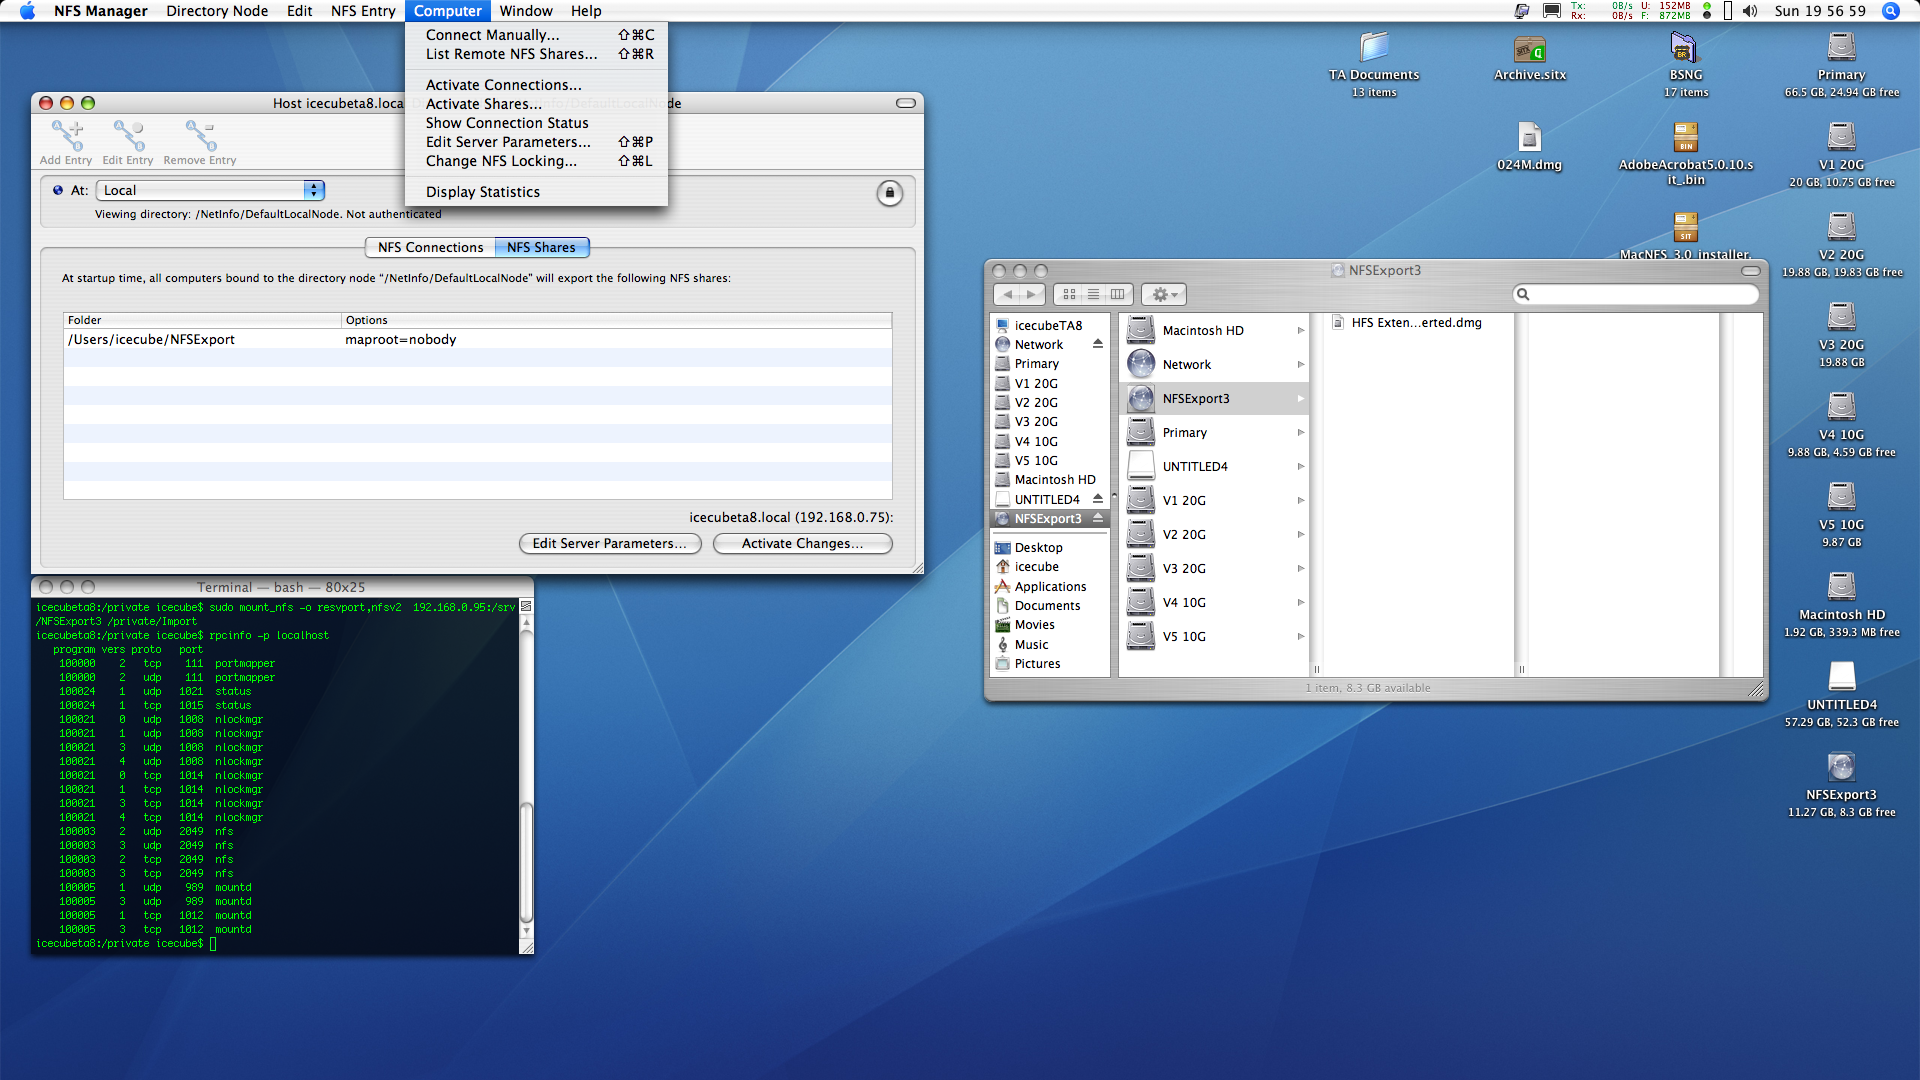 NFS Manager demo |
 NFS Manager demo (10.14) |
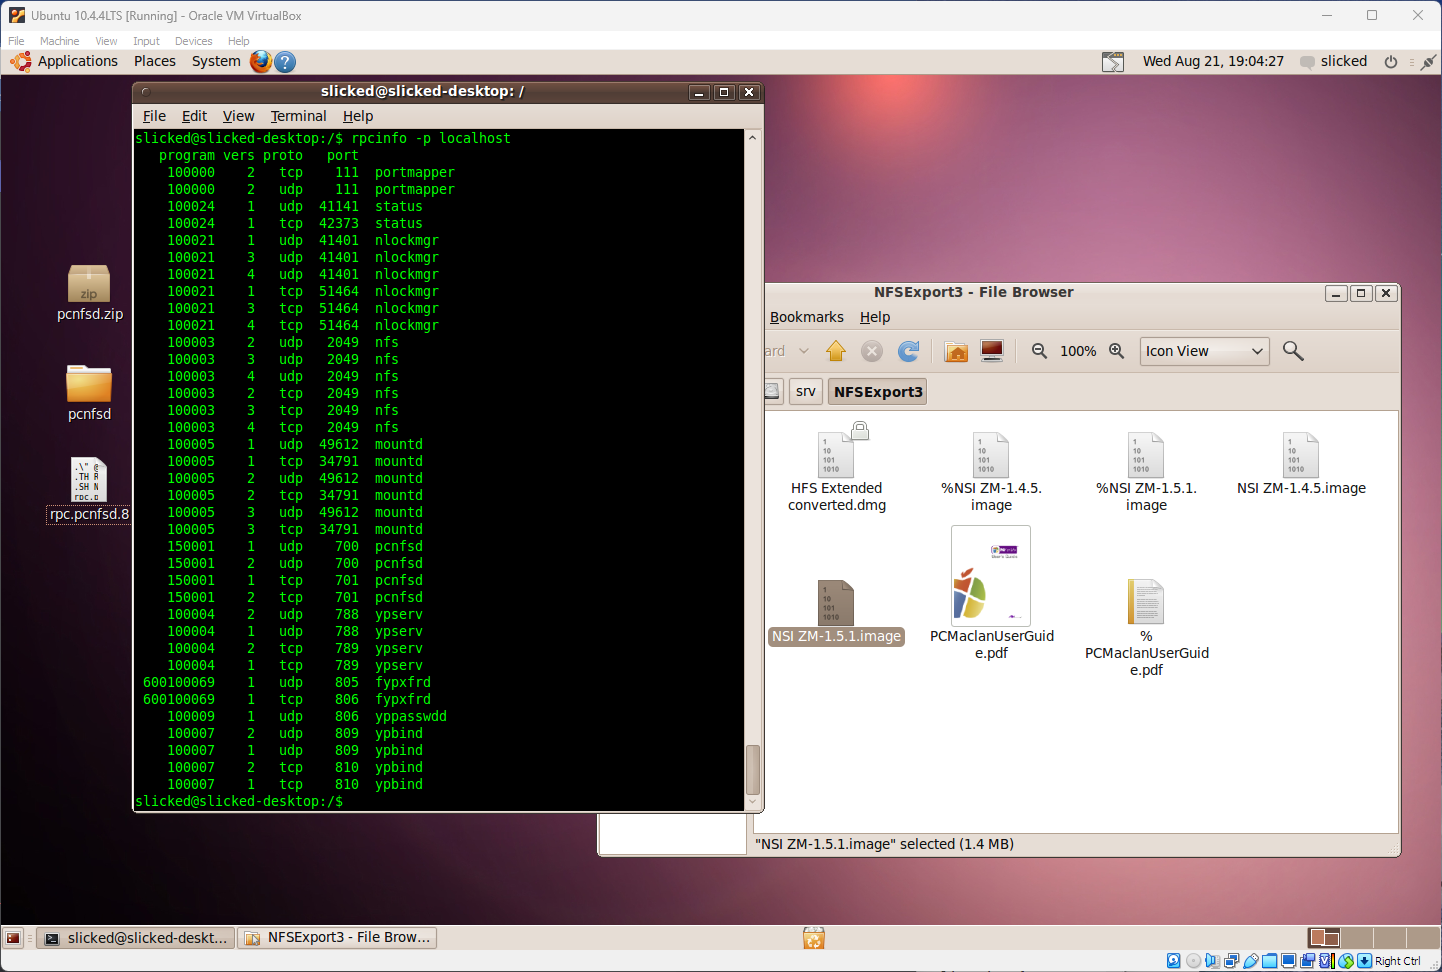 rpcinfo dump on Linux |
And now for Linux, with the usual disclaimer that different distros may deviate from here. Most Linux distros aside from ones like NetBSD don't include NFS server and client features by default. Fortunately the there's guides all over the internet on how to get it going, and is generally just required to install the server and client, edit the exports configuration file and then start the service. It's mostly been the same for most of NFS' history, and some particulars have changed but all in all it tends to be roughly identical. What is not the same from old days to new days is the authentication concept. Early on in with UNIX boxes, OS/2, DOS and obviously Macintosh machines needed some way to work with NFS, and so that's where pcnfsd comes in. It's an authentication and printing daemon that tries to implement some access control. This was fine in the early 1990s but these days it appears that only NetBSD still has pcnfsd. The next problem is support for NFS v2. If this mode is not enabled, then it will have to be manually enabled -- which probably changes from distro to distro.
To deal with the pcnfsd problem, a modernized user submission on a forum was trialed (if it expires on the real website, a copy of the referenced file is available locally), and it appears to work. It only includes a 64-bit Debian package, but that is what most people are using these days anyways, otherwise you'll have make your own from source code, included. Installation required devscripts which is required to get the dpkg-buildpackage capability; and then deb-helper had to be installed to get dh_testdir. Refer to the referenced setup guides for configuration and setup instructions: if they don't work, you'll have to poke around more. Very little information is still out there about pcnfsd: it may be better use the next choice.
NFS/Share can make use of NIS, or Network Information Service, or Yellow Pages, or yp, all of which mean the same thing. Mac OS X includes YP services as do most normal Linux distributions, or did; if they don't, then the package nis is required first. Like pcnfsd this introduces a number of pitfalls concerning operating system (OS X versus Linux), which version of said operating system, which distribution, which one has bugs, and so on. For instance, starting with Mac OS X 10.4 Tiger, launchctl was the choice for starting system daemons; for many years Linux used init (e.g. $ sudo /etc/init.d/nfs-kernel-server restart) but nowadays systemd is popular which is frequently interacted with systemctl, but other distributions use rc.d to start services and some older information doesn't translate correctly to newer systems, and vice-versa.
A moderately serious attempt was put into getting YP running on OS X 10.4 but failed because sudo ypbind couldn't be sorted out. An older Linux distribution was able to make use of this reference once the rc.d commands were translated correctly to a init based platform, but only after an obscure forum post was found (look at the last post: line 6 should be NISSERVER=master) and some additional work from this link. Outside of some reference links to what was successful on one implementation, but not another, and the seemingly endless deviations of Linux and their peculiarities, no additional information can be provided here as the topic is too complex.
Serial Data Interlinks
Terminal Data Transfer via RS232
In this section, we'll talk about interconnecting Macs to Macs and PCs via RS232 based hardware, and VT100 style terminal emulators. It's a fairly universal, yet antiquated way of doing things. It is also much slower than LocalTalk.
Basic principles
|
Serial file transfer methods date back to the origin of computer communication protocols. The methods, interfaces, protocols, platforms and so forth have all morphed or transformed to varying degrees but the overall principle isn't that unique or different between methods. Technically AppleTalk over LocalTalk is a serial data transfer method, as it generally uses only two wires to do this, however LocalTalk is proprietary to pre-iMac machines (with a LocalTalk or GeoPort connection) and special hardware like LocalTalk PC cards. This section may get a little technical but we'll do our best to make it understandable by "the common man". For this section we'll try to stick to DE-9 (often incorrectly stated as DB-9) RS232 ports. The DB-25 RS232 protocol is completely incompatible with the SCSI port and hooking up a DB-25 serial or parallel device will most likely destroy the SCSI driver chip. | 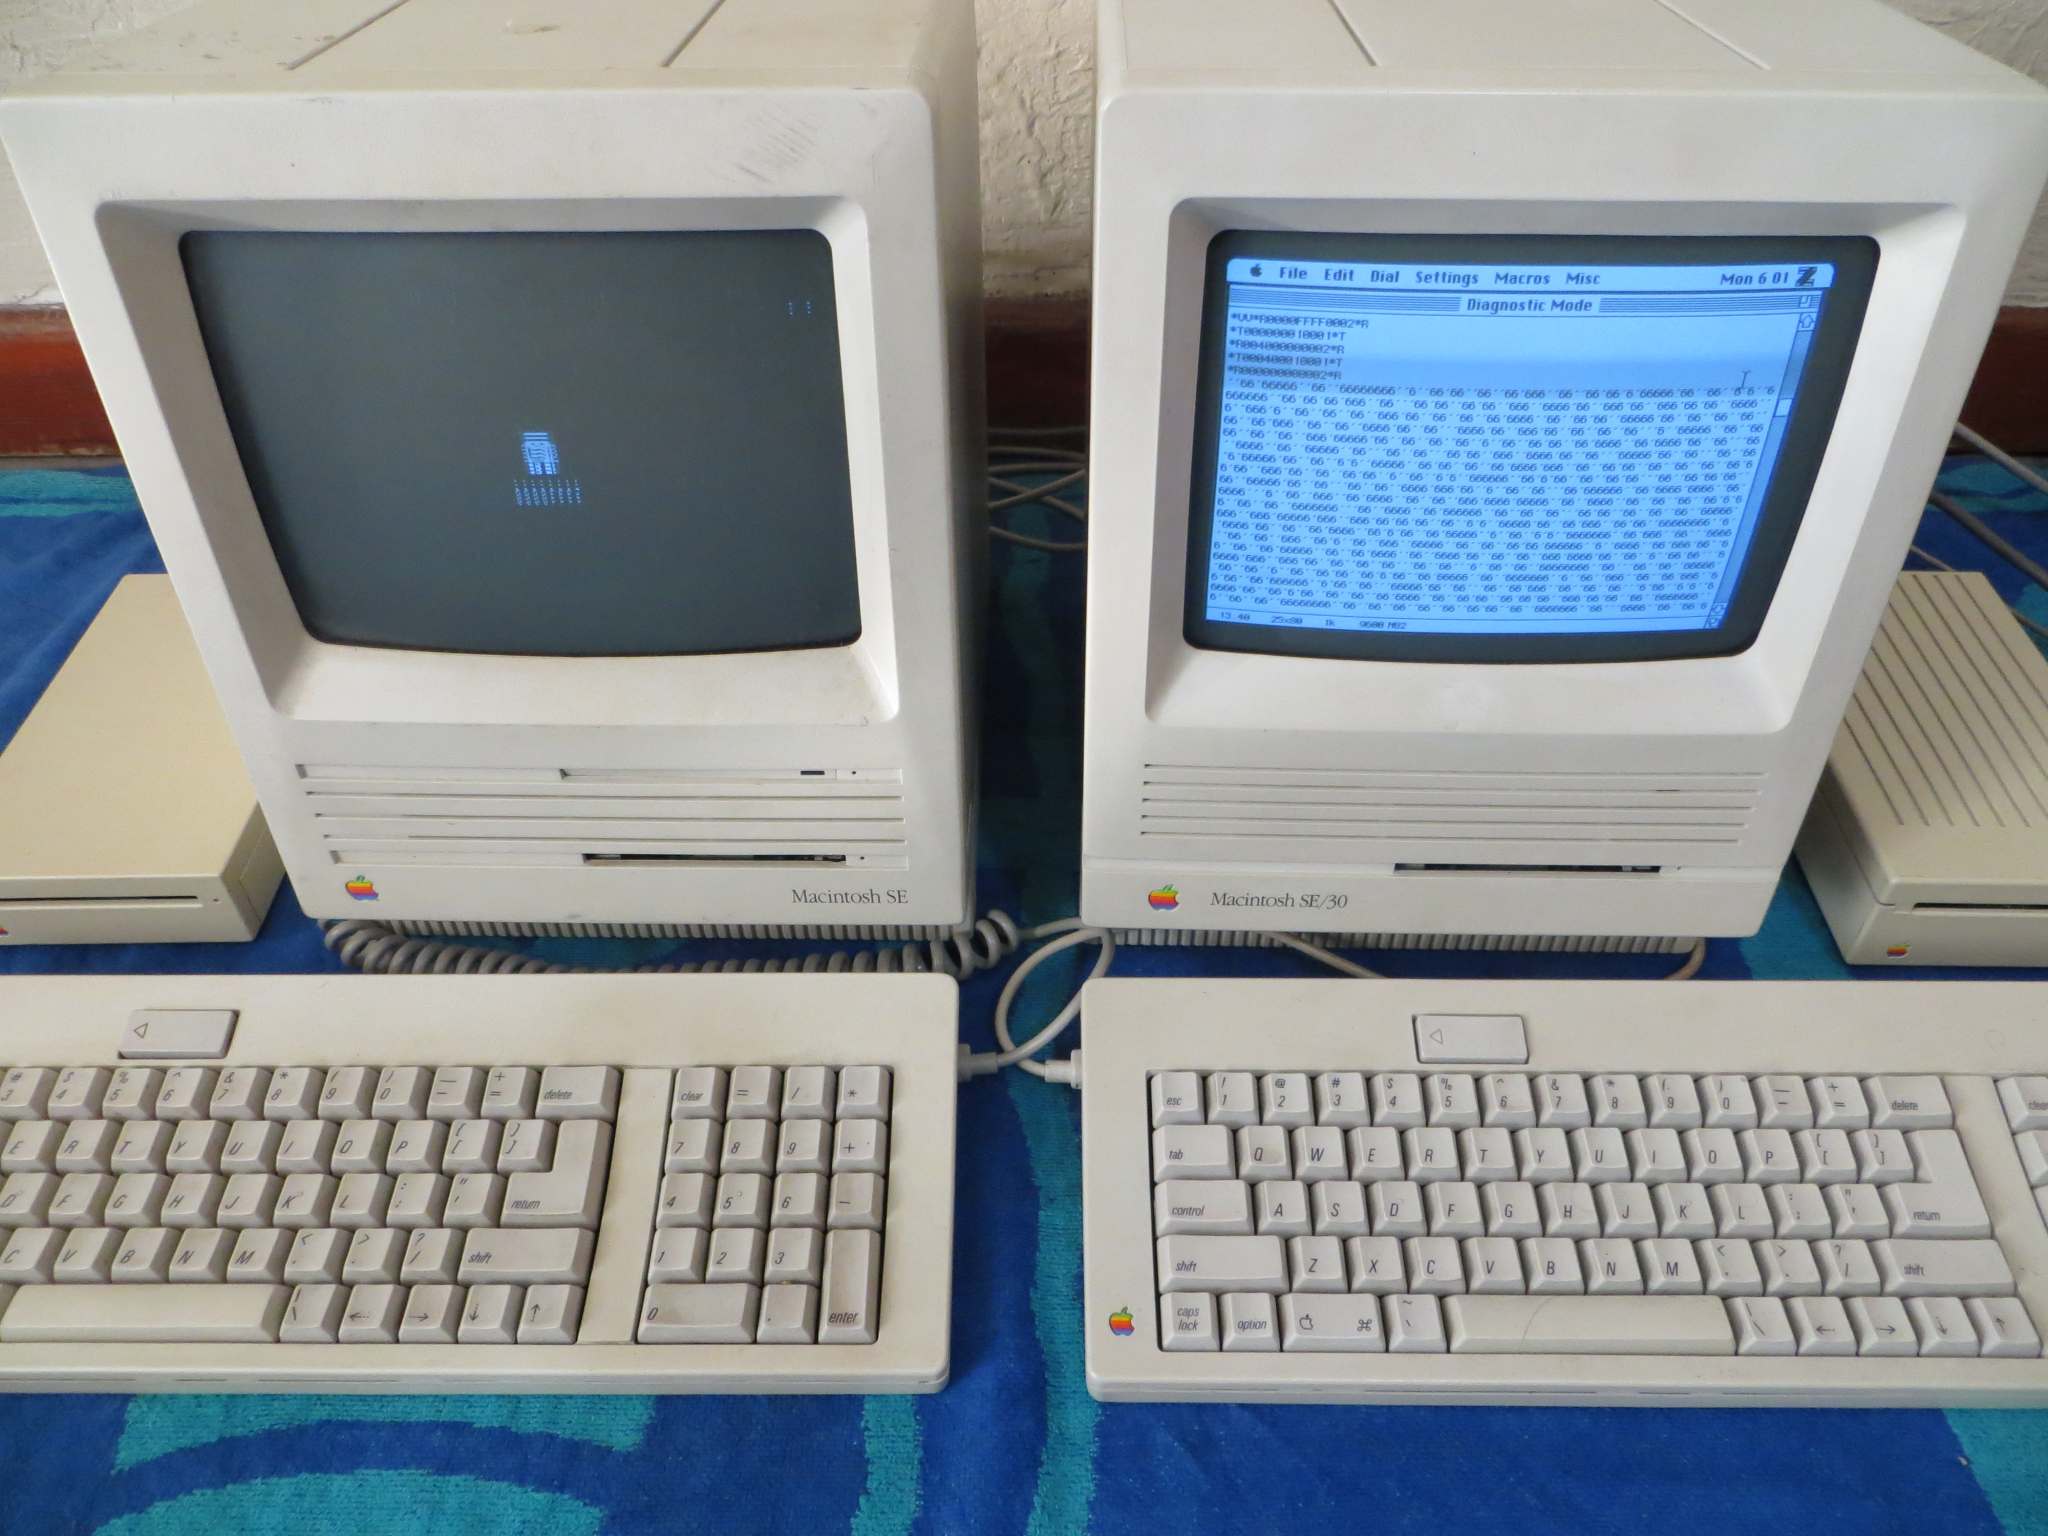 SE/30 using a diagnostic serial console to examine a Mac SE |
Typically the older desktop Macs had two serial ports, called "Printer" and "Modem", yet PowerBooks were usually assigned just one. The serial controller, of Zilog make on the older Macs, can support two serial ports off of one controller, basically PORT A and PORT B. In the PC world this would be mapped out to COM1 and COM2 by the BIOS, and reported in Windows or MS-DOS as the same, but in UNIX systems this may be mapped to something like /dev/ttyS0 and /dev/ttyS1. It's basically such so that a Mac user could have plugged his modem into the Modem port, but connected to a LocalTalk network for simple communication with nearby Macs and compatible LocalTalk printers. Typical modem speed in the early 1990s was 2400bps, depending on the timeframe and how much the user could afford, the dialup provider also had to support the bitrate. Switching between the remote modem and the local area network then becomes just a matter of software. Functionally the Modem port appears to be identical to the Printer port, although the Printer port is assigned for LocalTalk purposes, unless it is turned off or manually switched to Modem when Open Transport installed. There could be low-level hardware difference between the Printer and the Modem port, as Inside Macintosh explains, particularly relevant to the 128K and 512K series:
A IIci was tested at 57600bps with AppleTalk off and hardware handshaking enabled off the printer port with a ZModem transfer and worked fine. Later Macs like these shouldn't have any such concerns.
The image to the near right shows a RS232 DE9 female to RS422 Mini-DIN-8 male cable, a RS232 female to female null modem cable, a USB FTDI based RS232 adapter, and a Compaq Armada E500 with native RS232 COM1/ttyS0 serial port. The USB adapter is nice because it has power, transmit (TX) and receive (RX) LEDs which are useful when things start misbehaving or for diagnostic purposes; it was purchased from Adafruit. Counterfeit FTDI chipsets are unfortunately common and can have issues with performance or compatibility. Entry-tier diagnostic adapters are around, which have the RS232 lines wired inline with activity LEDs.
As far as the PC world goes, very few newer machines have RS232 ports. No regular Macintosh had a RS232 serial port aside from Xserves. But there was an Apple NuBus card that did and at least one aftermarket card such as the Applied Engineering QuadraLink, which had 4 RS422 Mini-DIN-8 serial ports on a NuBus card. Therefore, an adapter is a first level requirement to bridge USB to RS232. There is a Keyspan USB adapter which provides a pair of RS422 Mini-DIN-8 ports. If this adapter is in your toolbox, then all that is required is the driver for the USB machine and a Mini-DIN-8 cable. Normally these cables are cross-over unless they're designed for a specific application. This section will be applicable to the Keyspan adapter, but the RS232 adapter is more flexible to other applications involving other computers, accessories, or electronic hardware. |
RS232 serial hardware |
The two main heavyweights in the USB -> RS232 adapter world are FTDI and Prolific. Prolific PL2303 and FTDI FT232 chipsets are fairly common and should work fine. Driver support is an interesting element for OS 8 and 9 systems because the drivers are usually so far out of date that it may not work with the chipset in the adapter: the test FTDI adapter worked, amazingly enough, with the Mac OS 8/9 FTDI driver.
Two more prospective links of interest include this general page, and this page focused on the Lisa. Microsoft has compiled a useful KB article which also describes 4-bit parallel direct connection cables. Direct parallel port connections are interesting, though nobody really did it, and it is not demonstrated here. Finally, an exhaustive overview of serial data communications is available here, which has a focus on the *NIX platforms but is equally applicable for other systems.
Hardware elements
There are two nominal interface elements to this section, the first being the more common of the two, that is, RS232. The Keyspan adapter then warrants its own section.
RS232 interfacing
There are two principle kinds of RS232 cables: the first is a standard straight cable, where Pin 1 on one end leads to Pin 1 on the opposing end, Pin 2 to Pin 2 and so on. The other is a null modem female to female cable, for computer to computer interconnects, where the TX and RX lines are crossed, along with the CTS and RTS wires.
A basic description of the pin functions can be found here along with a TIL article about the signal levels. Because we'll be making our own adapter cable, it is best done with a straight RS232 cable. For testing/hacking/evaluation purposes, especially concerning hardware handshake (HSK or CTS/RTS) functions, one method is to use screw terminals and prototyping board to allow on-the-fly configuration, or DE-9 breakout boards. DB25 serial ports will need to be wired up differently than DE9 serial ports because they have completely different pinouts. There's also such a thing as three-wire RS232 cables, which have just GND, TxD and RxD. We'll be going for a 5-wire RS232 cable because CTS and RTS hardware handshaking is a very beneficial thing.
To make a Mini-DIN-8 to RS232 adapter cable, first obtain a Mini-DIN-8 printer cable. Next cut the cable to the desired length, leaving two male plugs separated. Remove the cable sheathing, about 20mm worth, leaving the inner wires exposed. Then, prepare the wires for soldering by stripping
off a small amount, about 20mm worth of wire is plenty. The next step is to plot out what wires go to what pin on the female plug with a digital multimeter, preferably with the continuity beep. The same process will have to be repeated for the RS232 cable as well. A chart that maps the pins to the colors is a good first step; the next step is to connect the correct wires to the correct pins on to RS232 cable end, using the colors to help match things up, such as red on the Mini-DIN-8 end goes to green on the RS232 side, and so on: the colors can vary by cable manufacturer. The wires are configured like image to the right. Pins not listed are not connected. An alternative is to use a RS232 crimp connector box, which is an enclosed unit, but then a special crimping tool and DE-9 die is required. | 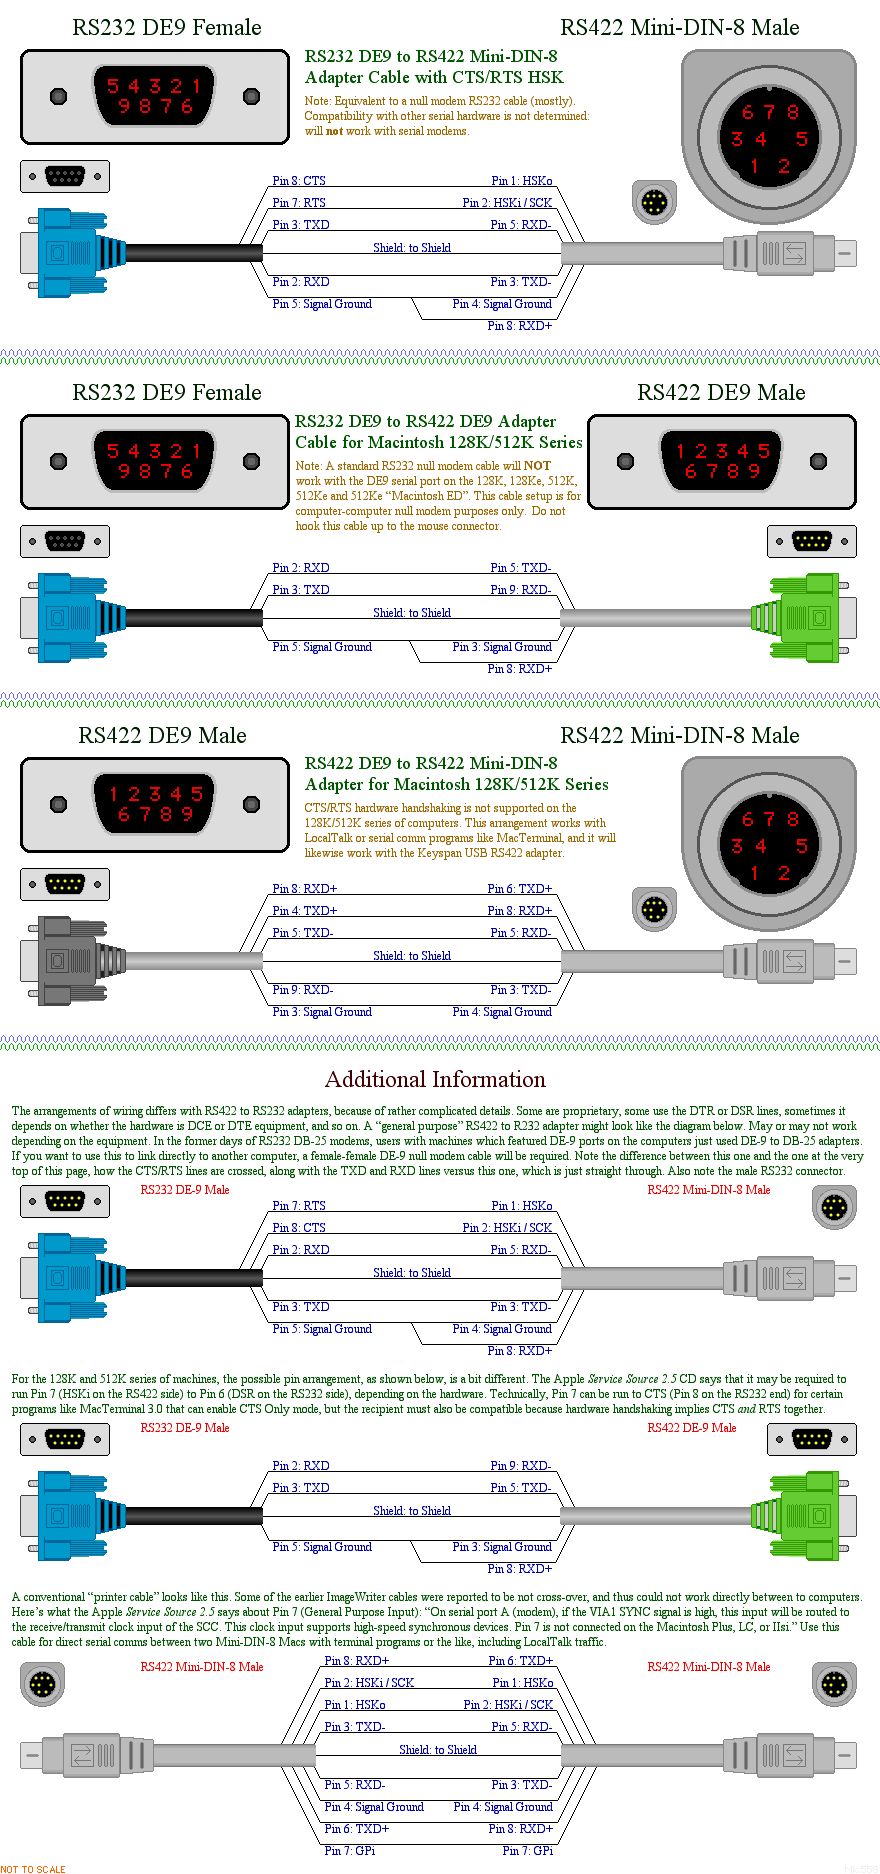 Wiring arrangements |
The reference image to the right used two sources: 1 and 2 were the primary references. This one also offers a different interpretation. Apple also has their own suggestion too. This can be found on the Legacy Recovery CD. Finally, another implementation can be found here which also information for old Apple II boxes and has a different wiring arrangement.
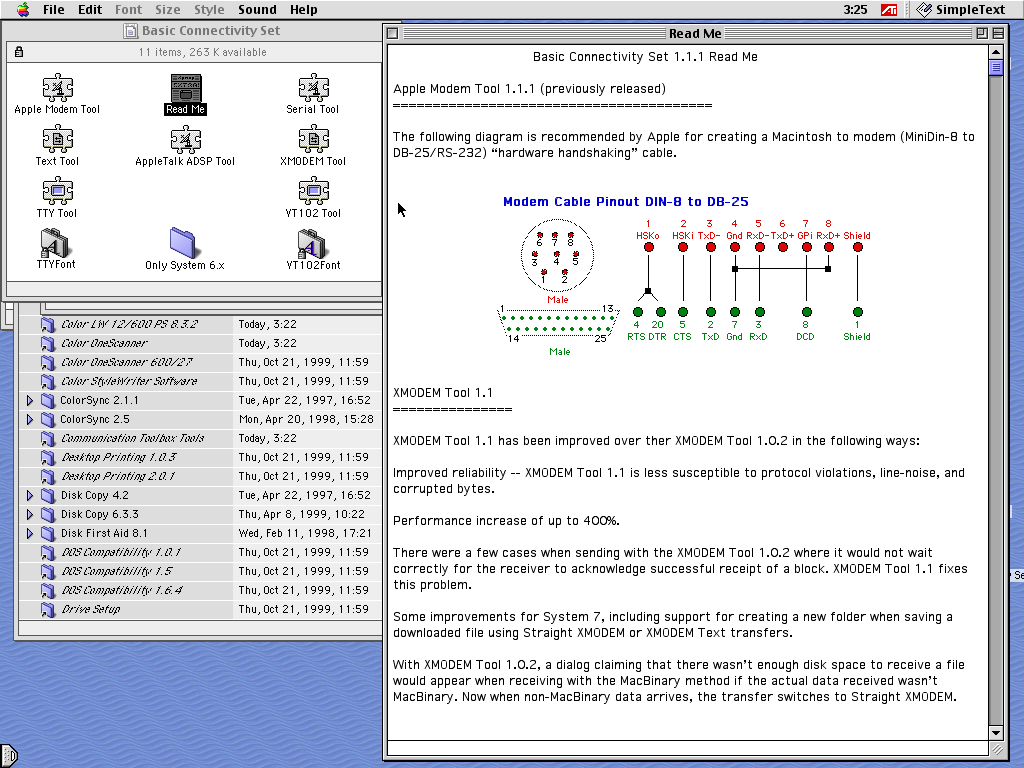
Verify that the proper wiring layout has been made with a DMM with the continuity beep function. Pro tip: Use a male-male gender changer to help test out the pins on the female DE9 end. A good idea is to slip a piece of heatshrink tubing onto the cabling beforehand, so that a solid seal is possible: use a larger size than you might first think, because of the bulge near the junction. Make sure to join the respective shielding to one another, shown on the right with the bare stranded wire pointing upwards towards the 12 o'clock orientation; foil to foil if featured and/or braided strands together. Solder the junctions for optimum reliability, isolate them from each other with good electrical tape or liquid electrical sealant. Use foil or better, aluminum tape around the junction to prevent EMF interference. | 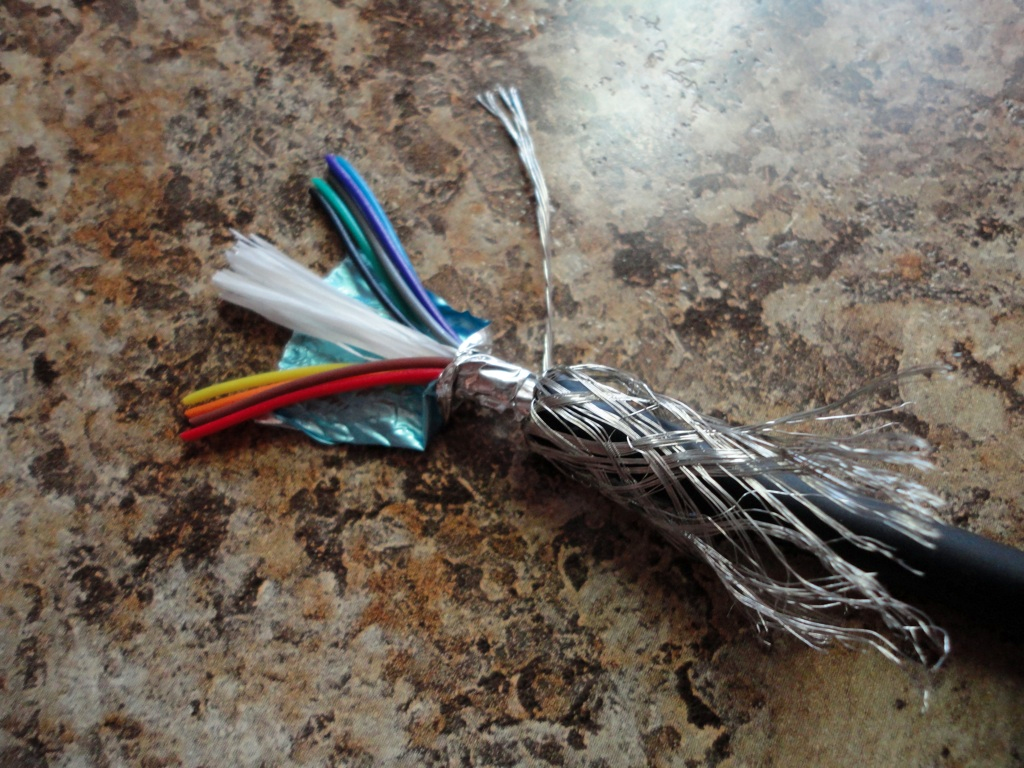 Stripped ends of the RS232 cable |
In certain markets like Amazon, it is possible, or was possible, to buy Mini-DIN-8 adapters, such as the PalmOne Mini-DIN-8 to RS232 adapter. Nowadays eBay is probably the best market for those, or certain electronic distributors. Make certain that they are wired up correctly. In the second image above, look in the "Additional Information" area for a conventional RS232 to Mini-DIN-8 general-purpose adapter. If the one that is purchased matches that configuration, or is pretty close to it (the CTS and RTS lines are important, DTR, DSR and GPi are not that critical), then all that is required is just a null-modem RS232 cable, and the job is done. Another solid choice is to get a DE-9 female connector that has an integrated screw terminal header for each of the 9 pins, which means that the Mini-DIN-8 cable wires can be stripped, then fed to the connector assembly and secured nicely, which is probably the best way to go these days. They have a lot of generic names such as "breakout board" "solderless connector" and so on which makes them tricky to find, but "screw terminal block" is probably the more accurate technical term for them.
Serial port addendum
Troubleshooting the Macintosh serial ports is a little tricky because most people don't have serial loopback testers, and thus certain programs that test the serial port fail because without a loopback adapter, they can only partially test serial performance and the serial communications chip itself. A loopback tester for a Mini-DIN-8 interface can be made by tying RS422 pin 3 (TXD-) to pin 5 (RXD-), and Pin 1 (HSKo) to Pin 2 (HSKi). Pin 6 (TXD+) to pin 8 (RXD+) does not appear to be necessary. (Very little information exists for this stuff. The only Apple supplied information that could be located was TA32298 for the ImageWriter II, which had a Mini-DIN-8 interface.)
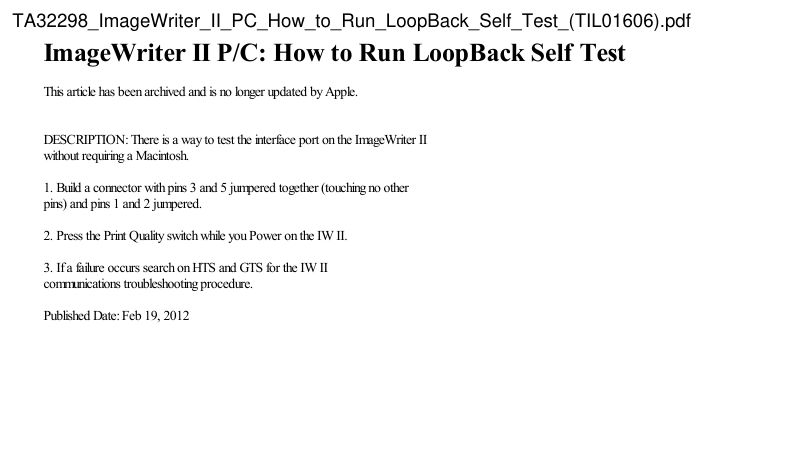
Since the ImageWriter was mentioned, we may as well talk about the serial port. There's two major kinds of ImageWriters: ImageWriter I and ImageWriter II. The first has a DB25 serial port, the second has a Mini-DIN-8 serial port. The ImageWriter II could be fitted with an AppleTalk upgrade card that sat in the bottom front of the printer, which upgraded it to support LocalTalk instead of requiring a serial connection directly. That's no big deal. But the ImageWriter I is a big deal. It could have had a connection to an Apple II, which uses a Mini-DIN-5 if it's an Apple IIc, but the IIc Plus uses a Mini-DIN-8 just like the Apple IIGS and the Apple IIe Enhanced with the Workstation Card. Or it could be a DB25 if it was hooked up to say, a IIe with a Super Serial Card, which was very common and had a DB25 port on the back. It gets better: the Apple III series and the Lisa/Macintosh XL also used a DB25 port. Are they all the same? No!
Or it could be driven by a 128K, 512K or 512Ke, which use a DE-9 serial port. Or, it could be hooked up to Mini-DIN-8 machine, which covers the Macintosh Plus forwards and the aforementioned select Apple II machines. While the DB25 serial ports were not exactly identical, they were very close. The result is people would have make their own ImageWriter I cable if Apple didn't supply one that was appropriate. Some of the LaserWriters used DE-9 serial ports, too. At any rate the best reference for this mess of serial ports is the Peripheral Interface Guide by Apple Computer, dated from 1991. It doesn't go beyond the IIfx timeframe.
Trivia: In OS X, a Power Macintosh G3 reports tty.modem and tty.printer for the two built-in RS422 ports. The serial ports are usable in OS X, but LocalTalk is not because there is no LocalTalk driver in OS X.
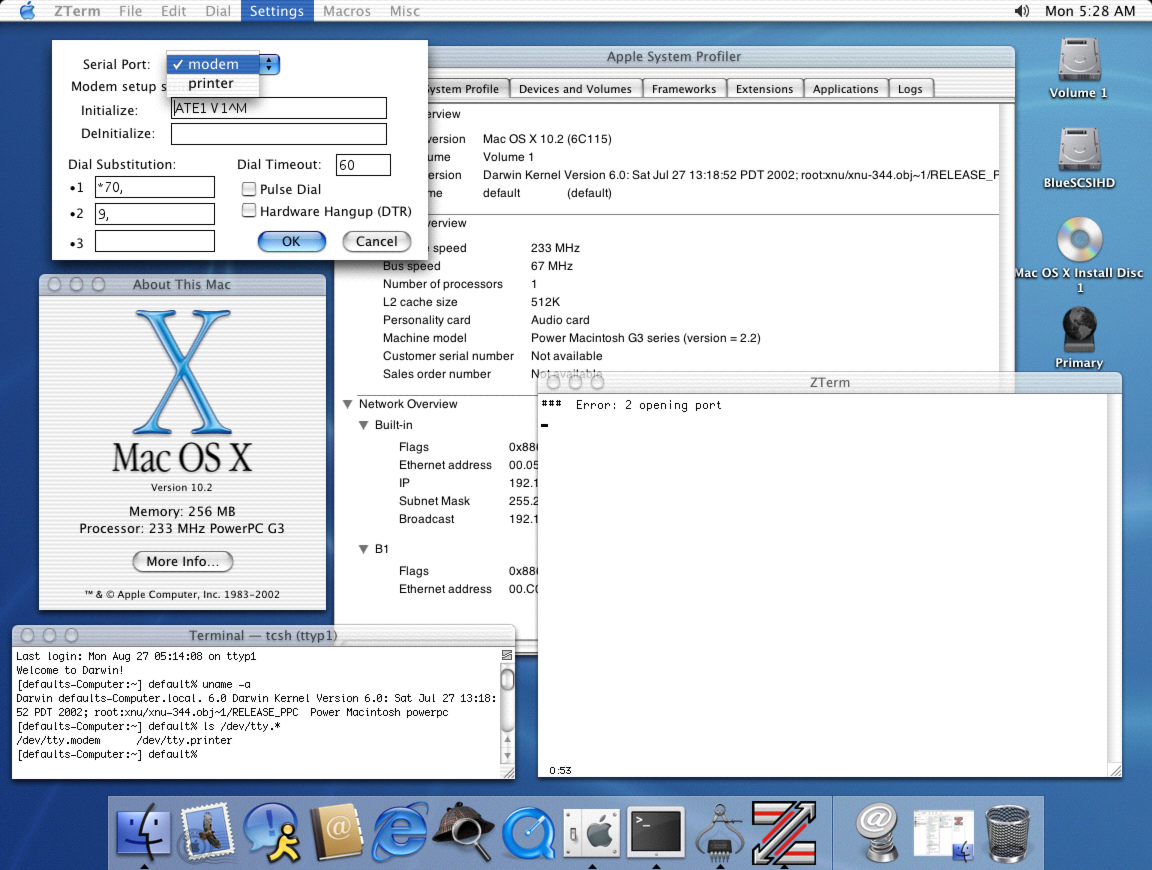
Keyspan USB twin-port RS422 adapter
This device warrants additional mention because for some reason it is a bit more popular than it probably should be. It does work with just a conventional Mini-DIN-8 cable which is normally cross-over. It is certainly convenient, at least for devices that have Mini-DIN-8 ports or Mini-DIN-9 GeoPorts like the eMate 300, shown below with a straight Mini-DIN-8 to DE9 cable and a null-modem cable.
First, LocalTalk will not work on this device. Secondly, if the drivers for OS X are installed, it won't work under Classic Emulation mode, neither is it compatible with virtual machines like VirtualPC. Thirdly, and most importantly, each device is somewhat different: there's a USA-28, a USA-28X model A and B, plus the USA-28XG, and the appropriate driver will have to support the specific model in question, mainly for OS 8 and 9. (Other locales or regions may differ slightly. The details are somewhat vague.) Despite the illustration on the splash screen for the installer, running both serial ports at the same time may result in packet losses: in our test case, HyperTerminal on a Compaq E500 got tricked into Minitel mode and a file transfer through ZTerm 1.2 had to be restarted twice. The Macintosh LC using pseudo-PPP dialup off the other port at the same time, using Fetch to pull a file off the host iMac G4 suffered a reduced speed rate (about 1800-1900 bytes/sec versus a usual 2500-2850 bytes/sec at 38400bps). In case you're wondering it's not possible to have one computer "talk" to another from, say, Port 1 through to Port 2 without going through a host machine.
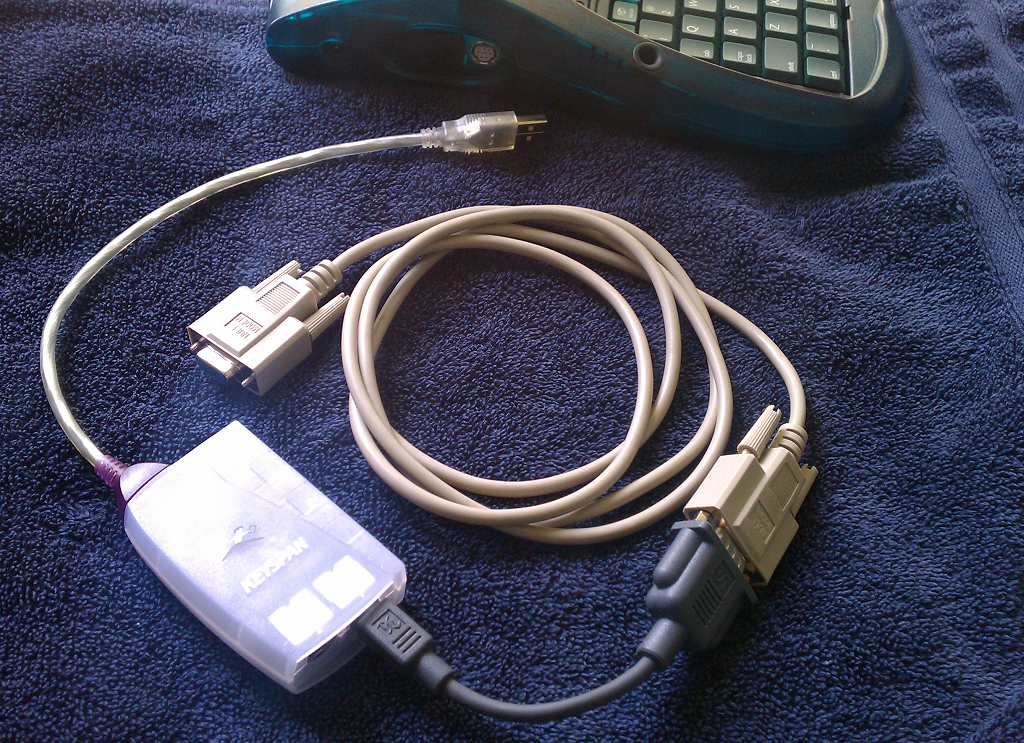 Keyspan adapter with Mini-DIN-8 adapter and null-modem RS232 cable |
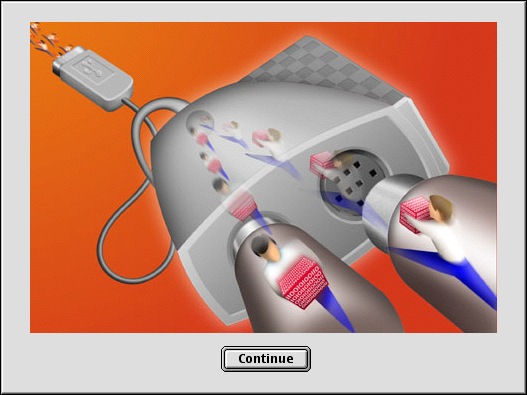 ... |
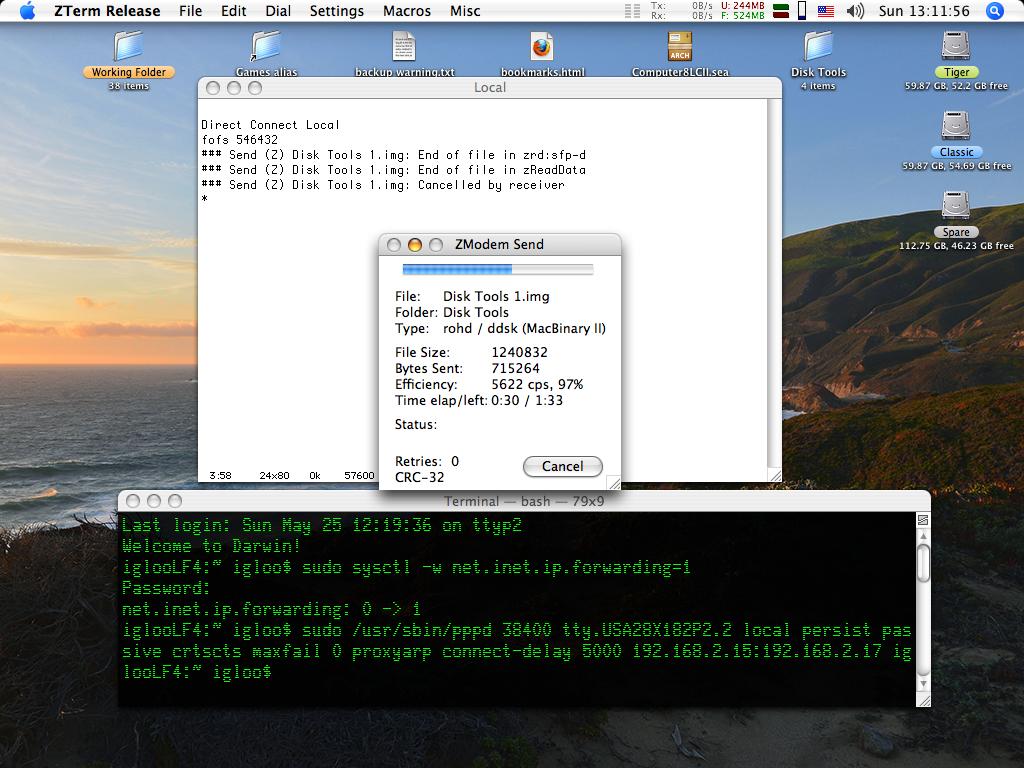 Using both ports simultaneously |
In Mac OS 9, the unit works fine enough. One port was called P#2USA28X11 and the other was named Printer Port USB in ZTerm: the latter wouldn't work with ZTerm and it's probably best to not use it. Under OS X, the ports are named /dev/tty.USA28X182P1.1 and /dev/tty.USA28X182P2.2 for a USA-28X model. /dev/tty.KeySerial1 is an alias which corresponds to /dev/tty.USA28X182P1.1 in version 2.1 and higher driver software. In Linux the device itself was registered without difficulty as /dev/ttyUSB0 and /dev/tty.USB1. Windows, on the other hand, simply lacks official driver support, although there is a webpage found with an easy Google search which claims to have drivers -- although it does look a little bit suspicious.
In regards to Mac OS 8.6 and 9, the USA-28 should be be fine with version 2.1 software, the USA-28X works with version 1.9, and the USA-28XG should only use version 2.1b4.
As for preference, it's not that hard to rig up a RS232 adapter cable if you have something like a Newton or eMate. As some RS232 adapters, like the one the author used come with TX and RX LEDs, plus there is a lot more RS232 hardware out there versus RS422, it would be better to choose the RS232 adapter if you are undecided on which one to get. Also Mini-DIN-8 cables have thinner pins than the ones used on DE-9 type ports and are prone to breakage, although it's probably advantageous that the cable be damaged rather than the native RS232 port on a PC box: but if that is a concern, then a slimline male to female adapter can always be used. Still, the Keyspan adapter has its place, if only a niche. RS422 does have some advantages over RS232, but for most applications, this difference is not significant enough versus using something like Ethernet or RS485 instead.
Software applications
Most Linux kernels have built-in support for USB -> RS232 adapters. The test FTDI-based adapter was already supported in the Ubuntu system so no drivers were required to be installed; PL2303 based units should be prebuilt into 2.4.31+ kernels: as most modern Linux distros have a 2.6+ kernel, that is usually not a concern. Debian based systems like Ubuntu are quite popular and there's usually no need to do anything out of the ordinary. Mac OS X and Windows systems will most likely need to install the drivers separately. There are some ancient versions of driver extensions for Mac OS 8/9 systems offered by FTDI and Prolific, but compatibility with modern chipsets may be sporadic.
HyperTerminal is a decent terminal application that is offered in Windows 95 all the way up to Windows XP. It is not included in Vista on up but it is available as a separate program; or download HyperTerminal 6.3, the last free version. There is a way to copy the program and relevant data files to a newer system. Another program is Le Putty which tacks on ZModem capabilities to the traditional SSH utility PuTTY. There are some newer terminal emulators around, you'll have to poke around to find out what they offer.
Classic Macs generally default to either MacTerminal or ZTerm 0.9, although there are 1.0.1 and 1.1b7 binaries as well. Although ZTerm 0.9 will run on a 512Ke, it could be on shaky ground in regards to memory. In OS X, ZTerm 1.2 is not exactly well-liked, but for the purposes here we're only using it for file transfers with the ZModem protocol. goSerial is an alternative but for some reason file transfers didn't work -- this is most likely because the lrzsz code is not installed by default. Which brings us neatly to the alternative for OS X -- installing lrzsz from source code and using it from the command line. But first the OS X port of the source code must be installed -- this requires Fink or MacPorts to be installed in the first place, and those porting applications only work for 10.4+ and most likely require Xcode to be installed...Homebrew also has lrzsz in its repository. For just a couple of file transfers, putting up with ZTerm 1.2 is probably preferable, however ZTerm starts to run out of steam when it comes to 64-bit Intel compatibility, because it is a PowerPC binary. Newer Macs from 10.7 Lion and above might have reasonable options from the Mac App Store. An example would be Serial, by Decisive Tactics, Inc.
Linux programs are limited, but are out there. For a Debian-based distro, the first task is to install lrzsz by using sudo apt-get install lrzsz, then run sudo apt-get install minicom to install a basic terminal-only shell program. A GUI alternative is cutecom, which is started from the command-line by simply typing (in a case of Ubuntu) cutecom, and it is also installed by running sudo apt-get install cutecom. For some obscure reason this program lacks the ability to receive files. Advanced users could experiment with the screen GNU utility which has an experimental ZModem feature.
Since file transfers via this method are under either Binary or ASCII, using an encoder like BinHex, uuencode or something in that class is a solid idea. See the section here for more information on this subject. In Mac OS X, inserting a serial adapter can generate a prompt dialog which basically asks if you'd like to set it up as a network interface, so it can be counted as a connection interface to the Internet, like as shown. For all the examples of the use of serial adapters in this Guide, this configuration is not necessary since it is meant for using PPP over serial ports, USB based broadband modems or USB WiFi bridges. As for PPP, most folks using that these days will be using PPPoE instead. |  Network interfaces (10.4) |
Usage
Both computers involved must have the serial communications parameters set to identical settings. Here is a general list of the critical parameters:
- Bitrate: This is the speed of the data stream, in bits per second. The usual rates are: 300, 600, 1200, 2400, 4800, 9600, 19200, 38400, 57600, and 115200bps. All Macs can handle a 19200bps bitrate minimum (they default to 9600 8N2 None internally), although if heavy CPU load is present, then there could be issues, or if other processes are competing for the serial port, like AppleTalk. The first limitation on "all out speed" is hardware: a typical RS232 serial port tops out at 115200bps. The second is that a compromise should be picked between minimizing error rates while still providing a respectable speed. This means that the fastest, most reliable speed should be chosen over "all out": if 38400bps works fine, yet 57600bps throws an occasional error and 115200bps is a mess, then pick 38400bps. Certain older hardware like a SE or Plus might have to settle for slower bitrates -- use ZTerm and watch the error count to see which one to pick. For those machines, try starting with 19200bps as the slower 68000 CPUs have a hard time with high data rates. Really slow machines like the Lisa with LisaTerminal could be forced to settle on 1200bps, which even then errors still come over the wires. (There should be absolutely no problem with 300bps... and MacTerminal 1.1 and 2.x can go down to 50bps. 110bps was used by mechanical teleprinters which ran at 5 bits per block.) Some terminal programs can be set higher than the standard 115200bps, like minicom, and some USB to RS232 adapters can handle a higher bitrate in the chipset, like the FTDI FT232RL can handle up to 2Mbps. This can mean that if two computers are linked with the same kind of RS232 adapter, they could use a higher bitrate.
If you're confused by "cps" versus "bps", "cps" refers to characters per second and "bps" means bits per second. ASCII character sets specify one character per byte, or 8 bits. Add any start, stop, or parity bits, and you're looking at 9 or 10 bits per character, so 230cps is roughly 2300bps. Baud versus bps are commonly misunderstood concepts: try reading this article, or a different one.
As far as top speed goes, Macs with 68030 processors should have no problem with 38400bps or even 57600bps if AppleTalk is turned off and no other programs are in the background. Later Macs with "I/O Serial" aka Input/Output Processor (IOP) or DMA (Direct Memory Access) serial ports instead of interrupt-driven serial ports can under favorable conditions go higher, like 115200bps. Apparently "I/O Serial" chipsets are used with the IIfx, Quadra 900 and Quadra 950; the DMA serial chipset is found on AV Macs like the 660AV and 840AV, all machines with functional Mini-DIN-9 GeoPorts and all Power Macintosh machines. Interrupt based Serial Communications Controllers (SCC) are found on most older machines, like the IIsi, SE/30, LC II, et cetera.
- Data bits, parity bits, and stop bits: The data bits are the actual encoded data, usually specified as 7 or 8 bits per "block". Usually 8 data bits are selected, although in rare cases it can be 7. Most configurations prefer no parity bits and one stop bit. As long as both systems are set up identically, there should be no issues. "8N1" is shorthand for 8 data bits, no parity bits and one stop bit, which is the most common configuration. If it's not mentioned, flow control is usually off.
- Flow control: This is control data for the hardware for internal regulation purposes.There are three kinds: None, XOn/XOff and Hardware. None is pretty clear on what that means, XOn/XOff is software flow control done by the respective CPUs and Hardware gets interesting. Generally this means, in the terminology of RS232 vernacular, CTS (Clear To Send) and RTS (Request To Send, these date back to the very early days of modems) handshaking. There are applications where other hardware lines like DTR or DSR are used, usually by RS232 modems. For the Macintosh 128K and 512K series, you'll have to use XOn/XOff because there is no HSKo (RTS in RS232 terms) for CTS/RTS handshaking. The remainder of Macs, assuming the terminal program or software permits it, along with a properly wired cable, should use CTS/RTS hardware handshaking because it will permit enhanced data rates and is essential in the higher bitrates like 57600bps and 115200bps. Most of the time, anything over 9600bps generally requires HSK for reliability purposes.
As mentioned earlier, both systems must be set identically or it will not work. The bitrates, data bits, parity bits, stop bits and flow control are the critical parameters for initial linking. A good starting configuration would be a bitrate of 19200bps, 8 data bits, no parity bits, one stop bit (often abbreviated as 8N1) and XOn/XOff. Try typing random keys on one computer's keyboard and look at the terminal screen of the other: if one types h on one end and gets something like J#c on the other, then either the wires are configured incorrectly or the terminals are set up wrong. Older Macs with both Printer and Modem ports should use the Modem port, although the Printer port can be used also. In the latter case AppleTalk will have to be turned off or set to another interface, else the port will not be permitted to open. Turning off AppleTalk in the same fashion should also enable the serial port and CPU to handle a higher bitrate. |  MacTerminal 1.1 with BinHex 4.0 input in the terminal (512Ke) |
Now we get to the software element, specifically the protocol:
- Text: This is also sometimes called "ASCII". What this means is that the terminal of Computer A will upload a raw ASCII text file directly into Computer B's terminal window. In the former days the terminal window would have text corresponding to some UNIX server, a BBS page, a telephone directory, or something like that. But unless the document is less than 80 characters wide then the new line feature must be enabled on the recipient end else the second incoming line of text will overwrite the first and the result will be a mess. The standard for many years was 80 characters wide and 24 characters tall.
The only practical use of this method for our purposes here is to send a BinHex 4.0 encoded file, or a raw SimpleText type ASCII file with MacTerminal 1.1 or any of the other really old terminal emulators which don't have XModem Text capabilities. Although you can send a BinHex 4.0 or other text file as Binary, it's not meant to work that way. Once Computer A has finished uploading the text file, Computer B will need to save the result to a plain text file: but before we go any farther, here are the critical settings to permit the proper use of this feature. This doesn't normally apply to users doing stuff such as pulling up a Lynx client using ZTerm .9 or other "normal uses" of a terminal:
- MacTerminal: In MacTerminal 1.1 through 2.3.1, make sure the "Record Lines Off Top" feature is enabled in the Commands menu. (If it is on, then the text will say "Don't record lines off top".) Then head to the Settings menu and choose "Terminal...". Turn on Auto Wraparound and New Line. Make sure there is enough disk space to handle the incoming file size. For MacTerminal 3.0, the "Save Lines Off Top" is enabled in the Session menu, and to turn on carriage return, the function is found in the Settings menu, then Terminal... and finally the Screen location on the left side which then reveals an option called "Auto Wrap to Next Line". Use the VT102 Tool for this stuff.
- ZTerm: The linefeed function is activated in the Settings menu, then Terminal..., then the option for "Auto Line Feed" is visible. Under the Edit menu, make sure there is a checkmark next to "Save Lines off Top". This program sends text files with no modifications whatsoever.
- HyperTerminal: When a connection has been made (after the bitrate and other low-level settings have been done), go to the File menu, then select Properties. Click the Settings tab, then the "ASCII Setup..." button. The newline feature is turned on with the "Append line feeds to incoming line ends" checkbox and the wrap around is the very bottom checkbox.
- minicom: Press Control + A, then W to turn lineWrap on or off.
Each terminal program will have a way of recording the incoming ASCII data. In HyperTerminal, this is done with the Capture Text feature, in ZTerm there is the Start Capture selection in the File menu, MacTerminal will simply save the contents of the terminal window to a text file by choosing Save As... from the File menu, and minicom starts its text capture method by saving the contents (much like logging events to file) with the Control+A, then L feature. This then prompts for a filename which is saved in the user's download directory. The normal name is called minicom.cap).
Now for a special mention about BinHex files. Although there are a number of programs that can do it, it doesn't mean that they'll do it properly. Officially, it's supposed to have just a Carriage Return (CR) after every line, which is the Macintosh way of indicating a new line. Historically, CR dates to the mechanical typewriter days, which means to bring the write head all the way to the leftmost position after each line, but remains on the same line. A Line Feed (LF) means to advance to the next line, such as from line 6 to line 7 on a piece of paper. Most of the time these days when someone types Return on a keyboard, it's doing a combination of the two.
But some programs will have Carriage Return and Line Feed (CR & LF) mode which makes the text look double-spaced; or they'll have it backwards, LF & CR, or just LF. The second case is tolerable but the first one can be decidedly unpleasant, because what happens is the terminal goes from column 1 to column 80 (on line 1), gets the carriage return, which pushes the cursor back to column 1, line 1 and then overwrites the line of text with new text instead of advancing to line 2, then line 3, 4 and so on. ZTerm sends text files with no changes, but MacTerminal 3.0 and Aladdin SITcomm can add a line feed if it is necessary through their respective control panels. Automatic wraparound will not help in this case because each line of a BinHex text file is 64 characters followed by a CR; the wraparound or line wrap just does an automatic CR+LF when the incoming text stream exceeds 80 characters.
The easiest way of dealing with this issue is to open the BinHex file in an advanced text editor. Notepad++ for Windows, TextWrangler for OS X, BBEdit Lite for classic Mac OS (because SimpleText can't open a file sized greater than 32KiB and isn't good at doing this) and *NIX can use something like vi, Emacs, awk, sed or tr through some fancy script lines the Internet can provide. In Notepad++, just click the Show All Characters button on the toolbar to see if there is a [CR][LF] after each line; if not, just select all text, go to the Edit menu, look for EOL Conversion and choose Windows Format. Save the file and it's ready to be shuffled over the serial line. In TextWrangler, when saving a file, change the "Line breaks" option in the save dialog to "Windows (CRLF)". This can be preset in Preferences, under Text Files, tick "Translate line breaks" and choose the Windows format. Also, the BinHex 4.0 program has an option in the File menu to add linefeeds -- this is highly recommended; one way to pipe a BinHex file to a remote system via a terminal is to open it first in an emulator, decode it, then re-encode it with the "Add linefeeds" option from the File menu. Also Stuffit Deluxe 4, which works under System 6, can add LFs to a BinHex encoded file.
All this fluff is because of the way terminals work: In Windows the default is CR+LF for all text documents, but Mac OS is just a CR, UNIX and UNIX derivatives (like BSD-based OS X) settle for a LF alone. Terminals use the first one, CR+LF to work properly. Don't rely on HyperTerminal's linefeed because it won't work right for this case: also sending BinHex files via XModem is a real good way to make things go haywire because Esc and control sequences get tossed around. minicom has a feature to add a linefeed but that's only for itself, as in, incoming text, not outgoing text.
- XModem: This should be supported by nearly all terminal emulators and programs. Because it doesn't send the filename along with the datastream, the receiving computer will have to provide a name for the incoming file. Very common for many years and is normal for binary files. In certain scenarios it can be faster than ZModem because it's a simpler protocol, although this mostly concerns out-of-standard bitrates above 230400bps.
- ZModem: The best one to use. It sends the filename with the file, so it doesn't have to be named by the recipient, can send multiple files sequentially, has more robust CRC and error checking, automatic receive, and supports crash recovery, but not fatal system crash or power failure. MacTerminal does not support ZModem so XModem will have to be used instead.
| 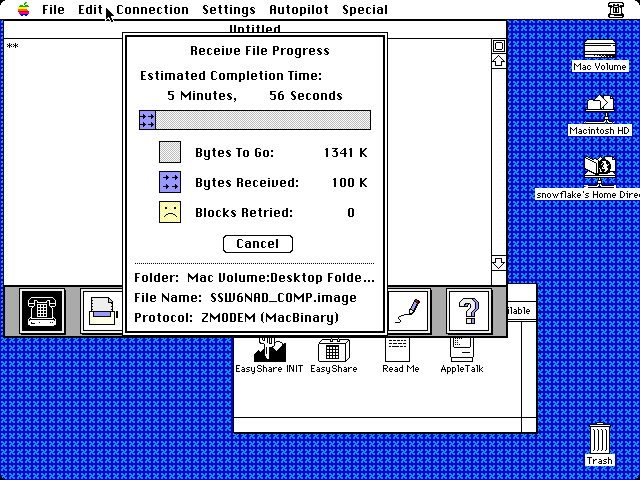 SmartCom II 3.3B receiving a file |
So in review, first hook the units up with a null modem cable, fire up the terminal program on each end, set the bitrate, the data bits, the stop bits, the parity bits, the flow control, choose the protocol in question, and then it's off to the high road. Let's have a look at how each terminal program does this.
HyperTerminal
From the Start Menu, point to Programs > Accessories > Communications > HyperTerminal. Then the terminal emulator will ask to create a new connection. Pick a name, an icon doesn't matter, then press OK. Ignore the modem dialing parameters and head straight to the "Connect using:" field, then pick either COM1 (first RS232 port, typically) or if equipped, the USB > RS232 adapter found at another COM port, usually COM3 or COM4, but can sometimes be COM5 (if it doesn't show up, then the driver is not installed). Then click OK to move on to the final settings dialog: set the bits per second, leave the data bits at 8, the parity at None, the stop bits at 1, and set the flow control. Finally click Ok to dismiss the prompt, then either click the little phone icon (third from the left, just to the right of the Open button) or from the Call menu, choose Call. The connection is now active on this side. In most cases the program will "call" automatically after the Ok button is pressed, but should these parameters need to be readjusted, you must first hang up, then go to the File menu, and choose Properties. When the configuration is done then Call must be executed once again. | 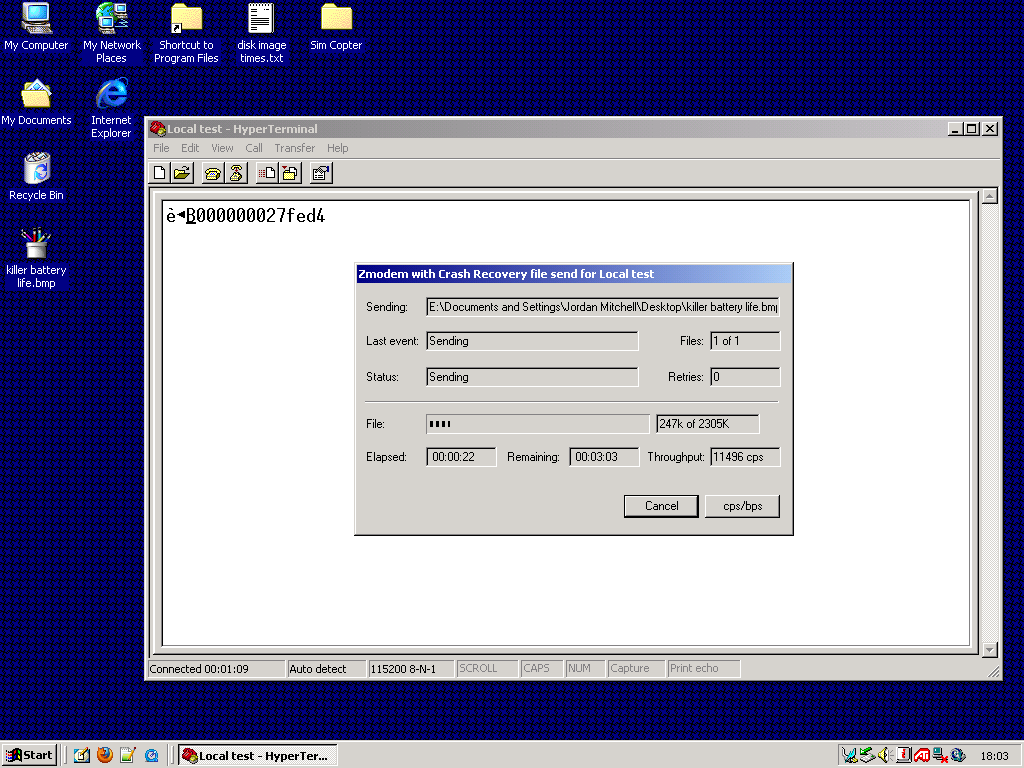 HyperTerminal in use (Win 2K Pro) |
Assuming the other side has been set up likewise, pressing random keys like f z k y p should show up on the other computer's terminal screen. (Instant messaging?) To send a file to the other computer, either click the Send button or choose "Send file..." from the Transfer menu, which will prompt for a file to send; use "Send Text File..." for ASCII text files like BinHex. But first make sure the other computer is ready to receive it by putting it in Receive mode -- don't rely on it to automatically put itself into Receive mode. The default method to send the file is ZModem with Crash Recovery and is fine as long as the client is using ZModem too. If not, then use XModem. To receive a file, choose "Receive file..." from the Transfer menu (or click the Receive button) which will bring up a prompt to choose the receive protocol, and the output directory for the file to be saved to.
If an error is returned indicating that the port cannot be opened, then either crank down the speed, make sure the correct COM port is selected, try disabling and re-enabling the COM port in the Device Manager, or make sure it's not in use by something else. COM ports cannot be shared by multiple programs at once in this case.
ZTerm
Download the program for the desired platform. ZTerm 0.9 can be found at other places, and was very widely circulated in old shareware places. Both OS X and the "classic" versions are identical in setup. ZTerm may be unstable in System versions earlier than 4.1 but did start up in System 3.3/Finder 5.4; use another program like MacTerminal 2.3 or earlier. Just once in awhile, ZTerm would bounce an error saying that the CTS signal is not active, and that it will now disable hardware HSK. Some Internet digging produced nothing concerning this error: a workaround is to go into Modem Preferences and change the serial port from Modem, to Printer, then back to Modem. This may not work so well if only one serial port is available: another workaround was found by simply opening Aladdin SITcomm (MacTerminal 3.0 can fit the bill too) and open a connection, then close and reopen ZTerm which probably "resets" the port. It could also be because it expects the other side to be active first, so set up the other computer first and get it active.
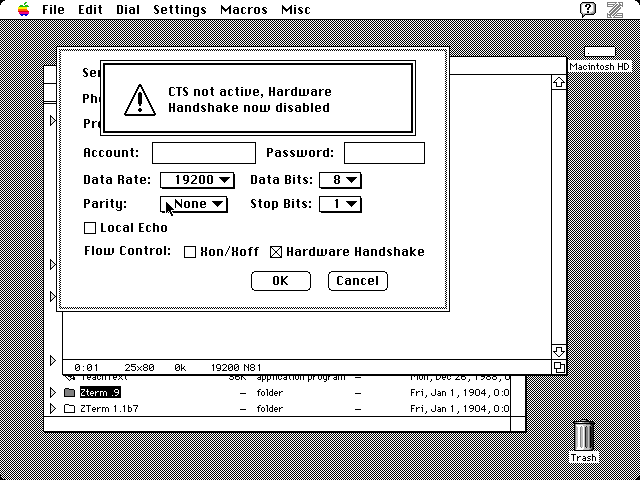
Start the program up and look to the Settings menu, then the "Connection..." entry, or press Command + E. For now, leave the phone number, pre-dialing init field, which used for dialing out of local phone nets, like *99 to dial outside lines, the account and password fields blank.
Set the data rate, then the data bits to 8, parity to None, the stop bits should already be 1, and the flow control as appropriate, then click OK. Local Echo just mirrors the key input onto the local terminal, as the remote would see it. Go back to the Settings menu and choose "Modem Preferences..." and change the serial port to the one in use by the Modem or Printer port, or the USB -> serial adapter. The Communications Toolbox in System 6 is not needed for this program to operate correctly, and reports have indicated a performance hit from using the Toolbox. Apple says the Communications Toolbox is built into System 7, and is also not needed. The last dialog box that might need adjustment is the "Transfer Options", set both the Send and Receive methods to ZModem, or as needed. From the Dial menu, choose the Local option. The connection is now active, at least on this side. |
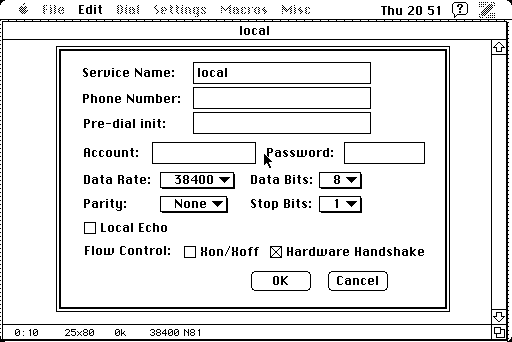 ZTerm .9 initial setup |
To receive a file, look to the File menu, and find the Receive Files selection, and choose ZModem. To send files, first make the other connection ready to receive it (use test characters to see if it is), then choose the "Send ZModem..." from the File menu or press Command + S. In the File menu, the Transfer Convert submenu has options for Smart MacBinary, Always MacBinary, Binary Data and Text. Choose the right one based on the case in question. Smart MacBinary will automatically encode incoming Macintosh type files into the MacBinary II format if it is needed, Always MacBinary will encode regardless of whether it needs it or not, Binary Data is for files with binary format or binary-only files like PackIt archives and files already encoded in MacBinary (though Smart MacBinary will avoid the case of double-encoding), and Text is for BinHex 4.0 files and other plain ASCII text documents. As with HyperTerminal, the connection can be checked by entering in characters from one computer and looking at the terminal screen of the other. |
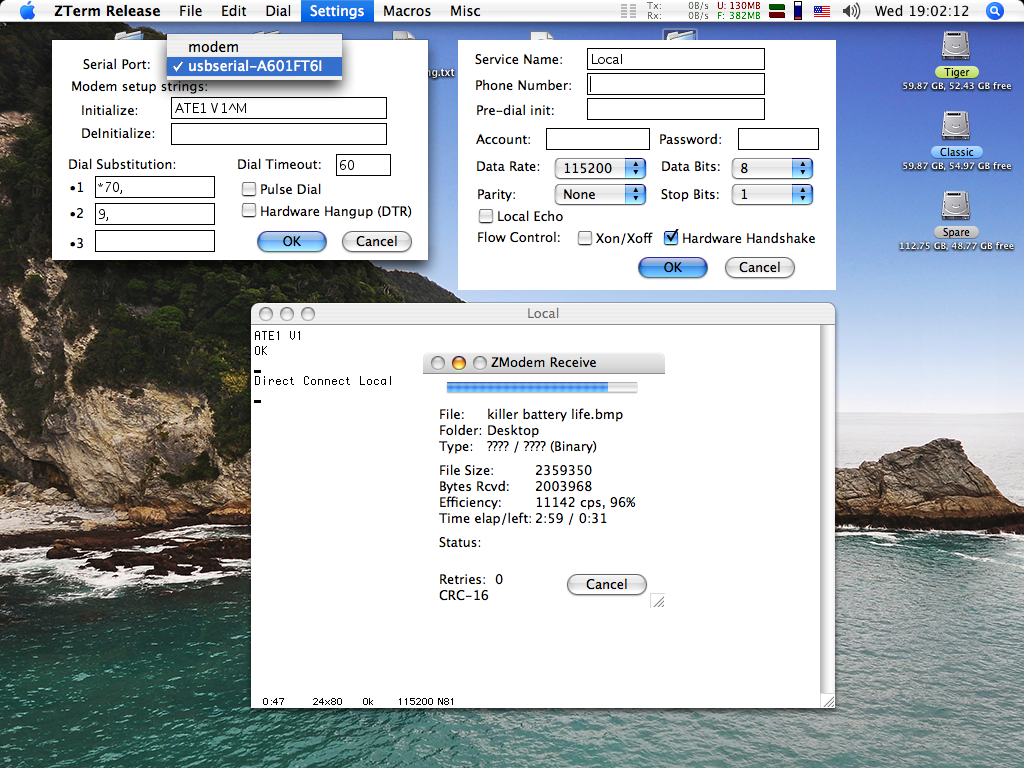 ZTerm 1.2 OS X (composite image) |
Make sure to avoid sending a file to a directory which already has a file of the same name: in a test case, both computers locked up.
Linux
Assuming minicom is the terminal of choice and any drivers required have been taken care of, run the following:
The active serial ports should be listed. Note the one that is desired for the program below: ttyS0 is usually equivalent to COM1 and so on. Let's get to work old-fashioned style.
From the Terminal program, type minicom -s to get started with a setup prompt. (In order for any settings to "stick" in the future, run sudo minicom -s instead to save the default profile file.) The "Filenames and Paths" entry should be highlighted: press Enter to edit it. Use the A B C et cetera keys to edit each field: set the upload and download directories to suit, or just use ~/ for both. The Esc key goes back after you're satisfied. Next, go to the Serial Port Setup, and change (if needed) the serial port: if just one USB > RS232 device is active (and as identified earlier with the dmesg command), then it probably is /dev/ttyUSB0. If needed, change the port speed with the prompt, using the A and B keys to go back and forth, so that it matches up with the desired bitrate. Match up the data bits, stop bits, parity bits and flow control as needed. Once the settings have been configured, choose "Exit" and the modem/hardware initialization process begins immediately. |
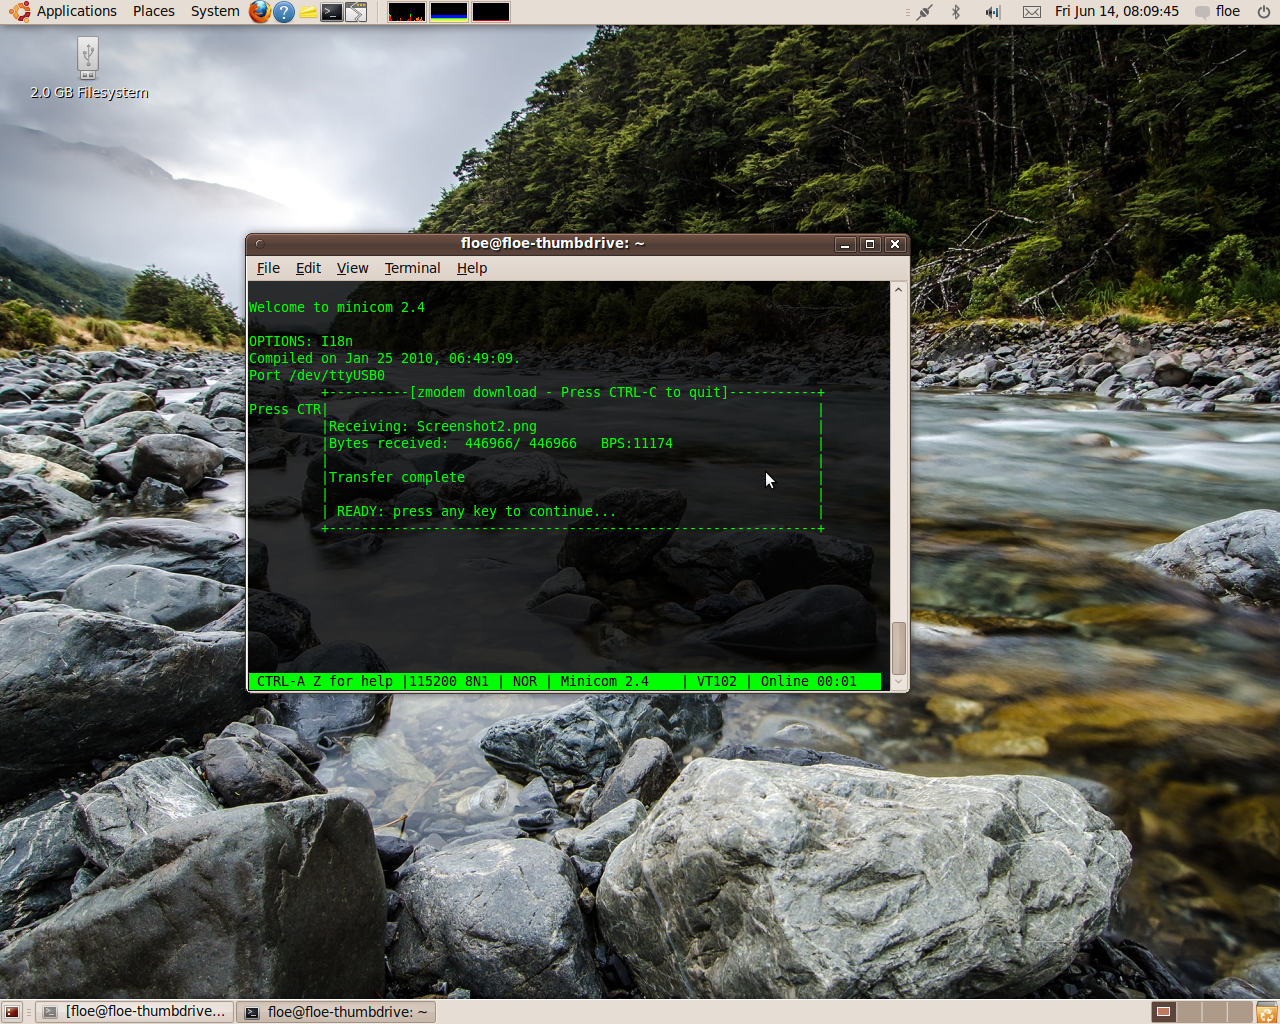 minicom receiving a file |
To bring up the semi-interactive window, press Control + A, then Z. From here, the S key starts the file sending (relates to the directory set earlier, but the Goto can change the directory): use the space bar to mark the files to send (only ZModem can send files sequentially); while the R key puts it in Receive mode. To navigate with the rather unintuitive and annoying directory changer, the [Goto] button is almost like the regular *NIX cd command except that it can only move up or down one directory at a time (or a full path, sort of); pay close attention to the directory contents since there is no feedback to indicate a bad directory. The [Prev] button is basically like the usual cd .. command. Try to place files in easy to navigate locations, like ~/Desktop/temp rather than some buried location somewhere which is difficult to navigate to. Use the up and down arrow keys to scroll up or down, the left and right arrow keys move the cursor around to select buttons and Space bar to mark files. Before sending a file make sure the other computer is in Receive mode. The ZModem file transfer will transfer binary files: select ASCII from the Send mode to send BinHex type text files and other plain text documents into the other computer's terminal window.
Minicom is a great throw-back to the olden days but it's not something that is exactly easy to use right off the bat and the directory navigator is rubbish. The best way to learn how to use it is to use it -- after enough tomfoolery, the lightbulbs will go off. Otherwise, to send files only, use cutecom, which is run straight off the Terminal with $ cutecom. This is much easier to use but testing (and Google searches) failed to indicate why Receive mode simply doesn't exist.
As usual, there's always another way. Here's how to set up stty to 9600, 8N1 with a local connection and send a BinHex 4.0 file through the wires, assuming the use of a built-in serial port, change as needed:
If stty has been set to something else prior, use stty -F /dev/ttyS0 sane first to set it to the defaults. It is prudent to make sure the BinHex file has CR+LF line endings. The other terminal will have to set likewise otherwise there will be nothing but a solid stream of gibberish: or change the stty command to different parameters to match the desired setup. clocal disables modem control lines like DCD aka Data Carrier Detect. Some systems require this for direct serial connections, like as used here. Example for 57600 8N1 Hardware HSK using a USB adapter:
By the way, this doesn't work with Mac OS X and nobody knows why. Scroll down to the Serial Console section for an example of how to do the same thing in OS X.
MacTerminal
Generally speaking, ZTerm is a better overall terminal app to use, but MacTerminal can do okay. There are a number of differences between them.
The first is MacTerminal 1.1. This comes on a 400KiB MFS disk with System 1.1, Finder 1.1g (System Software 0.1) and was meant for the 128K and 512K: it won't work right with System 6 so the highest OS for it is System 5.1, which would be better off with MacTerminal 2.2. MacTerminal does not support ZModem -- use XModem instead. If you don't like either of those terminal applications, then the old umich.edu archives may be of interest. Red Ryder is interesting because it has little buttons for Control+C, Control+S and Control+Q, so that's good for the 128K and 512K boxes. It is however, limited to 9600bps...White Knight was its successor, both written by Scott Watson with the latter meant more for BBS use. Not related to Black Night but were both popular.
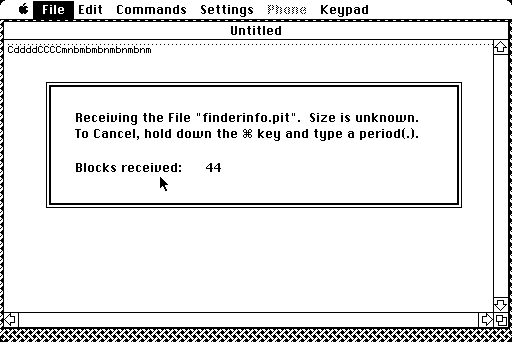 MacTerminal 1.1 receiving over XModem MT 2.2 and 2.3.1 look the same |
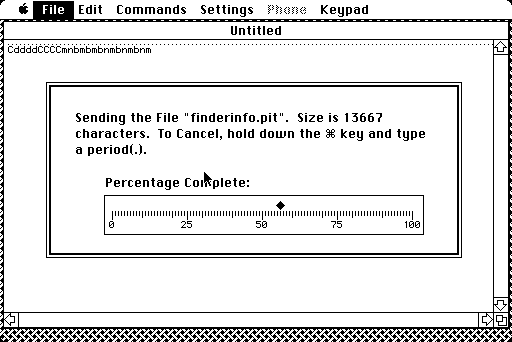 MacTerminal 1.1 using XModem |
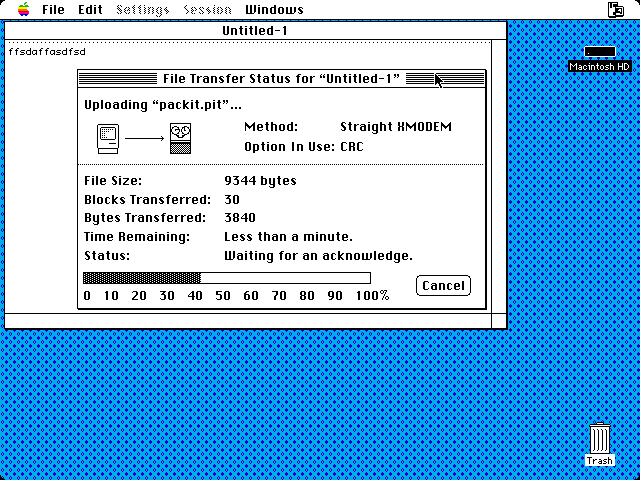 MacTerminal 3.0 |
Then came the MacTerminal 2.x series. Apparently it was retailed at US $125, but most people seemed to be more interested in third-party terminal emulators. Apple says that 2.0 and 2.1 have some incompatibilities with System 4.1, Finder 5.5 (also known as System Software 2.01) but MacTerminal 2.2 should be fine. MacTerminal 2.3 won't run on a 128K because of the memory crunch and MacTerminal 3.0 requires at least System 6.0.4, a Macintosh Plus or higher, at least two floppy disk drives, and 1MiB or more of RAM, according to a old comp.sys.mac.comm USENET posting. 2MiB is better -- considering that 1MiB 30-pin SIMMs are so cheap these days, 4MiB is the way to go for a Mac Plus or higher. Under System 6, the Communications Toolbox will have to be installed. MacTerminal does not feature CTS/RTS handshaking until MacTerminal 3.0, so XOn/XOff will have to be used instead.
Let's start with MacTerminal 1.1. This goes a lot easier if a second FDD is installed, or better, a hard drive. The program itself is easy enough to use without considerable difficulties other than its inherent limitations. From the Settings menu, choose Compatibility. Set the bit rate to the max, which is 19200bps, the data bits should be defaulted to 8, no parity bits and one stop bit. Turn on XOn/Xoff handshaking, set the connection to "Another computer" and finally select the port that you're using for this activity, which ought to be the Modem port. Next, go to the Settings menu again and choose File Transfer. From here, there are only two choices: Text is for dumping ASCII text files into the other computer's terminal window for the other computer to save to a text file and then there's XModem. On the other computer, set to identical bitrate and handshaking details, and for receiving files, choose XModem. Because XModem doesn't send the filename along with the datastream, it will have to be manually entered on the receiving end. Only ZModem has automatic receiving mode so the recipient will have to first put the computer into Receive mode. MacTerminal 1.1 does not work with the Control or Esc key on ADB keyboards, and it was not made with arrow key support in mind, either. MacTerminal 2.2 is necessary for that. Using a Macintosh Plus keyboard with an older 128K or 512K series machine is a good idea. Users who wish to use MacTerminal 1.1 for extended intervals should find these hacks to be insightful. The only other key sequences regarding MacTerminal 1.1 was found here and in case of future changes, they have been preserved below. It was noted that Command + . (period) stopped file transfers and text uploads.
The only way for MacTerminal 1.1 to receive a BinHex file is for the other computer to send it as an ASCII text file. Review the notes on this procedure further up. As MacTerminal 1.1 will usually be used on the really old 128K and 512K series of Macs, it's probably better to use PackIt encoding which is just a binary file which will work better because it can be easily sent around with XModem. A second floppy drive is a necessity when working with MacTerminal 1.1 without a hard drive. Configuring the whole set up and saving the profile can help speed things up in the future: and copying the session document to another volume, then starting up MacTerminal by opening the session document registers the other volume as the default for saving data. 512K and 512Ke Macs really benefit from 800KiB MFS disks in this practice. |
Special MacTerminal keys:
|
By the way, the proper way to shut down the computer in pre-System 2.0 Systems is to close all programs, eject all disks (use the Eject command from the File menu or Command + E) and then just flip the switch on the back of the unit. It wasn't until System 2.0 that the Shut Down command was added to do all this automatically. Restart was added later in System 4.0.
MacTerminal 2.2 and 2.3.1 follow the exact same configuration details, the only practical difference for our purposes here is the addition of the MacBinary, XModem Text and MacTerminal 1.1 modes. MacBinary will auto-encode Macintosh files, XModem Text is for sending BinHex and other ASCII files through XModem and MacTerminal 1.1 is for fiddling with MacTerminal 1.1 clients. There could be some technical advantages to setting MacTerminal 1.1 mode between two computers running MacTerminal 1.1 but the manual is lacking so it's probably better to stick to straight conventional XModem. Sometimes XModem won't start the file transfer process right away so just be patient.
MacTerminal 3.0 upends everything and is drastically different than all the other terminal emulators here, and the advantages are: a bitrate of 38400 and 57600bps; CTS/RTS handshaking; and some "Tools" can be useful (like the Aladdin ZModem Tool) but otherwise they're a waste of time. For starters, System 6 will need the Communications Toolbox to be installed, then all the "Tools" (Serial Tool, VT320 Tool, XModem Tool, ...) will have to be dumped into a folder called "Communications Folder" which goes in the System Folder. In System 7, just toss all those "Tools" into the Extensions folder. Simply copy the contents of the MacTerminal disk to the desired destination to "install" it.
Now, once the program is open, go to the Settings menu and choose Connection. Select "Serial Tool" from the very first drop-down menu. Set the bitrate as per the prescription, and the same goes for the data bits, parity bits, stop bits and flow control. Although the selection "DTR & CTS" implies a modem, it does translate to RS232 vernacular as "RTS & CTS". (See the manual which has been uploaded here in the Download Town, page 288 of 436. Also, this link should help clear things up.) Select the port to use, then click OK and choose "Open Connection" from the Session menu, and it is now active.
To send a file via XModem, the Settings menu has a preferences dialog for the File Transfer settings. The first drop-down menu has options for either Text Tool or XModem Tool, by default. Use the Text Tool to send a plain ASCII text file into another computer's terminal window, like a BinHex 4.0 document or some other standard .txt file, and the XModem Tool for everything else Binary in nature. The XModem Tool has two principle methods of usefulness here, selected in the Method area: the MacBinary for automatic MacBinary management and Straight XModem for files already encoded in Binary or other plain binary files like Stuffit .sit archives and PackIt archives. The XModem Text is for sending ASCII text files inside the XModem protocol: but first test it to make sure the recipient can understand it because XModem is usually presumed to be Binary only. Finally, sending and receiving files is conducted from the appropriate selection in the Session menu.
Addendum
As to whether MacTerminal is any better than ZTerm, the author would like to answer with ... No. ZTerm doesn't need the Communications Toolbox,
is easier to use, has obvious benefits with ZModem and can also go up to 57600bps. It also takes up less space on disk, as the addition of the Communications Tools tacks on another 621KiB on disk for MacTerminal 3.0. Although it is possible to install Aladdin SITcomm (Macintosh Garden has it), which looks a lot like a modified version of MacTerminal 3.0, with bonus features like a ZModem Tool and a built-in encoding/decoding module (just like what someone might find inside Stuffit Deluxe 4) and a few other enhancements. Then it is simple to extract the Aladdin ZModem Tool and plop it into a MacTerminal 3.0 folder and it will work, even if it is unstable; but it's even easier to just use ZTerm - and ZTerm only eats up roughly 200KiB on disk versus a full install of SITcomm which is 2445KiB according to the installer. Even ZTerm 1.1b7 is only about 330KiB for the stuff it needs to work, and that can hit 230400bps. (By the way, the serial for the SITcomm software is in the format of SN ##### where # can be any numeric digit.) | 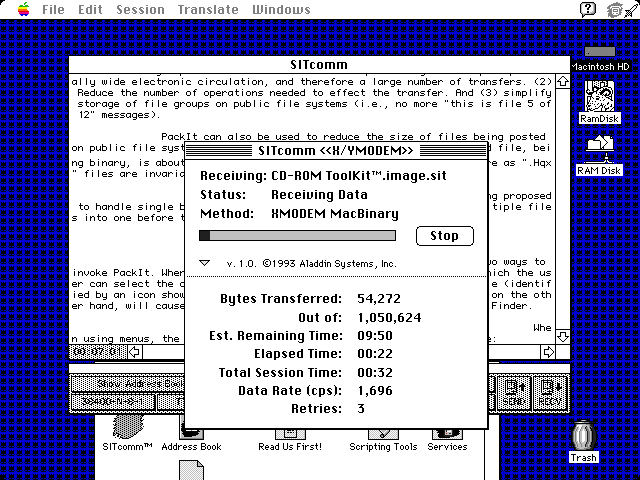 Aladdin SITcomm using XModem |
Another interesting, lightweight serial file transfer tool is Tiny Transfer by David Cook, available from the 68kmla.org forums. Although it doesn't support hardware handshaking, it is lightweight (around 60KiB on disk) and is designed to work all the way back to the earliest 128K with System 0.97 up to the most recent Mac OS 9 boxes. It supports XModem and ASCII (used for BinHex) file transfers and was designed for emulator compatibility. Since chicken-and-egg problems are a possibility with older machines and newer machines, an emulator to provide an AFP connection to slip software through could be very valuable, and all Macs except the 128K should be able to take advantage of that.
Black Night is a terminal emulator that came out around 1995 and has some interesting features. It supports XModem, YModem, ZModem, and a special Telnet extension. Apparently the Telnet extension is tricky to get right, but it is recommended by the host of the Captain's Quarters BBS service which offers a Telnet emulation of an old school BBS. Black Night is available from the Macintosh Garden in both original and the Captain's Quarters variant which has the Telnet extension.
Pseudo PPP Dialup
The first idea and motivation for this section came from this thread which describes a deceptively simple operation to create a fake PPP dialup
network which is routed through an Ethernet network. Actually it isn't that difficult, but whether it works or not is another matter. For a start, testing in 10.5 didn't work, but 10.4 did (which was probably what the previous poster used). In Ubuntu, 9.10 "karmic" worked fine after a little diagnosis, but 10.04LTS "lucid" did not. For this section, the technique will be presented and demonstrated regardless, as if it works, can be kind of useful -- and slow. Not all Linux distros may be compatible but it may be worth a shot: there may be oddities related to the distro in use (like Mandrake) but such matters are outside the scope of this section. Both Ethernet wired and WiFi protocols are acceptable for the host to forward to the PPP peer. The first requirement is a computer with a regular RS232 port or USB -> RS232 adapter as discussed earlier in the previous section, plus the Mini-DIN-8 to RS232 adapter cable. Any drivers required for the adapter should be installed prior to further steps in this section. Because this setup requires MacTCP for it to function correctly, it will not work any system software version earlier than System 6. | 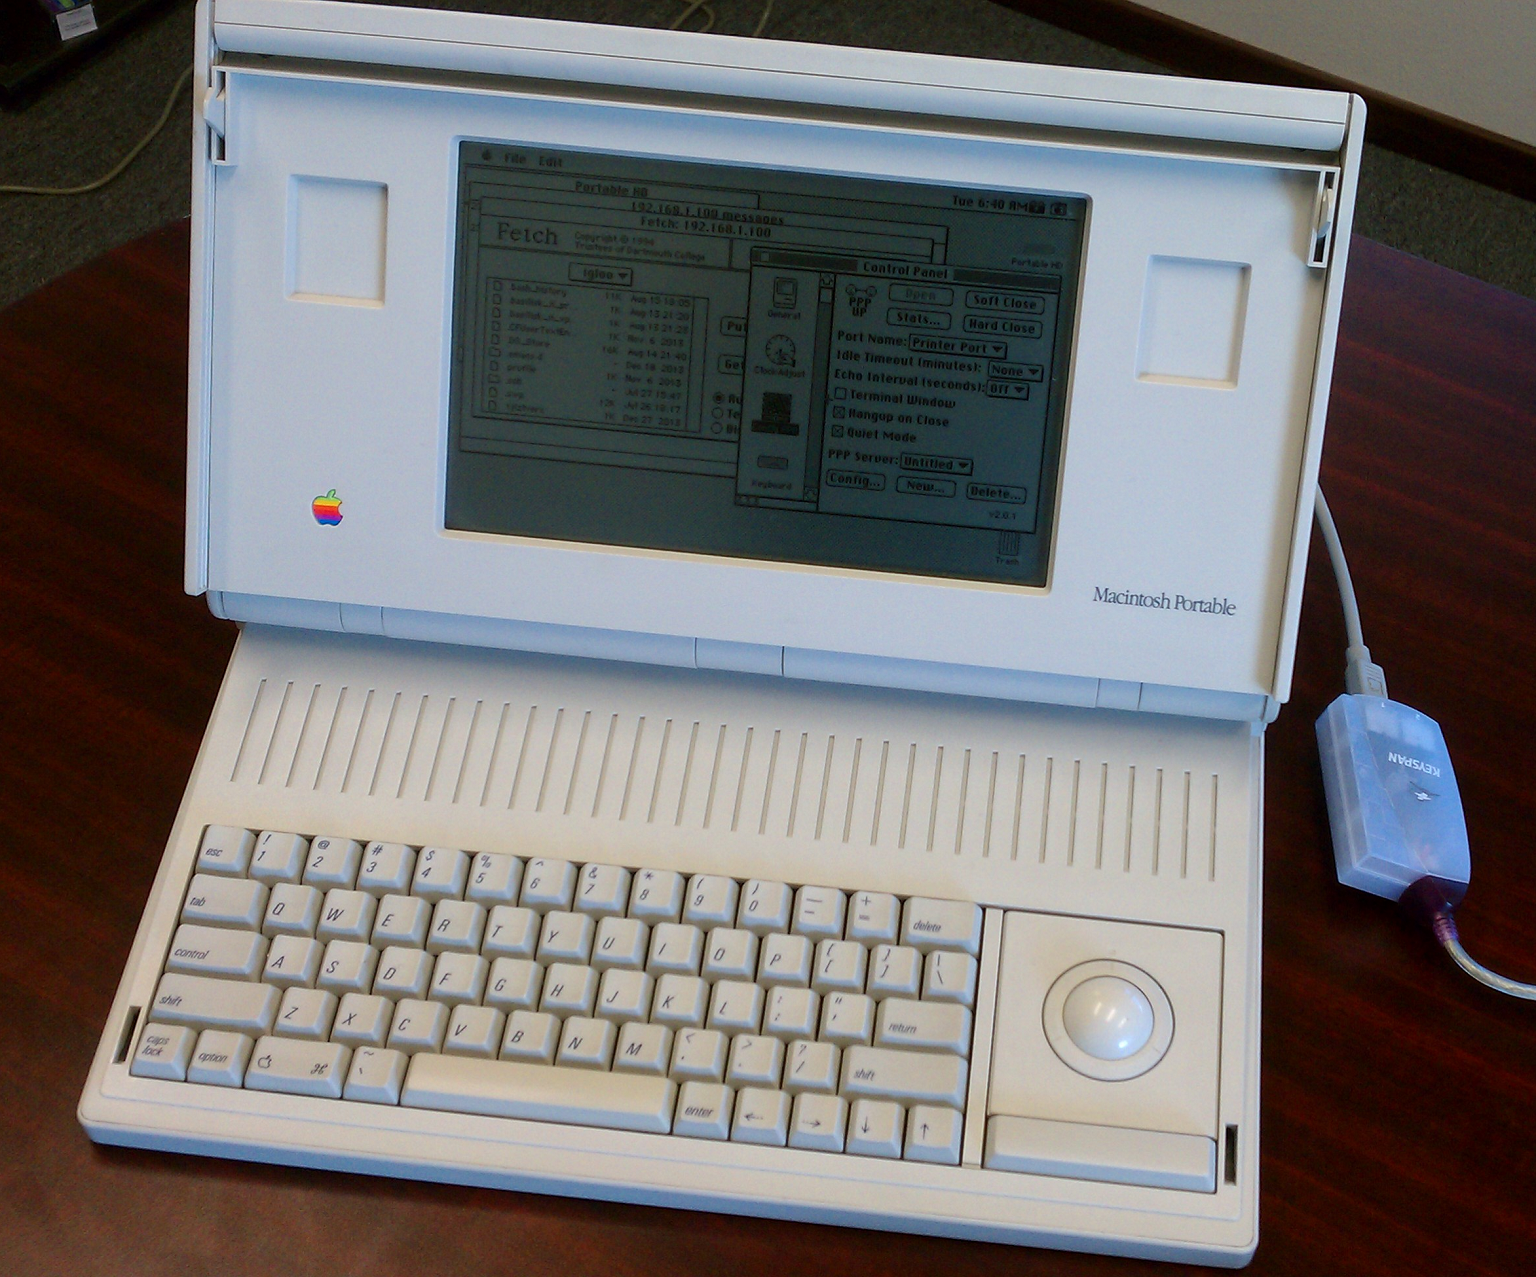 A Macintosh Portable (M5120) using pseudo-PPP dialup and FTP |
Server configuration
The server must be configured and ready to go before the client (peer) can connect to it. It is possible to delay the pppd command until just before the client is set up, if need be. There could be a way to make this whole shebang work with Microsoft Windows or other systems but such avenues will not be explored at this time. Begin by preparing the host computer with an Ethernet connection to the Internet (preferable) or wireless: suitable instructions for doing this have been explained in previous sections. The pppd daemon will automatically determine the proper interface (wireless or wired) to use; and monitoring the system log for hiccups is a solid idea: for OS X, the command tail -f /var/log/system.log will show the last ten entries and update with any new entries; for Linux, try using tail -f /var/log/messages.
Mac OS X
For Mac OS X, open Terminal and type the following to enable IP forwarding: sudo sysctl -w net.inet.ip.forwarding=1
Now we have to identify what the exact name of the serial port to use for this operation: ls /dev/tty.*
| 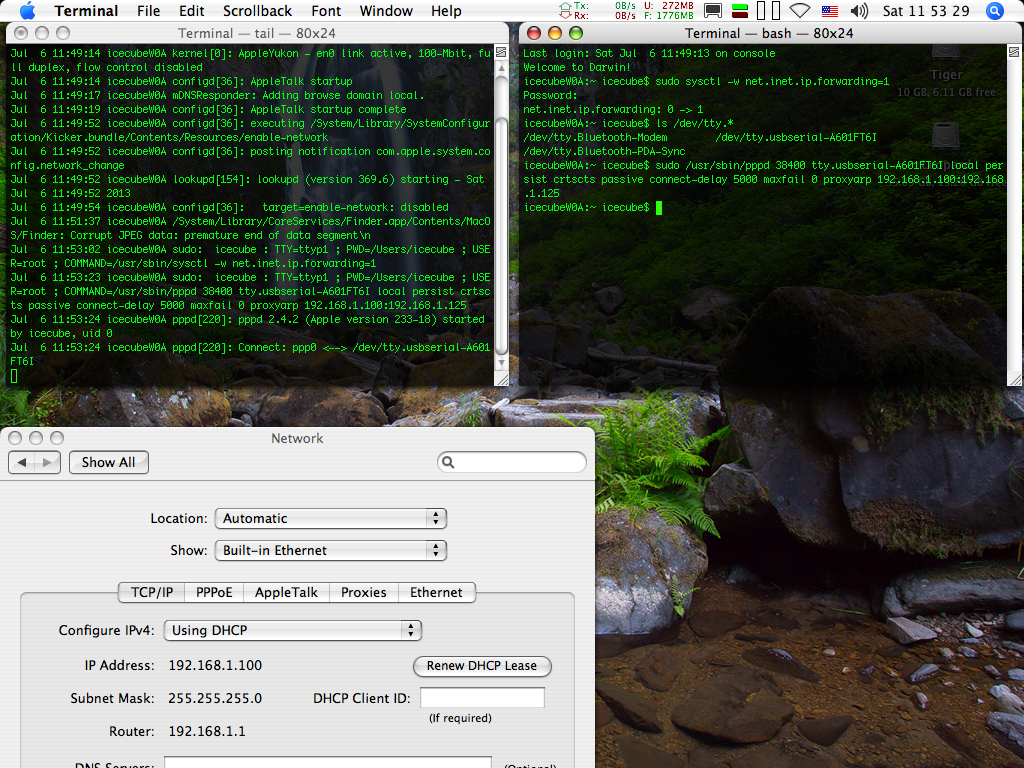 Mac OS X 10.4 procedure |
Most Macs that will be using this connection method will be using USB to RS232 adapters. If you use a Keyspan RS422 Mini-DIN-8 adapter, then look for tty.KeySerial1, or try using either the tty.USA28X191P1.1 or tty.USA28X191P2.2 devices: the first two correspond to the #1 serial port and the latter is in respect to the #2 serial port. The author's FTDI USB adapter was mapped to tty.usbserial-A601FT6I, so the next command may have to be changed to suit the circumstances:
Here's a breakdown of the commands: sudo allows temporary root user permissions for the command; pppd is the name of the PPP daemon responsible for this task; 38400 is the bitrate for this protocol piping, using standard serial speeds; tty.usbserial-A601FT6I is the name of the serial port; local makes the daemon skip the modem control lines (ignores Carrier Detect and fixes the state of the DTR signal); persist if the connection is terminated, try to reopen it; passive if the client is not there, wait until it receives an LCP packet instead of just dropping out; crtscts use hardware CTS and RTS flow control; maxfail 0 means there is no limit to the maximum connection failures; proxyarp tells the daemon to map the client to make it look like it's on the local Ethernet network; connect-delay 5000 this tells the daemon to wait five seconds before listening to a return LCP packet; 192.168.1.100 is an example of the internal IP address of the host machine and 192.168.1.125 is the desired internal IP address of the client (classic Mac, also known as the peer). Because MacTCP will be set up in the Server mode (and OT/PPP can be set likewise) then simply set the peer IP address to an IP address with the same subnet (in this example, it is 1) along with a proper node.
Use ifconfig from the command line to locate the internal IP address to use for the first set of IP addresses; the last set can be set to suit with a proper matching subnet as the host.
In testing, Mac OS X 10.4 worked fine without the connect-delay 5000 tag. Users who use this method full-time can experiment with the 5 second delay to reduce it if need be: it's a signal to the PPP daemon to wait five seconds before reading the return LCP packet(s) used to initiate the connection because the newer machine can negotiate a whole lot quicker than the older box. 38400bps was used on a LC II which was the testbed for this section, higher bitrates can also be explored but there is an increased risk of errors which will mandate the computers to resend packets. Use sudo killall pppd to terminate the daemon.
Linux
Linux uses a slightly different method (may have to change gedit to the text editor in use):
|
sudo gedit /etc/sysctl.conf
There is a little # which has commented out (programmer-ese meaning not used) the line in front of the net.ipv4.ip_forward=1 line. Remove the pound sign, then save changes and close the document. This change is persistent through reboots: using sudo sysctl -w net.ipv4.ip_foward=1 in a command line is temporary. Next, we have to identify the appropriate serial port: dmesg | grep tty
| 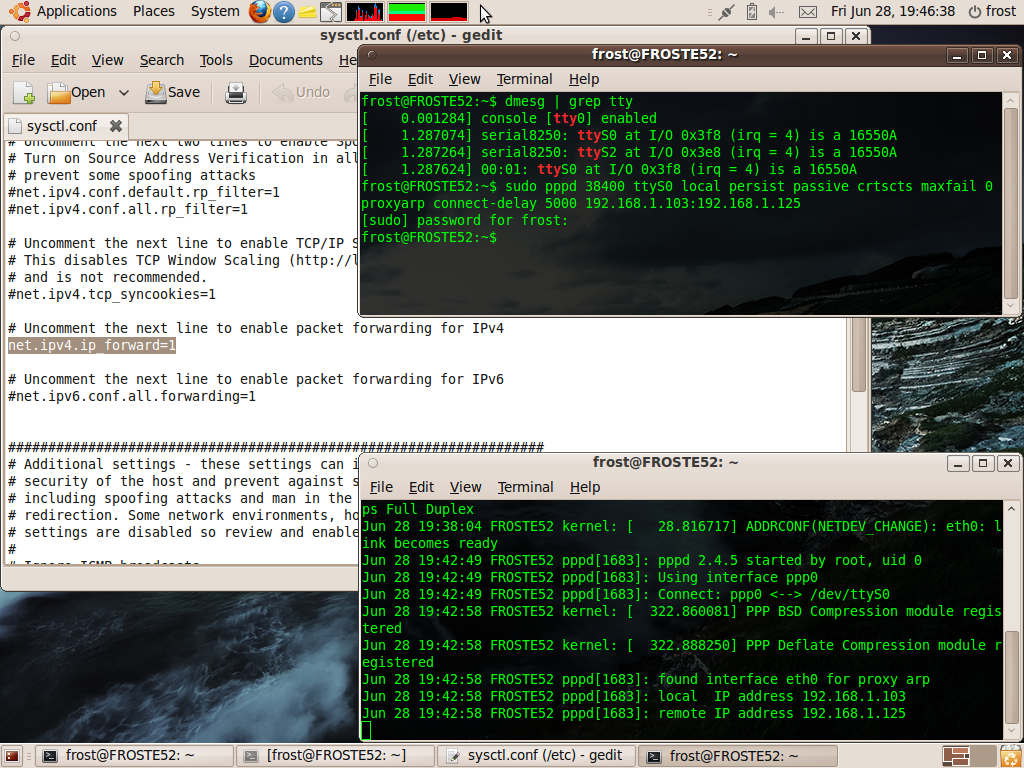 Ubuntu 9.10 complete operation |
This last command is to identify where the RS232 port, or USB to RS232 adapter is located as indicated by the software. Typically it is /dev/ttyS0 for machines with built-in RS232 ports, equivalent to COM1 in Windows. A Keyspan RS422 adapter was listed as ttyUSB0 and ttyUSB1 on our test machine -- make sure to verify on your own computer.
Now, enter in the following command to begin the process, changing ttyS0 to the appropriate port identified earlier and the bitrate 38400 as desired (but start with 38400, slower machines like a Plus might have to use 19200), and changing the IP addresses as necessary: for Linux (Debian based distros, other variants may differ) the /sbin/ifconfig command from a command prompt and look for the en0, en1, eth0 or eth1 interface will show the proper internal IP address, as appropriate:
Classic Mac setup
For Macs with 7.5.x or higher, FreePPP is based on MacPPP 2.2.1, and can be used in place of it, it also has an allocation for Open Transport/PPP. Later Mac OSs with Remote Access software have this built-in, and also have a rather unique feature called AppleTalk over PPP. Otherwise, use MacPPP 2.0.1; the remainder of this section will default to MacPPP. There are other versions of MacPPP, like 2.1.1SD which have a number of minor changes here and there but is otherwise pretty much the same thing. (2.1.1cm4 is rather elusive...) MacPPP 2.5 requires 7.1 or later.
In System 6, MacPPP is pretty much a no-frills CDEV which works fine. Copy the Config PPP cdev and the PPP init into the System Folder and reboot. Using MacTCP 2.1 is preferable if possible. Open the Control Panel, choose MacTCP, then select the PPP mode. Click the "More..." button and change the type to "Server". Select the Class to C in MacTCP 2.0.6, MacTCP 2.1 does not have this setting. Fill in the DNS fields as appropriate, mirroring that of the host computer -- it is pretty much identical to the MacTCP configuration as shown earlier in the TCP/UDP Networks section. Earlier systems like System 5.1 will not work because MacPPP requires MacTCP, which only works in System 6.0.5 up to 7.5.5.
Open the Config PPP panel, and from the main window choose the port you'd like, and then click the "Config..." button. Set the bitrate to the desired rate, set the flow control to "CTS & RTS (DTR)", then close the window. Click the "Open" button to initiate the connection. Later "versions" of MacPPP like 2.1.1SD had updated the bitrates to include 115200bps and 230400bps, but this usually required machines with "fast serial ports" -- usually machines with 68040 or PPC CPUs. System 7 is fairly close as far as the procedures go. The MacPPP control panel goes in the Control Panels folder and the PPP extension goes in the Extensions folder. Reboot, then open the MacTCP control panel. Select the | 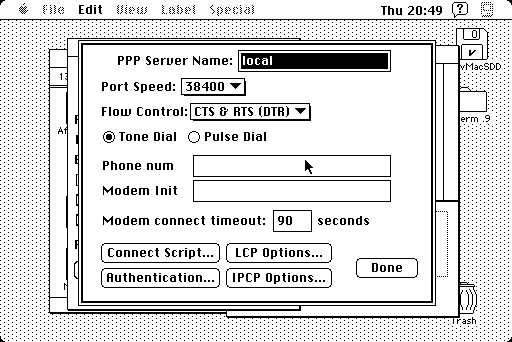 MacPPP 2.0.1 config prompt |
PPP icon, then click the "More..." button and change the type to Server, if MacTCP 2.0.6 is used, then change the Class to "C", then fill in the DNS info. Close the window and open the Config PPP cdev, and repeat the instructions in the previous paragraph. When the connection is open, use the "Stats..." button to check that the IP address fields of the local and remote computers have been properly established.
Before we move on there are a couple of quirks to point out about MacPPP. If the boot folder is not in the root directory of the startup volume (i.e. located in /MacHDD/Documents/System Folder/ versus /MacHDD/System Folder as usual) then it will either not work right (System 7) or toss an error saying it can't find the preferences file (System 6): it doesn't like boot folders that are not named "System Folder". In System 7, it has a terrible bug relating to the memory, tossing up an error saying that it doesn't have enough memory to run. The way around this is reboot with the MacTCP choice set to some selection other than PPP, then turn on PPP after the reboot so it won't have a chance to complain. In System 7, MacPPP doesn't seem to redraw the "connection active" area of the window so putting another window in front of it and then bringing the MacPPP window back to the front should force it to redraw it. During the connection establishment phase, the connection should not take longer than a second or two -- if it does, there's a problem somewhere. |  Mosaic 2.0.1 via pseudo PPP with no keyboard |
The client computer should now be able to access local FTP servers, remote WWW servers, and so forth as if it was on a regular modem connection or slower Ethernet interface. Try to use "Soft Close" for terminating the connection.
Serial Line Internet Protocol
SLIP was the predecessor to Point to Point Protocol (PPP) and it is very simplistic, suitable for use on microcontrollers these days but was not unusual back the early 1990s to be found on a personal computer. Even PLIP was possible, but probably not as common as SLIP was. Because this protocol will apply in particular to the 512K and 512Ke only, it will be somewhat shorter than some of the other sections. The Mac Plus should use PPP instead.
MacSLIP, which was commercial software, was popular in the old days. It wasn't very well preserved though, with an entry for it showing up on Macintosh Garden in 2022 and there is nothing on MacGUI for it. The Eagle's Nest BBS dump CD collection should have it on Disc 7. Anyways, this section will focus on NCSA Telnet 2.5, which has a connection option for SLIP, and InterSLIP. MacTCP is required for all cases here: MacPPP or other PPP software must be removed first because they will conflict with each other.
InterSLIP is really very easy to use. The installer comes with some help documentation that explains in clear terms how to get it started and out the door. A SLIP server element will be required: generally speaking, this means a newer computer will fill this role. Because it requires MacTCP, it stands a good chance of not working out nicely with a 512Ke, definitely won't work on a 512K, but is best left to higher systems. By the way, there is a posting on old USENET doesn't which says that hardware HSK doesn't work with InterSLIP. It won't matter for the 512Ke because hardware HSK wasn't possible until the Mac Plus.
The only other program that will be mentioned here is NCSA Telnet 2.5. It has a built-in SLIP mode which was promptly removed in 2.6 and 2.7. This mode, once all configured and all the nerdy details worked out, does allow for a FTP server to be established. Because it requires familiarity with a *NIX based system, it is not recommended for the common man to use.
Serial Console
The basic premise of this method is just like a Telnet session but over a serial port. Most Linux machines, if they are using GRUB (GRand Unified Bootloader) can have an option to provide a shell prompt right away, piped over the serial port. Mac OS X can do this as well, although that procedure tends to incline strongly towards advanced users. Certain Windows Server versions can perform a similar operation from the Emergency Management Services module. Otherwise third-party programs will have to fill in the void, because Windows doesn't have a command line backend like *NIX systems do. So this section will default to OS X and Linux; and the client can be nearly anything that has support for VT100, so as far as old Macs go, a 128K can do just fine, aside from the keyboard issues.
In each example below, there are ways of increasing the bitrate and turning on hardware handshaking. For the Macs that will use this interface, particularly for file transfer purposes, doing so is a good idea. Otherwise, 19200bps is fine for all cases.
One method of switching an unused Linux box into overdrive is to procure access to two serial ports on the same machine. Make one serial port dedicated to a serial console, and the other as a pseudo-PPP dialup port. In this fashion, conventional Internet access is possible with Fetch, IRC or a web browser, yet simply calling up a terminal program also allows the server to be called up. But of course then one can simply run a Telnet server and only need one port...
LinuxLet's start with a Debian distro, in this situation Ubuntu will be assumed. Assuming Karmic Koala (9.10) or higher, open the Terminal program and enter the following command to create a startup script to automatically start the service upon bootup. For just a temporary affair, just drop the last line (starts with exec into a Terminal window. More recent distros are different because they don't use init.d: sudo gedit /etc/init/ttyS0.conf
On the other hand, if a USB to RS232 or the Keyspan RS422 adapter is being used, simply change ttyS0 to ttyUSB0 so that the filename is ttyUSB0.conf. In the text document that opens, enter the following text, changing parameters as desired: |
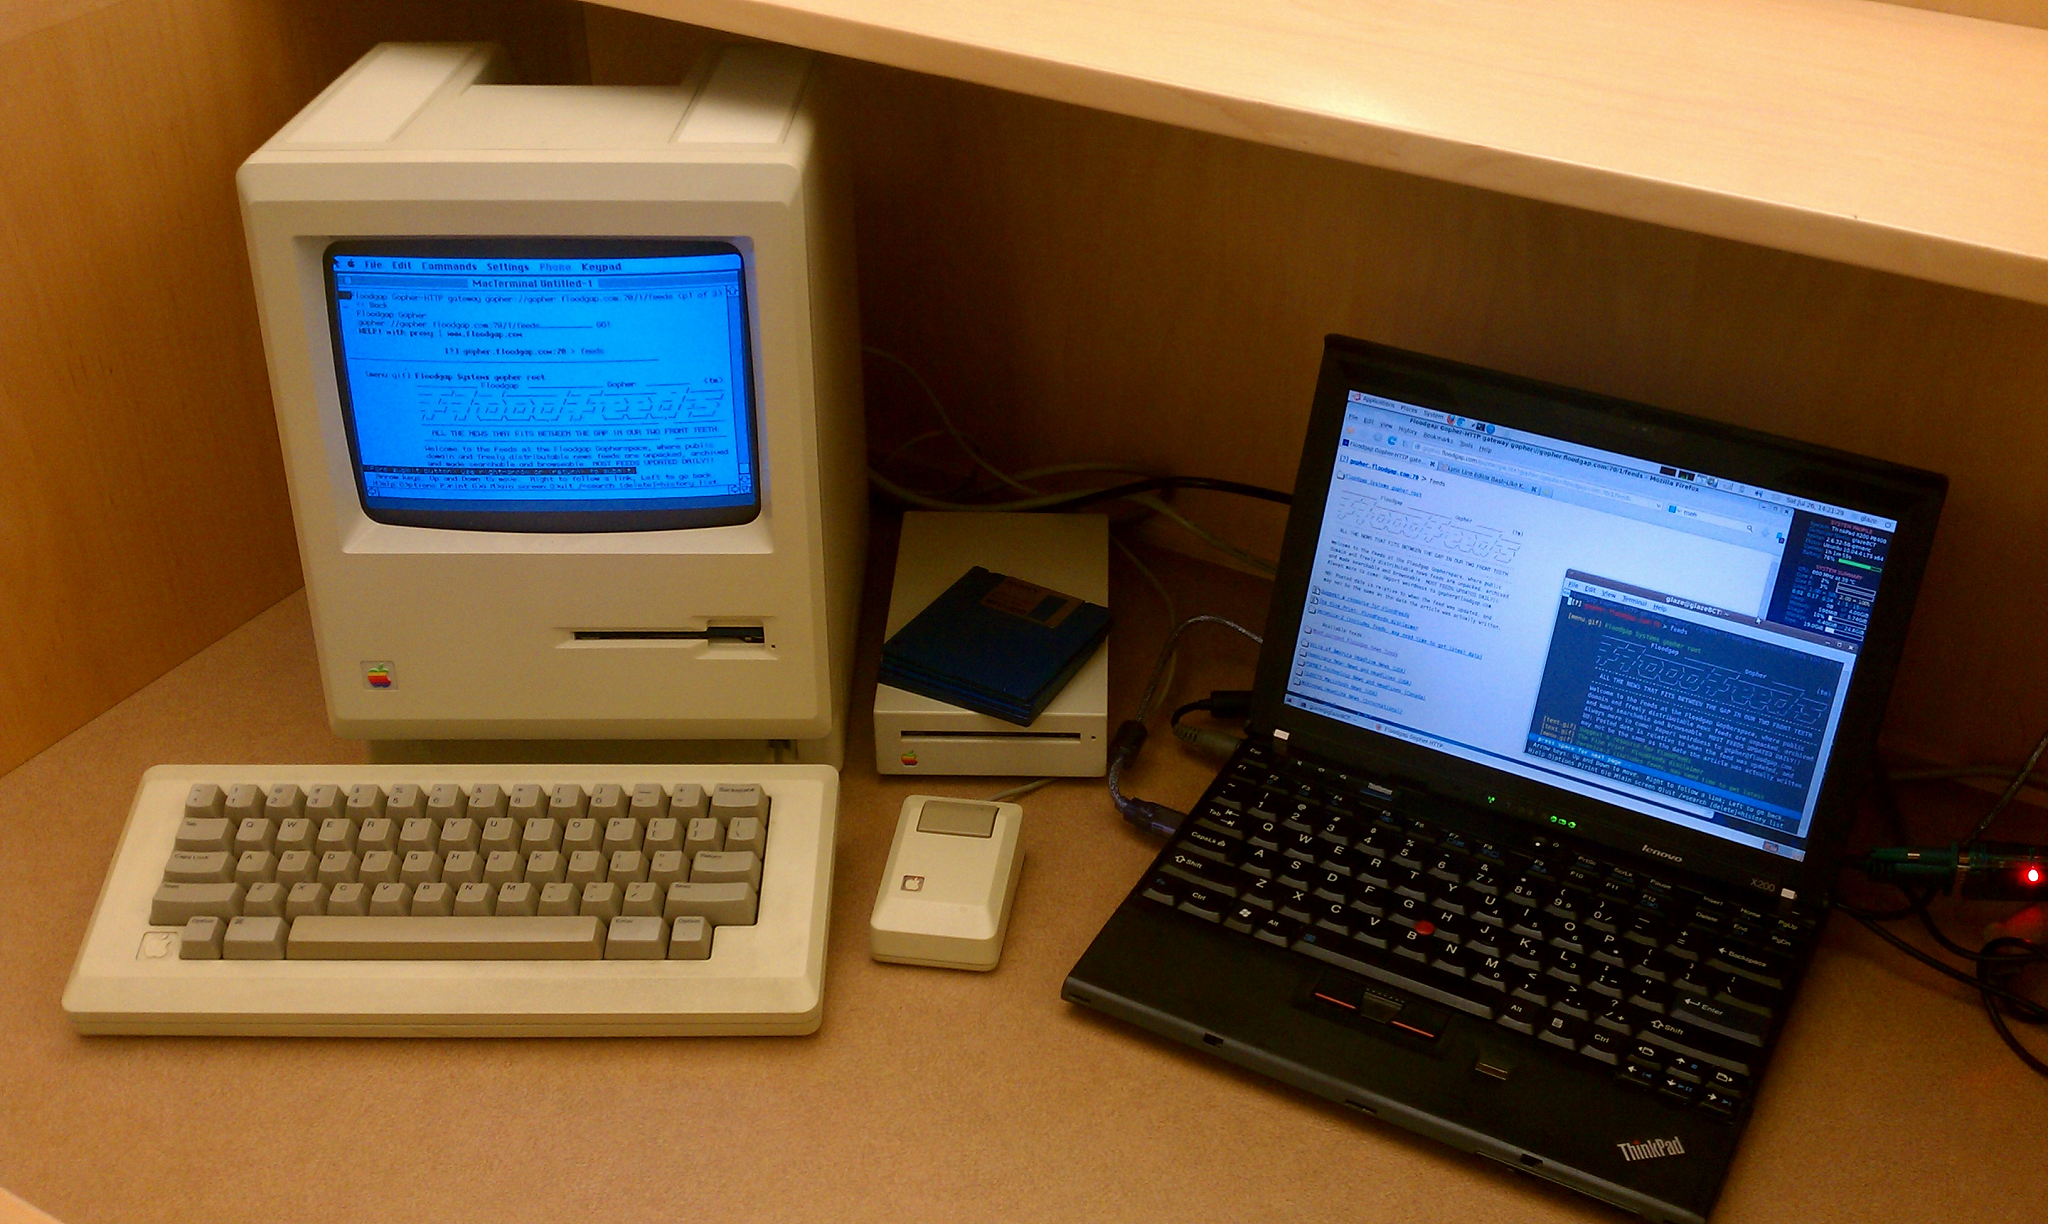 512Ke with MacTerminal 2.2 using Lynx over a serial console |
Another method is to simply change this slightly so every time the USB adapter is plugged in, getty will start the service. Refer to the linked HowTo if you have an older version of Ubuntu or for instructions on how to pipe GRUB to the serial port, which basically presents the usual GRUB OS selection screen to the serial terminal. Users who do that will want to have a Live CD or bootable Linux thumbdrive which can restore GRUB if an error is made: also keep the instructions for repairing GRUB on hand. It's not necessary for the purposes demonstrated here. Change the bitrate from 19200 to as desired: the 128K and 512K series should probably use 9600bps. Turn off AppleTalk for better performance on the 512K and up if it is not needed: the bitrate can be pushed a little bit higher but there won't be much of a speed difference past 38400bps because it's all text based which doesn't take much time to send through the wires. Lastly, to start the service, run the following:
Or, if you used a USB adapter, use sudo start ttyUSB0. Replace start with stop to extinguish the operation. Hopefully the lrzsz package is installed: file transfers can be piped through this interface. If hardware handshaking is desired, then change the last line of the configuration file to look something like this:
Mac OS X
According to a certain author, the operation has increased in difficulty since OS X 10.6, so there may be more work to do concerning this subject on your end.
A good primary source for this section is this useful page. Of note, the nerd-approved method is to use vi or Emacs to edit the text files, but pico is less intimidating for folks who don't frequent the command line much. Use it like sudo pico /etc/ttys; because of the tiny window size, it can feel cramped. Use either the mouse to select text, or use Control + Shift + ^ to switch in and out of "text selection mode" using the arrow keys to move the selection cursor, then cut the text and paste it again: it doesn't have a "copy" feature at all. It is possible to review the changes afterwards with the following:
|
cd /Applications && open TextEdit.app /etc/profile /etc/gettytab /etc/ttys
Regarding the lack of additional information concerning this method, the reason is that all attempts by the author in 10.2, 10.3 and 10.4 were failures. Even this link which is like a "testing phase 1" to see if it will work at all, failed. The RS232 adapter was the same one used earlier and text could be sent out through the serial port to the other computer's terminal screen but nothing else was possible. Refer to the adjacent image for some clues concerning this feature. |
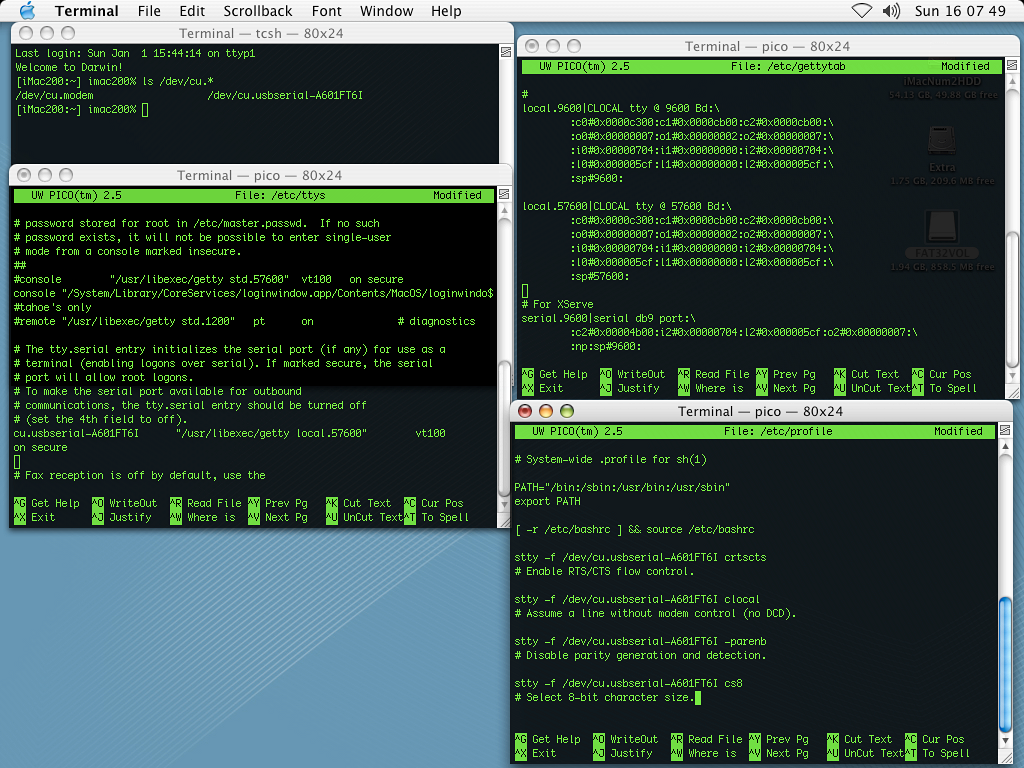 10.2 Jaguar with all configuration files shown for reference |
At the last minute, a revelation was made concerning an alternate method: Prepare the client, say with 19200 8N1 None like what we'll use here. The assumption is that the path of the serial port is already known, discovered via ls /dev/tty.*. Open Terminal, and enter the following; if you're using a different bitrate, change the 19200 and std.19200 to something else (and of course changing the serial port name to your case):
screen /dev/tty.usbserial-A601FT6I 19200
Press Enter, then Control + A which is an escape sequence. A prompt will appear in the bottom left corner of the terminal window. Press Shift + ; (a colon : ) which brings up a command prompt. Type the next line in again, modify to suit your setup: exec ::: /usr/libexec/getty std.19200
|
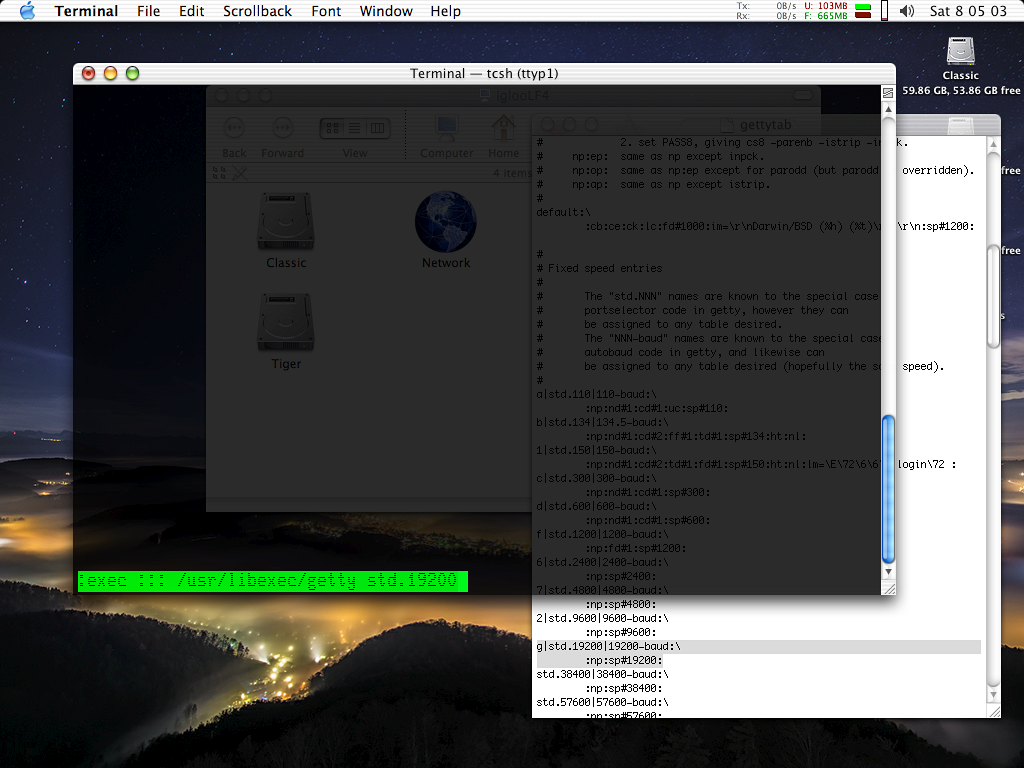 Starting getty with std.19200 gettytab (10.2 Jaguar) |
Lastly, press Enter and the client should have a logon prompt produced in the terminal program. Note that the password of the user credentials is passed straight to the host computer (because the screen window is mirrored) and presented in plain view, so keep that in mind. The std.19200 corresponds to one of the "Fixed Speed Entries" in the /etc/gettytab configuration file, it's just another one of pre-defined profiles. The terminal window will show everything the client enters in, except with a bonus feature: character doubling, meaning that if the client enters ls -Al | more then the host terminal window will look like llss --AAll || mmoorree. Just minimize the window to keep it out of the way, although closing it may or may not be preferable because screen and login are still active. If the login is incorrect, then the getty must be started again. Use Control + A, then Shift + / (a ? character) to see the list of commands, and Control + A, then Control + \ to quit screen.
To send a text file out via a serial port in OS X, because it is a well-known problem that the stty and cat technique used by Linux doesn't work, just bring up the command prompt as earlier. But instead of starting getty, use a line like this instead:
Do be advised that the line that this command is being entered cannot exceed 80 characters (the width of the window), further characters past column 80 are disregarded. Gratitude goes to mcdermd for this method with screen for the serial console.
Client access
After the "server" has been set up and is ready to go with the wires all rigged up, set up the terminal program like as described earlier. There is no support for XOn/XOff and hardware handshaking is not used unless it has been enabled: leave it off on the client unless the server has it on. Since the server has been set up first, it is likely that the client terminal program had to be configured with the appropriate bitrate and serial port settings after the host system has already sent a logon prompt. Just press Return a couple of times to get a new login prompt.
Then the operation works just like a Telnet session. After logging in, a shell prompt is produced. Here, the usual terminal command lines and so forth are usable, and certain programs like vi, eMacs, nano or Lynx can be used. Macs like the 128K which don't have keyboards with arrow keys will probably benefit better from a custom keybinding map in Lynx: also it might be a good idea to print out a list of all the keystrokes because by default it uses the entire keyboard. Press K to get a list of all the keybindings.
It is possible send files through the lines via XModem, YModem (don't bother) or ZModem. Expert users could try using cat to pipe text to the terminal but we'll pass on that for now. It may be better to wrap a BinHex file in MacBinary encoding (or PackIt for the earlier 128/512K series) rather than flirt with ASCII uploading. For now, here are some examples of sending files through this method via XModem: rz -X Terminal.image.bin
sz -X SSW201NAD.image.bin |
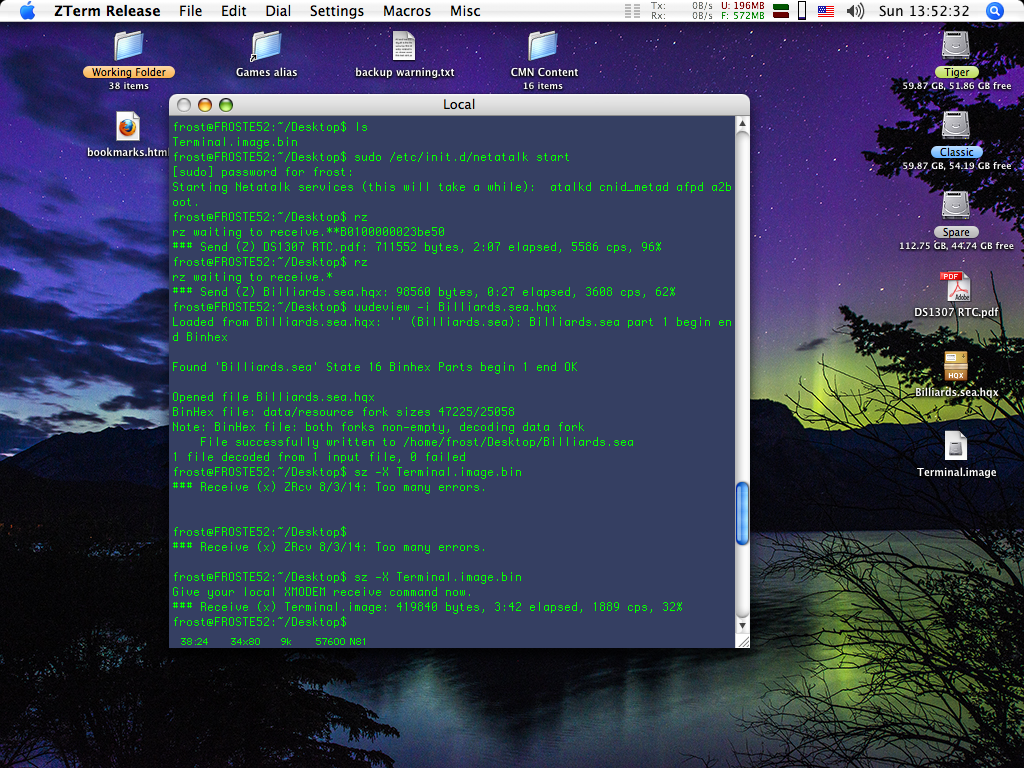 Using ZTerm 1.2 with a serial console (Linux host) and sz/rz |
Here's how the syntax works: rz activates the rz program (Receive ZModem), -X puts it into XModem mode. The file name such as Terminal.image.bin for here, is because XModem doesn't send the filename with the datastream like ZModem does so the recipient must name the file. Normally the directory where the data is downloaded to is the same as the current working folder, so if the current directory is /home/frost/Desktop/MacDrop, then it will be deposited there. The same applies to files uploaded. Use pwd to printout what the current working directory is.
Swap rz for sz (Send ZModem) and provide the name of the file to upload, like as used here, SSW201NAD.image.bin is uploaded and the recipient will have to provide a name for it, assuming they're already in Receive mode. ZModem automatically registers incoming transfers, XModem does not. If you use ZModem, then all is required to put it in receive mode is to just type rz: to upload, something like sz SSW201NAD.image.bin does the trick.
To get help on the programs, type sz --help for the sz program and rz --help for the rz program. There aren't any freebie examples in either help printouts, so that's why some examples are provided here. OS X doesn't have the lrzsz package installed, so this method won't work. Install MacPorts, Fink, or Homebrew, then install the ported version of lrzsz.
Direct Modem Connections
This is a rather obtuse and probably rarely used method, but since its an option, it might be suitable on a PowerBook Duo if it has an optional 14.4Kbps modem and the serial port is blown. The whole idea of this method is to link two modems directly without going through an ISP. There will be a speed drop compared to using a direct serial cable, in this case a null modem cable.
For starters, the maximum throughput possible with analog modems is going to be 33.6Kbps, because of the limitations of the hardware. Digital 56Kbps modems will be a little bit higher but not by much. Like Ethernet auto-negotiation, the modems will agree on the best method: if one modem is a digital 56Kbps modem, yet the other is a basic V.32 model, then they will default to the V.32 protocol. (64Kbps digital was a thing, but was an ISDN line that could be doubled up with two lines for 128Kbps. Adoption was limited.) A lot of newer computer don't have built in modems any more because in general, computers are connected via Ethernet or WiFi protocols. Not only are they significantly faster, particularly when the cards with 1000BASE-T and 802.11ac written on them are pulled out, they are far more flexible. Generally speaking, those users still stuck on dialup (remote areas) with newer computer hardware will likely be using USB to RJ14 modems or something like PPPoE (PPP over Ethernet). It is assumed that built in modems are being used and all requisite software has already been sorted.
Some modems will work directly between each other with just a passive straight RJ14 cable between them. This may not always be the case though, especially with older modems. If that doesn't work, then a line simulator must be constructed to fool the modems into thinking that a regular phone line is present, as all US hardwired old-fashioned "land lines" had power available on the wires, so that telephones could call out if the power was lost. To construct one, follow the instructions provided in the Jag's House link here.
This section won't be that elaborate because all the terminal programs have been discussed earlier. The first trial run using an iMac G4 800MHz dialing up a Compaq E500 was interesting because an attempt at using the homemade line simulator didn't work (the modems couldn't dial each other). Instead a straight regular RJ14 cable between them worked just fine. When HyperTerminal is fired up using a built-in modem, just cancel out of the dialing window and go straight to the terminal window to enter the AT commands. ZTerm doesn't need to "dial" any numbers, either. Simply go right to the terminal window and enter the AT commands shown in the bottom of Jag's page. The modems should dial each other, and afterwards, they're connected.
The Lap-Link Situation
In the mid-1980s up to about the late 1990s the LapLink or Lap-Link software and cable was well known. There's really two variants, one via a serial null-modem cable and the other via a parallel null-device cable. Computers were hooked up directly to each end of the appropriate cross-over cable, fired up some basic software and could then transfer files directly to each other. It was relatively simple and worked. There's good news: there was a Mac compatible version, which we'll take a look at.
The LapLink solution worked up to about the later end of Zip disks and CDs, but once Flash-based thumbdrives in a reasonably usable capacity became reasonably affordable, around 2004, there wasn't much point anymore. Around this time they had a USB version, but it wasn't really as popular as thumbdrives were. By the 2010s LapLink had essentially disappeared from the common computing circles. DVDs, bigger thumbdrives and Ethernet made LapLink solutions history. But for scenarios where two parallel ports could be used, then in its day, the LapLink solution was viable.
Virtual machine problems
VirtualBox, a popular hardware emulation environment tailored to x86 style systems, has some limitations for what we're doing here. While it can work with onboard RS232 serial ports or parallel ports, which are very rare today, it's not very good at dealing with them. USB serial converters, popular for a number of different things, also can be made to work, but with how old the stuff we'll be talking about here is, it isn't the best tool for the job. It's also bad for gaming or other stuff that is rather demanding, and the older the operating system is, the less favorable it might work out.
Part of the reason is that stuff which worked for what we're doing here in the MS-DOS days worked either very low level through the BIOS or worked directly with the hardware. For example, MS-DOS does not normally support higher serial port speeds, such as 57600bps -- the programs that did worked directly with the serial port itself. These days that would fall under the classification of "we do not do that" or experimental, prototyping, development or specialized stuff like ISP tools for programming microcontrollers via an In-System Programming interface like a JTAG header or something. Even then those have to go through the kernel.
It also doesn't help that VirtualBox documentation on how to use serial devices isn't very well written. Author's attempts to get a USB serial device working in DOS failed, it couldn't detect that COM1 was even attached. Windows XP in a VM would work with HyperTerminal, but Windows XP has a kernel, and works with devices differently than MS-DOS does. In addition, DOS-era stuff working in the Command Prompt likes to do things that scare modern operating systems, like writing directly to the hard disk.
Fortunately, not all is lost. DOSBox, an emulator designed to handle old DOS era games and certain other programs, is apt for the job. Unlike VirtualBox or VMWare it doesn't offer much in terms of configuring processor, RAM, virtual drives or disks, network options, and so on. It can still work with serial ports though and it provided some very useful information for our discussion here. Although it can do more than what is demonstrated here, a quick tutorial will follow to allow you the reader to replicate the demonstration setup.
Download DOSBox. There's other DOSBox derivatives, which have their place, and considering that DOSBox was last updated in 2010, some of the newer deviants may be better suited for your scenario by the time you're reading this, such as DOSBox-X. After installing it, create a folder for DOSBox to use as a C:\ drive. For example, in Windows, create a folder in the root directory of the C:\ called DOSBoxF. Next, fire up DOSBox. Type the next command in DOSBox to attach that folder as a virtual drive:
What this does is map DOSBoxF to C:\ in DOSBox, so when you type C:\ in the command prompt, it goes to that folder on the local hard drive. Keep in mind that it may not update that folder if things are put in or taken out of it after DOSBox is launched. Other options are possible and the command style differs based on host operating system is used: for those, check the MOUNT manual pages or the built-in help. Next, to open a serial port, use something like this:
This will attach the COM1 port to DOSBox's emulated COM1 port. The manual page for serialX is not very good... Let's get on with the show.
LapLink for Mac
Apparently this particular LapLink product wasn't very popular. We'll call this version 1, because well, it is version 1.2, but it doesn't seem like any subsequent versions made it out. Maybe people didn't really need it, didn't know about it, or something else. If it was because they found it unsatisfactory, well that would be warranted.
The software comes with a special cable, a 360KiB 5.25" PC floppy disk, a 720KiB 3.5" PC disk marked IBM, and a 400KiB MFS bootable Macintosh disk. It comes with System 3.2 and Finder 5.3 and has one thing going for it: it works on a 128K. First thing to do is launch the LL-MAC program, set the baud rate, and then there's nothing else to do on the Mac side. The PC side is also easy to get going: insert the appropriate diskette, copy the LLMAC.EXE file to a good location. Navigate to the location where it was copied to, then type llmac to launch it. Both programs are pretty small,
about 76KiB for the PC and 22KiB for the Mac element. Let's get back to this software front in just a moment. The cable has a DB-25 female end with a DE-9 female pigtail attached. This goes to the PC side, using whichever one fits the serial port equipped. Since DE-9 ports were used for lots of things back in those days, make sure the right port is used. The other side has a DE-9 male interface with a Mini-DIN-8 pigtail, which is the Macintosh end, and one merely has to pick the right one for the Mac involved. While the cable is mostly similar to a null-modem cable, and is described in the manual should you need to make one, it's not identical to one and a normal null-modem cable with a RS232 DE-9 to RS422 Mini-DIN-8 adapter will not work. It gets worse. |
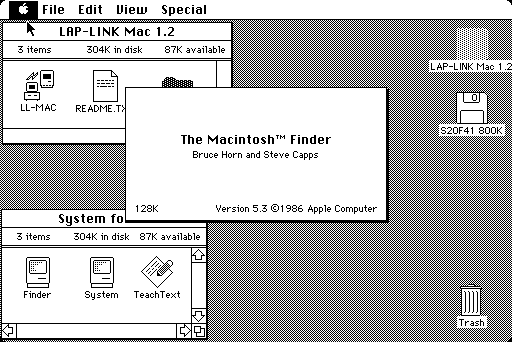 Macintosh disk contents |
The software, like other stuff of this era, works essentially directly with the hardware. This means that USB serial adapters will not work. If your PC doesn't have a native RS232 COM1 port, you're out of luck: motherboards featuring RS232 interfaces haven't been popular for over a decade. Based on what DOSBox is reporting, it scans either COM1 or COM2 depending on which one is set in the Options, trying 57600 and 9600bps with 5 bits per character, no parity and 1 stop bit. 5 bits per character is strange: terminal emulators are usually only allow for 7 or 8 bits per character, and 5 is rarely an option. minicom in Linux does however, which is unusual, supporting 5, 6, 7 or 8 bits per character. That won't help us here though, but that does explain two things: the USB serial adapter incompatibility (at least part of it) and the speed. |
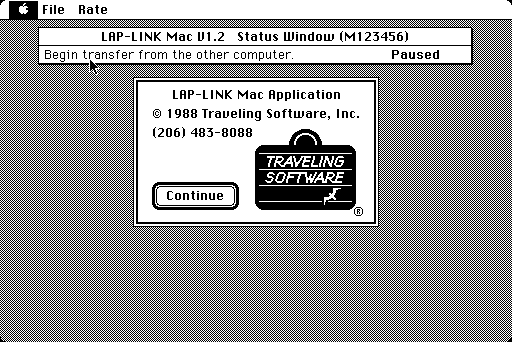 Program ready (128K) |
It's slow. Very slow. Although it boasts of 57600 baud on the packaging, that is rather misleading. As explained earlier in baud versus bits per second, baud is essentially how many times the signal changes or could change per second. For example, LocalTalk has a nominal bitrate of 230400bps, which after overhead, usually translates to about 20KiB per second. If the Mac is slow, it might drop down to half that, which isn't unusual on slower 68030s and older machines. For 57600bps, that should equate to roughly 5KiB per second, but this software transferred a 484KiB file (it said 3844 blocks) in 3 minutes and 32.68 seconds with the 57600 baud rate set, which works out to about 2.275KiB per second, or 18.2Kbps. If this was done to artificially slow down the speed to keep up with slow floppy drives, that would be one thing, except it doesn't hold up because then the user would merely have to dial down the bitrate to find something that works. If it uses 5 bits per character, at 57600 baud, then it would be transferring less information per second than something using 8 bits per character at the same baud rate. Maybe it's using checksum bits for each block? Who knows.
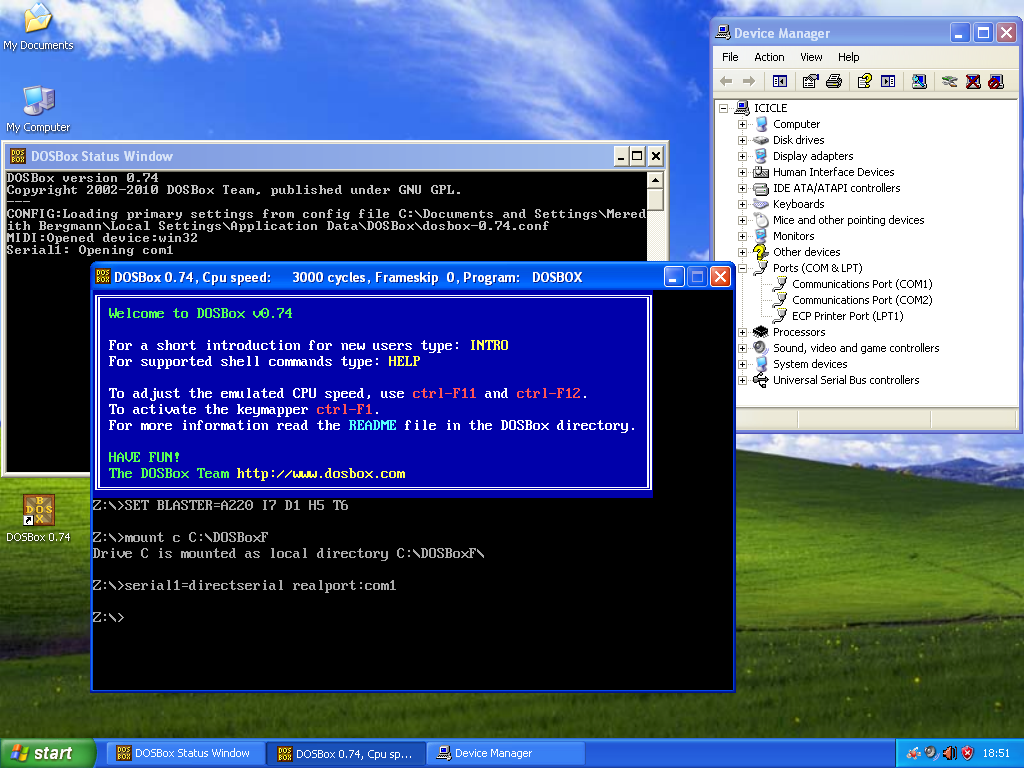 DOSBox setup (HP T610 thin client) |
 Main view (SE/30 server, System 7.1) |
 File copy in progress |
 USB serial adapter failure |
So the cable is special, it's slow and requires a native RS232 port. Surely it can't get worse can it? Well it can. Keep the manual close by, because unlike Norton Commander or MS-DOS Shell aka IBM DOS Shell, it's not very intuitive to use. Its only real value factor is the compact size and only does one effective thing. The problem with that is that most terminal emulators do that too, didn't require a special cable, were useful for dialing into BBSes or other things and were already in common use. On top of that, as discussed below, there were other options. Because it can't work with the parallel port interface for a higher throughput, it feels lackluster when a null modem cable and a few floppy disks will get a user in the time this was available, connected just the same.
Other MS-DOS articles
Norton Commander was a popular MS-DOS visual shell in its day. It could ease some of the difficulty of working with a command-line only interface, but starting with version 3.0 it could also exchange files to another Norton Commander machine via a null-modem cable. Even without the file exchange feature, being able to use a two-pane interface for managing files and copying stuff to and fro floppy disks is a nice perk. It even has a screensaver: but for roughly 800KiB on disk, it would be a bit much if the host operating system wasn't running on a hard drive.
Otherwise, for a more file-transfer focused program, FastLynx was an alternative to LapLink. And then there was INTERSVR.EXE and INTERLNK.EXE. These are included in MS-DOS 6, and the ability to remotely transfer the two to a recipient via a null modem serial cable even if the destination machine doesn't have those is remarkable. FastLynx can do that too, but only the client slave program, it's leveraging a feature of the PC MS-DOS BIOS. Both will work with parallel port interfaces for faster transmission speeds, but FastLynx will work better than INTERSVR.EXE in the modern age because it supports some USB serial adapters. If Norton Commander is an option, that will work with VirtualBox and a USB FTDI RS232 adapter just fine, even with Windows XP's limited DOS support via the command line. Expect issues with longer file names and larger disks unless later versions of NC are used. Shown in the image nearby is Virtual Floppy Drive, a Windows tool for mounting floppy disk images as virtual drives, a neat little program in the modern era. |
 Norton Commander 3.0 demo with VirtualBox DOS client (left pane) |
Internet and Email
Domain Name Server
In the old days, a configuration file called a Hosts file was kept on hand that held the DNS information locally, and it was either downloaded or compiled manually. That was fine when only a couple thousand sites are up, but when the Internet ballooned, it was no longer feasible to maintain such a list. MacTCP can maintain a hosts file, and Open Transport with the Advanced Mode selected from the Edit menu allows manual configuration. With System 7.1 and higher set up with Open Transport DHCP, DNS information is handled automatically through the router, so no local adjustments or tweaks are necessary.
All Internet capable devices require some way to reference a domain name to a IP address. Basically a DNS server takes something like http://www.yahoo.com and looks that domain name up in a huge list to see what IP Address should the client computer connect to (although it's a lot more complicated than that). In the USA, for instance, it's 72.30.2.43 at the time of this writing (and has since moved...), and one can either type http://www.yahoo.com or type http://72.30.2.43 into the browser address bar. One is just easier to remember ... promote ... and market. (Imagine seeing "72.30.2.43" on advertising billboards. So geekish.)
To find out the DNS servers on an OS X box, open System Preferences. Click Network. Select the service (AirPort, Ethernet, Bluetooth, FireWire) and select Configure. Click the TCP/IP tab. Information should be automatically populated by the computer getting info from the router via DHCP. If nothing shows up under "DNS Servers" (unless a different DNS is configured) then head to Terminal and type this:
Here is one example of the resulting printout:
In the case shown above, "192.168.0.1" is the router's internal address, and "205.171.3.2" is the DNS. Usually the router obtains this information from the ISP. Here's another one with a different ISP:
An even easier method than looking up the OS X DNS servers is to simply use Google's public DNS servers. They are easy to remember: 8.8.8.8 and 8.8.4.4. Or, if Google is not in fashion anymore for a variety of reasons, OpenDNS is available too: 208.67.222.222 and 208.67.220.220. If the server address can't be determined from the resolv.conf file, then just use the router address. The router has to lookup the DNS anyways through the ISP.
Web Browsers
One major problem with all these older browsers, except iCab and Internet Explorer 4.01 is the dearth of web pages that are still out there that will render properly. A good idea is to find out first on a more modern computer what the page looks like: HTML 3.2 formatted pages will still be okay: otherwise, it's a shot in the dark.
Another major problem is the expansion of TLS 1.2+ and SSL 3.0 encryption. Most newer stuff uses TLS 1.3 at the moment, but still accept TLS 1.2 from time to time. Older Mac browsers and operating systems do not have support for that level of encryption, and if they did, the hardware, especially 68000 family machines, will be bogged down by the computing overhead. The amount of websites that do not have this level of encryption is diminishing year by year, and you'll probably have to have another machine forward the content without encryption or seek the limited stock of webpages that don't use it. As long as Gopher remains active, that is another option.
Navigating to this location here allows a user to pick three very simple webpages from the days gone by which should render fine for example or testing purposes. No affiliation or ownership of that content is asserted nor should be assumed.
MacWWW (Samba)
The only browser for System 6, it is well reputed for crashes and bombs. It's about the only one that can remotely work: no rich content, as it's practically just a HTML source viewer, corrupted web pages and hangs are normal on even simple pages. Also it can get into the habit of self-corrupting, so keep a backup of the program on the computer. It behaves differently in System 6 versus System 7, too. In System 6, it nags incessantly for a printer and assumes that http://info.cern.ch. is still active, which it is, but it can't resolve properly on a lot of older browsers. There aren't any settings to configure. In System 7 it will not start up unless some kind of server is accessed immediately through the dialog that opens right after the program is started. Because there are a huge number of sites that don't work very well at all with it, it's probably best to scrap it and use Mosaic instead within System 7 (which also suffers from the same compatibility syndrome). Use "Open Doc ID" from the Navigate menu to open a URL. It's not really a good browser to use, although it's probably better than nothing. |  MacWWW on a local web server |
iCab
For System 7.5, the best is iCab Pre-2.9.9b (or Pre-2.99a for PPC), but it is heavily loaded, bombs when trying to set the colors for the background on a SE/30, the dialogue box for Preferences is too large for a 512x342px display, and is slow. Despite this, it does, for the most part work, as seen below. It also has a generous thirst for memory: four megabytes is not unusual. Hiding the navigation bar to free up more space (one can't really be in a hurry to go back one page) is a good idea. It can handle .png images, but it is not ideal as any sort of compression requires CPU work, which is limited in this case. iCab only runs under System 7.5 or higher: for 7.0/7.1, use the Pre-2.97 binary, which has a expiration date built-in, just backdate the computer's date. The download links are still maintained. It also has a nice download manager feature, providing the exact URLs are on hand.
It is really meant for a Blackbird (IIfx) or higher, even better on a fast '040 such as a 40MHz 840AV, or a PPC, and even then it's still sluggish. Mobile websites (e.g.: http://m.yahoo.com/) are, or more accurately were, stripped down for handheld and mobile devices such as tablets, PSPs, the lot and will render easier. These days with heavy JavaScript and Flash coding liberally sprayed over most websites will really bog down the computer. Obviously Flash is out of the game at this point, but the machine power is still limited from the start. For the most part, this setup should only be used to show off Internet access to friends and doubters, since it's too slow to practically work. Figure 3 minutes to send an email shown below (no longer possible), or about 90 seconds to load a basic web page Google alone used to take about 30 seconds to load. |
 .jpg rendering (~5min on a SE/30) |
JavaScript can be disabled through the menu or through Preferences, and the User Agent can be tweaked as well, it may be smart to change it to that of a mobile device like a iPhone OS device. At the present time, an increasing number of websites are moving to SSL encryption and device responsive design, where "intelligent" rendering based on device identification values determines the web site displayed. As of now, browsing has become mostly prohibitive except for a small number of old HTML 3.2 or HTML 4.0 websites coded mainly by hand. Faking the user agent and looking for mobile versions of pages doesn't work like it did in the early 2010s.
 Yahoo! Mobile |
 iCab sending an email |
 More space with no nav bars (iCab) |
 User Agent config in iCab |
 JavaScript config in iCab |
 Netscape 2.02 |
 JavaScript funzies (Netscape 2.02) |
 Internet Explorer 4.01 |
Other browsers
The browser that really got the cart going was NCSA Mosaic. The Macintosh port requires System 7 or higher. Mosaic 1.0.3 looks a bit like 2.0.1 but isn't quite as polished. 3.0b4 requires Internet Config to be installed for it to operate. None of these browsers will work with JavaScript, but they are lightweight and if basic HTML pages with few or no images are present, they work fine. 2.0.1 is recommended since it renders pretty much the same as 3.0b4 and is a lightweight download. The application only uses about 2MiB on disk for the 68K (PPC is a bit bigger) version; while we're on the subject of disk space, disabling the web cache is a good idea otherwise every page is saved to disk, figure about 16KiB each. Back in the old days, slow connections with pay-per-minute access made caching imperative, depending on free disk space; there's also a "preview" function to get an idea where the intended URL heads to, for precisely this reason. |
 Mosaic 2.0.1 with local LAN website |
One problem with Mosaic in the current age is that a most websites, even ones compatible with older browsers, refuse to work. For instance, the first website, http://info.cern.ch doesn't work, but FrogFind should, or certain very old websites which have not been updated. Try changing the proxy service under the Gates pane in the Preferences to a web proxy server address: you'll probably have to use a local web server proxy because there's not a lot of free open servers out there. But filling out a proxy in the "CERN Proxy Service" with a web proxy server should get more life out of it because apparently it doesn't send a HTTP header, which modern servers don't work with properly. A list is maintained of sorts on the System 7 Today forums: a local archive is here. Expect links to break over time.
MacLynx is a port of the UNIX browser into a Mac program, which is okayish. It follows the old-school page navigation sans pointer control and requires System 7 or above. Very minimalist web rendering, no images whatsoever, and knowledge of all the pertinent key commands is a must. This page should be able to bring new users up to speed, or the included documentation. In this day and age a better idea is to use a Linux Lynx client over a Telnet, SSH or serial session because the host computer can do all the heavy lifting involving encryption and will be a more recent version than something stuck in the mid 1990s.
Netscape 2.02 is another candidate, which has issues with JavaScript, so disabling JavaScript in the settings is important; nonetheless if it is a simple text website with few graphics, it is faster than iCab. It also is a huge memory hog: 4MiB is not unusual. You are free to explore this route and experiment, but don't be surprised if something doesn't work very well, simply because the modern HTML and page design has changed so drastically.
Other prospects include Netscape Navigator 3.04 and Internet Explorer 4.01 (68k, and FAT), but both are best used on a PowerPC CPU because they are quite bloated. Internet Explorer 4.01 installer includes Outlook Express, a Personal Web Server with an FTP plugin, and so forth -- it also takes up about 24MiB on disk. NN 3.04 could not load Google correctly without displaying a barrage of JavaScript error dialogues, and attempts were made to try find out a way to disable it, without success. IE 4.01 seemed be okay, but it took about a minute and fifteen seconds to load Google (plain http://www.google.com) including time to display an error dialogue. The time for iCab to load Google was just under 20 seconds (SE/30, 32MiB RAM). Another candidate is MacWeb, and there is a bit of juggling to do with the versions.
Internet Explorer should have native built-in support for Gopher, and there's other types of Gopher proxies around, like the Floodgap HTML proxy. These aren't very big on bandwidth or computational requirements, but you can still read articles and news updates.
 NCSA Mosaic 2.0.1 (1.0.3 similar) |
 Ideal webpage (Mosaic 2.0.1) |
 NCSA Mosaic 3.0b4 |
 MacLynx with a Google search |
Gopher
As far as actual usage of Gopher goes, there's a few options. The first is TurboGopher, available from Macintosh Garden. The last of the version 1 chain, 1.0.8b4, is also the last one to run on System 6. Meanwhile the 2.0 update mandates System 7 with Thread Manager at the lowest. A few other Gopher clients are on Macintosh Garden for newer machines. Public servers are still around, at least for now, with the Floodgap Gopher server, Gopherpedia and something else for Reddit. Floodgap's main page, a kind of "front page" to Gopher in general, has an running list of active Gopher servers around the world. Or, start your own, which NetPresenz can do, or a few others.
Using TurboGopher 1.0 is extremely simple. Settings for font size and application handlers are in the Setup menu, bookmarks in the Gopher menu. Purging out the old bookmarks (including the default in "Configure TurboGopher...") is a good idea. Since Floodgap is probably the home page for a lot of Gopher users, you can set the default to gopher.floodgap.com, and leaving the port at 70. Otherwise, to open a quick session outside of using a bookmark, go to the File menu and choose "Another Gopher...". The title can be anything, but we'll pick an example for now. Type Gopherpedia for Title, gopherpedia.com (another example, gopher.quux.org), leave the Port at 70, and the Selector can be left blank. Hitting OK should open the new connection. Hyperlinks open up new windows to read or explore further. About the only thing to do today off Gopher URLs is looking at images with something like JPEGView (requires System 7 and 68020+) or Gifwatcher, or FTP. |
 TurboGopher 1.0.8b4 (SE/30) |
On Compacts, consider setting TurboGopher's font sizes to something like Geneva 9. Faster Compacts, like the SE/30 and Classic II should use System 7 over System 6 because WindowShade can collapse nested trees of windows and TurboGopher 2 is a bit more polished. On the other hand WindowShade 1.1 should work for System 6.
Internet Relay Chat
IRC was developed a long time ago and is still used to this day as a instant messaging service. For this demonstration we'll try out a channel under a Freenode server with Homer 0.94. Homer is a fairly moderately sized application at 1.6MiB and appears to work fine with grayscale graphics, although the specs say it can work with MacTCP and System 7.0, so it should work fine on a 512x342 1-bit display and it seems to work with System 6. It's readily available from Macintosh Garden. There are also mIRC and Ircle 3.0.2 as options if Homer isn't to your liking, this site explains some alternatives (there are not many).
Let's try connecting to irc.freenode.net to the ##arduino channel. Freenode uses NickServ to register nicknames, so registration must be done first; doing this on a more modern computer would be a good idea, such a Colloquy on OS X (or the web client at webchat.freenode.net), as there is some email authentication required. First, open the application, and a connection dialog is presented. In our example, type irc.freenode.net for the Server Address. Homer doesn't seem to "click" right with NickServ so the User ID and User Name can be filled with anything. For the nickname, enter that in as well, and set the port to 6667. Freenode does have a few other ports available for IRC, depending on the server. Click Connect.
Next, type /msg NickServ identify nickname password, replacing nickname for your nickname, and password for the password. Hit Enter, then once it acknowledges the identity, one can join a channel by typing /join #channel, replacing #channel as appropriate. In this demonstration ##arduino was used, other channels like #win32, #bash, #android, #debian, and so on are possible as well. If everything ticks, the chat room is live.
It is a good idea to set the font size to 9 (unless size 7 is sufficient) and shuffle the windows around until a workable arrangement is found. It should be happy with 640x480, so as the demonstration was with 640x400, a little working around to find an ideal placement for everything was needed. 512x342px is a bit more work but it can be done. If WindowShade is installed, the Console window can be collapsed, keeping it handy in case a few more tasks need to be done. Homer will not work with all chat servers, like Undernet servers, but if it's just a Freenode server, it is sufficient. Otherwise, Ircle 3.0.2 or the like should manage instead. To start a private chat with someone, use /query username message, replacing username with the target username, and message with a starting message like "Hello?", although it can be blank. /msg can be substituted in place of /query.
 Connection dialog |
 NickServ login |
 Joining a chatroom |
 Chat room is now live |
Email Clients
An email client requires SMTP, POP3 or IMAP protocols to work correctly. If a personal email address is established through an ISP and a client like Outlook, OS X Mail, or the like, then these protocols are already present. Free Yahoo! mail does not include POP3 protocols anymore: mobile devices have, or had special servers for them. However there were other free email services (like gmx.co.uk, gmail, etc) which offered those connection protocols. The hard part these days is that SMTP or SSL authentication is established by modern email systems, which wasn't established in the 68k days with the same degree of intensity as these days.
One way is to use certain software widget on a bridge Mac that relays the email traffic to the vintage machine and back out again, but that isn't a complete solution. More pertinent information is available here. There is a prospective client that may work under System 7.5 and may require Open Transport to work, but no testing was performed to verify this because email protocols are much more complex than they used to be.
This section will not be updated further unless new discoveries surface — the author has experimented with a number of different clients and could not get them to work in a reasonable period of time, and that was about a decade ago. At this point in history it appears that the lid has been shut on this case, although if you did setup your own email server there is a possibility it could be blacklisted for different reasons. At this time, accessing email accounts through a browser is probably the only workable option, or a bridge machine.
For hosting a personal email server, a starting square could be Apple's Internet Mail Server (AIMS) or Eudora Internet Mail Server. Both are nearly identical as the latter was bought by the former.
Web Hosting
It is still very possible to host HTML webpages with these computers. Even a C64 can do it. The server appears to have been retired, and has historically had spotty access times.
The WWW server in NetPresenz might work, or search around the web for other applications, such as MacHTTP which was popular and can run on a Plus. The ideal machine for HTML hosting is a SE/30 because it has a fast 16MHz CPU, has separate video driver circuitry (rather than interleaving the video with the CPU, as with earlier machines: the 128K and 512K series spend half the CPU cycles on redrawing the screen, while the SE spends a quarter), enough memory to host entire webpage and everything else aside from the System on a RAM disk, a compact footprint and...well, not many disadvantages.
At any rate, one popular software suite was WebSTAR 2.0, which was basically a rebranding of MacHTTP. AppleShare IP also has a WWW server feature, as does Rumpus 3.5. Expect slow transfer rates, primarily by reason of the slow network cards, the computer itself, and the storage. Web hosting is usually best left to a computer with at least a 300MHz CPU, decent ATA100 hard drive bus, and 100Mbps rated Ethernet, although this depends on the complexity of the webpage. Simpler HTML pages with few or no images are better.
Ending Text
The author has invested a great deal of time into this Guide, and appreciates the help and information provided by various 68kmla.org members and various Internet denizens who have uploaded archives and PDFs for reference and use, with special mention for mcdermnd; as without his formerly extensive collection, most of this Guide would not be possible. All content not owned or accredited to others is public domain content, free to use for any positive, productive non-commercial purpose. A link and credit back to this page is all that is requested. Header image sourced from here (Caution: Site has loads of ads and "suspiciousware"). Font used for header text can be sourced via this link which is a nice reconstruction of the DEC VT220 terminal font; albeit in a raster format, and looks better on Windows than *NIX and OS X. The image for the More Info page header was yanked from here.