This page describes how to construct a Macintosh serial adapter that
converts the Macintosh serial port (Apple refers to them as the modem
and printer ports) to the standard DB-9 or DB-25 connector so it can be
attached to PCs and other peripherals for file transfer, etc.
I made this a couple years ago from plans that apparently no longer
exist on the Internet. I'll also include pinouts for a few other
adapters that do the same thing in slightly different ways.
This particular adapter allows you to connect the Macintosh to
peripherals as if it were a PC. This works for thinks like routers or
serial terminal servers. In order for Mac to PC file transfer, you will
need to attach a null modem to "cross over" the communication lines.
Some of the other designs "cross over" the lines for you so that you
won't need a null modem, but they aren't as versatile.
Well enough rambling. Let's get started!
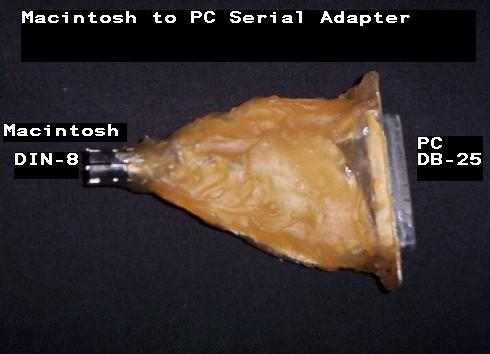
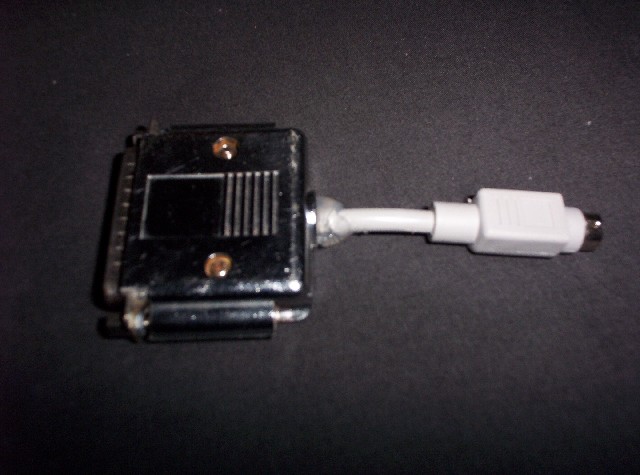
Here is a picture of the first adapter I made:
You can see that I used the DB-25 Female connector. Most PCs today
use a DB-9 so keep that in mind when you make yours. You can always
hook up an inexpensive converter to convert it back to DB-9 if you need
to.
The way I did this was after all the connections were soldered, I
embedded them in some 2-part epoxy. While it was still soft and being
careful not to short it to any of the pins, I put a piece of aluminum
foil over it to help shield interference. When that was dry, I applied
another layer of epoxy over the foil to cover it and protect it from
damage.
This makes a good sturdy adapter. The only time you may run into
trouble is if the serial port is adjacent to another port that has a
rigid plastic connector plugged into it that would interfere.
Here is a diagram of the standard Macintosh male DIN-8 serial connector and pinouts as it would look on the end of your cable.
The Mac End
(Port images courtesy of http://www.stokely.com)
1 HSKo        Output Handshake
               (Zilog 8530 DTR pin)
2 HSKi/CLK    Input Handshake *OR*
               External Clock
3 TxD-        Transmit data (-)

4 Ground      Signal ground

5 RxD-        Receive data (-)

6 TxD+        Transmit data (+)

7 N/C         (no connection)

8 RxD+        Receive data (+)
Possible PC End #1 DB-25
or
Pin 2   TD   Transmit Data
Pin 3   RD   Receive Data
Pin 4   RTS  Request To Send
Pin 5   CTS  Clear To Send
Pin 6   DSR  Data Set Ready
Pin 7   SG   Signal Ground
Pin 8   CD   Carrier Detect
Pin 20  DTR  Data Terminal Ready
Pin 22  RI   Ring Indicator
Possible PC End #2 DB-9
or
Pin 1  CD   Carrier Detect
Pin 2  RD   Receive Data
Pin 3  TD   Transmit Data
Pin 4  DTR  Data Terminal Ready
Pin 5  SG   Signal Ground
Pin 6  DSR  Data Set Ready
Pin 7  RTS  Request To Send
Pin 8  CTS  Clear To Send
Pin 9  RI   Ring Indicator
Assembling the cable
What you'll need:
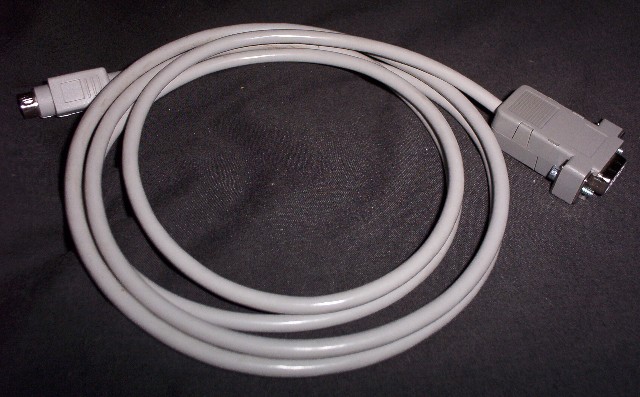
1) A Macintosh serial cable (modem or printer cable)
2) A DB-9 or DB-25 connector
3) A battery light bulb and wire, or a digital multimeter that tests continuity
4) Soldering iron and flux
5) Brush and defluxing solvent or automotive brake cleaner
6) Liquid electrical tape (check your local home center), epoxy, or hot glue
7) Hot glue & gun
How to put it all together:
1) Cut the Mac serial cable leaving however long of a cable you want and strip the wires.
2) Use the light, battery and wire or multimeter to figure out what
color wire goes to what pin on the DIN-8 connector and write this down.
3) Using the table below, solder the wires onto the proper pins of the
PC connector. Use a short section of wire or a solder blob to connect
pins 6&7 on the DB-9 or pins 4&6 if you're using a DB-25. Flux
is your friend!
4) Test the cable using a PC with a terminal program like HyperTerminal and a Mac with ZTerm or you favorite terminal software.
5) Once you get it working, deflux the solder joints using solvent or
automotive brake cleaner and a stiff bristled brush that won't get
melted by the solvent.
6) Cut all unused bare wires.
7) Insulate exposed connections with liquid electrical tape, epoxy or
hot glue. Make sure they don't protrude and interfere with the casing
that goes over the connector.
8) Use hot glue to secure the cable inside the connector casing
9) Test cable again
That's it!
Now remember. If you're planning on using this to transfer files
between a PC and your non-ethernet Mac, you will need to hook up a null
modem adapter in line with your new serial adapter.
Some alternative designs
Here's another design for this adapter that I have run across on the net
that I thought I would throw in here just in case they disappear.
These designs cross the transmit and receive lines so they don't need a
null modem, but you will have to use one anyway if you plan on using
your Mac to configure routers or use other PC serial equipment.
This first one came from Usenet via our friend Chris Adams.
Mac name   RS-232 name   Mac DIN-8 Pin#   PC DB-9 Pin#   PC DB-25 Pin#
--------   -----------   --------------   ------------   -------------

RxD-       RD            5 -------------- 3              2   TD

TxD-       TD            3 -------------- 2              3   RD

Ground     SGND          4 -------------- 5              7   SGND
                                       |
RxD+       DCD           8 ------------

HSKi       CTS           2 -------------- 7              4   RTS

HSKo       RTS           1 -------------- 8              5   CTS
Here's another one I've found to work quite well. An acquaintance of
mine found a cable in one of his parts bins and got the pinouts using a
DMM. Here are the pinouts for DB-9.